Looking Outwards-12-aboyle

Due to the way that my partner and I are planning to split up the workload, I’m more focused on the generation of the quotes. I looked for random quote generators online to see what other people have done. The first one I found, http://www.manythings.org/rs/svoc.html, is a random sentence generator. It was created in 1998 by Charles Kelly for a collection called “Interesting Things for ESL Students”. I like this project because it’s very good at breaking down the parts of speech and being consistent in the generation of words so that the final sentences actually make sense. Unfortunately, the sentences themselves are not very fun.

Random Sentence Generator 

The second project I found is http://inspirobot.me/. It is described as an “artificial intelligence dedicated to generating unlimited amounts of unique inspirational quotes.” I like this project because it creates funny and unique quotes that still have the special “inspirational quote” flavor. It tends to be more engaging than the first generator, partly because of the random photos the quotes are displayed on. My one complaint would be that pressing the “generate” button over and over is not particularly fun.

Inspirobot quote 

Final-Project-Proposal-aboyle

I will be collaborating with Thomas Wrabetz for the final project. We want to make a “Maze of Inspiration” game-like program. The person running the program will use the arrow keys to move a small circle through randomly generated pathways in a maze-like formation. During their travels, they will come across other dots, which they can collide with to generate “inspirational quotes”. In order to create the quotes, we will first collect a lot of inspirational quotes and then break them down into separate parts of speech and sentence format. The sentence format will be randomized, and then filled with various random parts of speech. 

If we have extra time, we could try to make the program more visually pleasing. We might hang inspirational posters on the walls of the pathways or use representations other than dots. We could also make it more game-like by having a start screen or allowing the player to escape the maze after a certain amount of time has passed or they have generated a certain number of quotes. See illustrations below for early-stage visualizations.

aboyle-Looking Outwards-11

For Looking Outwards 04, I focused on the creation of music, so I’ll use this opportunity to explore sound art.

LINES is an sound art exhibition that allows the audience to create music by interacting with colorful lines on the walls, floor, and ceiling.  You can move your hand up and down the lines on the wall to increase or decrease the pitch. You can stand in different places on the lines on the floor to adjust the tempo, and you can move your body up and down the lines hanging from the ceiling to change the dynamics of the sound. You can use checkers to create harmonies with yourself. This exhibit was created by Swedish composer Anders Lind in 2016 and was displayed in Västerbottens Museum in Umeå.

I think this exhibit was very cool because it encourages the audience to interact with the exhibit. There are so many different ways to produce different sounds, so every person will have a unique experience. With regards to the technical side, Lind mentions that sensors and electronics are used to form three novel musical instruments, and I’m sure that there are several algorithms at work to ensure musical beauty. I can definitely tell that Lin had an appreciation for the complexities of sound, the influence of color, and the ways technology can be used to heighten our appreciation of art.

aboyle-Project-11-Composition

aboyle composition

//Anna Boyle
//Section D
//aboyle@andrew.cmu.edu
//Project 11


var turtle;
var red=0;
var green=0;
var blue=0;
var lineWeight=6;

function setup() {
    createCanvas(480, 400);
    background(255)
    turtle = makeTurtle(0,height/2)
//creates borders to make it more ms paint-ish
    strokeWeight(2);
    line(width, 0, width, height);
    line(0, 0, 0, height);
    line(0, 0, width, 0);
    line(0, height, width, height)
//creates text
    textSize(10);
    text("M.S. Paint: Turtle Edition", 10, 20)
  }

//draws the line
function draw() {
    drawLine();
}

//function to draw the line
function drawLine(){
  //variable colors
    turtle.setColor(color(red, green, blue));
  //variable line weight
    turtle.setWeight(lineWeight);
  //makes the turtle constantly move toward the mouse
    turtle.forward(2);
    turtle.turnToward(mouseX, mouseY, 8);
}

function keyPressed(){
//press enter to restart turtle
   if (keyCode === ENTER){
      turtle = makeTurtle(mouseX,mouseY)
      drawLine();
//press up to make line thicker
    } if (keyCode === UP_ARROW){
      lineWeight++
      drawLine();
//press down to make line thinner
    } if (keyCode==DOWN_ARROW){
      lineWeight=lineWeight-1;
      drawLine();
    }
}

//type the first letter of a color to turn the line that color
//or in the case of black, the second letter

function keyTyped(){
    if (key === 'b'){
      blue = 255;
      red = 0;
      green = 0;
      drawLine();
    } if (key === 'r'){
      red = 255;
      blue = 0;
      green = 0;
      drawLine();
    } if (key === 'g'){
      green = 255;
      red = 0;
      blue = 0;
      drawLine();
    } if (key === 'y'){
      red = 255;
      green = 255;
      blue = 0;
    } if (key === 'p'){
      red = 145;
      green = 0;
      blue = 255;
    } if (key === 'o'){
      red=255;
      green=145;
      blue=0;
    } if (key=== 'l'){
      red = 0;
      green = 0;
      blue = 0;
    } if (key === 'w'){
      red=255;
      green=255;
      blue=255;
    }
}

function turtleLeft(d) {
    this.angle -= d;
}


function turtleRight(d) {
    this.angle += d;
}


function turtleForward(p) {
    var rad = radians(this.angle);
    var newx = this.x + cos(rad) * p;
    var newy = this.y + sin(rad) * p;
    this.goto(newx, newy);
}


function turtleBack(p) {
    this.forward(-p);
}


function turtlePenDown() {
    this.penIsDown = true;
}


function turtlePenUp() {
    this.penIsDown = false;
}


function turtleGoTo(x, y) {
    if (this.penIsDown) {
      stroke(this.color);
      strokeWeight(this.weight);
      line(this.x, this.y, x, y);
    }
    this.x = x;
    this.y = y;
}


function turtleDistTo(x, y) {
    return sqrt(sq(this.x - x) + sq(this.y - y));
}


function turtleAngleTo(x, y) {
    var absAngle = degrees(atan2(y - this.y, x - this.x));
    var angle = ((absAngle - this.angle) + 360) % 360.0;
    return angle;
}


function turtleTurnToward(x, y, d) {
    var angle = this.angleTo(x, y);
    if (angle < 180) {
        this.angle += d;
    } else {
        this.angle -= d;
    }
}


function turtleSetColor(c) {
    this.color = c;
}


function turtleSetWeight(w) {
    this.weight = w;
}


function turtleFace(angle) {
    this.angle = angle;
}


function makeTurtle(tx, ty) {
    var turtle = {x: tx, y: ty,
                  angle: 0.0,
                  penIsDown: true,
                  color: color(128),
                  weight: 1,
                  left: turtleLeft, right: turtleRight,
                  forward: turtleForward, back: turtleBack,
                  penDown: turtlePenDown, penUp: turtlePenUp,
                  goto: turtleGoTo, angleto: turtleAngleTo,
                  turnToward: turtleTurnToward,
                  distanceTo: turtleDistTo, angleTo: turtleAngleTo,
                  setColor: turtleSetColor, setWeight: turtleSetWeight,
                  face: turtleFace};
    return turtle;
}

When thinking of an idea for this project, I thought about other drawing tools that I’ve used in the past. Eventually I got the idea to make this project visually emulate at least some aspects of MS Paint. In my final code, the turtle draws a line that constantly follows the mouse. You can make the line thicker and thinner, change the color, or restart the turtle with a different starting point. I added borders and text to drive home the visual similarities. When playing around with it, I couldn’t help but remember scribbling on MS Paint, so I think this one was a success. You can see screenshots of some scribbles I created below.

Playing around with color:

Playing around with restart:

Playing around with thickness:

All of the above:

aboyle-Project 10-Landscape-Section D

aboyle landscape

var fish = [];
var oceanSpeed = 0.0005;
//ocean detail is low to make it look wavy instead of jagged
var oceanDetail = 0.001;
var floorSpeed=0.0004;
//floor detail is high to simulate rocky bottom
var floorDetail=0.02;

function setup() {
    createCanvas(480, 240);
  }

function draw() {
    background(147,202,243);
//makes ocean
    displayOcean();

//makes fish
    updateAndDisplayFish();
//removes fish that aren't on screen
    removeFishThatHaveSlippedOutOfView();
//adds new fish
    addNewFishWithSomeRandomProbability();

//makes ocean floor
    displayFloor();

}


function updateAndDisplayFish(){
// Update and display the fish
    for (var i = 0; i < fish.length; i++){
        fish[i].move();
        fish[i].display();
    }
}


function removeFishThatHaveSlippedOutOfView(){
//If fish aren't on screen, remove them from the array
//I based this on the provided code
    var fishToKeep = [];
    for (var i = 0; i < fish.length; i++){
        if (fish[i].x + fish[i].breadth > 0) {
            fishToKeep.push(fish[i]);
        }
    }
    fish = fishToKeep;
}


function addNewFishWithSomeRandomProbability() {
//with a low probability, add new fish to array
    var newFishLikelihood = 0.009;
    if (random(0,1) < newFishLikelihood) {
        fish.push(makeFish(width));
    }
}


//change position of fish every frame to make them look like they're moving
function fishMove() {
    this.x += this.speed;
}


// draw the fish
function fishDisplay() {
//randomize the color of the fish
//I kept blue at zero so the fish wouldn't blend into water
    fill(this.fRed, this.fGreen, 0);
    noStroke()
    push();
//translate so 0 means the moving x
    translate(this.x, height);
//makes body of fish
    ellipse(0, -this.fPosition, this.fLength, this.fHeight)
//makes tail of fish
    triangle(this.fLength/2-8, -this.fPosition, this.fLength, -this.fPosition+this.fHeight/2,
      this.fLength, -this.fPosition-this.fHeight/2)
//makes eye of fish
    fill(0);
    ellipse(-6,-this.fPosition,6)
    pop();
}

//makes the object of a fish
function makeFish(birthLocationX) {
    var fsh = {x: birthLocationX,
                breadth: 50,
              //randomizes speed
                speed: random(-2.5, -1),
              //randomizes position in water
                fPosition: round(random(50,150)),
              //randomizes length
                fLength: round (random(20,50)),
              //randomizes height
                fHeight: round (random(10,20)),
              //randomizes color
                fRed: random(0,255),
                fGreen: random(0,255),
                move: fishMove,
                display: fishDisplay}
    return fsh;
}


function displayOcean(){
  noFill();
  stroke(55,122,172)
  beginShape();
//generates the ocean using the noise function
  for (var x = 0; x < width; x++) {
      var t = (x * oceanDetail) + (millis() * oceanSpeed);
      var y = map(noise(t), 0,1, 0, 60);
      vertex(x, y);
      rect (x, y, 1, height)
  }
  endShape();
}

function displayFloor(){
  noFill();
  stroke(104,81,47)
  beginShape();
//generates the ocean floor using the noise function
  for (var x = 0; x < width; x++){
    var z = (x * floorDetail) + (millis() * floorSpeed);
    var v= map(noise(z), 0, 1, 200, height)
    rect(x, v, 1, 50)

  }
  endShape();

}

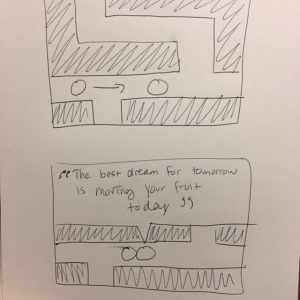
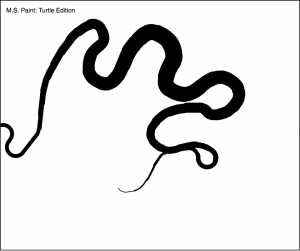
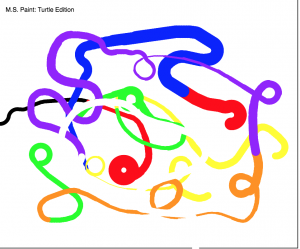
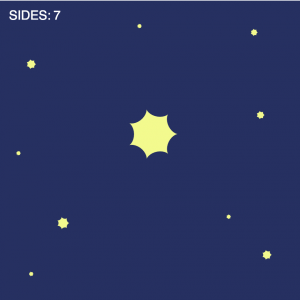
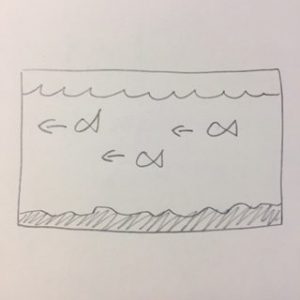
For this project, I knew I wanted to randomize the speed at which the objects crossed the screen. For this to make sense, the object needed to be something that was moving on its own. I thought about a couple of options, including cars, bees, clouds, and hot air balloons. I ultimately decided on fish because I thought I could have fun making the water look like it was moving. You can see my original sketch below.

Although I based this project on the provided code, I tried my best to insert my original ideas. I made the water have a low detail to look like it was calm but still moving. I made the sea floor have a high detail so it looked jagged and rocky. I made the fish move at different speeds, ensured that they would be between the surface of the water and the sea floor, and randomized their colors to some degree. (I set the blue value equal to zero so they would never be blue and blend into the water.) It took some trial and error to figure out the right proportions of the fish tails and how to color in the water and ground, but I figured out both of those eventually. I had some trouble with making objects in the past, so although the code is simple I’m proud of it. However, I glanced through other projects and noticed a lot of other people decided to something with fish, so in retrospect I wish I could’ve been more original. Overall, though, still a fun project!

aboyle-Looking Outwards-10

“TRANSCENDENCE 115” is a collaboration between the digital artist LIA and the Portuguese experimental music project @c, created by Miguel Carvalhais and Pedro Tudela. It was created for the composition *Three-Body Problem* and was released in 2016. The starting point is a “system of forms and actions, an algorithm for visual composition,” which is then enhanced by the music and LIA’s interaction. You can watch it below.

I really admire this work because it seamlessly weaves together audio and visual in a way that is very difficult to do. Low heaves of noise push forward rounded lines, and high tinkling sounds fracture them into angles—it is endlessly entertaining to watch and listen to. I also love the way it uses orbits and patterns to make the entire image seem full, cohesive, and mesmerizing.

LIA, the co-creator of “TRANSCENDENCE 115”, is known for being a pioneer in software art. She is an Austrian artist who lives in Vienna and has been active since 1995. She uses a wide range of media, such as video, performance, software, installations, sculpture, projections, and digital applications. However, her primary working material is code, which she leverages for fluid and conversational interaction between human and machine. You can view more of her work at http://www.liaworks.com/.

aboyle-Project 09-Portrait

aboyle portrait

var underlyingImage;

function preload() {
    var myImageURL = "https://i.imgur.com/znMO3pp.jpg";
    underlyingImage = loadImage(myImageURL);
}

function setup() {
    createCanvas(470, 410);
    background(255);
    underlyingImage.loadPixels();
//framerate is low, so random dots appear slowly
    frameRate(3);
}

function draw() {
//creates random dots
    var px = random(width);
    var py = random(height);
    var ix = constrain(floor(px), 0, width-1);
    var iy = constrain(floor(py), 0, height-1);
//makes dots match the color of the photo
    var theColorAtLocationXY = underlyingImage.get(ix, iy);
//varies size of random dots
    var ellipseSize=random(3,7)
    noStroke();
    fill(theColorAtLocationXY);
    ellipse(px, py, ellipseSize);

}


function mouseDragged() {
//if you drag mouse, you get line of randomly sized dots
    var ellipseSize=random(3,7)
    var theColorAtMouse=underlyingImage.get(mouseX,mouseY)
    fill(theColorAtMouse)
    ellipse(mouseX, mouseY, ellipseSize);
}


function mousePressed(){
//if you press mouse, you get randomly sized dot
    var ellipseSize=random(3,7)
    var theColorAtMouse=underlyingImage.get(mouseX,mouseY)
    fill(theColorAtMouse)
    ellipse(pmouseX, pmouseY, ellipseSize);
}

//My name is Anna N Boyle, so I made my picture appear faster
//if you type in the letters A N B O Y L E
//each section is the width of the canvas and 60 pixels down
//and each ellipse is 10 pixels and spaced evenly
//the color variables make the ellipses match the photo color

function keyTyped(){
    if (key==='a'){
      for(i=0; i<width; i+=10){
        for(w=0; w<60; w+=10){
        var theColorAtTheA=underlyingImage.get(i,w)
        fill(theColorAtTheA)
        ellipse(i,w,10)
    }
  }
}
    if (key==='n'){
        for(i=0; i<width; i+=10){
          for(w=60; w<120; w+=10){
            var theColorAtTheN=underlyingImage.get(i,w)
            fill(theColorAtTheN)
            ellipse(i,w,10)}
          }
          firstNCheck=1
        }
    if (key==='b'){
      for (i=0; i<width; i+=10){
        for(w=120; w<180; w+=10){
          var theColorAtTheB=underlyingImage.get(i,w)
          fill(theColorAtTheB)
          ellipse(i,w,10)}
    }
  }
    if (key==='o'){
      for (i=0; i<width; i+=10){
        for(w=180; w<240; w+=10){
          var theColorAtTheO=underlyingImage.get(i,w)
          fill(theColorAtTheO)
          ellipse(i,w,10)}
      }
}
    if (key==='y'){
      for (i=0; i<width; i+=10){
        for(w=240; w<300; w+=10){
          var theColorAtTheY=underlyingImage.get(i,w)
          fill(theColorAtTheY)
          ellipse(i,w,10)}
        }
      }
      if (key==='l'){
        for (i=0; i<width; i+=10){
          for(w=300; w<360; w+=10){
            var theColorAtTheL=underlyingImage.get(i,w)
            fill(theColorAtTheL)
            ellipse(i,w,10)}
          }
        }
        if (key==='e'){
          for (i=0; i<width; i+=10){
            for(w=360; w<height; w+=10){
              var theColorAtTheE=underlyingImage.get(i,w)
              fill(theColorAtTheE)
              ellipse(i,w,10)}
            }
          }
}

//If you press the enter key, the portrait resets to white screen
function keyPressed(){
    if (keyCode===ENTER){
      background(255);
    }
}

This was a fun project! I went ahead with the “randomly appearing dots” idea, but I made the frame rate very low so they would appear slowly–I wanted to the majority of my portrait to appear as a result of the viewer interacting with it. I made it so if you clicked the mouse a randomly sized dot appears at that point, and if you drag the mouse a line of dots appears. Since this was a portrait of me, I made it so typing my first two initials and my last name would make sections of the portrait appear. Finally, if you press Enter, the portrait resets to a white canvas and lets you start over!


The portrait when you drag and click the mouse 

The portrait when you type in ANBOYLE

The portrait when you use a mix of typing and dragging 

aboyle-Looking Outwards-09

For this looking outwards, I chose to look at Angela Rubin’s post on the Kinematic Petals Dress, which can be found at https://courses.ideate.cmu.edu/15-104/f2017/2017/09/13/aerubin-lookingoutwards-03/. The dress was created by Nervous System and commissioned by The Museum of Fine Arts, Boston. It was presented at the exhibition #techstyle, which ran from March 6 to July 10, 2016. I think that the project is incredibly cool—planning a dress on a model and then 3D printing it sounds like something out of a sci-fi movie.

Angela brings up some very good points in her discussion of the project. I hadn’t thought about the disadvantages of the project until she mentioned them. For example, shell structures can only move in one direction, which prevents the 360 movement other fabric is capable of. Additionally, I wholeheartedly agree with her assessment that the Kinematic Petals dress has an amazing amount of customizability.

One thing I would add to the discussion is how the aesthetic of the dress was tailored to the medium it was created in. Just by looking at the dress, I get the sense that it is not a typical store-bought dress. The interlocking petals look almost futuristic. I could tell the goal wasn’t to simply make a dress with a computer; it was to test the boundaries of fashion and technology.

aboyle-Looking Outwards-08

Meejin Yoon received a Bachelor of Architecture from Cornell University in 1995, a Masters of Architecture in Urban Design with Distinction from Harvard University in 1997, and a Fulbright Fellowship to Korea in 1998. Today, she is a Professor and Head of the Department of Architecture at MIT, as well as the co-founded of Höweler + Yoon Architecture LLP and MY Studio. Throughout her career, Yoon has received numerous awards and accolades and her work has been widely recognized for its innovative and interdisciplinary nature. Examples of her past projects can be found at http://mystudio.us/.

Yoon’s body of work is focused on the intersection architecture, technology, and public space. I’m impressed by the strategic way she approaches her work; she pays a lot of attention to the practicality of materials, space, and interactive potential. I also admire the publicness of her work. While it’s difficult to create work to be displayed in a gallery, I think it can be even more difficult to create work that is meant to exist in a public space and tangibly benefit the people who pass through that space. One of her works that I feel encapsulates these aspects is the “public parasol” she created in downtown Phoenix, seen below. It’s official title is shadow play, and it was specifically created to provide shade during the hottest times of the day and let sunlight in during the cooler hours. Yoon also managed to save several tons of material by being strategic with the design.

“Shadow Play”, created in 2015 at Roosevelt Street in Phoenix. Photo Credit: http://www.howeleryoon.com/projects/shadow-play 

When watching Yoon’s talk, I noticed her use of visuals right away. She includes so many relevant visuals that it was very rare for the video to be focused on her face. She is also very effective at providing background information that enhances the audience’s understanding of her work. For example, I would have been a little confused with the Mobius strip dress had I not known the cultural differences between how clothing is created. I think I’ll take these ideas to heart when I present my own work in the future. If needed, I’ll try to include any sketches I did and talk about my inspiration(s).

aboyle-Project 07-Curves

aboyle curves

//Anna Boyle
//Section D
//aboyle@andrew.cmu.edu
//Project 07 Curves

function setup() {
    createCanvas(480,480);
}

function draw() {
    background(38,48,97)
    //draws all the stars/moons
    //Placement and size deliberately chosen by me
    push();
    translate(width/2, height/2-30);
    drawHypotrochoid()
    pop();
    push();
    translate(50,100);
    scale(0.2,0.2);
    drawHypotrochoid();
    pop();
    push();
    translate(400,50);
    scale(0.15,0.15);
    drawHypotrochoid();
    pop();
    push();
    translate(220,40);
    scale(0.1,0.1);
    drawHypotrochoid();
    pop();
    push();
    translate(100,350);
    scale(0.25,0.25);
    drawHypotrochoid();
    pop();
    push();
    translate(30,240);
    scale(0.1,0.1);
    drawHypotrochoid();
    pop();
    push();
    translate(420,400);
    scale(0.2,0.2);
    drawHypotrochoid();
    pop();
    push();
    translate(360,340);
    scale(0.1,0.1);
    drawHypotrochoid();
    pop();
    push();
    translate(410,180);
    scale(0.17,0.17);
    drawHypotrochoid();
    pop();
    push();
    translate(50,430);
    scale(0.1,0.1);
    drawHypotrochoid();
    pop();
    fill(255)
    //text to show how many sides there are
    textSize(20)
    text("SIDES:",15,30)
    text(sides,85,30)
    textSize(30)
    //"Goodnight, moons" when circles
    //"Goodnight, stars" when star-shaped
    if (mouseY<100){
        celestial="moons"
  } if (mouseY>380){
        celestial="stars"
  } if (mouseY>=100 & mouseY<=380){
        celestial="."
        fill(38,48,97)
  }
    text ("Goodnight, ", 130, 410)
    text(celestial,285,410)

}

//how many sides there are
var sides=4

function drawHypotrochoid(){
    var x;
    var y;
    //makes the shapes bigger or smaller
    var a=constrain(mouseX/4, 40, 130);
    var b=a/sides
    var h=constrain(mouseY/16, 0, b)
    var ph=mouseX/50
    var nPoints=100
    noStroke()
    fill(243,250,142)
    //the equation for the curve
    beginShape();
        for (var i=0; i<nPoints; i++){
        var t=map(i, 0, nPoints,0,TWO_PI);
        x = (a-b) * cos(t) + h * cos(ph + t*(a-b)/b);
        y = (a-b) * sin(t) - h * sin(ph + t*(a-b)/b);
           vertex(x,y)
    }
    endShape(CLOSE);
}

//If mouse is pressed, another side is added
//stays between 4 and 8 sides
function mousePressed(){
    sides=sides+1
      if (sides>8){
          sides=4
  }
}

For the type of curve, I selected hypotrochoid. (http://mathworld.wolfram.com/Hypotrochoid.html). Since it was fairly similar to epitrochoid curves, I referenced the example while I was writing my code. I had some trouble making it look like what I wanted it to; for a while, it was only a circle that got thinner or wider as you moved the mouse. Eventually I figured out that the number you divide variable a by is the number of sides. When I increased that number, it looked a lot more like the example image given on mathworld.wolfram.com. I made it so the curve starts with four sides, but you can add up to eight by clicking the mouse.  You can make the curve bigger or smaller by moving the mouse from left to right or vice versa.

Somewhere along the line I realized that the two extremes were a circle and a star shape, so I made it a sky full of celestial objects and I added the text “Goodnight, moons” and “Goodnight, stars” when the mouse was at the top and the bottom.

I wish I had done more to experiment visually, but overall I enjoyed this project!