Looking at other students’ looking outwards posts, I found the looking outwards 06: randomness post by the username “catbug” interesting. The work he/she talks about it Robbie Barrat’s Neural Network Balenciaga series. Barrat produced a random image by analyzing the similarities in thousands images from Balenciaga runway and interpret the patterns in those. I agree with him/her that it is very interesting and admirable that this project throws the whole concept of randomness into question; that they are series of randomly generated images yet look so similar to each other and look so consistent in the style. I wonder if it is a similar concept to the average. Analyzing thousands of images of Balenciaga runway and lookbook may have allowed the algorithm/system to find out the patterns in the clothes and find out the “average” of the aspects of the Balenciaga style and that led to generating the most “Balenciaga” images.
For this week’s LO, I looked at Holly’s Looking Outwards post from week 5 on 3D computer graphics. In this post, she examined the work of 3D designer Roman Bratschi, studying a piece from his “NONSENSE IN 3D N°191-200” collection from 2018. Similar to Holly, I am drawn to Bratschi’s work because of his highly detailed, realistic renders of complex textures. His strong sense of color is evident in his work, as he utilizes sophisticated color palettes to enhance his visual narratives. In addition to the elements that Holly pointed out in her post, I think that the compositions of his pieces play a significant role in their success, as they are quite dynamic and invite viewers to examine the intricacies of each render.
To learn more about Bratschi, I visited his website, where I read about his career path and past work. I was really intrigued by the way that although his work is extremely clean and polished, he is able to effectively manipulate texture, color, and composition to convey a range of emotions and narratives across the different pieces in his portfolio. While some renders come across as very elegant and satisfying, others feel dark and unsettling.
Author: Anthony Prestigiacomo Assignment: Looking Outward 03 Artwork: Probability Lattices Artist: Marius Watz Year: 2012
I agree with Anthony that the 4 pieces created are all quite unique, but similar in a very interesting way. The sharpness of the edges created by the angles give an interesting appearance to each individual sculpture. I would be interested to see what the parametric functions looked like to create the art pieces. Also, as the piece was created in 2012, the 3D filament is quite apparent. I would be interested to see how complex Watz could make these art pieces with today’s technology. 3D printers are much better at not leaving lines as well as can create more complex structures. I agree with Anthony that the artist relies on abstractionism which gives his artwork the feel that it does. On top of that, the Watz manages to reduce the abstractness with computation. The ties between the two gives the art its appeal which I imagine is quite difficult to create.
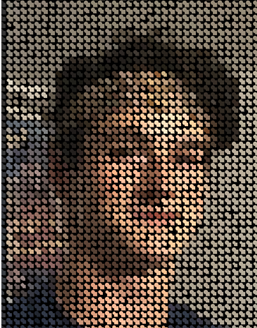
I wanted to create a replication of the portrait that could be either detailed and accurate or abstract. To do this I made my image get created by squares and circles that are created by a loop. The size gets changed by the x-position of the mouse (left is less abstract and right is more abstract).
//function that loads image of my face
function preload() {
    lucas = loadImage("https://i.imgur.com/M9dRkNS.png");
}

function setup() {
    //canvas is the size of the resized image
    createCanvas(850/2.29, 480);
    background(0);
    //stores pixels from the image
    lucas.loadPixels();
    //resizes image to keep proportions
    lucas.resize(850/2.29, 480);
    frameRate(100);
}

function draw() {
    //changes position of the circles and squares in the array
    var modifier = 10;
    //constrains the size of the circles and squares
    var restrict = map(mouseX, 0, width, 5, modifier*2);
    for(var i = 0; i < width; i++){
        for(var j = 0; j < height; j++){
            //obtains the pixel color at a given x and y of the picture
            var pixelColor = lucas.get(i*modifier, j*modifier);
            noStroke();
            //fills with the color from the pixel
            fill(pixelColor);
            //creates circles and squares that will replicate the image
            circle(i*modifier, j*modifier, random(restrict));
            square(i*modifier, j*modifier, random(restrict));
        }
    }
}
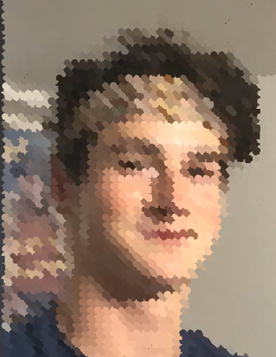
“The painting has a life of its own. I try to let it come through.It doesn’t make much difference how the paint is put on as long as something has been said. Technique is just a means of arriving at a statement.Every good painter paints what he is.”
– Jackson Pollock
While this quote from Jackson Pollock’s celebrates a dynamic and ad-hoc approach to painting, this week’s Project was about understanding the technique even though the motion of particles and elements seems random. However, it is enjoyable to see how the code breathes life into the composition.portrait.
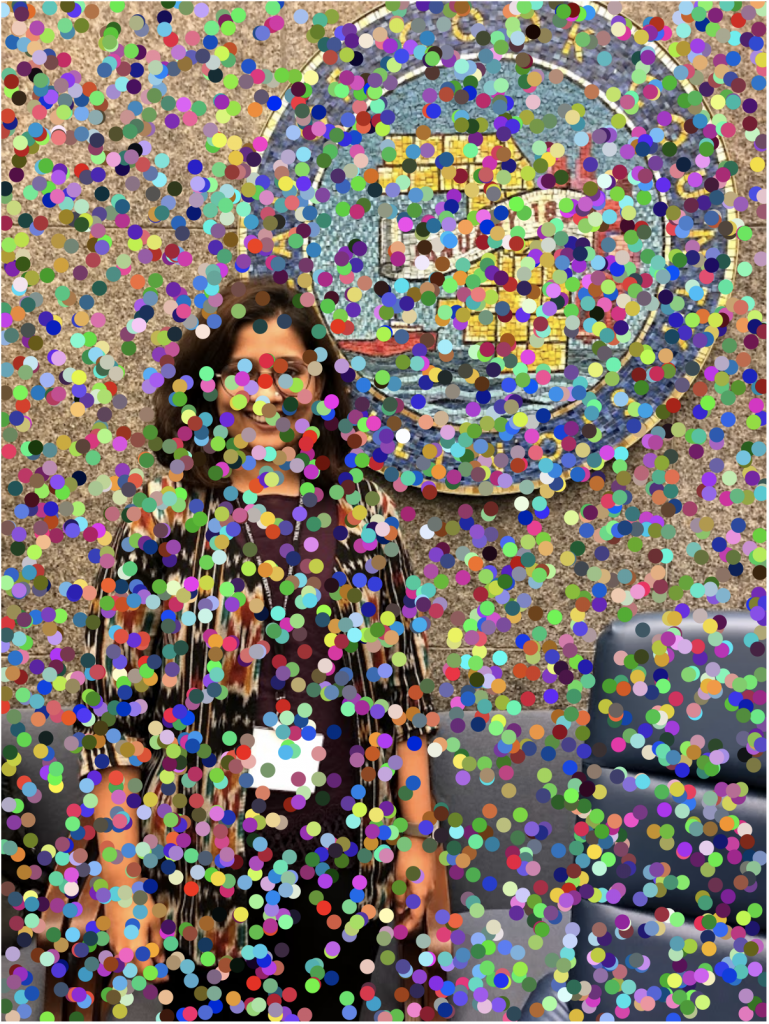
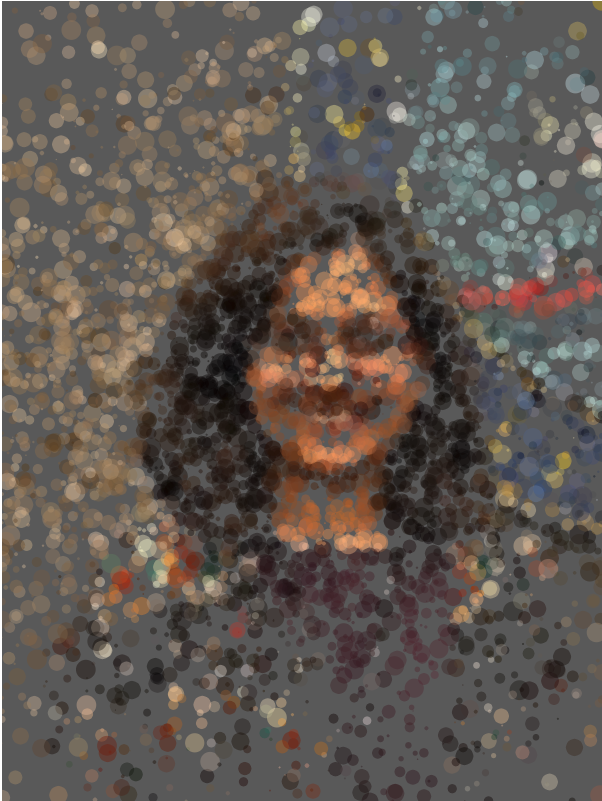
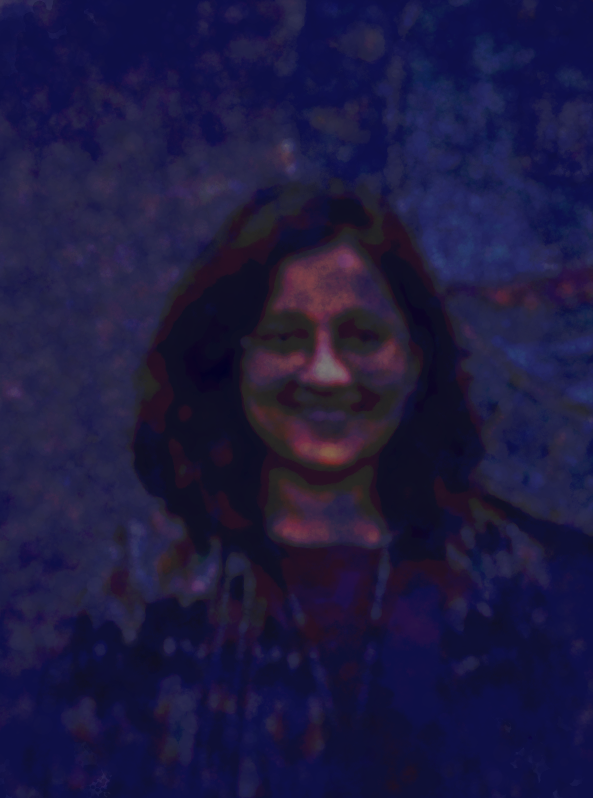
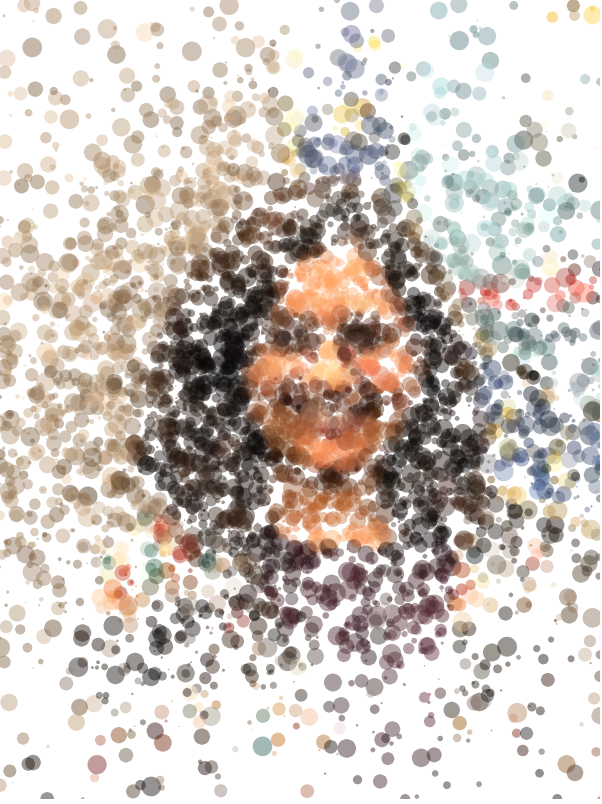
The project this week was an opportunity to merge different techniques from the p5.js toolkit. Mainly the two topics that I combined was “Particles” and “Images”.
I started off by experimenting with different parts of the Particles code from the in-class examples, to see how the behavior of particles changes and affects the composition. For reference, I set the image in the backdrop so that I could see the relative positions of the image in the canvas.
Merging Particles and image methods in p5.js
I used Daniel Shiffman’s tutorials to guide my process and used the steps he proposes to create code that gradually reveals the image through the scattering and random motion of particles. I used 200 particles, to create a play of “hide” and “reveal in the image.
One important thing I learnt is scaling the image correctly so that its scale aligns with the canvas created in the setup function.
Also, constraining the size of the particles and choosing the right variations contributes to a good computational portrait. For example, I ensured that the size of my particles lies between 1, 20 – if they were too big it would be harder to see what image is being rendered, but at the same time, they also do create a dramatic effect.
As you see in the images above, I played with color value, particle size and mouse Interactions to show different textures of grain, contrast and color value in the portrait. I also used mouse Interactions to change the background so a viewer can notice the particles and how the interact.
//code citation reference
//Daniel Shiffman's Painting with Pixels:
//https://www.youtube.com/watch?v=0V3uYA1hafk&ab_channel=TheCodingTrain

var p = 2000;

var particles = [];


function preload() {
  img = loadImage('https://i.imgur.com/yprs5DW.jpg');
}

function setup() {
  createCanvas(400, 400);
  pixelDensity(1);
  //image = createCapture(img); //??
  //image.size(width / vScale, height / vScale); //??
  for (var i = 0; i


This portrait project taught me a lot, and I was able to strategize my process much better than before. With more time, I would like to experiment with this same image using Brownian motion and a random walk of a particle.
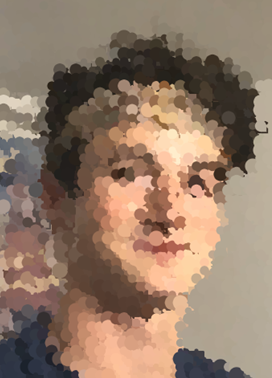
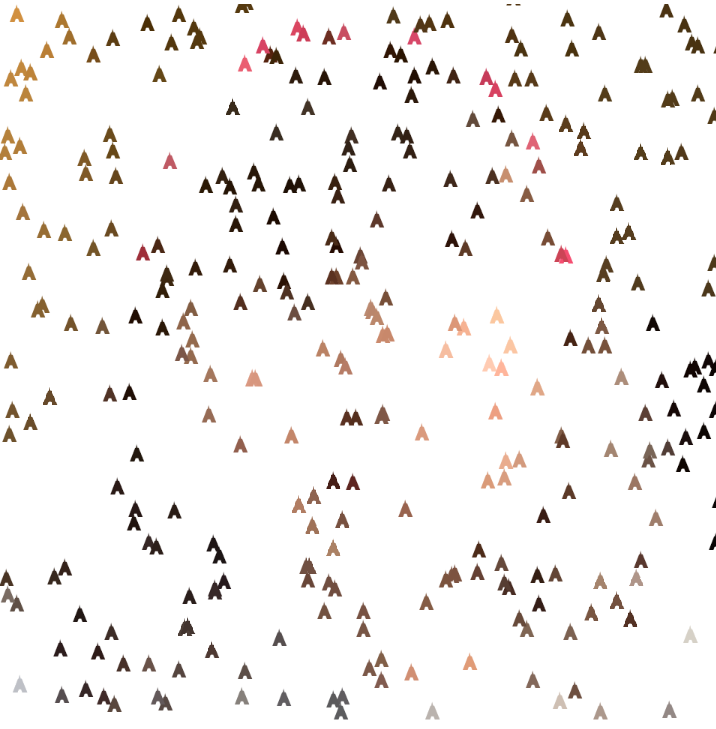
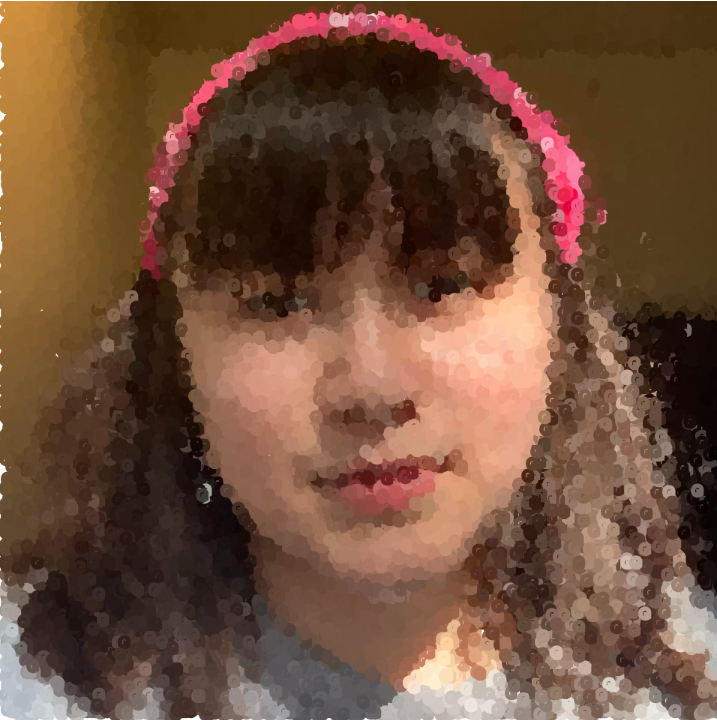
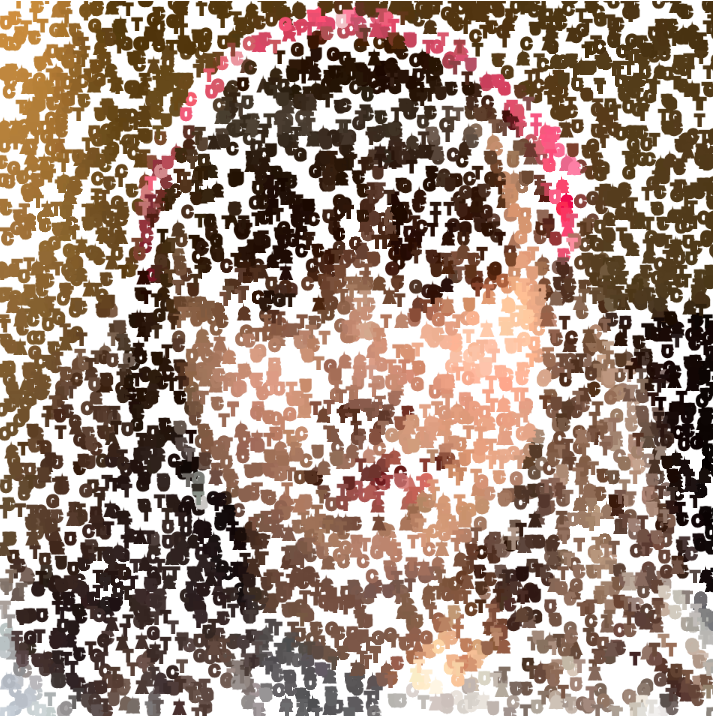
I chose to construct my portrait from nucleotide pixels; nucleotides are the building blocks of DNA and RNA. Each time the mouse is clicked it switches the pixel mode to a different nucleotide: A for Adenine, C for Cytosine, T for Thymine, G for Guanine, and U for Uracil. If the mouse is held down, the pixels drawn will be randomly chosen from all nucleotides.
let img;
var Nucleotide = 1;
var Nucs = ['A', 'C', 'T', 'G', 'U']

function preload() {
	img = loadImage("https://i.imgur.com/wOvSeLp.jpg?1");
}

function setup() {
  createCanvas(480, 480);
  background(255);
  img.resize(width, height);
  img.loadPixels();
  frameRate(75);
  imageMode(CENTER);
}

function draw() {
  	var x = floor(random(img.width)); // random x position for the letter
  	var y = floor(random(img.height)); // random y position for the letter
  	var pixel = img.get(x, y); // select color from the image and store in pixel
  	stroke(pixel);	//make the stroke color the color of the according image pixel
  	strokeWeight(2);
  	fill(pixel);	//make the text color the color of the according image pixel
  	textSize(10)
	if(Nucleotide == 1) {
  		text('A', x, y);	//A, for adenine
  	}
 	else if(Nucleotide == 2){
  		text('C', x, y);	//C, for cytosine
  	}
  	else if(Nucleotide == 3){
  		text('T', x, y);	//T, for thymine
  	}
  	else if(Nucleotide == 4){
  		text('G', x, y);	//G, for guanine
  	}
  	else {
  		text('U', x, y);	//U, for uracil
  	}
  	if (mouseIsPressed) {
  		text(random(Nucs), x, y)	//while the mouse is being held down, randomize pixel letters (any nucleotide can be generated)
  	}
}

function mousePressed() {
	if(Nucleotide == 1) {
		Nucleotide = 2;	//click once and set pixel letter to C
	}
	else if(Nucleotide == 2) {
		Nucleotide = 3;	//click again and set pixel letter to T
	}
	else if(Nucleotide == 3) {
		Nucleotide = 4;	//click again and set pixel letter to G
	}
	else if(Nucleotide == 4) {
		Nucleotide = 5;	//click again and set pixel letter to U
	}
	else {
		Nucleotide = 1;	//click again and reset pixel letter to A
	}
}
These are some of the images of my computational portrait with the various modes.
For this portrait I wanted the snaking lines to help give the portrait depth perception. Over time, as more and more tiny lines are added, the portrait slowly evolves into an increasingly recognizable face.
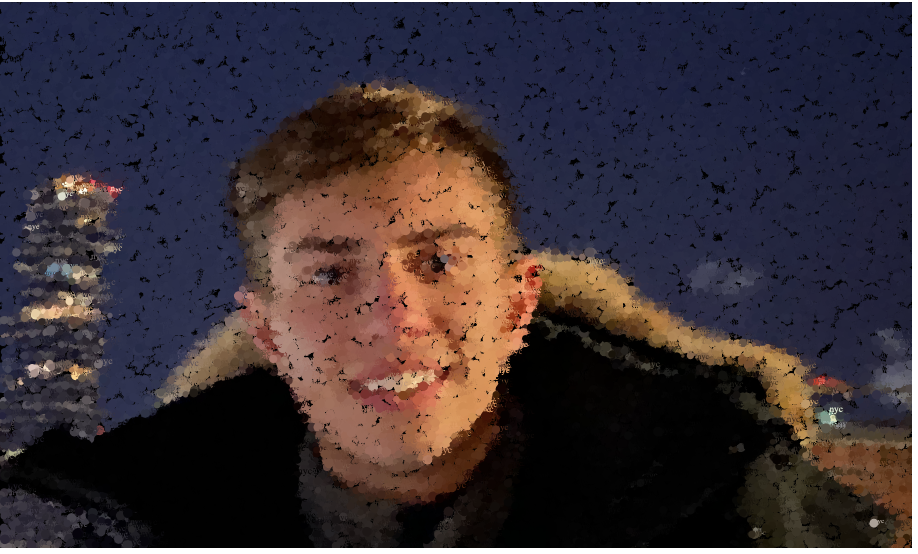
The photo I used is the famous “Migrant Mother”, taken by Dorothea Lange in 1936.
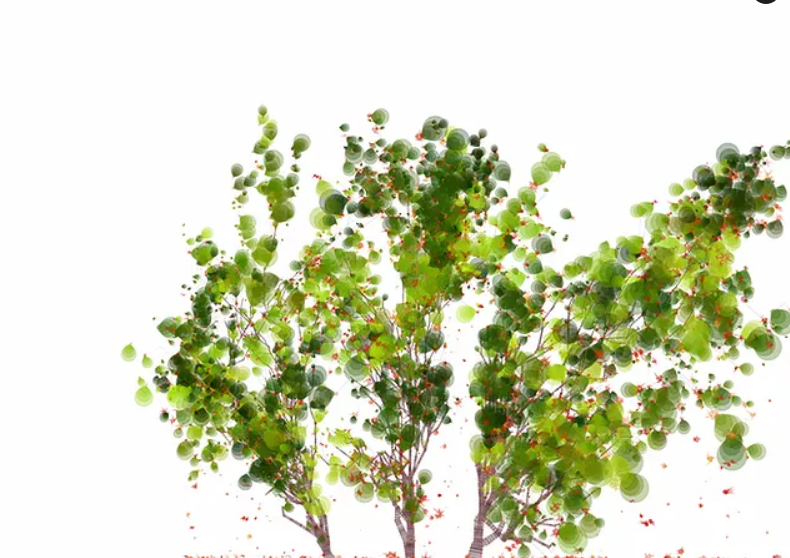
“Tree Growth” is a very simple piece that I find really intriguing. Like Alyssa mentions, the process of painting a tree comes down a lot to muscle memory and random brushstrokes to give it enough “noise” to be lifelike. This program does the exact same thing, replicating the process of painting or growing a tree through computational means.
The leaves even change color by the seasons! The piece, fundamentally, is simulating natural growth within the confines of code. By roughly replicating the natural process, the piece takes the first step towards growing a “real” digital tree.
One Looking Outwards that I am drawn to is Jubbies’s Looking Outward 5 on 3D computer graphics. Jubbies chose the Nike AirMax 2017 campaign created by the design studio ManvsMachine. I totally agree with Jubbies’s assessment of the video. The promotional video was able to use sound and 3D renderings to convey the lightness and comfort of the Nike AirMax without having to render the literal shoes themself which I thought was really cool. I really enjoy the gravity simulation created. The application of computer-aid 3D rendering to something that I’m really interested in–running shoes– and an aspiring product designer is really eye-opening to me.
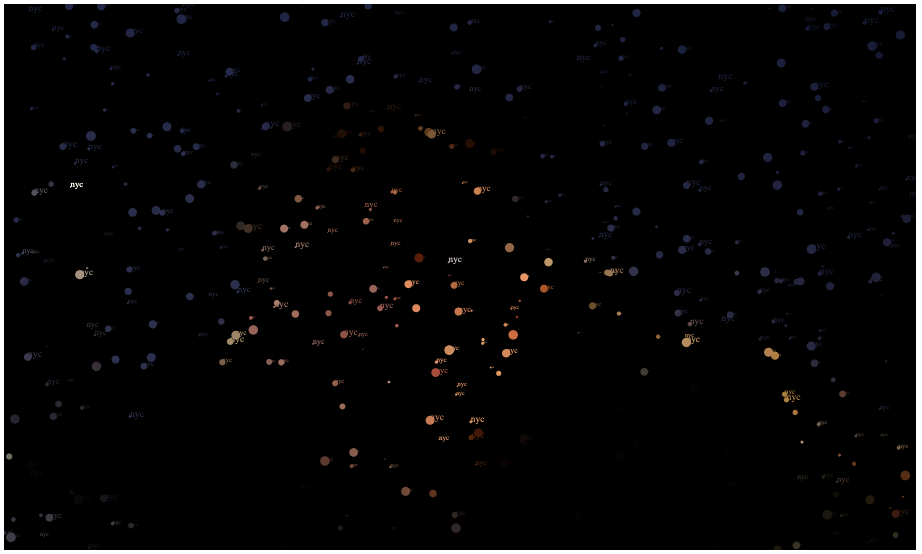
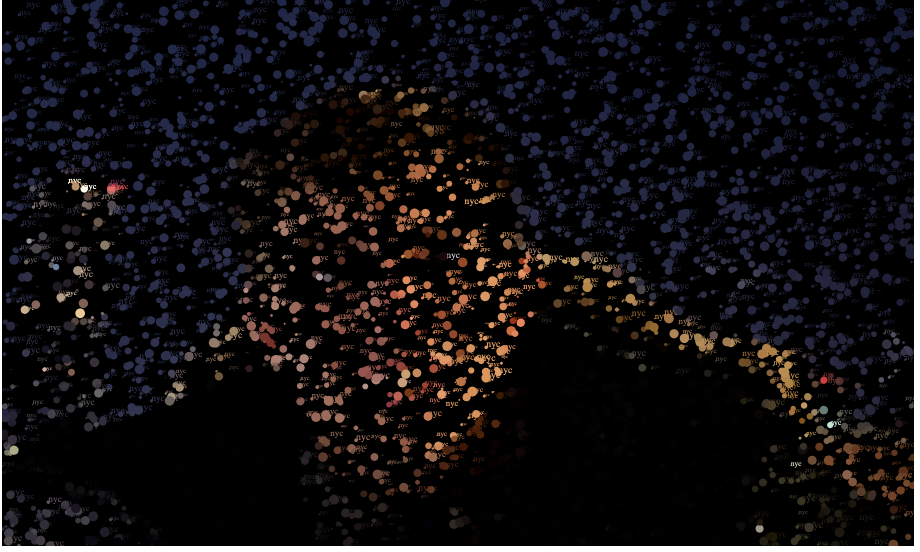
My process for this project was to choose a picture of myself and figure out how to go about the assignment. I was able to combine the letters “nyc” and circles to make the completed picture. This picture was taken in NYC.
//Anthony Prestigiacomo Section C
function preload() {
    var citypic="https://i.imgur.com/q3X1p2I.png";
    photo=loadImage(citypic);    //image variable
}

function setup() {
  createCanvas(456,273);
  background(0);
  photo.resize(456,273);    //resizing the image to fit the canvas
  photo.loadPixels();
  frameRate(400);
}

function draw() {
  var x=random(width);
  var y=random(height);
  var pixelx=constrain(floor(x),0,width);
  var pixely=constrain(floor(y),0,height);
  var pixelcolor=photo.get(pixelx,pixely);    //calling each pixel color
  noStroke();
  fill(pixelcolor);    //fill the circles and words with image pixel colors
  textFont('Veranda',random(0,5));
  text("nyc",x,y);    //nyc text to appear to form the image
  circle(x,y,random(0,5));    //circles that will appear to form the image
}
A few seconds in Image is starting to formAfter a couple of minutesoriginal image
![[OLD FALL 2020] 15-104 • Introduction to Computing for Creative Practice](https://courses.ideate.cmu.edu/15-104/f2020/wp-content/uploads/2021/09/stop-banner.png)