Nina Lin & Vinitha Ranganeni
Abstract
Our idea was to design and produce a robot arm controlled by external sensor input. On a table, we had a 2 degree of freedom (DOF) robot arm with four motors that was surrounded by 4 stations. Each station had parts of the robot arm that controlled the same part on the actual arm with a potentiometer. There were bins and blocks at each end of the arm that could be picked up and moved to different locations. During our exhibit at the Children’s Museum, Robby successfully facilitated teamwork amongst the children and their parents. They were able to realize the mechanisms of each station and were delighted by ability to freely control parts of the robot arm. They learned how to move the arm collaboratively from their individual stations to pick and place the blocks in bins. Through this task-oriented activity, we hope to have inspired fascination in robotics with an interactive interface.
Objectives
- Be able to control the robot arm from each of the stations at real time
- Facilitate teamwork amongst children
Implementation
The design really centered around answering two questions:
- How easy would it be to control this part of the robot from a station?
- Can all four stations be operated at the same time without the robot crashing into itself?
In terms of material, we chose ⅛” wood for the arm so that it would be lightweight and easy to laser cut. We did not enclose any of the wiring or motors so that the children could see how the arm was being controlled. We also designed the arm in such a way that it would move 180 degrees to maximize movement since developing a rotating base (adding a third degree of freedom) was out of the scope/time frame of this project.
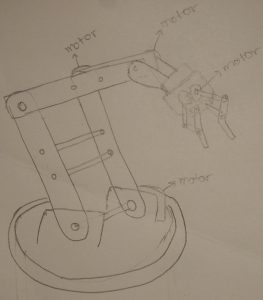
One of the initial sketches of the arm.
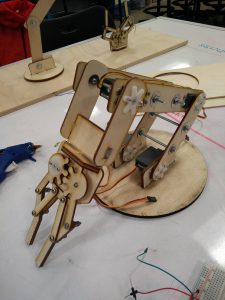
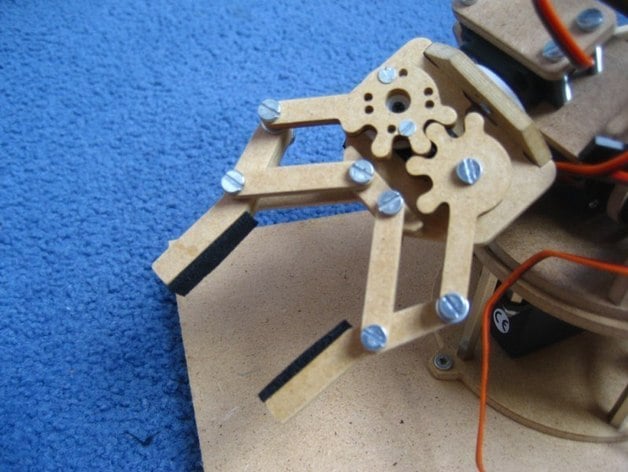
A closer look at the robot arm.
Outcomes
We didn’t have any issues with the weight or robustness (to children’s abuse) that we were initially worried about. We did have an issue with the arm being wobbly due to they way we chose to connect parallel pieces of the arm.
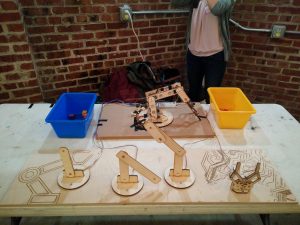
The four stations in the front control various parts of the robot arm behind it. The two bins on the side are what the blocks must be placed into.
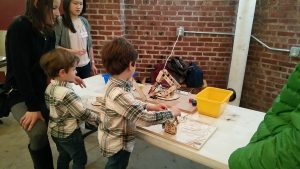
This is a picture taken at the children’s museum where two boys are working together to get the robot arm to pick up a block and place it in one of the bins.
Contribution
We both designed, laser cut, programmed, wired and tested the robot arm together. We decided that this was the best way to tackle the project instead of working on individual pieces and putting them together.
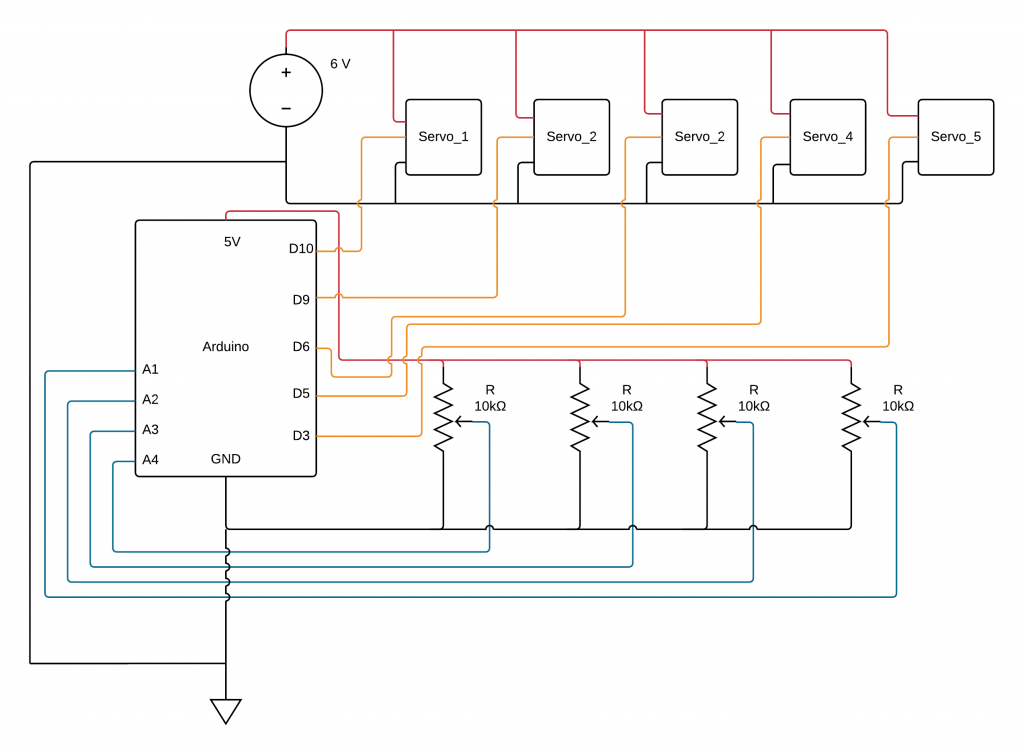
The circuit diagram for the robot arm and the stations controlling the arm.
The gripper design was adopted from here
Leave a Reply
You must be logged in to post a comment.