Adafruit Circuit Playground Bluefruit
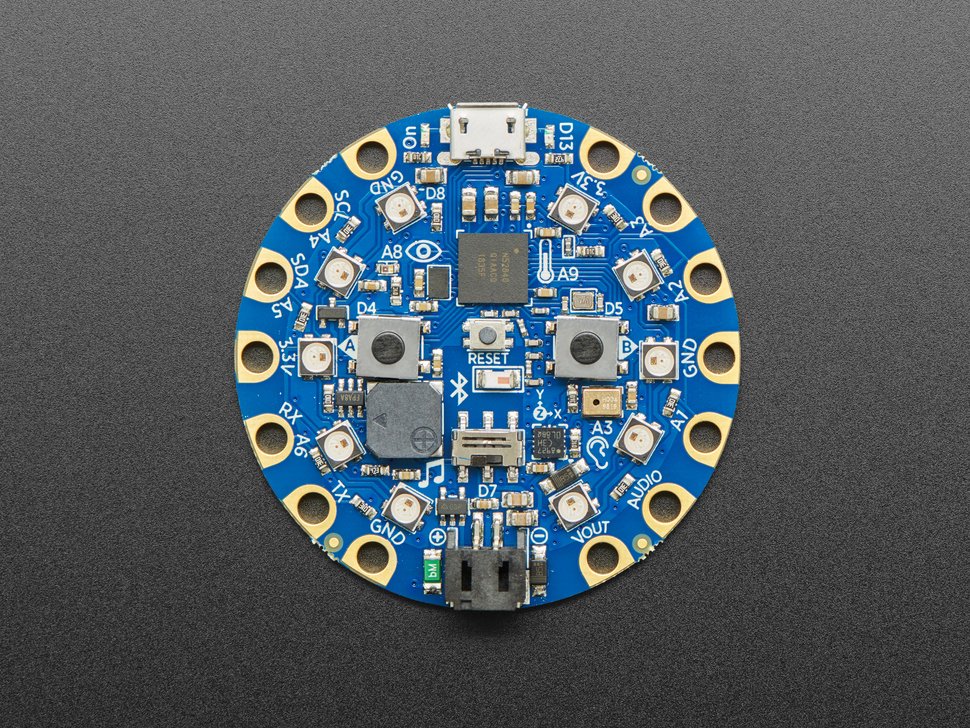
The Circuit Playground Bluefruit (CPB) is a microcontroller board sold by Adafruit which we have used for embedding computing in projects. We will be programming it in CircuitPython. The board also supports programming in Arduino C++.
Contents
Setup and Testing
The CPB is shipped with a demo program installed but without CircuitPython onboard. Installation of CircuitPython is as easy as copying a file to a USB stick, but there are a few steps to prepare.
I recommend you install the Mu Editor on your laptop or desktop. It will provide a single tool for editing CircuitPython programs, observing debugging output on the serial monitor, using the Python command line (REPL), and plotting live data. 1
There are two CircuitPython downloads required for installation: the core system and the library bundle. The core system is specialized for the particular board. The library bundle version must match the core system.
Download the latest stable release of CircuitPython. This will be a .uf2 file from https://circuitpython.org/board/circuitplayground_bluefruit/. Multiple language translations are available.
Download the matching release of the CircuitPython library bundle from https://circuitpython.org/libraries. This will be .zip file containing a large number of .mpy library files and sample code. You’ll be unpacking this on your desktop or laptop and installing just a subset of files.
The Adafruit tutorial has a detailed installation description, but the process can be summarized as follows:
Plug the board into a USB port on your computer; you’ll need a USB micro-B cable.
Double-click the tiny RESET button right in the center. I find it helpful to use the blunt end of a pen.
If successful, a new ‘drive’ will be mounted on your computer as CPLAYBTBOOT.
Copy the CircuitPython .uf2 file you downloaded to this drive; drag-and-drop works fine.
After a brief delay, CPLAYBTBOOT will disappear and a new ‘drive’ called CIRCUITPY will appear.
After installing the core system, you can test it using the Serial pane in the Mu Editor to interact directly with CircuitPython. You may need to enter a keystroke in the serial pane to see the
>>>input prompt. Then you can enter commands: you might tryhelp('modules')to see the available built-in libraries. REPL stands for “Read-Eval-Print Loop”, it is an interactive prompt at which you may enter expressions and define short programs; it is very useful for testing individual code fragments. Control-D will reload and rerun code.py; control-C will interrupt a running program. The prompt offers tab-completion which is handy for exploring modules.If this appears to work, the next step is to install the essential set of libraries from the bundle. After you unpack the library bundle .zip, please locate the following folders and files and copy them into the lib/ folder on your CIRCUITPY drive:
adafruit_ble/
adafruit_bluefruit_connect/
adafruit_bus_device/
adafruit_circuitplayground/
adafruit_hid/
adafruit_lis3dh.mpy
adafruit_motor/
adafruit_thermistor.mpy
neopixel.mpy
Now you may try out any of the course-supplied sample code by copying the corresponding .py file into the CIRCUITPY drive as
code.py. For online examples, you can simply cut and paste into code.py using the Mu editor. The default behavior is that saving a new version of code.py on CIRCUITPY will trigger a reload and it will immediately run. Syntax errors will generate messages on the serial console.The libraries bundle also includes a comprehensive examples/ folder. Some of these will work on the Bluefruit, most will not. The examples prefixed with circuitplayground_ are a good starting point.
Next steps: some of the course examples will require Python programs running on your desktop or laptop, so you may wish to proceed with installing or upgrading Python as per Python 3 Installation.
Features
The board includes a number of onboard sensors:
three-axis accelerometer, useful for tilt, tap, and fall detection
sound level sensor
ambient light-level sensor
temperature sensor
two pushbuttons
one slide switch
The board includes several outputs and external connections:
ten NeoPixel RGB LEDs
speaker with amplifier
red LED
eight alligator-clip-compatible general input-output pads, 14 pads total
Bluetooth Low Energy radio for wireless data communication
native USB (including human interface device emulation)
battery connector (but no charger)
Tutorials and Information Online
The CPB information online is scattered over several sites, so the following notes may help guide you. This is specific to this board, more general CircuitPython programming information can be found in the CircuitPython Guide.
- Adafruit Store - Circuit Playground Bluefruit.
This is the purchasing page at Adafruit.
- Adafruit Circuit Playground Bluefruit - Tutorial.
This is a step-by-step guide to the Bluefruit microcontroller. The CircuitPython Playground section has a comprehensive set of example programs.
- Adafruit Circuit Playground Library - Tutorial.
This is a convenience library provided for the Bluefruit which simplifies access to the onboard hardware. This narrative tutorial walks through the examples using the specific sensors and functions.
- Adafruit Circuit Playground Library - API Reference.
Technical documentation on the convenience library, useful if you need a precise specification or to inspect the source.
- Schematic and Datasheet Downloads.
The circuit diagrams may be useful to answer hardware questions.
- 1
Please note that unlike the Arduino IDE, no compiler is needed, so editing can be performed with any Python-aware programming editor if you wish. Debugging can also be performed with a separate terminal emulator.