Exercise: Introduction to Autodesk Fusion 360
Fusion 360 is a 3D CAD software package which we will be using for the parametric design of mechanical systems. It is ‘cloud-based’ in two senses: the client software is automatically updated using a ‘software as a service’ model, and your files live by default in online storage. The main implication for us is that online storage supports remote team collaboration and design review. However, it also means that update and server problems can make it occasionally unreliable.
Autodesk has liberal free educational licensing for students and instructors, so it is available to you at no charge. The client software works on either macOS or Windows. You’ll need an Autodesk Account if you do not already have one.
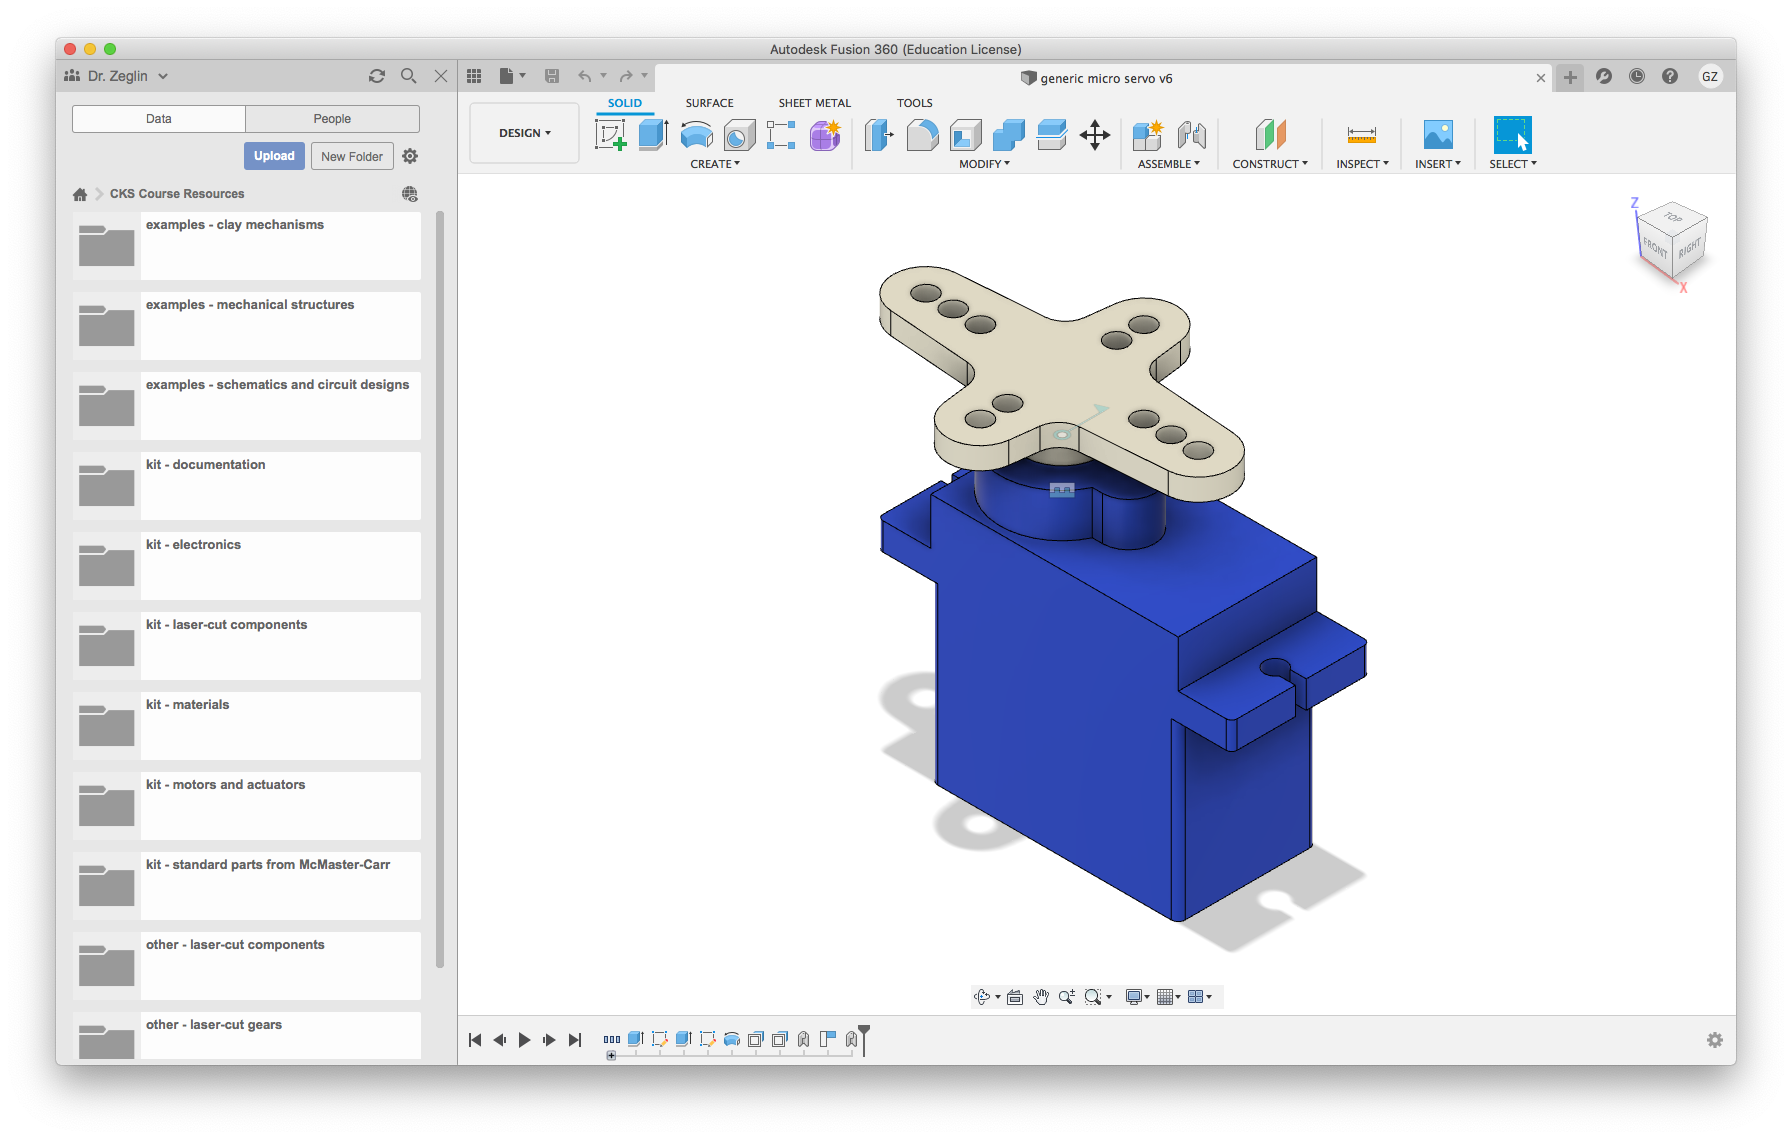
The Fusion 360 application on macOS showing a sample model of a micro servo. The Data Panel is open at the left showing folders within the CKS Course Resources project. On the right is a 3D view of the model, opened in Design mode for parametric modeling. Below the 3D view is the Design History representing the timeline of operations which created the model.
Objectives
The overall objective of this exercise to work out any problems with creating and sharing 3D models. The goals of this exercise are that you should be able to:
Set up a working installation of Fusion 360.
Configure your “Team” and enable instructor access.
Create a 3D model with a mix of sketched and imported parts.
Share a Fusion 360 project and model with your instructor.
Reference Guides
Please review the following reference guides as needed:
Assigned video lecture clips, including specific commentary on this exercise.
Getting started with Fusion 360 (product documentation)
Getting Started with Fusion Team for Academia (article regarding teams)
Autodesk Fusion 360 (course site notes)
Steps and observations
The following checklist will walk you step by step through getting oriented with Fusion 360.
N.B. The sharing and submission notes have been evolving as I uncover the specific limitations of Fusion 360 Teams. A more detailed description can be found under Fusion 360 Team Protocols.
If you do not already have an Autodesk account, please apply for a free academic Autodesk Account.
I highly recommend using your Andrew email account to make it easier for me to process your membership in the course team. If you are using a different email address for your Autodesk account, please let me know which are using.
If you have not already installed the software, please download and install it via https://www.autodesk.com/education/edu-software/overview.
Start up the software, which will require logging in using your Autodesk credentials. You will likely be faced with some configuration choices.
The ‘Fusion 360 Team’ is a model for sharing online storage. It has the following limitations:
Each user can only create one team.
Each user can belong to multiple teams.
A team can have any number of projects.
Team members are specifically granted access to projects.
Only Editors can directly download files; Viewers can see them in the browser but not download.
The sharing model we will try is as follows. This generally follows the second option outlined on Getting Started with Fusion Team for Academia. Please note this is new for Fall 2020, so this scheme may be revised as we go and discover problems.
Each student will create their own team. Please use an identifiable name to make sharing requests understandable; this name can be changed later.
Every student will be invited as Viewer Editor to the ‘CKS Course Resources’ Project on the ‘Dr. Zeglin’ team in order to have access to reference parts and designs. Please note: this role is needed in order to have download access, but also gives you write permissions on the shared files. Please be careful not to inadvertently change anything.
For each collaborative assignment, one student will create a project within their team, invite their partners to the team, and grant partners access to the project.
The ‘Project Type’ should be Closed or Secret.
The hosting student will take the role of ‘Team Administrator’.
The partners will take the role of ‘Team Member’ and be granted ‘Editor’ permissions.
For submission and review, the instructor will be invited to the team as Team Member Project Contributor with either Editor or Viewer Editor permissions.
Please create a project for the assignment.
Please create a model with the features as specified below.
Please invite your instructor to your team and project.
Deliverables
After you have become familiar with the software, please prepare a model with the following:
At least one original solid component. I recommend starting with a flat part, e.g. a single sketch extruded 6 mm thick as if for laser-cutting.
At least one component imported from the course resources. Suggestion: find the ‘generic micro servo’ in the ‘kit - motors and actuators’ folder within the ‘CKS Course Resources’ project of the ‘Dr. Zeglin’ team.
At least one component imported from McMaster-Carr. Suggestion: find a bushing bearing (sleeve bearing) with a 1/4 inch inside diameter and your preferred length.
The design itself doesn’t have to be anything practical, but this is a good opportunity to practice drawing a model, or at least locating the parts in a meaningful way in the space.
When it is time to submit your model, please find the administration page for the project (‘Open on the Web’), go to the ‘Project Members’ tab, click the Invite button, make sure role is set to Editor, and enter your instructor’s preferred email address garthz@cmu.edu.
Please then submit a brief text note to Canvas specifiying your team name, the specific project name, and design name.
If you wish, you may also share your project via a browser. For an example of how this appears, please see the generic micro servo on the web. This is adequate for a visual inspection of a final model or providing a means for others to download your model, but isn’t sufficient for instructor review of your design process. Sharing is available via the web page provided for the model.