IDeATe 3D Printing Guide
The IDeATe fabrication facility includes a Stratasys CB3D 3D printer which we will use for this course. This is a highly useful tool for fabricating complex 3D forms in ABS plastic. The Stratsys CB3D uses a fused deposition modeling (FDM) process which extrudes a thin bead of melted ABS plastic layer by layer.
The best feature is the design freedom to create complex shapes, including forms impossible with conventional machine shop tools. Of course, using this freedom requires sophisticated 3D CAD skills. The chief limitatation is the speed: many parts take hours to fabricate and then hours to clean. The parts are also not solid which can limit the options for modifying parts during post-processing.
In general, I encourage designing most project parts for the laser cutter, since the fast turnaround time and the relative ease of hand modification speeds design iteration and project development. But some design problems will be best solved using 3D printing.
Procedures
Design your part as a 3D solid model. Please refer to the design guide below for hints on tolerancing and process limitations.
If possible, add an identifying mark into the model. I recommend embossing your Andrew ID as a geometric feature in a discreet location. All parts go through a common cleaning bath, and this may help disambiguate your particular part in the drying rack.
Export as a binary STL file with millimeter units. STL is the common interchange format for 3D printing. Please note that the file format does not intrinsically specify dimensional units, so I recommend always using millimeters. The STL format describes the part as a triangulated surface mesh, so smooth curves will be tessellated and unwanted subtle edges may be visible in the part. You may choose to adjust the export options to increase the polygon resolution as needed.
Log into the online printer queue by opening the Skylab interface in a web browser using your Andrew ID and password.
Upload your file. Verify the units and choose print density. Select the best print orientation; in general, this will be one which minimizes the use of support material, e.g. by orienting the largest face at the bottom.
Please add the following to the comments field: “Please charge to 16-223 Creative Kinetic Systems.”
The IDeATe staff will review your job request. It may be directly submitted for printing if suitable, or they may contact you or me to review details.
The Skylab interface has a status page which will show the part progress as it works through the system.
After printing, the part will be ejected into a bin on the side of the machine, located in Hunt A5B. Parts are printed on an individual mylar sheet and include some amount of dissolvable support which can be removed in a cleaning bath.
You may fetch the part yourself, or if requested, wait for the staff to move it into the processing bath. If you have been trained in the bath procedures you may process it yourself.
After processing, parts are left in a rack in Hunt A5 for drying.
3D Printing Design Rules
The maximum build dimensions: 120mm × 120mm × 120mm. Larger models will need to be split into sections.
Maximum resolution: 0.1 mm.
As a rule, holes tend to be undersize. Specific recommended adjustments are TBD.
Multiple parts may be included in a single STL. Recommended practice is to align each to the ground plane; stacked parts will require dissolvable support between them.
3D Printing Best Practices
Avoid overhanging walls if possible; these can require a great deal of support material.
Keep the limitations of cleaning in mind when designing deep pockets and holes. If liquid won’t flow easily into an area then it may be difficult to remove the support material. Internal voids cannot be cleaned at all and will remain filled with support.
Both the cost and print time of a part are directly proportional to the volume of material. Consider adding cutouts or pockets as appropriate to shed mass without affecting the function of the part. E.g., an I-beam member or channel will be much stronger than the equivalent material as a narrower solid bar. For some situations, SolidWorks offers a Shell tool which can hollow out a part leaving only thin-walled surfaces. However, please remember that creating undercuts will increase the amount of support material required, so it may lower part mass but not always part cost or time.
References
Support Wash Station
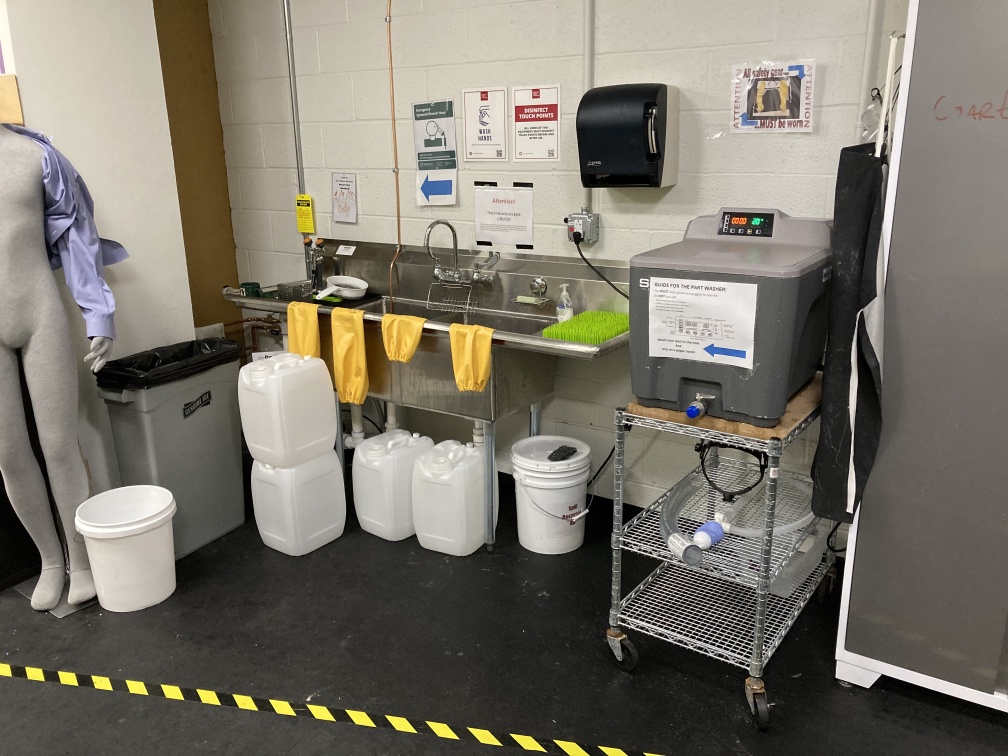
The washing station for dissolving 3D printer support material located in the rear corner of HL A5. The dissolving bath is a machine containing a hot, alkaline solution. Please use the gloves to load and retrieve parts. It can take several hours to clean parts with a lot of support material. The sink is usable for rinsing parts afterward, but please don’t ever put anything else down it.