Laser Welding Plastic Pneumatic Actuators
Please note: this page is a work in progress.
We will use low-pressure pneumatic actuation for a number of experiments and projects in the course. The fastest way to make a simple pouch actuator is to use an impulse sealer to weld together polyethylene sheets. For more complex shapes it may be desirable to use the laser cutter for plastic welding.
Summary
The impulse sealer creates an airtight mechanical bond between two sheets of plastic using a combination of heat and pressure. The laser cutter beam is efficiently absorbed by the plastic to create heat, but lacks pressure, so the laser welding process depends on the passive joining of closely mated sheets of plastic as they locally melt.
A good weld depends on several conditions:
fixturing two layers of plastic smoothly in close contact but without excessive tension
selecting laser operating parameters to passively melt and join without creating a gap (‘melting through’)
designing the weld pattern for airtight reliability and even heat distribution
The key elements of the process:
Defocusing the laser to produce a wider focal spot than normal cutting.
Using small magnets to hold the plastic smoothly against the honeycomb support.
Protocol
Focus the laser 36 mm above the bed. This can be accomplished by running the normal autofocus using either six layers of 6 mm plywood or the Laser Focusing Jig.
Choose two layers of smooth 0.004 inch LDPE film. Squeeze out any air between the lasers and arrange flat on the bed.
Use the ceramic magnets to fixture the plastic to the honeycomb, making sure to minimize any bubbles or ripples.
Load your design file and set the weld lines to the following parameters:
‘Cut’ mode
20% laser power
25 mm/sec speed
“Laser through mode” turned off
Air blow disabled (does this matter?)
For now, after welding, hand-trim the part using scissors. Still pending: testing defocused cutting for boundary trim.
Weld Design Rules
The weld pattern design rules are still in development. Some initial assumptions:
Each airtight weld should include two passes spaced 1 mm apart. A single pass appears to leave small gaps as the plastic wrinkles; a second pass slightly offset appears to reheat the weld and close remaining gaps. This can be accomplished in a SolidWorks drawing by using the sketch ‘offset’ operation.
Sharp corners should be rounded with a circular fillet.
Materials
Plastic film for heat-sealing:
Flexible LDPE Film, 3x100’, 0.004” thick, semi-clear white, https://www.mcmaster.com/8553K101/
Open-Top Bags on a Roll, 4 Mil Thick, 750 Feet Long, 6” Wide, https://www.mcmaster.com/2062T806/
Magnets for fixturing:
ceramic disc magnet, 18mm diameter, 5mm thick
Physical Computing Lab part 0401, drawer B13-R1-C3 in HL A10.
The IDeATe laser cutters are Rabbit Model RL-80-1290 with an 80 Watt carbon-dioxide laser.
We use lenses with a focal length of ?? mm.
more details: IDeATe Rabbit Laser Cutters
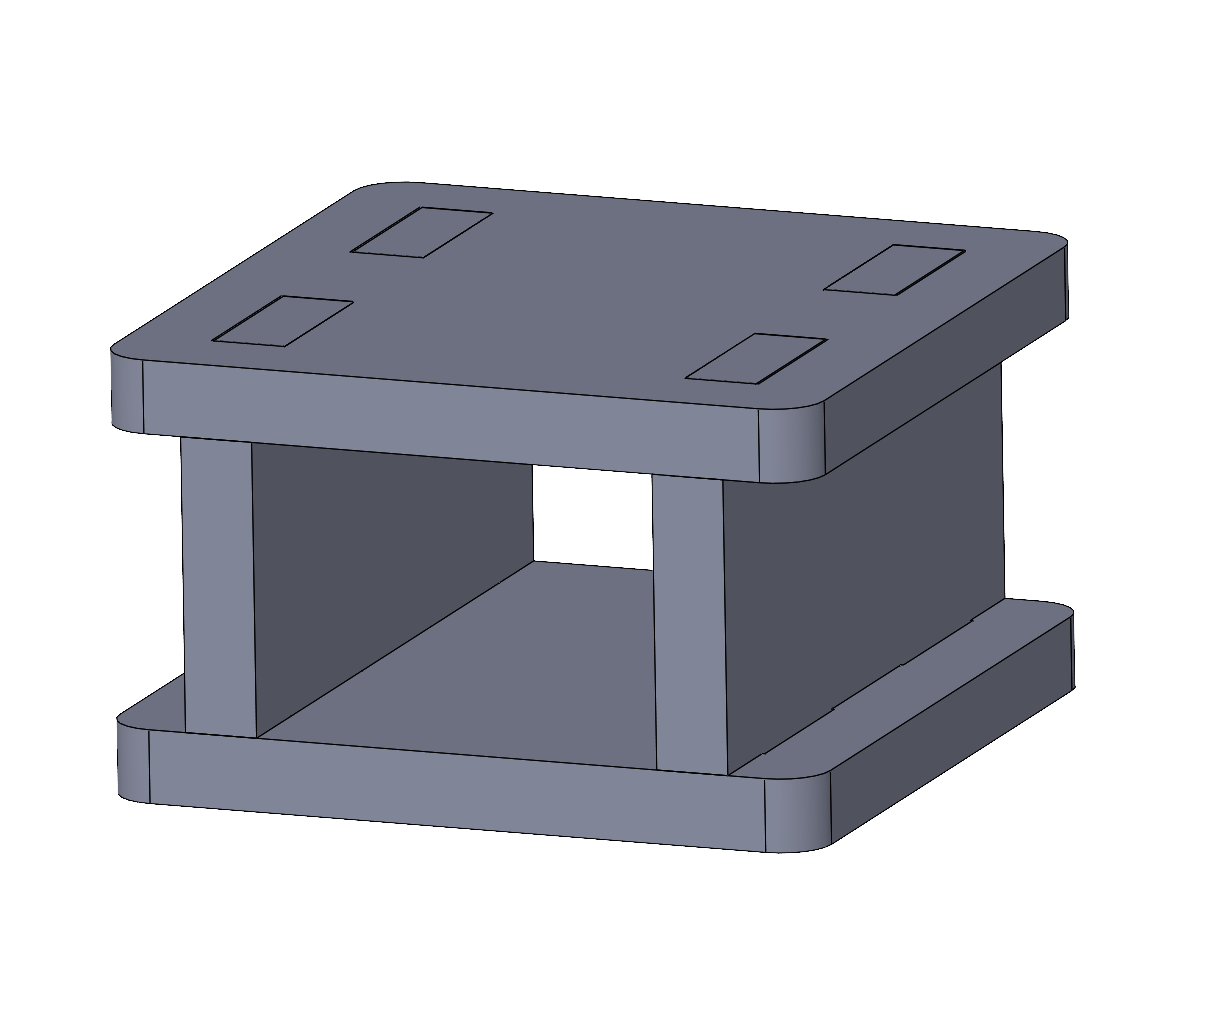
Laser Focusing Jig
A convenient way to set the correct defocus is to autofocus on the following object.

The SolidWorks sources and DXF cutting file can be found in laser-focus-jig.
Furthur Investigation
It may help to tack-weld the boundary of the plastic in advance using the impulse sealer to ensure air-free contact between the layers. It may be possible to fully evacuate a closed chamber to ensure tight contact.
The welding has been tested using defocus distances up to 48 mm. Smaller spot sizes tend to increase melt-through, so the current recommendation was selected as a balance between melt-through and weld width.
The laser heating seems to drop off non-linearly at low power levels; the current recommendation was selected for reliability.
The operating parameters can probably still be optimized. Other potential operating points which have been tested trade off spot size and speed to control the total heating:
defocus
power
speed
mm
%
mm/sec
12
20
100
18
20
80
24
20
80
30
20
60
36
20
50
42
20
40
48
20
30
References
The work on this page and the specific design examples were motivated by two particular publications: