
Title: Skyline
Team Members: Katelyn Smith, Isabelle Chevallier, Boyao Yu
Description
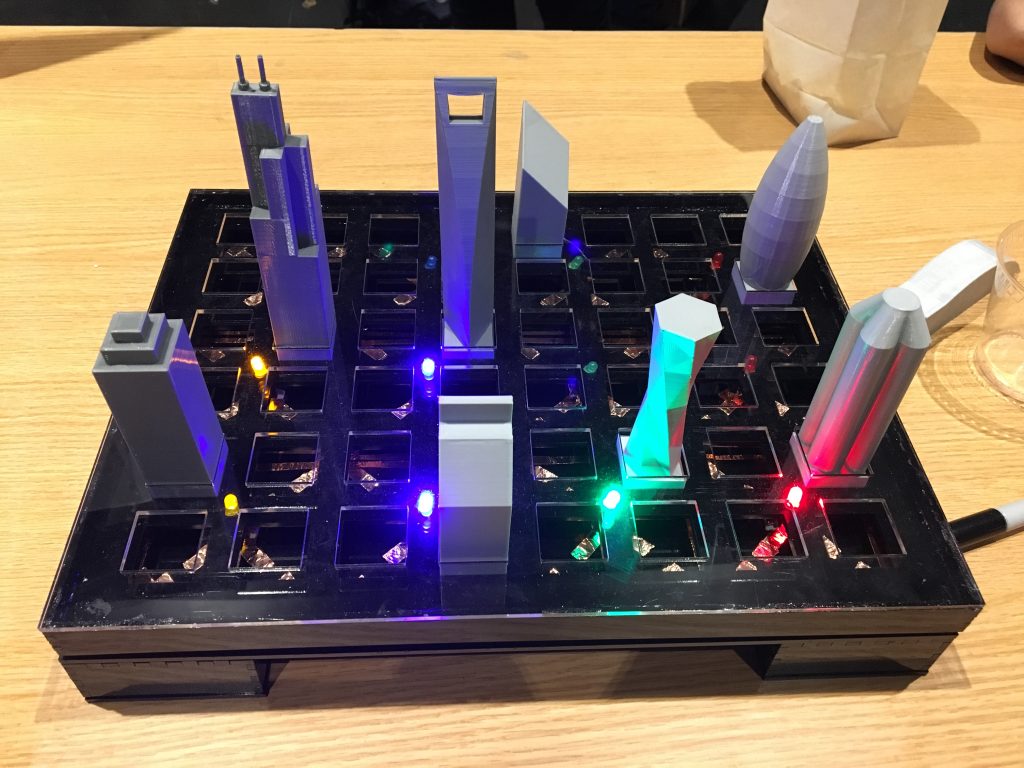
Our toy, Skyline, is an original concept that consists of a board and model buildings. The goal of the game is to place the buildings in any formation that creates a skyline that is identical to the ones on the prompt cards. Lights are incorporated into the base board so that the board lights up when the buildings complete a circuit. While the project is geared towards older children, children of all ages can enjoy the game. Children can either choose to use the prompt cards to challenge themselves, or they can disregard them and build any city that they choose. The base board and buildings are large and durable, since they are made of acrylic and plastic, so they are safe for children to play with.
Learning goals
We designed our toy to allow children to learn about 3D spatial reasoning and basic concepts of circuitry. Children will be provided with prompt cards with a 2D sketch of a particular skyline and several 3D-printed buildings to put together a city that creates the skyline when viewed from the side. This allows the kids to see how 3D environments can be represented with a 2D drawings. The buildings will complete a circuit when placed on the board, lighting a corresponding LED, teaching children the basics of circuitry. Children also learn reasoning and deduction skills through solving the puzzles on the prompt cards, as not all solutions are immediately apparent.
Operation info
The toy is safe for children above the age of two. While the buildings and the board are not choking hazards, if one of the LED’s or another part of the circuit fell off, they could be potentially hazardous. Running the activity is fairly simple. The children can be given the prompt cards and instructed to recreate the skyline and have the buildings light up certain colored lights, or the children can be left free to play as they wish.
How do you make it?
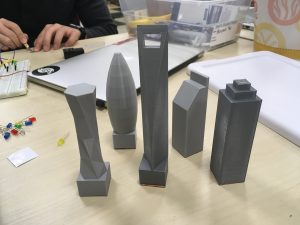
 All the buildings are designed in CAD and 3D-printed using the NVBot 3D printer in Hunt A5.
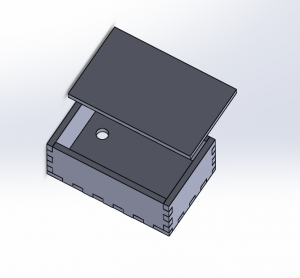
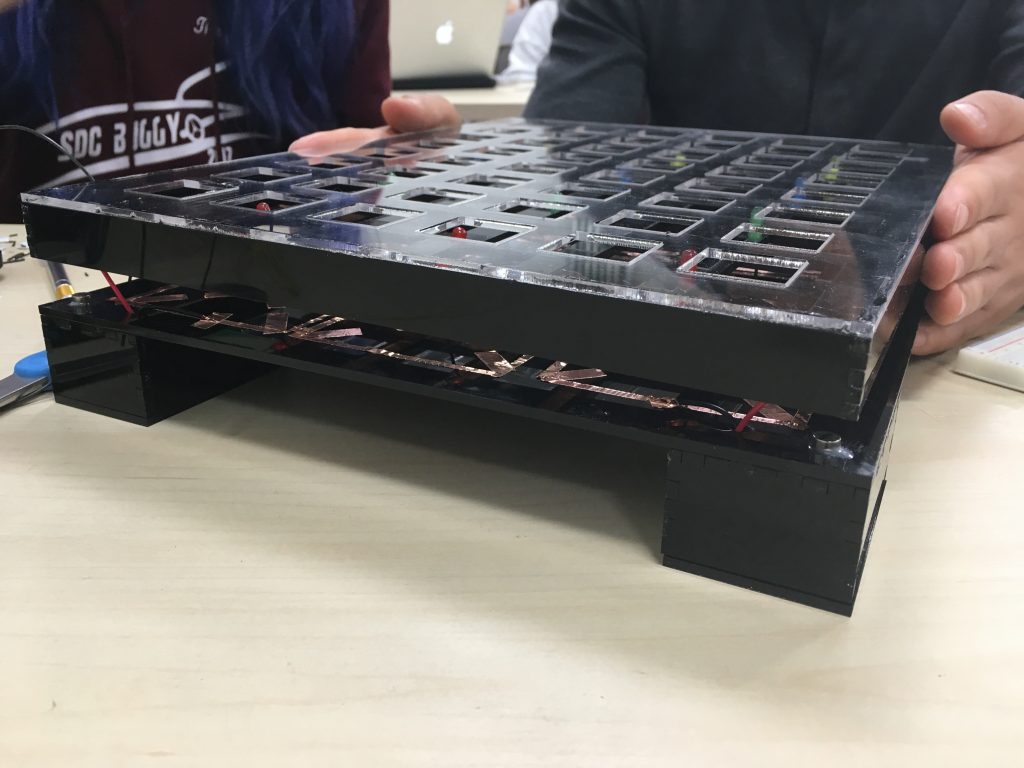
The base board is made out of laser-cut acrylic sheet, and we used acrylic glue along with finger joints cut out on the edges to glue the pieces together.
The bot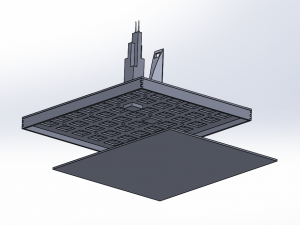 tom plate of and the rest of the baseboard are attached by magnets, and therefore can be detached and make it easier for us to work on the circuits inside the board.
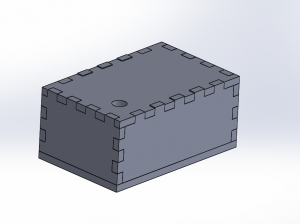
The battery housing is also constructed with acrylic and it is glued to each corner of the bottom plate. We also drilled holes on the bottom plate of the base board so that the wires of the 9V batteries can go through.
Similar to the design of the baseboard, the battery housings also uses magnets to allow us to change battery when needed.
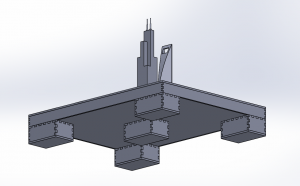
Additionally, we added one more support in the middle of the toy to avoid deformation of the acrylic baseboard.
In terms of electronics, we used conductive tape, 12 LED lights, and four 9V batteries to build our circuit in the baseboard.
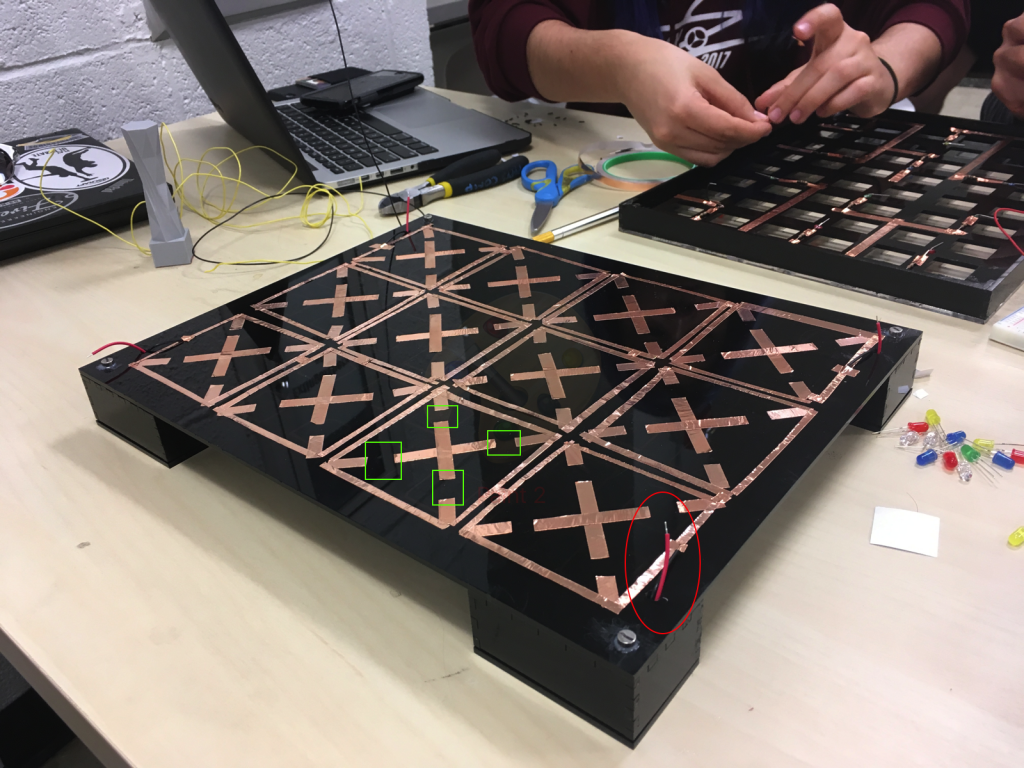
This is the circuit design of the bottom plate of the baseboard. Each box is responsible for one LED lights, and the gaps between the diagonal lines are designed so that the circuit is complete when a building with conductive tape on the bottom is placed in the slot. On each corner of the bottom plate, a 9V battery supplies the power of a group of three LED lights.
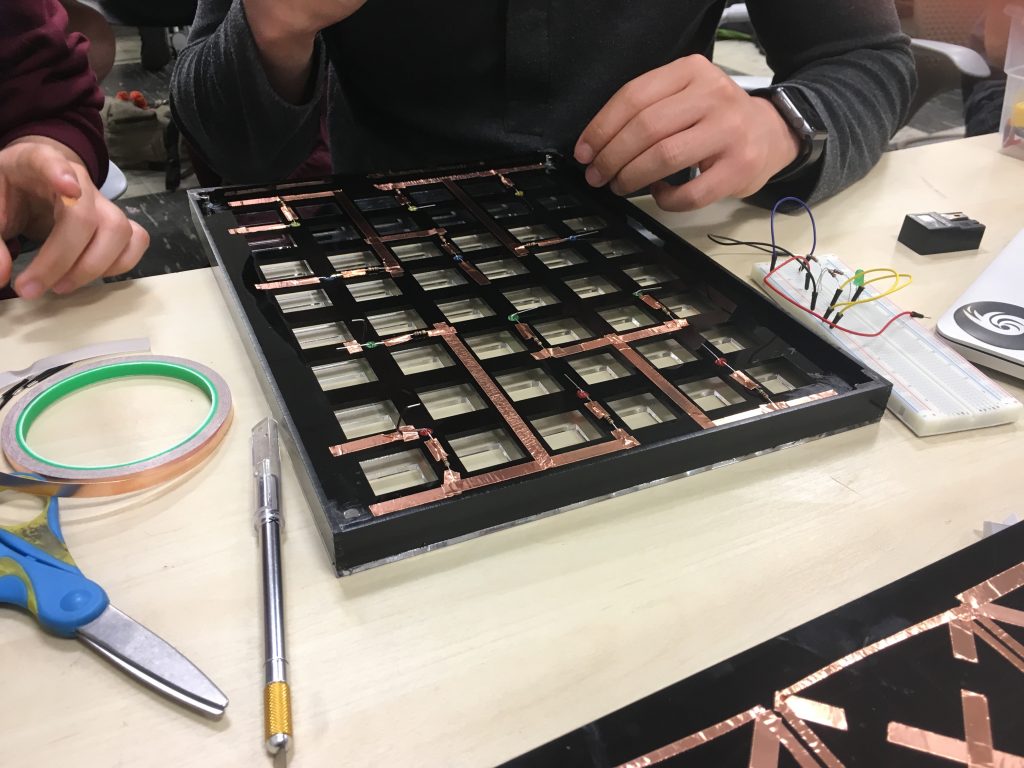
The LED lights are placed on the middle plate of our baseboard and connected by conductive tape on underside. Next to each LED light, there is a small piece of acrylic covered by conductive tape that is able to touch the conductive tape on the bottom plate when the board is closed (image shown below)
Materials
1x black acrylic sheet 1/8″ thick
1x frosted acrylic sheet 1/8″ thick
24x magnets
12x LEDs in various colors
12x 100 ohm resistors
4x 9V batteries
4x 9V battery housings
Conductive Tape
Extensions
To improve our project, we would like to make the game more complex. Next steps would include modifying the base board and creating differently shaped buildings. To make a more interesting base board, we could alter it so that the rows and columns aren’t regular. By either changing the shapes of the holes or staggering the rows and columns, it would allow more complex building configurations to be made. Additionally, we’d like to design building pieces that take up more than one slot, or pieces that can act as “road” or “park” spaces that are flatter.
Our project already targets a wide age range, but different steps could be taken to appeal more to the different age groups. To make our game more appealing to younger audiences, we could make the buildings and board more colorful and perhaps include pictures. To make our game more interesting to older children, we could add more complexity by making more pieces to build the city.
Handouts
Grownups leading the activity should know the basics of circuits and be able to explain why closing the circuit lights up the LED.