Smart Curtain

At the beginning of the semester, Chloe had an idea for an alarm clock that wakes people up through lights rather than sounds. I then bought an alarm clock, sunrise alarm clock, that has a similar functionality, and it has been great. Then I thought, well instead of using artificial lights, why can’t we use natural lights? (Of course natural light would not work if you are waking up in the middle of the night).

sketches

I then came up with this idea of a smart curtain that is basically a reverse sunrise alarm clock. It serves as an “alarm clock” as it opens and lets lights in at the time you set. I also added a natural light mode: curtains are closed when the sun is down, and the curtain is opened when the sun is up. Houses/apartments in China are much closer to one another than ones in the US, so you have to close your curtains at night. But I rely on the lights to help me wake up in the morning, so ever since I came back home in China, my mom has been yelling at me to close my curtains completely every other night.

schematic

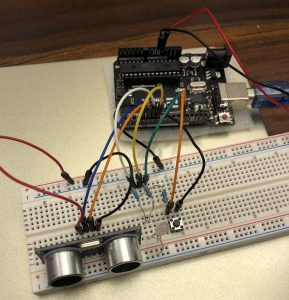
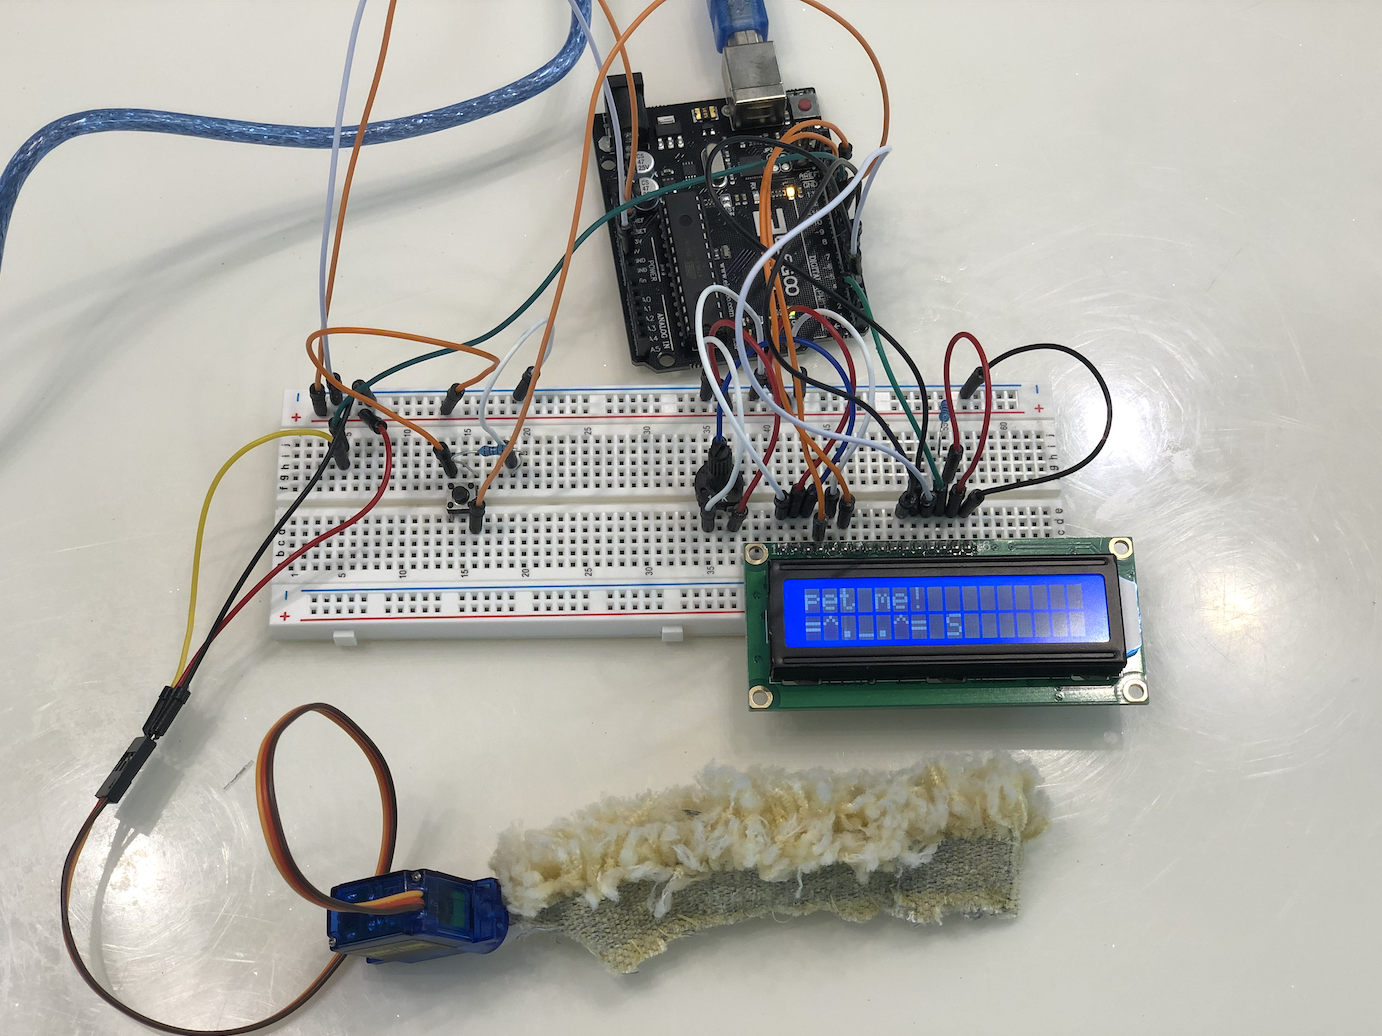
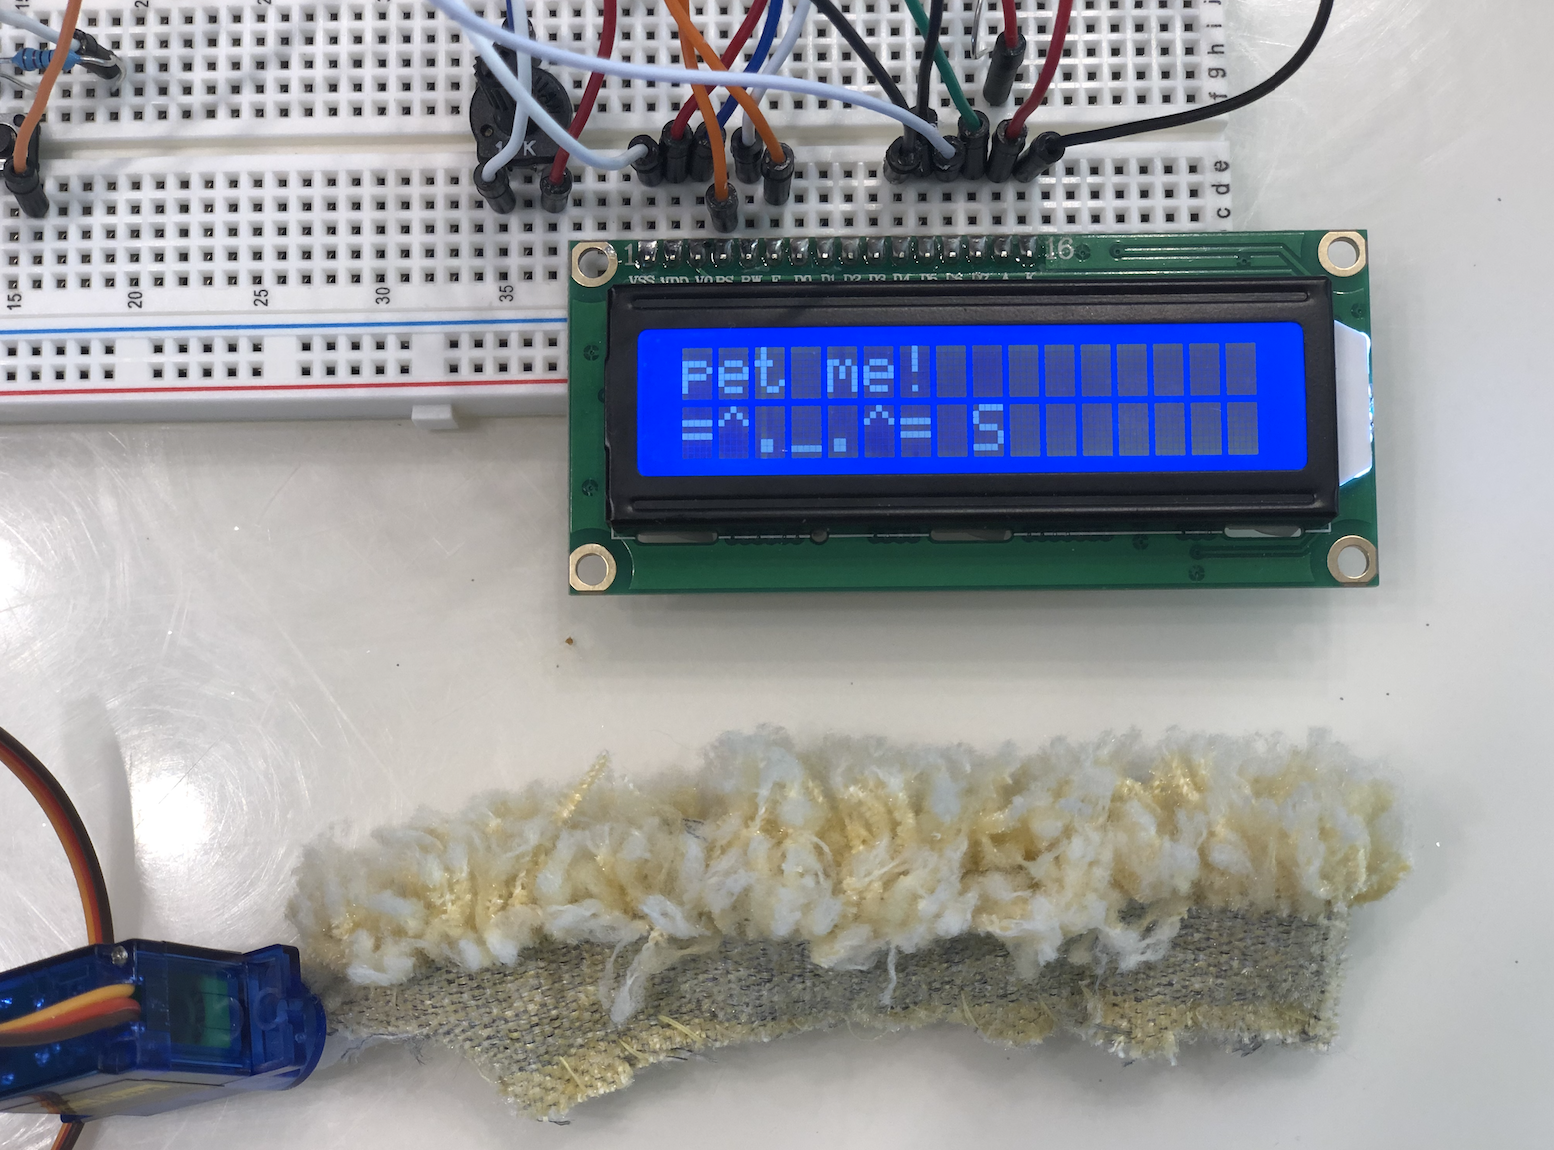
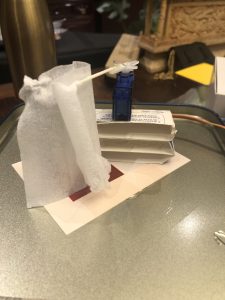
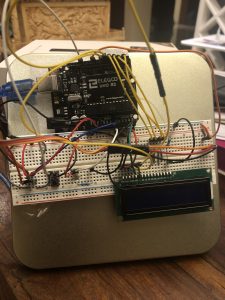
I don’t have access to a linear stepper motor, nor a time module. So I used a servo motor to show the actions of opening and closing the curtains, and hardcoded the current time.

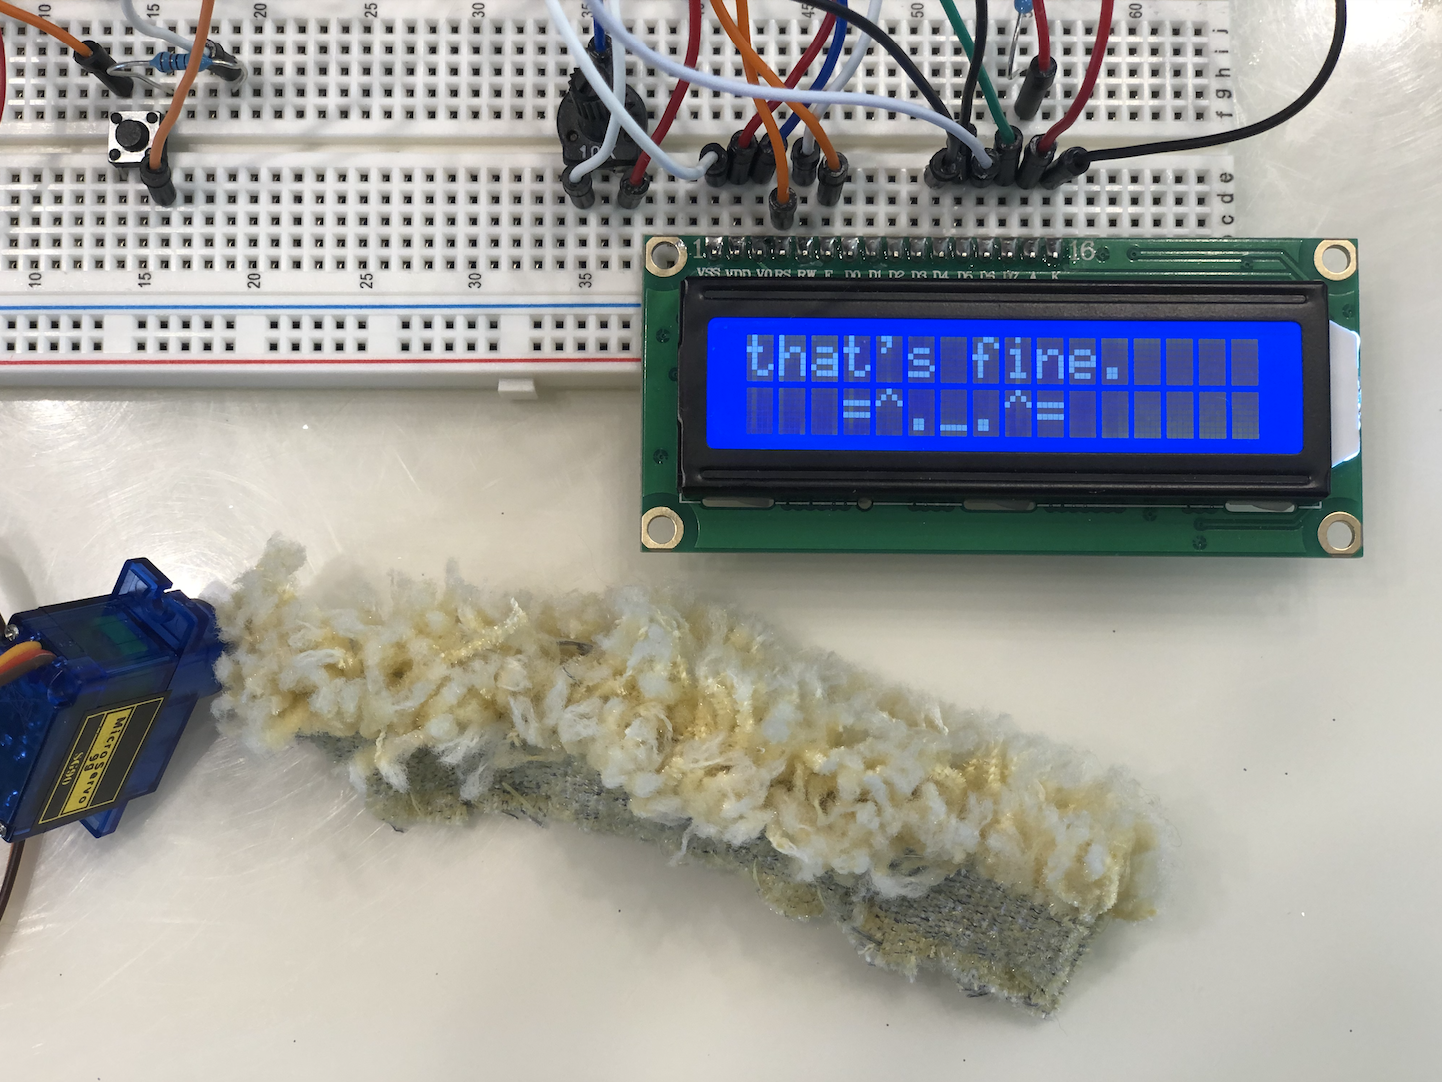
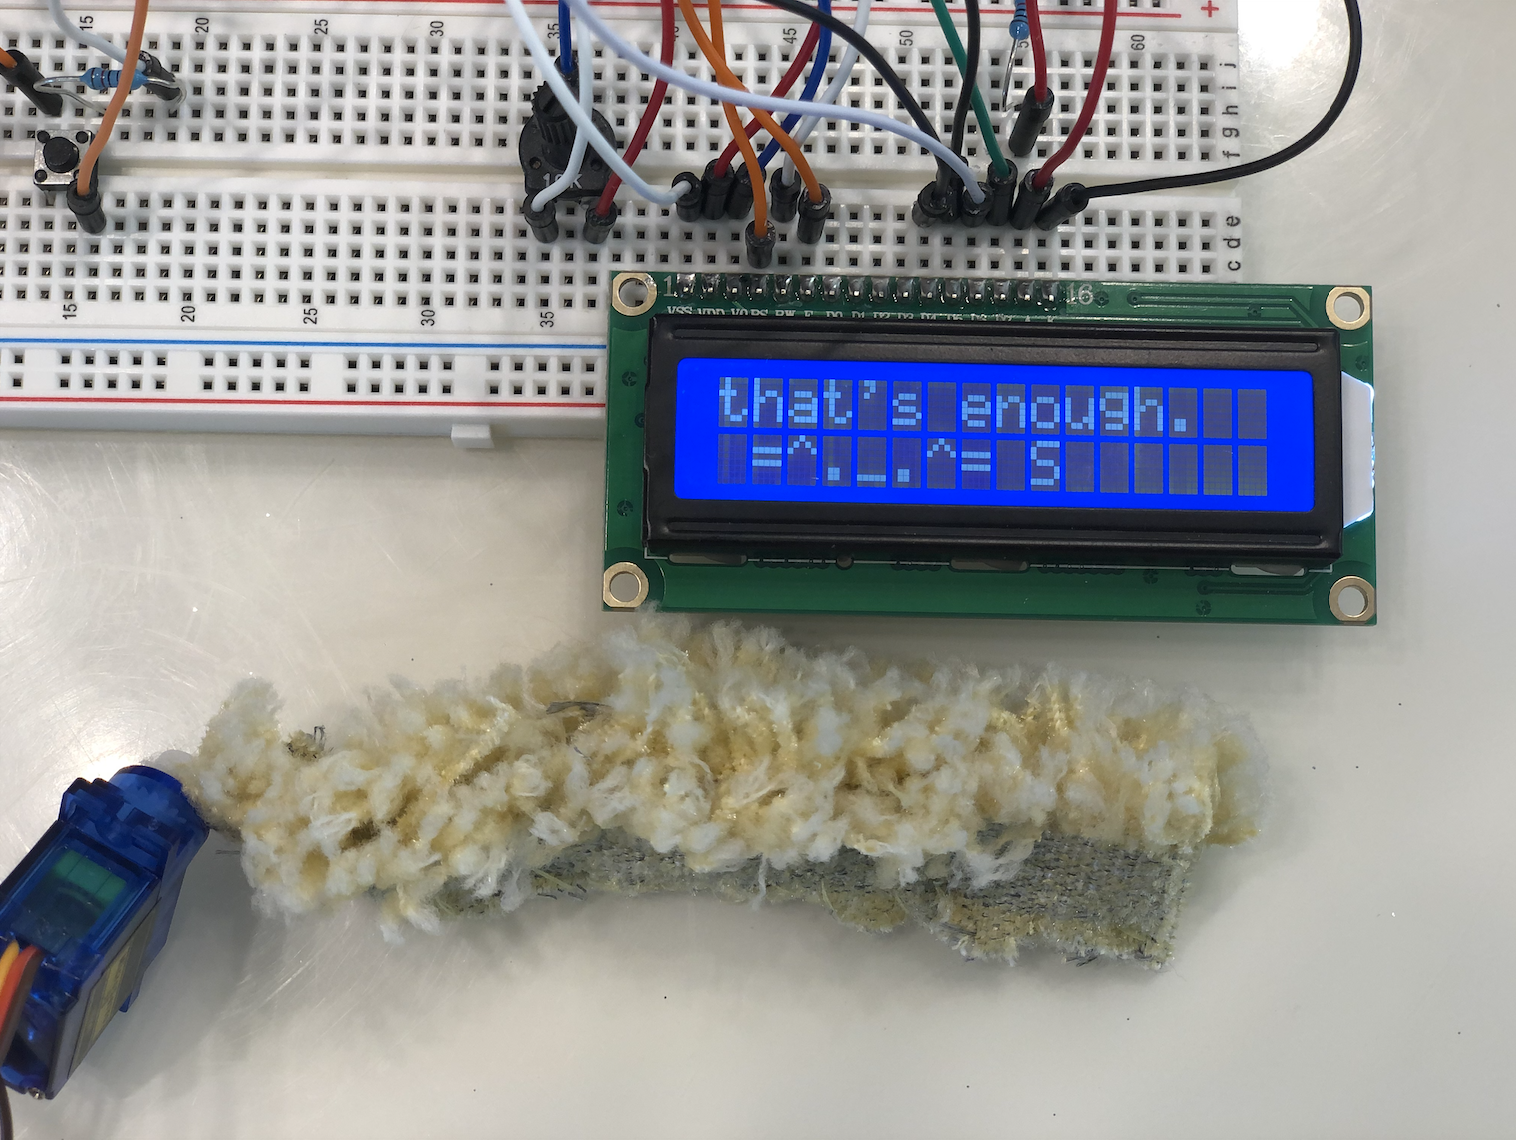
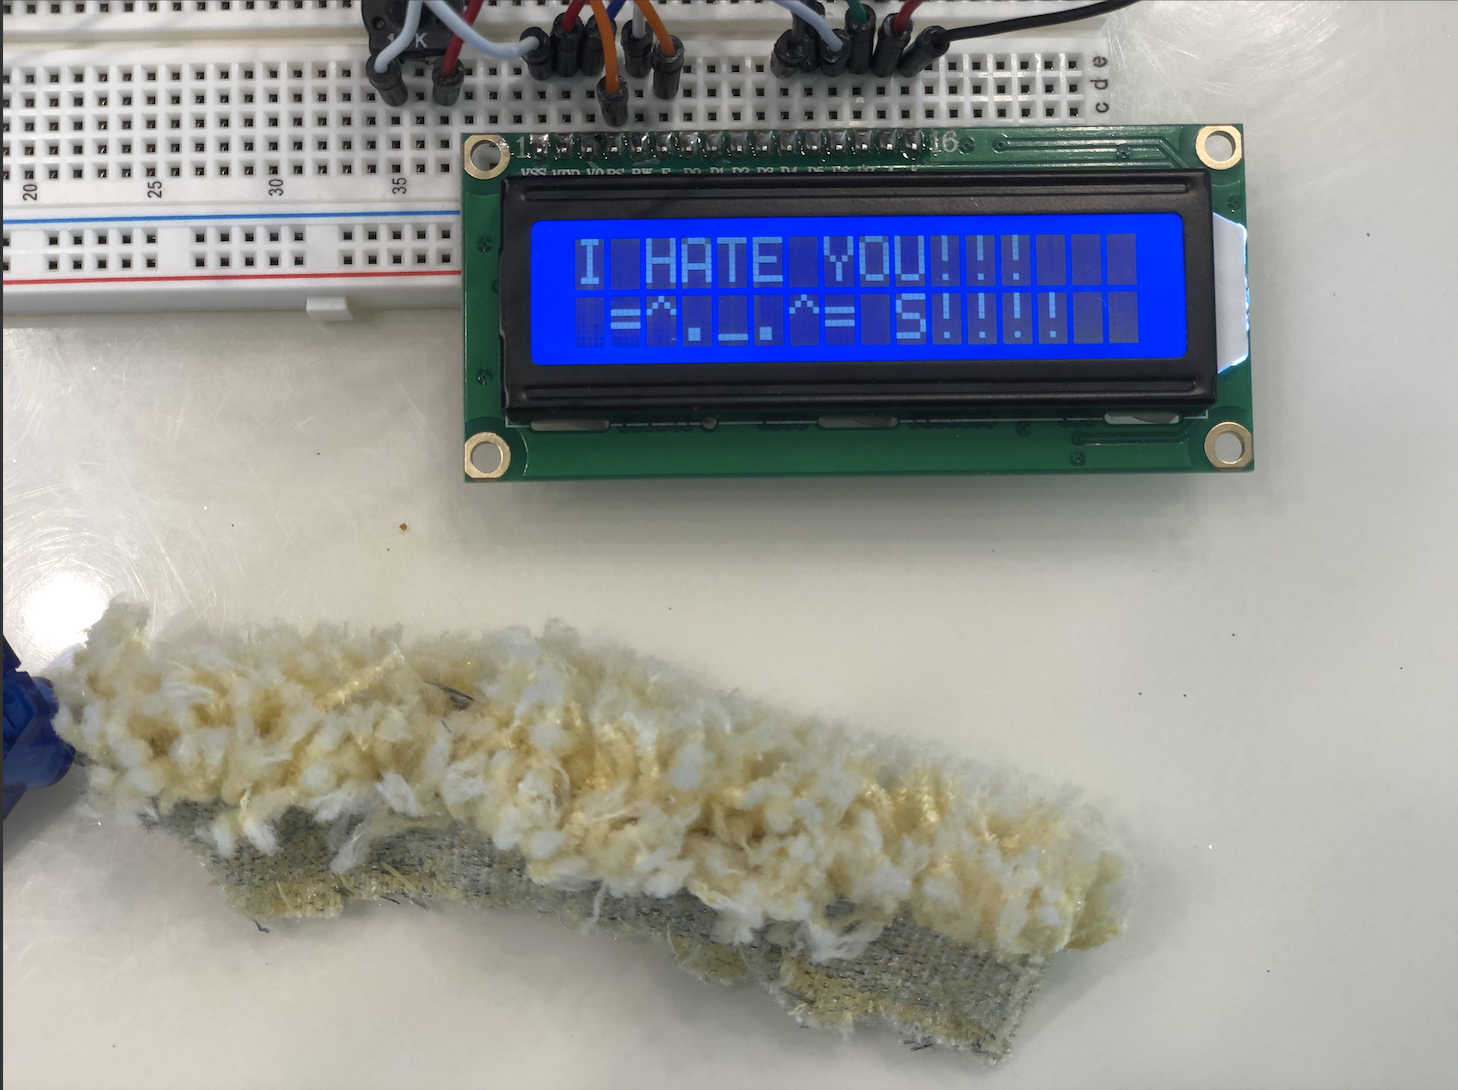
In addition, I used a potentiometer to adjust time, and I kept on getting connection issues with the potentiometer to have consistent readings. I used a push button to change mode, a photo cell to detect day/night(in practice, this photo cell needs to be placed such that only outdoor lightings are sensed but not indoor lightings), and an LCD to display mode and time.

the beautiful curtain(wet wipe)


This smart curtain can be improved in some ways. In alarm mode, the curtain could be slowly opening instead of opening at once, to fake the effect of sunrise. Like the sunrise alarm clock that can be controlled by smart phones, smart curtain should do that too and maybe even integrate with a traditional alarm system, i.e. slowly opens up at curtain and then alarm rings.

Code:

#include <LiquidCrystal.h>
#include <Servo.h>

LiquidCrystal lcd = LiquidCrystal(7,6,5,4,3,2);
Servo myservo;
const int POTPIN = A1;
const int BUTTONPIN = 13;
const int PHOTOPIN = A0;
const int SERVOPIN = 9;
const int PHOTOTHRESH = 300;


bool isAlarm = true;
bool isOpen = false;
int clockTime = 0; // used for demo purpose
long long lastLCDTime = 0; 
long long LCDinterval = 100;
long long lastDebounceTime = 0;  
long long debounceDelay = 50; 


void openCurtain() {
  for (int pos = 89; pos > 0; pos -= 1) {
    // in steps of 1 degree
    myservo.write(pos);
    delay(15);
  }
  isOpen = true;
}

void closeCurtain() {
  for (int pos = 0; pos < 90; pos += 1) {
    // in steps of 1 degree
    myservo.write(pos);
    delay(15);
  }
  isOpen = false;
}

void updateLCD(long long currTime, int h, int m, bool isAlarm) {
  if (currTime - lastLCDTime > LCDinterval) {
    lcd.clear();
    lcd.setCursor(2, 0);
    String mode = isAlarm ? "alarm" : "natural";
    lcd.setCursor(2, 1);
    lastLCDTime = currTime;
  }
}

void setup() {
  lcd.begin(16, 2);
  analogWrite(A5, 40);
  myservo.attach(SERVOPIN);
  myservo.write(0);
  pinMode(BUTTONPIN, INPUT_PULLUP);
  Serial.begin(9600);
}

void loop() {
  // read button
  long long currTime = millis();
  if (currTime-lastDebounceTime>debounceDelay) {
    if (digitalRead(BUTTONPIN) == 0) {
        isAlarm = !isAlarm;
    }
    lastDebounceTime = currTime;
  }

  // read potentiometer
  int potVal = analogRead(POTPIN);
  int potTime = potVal/(1023.0/(24.0*60.0));
  int h = potTime/60;
  int m = potTime%60;

  // read photo resistor
  int photoVal = analogRead(PHOTOPIN);

  updateLCD(currTime, h, m, isAlarm);
  if ((!isAlarm) && (!isOpen) && (photoVal>PHOTOTHRESH)) {
    openCurtain();
  }
  else if (isAlarm && (!isOpen) && (potTime==clockTime)) {
    openCurtain();
  }
  else if (isOpen && (photoVal<PHOTOTHRESH)) {
    closeCurtain();
  }
  
}


I’m your fan

In counter-clockwise order, a fan, accelerometer, gas detector, and a PIR sensor.

To an artist, one’s respiratory health is one of the priorities. Spray paint, paint fume, melting plastic… even with a mask on, the fume still enters my lungs. Right now, being able to work on my projects from home, I had to make a compromise with my parents and trade my ventilation with an at-home studio. The room has no windows other than a door. However, to have a fan in the room, the foam particles will fly everywhere and stick to my sculptures or get into my eyes, which is not an ideal situation. But just leaving a door open doesn’t do much to ventilation either.

Therefore, I came up with a fan that interacts with my presence, action, and the gas level.

Video demonstration:

https://drive.google.com/file/d/1VG5g9sS6BtFTEqqUuGJY6JN5LMpSzvyK/view?usp=sharing

If people had a hard time understanding since I was struggling to talk, film, move an accelerometer, and light a candle all at the same time, basically the fan works in this way:

Fan gets activated:

  • when it detects no movement in the room and the doorknob was pulled
  • when the toxic gas level (flamable gas) is too high in the room, no matter of my presence in the room.

Fan is off when:

  • when it detects a movement in the room with a low gas level

Now it is time to get real.


The first demonstration is activating the fan with no movement and the door knob.

So this is my dusty, non ventilated studio. Since I am moving in the room, the fan is off.

Currently, there is a movement detected in the PIR sensor, so the fan is off.

So I opened the door, AKA activated the accelerometer.

The fan turns on and ventilates the room.


Now it’s time to test the flamable gas detecting interaction.

Now I am in the room again, and moved infront of the PIR sensor. The fan is off.

I give the toxic gas detector (flamable gas detector) a whiff of my spray foam,

The fan turns on, even though there is movement detected in the room.


<Schematics>

<Code>

int GasPin = A0;
int PIR = 7;
int motorPin = 8;
int Ypin = A1;


int yVal;
int oldY;
int dif;

void setup()
{
pinMode(GasPin, INPUT);
pinMode(PIR, INPUT); 
pinMode(Ypin, INPUT);
pinMode(motorPin, OUTPUT);
Serial.begin(9600);
analogWrite(motorPin, 0);
}
void loop()
{
oldY= yVal;
yVal = analogRead(Ypin);
dif = abs(oldY - yVal);
// delay(250);
//Serial.println(dif);


if (digitalRead(PIR) == LOW && dif>5){ 

/*Serial.println(dif);
Serial.println("PIR OFF");
Serial.println(analogRead(GasPin));
Serial.println();
delay(1000);*/
analogWrite(motorPin, 255);
}
if(digitalRead(PIR) == HIGH){
/*Serial.println(dif);
Serial.println("PIR: ON");
Serial.println(analogRead(GasPin));
Serial.println();
delay(1000);*/
analogWrite(motorPin, 0);
//delay(4000);
}
if(analogRead(GasPin) > 330){
/*Serial.println(analogRead(GasPin));
Serial.println("PIR: ON");
delay(1000);*/
analogWrite(motorPin, 255);
//delay(4000);
}
}

<Reflection>

Hardships:

  • initially I had an LCD display, yet for some reason it was glitching not by itself, but also making the whole arduino glitch, and even my computer. The wiring was correct and everything, and that gave me a hardship of setting the range of gas level, because the serial monitor was already showing so many values from different sensors.
  • the both ground and vcc wire of my fan got detached. I didn’t have soldering equipments or anything so I took a knife and peeled some of the wire and used a piece of tape to hold them together.

For future:

  • Buy a bigger fan and actually use it.


Kinetic Crit

Kinetic Crit, due 15 Oct 2020

Note: 13 Oct is a work day in A10, I will be on zoom if anyone has questions.

Requirements

Combine inputs, kinetic outputs, and state machines to create a physically interactive system that changes interaction based on inputs and logic a person cannot perceive.  That is, information we can’t see, or we cannot see visible information.

Doorbell example

One example I gave early this semester was a “doorbell” for someone who cannot hear.

Inputs: doorbell, physical knock, person detector

Interaction: use inputs to determine output.  Doorbell + no person detected means someone rang the bell and walked away, was this a UPS/FedEx delivery?  Knock and person is there, is someone coming to visit?  To sell a product?  “Secret” knock pattern used by friends and a person is there, one of your friends has come to visit.

Output: Create appropriate output for the results of the interaction process.  UPS/FedEx drop off is lower priority than a friend coming for a visit.

Class Notes, 8 Oct 2020

Kinetic input devices

In 1968, Doug Englebart demonstrated the first “workstation”.  It’s a long watch but I think at least the first half will give you a lot of ideas on how to pitch a novel technological concept.  Stanford has a broken down version in flash.

Doug Engelbart’s 1968 Demo in full from Frode Hegland on Vimeo.

Accessibility vs Inclusion

What makes something accessible?  Is universal design also accessibility?

Inclusion ==> inviting, making someone want to participate. How do you invite someone to provide input / direction?

Microsoft has a great program on

Microsoft Inclusion and PDF book

Are 30mm arcade buttons are accessible? Interrupt or constant? Convex or concave? If you want to use Universal Design, how do you decide how big the button should be and where it’s located?

There’s a wide variety of arcade push buttons.  Are controls like buttons the wrong answer?  Is a better way to collect input?

What is wrong with the E-Stop button in A10?

  • Unlit
  • Recessed button “hidden” in a guard
  • No signage on the wall like we have with fire extinguishers

Kinetic Output and representation of data

tactile maps: https://www.youtube.com/watch?v=psObymNkzvk

research data on tactile map comparison: https://www.youtube.com/watch?v=Qbe9G9dWcSk

tactile graphics using “swell paper”: https://www.youtube.com/watch?v=QeulfaWn_Ps

what does a snowflake look like?  A butterfly?  A sailboat?

3d printing for the blind: https://www.youtube.com/watch?v=bEVTu1xdpVI

Not discussed in class — make your own 3d prints of maps.  https://www.instructables.com/Make-3d-Printed-Topo-Maps-of-Anywhere/

Interrupts and kinetic interaction

  • Interrupts as inputs to state machines
  • Human interruption as part of a UI
  • Environmental interruption as part of communication.  How do we interrupt each other (politely!) during conference calls or video sessions?
  • Interrupts that limit motion — end-stop switches

ASL interpreters and physical communication

In lecture I was talking about ASL translators for public speakers, but I think interpretations of music  and lyrics are even more dramatic

ASL Poetry Sign-Off Finals

Cardi B, Bodak Yellow in ASL

Hamilton, “Wait for it“, “Guns and Ships“, and “Alexander Hamilton” by a group with nice costumes.


Class notes, 6 Oct 2020

Haptic/touch vs. objects moving in space

touching a person vs. moving an object

person presses a button vs. wind blowing a windmill

touching a person vs. moving an object – touch is more personal, requires little energy.

Touch can be wrapped in a robotic device, ex: Paro (wiki) trade show demo.

Moving things typically requires an external power source, Arduino can only provide 5V at a few milliamps.

energy required to move large things vs. small things

explain watts vs. amps vs voltage vs. movement

For moving things, use basic physics

  • gears — FAQ on 3d printing gears
  • levers — drive a lever with a solenoid, transfer short movement to long
  • pulleys – drive with DC motors or stepper

Input classification, serial communication, interrupts.

Types of Input

monophonic + skill: wind instruments, percussion

polyphonic + tech: keyboards, pianos, organs, strings
anthropomorphic: respond to human condition, blood pressure, galvanic skin, breath rate, pulse rate, visual interpretation of secondary movements: eye twitch, touching your face, blinking

“rapid eye movement” when eyes are closed, used in PTSD therapy called “EMDR”:

https://en.wikipedia.org/wiki/Eye_movement_desensitization_and_reprocessing

SparkFun biometric sensors: https://www.sparkfun.com/categories/146

UPMC lobby temperature check:  upmc-lobby-temperature-check

Serial Communication

SPI/I2C and complex communications protocols
How we get complex data from sensors – a lot of this is hidden in libraries
Unique IDs
Simple controls for complex output: neopixel
SparkFun’s version: Qwiic

Interrupts

Show examples of interrupt code in the environment
switches on mobiles
remote controls for the projectors, TVs, stereos
little to no latency
complex interrupt systems in video game controllers
rotary encoder (we’ll do a demo later in the semester)
for now, we only use digital inputs for interrupts

Code samples, show how an interrupt can be used to toggle a state by one increment compared to holding down a switch and falling through a number of states.
Note that holding down the switch means the interrupt service routine (ISR) only functions once
Compare to using delay() to sample data every so many units of time.

Use an interrupt to stop a task that takes a long time, say a long for() or while() loop, by adjusting the terminating conditions

Question: What if you were playing mp3 files or video, how would you use interrupts as part of the interface?

zip file with some examples:  interrupts-1-pot

Will you shut up, man?

Problem: Aggressive, domineering speakers often create a hostile environment (both consciously and unconsciously) by interrupting others during discussions, meetings, and most recently, during the presidential debate.

Lots of such speakers are unaware that they are constantly speaking over others, and do not actually respond to intervention by others in-situ when they are exhibiting this behavior. They also distrust other’s claim that they are frequently being disruptive to others because of confirmation bias.

Solution: A tactile, haptic feedback in your pocket based on how long you have interrupted someone. Similar to someone kicking you under the table when you’re saying something you shouldn’t, it delivers a metaphorical “kick under the table” to provide a speaker awareness of their interruption.

When you first start speaking when someone else is speaking, you receive a simple tap as a reminder. As more time elapses, the taps increase in frequency (and optionally magnitude. The mini solenoid in our kit doesn’t allow for a change in force). This should impress upon the speaker the severity of their interruption (i.e. the longer it is, the more rude and disruptive it is and unlikely to be constructive). If the interruption time elapsed exceeds 5 mins, it should just switch off someone’s mic.

Schematic

Application: Outside of the presidential debate, this kinetic feedback is a discrete way to help speakers monitor their own speaking (and interrupting) behavior to create a more inclusive environment.

As we transitioned into entirely online meetings due to covid WFH, people have become more conscious about turn-taking when speaking since visual / auditory cues of when someone might want to interject are now invisible.

Humidity Monitor

Problem

Plotted plants are great choice for indoor decoration offering a sense of liveliness. However, the humidity in people’s rooms may be too low or too high. For example, some tropical plants typically require relatively higher humidity. In addition, it may get very dry during winter, making it difficult for the plotted plants to thrive.

Solution

The set-up of the device.

The solution I came up with is a system that monitors the humidity at the proximity of the plant. The system is composed of two separate device. The device on the left is hung on the wall with a fan and a servo arm that holds a spray bottle. The device on the right is a humidifier with a humidity sensor on it.

To demonstrate how the system work, suppose we have a delicate plant that requires misting if the average humidity is below 60% for the past 4 hours. The humidity cannot be over 90% because the plant can be suffocated or harmed by pests. Therefore, every 4 hours the system will check the average humidity and if  it is below 60%, the servo-arm will swing up and down to remind the person in the room to mist the plant. If the humidity level does not change in 5 minutes, the servo-arm will stop and the humidifier will be turned on to increase the humidity and sustain it for a specific period. If the humidity level is over 90%, the fan will work until the humidity is below 90%.

When higher humidity is required, the servo-arm comes in first because manual misting is preferred, which gives the person more awareness of the condition of the  plant. A night mode can be selected and the humidity is regulated autonomously by the system. Data and commands are sent between the two devices through IR transmitter and receiver.

Proof of Concept

The prototype includes a servo motor, a dc motor, a humidity sensor, a red LED, and a power module on the right.

Code:

#include <dht.h>
#include <Servo.h>

// Analog Pin sensor is connected to
#define dht_apin A0
#define SERVO_PIN 2
#define LED_PIN 13
#define ENABLE 5
#define DIRA 3
#define DIRB 4


dht DHT;
Servo servo;

//The vairables that define time-flow
const int hour = 8000; //In this time-scale 4 sec represent 1 hour

const int ideal_humid = 60;

//The array that store the humidities
int humidity_Data[48];
int record_digit; //The digit for inputing data into the array
int check_digit; // The digit for checkingg every 2-hour
int check_points = 8; // How many datapoints to check for the checking period

String plant_status;


//Clocks
unsigned long clock_record = 0; // The clock for recording humidity
const int INTERVAL1 = 2000; // milliseconds between each recroding


//Funtions

//Universal clock
bool Universal_clock(String type) {
  if (type == "record") {
    if (millis() >= clock_record) {

      clock_record = millis() + INTERVAL1;

      return true;
    }
    return false;
  }


}


//Check if the plant need to be mist
void need_mist() {
  int sum = 0;
  int average_humidity;

  //Serial.println(sum);
  for (int i = 0; i < check_points; i ++ ) {
    int d = check_digit + i;
    int humid = humidity_Data[d];
    sum = sum + humid;

    Serial.println(i);
    Serial.println(humidity_Data[d]);
    Serial.println(sum);
    //Serial.println("hey");

  }

  check_digit += check_points;

  //Serial.println("humidity checked");
  average_humidity = sum / check_points;


  if (average_humidity < ideal_humid) {
    servo.write(0);
    delay(200);
    servo.write(180);

    plant_status = "dry";

    //Serial.println(average_humidity);
    Serial.println("dry!");
  }
}


void setup() {
  pinMode(LED_PIN, OUTPUT);

  pinMode(ENABLE, OUTPUT);
  pinMode(DIRA, OUTPUT);
  pinMode(DIRB, OUTPUT);

  servo.attach(SERVO_PIN);


  Serial.begin(9600);
  
  Serial.println("DHT11 Humidity & temperature Sensor\n\n");
  delay(200);//Wait before accessing Sensor

}

void loop() {


  //Record the humidity
  if (Universal_clock("record") == true) {
    DHT.read11(dht_apin);
    humidity_Data[record_digit] = DHT.humidity ;


    Serial.println(humidity_Data[record_digit]);

    if (DHT.humidity >= 90) {
      plant_status = "wet";
      digitalWrite(ENABLE, HIGH);
      digitalWrite(DIRA, HIGH); //one way
      digitalWrite(DIRB, LOW);
    }

    if (plant_status == "wet") {
      //check if it is still wet
      if (DHT.humidity < 90) {
        plant_status = "fine";
         digitalWrite(ENABLE, LOW);
         check_digit = record_digit;
      }

    
    }

    if (plant_status == "dry") {
      //check if it is still dry
      if (DHT.humidity >= ideal_humid) {
        plant_status = "fine";
        digitalWrite(LED_PIN, LOW);
        check_digit = record_digit;
      }

      else {
        digitalWrite(LED_PIN, HIGH);
      }
    }

    if (record_digit - check_digit == 7) {
      need_mist();
    }


    record_digit += 1;


  }

  //Check if the plant is too dry in the past 2 hours


  //Serial.print("Current humidity = ");
  //Serial.print(DHT.humidity);
  //Serial.print("%  ");
  //Serial.print("temperature = ");
  //Serial.print(DHT.temperature);
  //Serial.println("C  ");

  //delay(5000);//Wait 5 seconds before accessing sensor again.

  //Fastest should be once every two seconds.

}


Work, but not too long

With WFH and remote learning, I find it either really hard to focus and keep on getting distracted, or sitting too long in front of my laptop until my back hurts.

Work, but not too long “rewards” you when you sit in front of your laptop for a short period of time, and “warns” you when you sit in front of your laptop for too long.

Consider this example scenario: You tried to get some work done, but you keep going to the kitchen or lying on the couch. And when you finally stayed in front of your laptop for a short period of time, you are rewarded! Now that you got into the momentum, you keep working and working. Hours went by, and by the time you realized that you’ve been sitting too long, your back already hurts.

In my system, the “reward” is a colorful light sequence, and the “warning” is blinking red lights. It uses a button to set the background distance to maximize its portability, and uses ultrasonic to measure the distance.


For demoing purpose, the “reward” period is set to be 5s, and the “warning” period is set to be 15s. But in reality, a 30min “reward” period and a 2h “warning” period are practical.

Before I sit down, I hit the button to get the background distance. Then I sit, there is a “reward” for every “reward” period until I hit the warning period. If I stand up and move away from the laptop, then the timer/cycle restarts.

What’s missing in this video is that warning is only on for a short period of time. Like how you can snooze an alarm, you are snoozing the system when you stay seated, and after another reward period, the system will warn you again.

One flaw of the system is that it requires manually setting the background distance, and it can be easily solved using computer vision to detect whether a face is present. Such solution would require a lot more computing power and much more sophisticated software.

ROBO CAT!

Sometimes we need an animal for emotional support; however, not everyone can afford to have pets! Therefore, I introduce a (part) of my robocat.

For cats, tail is one of the biggest indicator/langauge for how they feel right now.

Unlike dogs, cats wagging their tail indicate that they are agitated. The more they are annoyed, the more they wag their tails. So I created a module of correlation between petting and a tail overtime.

The button stands for a body part. When it is pressed, it. means that the cat is being pet. The LCD monitor shows the state of the cat literally.
The cat is pet for twice (button is pressed twice). The tail wags a little bit.
The cat is pet four times. The tails wags more, but still slowly.
The cat is pet for multiple times now. The cat is now starting to get annoyed.
You pet the cat for too many times! The tails wags rampantly, and now the cat hates you.

But cats, unlike humans, they are fast at forgetting.

After 10 seconds of being mad at you, the cat is now back to where she was.

(in the video, for convinience I set the timer as 3 seconds)

Video demonstration:

https://drive.google.com/file/d/1UfTICAObl-EV51BOliyEytrU68ZdZQGh/view?usp=sharing

Intuitive TV (Volume) Remote

Problem:

When watching something on TV, the volume we want it to be at is highly dependent on what is on the screen. If there is an action scene, the volume is usually way too loud and needs to be lowered. If the scene is dialogue with some background music, the volume often needs to be raised to understand what is being said. This is something that myself, my family, and my housemates have often faced and leads to us button smashing the remote after certain scene changes.

Proposed Solution:

After raising and lowering the volume three times, the volume automatically goes to the average of the low/high by simply holding the corresponding button for a second thereafter. The volume could still be adjusted from there by pressing the buttons, but being able to consistently go back and forth to a value would make things much more convenient. I chose three times of going back and forth because that leads to a pretty good average which would be quite close to the volume actually wanted each time as well as because three times is when I want to just hold the button down and go back to the previous low/high.

Proof of Concept:

Here I used two tactile push buttons to represent the up and down volume button respectively. I chose not to take too high or low volumes so that the video could be relatively short, but still make the point. As can be seen after cycling up and down the volume a few times, I long hold the up button and it goes to the average high. I then adjust it a bit lower to a medium volume followed by going back to the high. Finally, I skip to the low volume. I chose to start at volume 30 arbitrarily here, but for an actual TV, it would start at whatever the last volume was.