Today we started out on our new game – “Astral Attackers” – a Space Invaders inspired alien shooter that we will use to illustrate the ways in which the objects in our object-oriented program interact to create gameplay.
Part 1: The Objects
The main principle behind “object oriented programming” is right there in the name – Objects. Every item in our scene is a “game object”, and it is the interaction and behaviors of those objects that makes our machine do something compelling.
My favorite (yet still undercooked) metaphor for this process is to imagein a train station. Think about a busy transit hub like Grand Central Terminal in New York City. If Grand Central is the scene, the objects are the people passing through. By and large, the people/objects tend to be very independent of one another, just going about their own path or instructions, and are generally unaware of the existence of the others around them. They may see the other people there, but they know little about the individual objects unless they are somehow introduced, or actively seek out a connection or to find a particular object so that they can approach and interact with them.
In the last assignment, we made a few of these connection. We created public GameObject variables, then assigned a specific object from the Scene or the Asset window. That script then becomes aware and has a reference to that object. But that target object has no awareness of its connection to our script object. Think of the spy movies where someone is secretly following a person – they are watching, but the person they are watching does not know they are being watched.
We also used a Find( ) command to get the reference to our GameManager through searching by its name. In this case, the searching script has a name, and checks every object until it finds one with a matching name, and then continues to watch that one object. Again, the target has no idea that they are being watched.
Then there is another type of interaction that is very close and personal – a collision. When two objects collide in the physics system (and at least one of them must has a Rigidbody component) they are both given the opportunity to respond to that moment through the collision message that is sent out to both of them.
Think about when you have been walking somewhere and suddenly you and a stranger roughly bump shoulders. What do you do? Probably you both are shocked and turn to look at one another. You are both aware of the presence of one another. Maybe you both ignore it and walk away. Or maybe you say something to the other person, tell them to watch where they are going. Or perhaps you reflexively check your pocket to make sure you still have your wallet, as you have seen too many spy movies and think that a shoulder bump probably means that you were just the victim of a pick-pocket.
In that moment of contact, the Collision events are broadcast to both objects. If either object has a handler script for that message, it will not only run, it will receive all of the properties of the collision, including information about the other object, such as its transform, rigidbody component, and the reference to the game object itself. This passing of the object reference is where so much of games truly occurs.
Part 2: The Setup
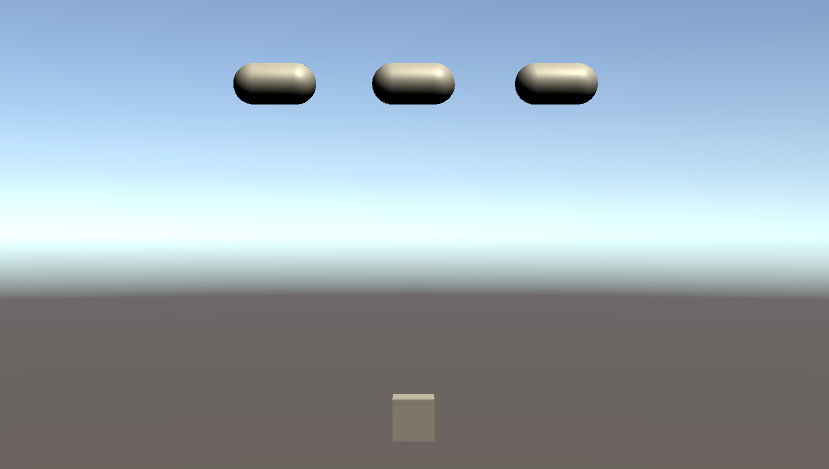
Our setup for today is relatively simple – we created three simple primitives and assigned them roles. A cube will act as our “player” object, the ground based cannon. A capsule turned on its side will be our “enemy”, an alien attacker in the sky. And a sphere will be our “bullet”.
Players will shoot bullets at the enemy objects. If a bullet hits the enemy object, it will be destroyed. Enemy will also shoot projectiles that can damage or destroy our Player object. And bullets should be destroyed as soon as they contact anything.
Since all of our primary objects have multiple destructions and reincarnations ahead of them, we are going to make each of these a prefab, which we do by dragging the object down into the Asset window.
A few quick camera adjustments, and we have our test screen:
Part 3: Player Motion with Input.GetAxis( )
The first thing we want to do is move our player from side to side. In the past we have used Input.GetKey( ) to see if a particular button has been pressed. But this time we are going to use an axis based input, specifically Input.GetAxis( ). The idea of the axis input is that there exist common mappings between input devices that can be similarly interpreted as directional motion, such as the WASD or Arrow keys on a keyboard, and the thumbsticks on a game controller.
In this case, we want to move side to side, so we use Input.GetAxis(“Horizontal”) to returns a value that is between -1 and 1, and centers at 0 when nothing is pressed. In a script assigned to our Player object, we set up variables for our player object’s speed and a MAX_OFFSET variable to hold the maximum range from 0 that we should travel, and then moves the player in the Update( ) function using this:
void Update()
    {
        // move by the horizontal speed
        Vector3 currentPosition = transform.position;  // get location
        currentPosition.x = currentPosition.x +  (Input.GetAxis("Horizontal") * speed * Time.deltaTime);  // move by get axis
        // clamp my position
        currentPosition.x = Mathf.Clamp(currentPosition.x, -MAX_OFFSET, MAX_OFFSET);

        transform.position = currentPosition; // set location
    }
This is very similar to our Paddle movement from the previous assignment – we get the current position, have it offset by a small increment (here the value of GetAxis multiplied by the speed and Time.deltaTime), clamp our values to make sure we remain inside of our defined range, and then pass the resulting vector back into the position of the object itself.
When you play this, you may notice that your Player object feels a bit…. loose? You’ll lift your finger off the button and it will continue to move briefly as it slows down to a stop. Pressing a button again will cause it to start to move but it takes a moment to get up to speed. It is hard to make a precise move.
This floaty behavior happens because GetAxis( ) has a gravity to it – an amount of time designated for the result to arrive at a full value, taking its time to build or decay. For some games, this can create a natural behavior, such as a platform game where your character may take a moment to accelerate or slow down to a stop. For this game, however, we want our movement to be swift and precise, so instead we are going to use GetAxisRaw( ) which returns the same -1 to 1 range, but without the smoothing. Values are instant. Now our player moves swiftly and stops on a dime.
Part 4: Bullets
Our bullet is our main projectile, our primary collision object, and we will spawn many of these over the course of our game. We assigned a Rigidbody component to this object, and then turned off “Use Gravity” so that we don’t have to worry about managing our forces here.
Our Player object will be responsible for spawning the bullet, but we will make the bullet responsible for moving itself. We create a script that we attach to the prefab and add the following:
    private Rigidbody rb;
    public float speed;
    // Start is called before the first frame update
    void Start()
    {
        rb = GetComponent<Rigidbody>();
        rb.velocity = (Vector3.up * speed);
    }
Upon entering the first frame, the bullet’s script grabs the Rigidbody component, and applies a velocity expressed as speed times the direction “up” (a Vector3 that resolves to [0, 1, 0])
Finally, we will create a new tag, “PlayerBullet” and assign it to our bullet prefab object. We will use this to let the enemy test whether a bullet just hit it or not.
Now back in our Player object’s script, we add a public GameObject to hold the Bullet Prefab. You will want to make sure that you use the prefab from the Asset window for this, rather than any bullet you may have in the scene. When an object in the scene is destroyed, so is the object reference that other scripts may be holding onto, even if that object is recreated or respawned.
In our Player’s Update( ) we add in a check to see if the space button is pressed, and if so we call the FireBullet( ) command which looks like this:
void FireBullet()
    {
        // make a bullet
        Instantiate(bulletPrefab, (transform.position + Vector3.up), Quaternion.identity);
    }
Here we call Instantiate( ) using the (Object, Vector3 position, Quaternion rotation) version of the method. This version will create an object at the top level, meaning the parent is “null”. It will appear at the position passed, so in this case we use the current position of the player, plus 1 unit in the “up” direction so as to appear outside of our player object and avoid any collisions at inception. The “rotation” here uses Quaternion.identity which is the fancy math way of saying “0, 0, 0” rotation.
Because the Bullet object has it’s own script to move, it will fire as soon as it appears.
Part 5: Enemy
Finally the enemy. What good is a game if we have nothing to shoot at?
If we just pause here and play our game, we see our bullets run up against the enemy objects, and maybe bounce off of each other. Not much is going on here. We need these enemy to react.
When the bullet object hits the enemy object, both of them receive the collision notice. In this case, we will put the collision handling on the enemy object. For now they will be destroyed instantly with one shot, but in the future we may wish to have a handling script capable of taking multiple hits.
To process the collision, we test for the “PlayerBullet” tag, and if found, we tell the object to destroy itself using the Destroy( ) command.
    private void OnCollisionEnter(Collision collision)
    {
        if (collision.transform.tag == "PlayerBullet")
        {
            // tell the bullet to destroy itself
            Destroy(collision.gameObject);
            // destroy ourselves
            Destroy(this.gameObject);
        }
    }
You will notice we actually have two Destroy( ) commands here, and that is because we want the bullet to disappear also. The first command tells the game object that we collided with (the bullet) to destroy itself, and the second passes the reference to the game object that this behavior is running in.
What about those other bullets? The ones that miss and head into space? While it is perfectly OK to leave them there for our small little game, in a large game over time they may add up and be a drag on our memory. It’s good form to clean up after ourselves and remove them from the equation if they have gone unused after a period of time. To do this, we can use the timed version of Destroy( ) which takes both the object and a float time value. We edit the Bullet script to make a Destroy( ) call at the Start( ), but delay the execution for 5 seconds. Now if the bullet still exists past 5 seconds, it will self-destruct.
Player.cs
using System.Collections;
using System.Collections.Generic;
using UnityEngine;

public class Player : MonoBehaviour
{
    public float speed;
    public float MAX_OFFSET;

    public GameObject bulletPrefab;

    // Update is called once per frame
    void Update()
    {
        // move our player object
        Vector3 currentPosition = transform.position;
        currentPosition.x = currentPosition.x + (Input.GetAxis("Horizontal") * speed * Time.deltaTime);

        // restrict motion to range
        currentPosition.x = Mathf.Clamp(currentPosition.x, -MAX_OFFSET, MAX_OFFSET);

        // update the position
        transform.position = currentPosition;

        if (Input.GetKeyDown(KeyCode.Space))
        {
            FireBullet();
        }
    }

    void FireBullet()
    {
        // instantiate a bullet
        Instantiate(bulletPrefab, (transform.position + Vector3.up), Quaternion.identity);
    }
}
Bullet.cs
using System.Collections;
using System.Collections.Generic;
using UnityEngine;

public class Bullet : MonoBehaviour
{
    private Rigidbody rb;
    public float speed;

    // Start is called before the first frame update
    void Start()
    {
        rb = GetComponent<Rigidbody>();
        rb.velocity = Vector3.up * speed;

        // destroy the bullet if it doesn't hit anything
        Destroy(this.gameObject, 5.0f);
    }
}
Enemy.cs
using System.Collections;
using System.Collections.Generic;
using UnityEngine;

public class Enemy : MonoBehaviour
{
    private void OnCollisionEnter(Collision collision)
    {
        if (collision.transform.tag == "PlayerBullet")
        {
            // tell the bullet to destroy itself
            Destroy(collision.gameObject);

            // destroy this object
            Destroy(this.gameObject);
        }
    }
}