Today we looked at the build process, and also at Unity’s preferred method for text rendering, TextMeshPro, and implemented a sample overlay message. (TMP uses different libraries and types, so your code from the previous project will not work without some adjustment).
Part 1: Finding a Font
Fonts are wonderful little things. They can add so much personality to your game, helping to set a mood or support a theme. Just one look at a font can often tell you so much about an experience. Are we in for a fun, lighthearted adventure? Perhaps your game wants us to know that it means serious business. Or maybe you want your game to feel as though it is set in a particular time period. Fonts are a great way to quickly establish that tone… or ruin it, if the font feels out of sync with the style, especially when it is the “default” font. Imagine you spend weeks and weeks building a fantasy style game with wizards and dragons and characters with armor and swords, and beautiful orchestral background music, but then all of your dialog is in Arial. Yuck.
So how do you find fonts? Well, one way is to look on your computer. Macs & PCs have a “Fonts” folder that contains font files, most of which can be used by Unity. You can use either a TTF (True-Type Font) or OTF (Open-Type Font), and import it into your game either by dragging it into the Asset window or using Import New Asset… (Both of these methods will create a local copy of the file, rather than moving it).
But if you want to find more fonts, I recommend visiting Google Fonts, where they have a massive library of fonts that are free for use. You can download the font-family and import them into your game. (Just be sure to check the license on the font if you are planning on selling your creations, to make sure that usage is covered).
Part 2: TextMeshPro
One thing that you may have noticed when working with the text objects is that they do not scale well. When scaled up to a larger size, the characters in the text often appear to be blurry, with fuzzy edges. This is because Unity uses a “bitmap” texture – an image of the font – to build your text. It chops up the texture into small rectangles and displays those on your screen. Depending on the original size of your font, this jagged effect – an artifact of upscaling the anti-aliased font image – may be quite pronounced.
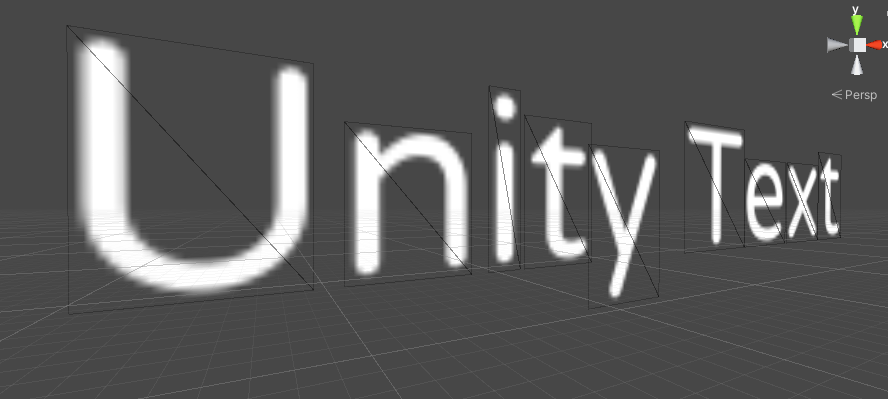
Thankfully, Unity now offers us an alternative solution that can render crisp text at any resolution. TextMeshPro was once a third-party asset, but was so popular that Unity acquired it and now includes it with the engine. It takes a few more steps to set up, and is implemented in a slightly different manner, but the end results are spectacular.
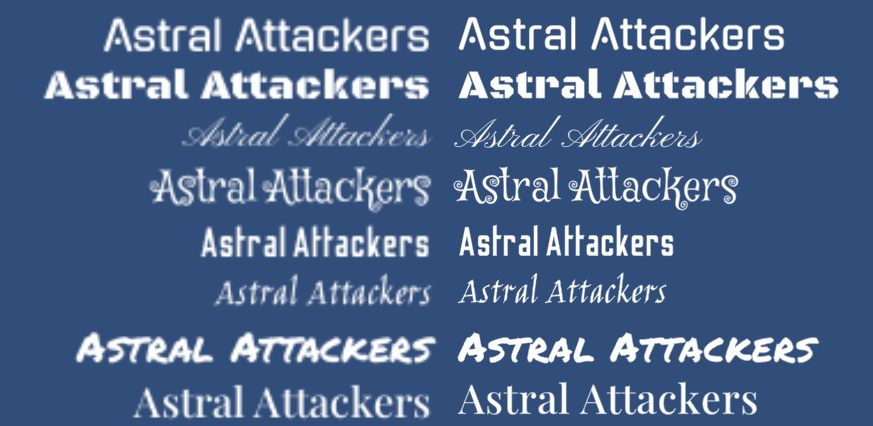
Both set to a font size of 18
TextMeshPro differs from the legacy Unity text system in that it does not display bitmap textures – instead it uses a technique called a Signed Distance Field (SDF). In simple terms, it uses a low resolution image that looks like a blurry version of the font texture and applies a bunch of crazy graphics math on those images to generate a crisp looking render at any distance. If you would like to read more about the process, check out this SIGGRAPH paper from the folks at Valve who invented the technique.

What this means for us is that we cannot simply load and assign a font as we can with a Text object. Instead, we need to generate a Font Atlas by importing a font and letting TextMeshPro process it into one of these fancy blurry texture maps.
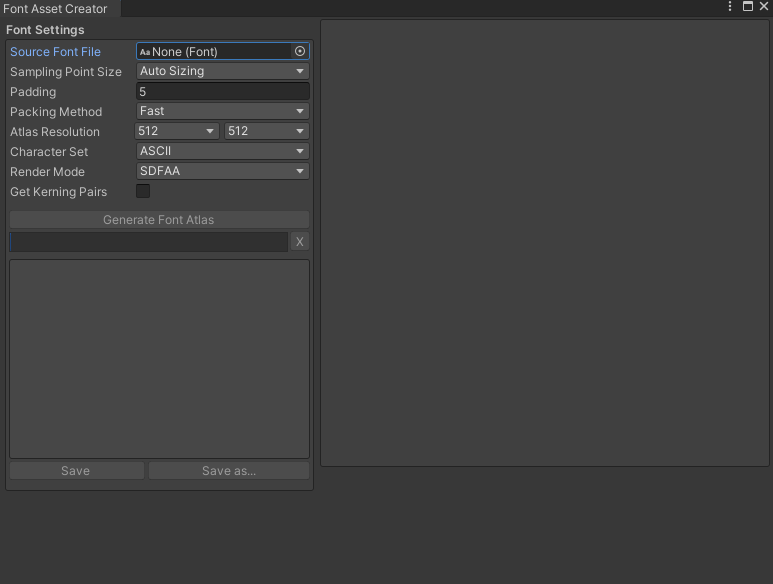
To begin, launch the font creator by going to Window > TextMeshPro > Font Asset Creator. If this is the first time you have launched TextMeshPro in this project, you will get a menu asking you to Import TMP Essentials. Click this and install. You do not need to load the Examples & Extras.
Importing Fonts
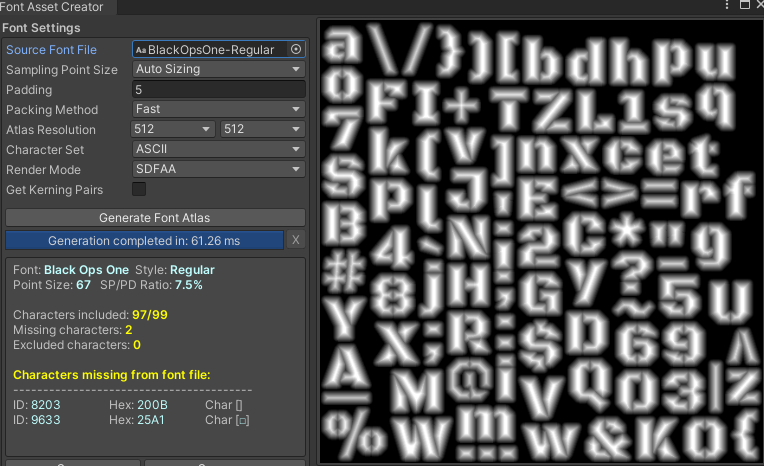
In the Font Asset Creator, assign a Source Font File – this is a font file that you have already loaded into your Assets folder. As a reminder, Unity supports both True-Type Font (.ttf) and Open-Type Font (.otf) formats. Click the Generate Font Atlas button and the creator will generate the font image. Select Save As… to save the font atlas to your asset folder.
TextMeshPro will also create a folder in your Asset directory that includes some instructions and documentation if you want to dig deeper into the settings.
Changing TextMeshPro Text Values
In the past, we used GetComponent<Text>.text to set the value of a text string. TextMeshPro objects have their own component types – one for UI, and one for In-World objects. To access these, you must also call the TMPro library.
using UnityEngine.UI;
using TMPro;

...

GetComponent<Text>().text = "This is how you set a Unity UI Text value";

GetComponent<TextMeshPro>().text = "This is how you set a TMPro In-World text value";

GetComponent<TextMeshProUGUI>().text = "This is how youet a TMPro UI value";
Note: There is a big difference between TextMeshProUGUI and TextMeshPro components. One is for UI, the other for in-world. They are not interchangeable.
To update our game UI elements, I simply created new TextMeshPro Text objects for the UI, then changed the assignment type of the public variables in our GameManager from “Text” to “TextMeshProUGUI”. The rest continues to work as expected, by updating the content of the .text property.
Part 3: Build Process
When we “build” the game, Unity will combine all of our code, all of the assets and packages that we use in the game, and all of it’s underlying systems and combine them into an application (if you are running MacOS) or an executable and a series of support files and folders (if you are running on Windows). Unity is also capable of building to other platforms such as Linux, Android, iOS, PS5, XBox, and HTML5. That’s one of the advantages of working with Unity – the platform specific instructions and abstractions are already built in, making it easy to publish cross platform games.
When you are ready to publish your game, you will want to open the Build Settings panel (File > Build Settings).
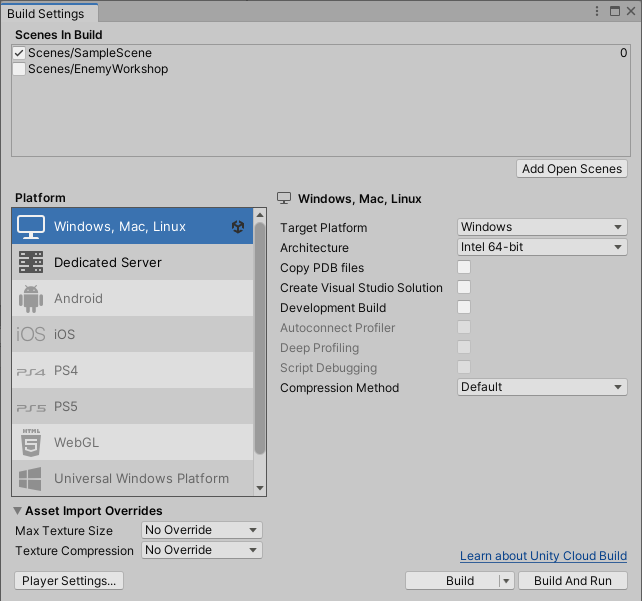
The first thing to do is to add your current scene to the build, by clicking the Add Open Scenes button. This will bring your current scene into the build process. Games can have many scenes, but the build process will only include those that are listed in the Scenes in Build panel above. Also note the number to the right – these scenes have an index number defined by order in this process, that can be used to jump to the next or previous scene. We will see this in the next project when we get into Scene Management.
Next, check your Platform Settings to make sure you are building towards the appropriate target. This will be set to the platform you targeted when opening the Editor (the Target setting in Unity Hub). If you change this now, Unity may need to reload the project. For this project, use whatever platform you are currently on – Windows or Mac. While it is possible for one platform to build for the other, we will not get into that in this class.
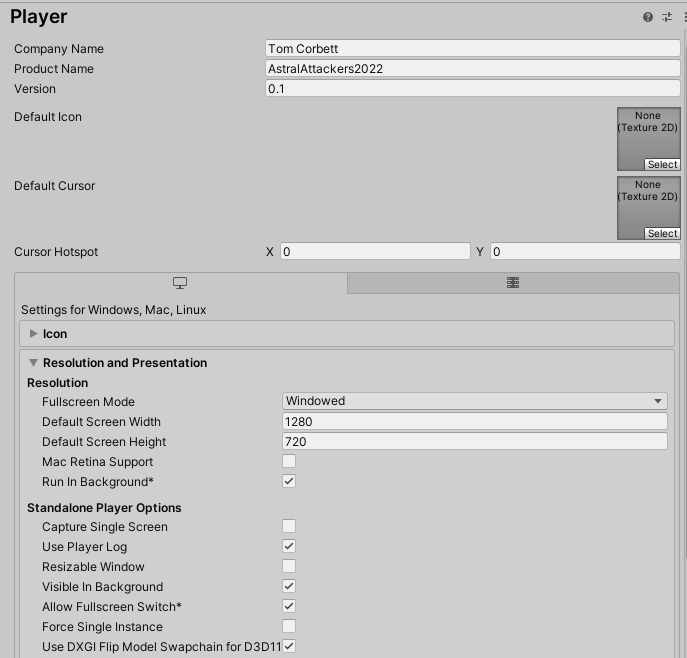
One final step – open the Player Settings panel by clicking the button in the lower left. This will open up the Project Settings panel to the Player Settings tab. The important items to know about in here are the Company and Product name, the Icon, and the Resolution. By default, applications are set to run as Fullscreen.
Once you are ready to publish your game and your settings are correct, click the Build or Build and Run button. Unity will ask you for a location to save this. If you are building for the Windows platform, you will want to create a new folder to contain the various files.
Then you’ll have to wait for a few moments while Unity does its thing. Now is the time where your game engine takes all of your code and objects and compiles them into raw game code and zipped binaries of data. Often this process is short, mostly just compressing files, but if you generating baked lighting and light/reflection probes as part of the build process this may extend the time required to complete this.
The end result will be either an Application (Mac) or an Executable (Windows) . If you publish for Windows, you will get an “.exe” file and a “Data” folder. (And a few other folders… and a UnityCrashHandler.exe) You need to include these files and folders as they contain contain relevant components – for instance, “Data” holds all of your assets. (Apple users don’t have to worry about this, as both their executable and data are both inside the “application” container.)

And that’s it! Now you have a self contained game. Congratulations!