Today we continued to look at 2D level art creation tools with the Tilemap system, which lets us quickly generate sprite-based levels on a series of layered grids. Then we began to apply 2D physics to our character, a used a 3rd party script to control the character movement.
Part 1: Tilemaps
Now that we have set up our sprites, it is time to build a level. While we could place individual sprites and colliders throughout the environment, Unity gives us an excellent tool for designing sprite content – the Tilemap. The Tilemap is a system of components which handles Tile assets and allows you to place them in your scene.
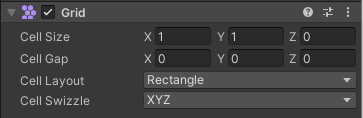
To create a new Tilemap, go to Create > 2D Object > Tilemap. This will also generate a Grid object, and your Tilemap will be a child of this object. (You can create more than one Tilemap, each will become a child of this Grid). This parent object has a Grid component within which you can set the size, spacing, and orientation of the Grid.
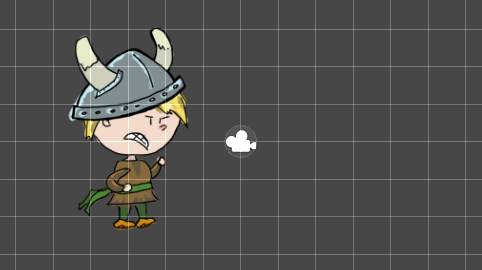
You will see this grid reflected in the Scene window…
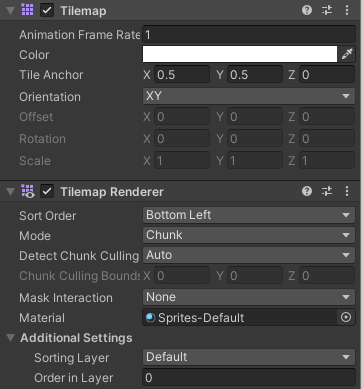
The Tilemap object will contain the Tilemap Component and the Tilemap Renderer component. The most important setting to notice here is the Sorting Layer setting in the Tilemap Renderer. For our game, we will set up multiple Tilemaps under the same grid, and set them to different sorting layers to create foreground and background objects.
Once your Tilemap is created, you will want to create a Tile Palette – a collection of tiled sprites that you can use to populate the grid cells on your Tilemap. Access this by going to Window > 2D > Tile Palette. Once here, select “Create New Palette…” and give it a location and a name. Then you can drag sprites into this window which will create Tiles for each sprite. (You will see a window asking where you want to save these in your Asset directory. I recommend creating a new folder, as these can get pretty numerous if you are working with even a modestly sized sprite sheet.)
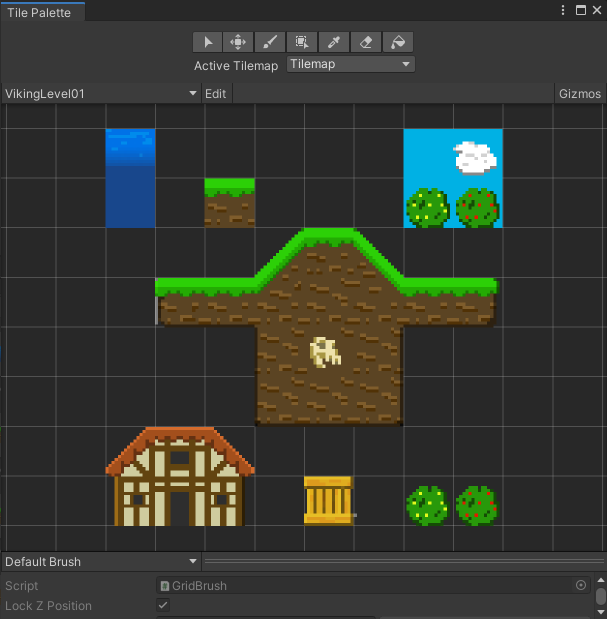
The Tile Palette window features a list of tools at the top. These are:
- Select – allows you to select one or more grid cells
- Move – allows you to relocate a tile (you must first select the tile)
- Paint – select a palette tile or tiles and use this to paint that selection onto your scene’s tilemap.
- Box Fill – fill an area of your tilemap with the selected tile(s) from your palette
- Pick – click on a tile to change your active brush selection to that type of tile
- Erase – click on a tile to remove it
- Flood Fill – fill a large area with the active tile(s)
Below the tile tools is the Active Tilemap setting. If you have multiple tilemaps (which is common with layering) you will want to make sure that you have the correct Tilemap selected before you paint. For this reason, it is recommended to give each of your Tilemaps a unique name that identifies their purpose (such as Foreground, Background, etc)
Tomorrow we start to look at 2D physics, adapt a character controller to make our player move, and make our camera follow along.
Part 2: 2D Physics
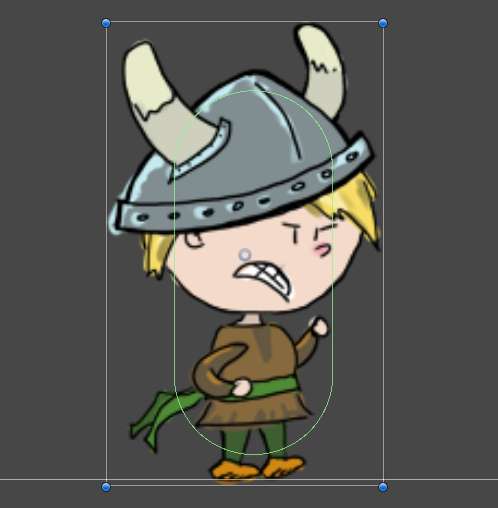
Now it is time to make our Viking Boy move. Just like we did with objects in our 3D games, we want to apply a rigidbody object so that physics will be applied to this object. However, there is an entirely separate physics system for 2D objects, and so we must apply the Rigidbody 2D Component to our character. We also need a collider so that we have something to act as our physical volume. For this, we are going to use the Capsule Collider 2D. I prefer using the Capsule Collider as the rounded shape at the top and bottom create a more realistic interaction with objects like platforms and slopes, where we may glance off of them. Otherwise our character may seem as though they are hovering in space, or that a collision occurred too soon. All of these can be found under the Physics 2D folder of components.
In order to land on our game level, we need to set colliders for our Tilemap. Rather than build out a series of individual colliders, we can apply the Tilemap Collider component to the Tilemap that holds our game tiles (in our examples case, we will use the tilemap that we have on the “default” layer). The sprite import will generate a simple collision shape based upon the transparency of the sprite, so this means that objects like our grass slopes will behave as we would expect them to.
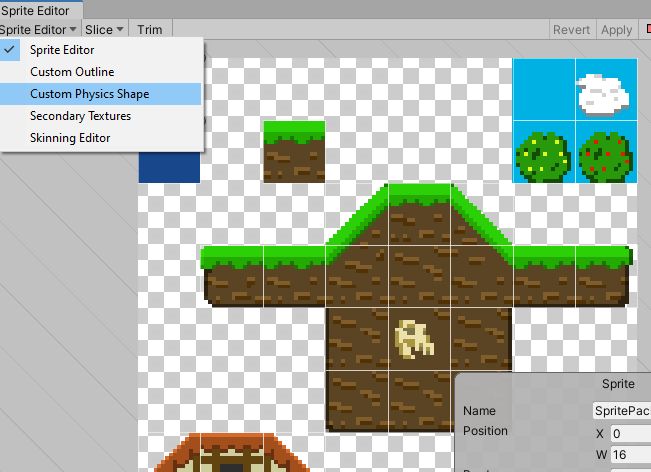
As we saw in class, the estimation of the collision shape for the slopes does not always work as well as we would have hoped. If this is the case, you can use the Sprite Editor to create a Custom Physics Shape that you can adjust to your own preference for how objects should collide.
Now we run our first test. Our Viking Boy probably falls straight onto the ground, depending on where you have placed him, but if you play around or have him land on a corner, you might see him roll off. This is because our Capsule Collider is capable of rotation. We can easily fix this by going into the Rigidbody 2D component and setting the Constraints to constrain rotation in the Z axis. (which is the only axis that it CAN rotate in). You may also notice that our object falls… slowly. This is because we are still using the same 1 unit = 1 meter model of physics, which may be true to life, but is not how we expect our platform games to play. To correct this, we set the Gravity Scale of the Rigidbody2D component to a higher number like 3 or 4.
Part 3: Character Controller 2D
For 3D projects, Unity has long featured a helpful component called the Character Controller. It’s a physics-like-but-not-quite-physics object that can be used to efficiently move a character in a level. This can be useful if you are building a first-person-shooter (FPS) style game, or a platformer with 3D characters. It allows you to pull off all of the moves that real physics NEVER would allow. But there is no built-in version of this for 2D character. Thankfully, plenty of people have tackled this problem and there are a number of excellent free resources that address this.
For this class, we are going to use the free CharacterController2D from Brackeys. (If you don’t know Brackeys, this is an outstanding resource of Unity tutorials. Just about any feature or gameplay style you could wish to build, they have an easy to follow tutorial on that subject. Sadly, they have announced they will not be making any more of these, but for the next three years this resources should still continue to be relevant.)
For setting this up, I strongly recommend watching the YouTube workshop for this class, as there are a number of necessary steps. The key steps you need to keep in mind:
- Your player object will need two child objects to serve as positional markers for the top and bottom of your character. These are used to do a physics test to check for objects where the floor and ceiling would be. These can be completely empty, but must be placed appropriately otherwise your character may not jump as expected, or may slow down because it thinks it is hitting the ceiling.
- These position marker objects must be associated with the CharacterController2D (“GroundCheck” and “CeilingCheck”)
- You must set your object to a layer and tell the “What is Ground” to ignore that layer. (or better yet, only look for objects on one layer that is considered “ground”). The CC2D will use this to determine if your character has landed. This will be important for animations.
- The CC2D uses a Move( ) command that we can access to apply side movement to our character, and crouch or jump. For crouching, there is a more complicated collider setup than what we use here. If you want to see how to use this, you can check out Brackeys’ tutorial on their character controller.
Next we create a simple movement script to also attach to the player (code for this is at the end of this post). We use the Input libraries to determine direction of movement and whether or not the “Jump” button was pressed. (This is one of a number of named buttons that have default settings in Unity. You can edit these settings in the Input Manager, which we first saw when we encountered GetAxis(“Horizontal”)).
We adjust our speed in our player script, and our Jump Force in our CC2D script until we have a motion that we like. Next we create a Physic Material 2D to provide a near frictionless experience for our player so that he cannot stick to walls through mere force. (Don’t worry, our CC2D will slow us down). We apply the newly created physic material to our player Rigidbody.
PlayerMovement.cs
using System.Collections;
using System.Collections.Generic;
using UnityEngine;

public class PlayerMovement : MonoBehaviour
{
    private CharacterController2D controller;
    public float speed;

    private float horizontalMove = 0.0f;
    private bool jump = false;


    // Start is called before the first frame update
    void Start()
    {
        controller = GetComponent<CharacterController2D>();
    }

    // Update is called once per frame
    void Update()
    {
        horizontalMove = Input.GetAxis("Horizontal") * speed;

        if (Input.GetButtonDown("Jump"))
        {
            jump = true;
        }

    }

    private void FixedUpdate()
    {
        controller.Move(horizontalMove * Time.fixedDeltaTime, false, jump);
        jump = false;
    }

}