Assignment 5 Final: Accordion

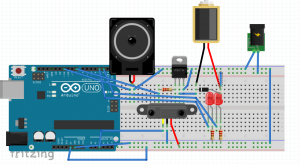
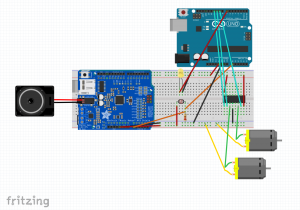
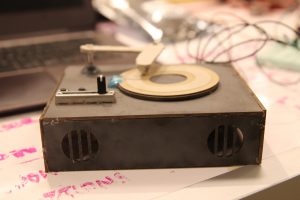
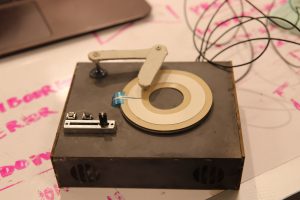
For this project I was inspired by the accordion – the way it moves and creates sound – to make a musical instrument. The instrument is made of a living hinge with a flex sensor that controls volume, and keys that each play a note using an eight-channel capacitive sensor. I wanted to make an interactive piece with which you could create music, and I also wanted to explore the flexibility and organic feel of a living hinge.

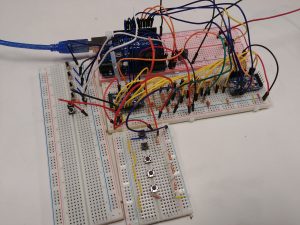
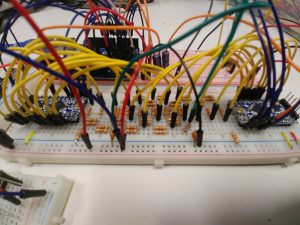
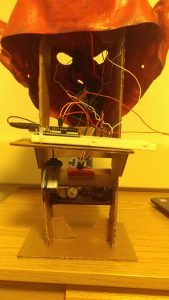
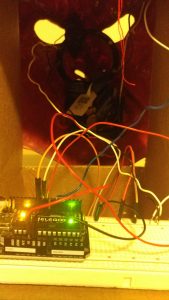
The flex sensor and volume control part went pretty smoothly, but I ran into a few challenges with the capacitive sensors. The wires were very very sensitive if they bumped against one another, so in the end I could not have all 8 keys because the holes are too close together, so I had to do 4. If I could do this project again, I would add another speaker and more capacitive touch sensors so that I could play chords, and I would add an option to change the scale (default is A major). Overall, I am pretty happy with the way it turned out – I had fun playing with the living hinge and learning how to use capacitive sensors.

sketch: Assignment5-sketch-NinaPrakash

Assignment 5: Treat for a Trick (Currently Fixing)

As shown through the prototype, this project is designed to simulate a common horror movie scene, where the background music plays faster with higher pitch as a character approaches closer to a subject.

Likewise, in this project, the user will be hearing a shrill sound that plays faster as he/she reaches his/her hand closer to a candy (I changed my  initial music choice from harmonic minor scale to a violin screech sound effect).

(picture of the final product)

(picture of the final product close-up)

(picture of interaction)

For the final product, I decided to use an ultrasonic distance sensor instead of an IR distance sensor, since the sensing range was broader, which thus, allows a smoother interaction. For the speaker, I decided to use a larger, 8 ohm 2 watt, audio speakers through an addition of audio amplifiers.

In order to enhance the spook-factor, I decided to add an output vibrator attached to the target treat, where it would start vibrating when the distance sensor reads the user’s location to be close enough to the treat.

Documentation in Google Drive (Video X /Fritz X /Photos X /Code X): https://drive.google.com/drive/folders/0B70fyRiHk85qSW9vcDNuV0I2Y3c?usp=sharing

Spooky Skull

For this project, I was inspired by the nearness of Halloween. I wanted to incorporate the festive feel. My original idea involved a hand that would recoil as you got close to it. My plan was to tie one end of a string to the individual fingers and the other end to a servo that would coil the string when activated, and consequently pull in the fingers. Unfortunately, the library required to play the converted audio file interfered with the servo library so the two could not work in tandem. My solution was to use a solenoid instead. With the solenoid incorporated, it made more sense to directly relate the audio aspect to the visual component, resulting in an evil laughing skull. If had the opportunity to recreate the project I would like to retry the recoiling hand idea.


Link to Code:https://drive.google.com/open?id=0B62ArY8nFitqRmo2Wnd5UU9PRFE

Assigment 5: Bolaji Bankole

For this assignment, I set out to create a two-voice synth/sequencer. A major goal of mine was to be able to create each of the basic waveforms (I ended up with sine, square, triangle, and noise), so I made two R2R ladder DACs, each with a controlling arduino pro mini. The two pro minis were then controlled by an uno that told them what waveform to use, and what note to play. The uno had arrays of notes that it would tell each pro mini to play, and I threw together an interface for inputting them.

I’ve essentially learned that analog circuitry is really hard, especially on breadboards. I tried to do more thorough unit testing as I went on, trying different values for filters and making sure that I was getting the correct waveforms at the correct frequencies, but when all put together, it just kinda shat the bed. There were likely issues in the final signal combining and amplification, but then again, there were likely issues in every step. I think that in the future I’ll try and step away from using as much electronics and do something more material. I think this kind of project could have turned out well if I was able to put more time into it, but sadly I need to graduate.

At the very least, the sounds it makes are kinda spooky so it’s fitting for Halloween.

code

video

Assignment 5 Final: Scott

For this assignment I aimed to make a music pattern generator. I wanted to have an interface for the user to make a custom pattern and then the ability to play that pattern back and hear it as they see time moving across the pattern. I had a few iterations of ideas with sound that all focused on the user having the ability to customize what they were hearing. I was fortunate that Aditi let me use the 8×8 LED matrix with the backpack she attached, and this was perfect for showing a pattern of notes in time.

zip: assignment5

Assignment 5: Musical Objects

For this project, I integrated different musical melodies with objects around us. I wanted to use a set of objects with different weights, categorize them, and then produce separate musical identities of each object. While there is a range of objects available, only 3 sensors are available. So, different combinations using the objects produce slightly different experiences.

For the practice assignment, I used the playMelody Arduino tutorial  to be the tune set off by the ball and original backbone for the program (the weight is captured by an FSR). However I needed to change the program heavily to adapt for three sensors. The biggest challenge I faced was wiring the FSRs appropriately to the get solid and consistent readings.

Overall, I’m very happy with how the project turned out and learned a lot about sensors as well as programming this time around. If I were to improve, I would like to fine-tune the thresholds of the sensors and weights and also develop the program to play melodies in parallel with one another.

video

documentation, fritz, and code

Scooby Doo Project – Sarika Bajaj

For my Halloween project, I wanted to do something that involved playing the Scooby Doo theme song (as illustrated in my prototype) and some type of motor/sensor action that involved the gang and maybe some monsters. I was not really pleased with the quality or length of the sound that I achieved in my prototype, so I decided to pursue using the Music Maker Adafruit shield which uses an SD card to play songs (which would give me longer music length and better quality as I would no longer be using the Arduino as my storage device). After a lot of struggling, I got the full theme song playing such that when it got to be “nighttime” (based off my photoresistor) the song would play in its entirety. However, I think this Music Maker shield + the photoresistor got to be too much for my Arduino (and I think some pins might have been fried in the process), so I had originally connected the wheels of the Mystery Machine straight to power and ground so I could get some motor action.

I then spent a decent amount of time trying to make some workaround to get some motor and LED interaction from the light sensor. I realized that an easy solution without messing too much with the Music Maker set up would just to use a second Arduino that gets the same input from the photoresistor that connects to the Music Maker and instead just runs the data to an h-bridge and an LED. After some simple issues of downloading code to the wrong board, I was able to get this system up and working.

My final project now works such that when it gets to be “nighttime,” the wheels of the Mystery Machine start spinning, its headlights turn on, and the Scooby Doo theme song plays. The whole system is completely functional!

Final Video:

Arduino Code for the Music Shield:  HalloweenProject
Arduino Code for the H-Bridge and LED: Halloweenpt2

Reference Material Used: http://digitalmedia.risd.edu/pbadger/physcomp/index.php?n=Devices.ArrayOfMP3sOnAdafruitVS1053

Assignment 5: DJ Turntable

For this assignment, I made a mini DJ turntable using a soft circular potentiometer, speaker, and some buttons/switches. The buttons and switches are only for aesthetic purposes, however, since I didn’t have time to figure out how to incorporate volume and play/pause into my code.

As you press the needle in different places around the record (the circular potentiometer), the speed of the song (Super Mario theme song) either increases or decreases.

Link to demo video, code, etc:

https://drive.google.com/drive/folders/0B0yMpI_ZOcoYU2pTOVd2M2hWVDg?usp=sharing

Evil Lord Kakoon – Akshat Prakash

I created a “trick or treat” project where people can come to get candy to and be “treated” by the evil halloween lord “Kakoon.” As a person reaches out for candy, “Kakoon” senses his/her presence and erupts in a melancholic tone and lights up his fiery eyes to drive away intruders.

I used a ping sensor, neopixel and speaker to achieve this effect. I had no trouble this time around with code or circuit and everything seemed to work in the first go. I also feel with more and more projects, I feel more comfortable with the creativity and art side of physical computing. A lot of the makeup for Kakoon was pretty spontaneous.

Link to project video:

https://drive.google.com/file/d/0B-XYwe_ldmF9bjNta2lWNzZnYUU/view?usp=sharing