Final Crit- Noel Lau

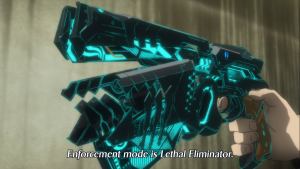
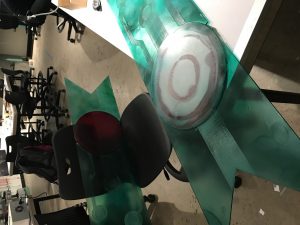
My final project is a cosplay prop from the game Transistor, that uses phys comp fundamentals to bring the prop closer to functions/behaviors in its original work, enhance static features, and bring others to engage with the great works that these props come from.

https://drive.google.com/open?id=1iKilGAet8-1_XHfDLTWK0RPx5Jyya3yF

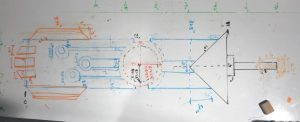
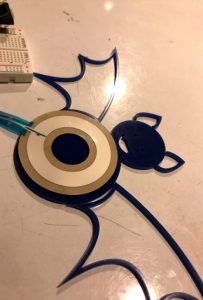
The first stage was focused on code and learning more about using physical computing components like transistors and capacitors to deliver consistent power to the circuit and read noisy signals. High pass filter methods were used to find the most effective way to read and pulse the LED with. Different conditional loops and commands such as “return”, “goto’ and “switchCase” were also explored to achieve the conditional cases I wanted to program for:

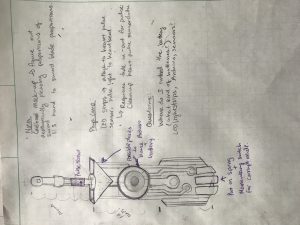
Corrupt Mode: When the sword is lowered from the stand, sword point touches the group and pressed a momentary switch down. The switch reads LOW because the circuit moves voltage from 5 V to ground. The switch is connected to a pin and the Arduino executes a command to fade from blue to red LED strip color, and stay within the red state while the button is pressed.

Normal Mode: Pulse in blue light while second (auxiliary) momentary switch is also pressed.

Push buttons are used in conjunction with if statements.

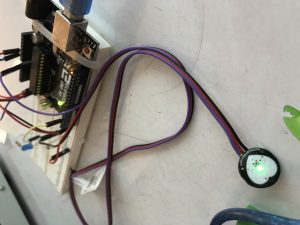
Booleans and return functions were considered as ways to control when the pulse sensors was activated and taking in inputs, but a momentary switch was the better option because it was a mechanical switch not dependent on the code for the pulse sensor to avoid reading noise.

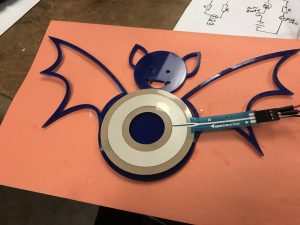
Much of the difficulty was with prototyping outside of a breadboard- soldering with large lengths of wire and attaching buttons in the absense of pre-existing holes created a building difficulty. The pulse maker has to be strong through the silver hilt, which was not formerly anticipated. I also had a lot of difficulty with making a pushbutton work that did not have 4 prongs (2 prongs only).

Transistor Sword Rough Crit


https://drive.google.com/drive/folders/1Xv4OfpfIbuqn6w5a-yl5K2HX8IPY0XIM?usp=sharing

Difficulties:

Transistors:It so turns out that the MOSFETs were not very functional transistors, and a Darlington Array transistor (UM2003) was used instead. Independent continuity of each R, G, B, pin and MOSFET circuit was tested, but there seemed to be a perpetual issue with connectivity. The lights responded well to code after the switch to the Darlington Array transistor.

Pulse Sensor: The pulse sensor used the code from Pulsesensor.com but the threshold was set at 550, while the readings from the pulse sensor ranged from 900 to 10, since there was much noise. Even if someone’s hand was close but not on the sensor, a “pulse” was detected. To prevent the lights from pulsing when there was only noise and no real pulse, I included another pulseSwitch, a momentary switch that had to be activated, in addition to the corruptSwitch being inactive.

Getting Corrupt Mode (corruptSwitch == LOW)  to stay red: I have some trouble writing the code to exit the loop and end with the LEDs staying in the red state. I tried using booleans and conditionals but can not seem to get it right.

The circuitry has been completed for this project but the code could use some tweaks.

Final Project Proposal: Transistor Prop

Project fundamentals

My final project can be a cosplay prop that uses phys comp fundamentals to bring the prop closer to functions/behaviors in its original work, enhance static features, and bring others to engage with the great works that these props come from.

Phys Comp Components: Light sensors, IR sensors, mp3 shields, momentary switches, LED light strips

Things that a prop can be modified to do: light up (different patterns of lighting, color, intensity), make sounds/play dialogue, change configuration (physical changes, like add/remove armor, Psychopass gun etc.)

Besides adding to the list of things the prop does, I also want to think more about making a meaningful interaction between user and prop, perhaps through symbolism, theme, addition of a custom mode/feature.

Transistor Sword:

Red’s sword has several tutorials that incorporate physical computing elements already. I really love this game, and it means a lot to me, so I would want to move forward with this project proposal, but understand if it’s already done well.  

Here’s one good example of tutorials to make the phys comp version of the Transistor Sword: http://chrixdesign.blogspot.com/2016/06/transistor-sword-closer-look-at.html

Chris’s version of the sword has two modes of glowing and is sound reactive. However, she doesn’t use an Arduino, and has hacked the project using circuits and components from OTHER devices.

Input = sound

Output = LED light states

Proposal:

Interaction 1:Install a pulse sensor to the handle, outline where a person’s hand should go.

Input = pulse sensor

Output = LED light strips PULSE in time with heartbeat detection


Interaction 2: Corrupt Mode via button

Input: Pressure downwards (press sword into ground)

Output: LED strip color change into corrupt mode (green is normal, red is corrupt), maybe pulse red

State machine would be able to recognize if the sensor or the switch is activated and change sword light color to show sword mode.


I will try to think of ways to make this more interactive, but the purpose of this project would be purely entertainment-focused as a cosplay prop. As a prop, its function can remain purely aesthetic as most props are created to replicate the original work’s as closely as possible and supplement a person’s cosplay project. Giving it the ability to respond to outside stimuli will bring it closer to its function in-game, further pushing it semblance with the original work.


Other Alternatives Considered:

Overwatch Heroes

League of Legend Heroes

Psychopass gun: Yes, lots of dremmel work

An Affectionate (?) Bat

The idea was to create a bat that would respond differently depending on where it was “pet”. Since no linear softpots were available, this idea evolved into its current state using the rotary soft pot.

Much of the difficulty was getting the readings to be consistent, testing different mapping values (there’s no indication of how to map output values to pot inputs, whether it should be inches, radians, degrees around the rotary pot etc.) and figuring out why the pot wasn’t reading half the time. The pot does read in degrees it seems, and is better for touch detection in a certain area, rather than producing a spectrum of tones by running your finger along the circle.

Note: Despite what some websites recommend, do NOT connect softpot directly to power and ground. It will burn the pot.

https://drive.google.com/drive/folders/0B6vucT1cFrpgeXJFWDhzSDA1MEk?usp=sharing

All files should now just be public.

“Tickle Me” Bat

The idea is a bat that “screeches” at two different frequencies depending on how you pet him (yes, him.). The circular softpot is a good tool to use to change resistance depending on the location of your finger/interaction. The resistance changes from 0 to 10k as you go around the wheel.

There is little documentation on how this specific form of softpot functions (like what to use in the map function when assigning values of potentiometer readings to positions on the pot), but there’s more stuff on linear flex sensor monitors (FSMs) and softpots. Some of the documentation is translatable. The next steps will be defining what cases I want:

1.) Bat (we should name him) will screech in more pleasant frequency when user pets him under his chin.

2.) When not petting in the “sweet spot” (much like that of a cat), will the bat screech at all? Will it screech at a lower frequency everywhere else? Should it be silent when there is not interaction?

https://drive.google.com/drive/folders/0B6vucT1cFrpgeXJFWDhzSDA1MEk?usp=sharing

Hungry Dragon (that didn’t work bc of planning issues)

The goal of this project is to use the motor to tell a story. I made a “hungry dragon”, so my dragon would move faster in response to a stimulation (chasing a cat, food placed in front, etc). Movement is shown through rapid rotation of the CAM systems, creating the undulating motion of the dragon’s body.


The stepper motor would turn the dowel with the CAMs, and the speed of the rotation can be varied by a potentiometer. However, there were a few challenges: the motor spins too quickly, the CAMs themselves are too large for the frame made, and decorations could not be completed to satisfaction.

To solve these issues, I can cut smaller CAMs, use off-center CAMs rather than snail or tear CAMs, use longer screws, and make the frame smaller. Some parts of my dragon (or sausage links) have to be stationary to create the undulating motion. To make sure the motion works, I could learn to run a SW animation or do a cardboard prototype. To cut better pieces, I can become more familiarized with bitmaps in lasercutting.

In the future, I also want the stimulation to be more in line with the context (the hungry dragon), rather than having a random potentiometer.


https://drive.google.com/drive/folders/0B6vucT1cFrpgYmppRzA1TmhBb1U?usp=sharing


Assignment 3: noel lau

Can I make the sensor read the heartbeat, calculate bpm and flash a blueLED with some relation to the readings?

Emotion portrayed: annoyance and frustration at trying to write a seemingly simple code for a seemingly simple task, rather than use the library available here: https://pulsesensor.com/pages/code-and-guide

Original idea: change red/blue LED blinking patterns in accordance to BPM readings.

Difficulties: I found that thresholding techniques were needed to to process the raw sensor data (reads a spectrum of values, highs correspond to a heartbeat) to identify and count the number of heartbeats and calculate BPM. Much of the time was spent doing this.

https://drive.google.com/drive/folders/0B6vucT1cFrpgdlBVWTlUamxzV1U?usp=sharing