Assignment 7: Rough Crit of Interactive Shadow Lamp

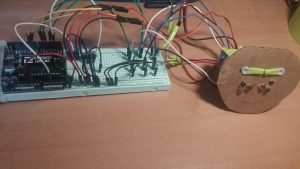
Hi hello, so for my final project, I wanted to create a multi-person interactive experience so I decided to attach both photoresistors and distance sensors to my lamp.

The experience involves two users, one equipped with their smartphone flashlight and the other controlling the Y-height depending on distance.

To begin, I decided to give myself small goals that I should  check off by the time of the rough crit.
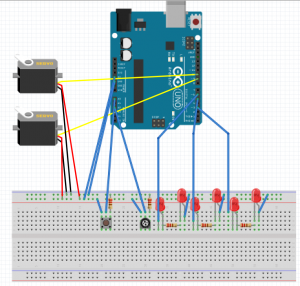
  • get servo working
  • get light bulb working
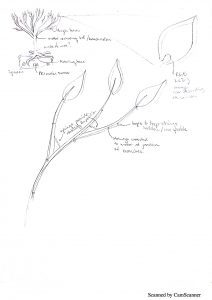
  • lasercut shade, and chassis
  • get the light bulb communicating with the photoresistor

As of now these individual components are working, but naturally the hardest part is getting them to communicate with each other.


Final Project Proposal-Changing of the Seasons

Abstract 

I wanted to create an organic interactive kinetic installation that represented the changing of the seasons, which was mainly inspired by the temperamental weather we are experiencing. It will be a tree that is mounted on a turntable which will spin at different rates depending on the interaction with the user. It will also have leaves that will change color corresponding with the appropriate response. Lastly, the branches will be connected to a pulley system which will determine their angle. The idea is that there will be four settings or ‘seasons’ that will be represented by the tree. I currently have two running ideas for the user interaction. The first requires a motion sensor that will track the speed at which the user walks past the installation and use this information to determine the corresponding season. The second idea relies on the facial expressions or mood of the user.


Hardware

  • Materials for the body of the tree (wire?)
  • (Clear) Acrylic for leaves
  • RGB LEDs
  • High torque motor
  • High precision motor
  • springs
  • PIR Motion sensor or webcam ( depending on direction)
  • at least 2 speakers
  • micro SD Card and adaptor

Software

  • Stores and plays multiple different tracks
  • Use open CV for the facial recognition component if necessary
  • Controls the RGB LEDs and motors

Order of construction and testing:

  1. Make a leaf that can turn different colors using RGB LED
  2. Make turntable with hole in center for wires
  3. Make the trunk of the tree using wires
  4. Make body of tree hollow to mount on turntable
  5. Design housing for the motor that controls branches
  6. Build branches with corresponding leaves
  7. Find way to control multiple LEDs with different settings (different variations of colors for each season)
  8. Figure out how to make the LEDs and motors work at the same time without tangling wires
  9. Figuring out a way to conceal the strings and wires
  10. Learn how to play multiple different tracks on the speakers and determine if one is enough or if two is necessary for the full effect
  11. Learn how to use SD Cards
  12. Mount PIR  and figure out the threshold values
  13. Learn how to use facial recognition software and webcam (determine if it is worth the extra work)
  14. Let other people try it out and see what their reaction/ interaction with it is ( can they figure it out or is it not obvious enough)
  15. Fix everything that doesn’t work
  16. Repeat!


Moody Monster

My project is based on the idea of relaying an emotion of the user based on the input that they feed the Arduino.

The little monster expresses emotions that are directly related to the speed at which the user presses the button, and the intensity with which they press it. The ‘intensity’ is calibrated by the potentiometer connected to the board. On the setting with high intensity, the faster the user presses the button, the angrier the monster gets. The slower the button is pressed on high intensity, the sadder the monster gets. On low intensity, the faster the button is pushed, the more scared or nervous the monster gets while the slower the button is pushed, the more tired he gets. In both intensity settings, if the user pushes at a medium pace the monster will be happy.

The following is a link to the video, code, and circuitry:

https://drive.google.com/open?id=0B62ArY8nFitqcy1IeWY4cmNualk