Automatic Ball Winder
For the final project of Introduction to Physical Computing, The Weavers, which consists of Jenny, Megan, and Ghalya, were assigned to create an assistive device for Rebecca Herbert. Rebecca loves to weave and the most tedious task in weaving is winding the yarn into a ball from its original loose packaging. Not only does this tedious hurt her wrist, but she also has to estimate the amount of yarn that she has. This documents the process of creating a motorized ball winder that would save Rebecca from doing this task manually.
Link to Prototype Documentation: https://courses.ideate.cmu.edu/60-223/f2018/work/team-weavers-prototype-documentation/
Link to Initial Interview: https://courses.ideate.cmu.edu/60-223/f2018/work/interview-documentation/
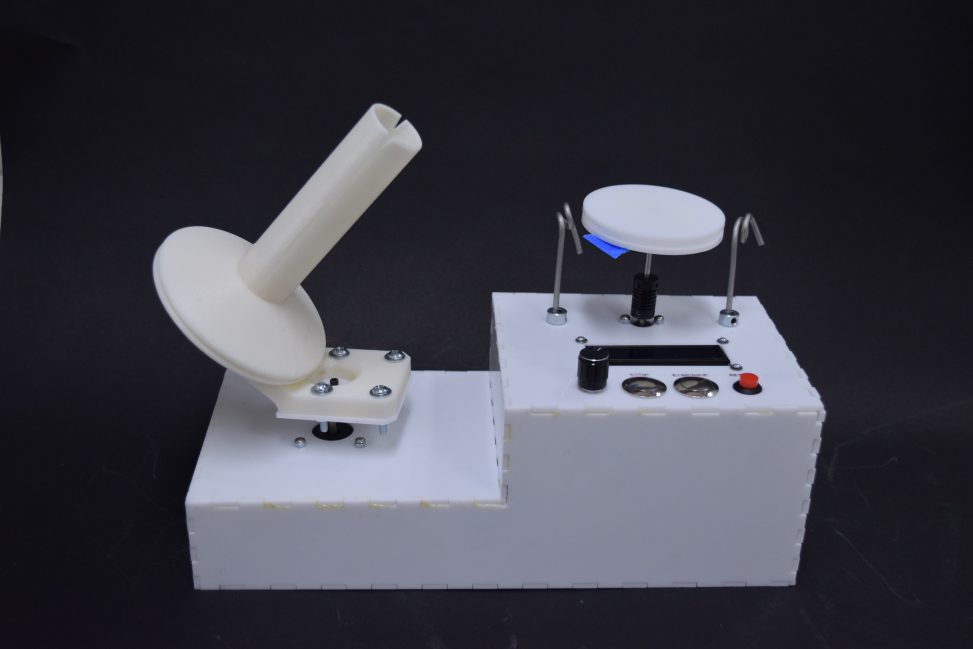
What We Built
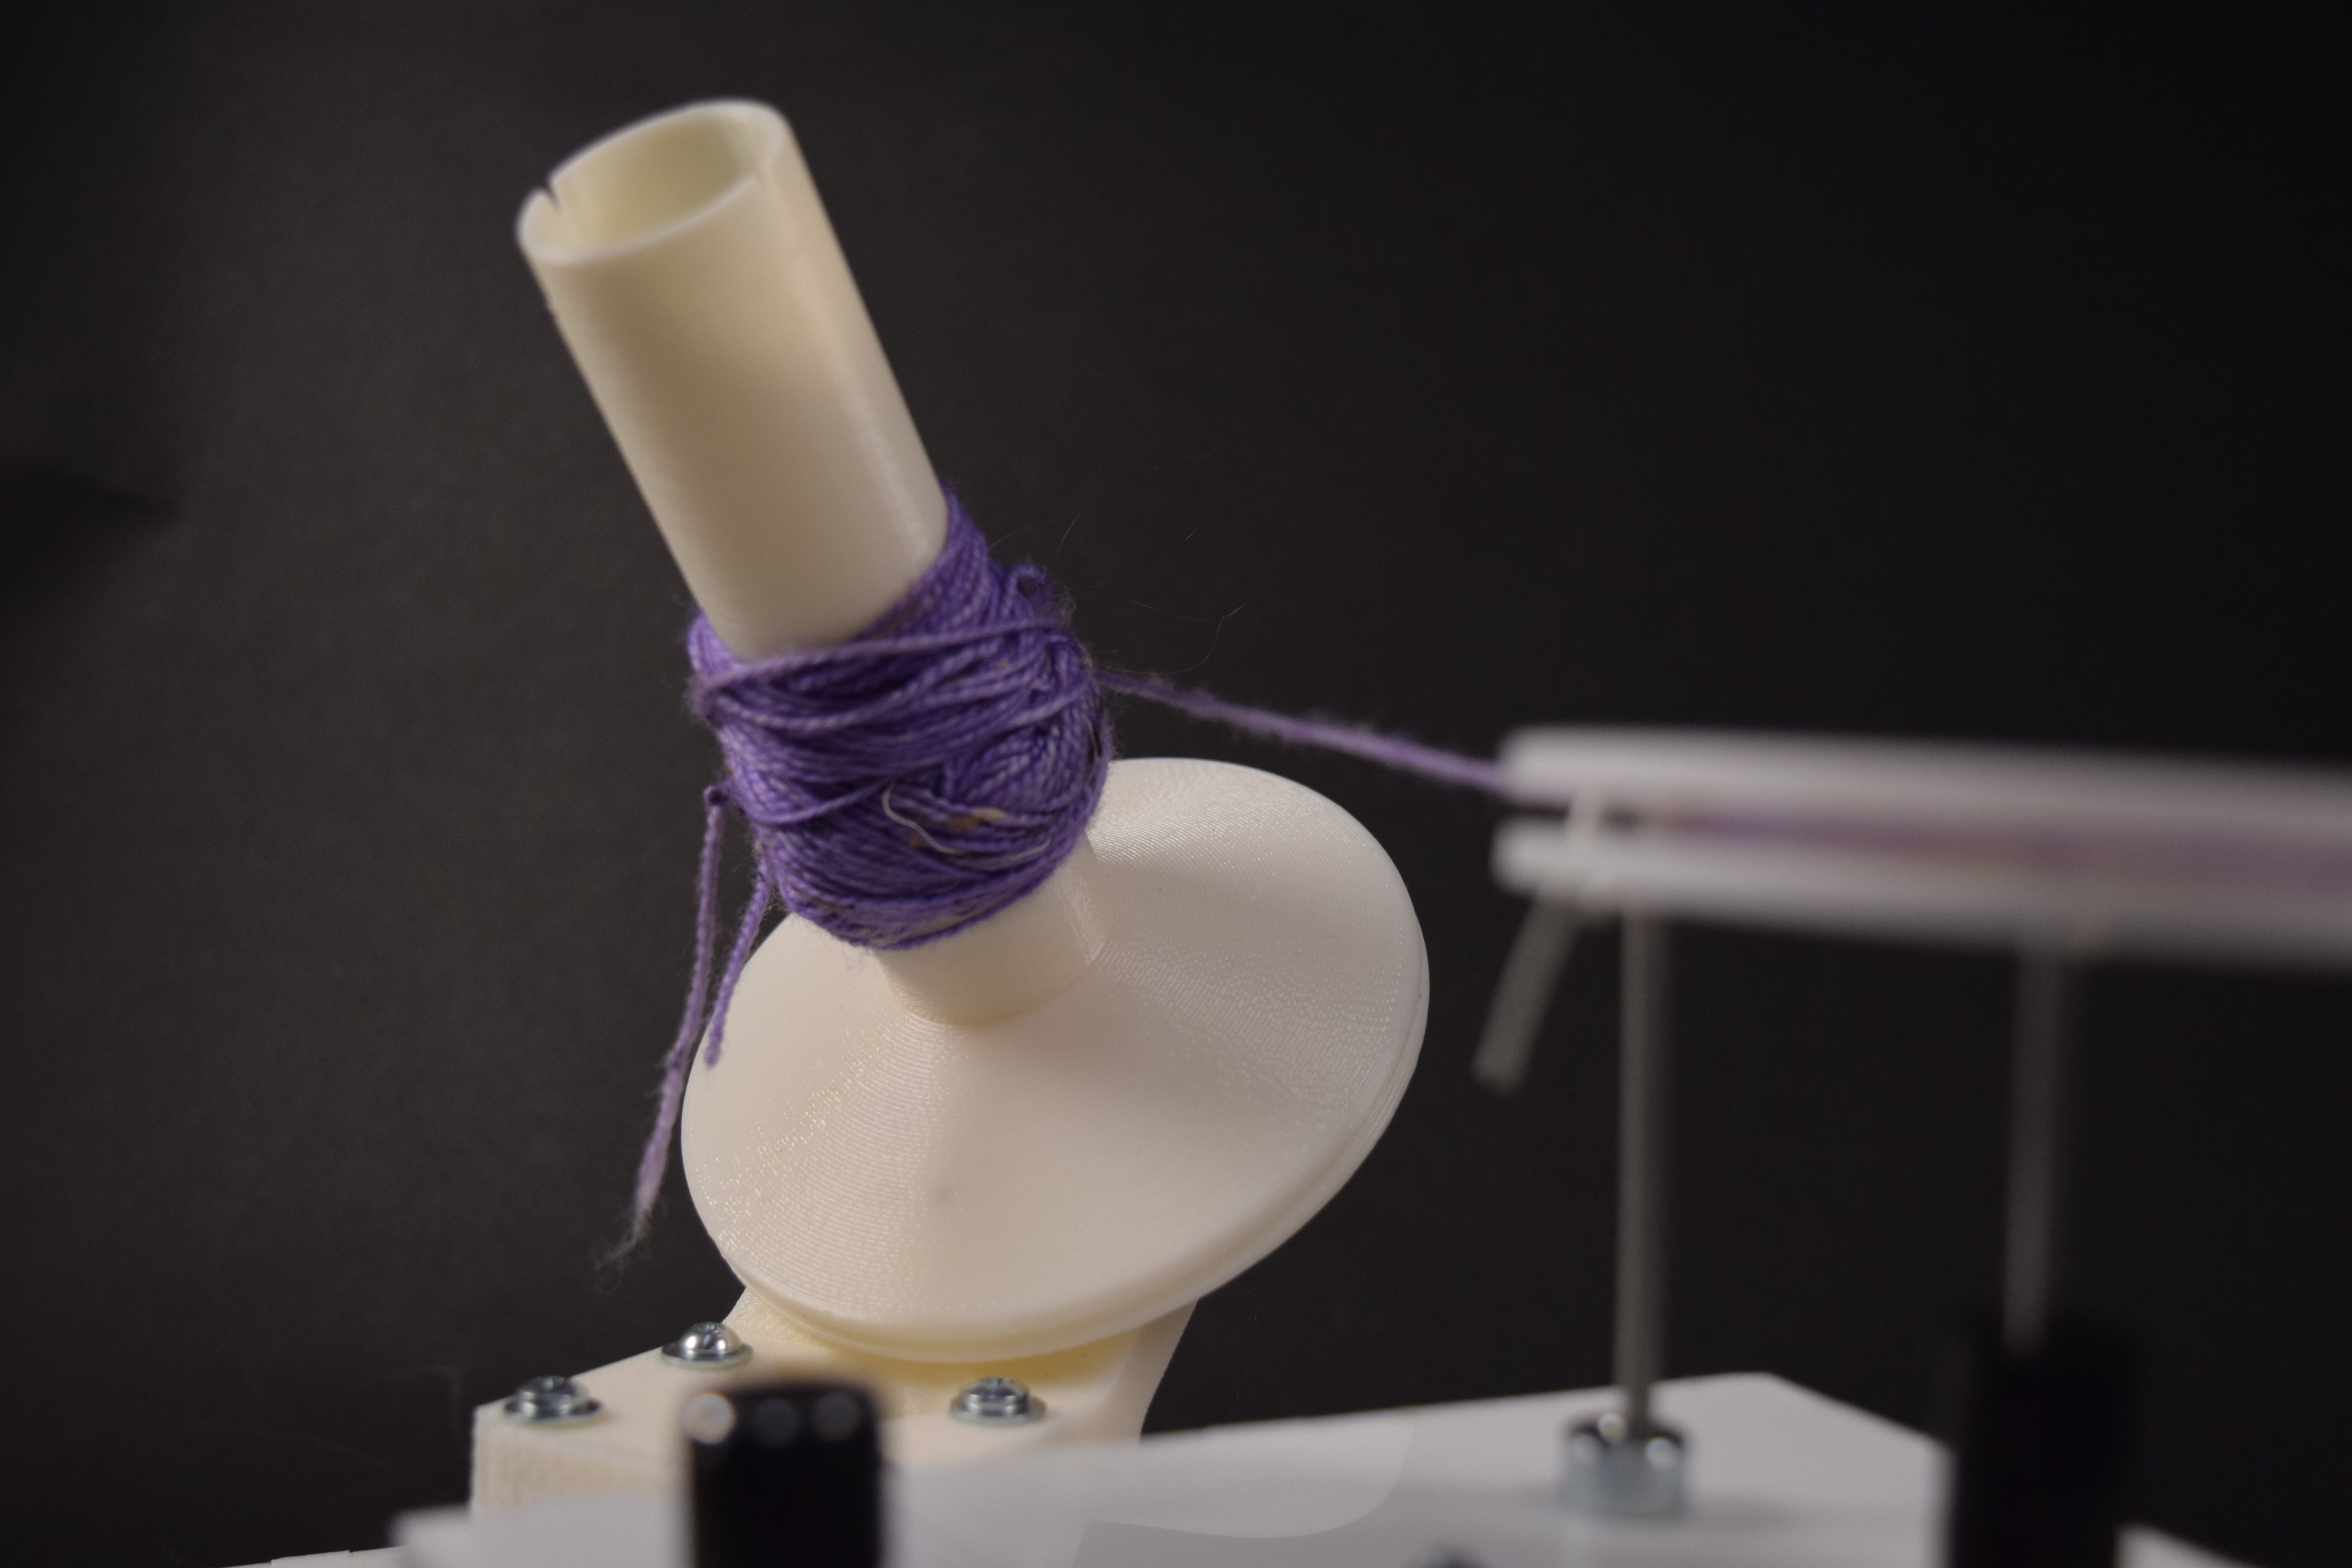
Details of Ball Holder
The Automatic Ball Winder is composed of three main components. First, the screen and buttons allow the user to interact with the device and input yards of yarn needed as well as emergency stop, reset, and continue buttons that let the user change his/her mind. Next is a distance encoder. The user feeds the yarn through metal feeder loops and around a disk. The disk measures distance by counting the number of rotations while the metal feeder loops keep the yarn at the right tension and height so it doesn’t fall off. When the user presses “start”, the motor that is attached to the yarn holder will spin, spinning both the encoder as well as winding yarn onto the holder. If the yarn falls off or encounters a knot, the device will automatically shut off to reduce error.
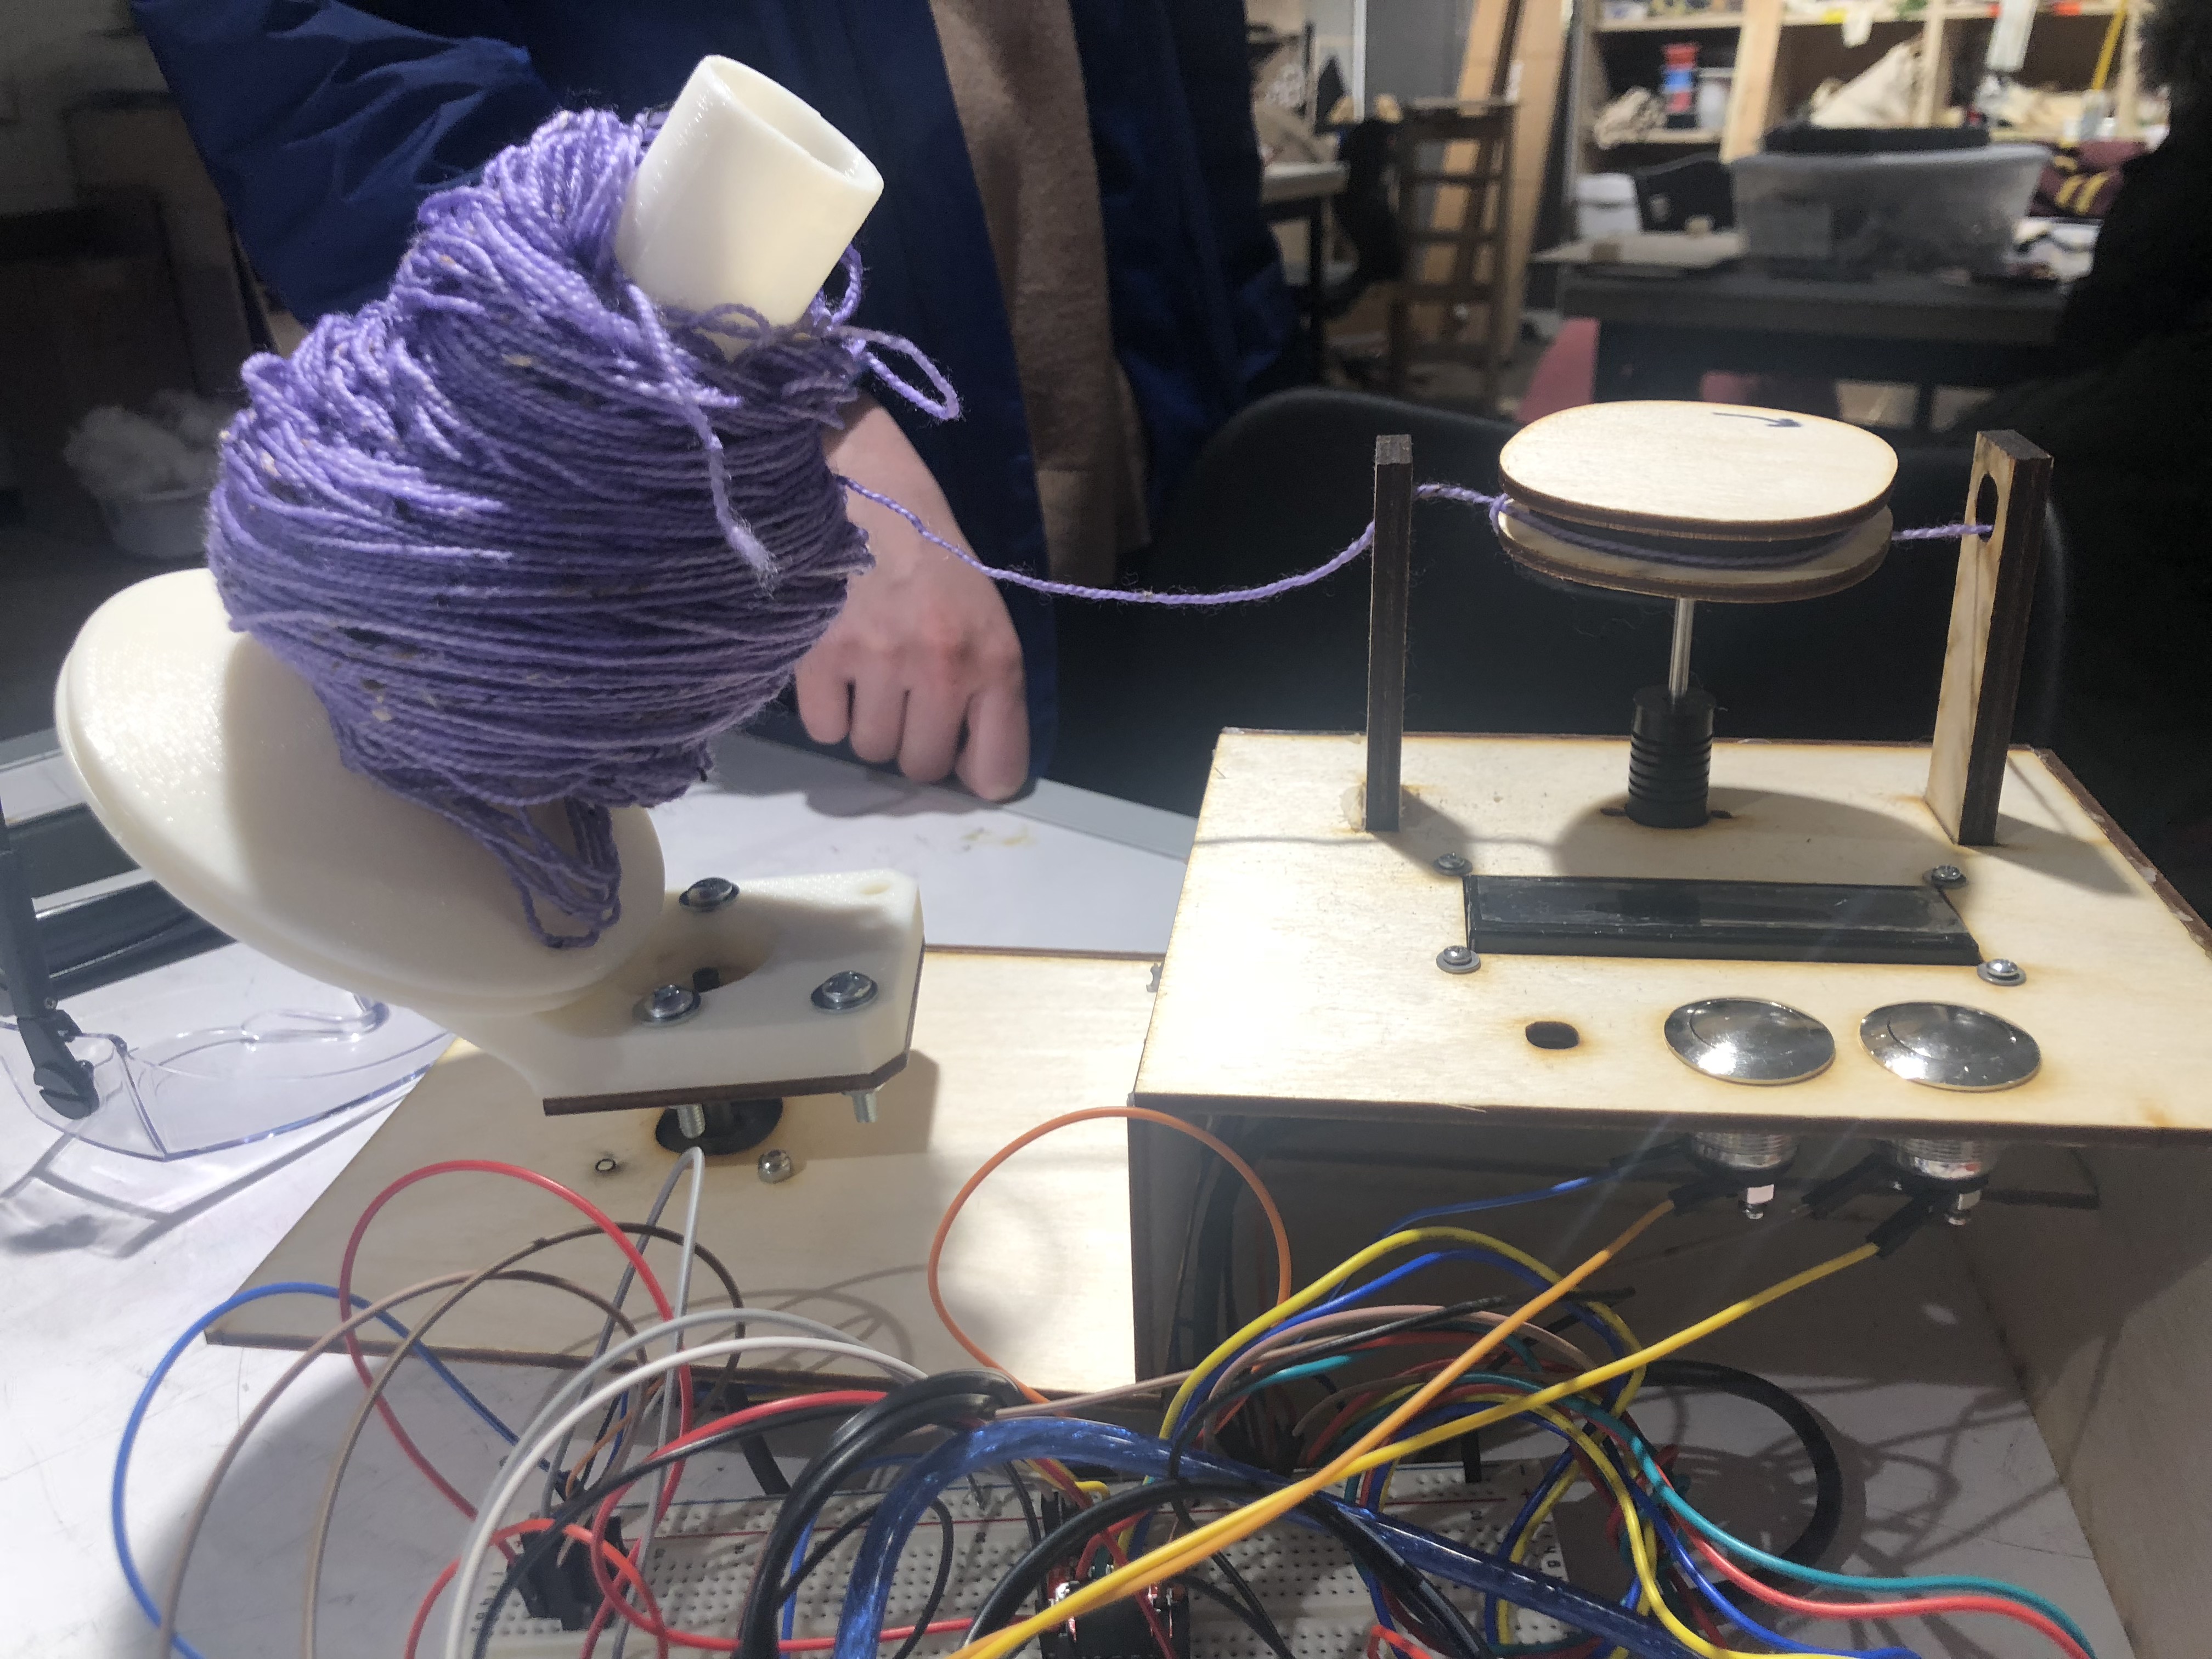
Ball Winder in Action with Yarn Umbrella.
Imagine Rebecca wants to start a new weaving project, but her hands are hurting too much to use the manual ballwinder, and since she’s working with silk she can’t afford to ball up too much more than what is necessary. She goes to her Automatic Ballwinder, and presses the “reset” button, which makes it say “Welcome Rebecca”, and “Yarn to wind:”. She turns the knob until she gets to the desired amount to wind, presses start, and goes to make herself some tea.
After about 15 minutes, she comes back and sees that the ballwinder is done, and she screws off the top so she can use the yarn there. She still needs some more for another project, so she prepares another skein and heads off to start her project.
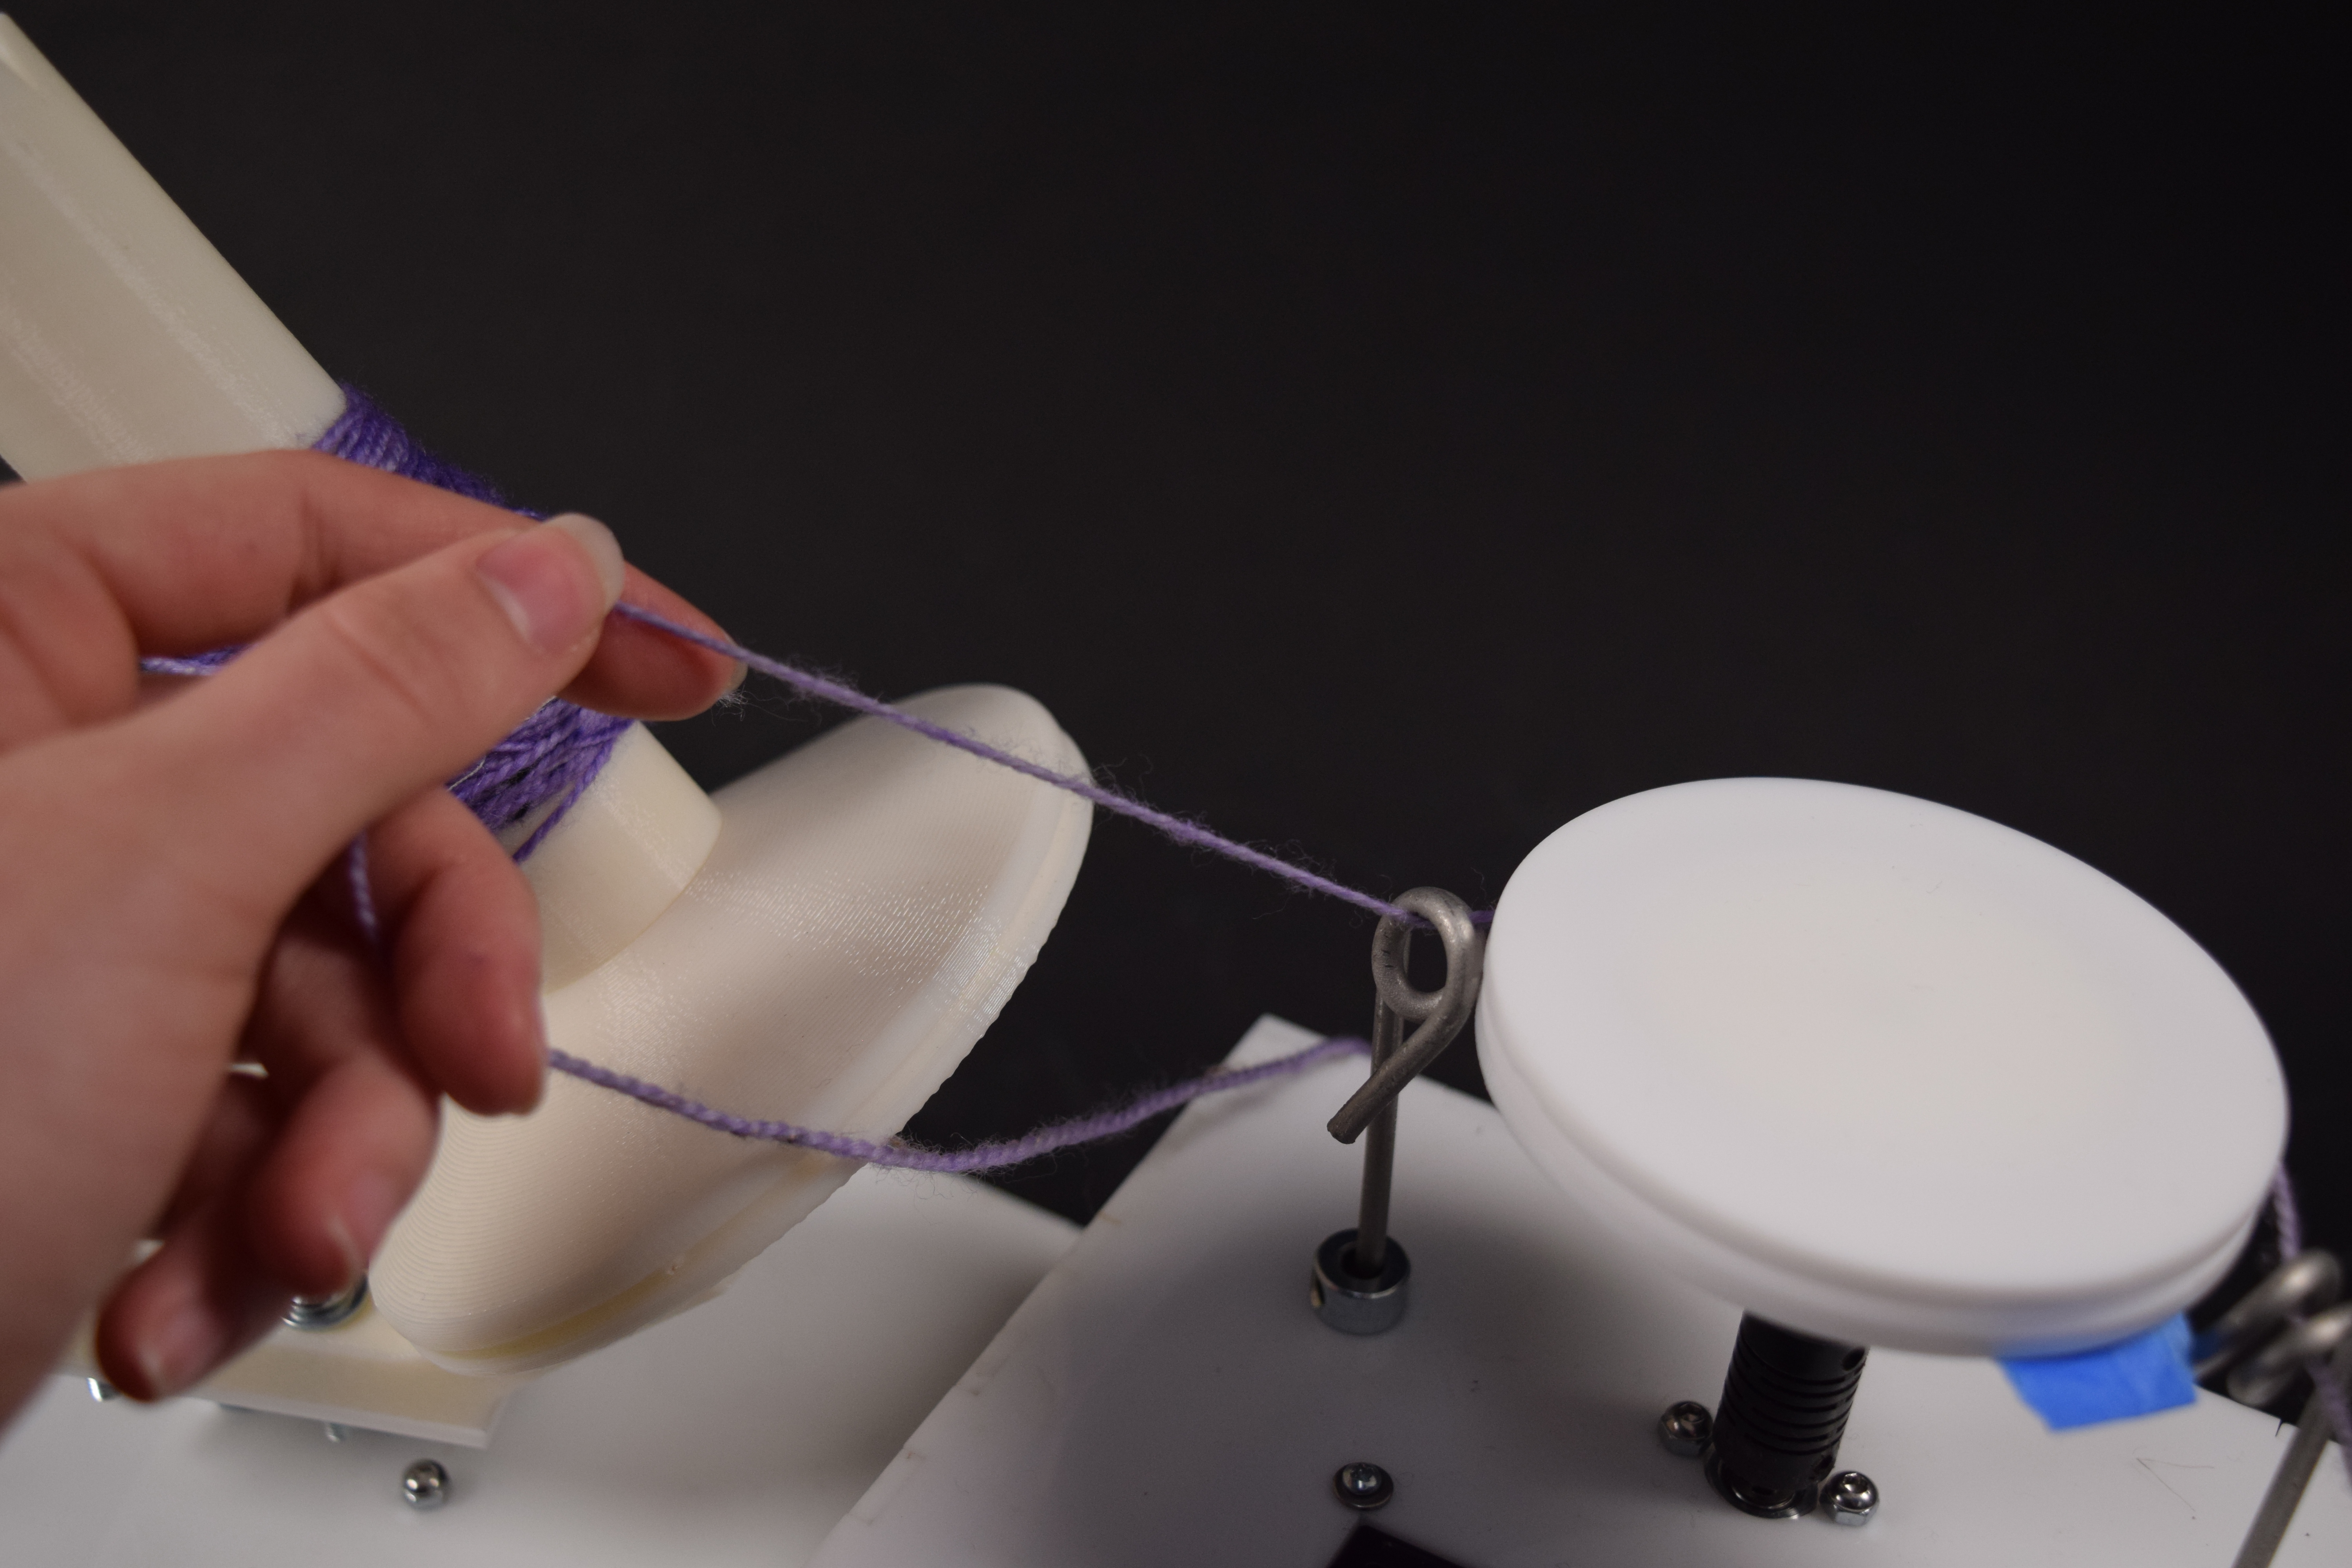
Threading Yarn Through Distance Encoder
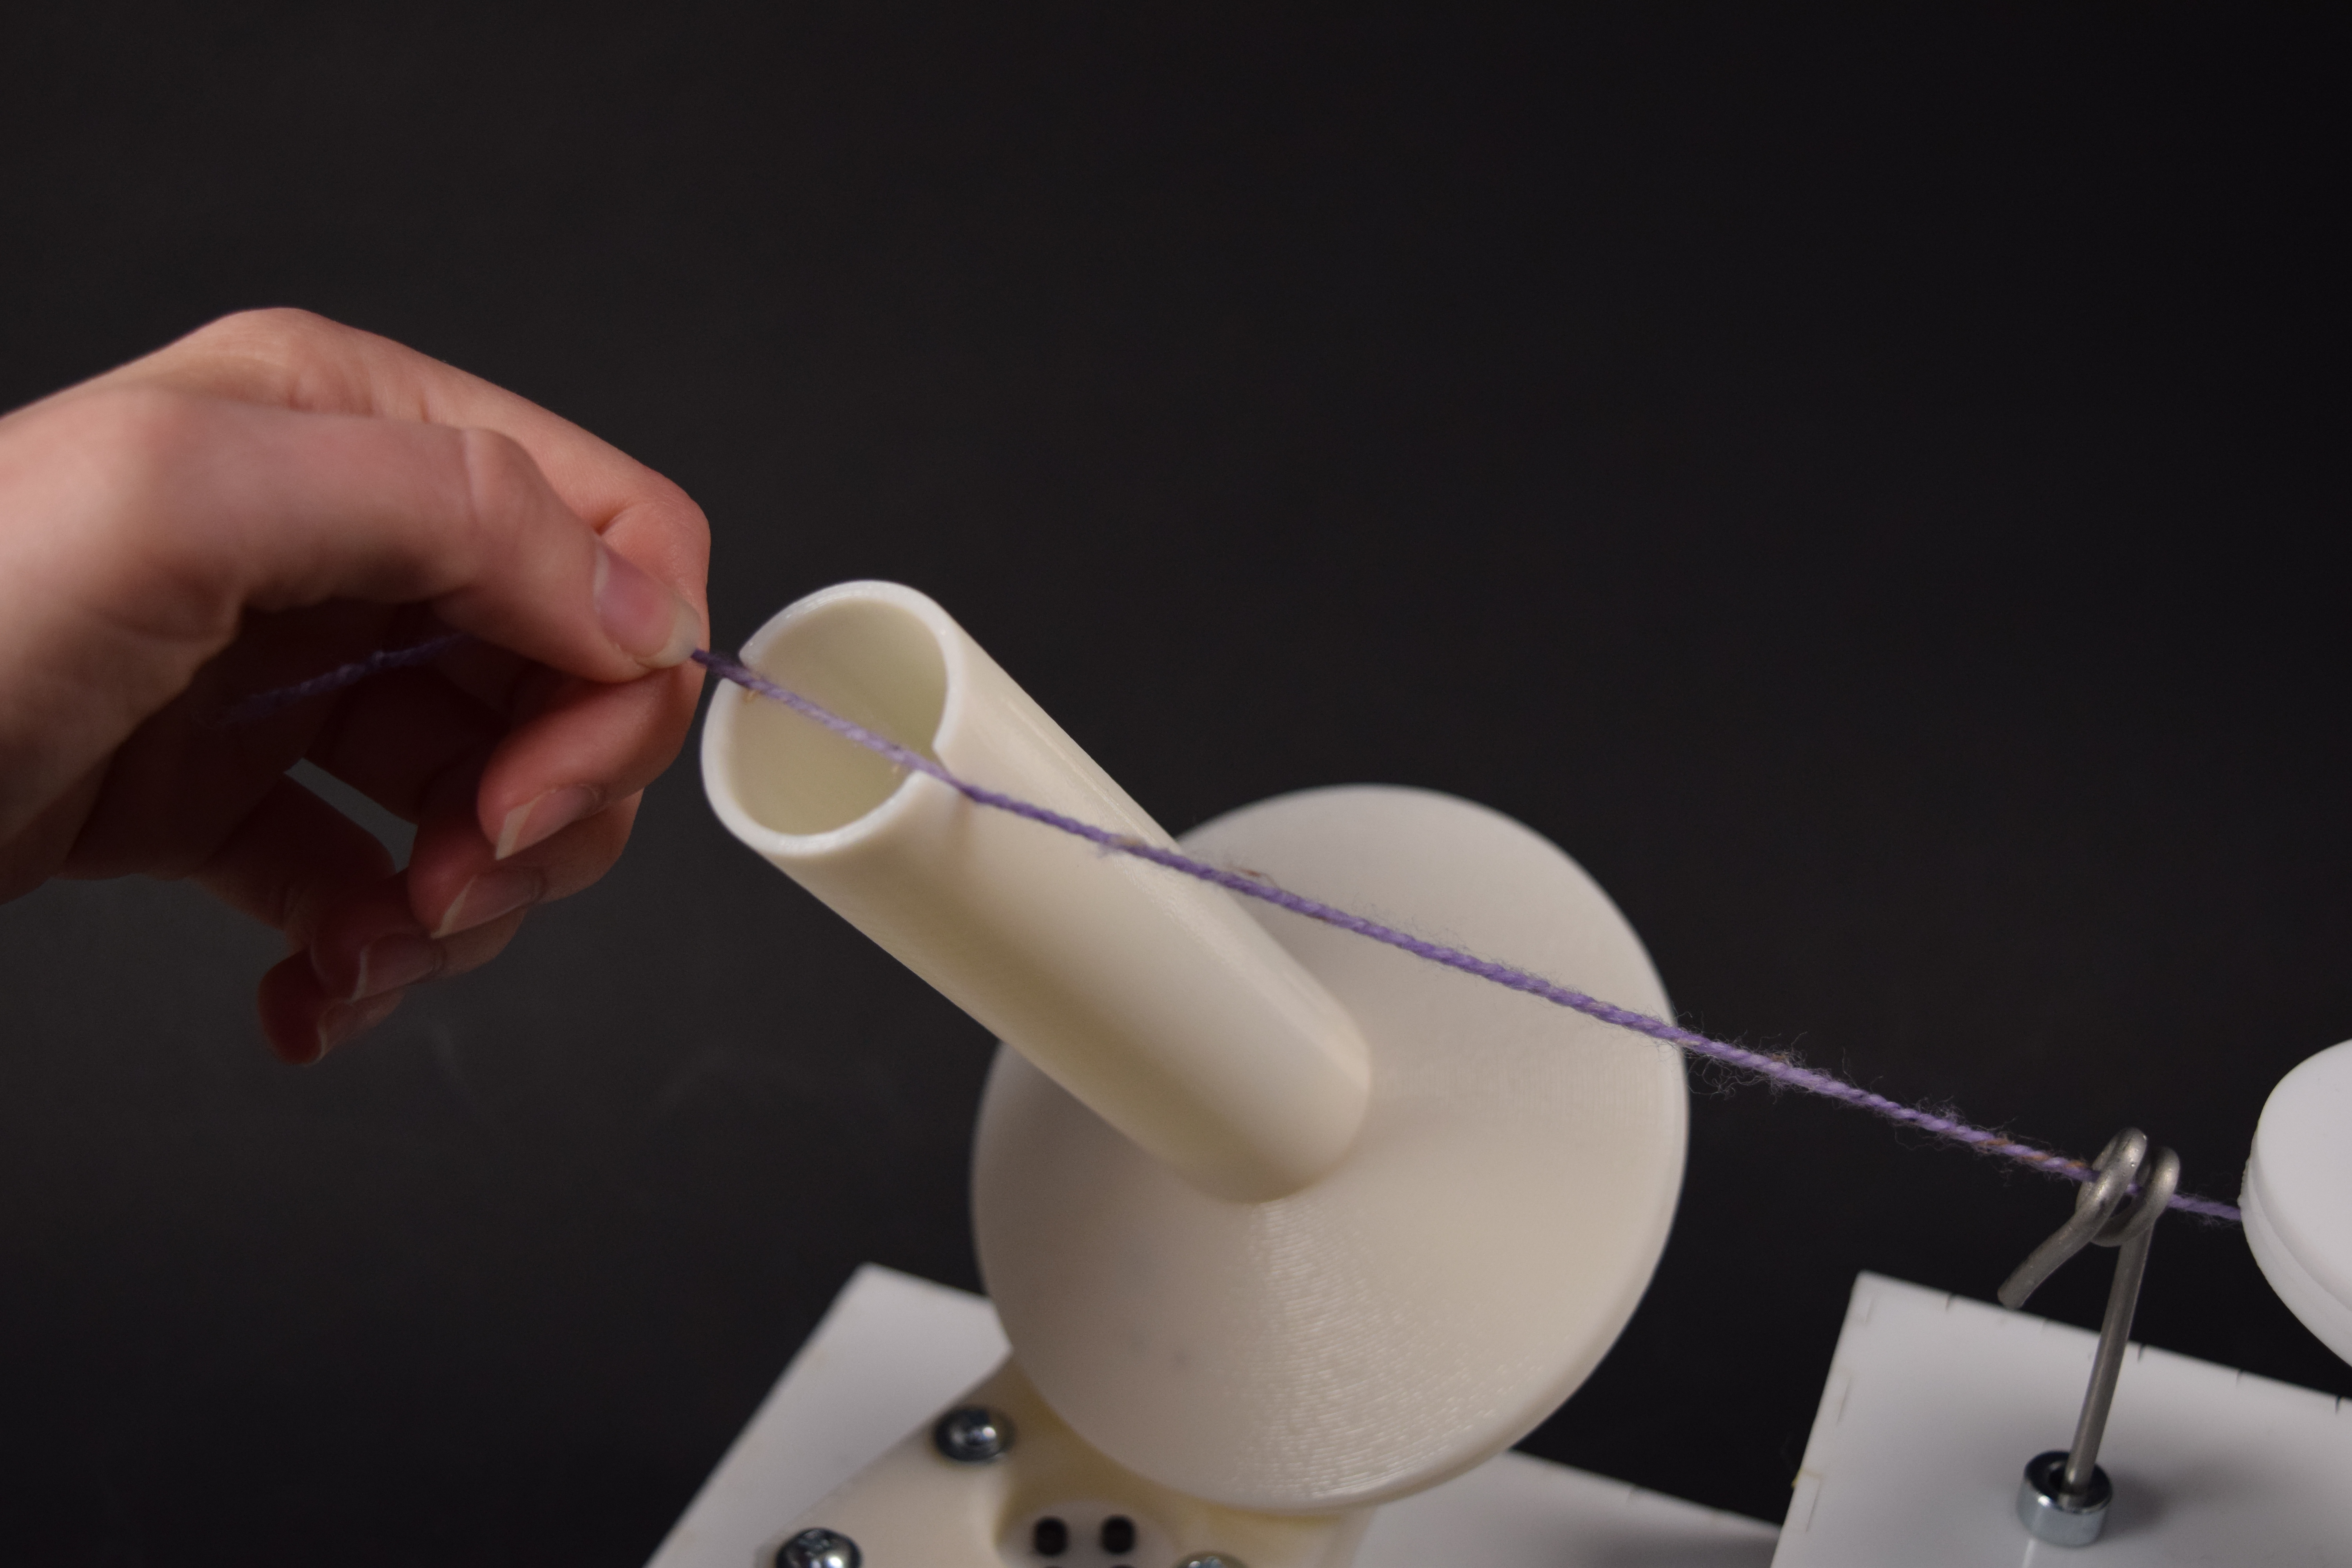
Putting String onto Ball Holder
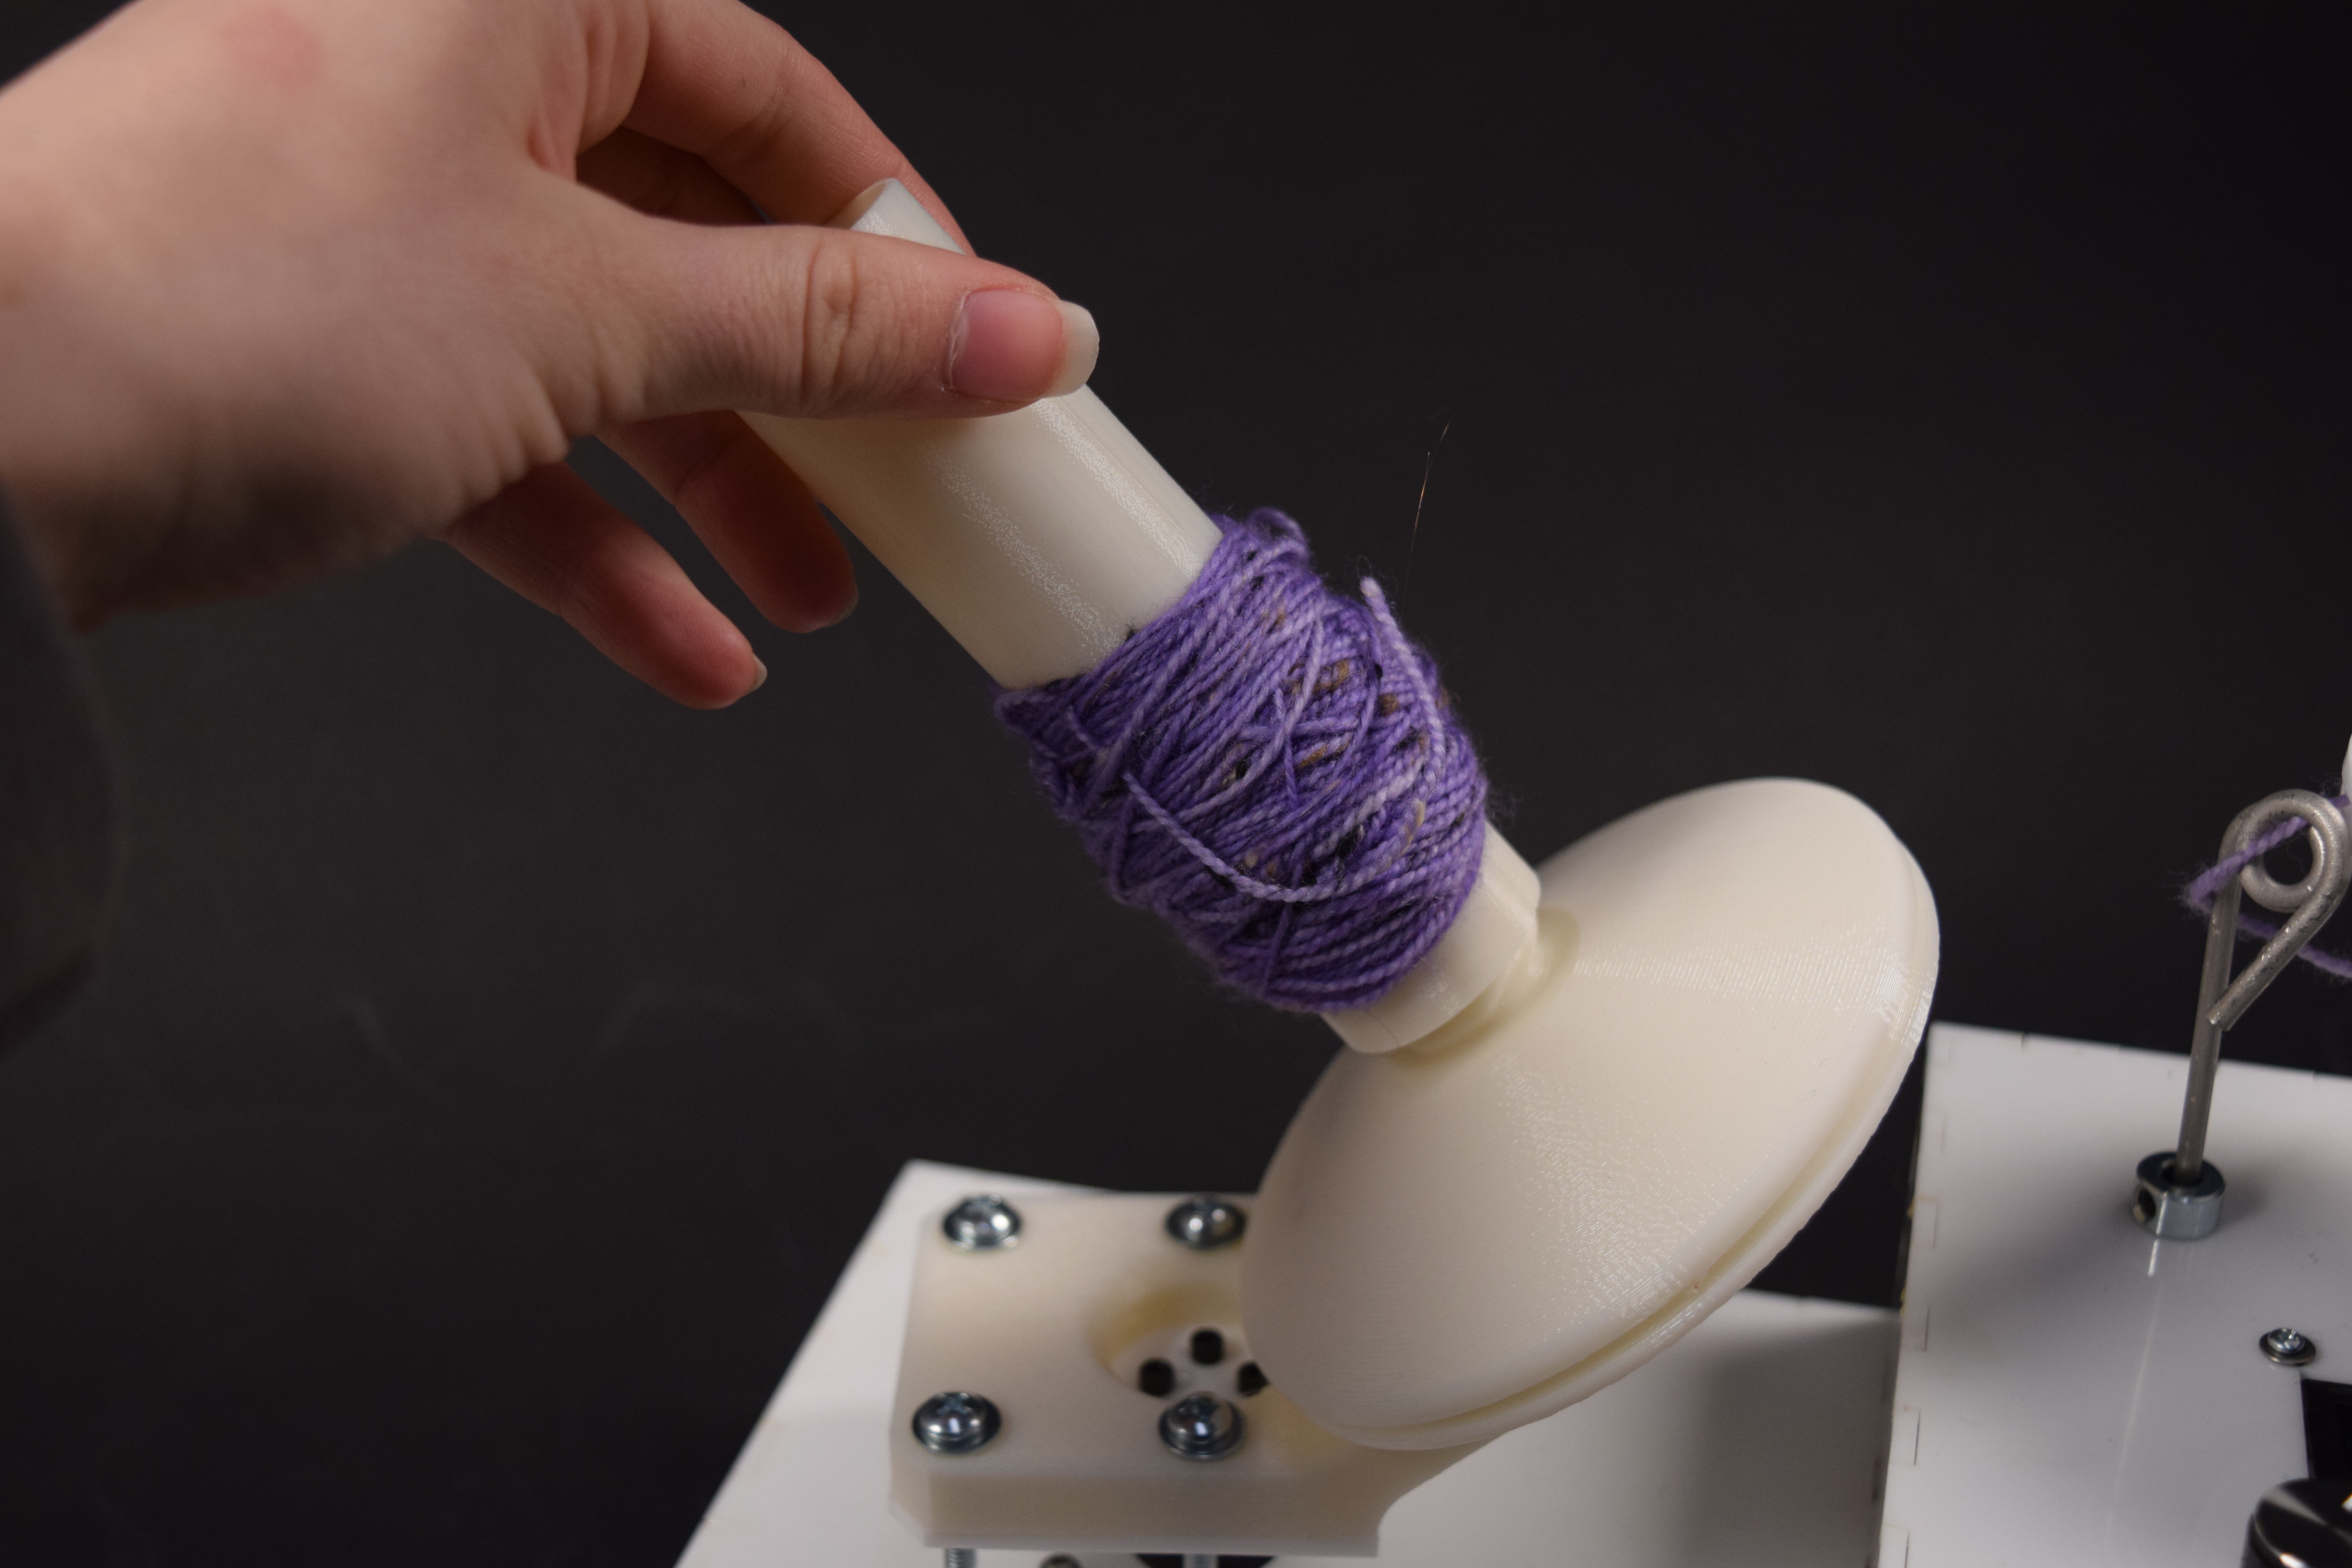
Unscrewing Ball Holder
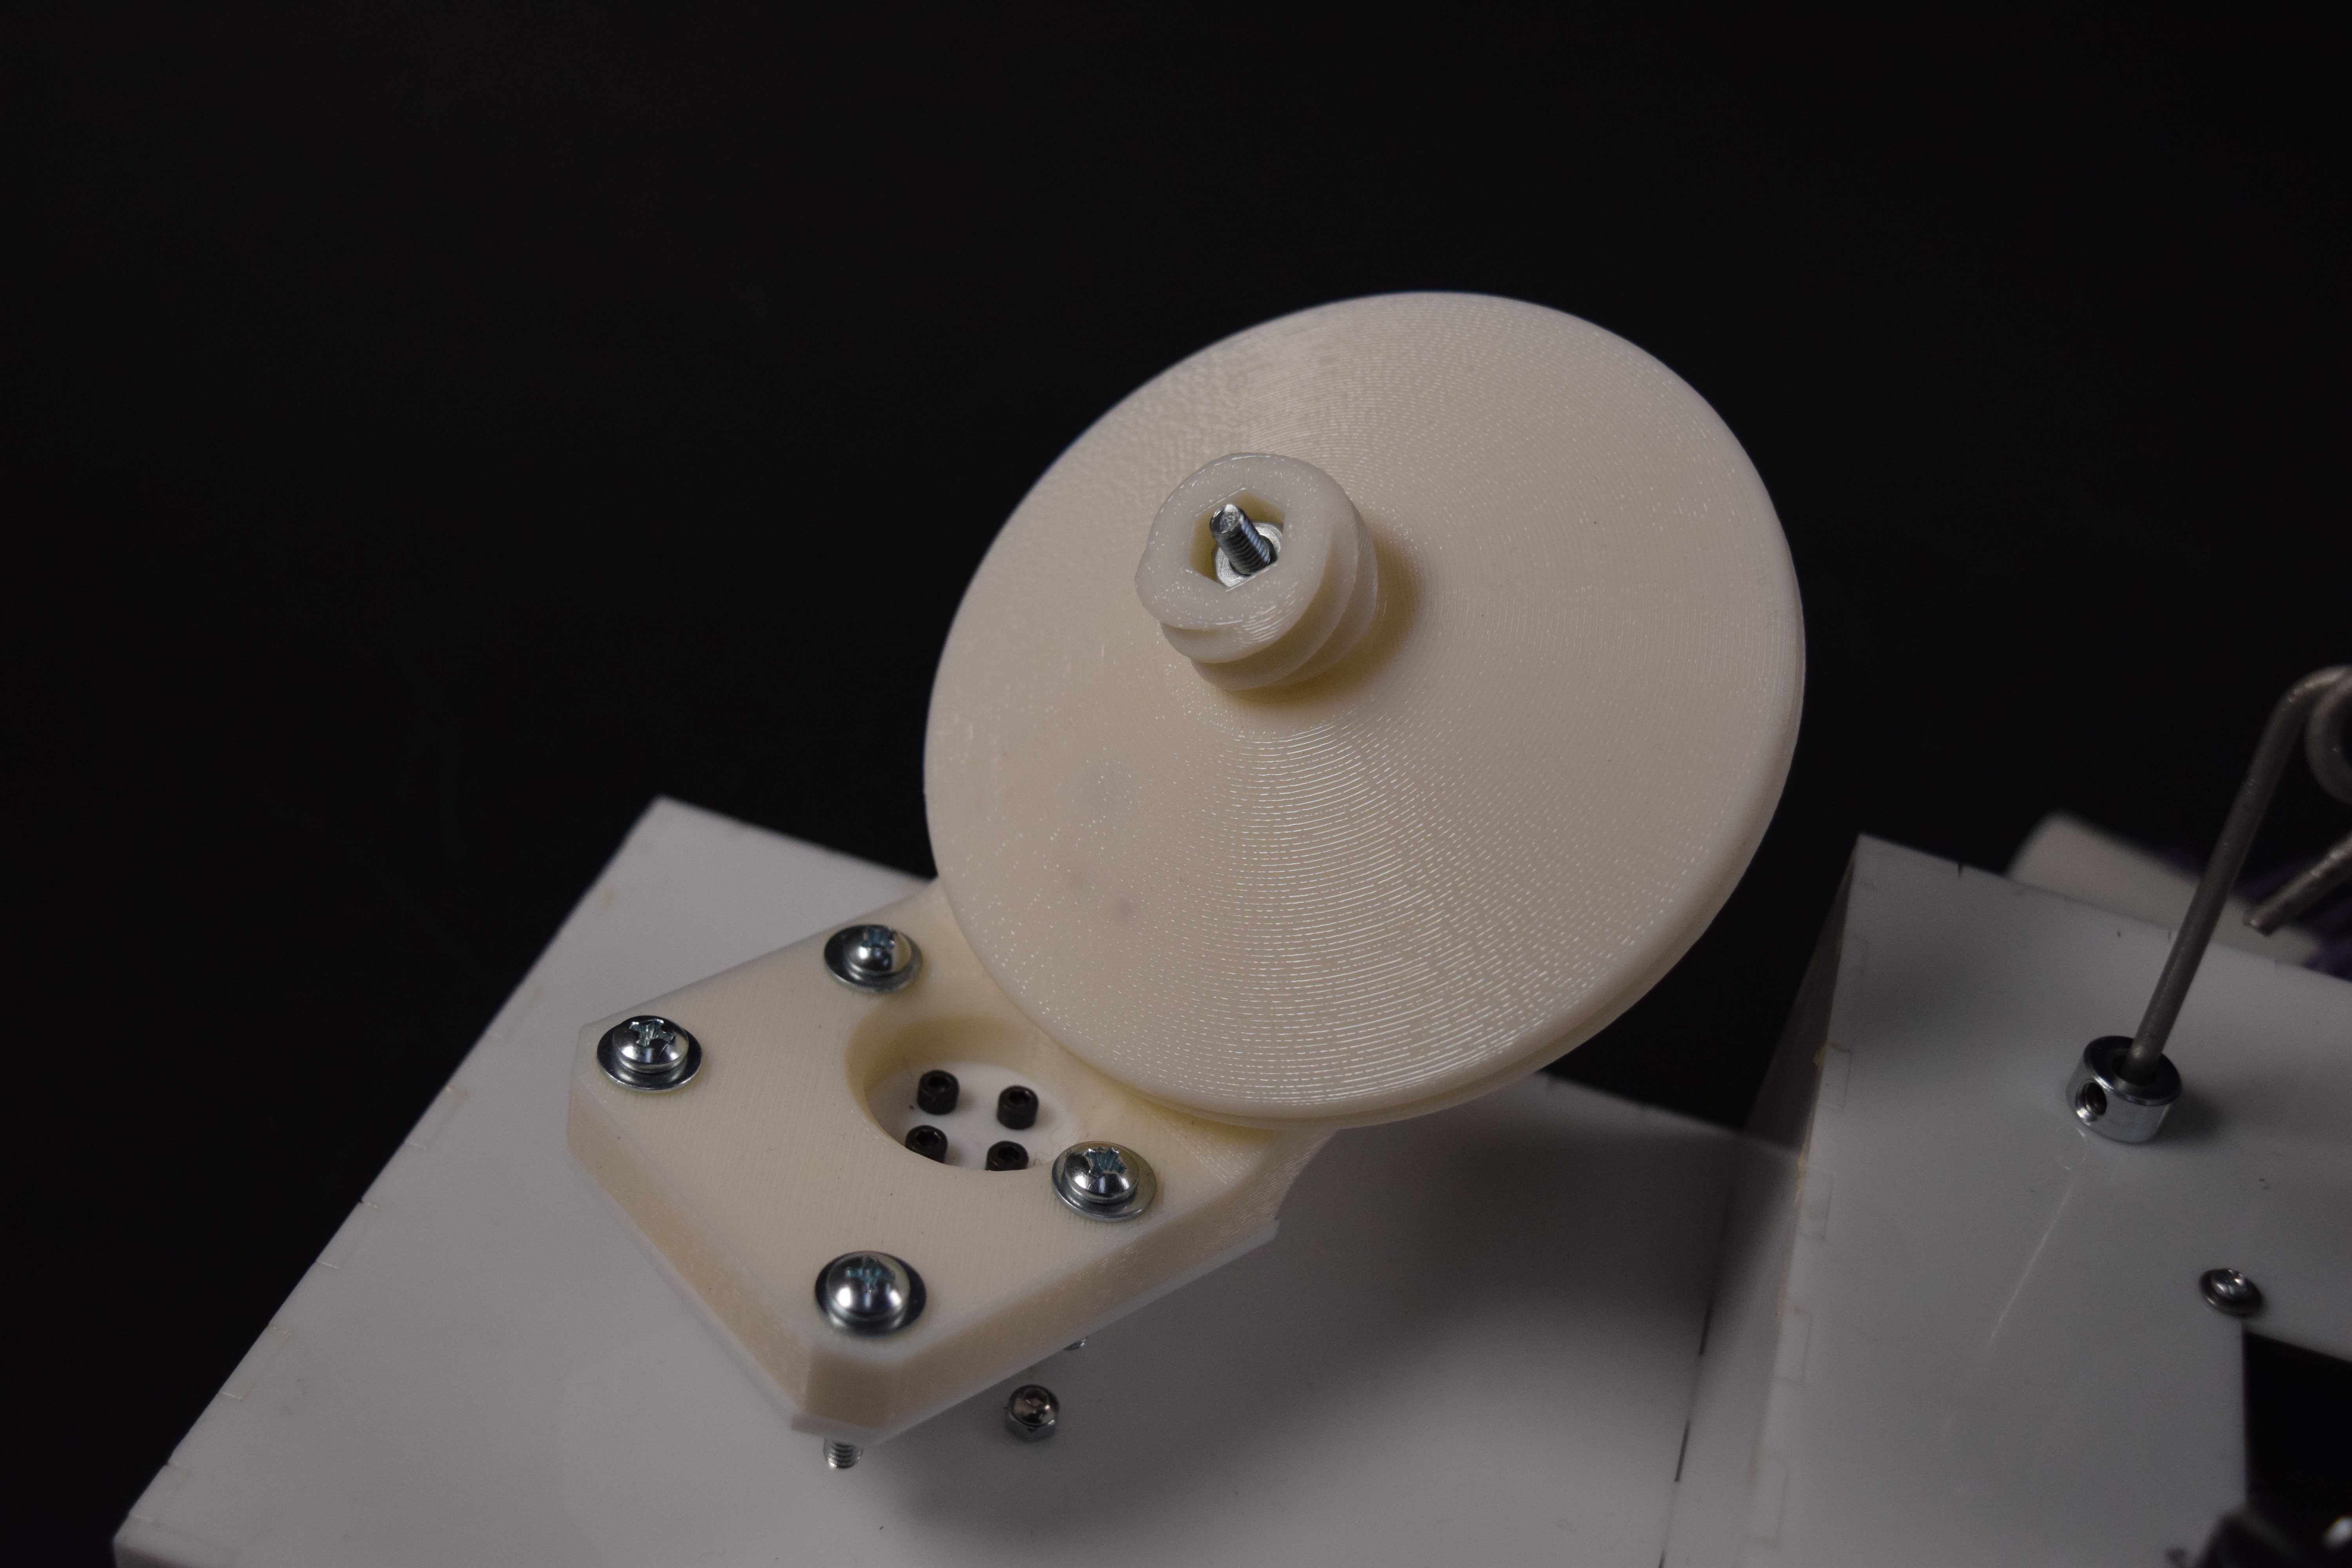
Ball Holder Unscrewed
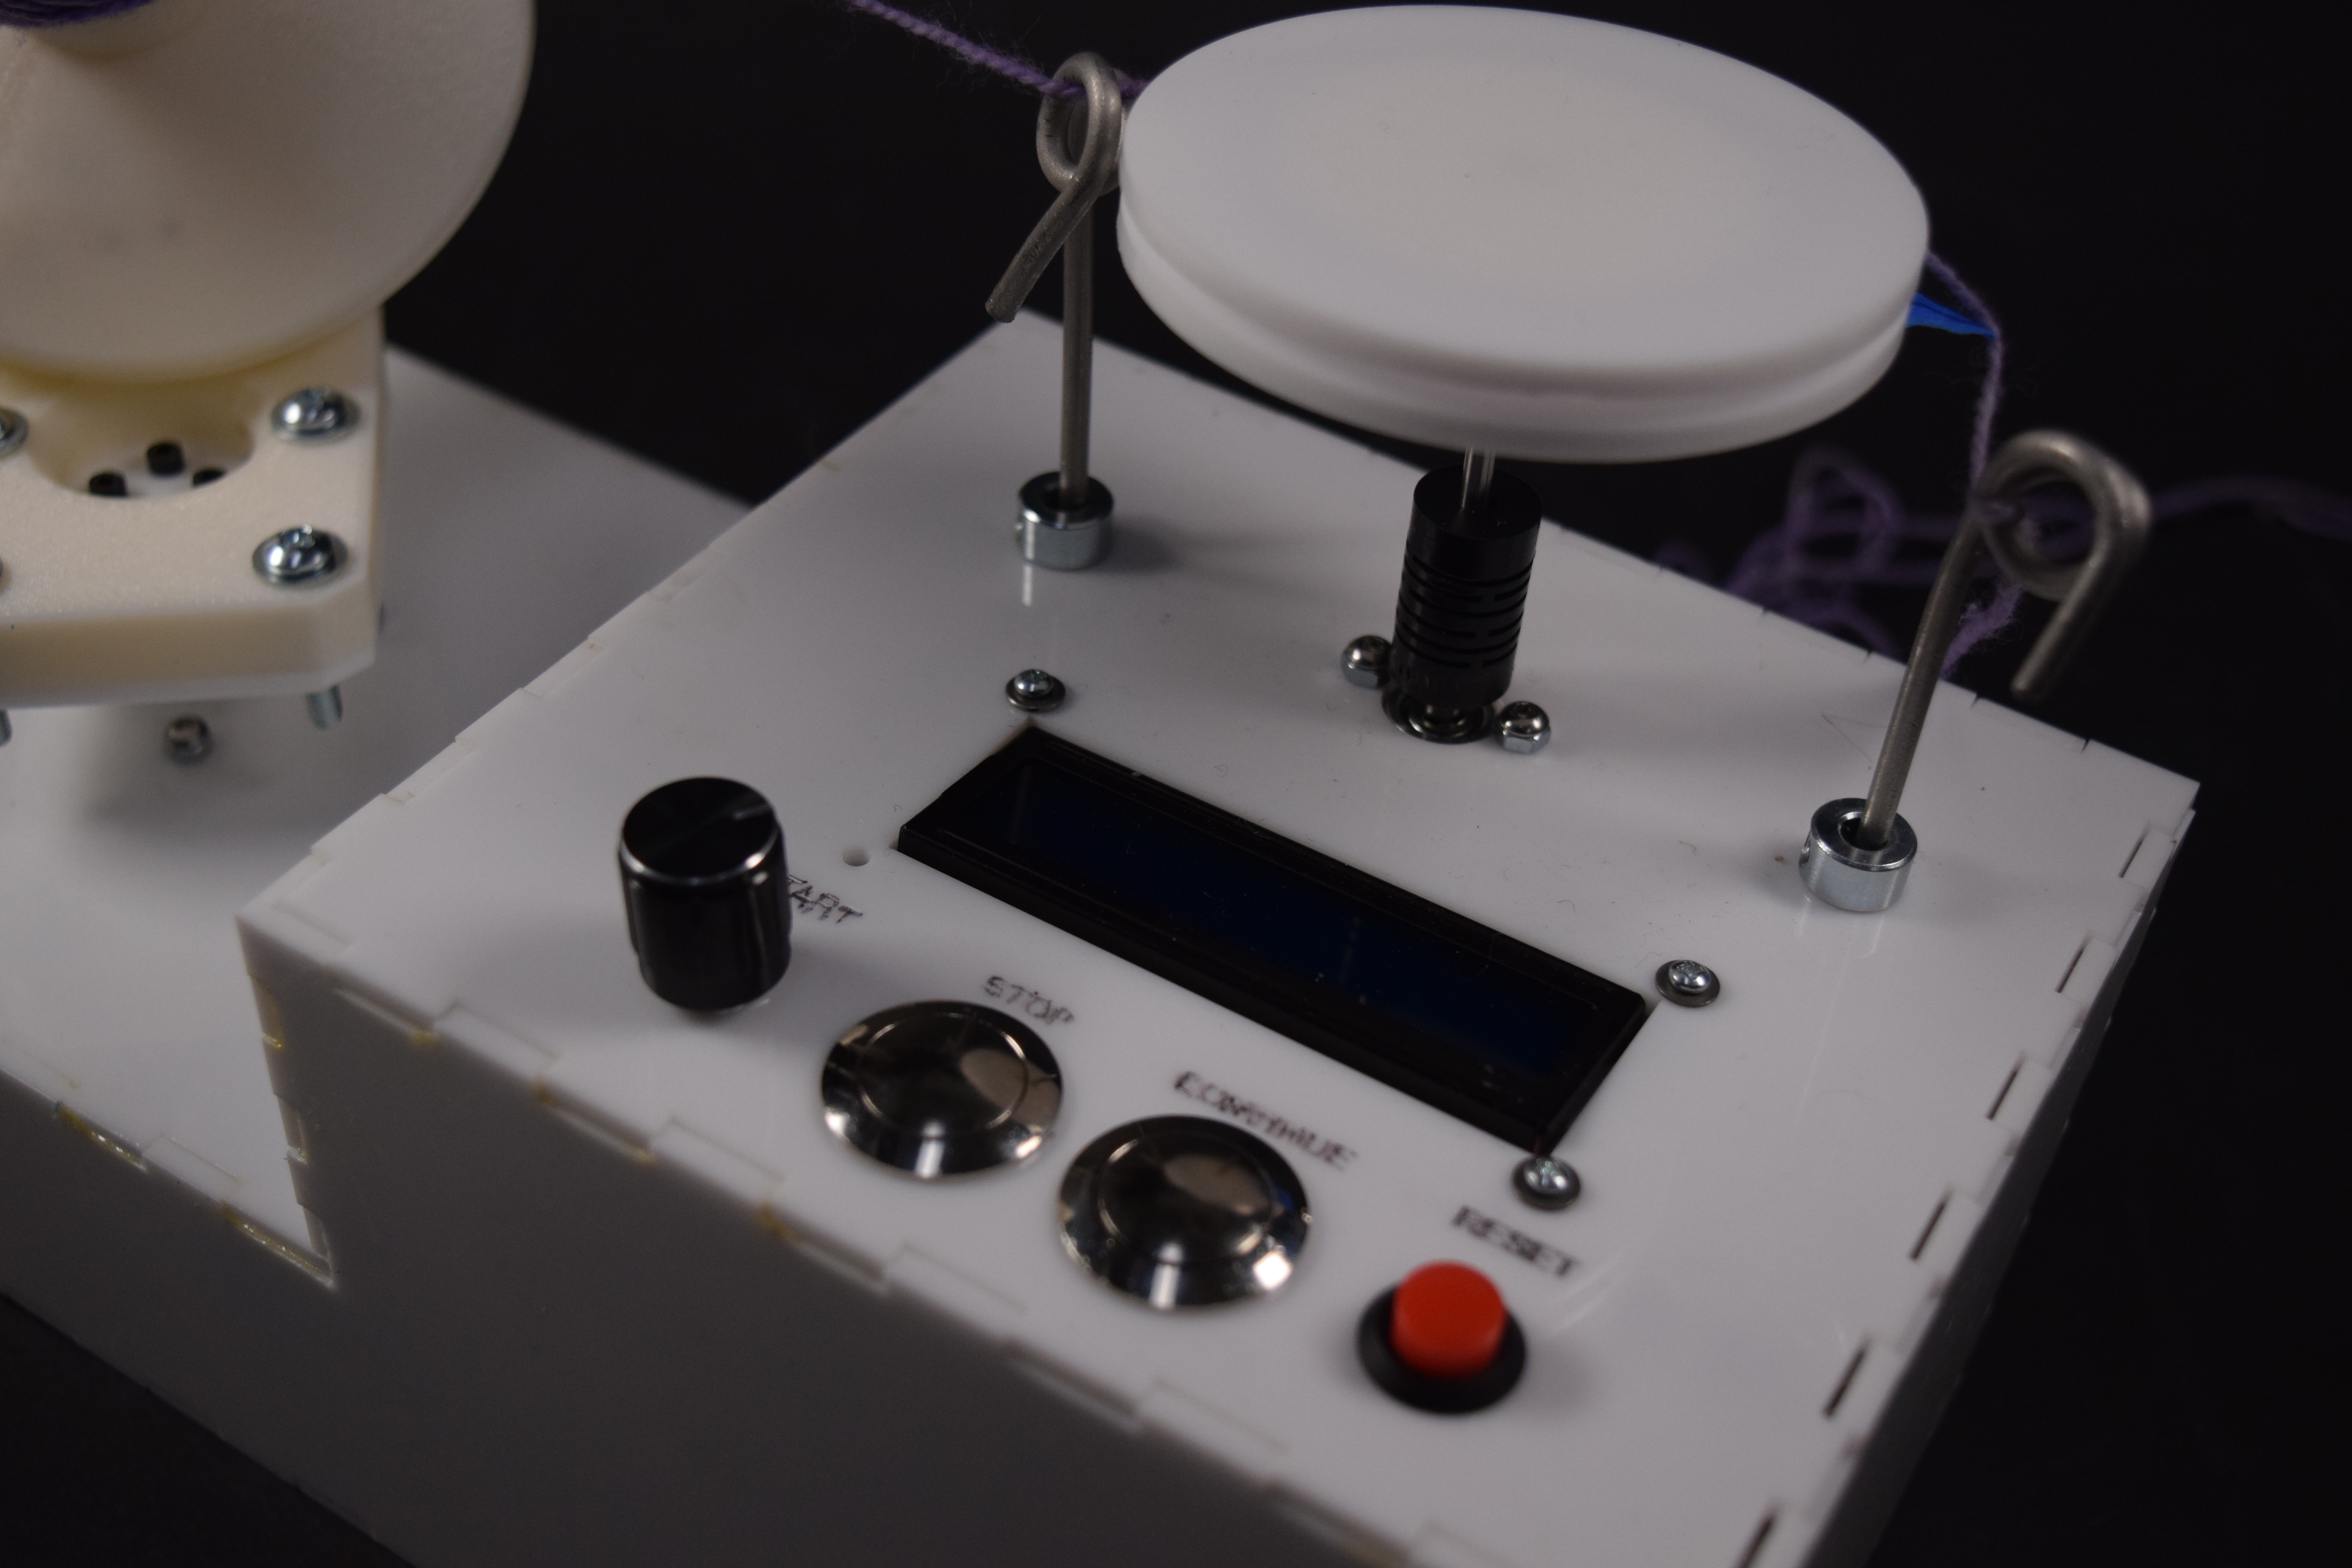
Details of Distance Encoder and Buttons
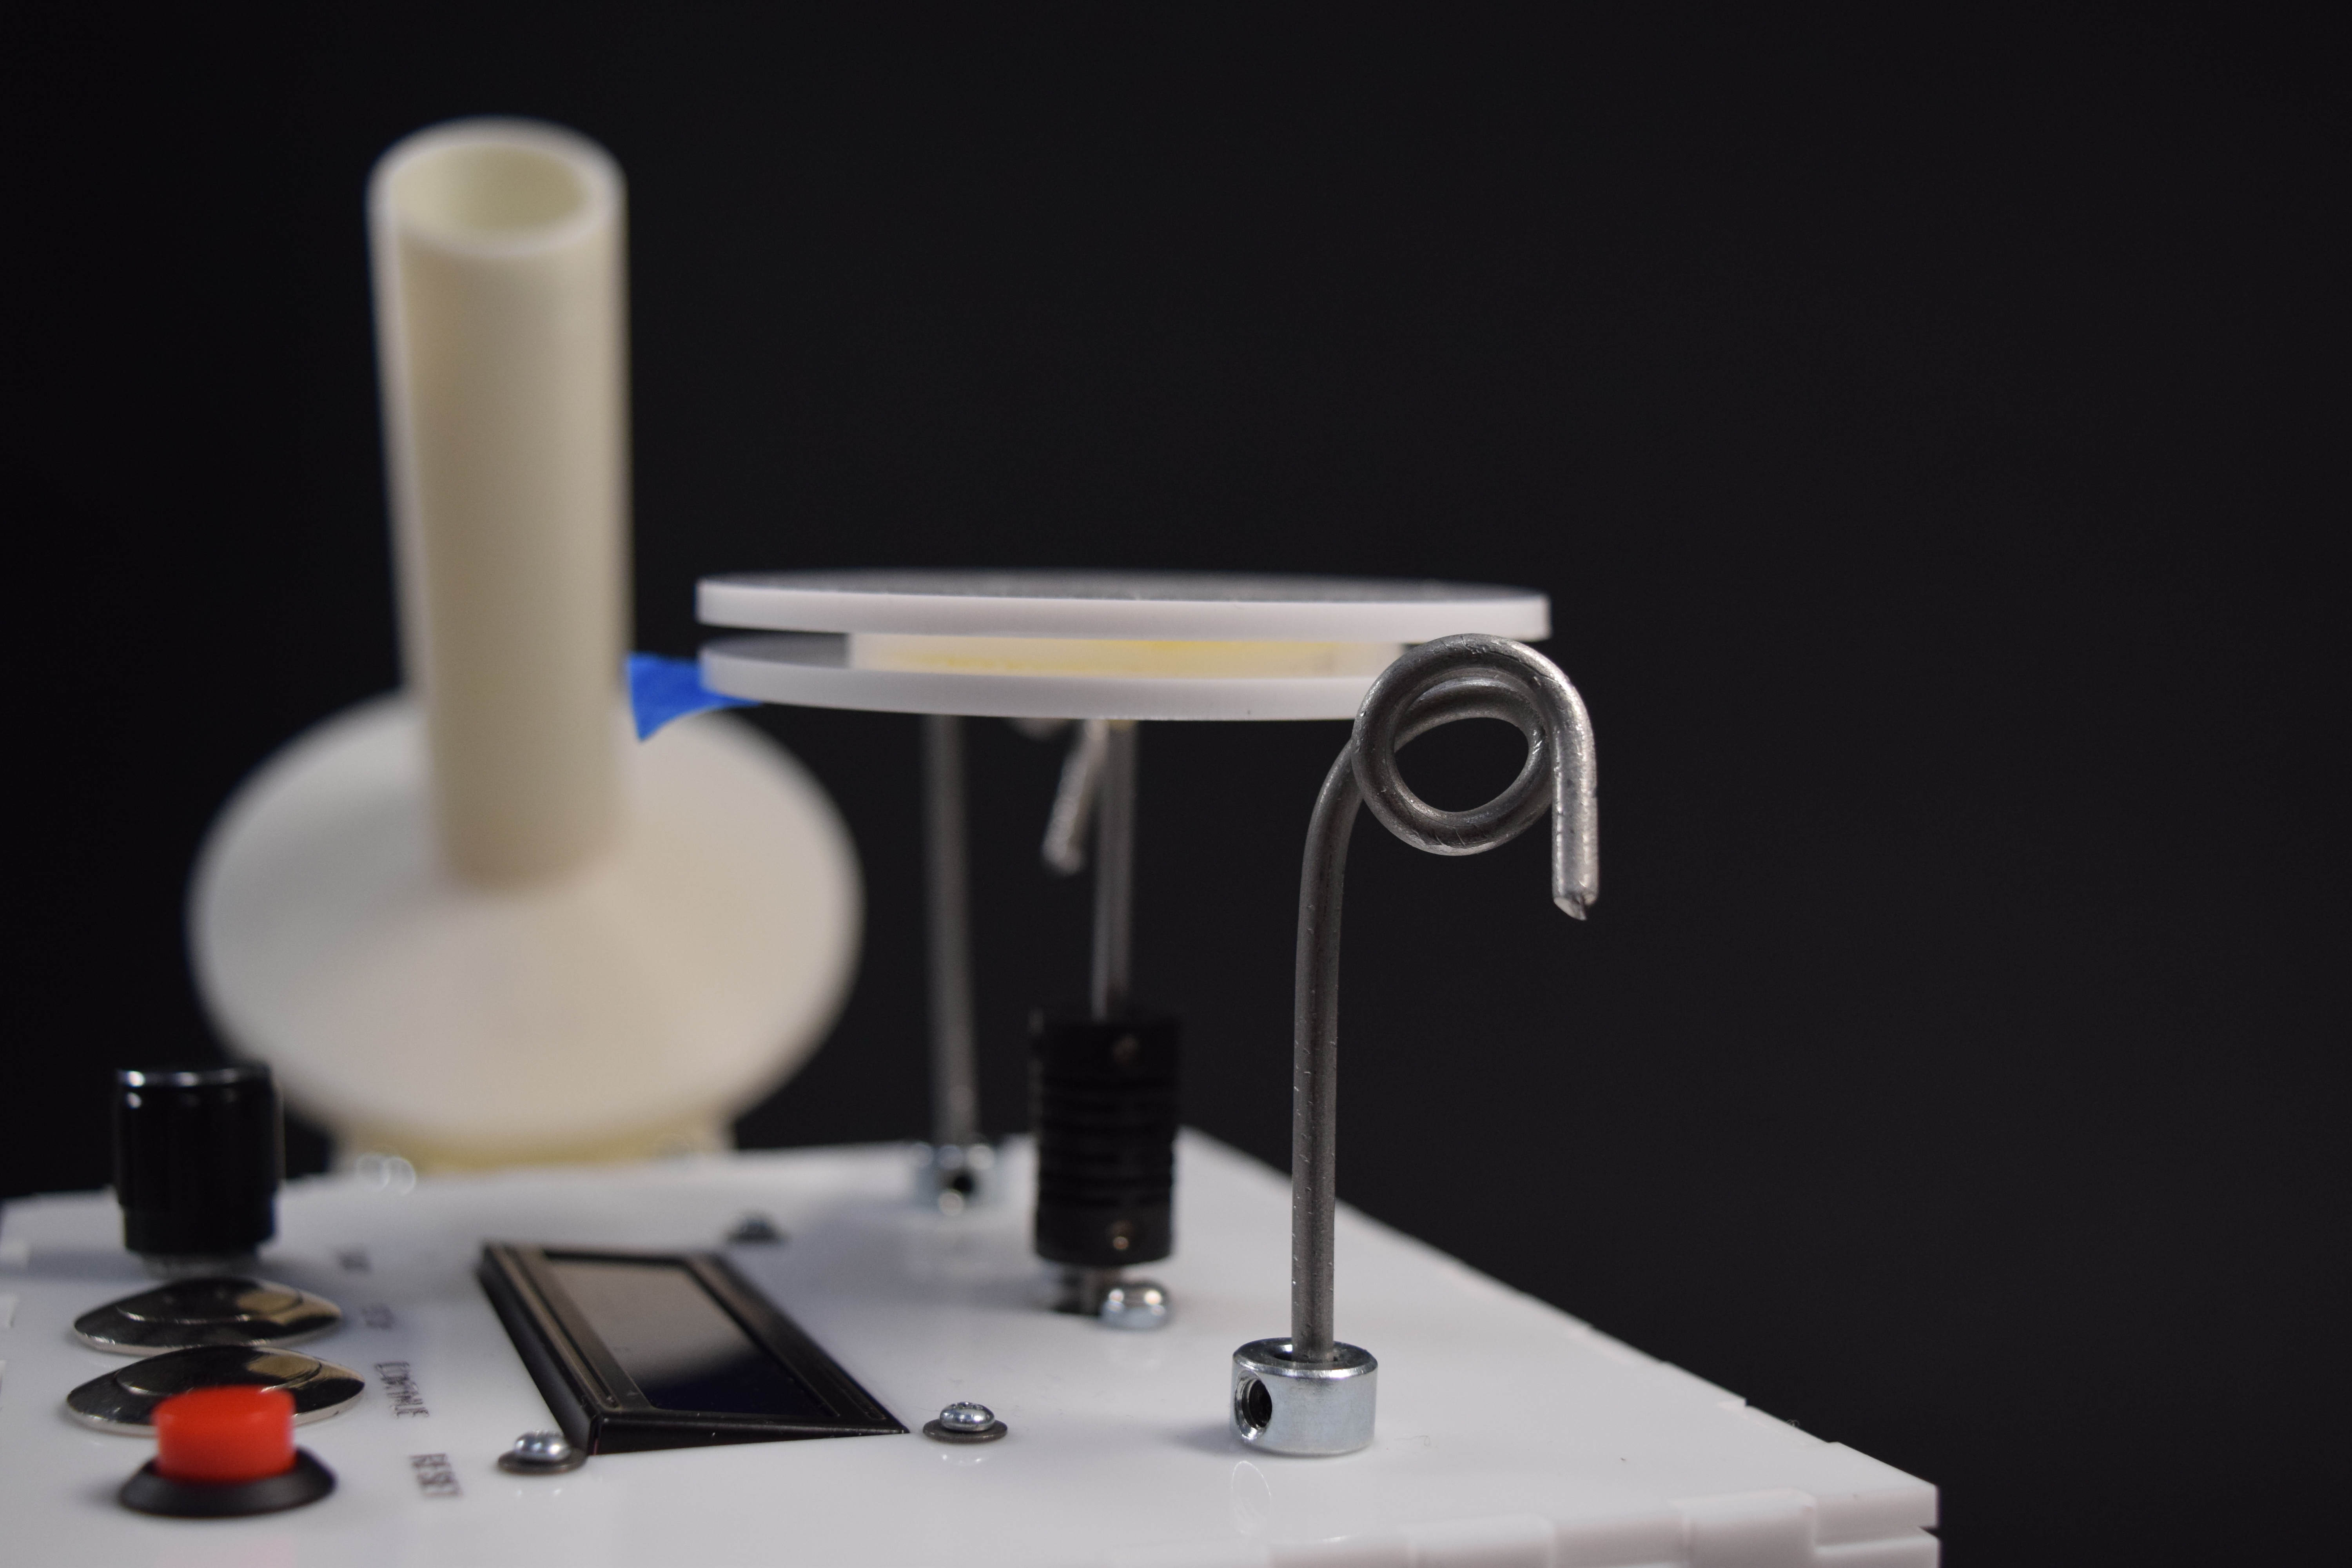
Wire Thread Feeders
How We Got Here
During the initial meeting with Rebecca, it was clear that she loved to weave. She vocalized how strongly she disliked the ball winding process and how commercial ball winders were upwards of 300 dollars. Since that meeting, Team Weavers decided the product that would best fit her lifestyle would be an automatic ball winder that would tell her distance of yarn wound and save her wrists from carpal tunnel.
Initially, the main thing that we focused on was the criss-cross yarn pattern that the handheld ballwinder created. With the winding method of the motor, the pattern was mostly parallel. After a few days, we decided and Rebecca assured us that the yarn pattern was not as important as the distance encoding and the automatic function of the winding. At the end of the project, we found that consistent tension in the yarn and speed without erratic stop and start would create a decent yarn pattern that would not entangle.
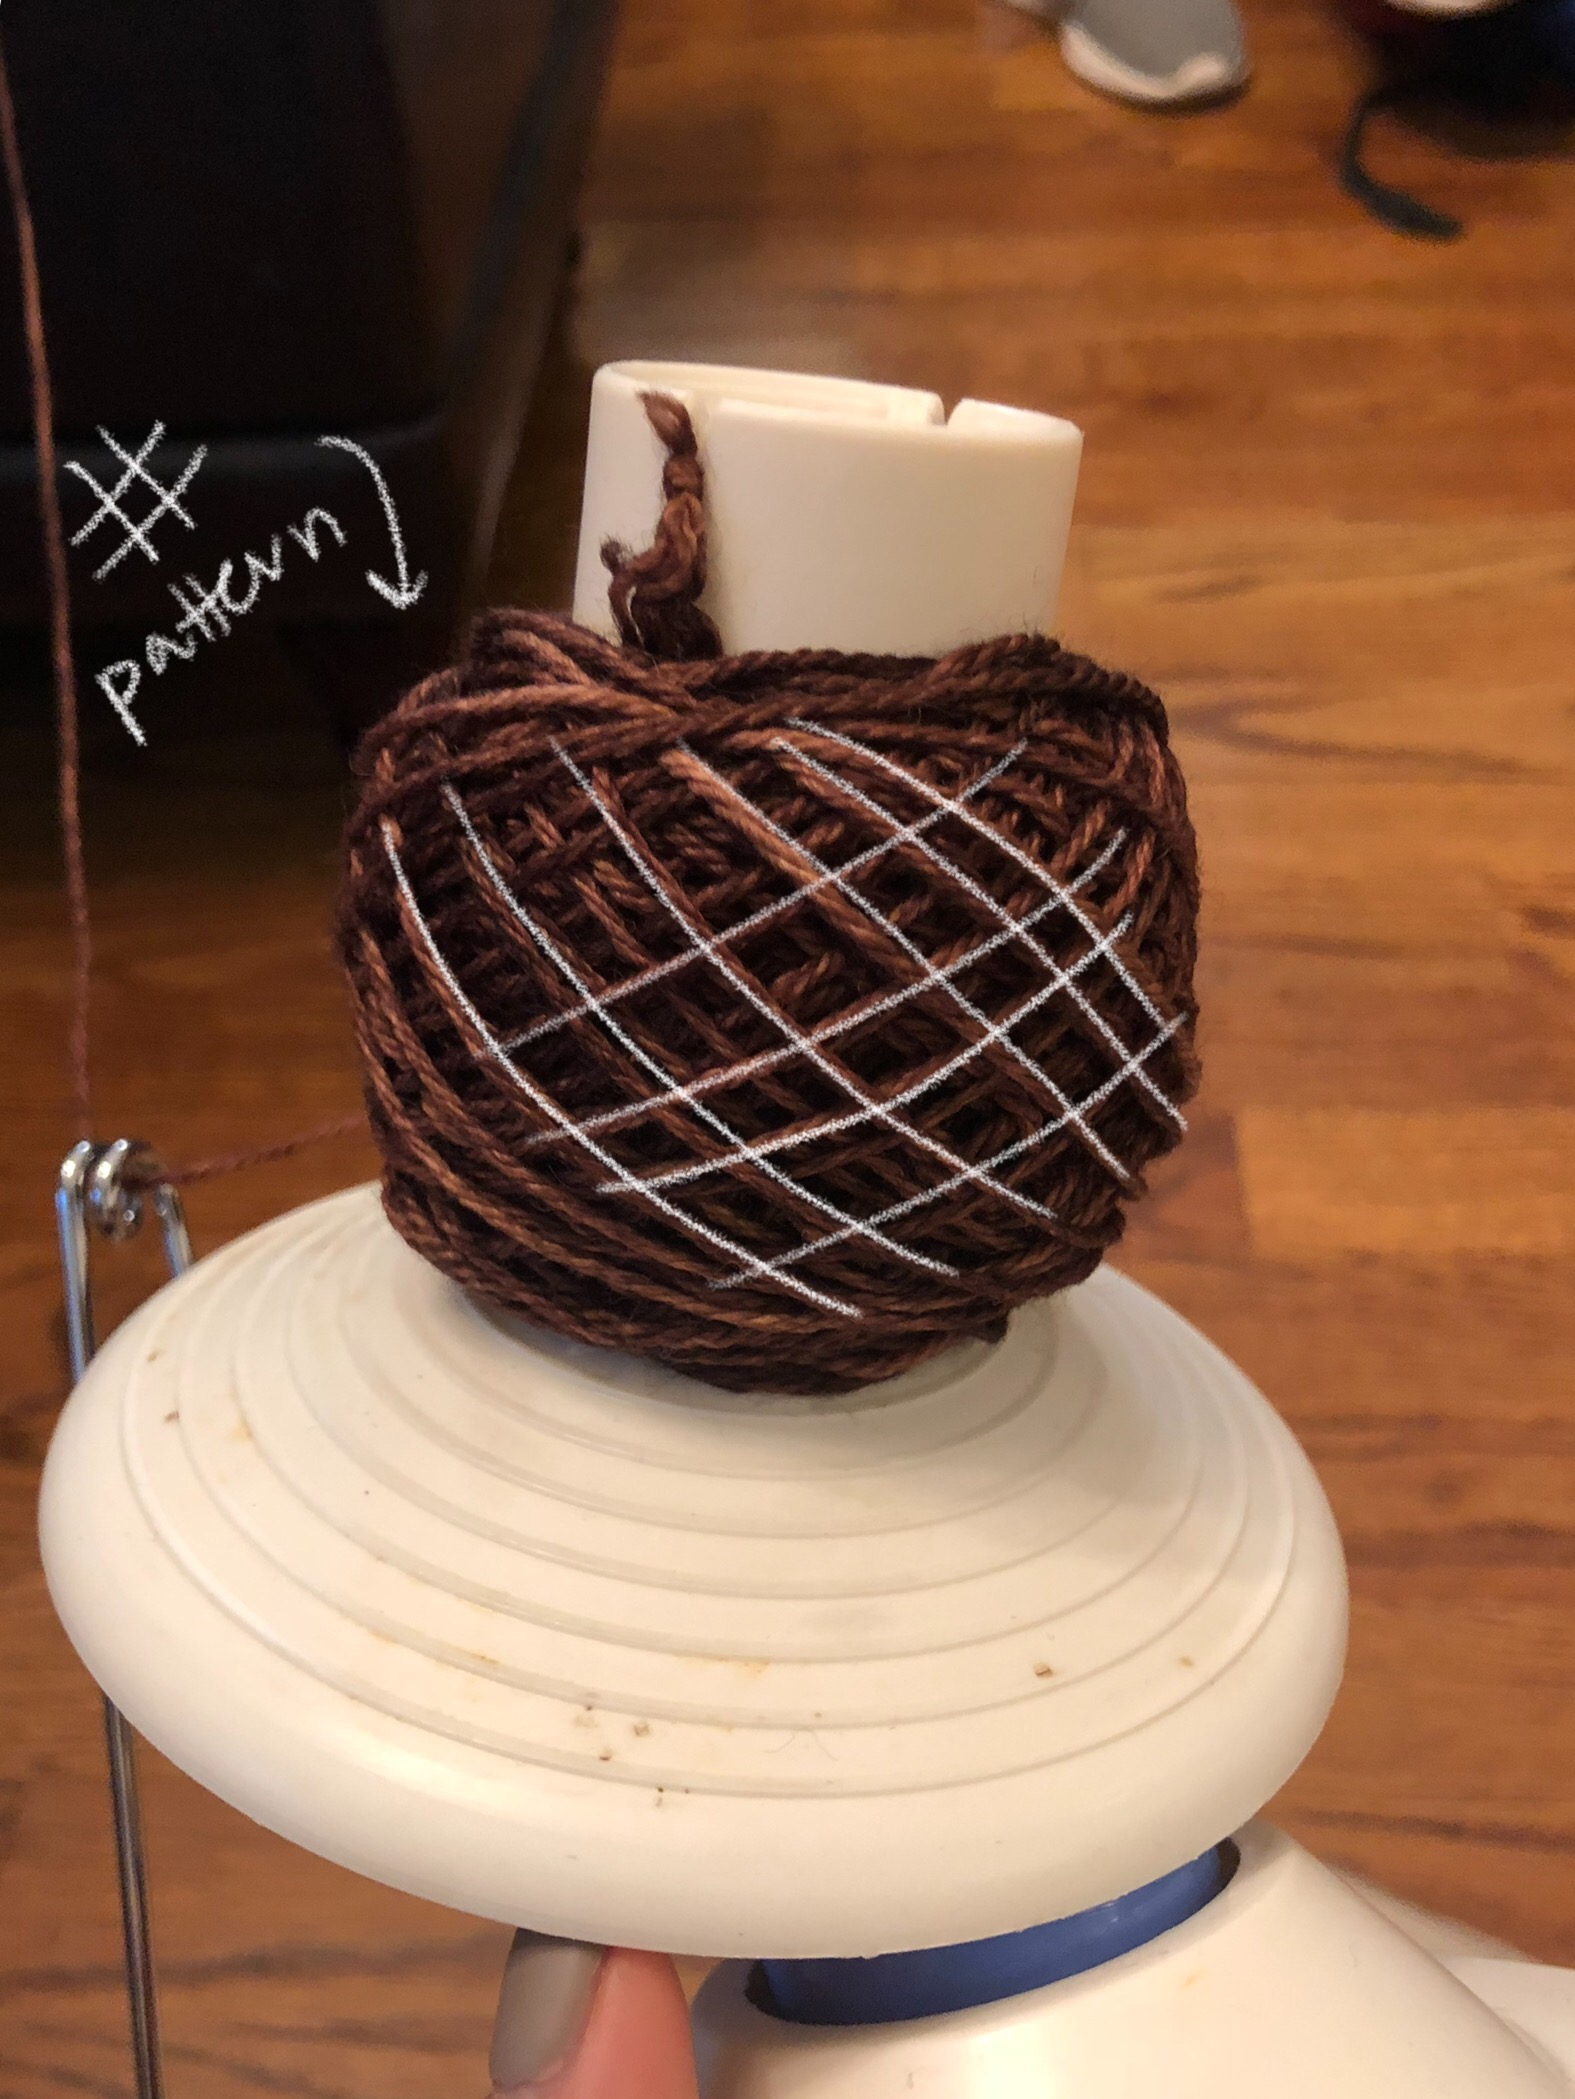
Manual Ball WInder Yarn Pattern
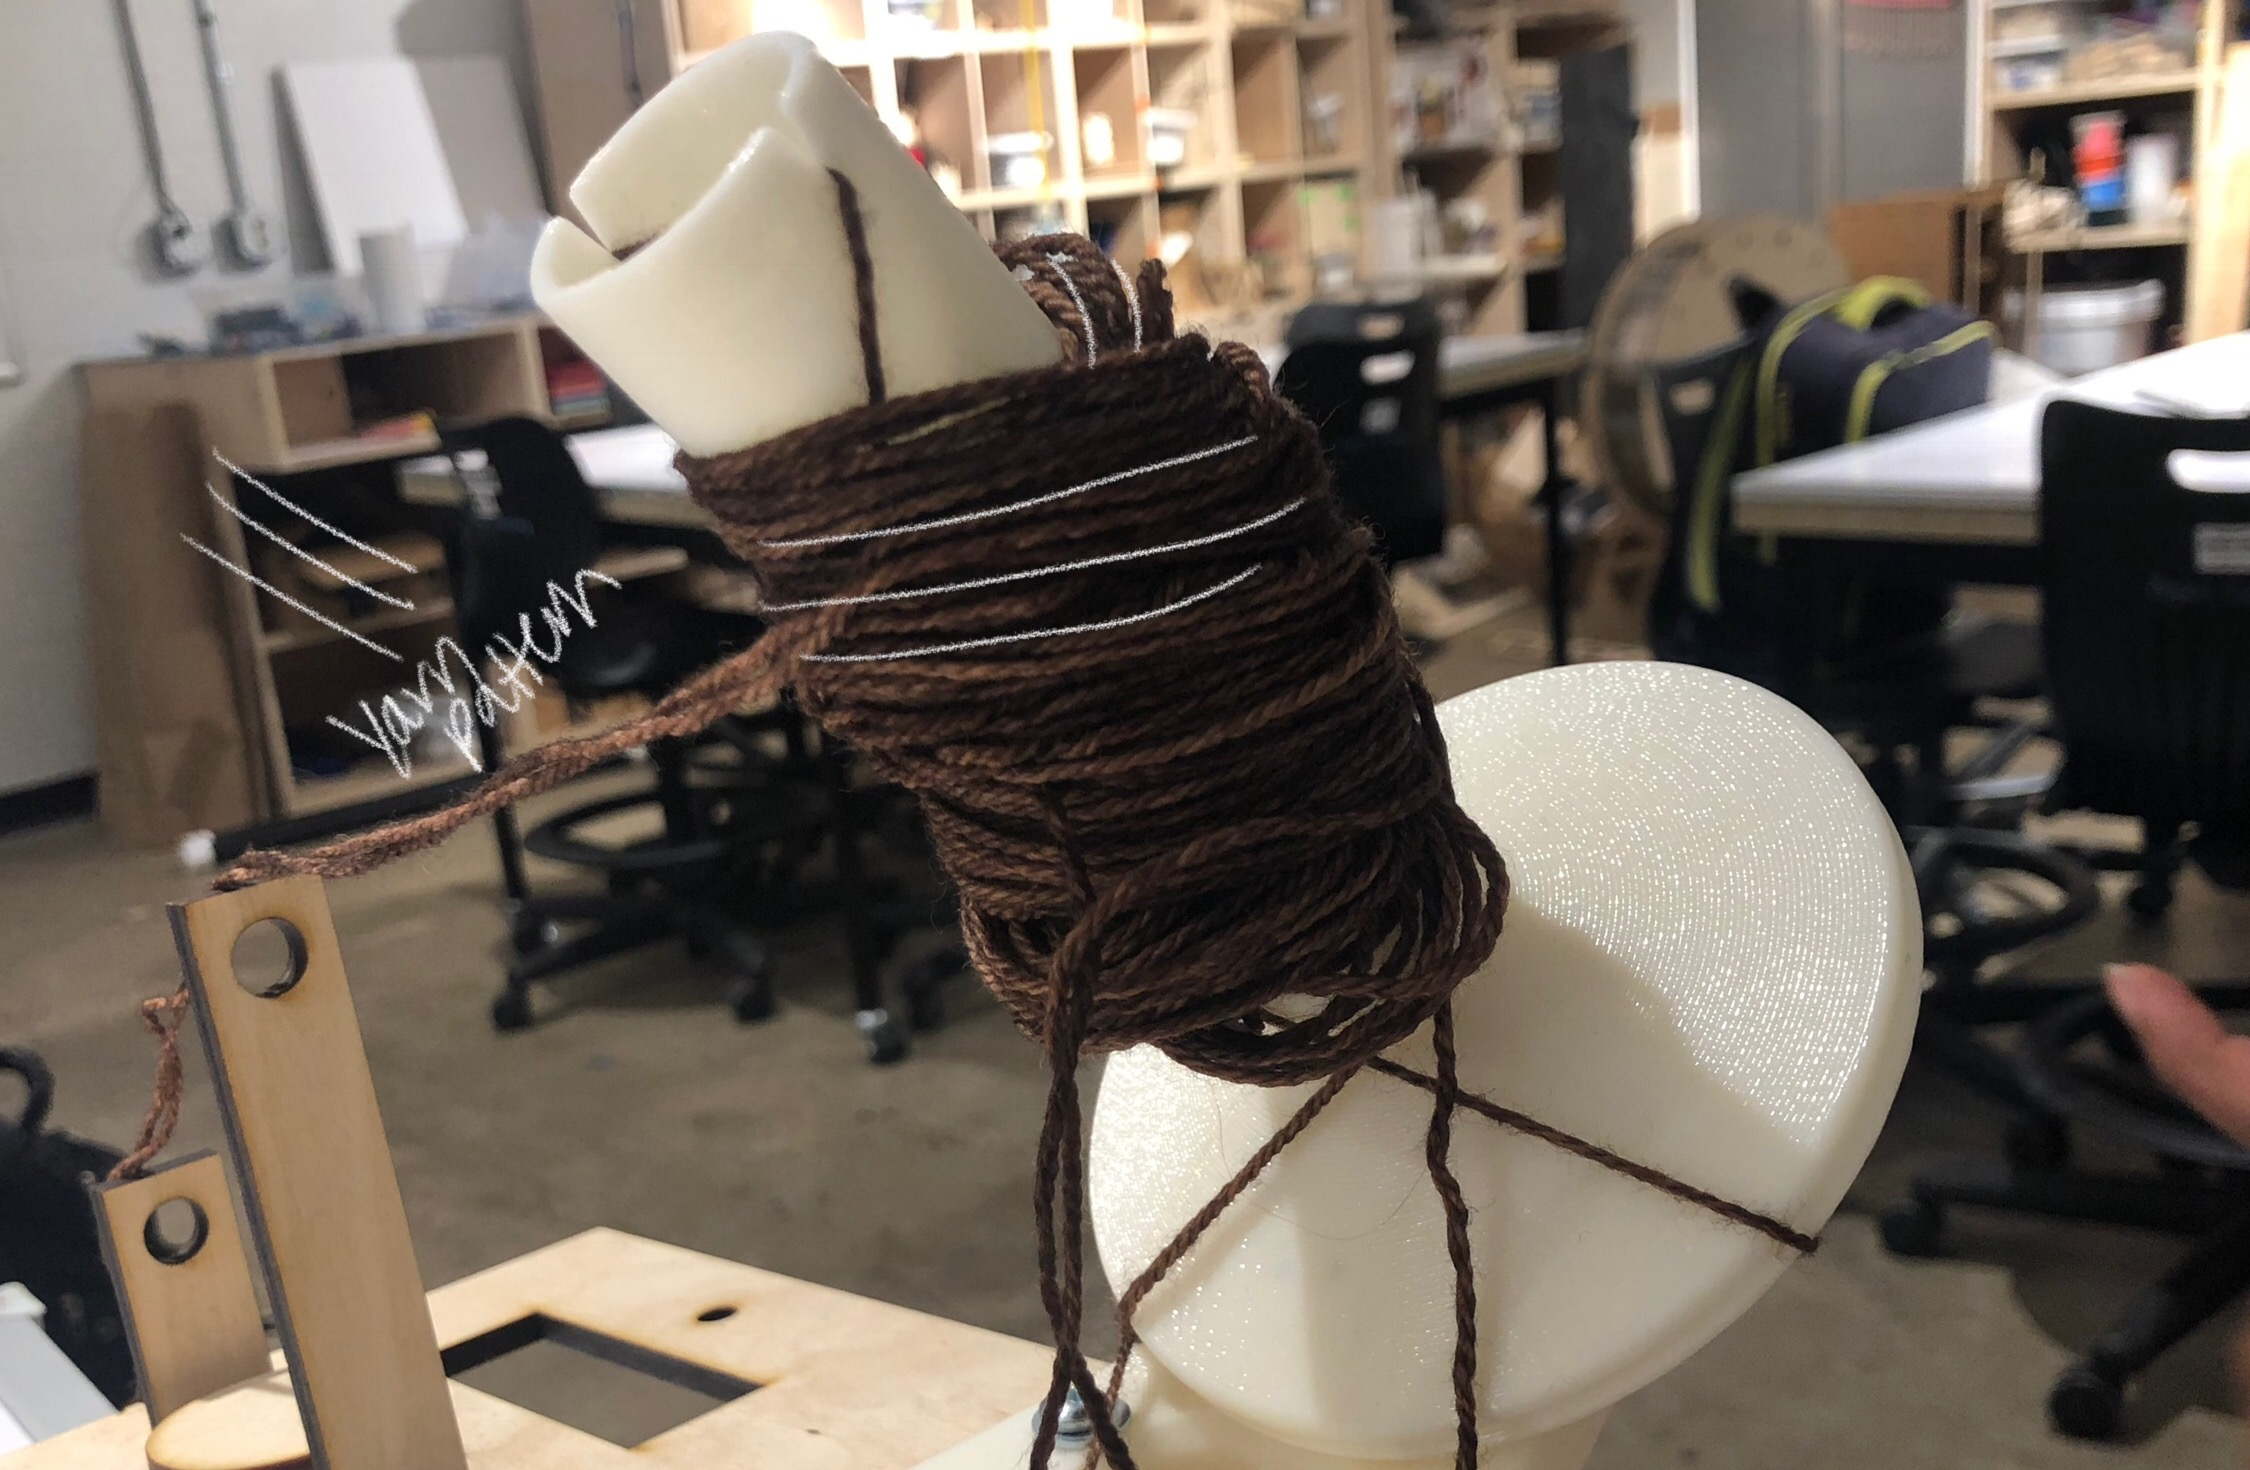
Prototype Yarn Pattern
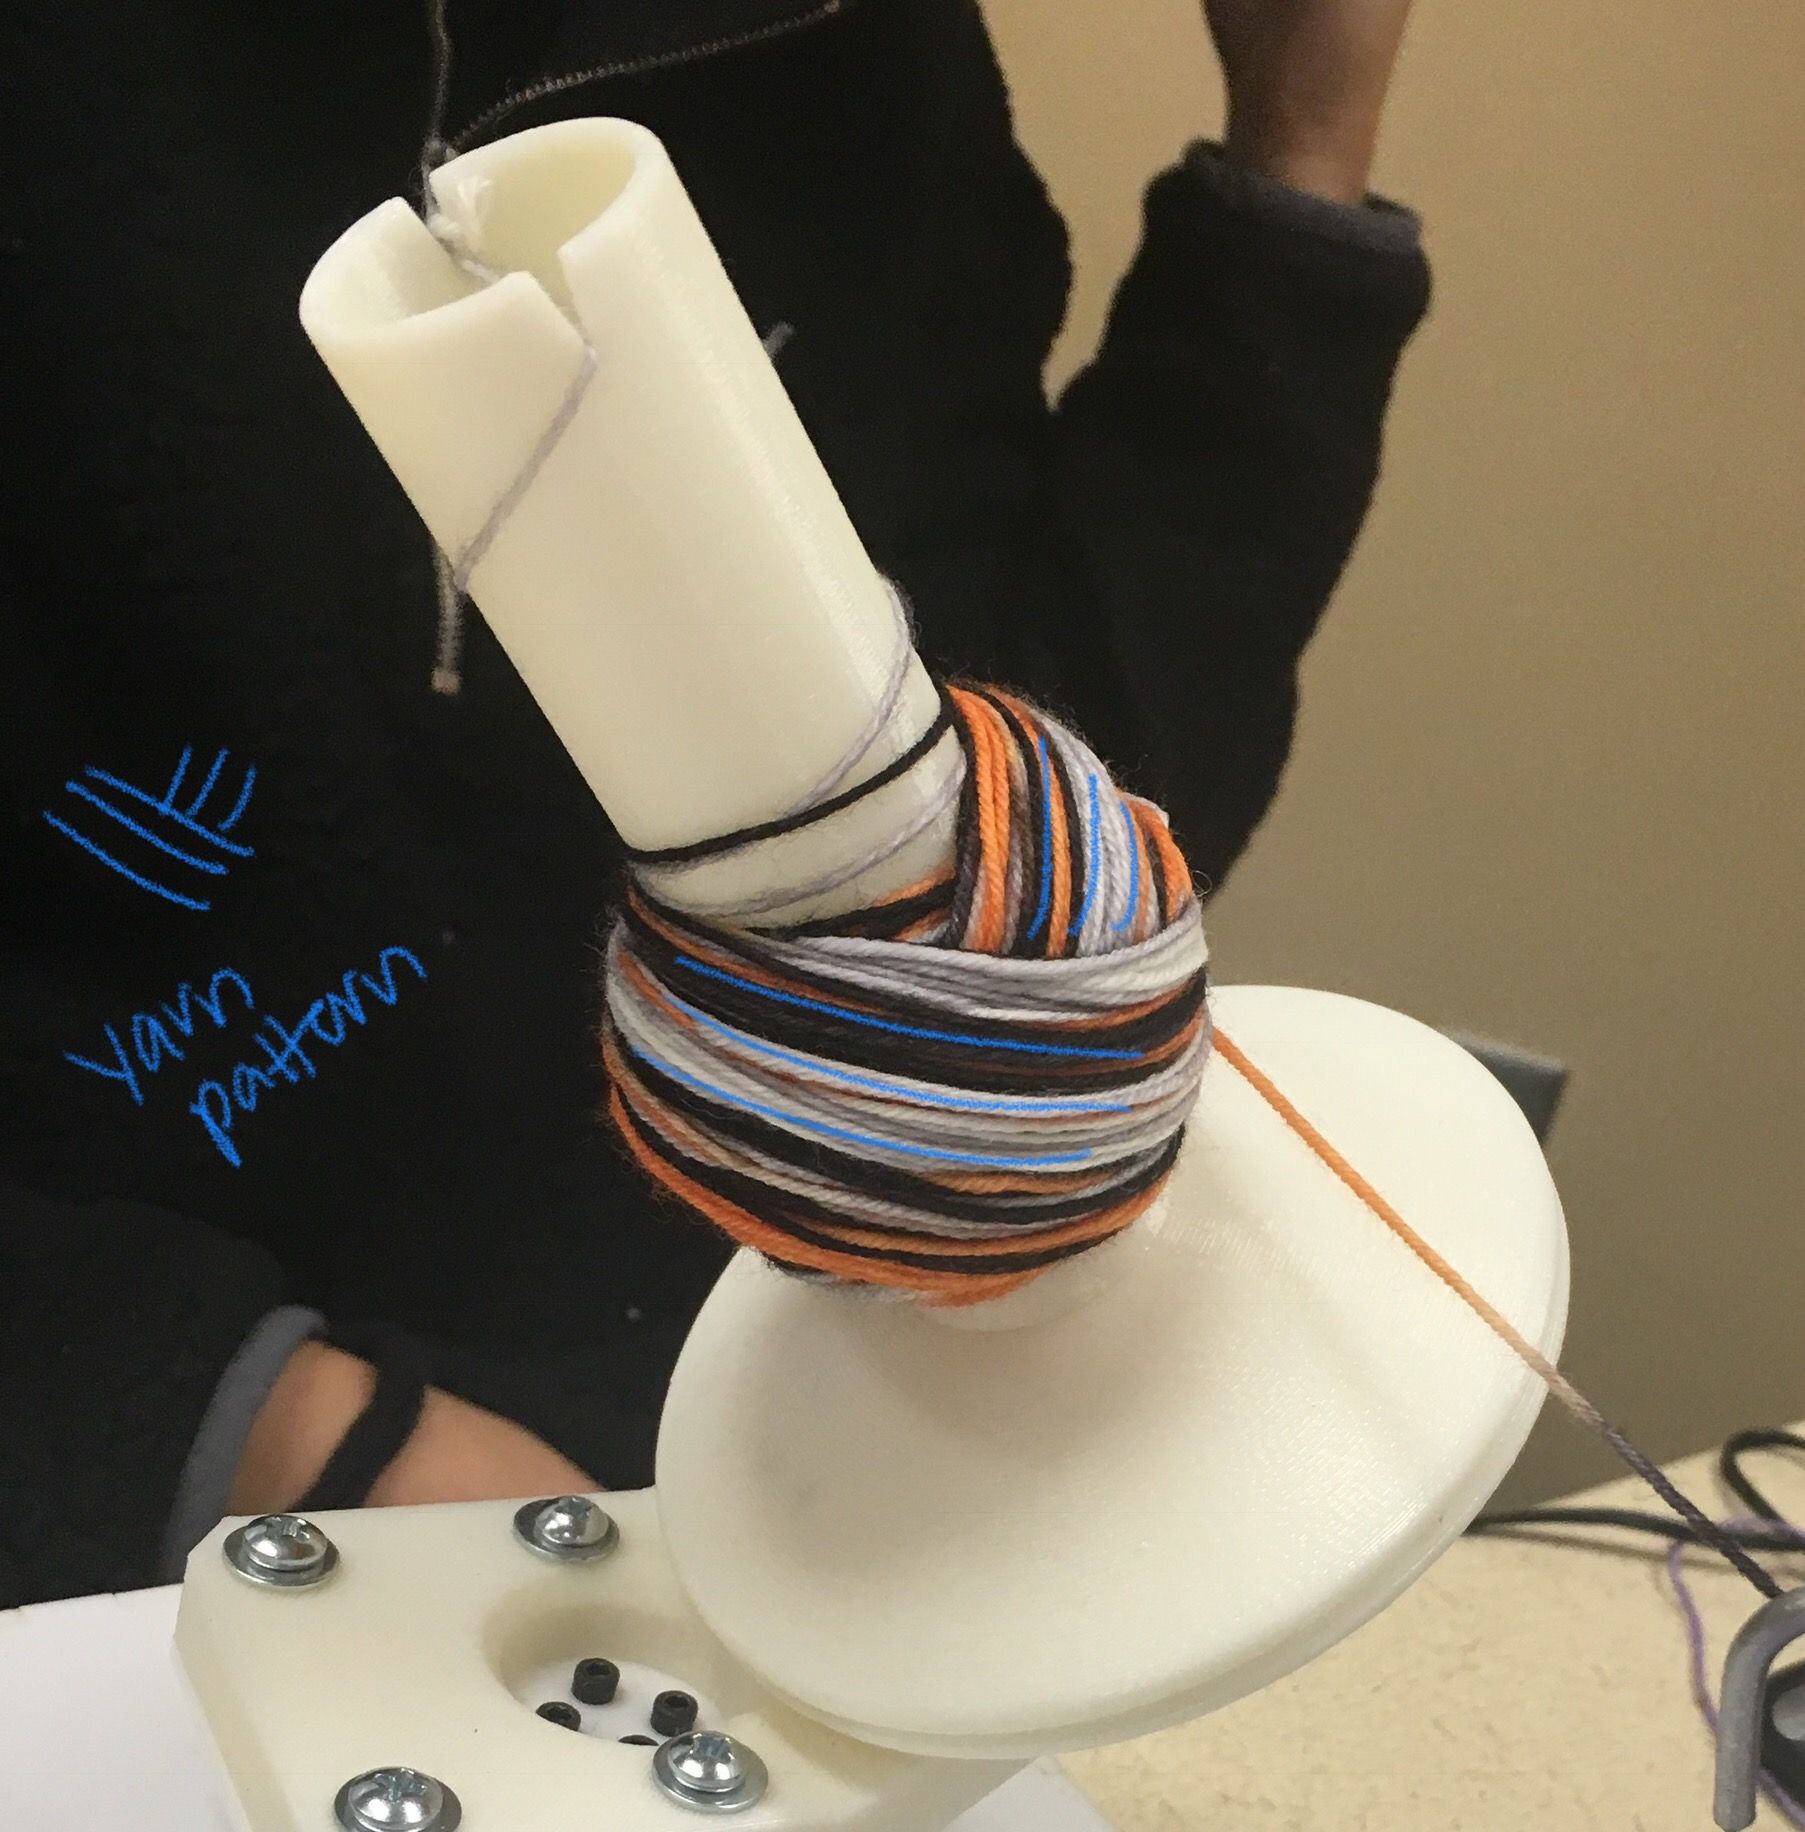
Final Yarn Pattern: Consistent Tension and Speed
To get an accurate distance reading for the yarn, we created a disk that the yarn wrapped around. When the motor for the yarn holder spun, it would pull on the yarn around the disk and turn the encoding disk. Counting the number of turns would give an accurate reading of yarn wound on the ball. Some of the problems we encountered with the encoder were that the yarn kept falling out of the disk, making the reading inaccurate. The ball winder would spin and pull yarn onto the ball, but the encoder would not spin. This was a big problem because not only would the device not know that the yarn was being added and therefore stop, but it would deceive Rebecca on how much yarn was wound onto the ball.
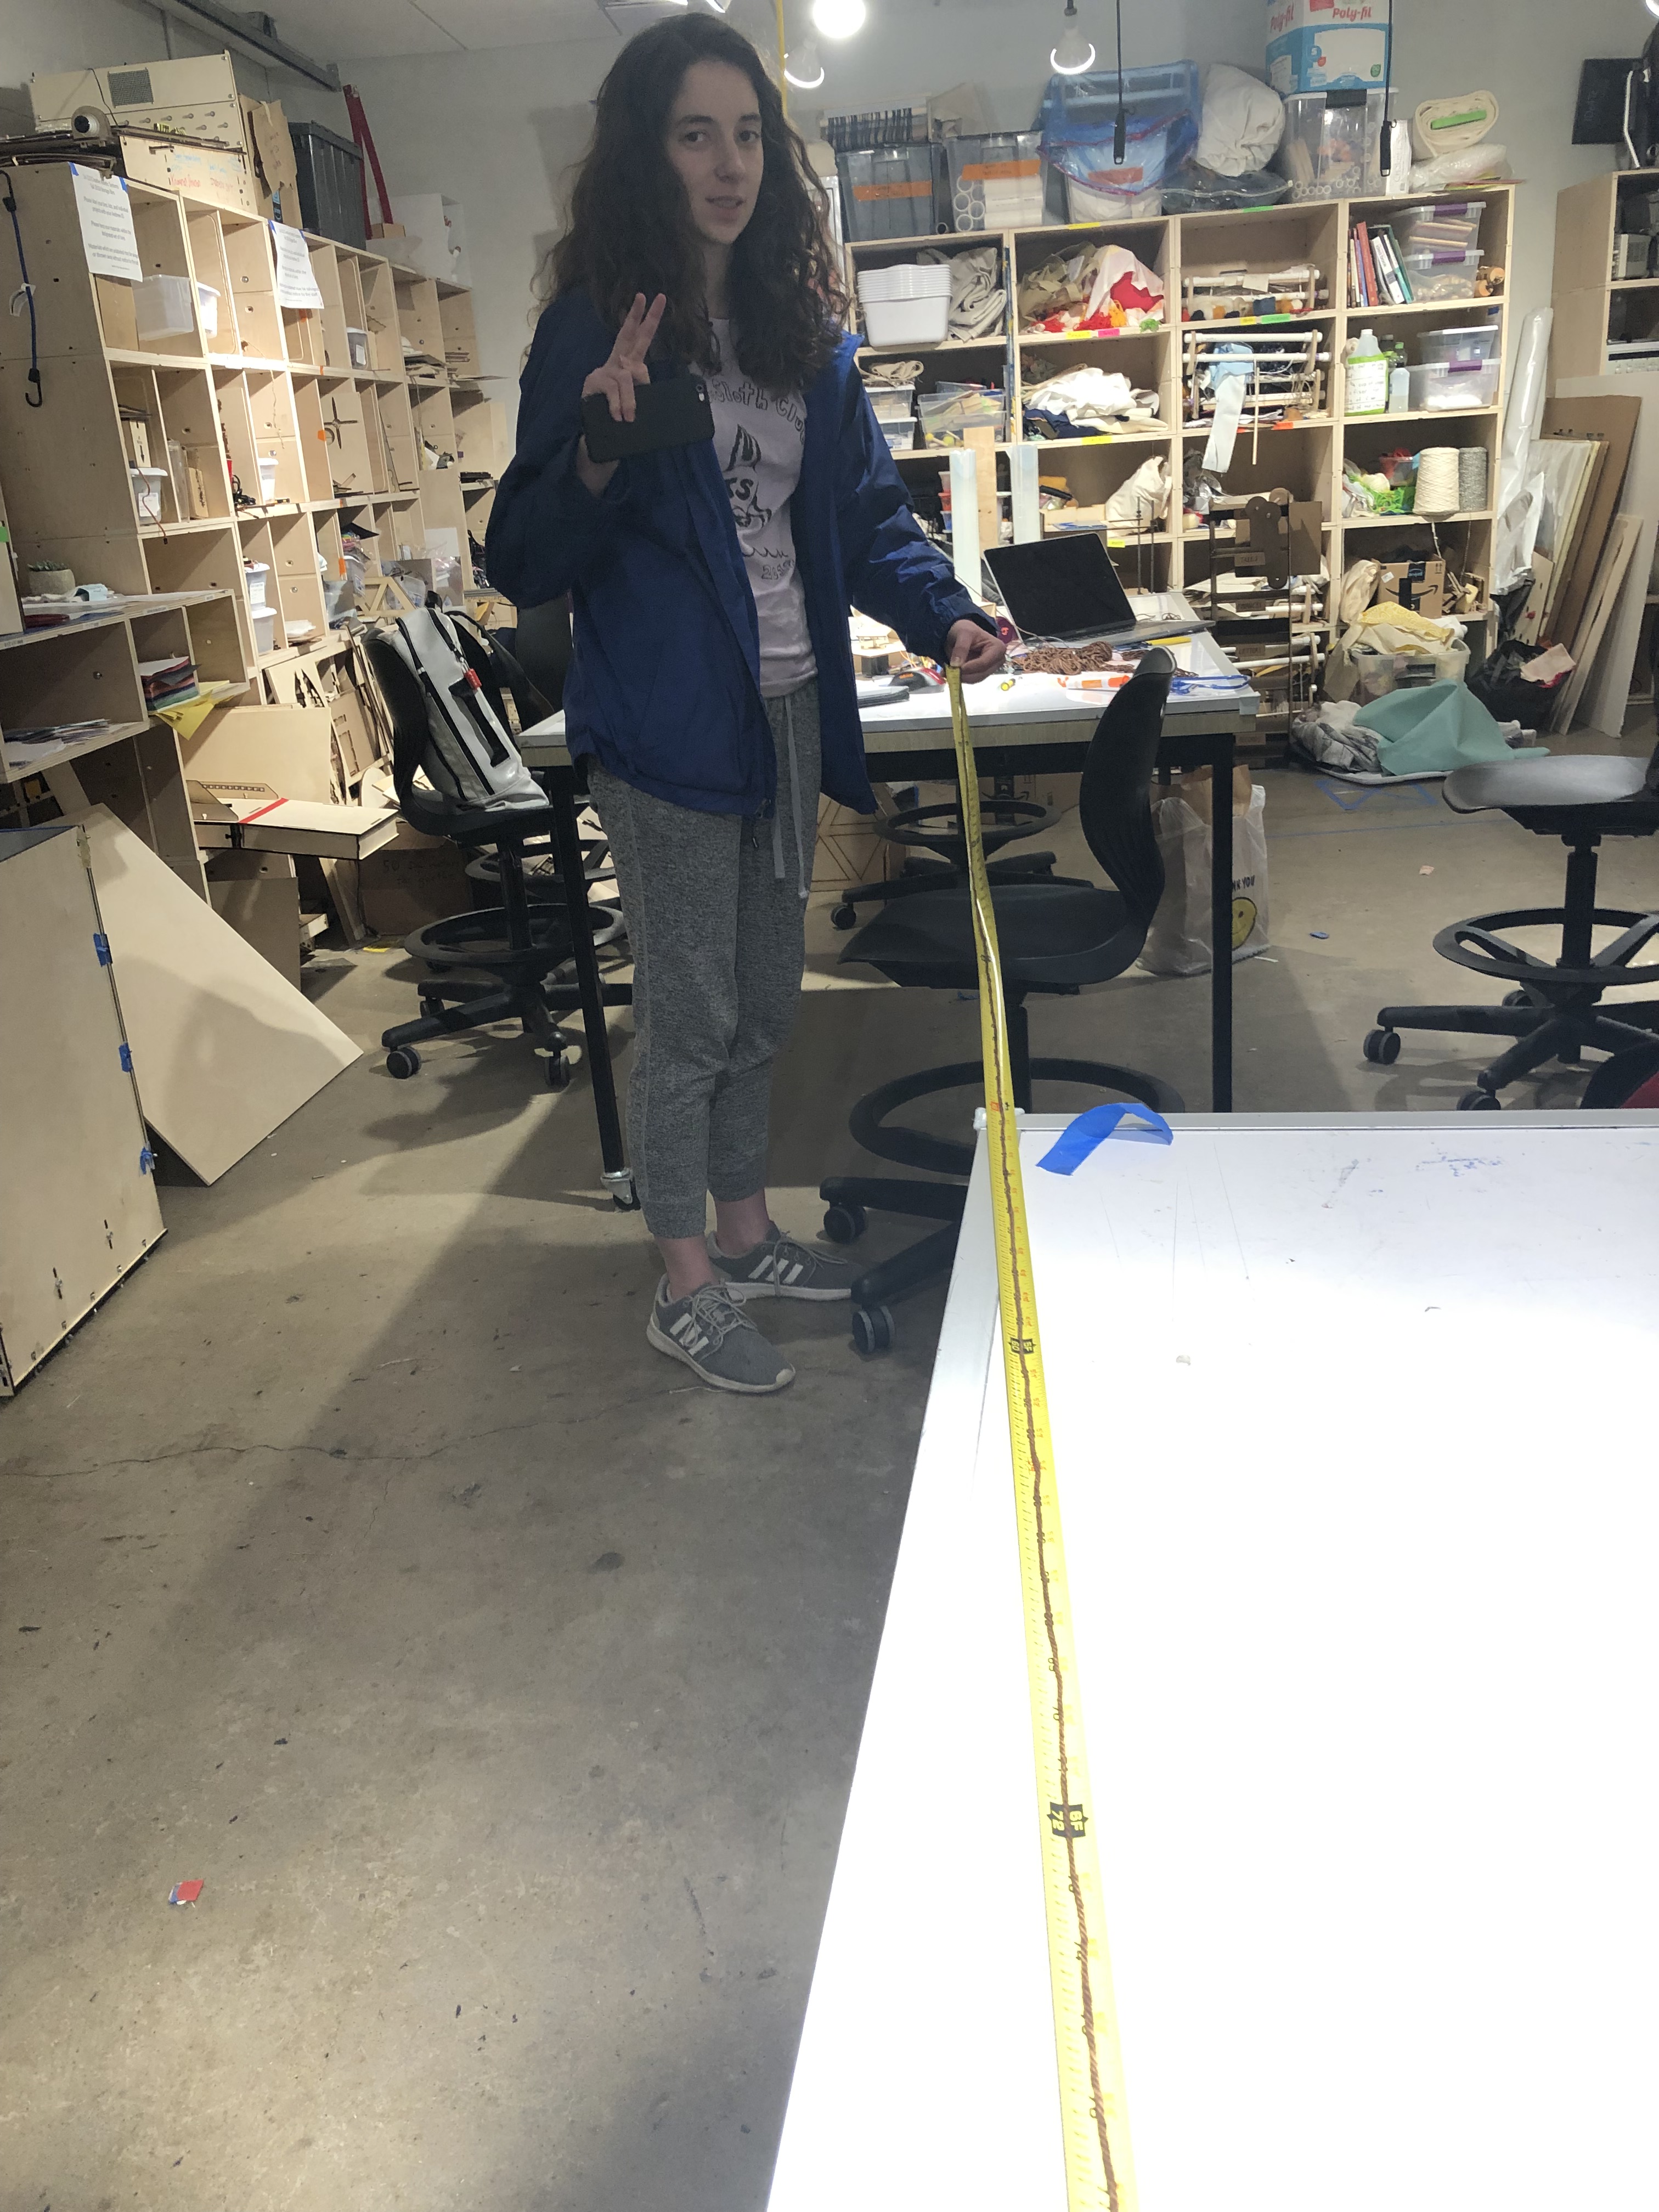
Testing the Length of String After Finished.
To deal with this problem, we turned to both software and the physical form of the device. In terms of software, we decided that if the motor was running and the encoder was not, then the yarn had fallen off and to switch to an “emergency stop” mode. During this mode, the user can read how much yarn is currently wound as well as continue the winding process or restart. One of the physical changes was to make the shape of the encoder have a larger lip and therefore less chance to fall out. The second preventative physical measure was to create wire guides that served as a way to feed the yarn at the right height as well as create the right pull tension so that the yarn would not fall out. Also, the wire guides instead of the prototype wood guards make it easy to remove the yarn without being at the end of the string.
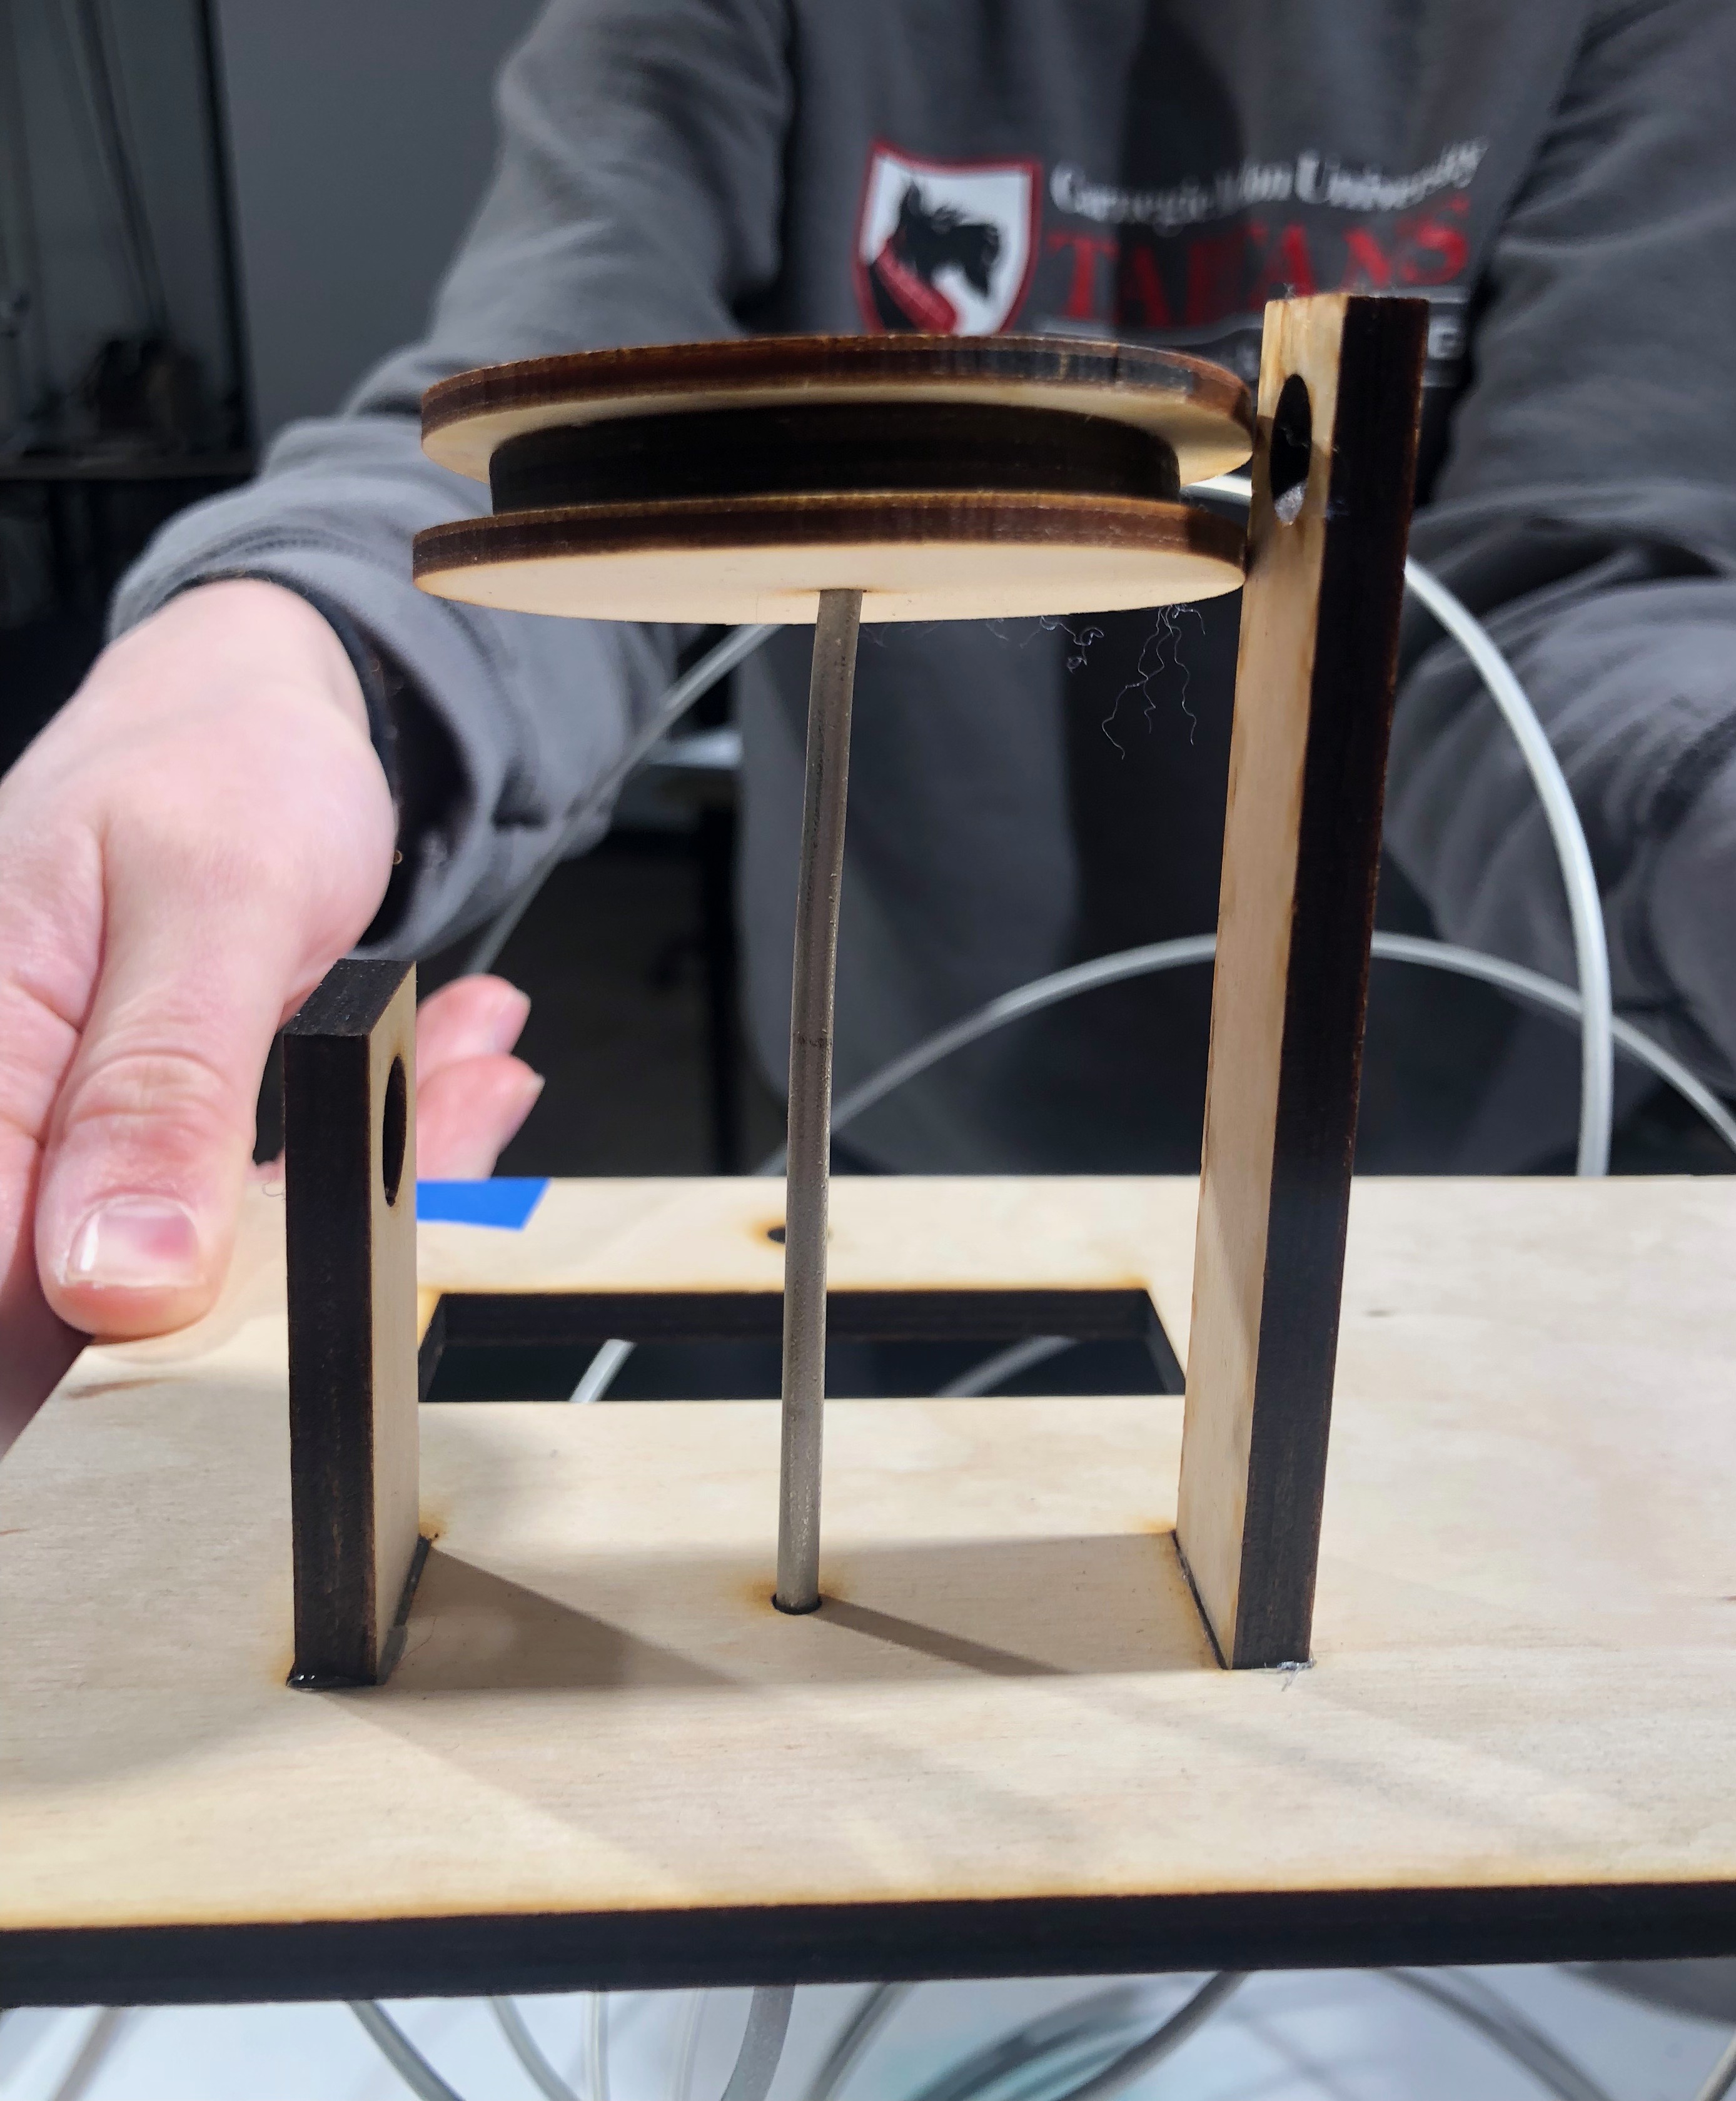
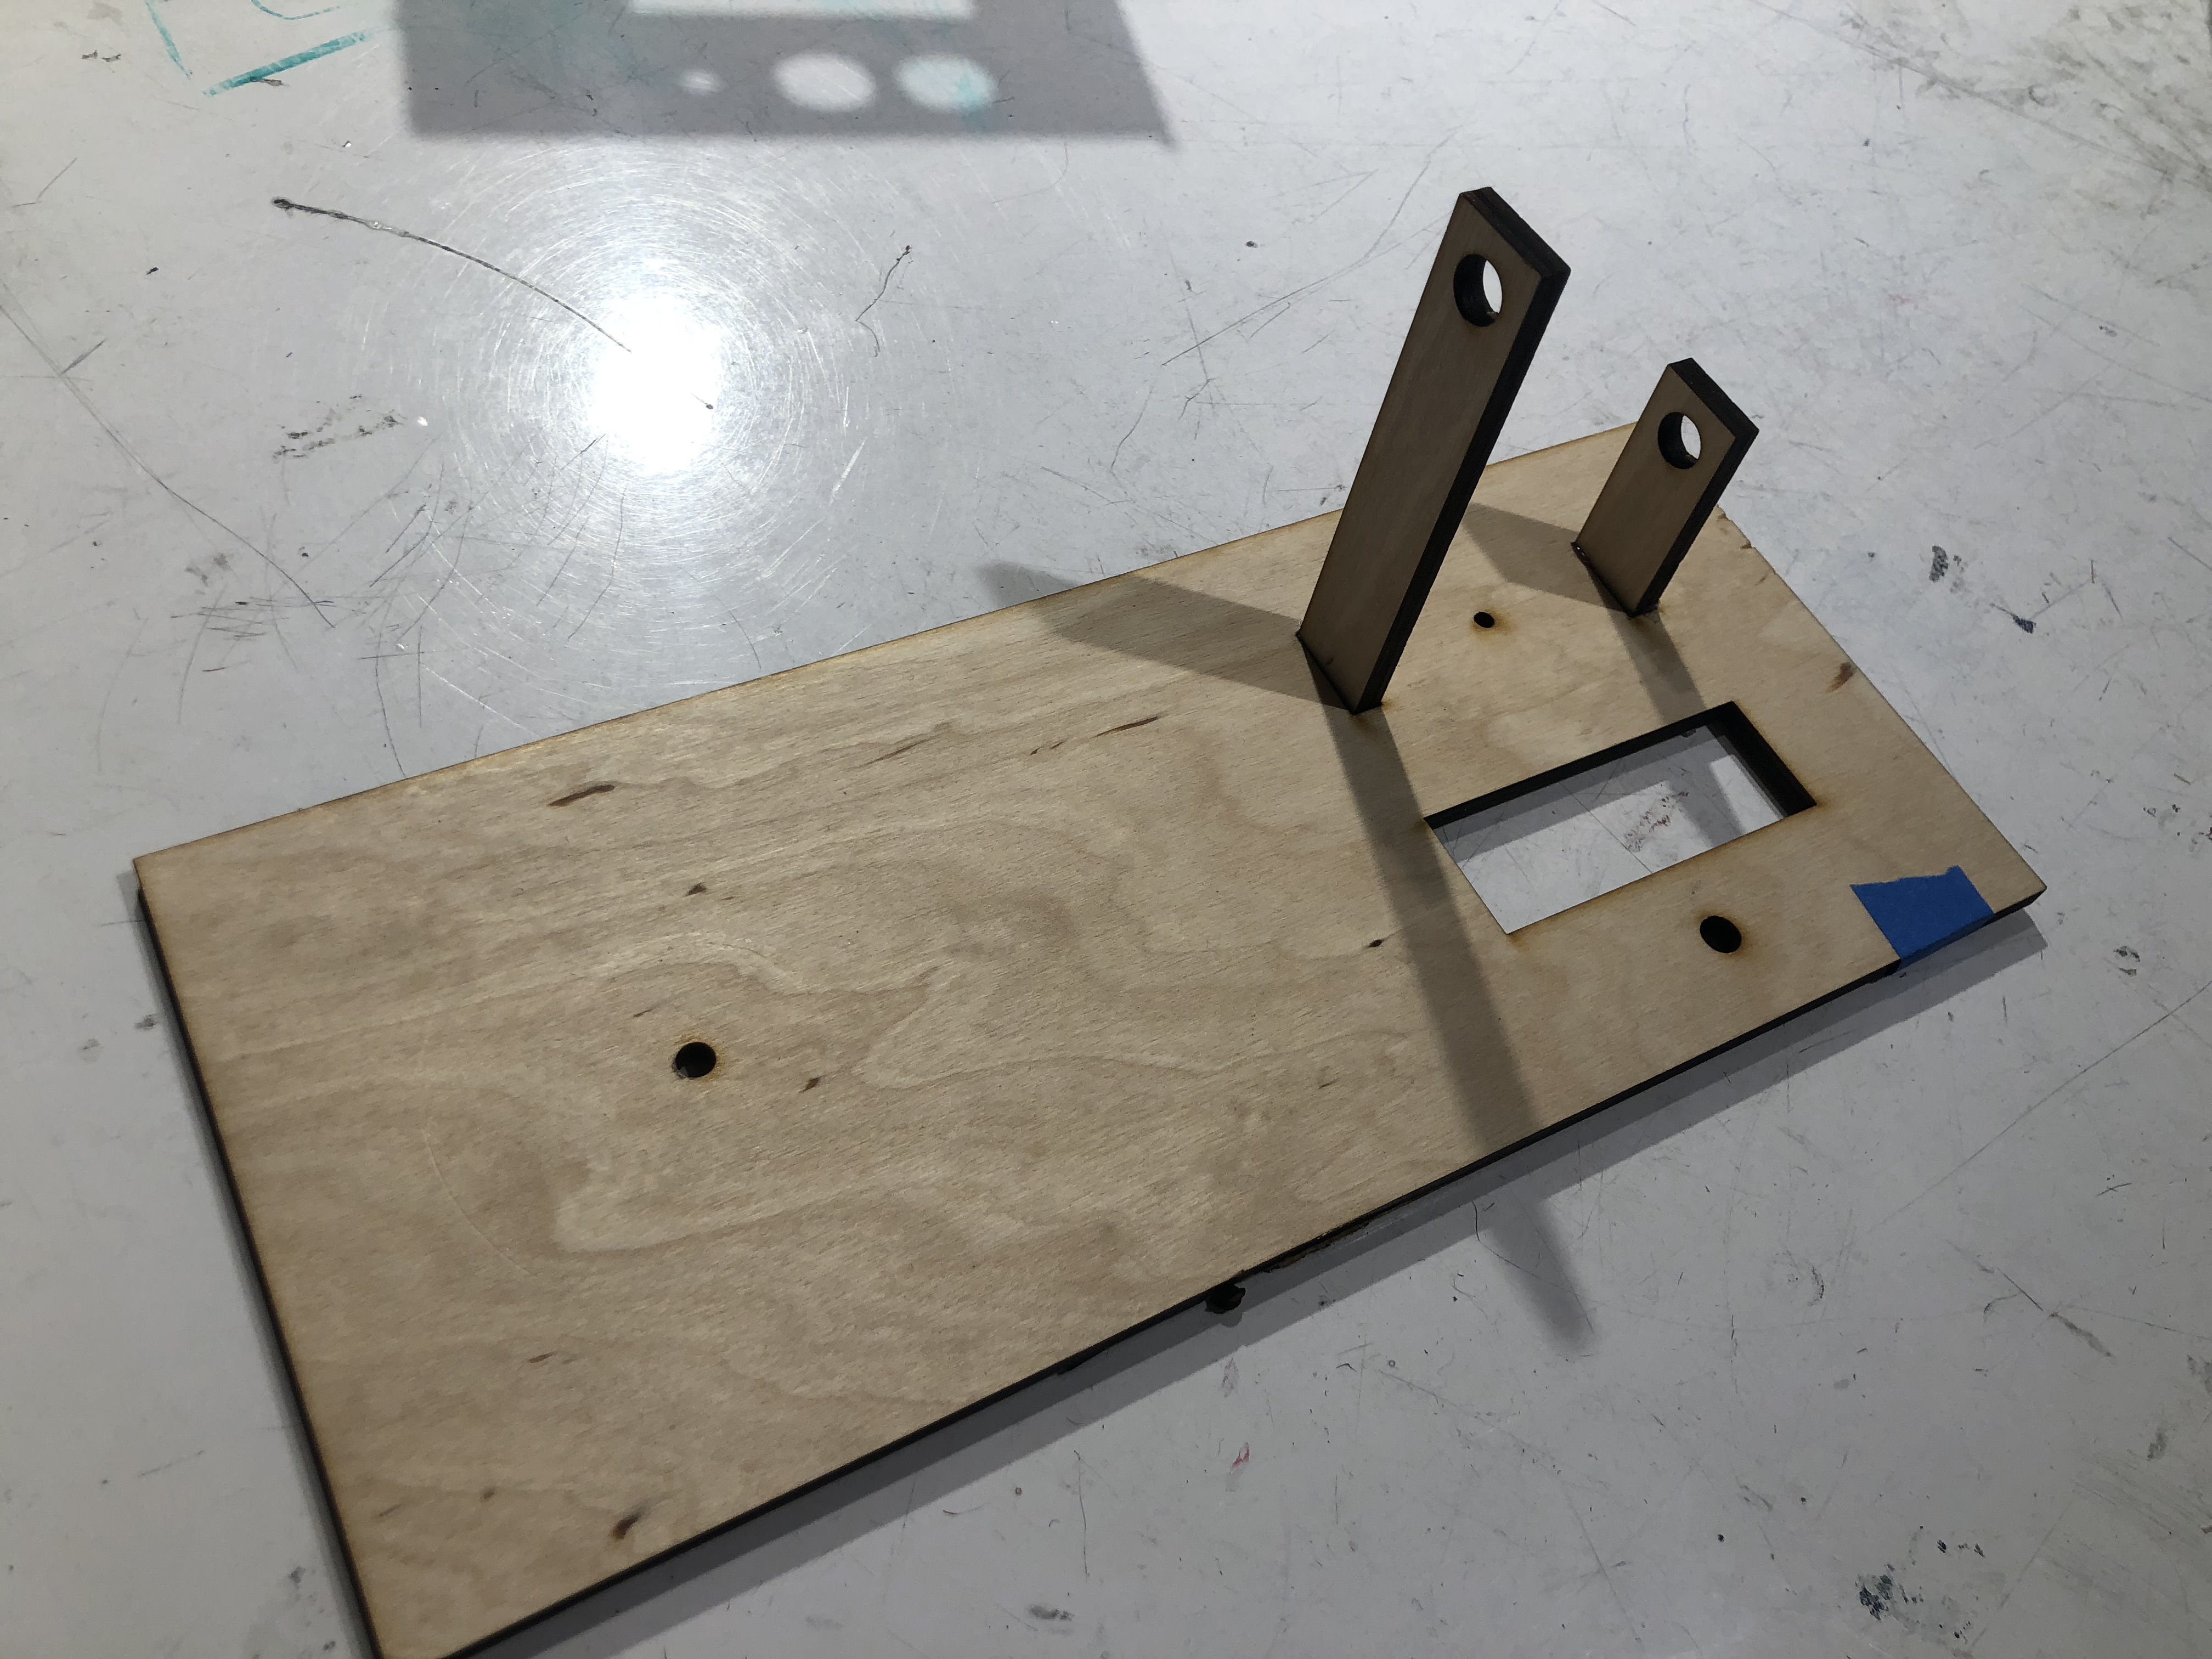
Initial Prototype of Distance Encoder
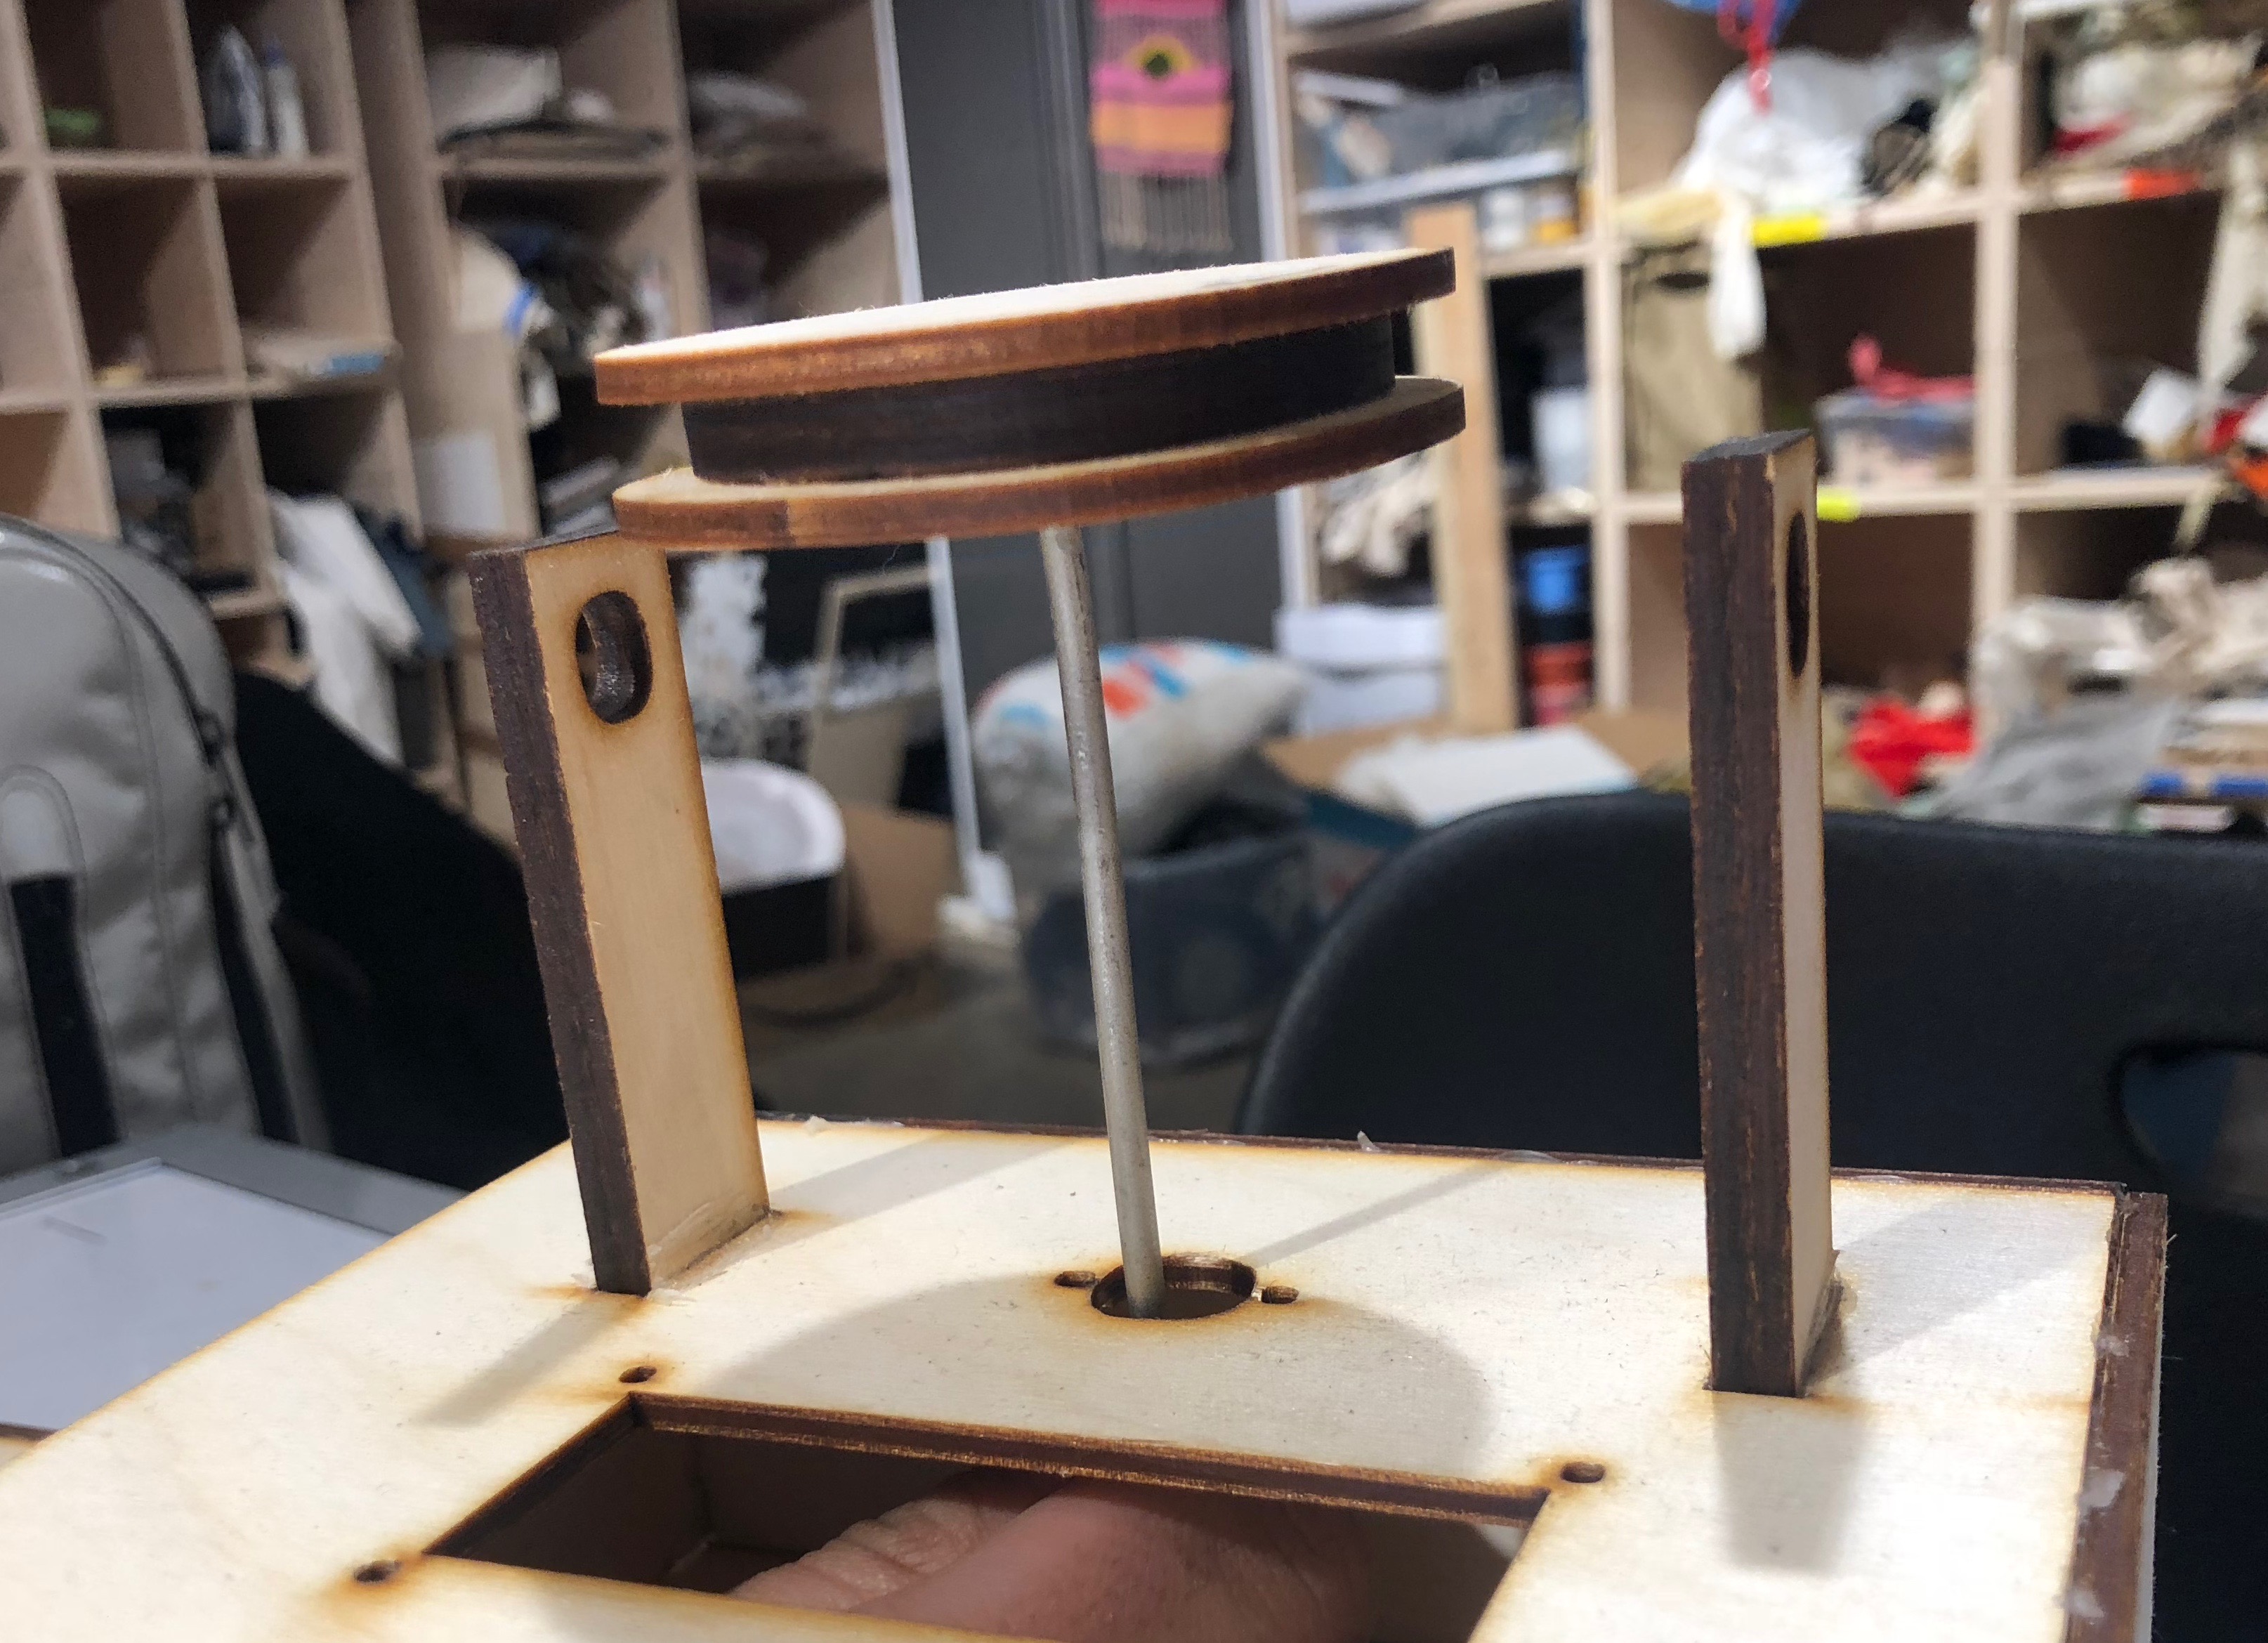
Second Iteration of Distance Encoder: Lowered yarn holders to prevent yarn from slipping out.
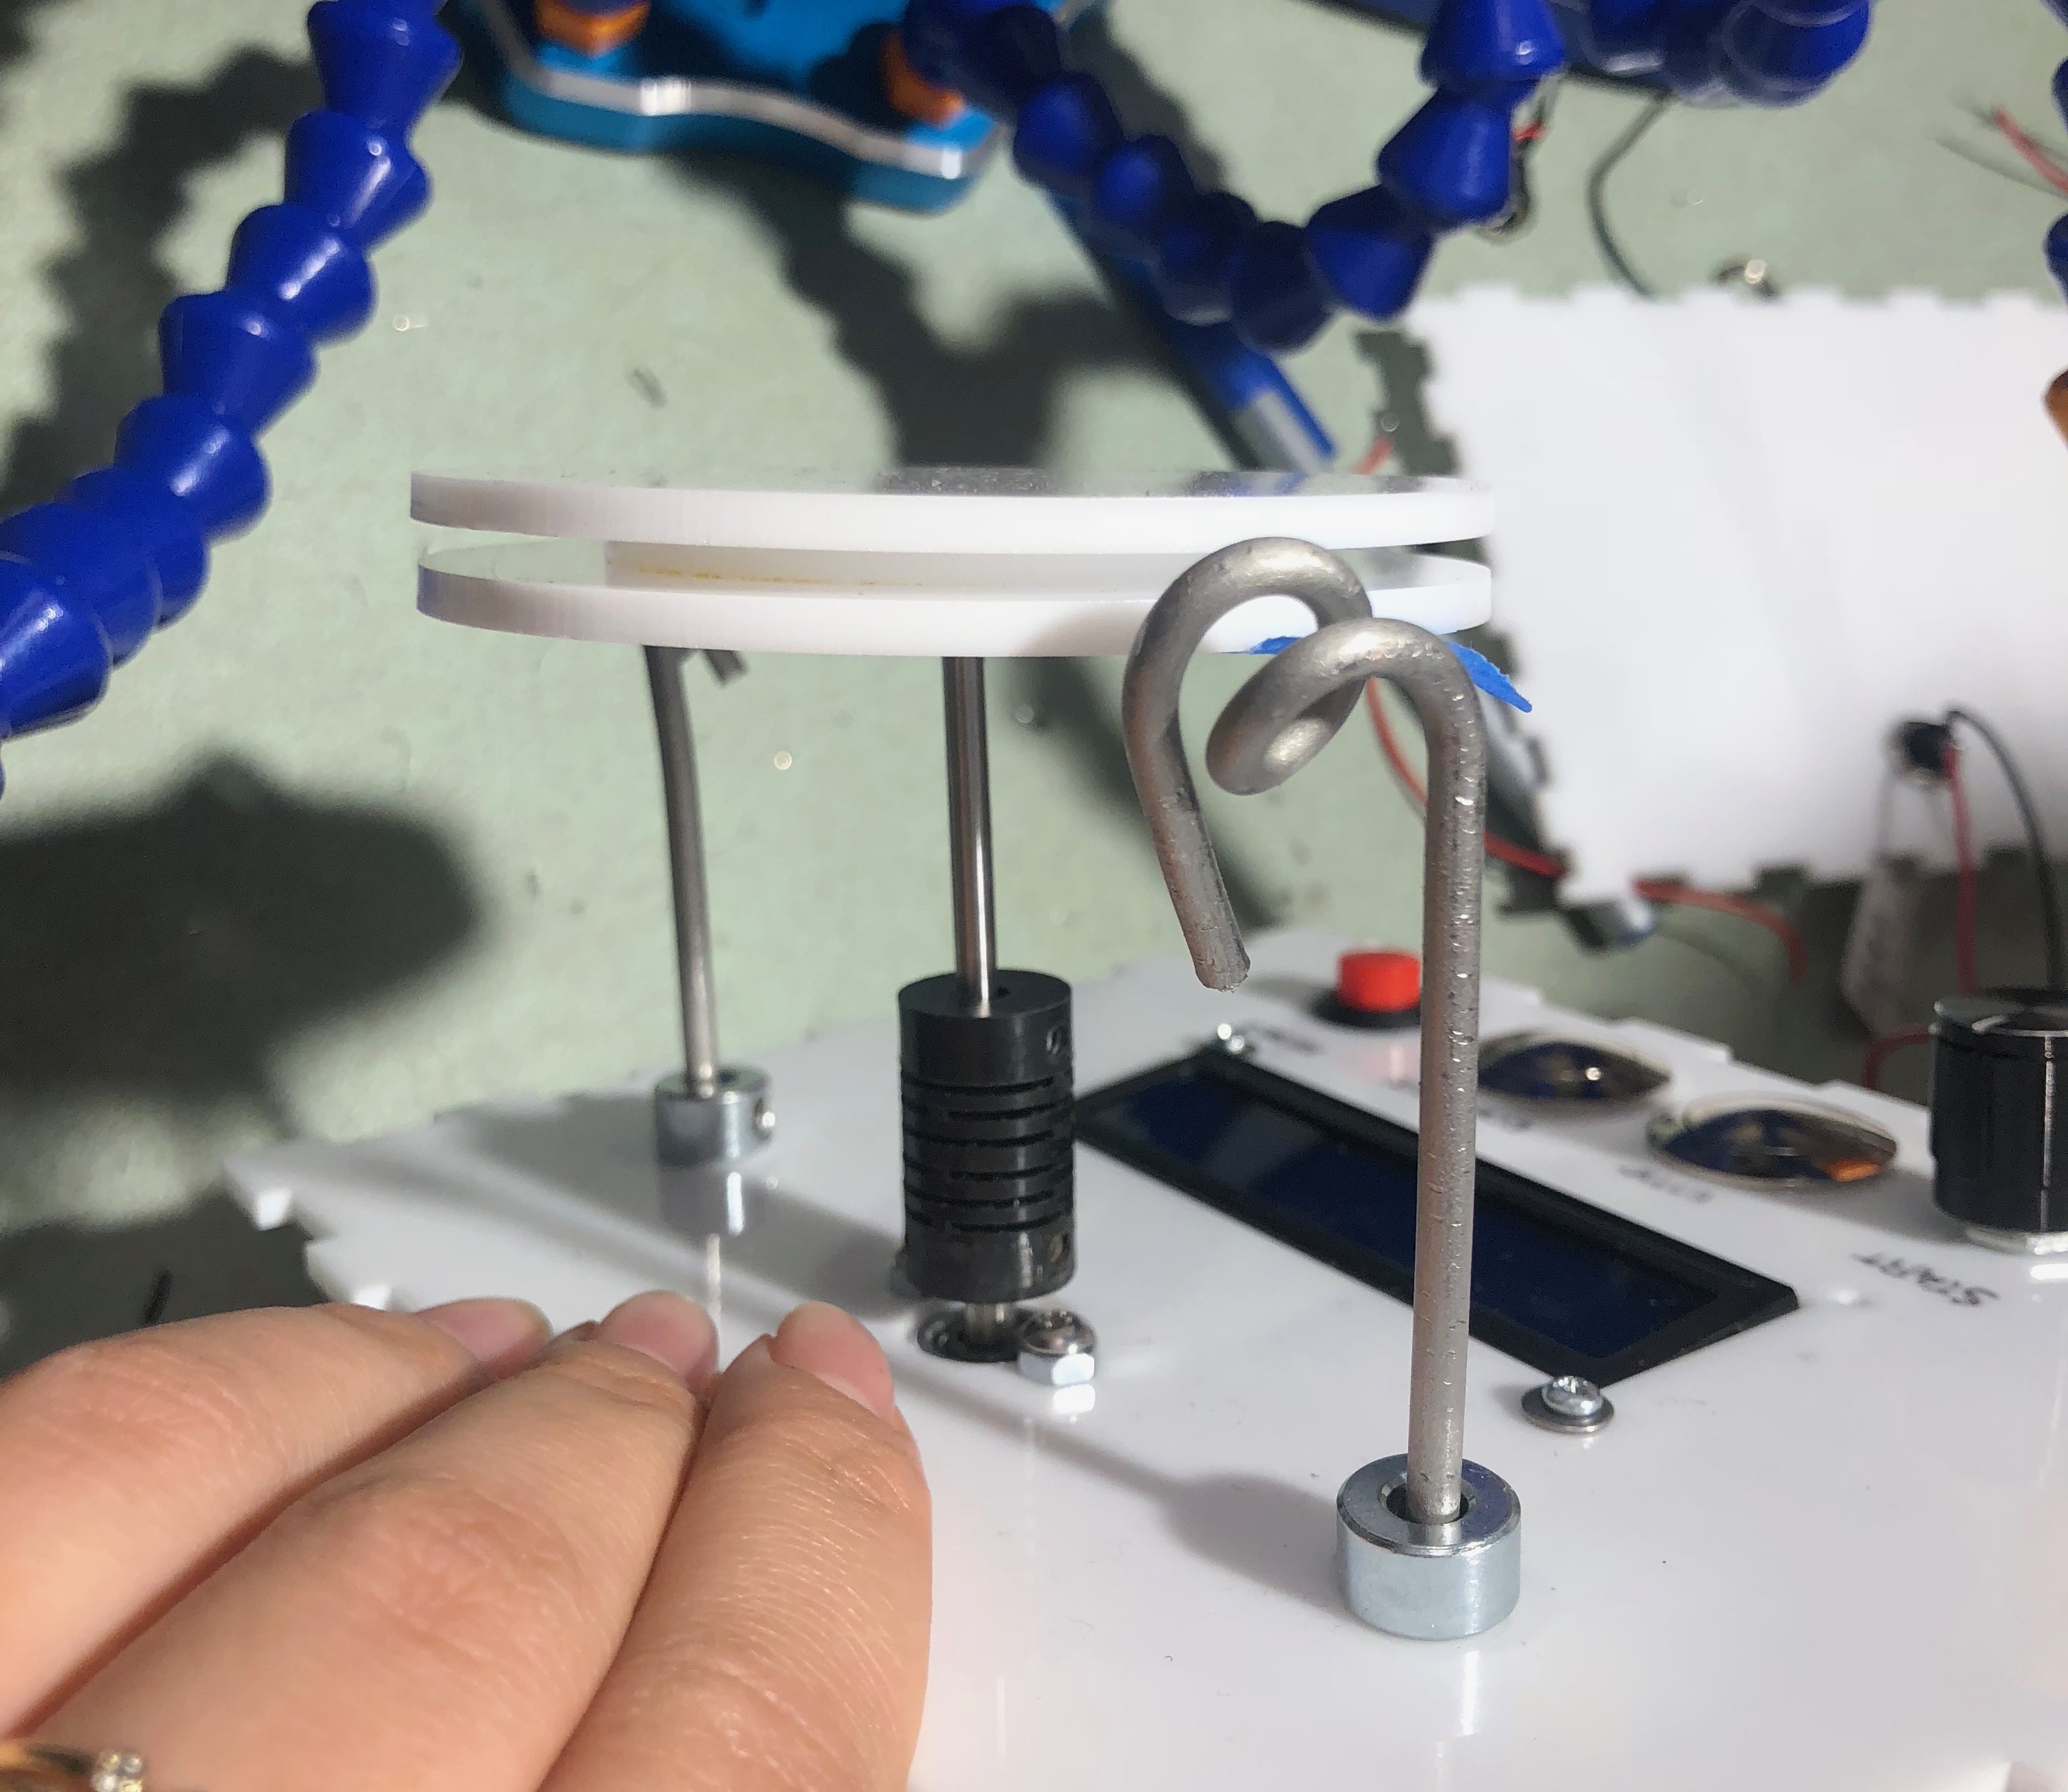
Final Distance Encoder: Metal wires allow for easy usage and larger gap in the disk prevents slipping.
Finally, instead of an overall level box for the shape of the device, we decided to create levels. After much testing, we found that having the encoder be at an elevated surface that feeds the string directly parallel to the yarn winder would increase the tension in the string and encourage the string not to be found on the bottom of the yarn holder or fall off the track.
Original Top for the device.
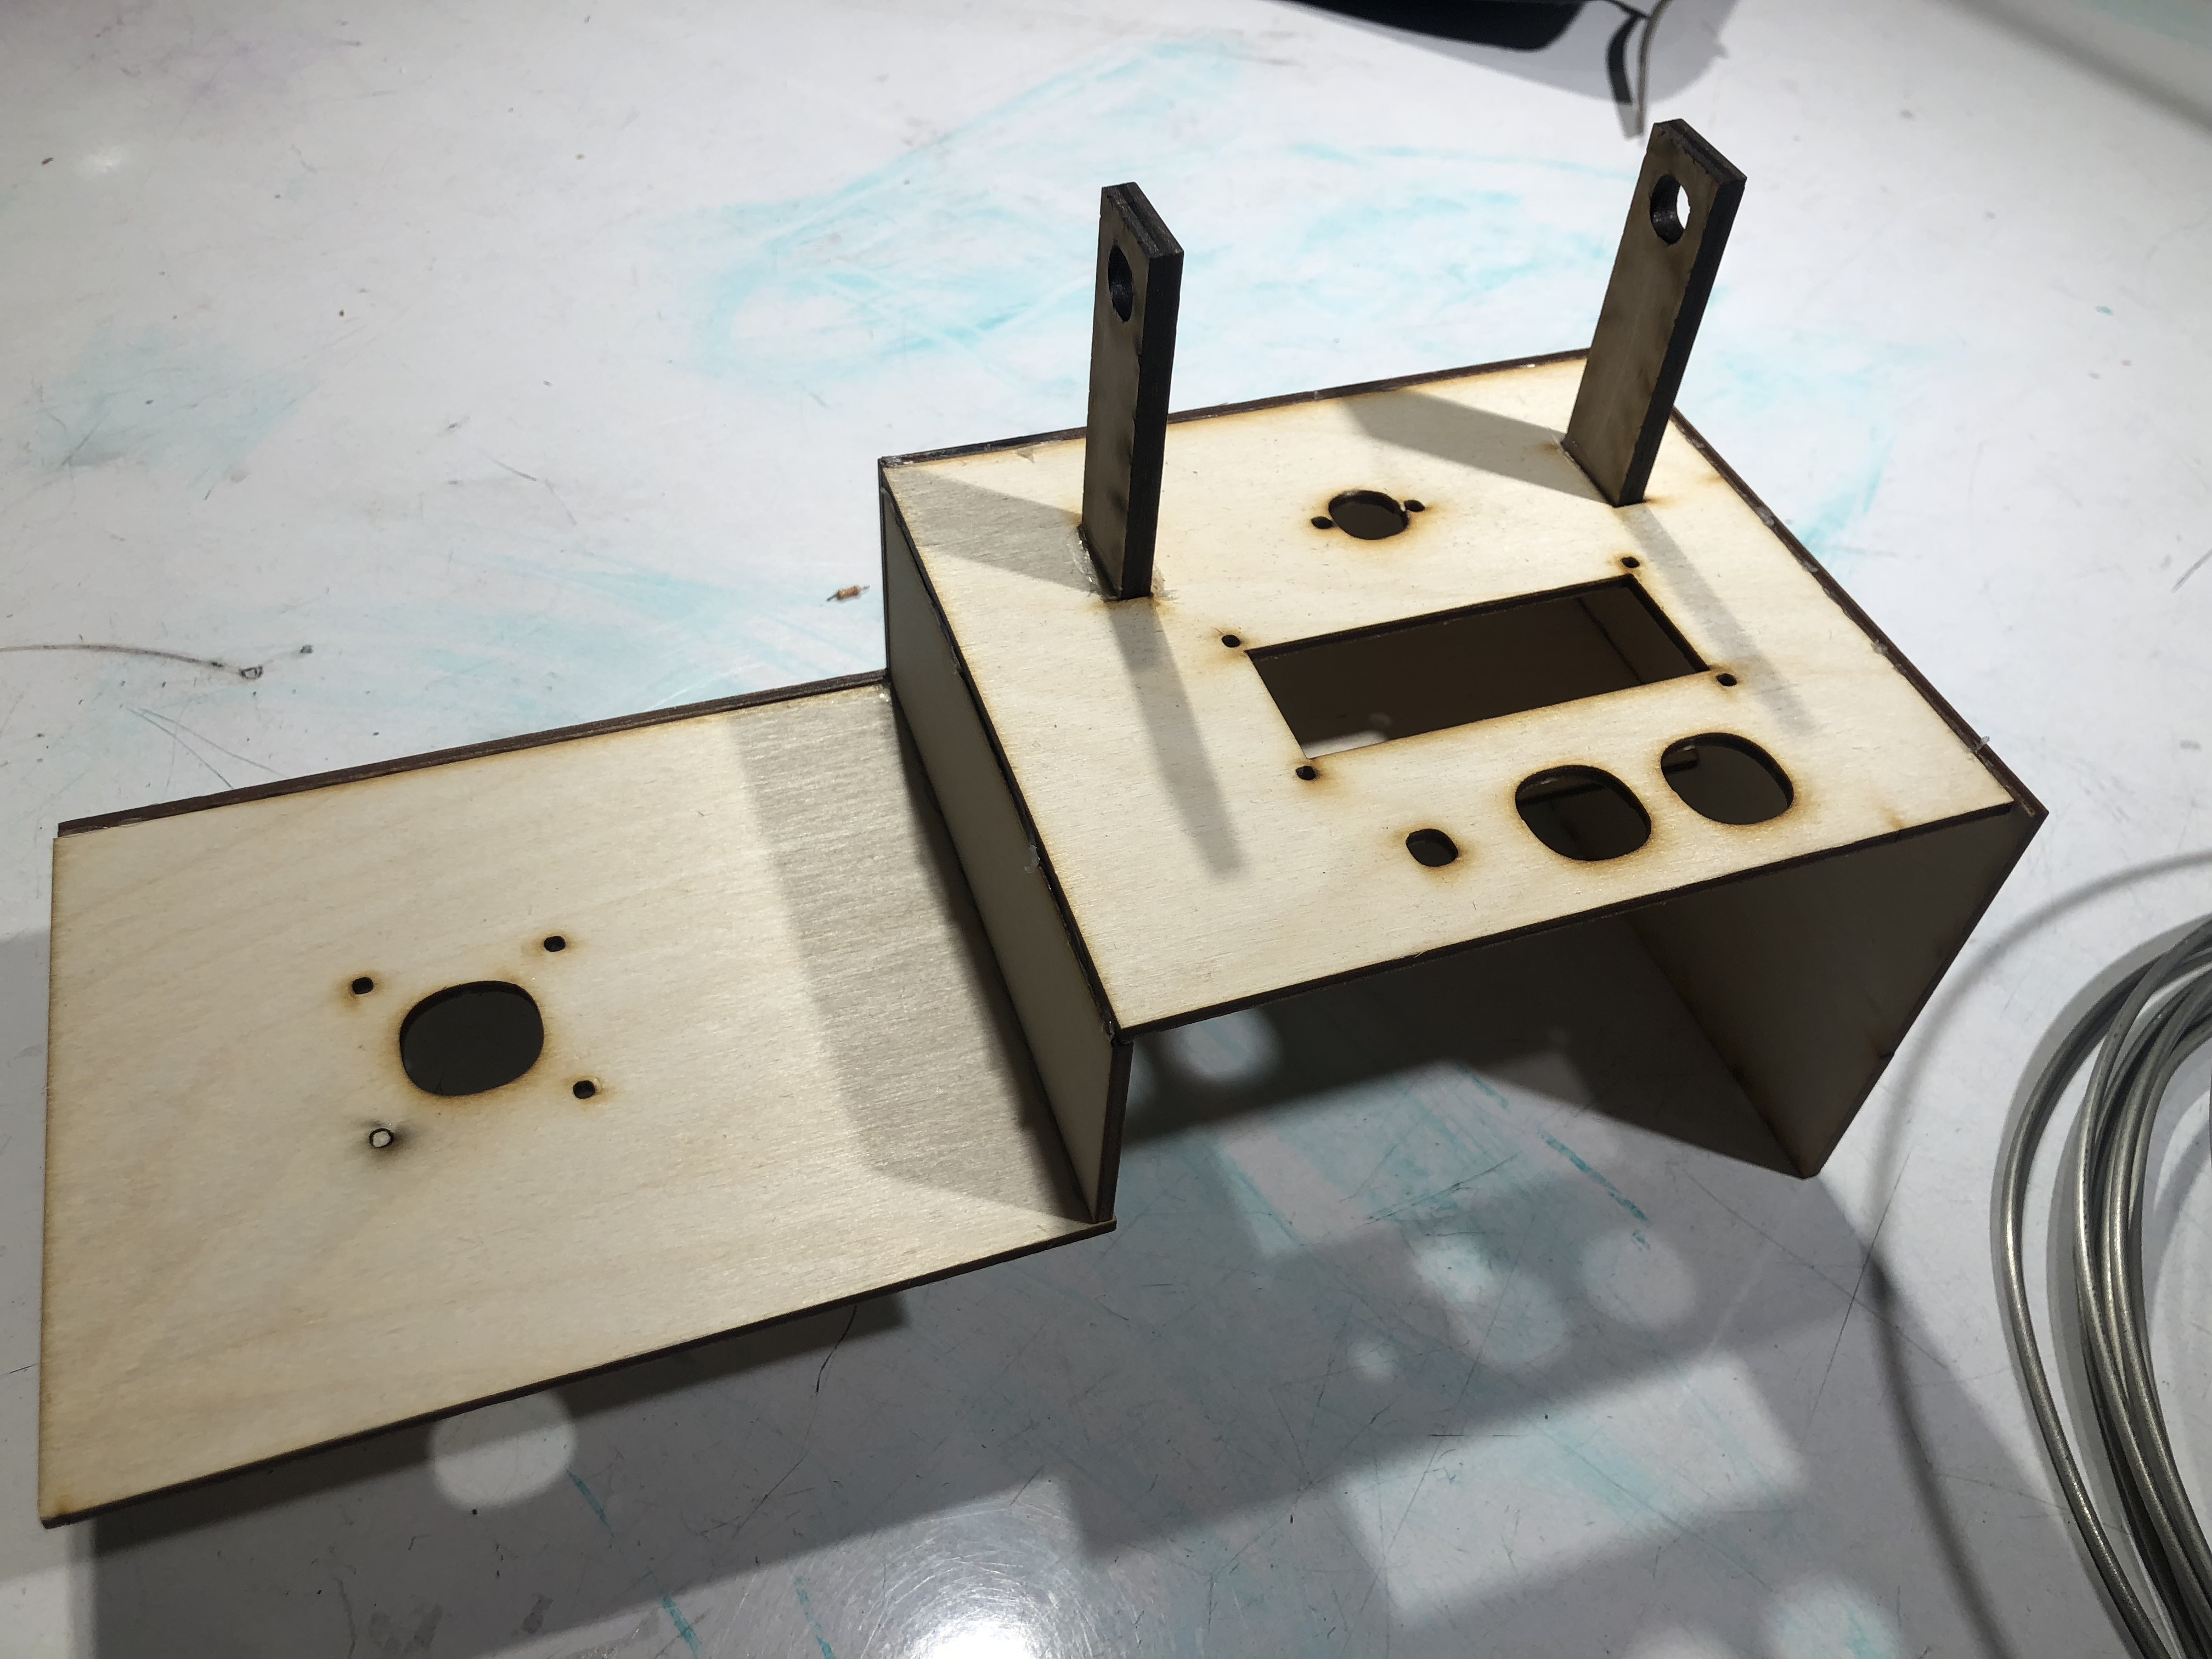
Second Iteration of Box
Moving from the prototype to the finished device had some aesthetic and physical challenges as well. We ended up choosing white acrylic for the overall form of the box and white plastic to create the yarn holder to mimic the original feeling of the handheld ball winder. Also, the screen updates the user as to how many yards have been wound, if the emergency stop was triggered, and if the winding has been completed.
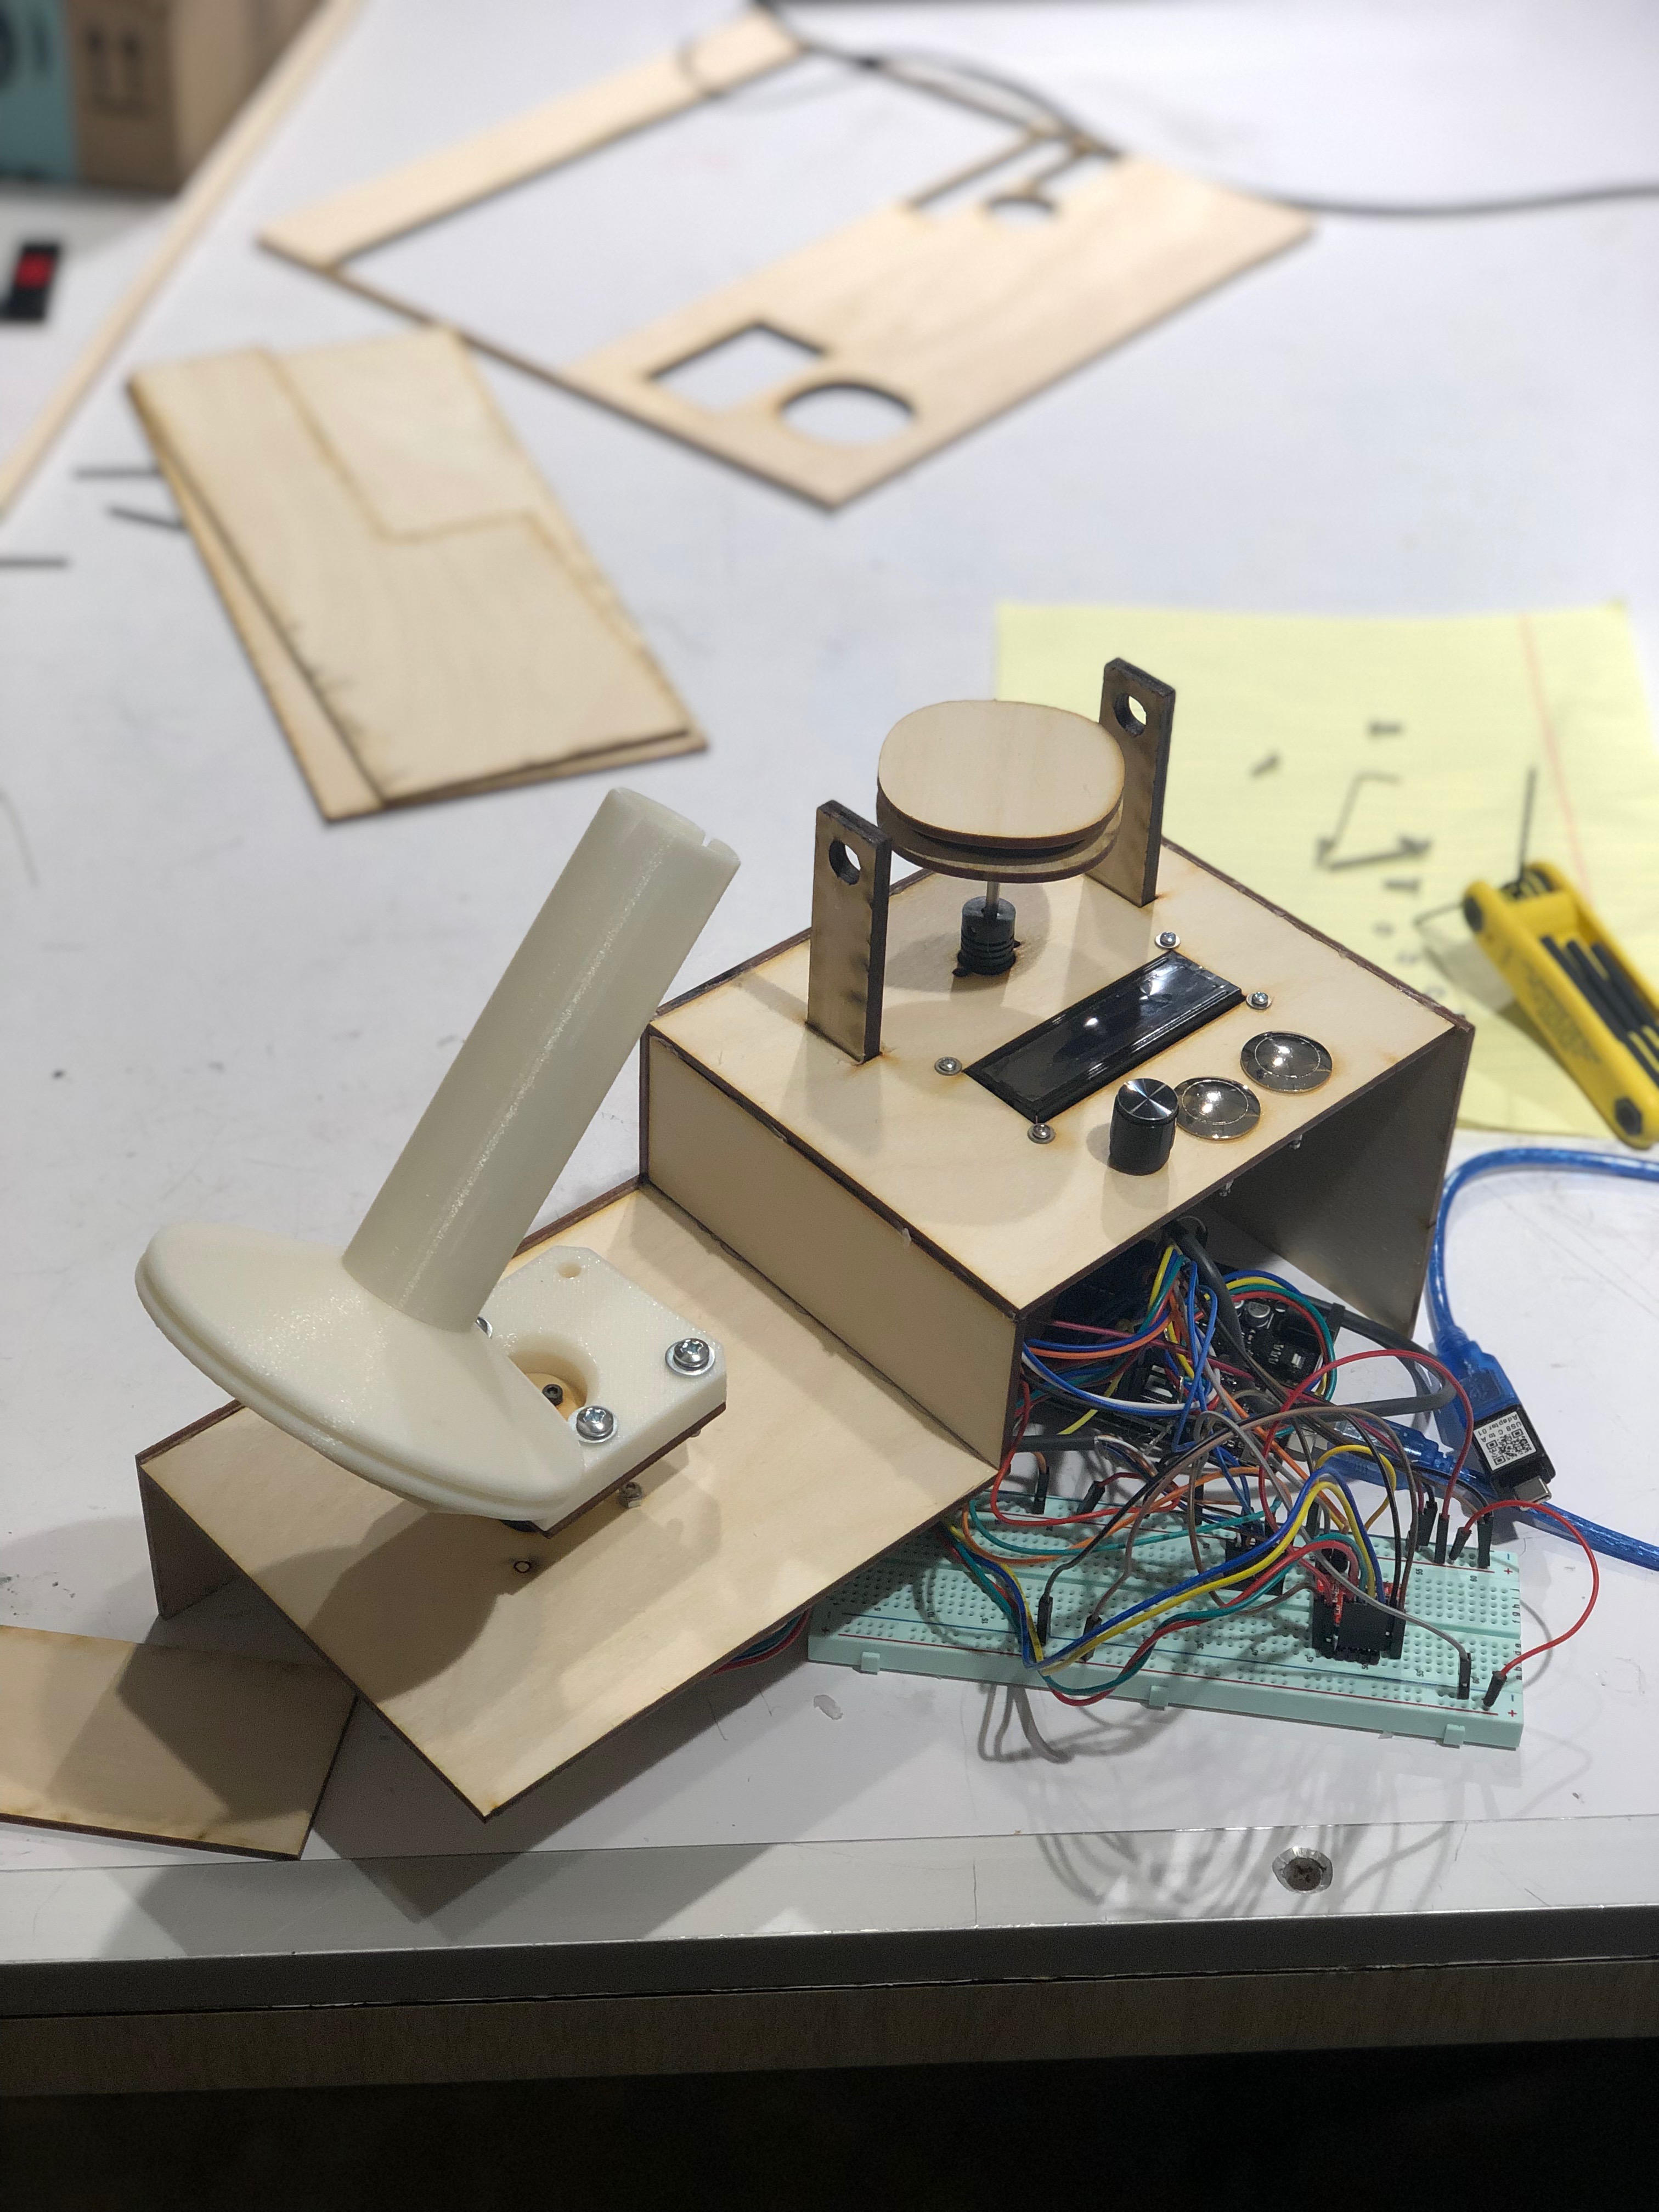
Original Wood Prototype
Prototype Ball Winder with Ball
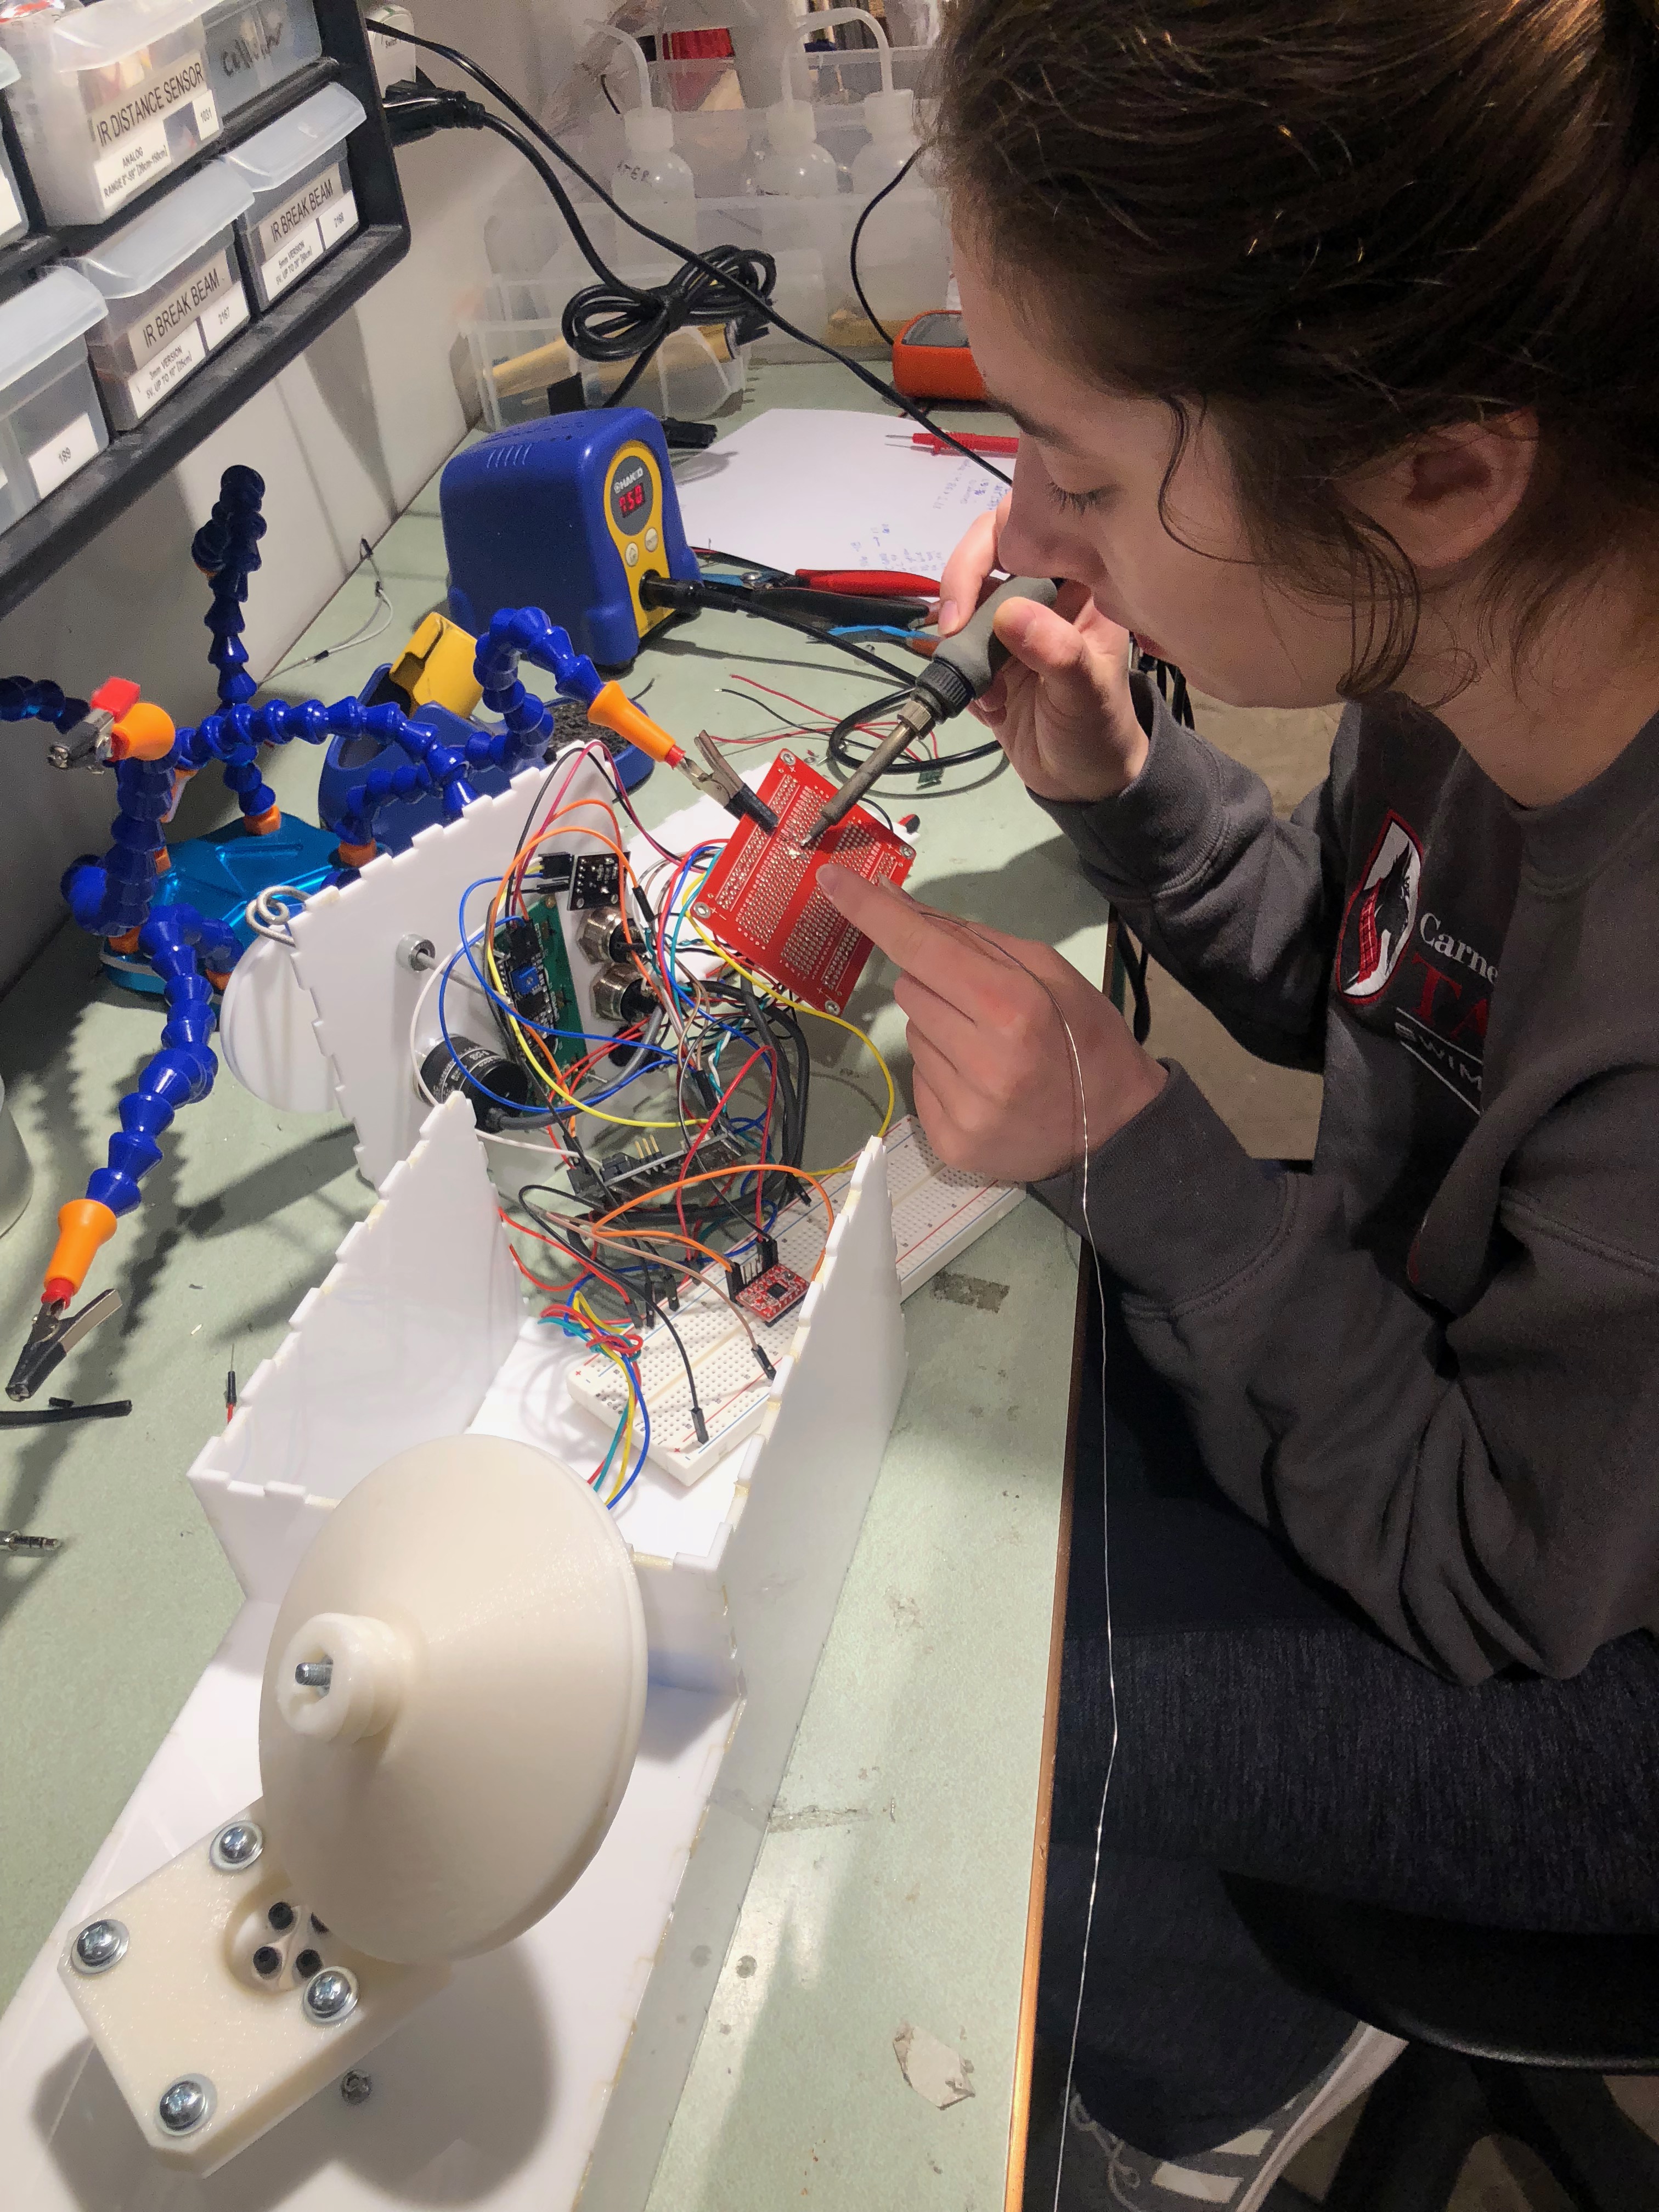
Megan Working on Soldering the Final Board
We spent awhile soldering the components in, to make the project more permanent and portable; in addition, we glued the box shut for easy portability.
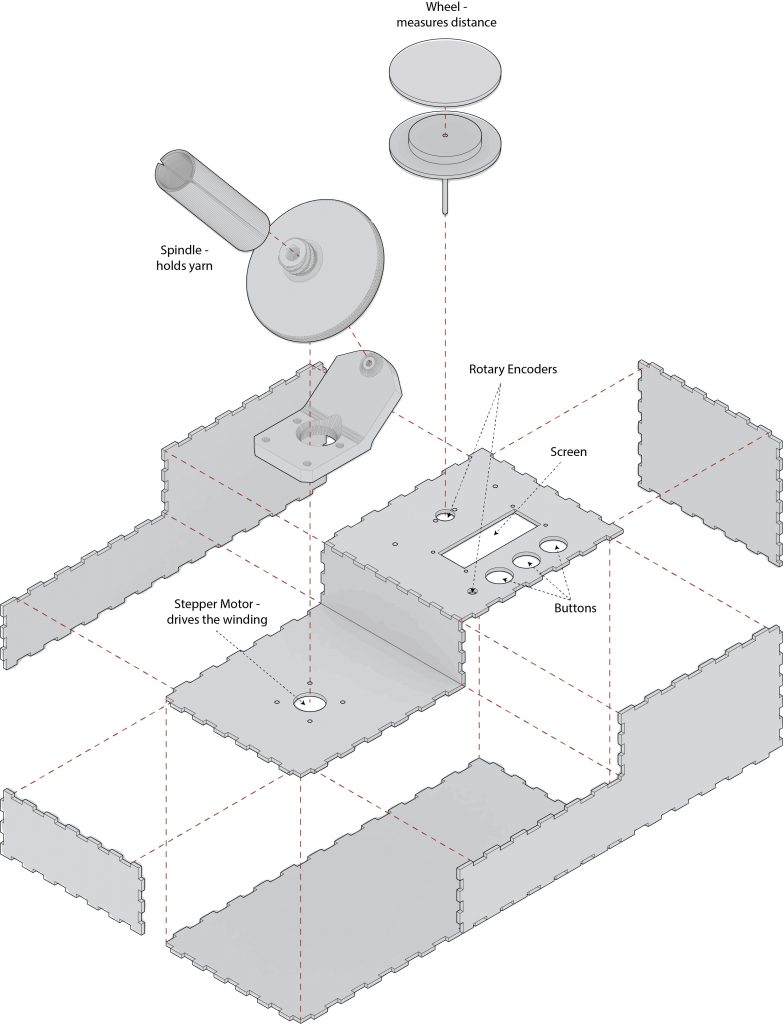
Digital Sketch of Final Device Structure
For the above design, we went with white acrylic to make it seem more attractive and presentable, and we used the teeth to make our box easier to assemble and sturdier. We added some space for buttons, and a port in the back for Rebecca to plug in her winder.
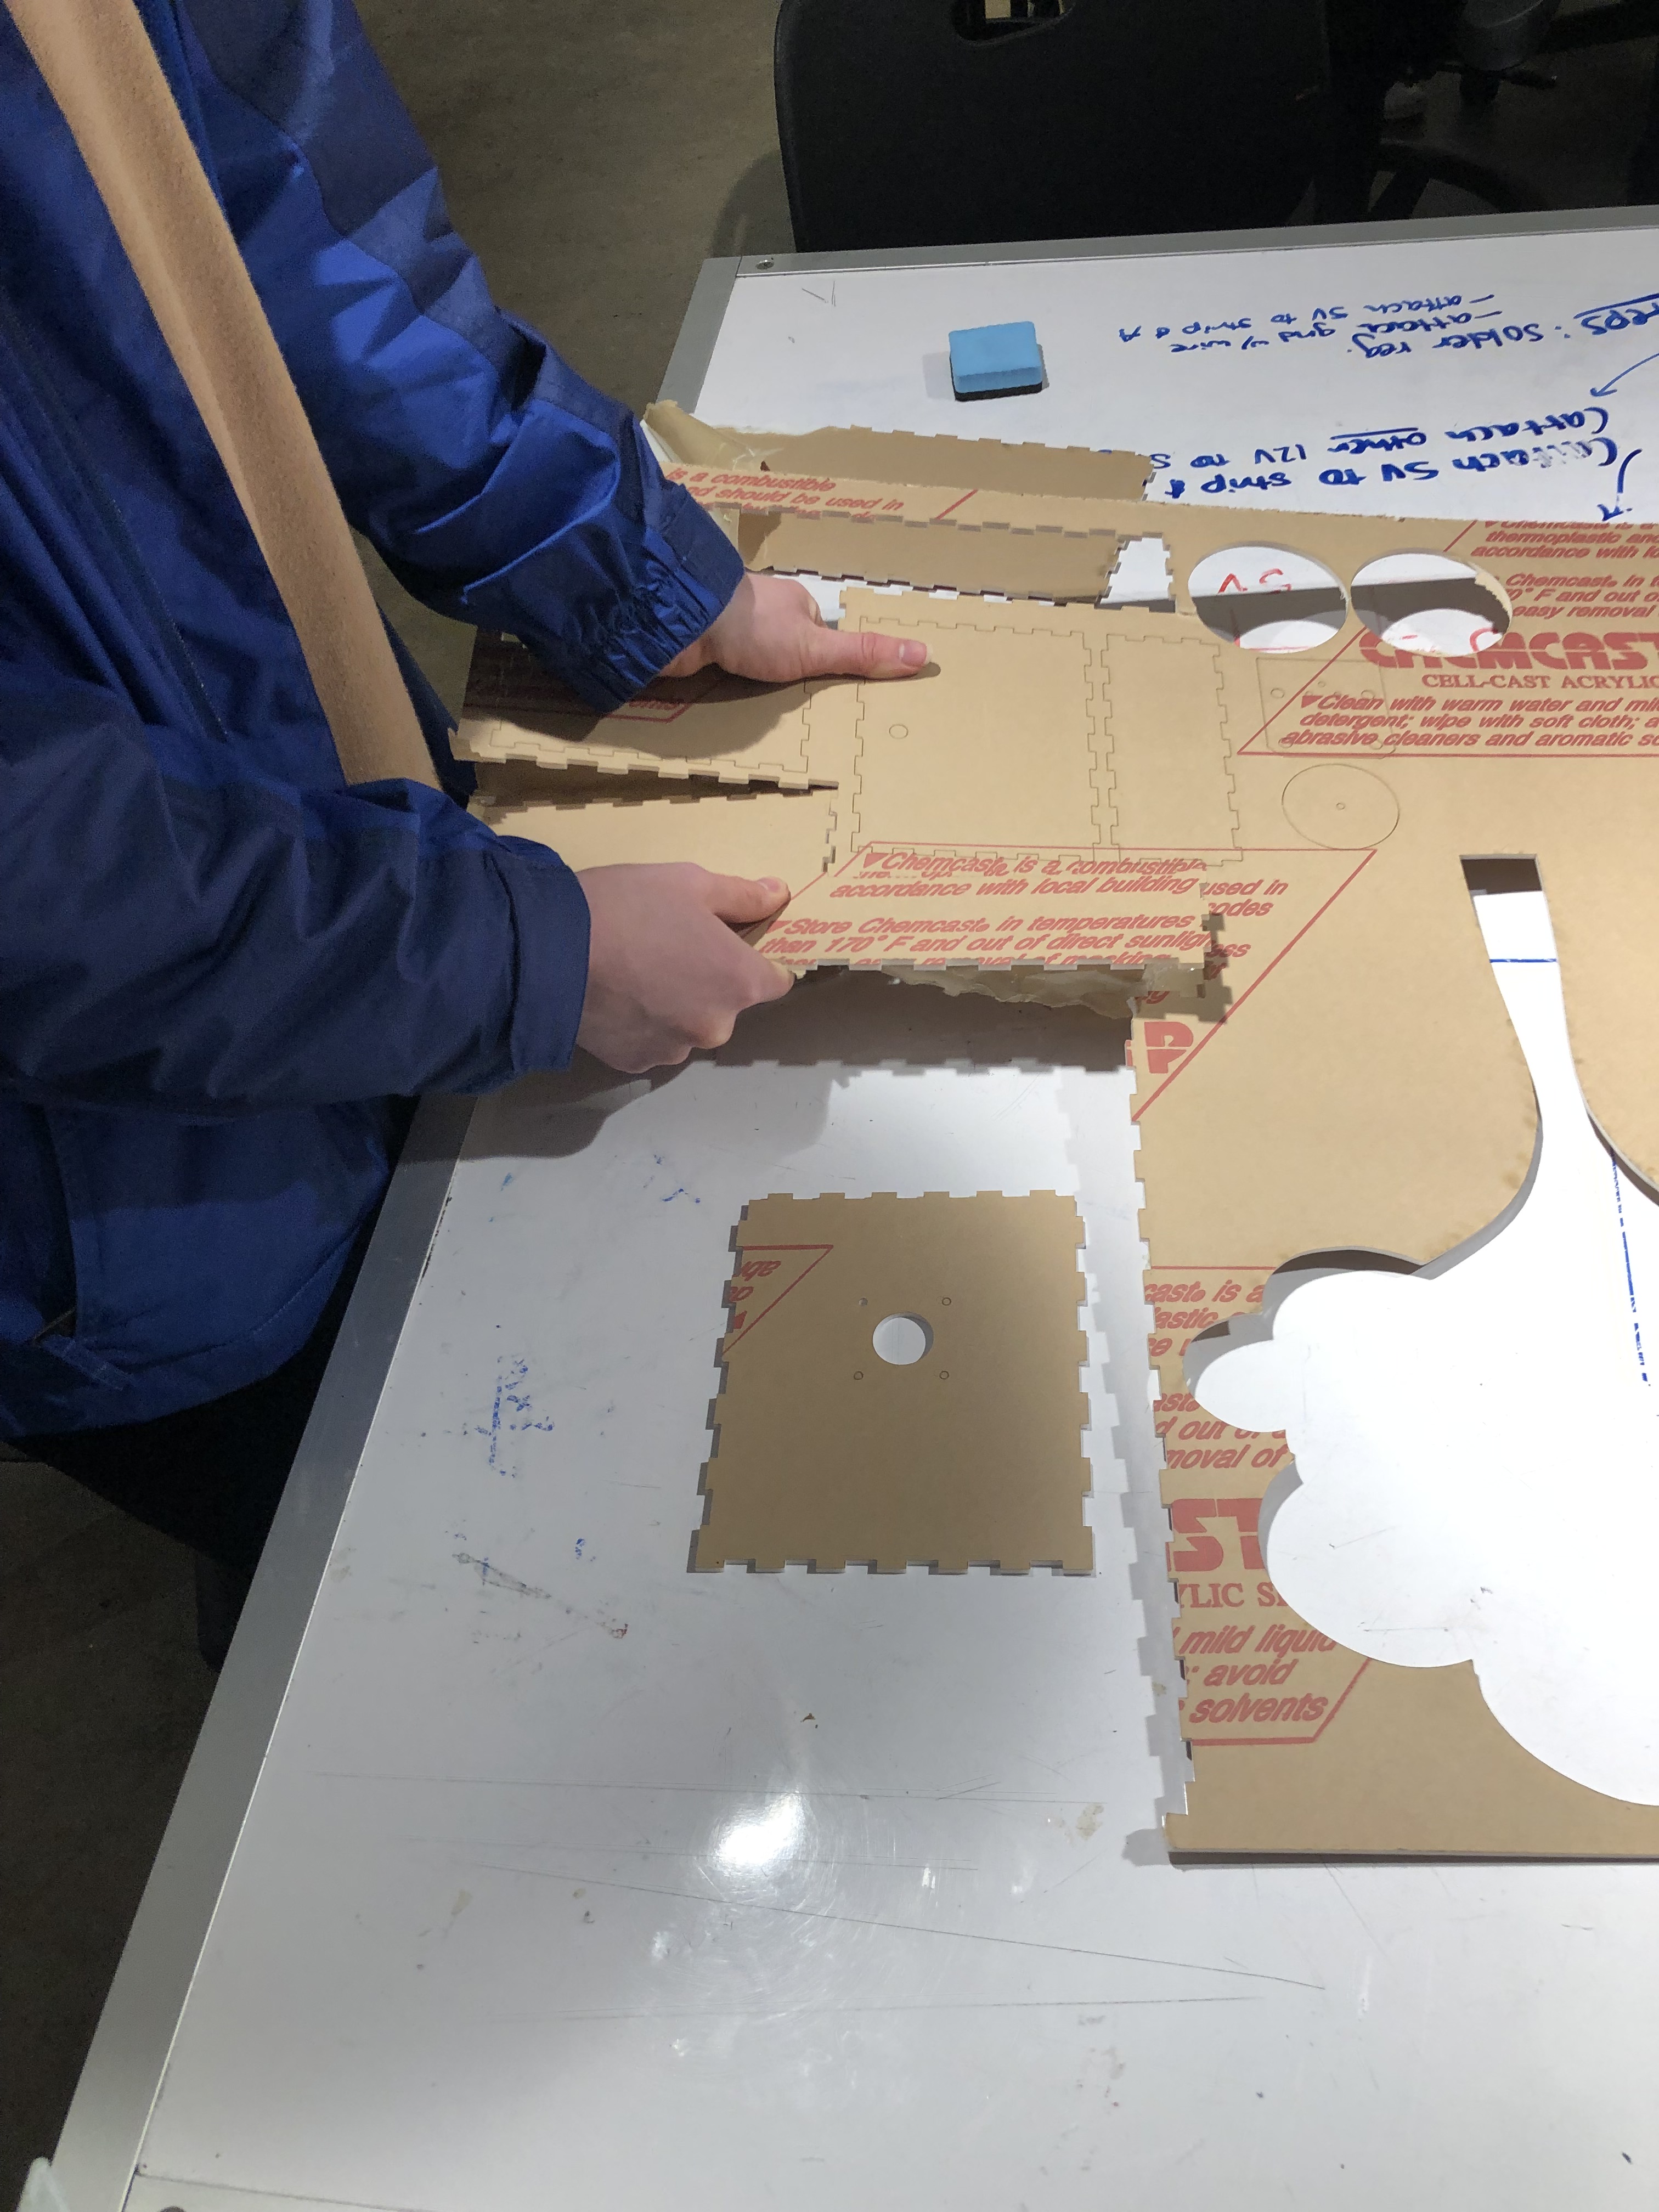
Making of Acrylic Box
The laser cutter did not fully cut through the acrylic, so we had to try and rip a lot of pieces out- though it was difficult, we wound up getting most to come out and by using only a little extra acrylic and a filer, we were able to get the box made.
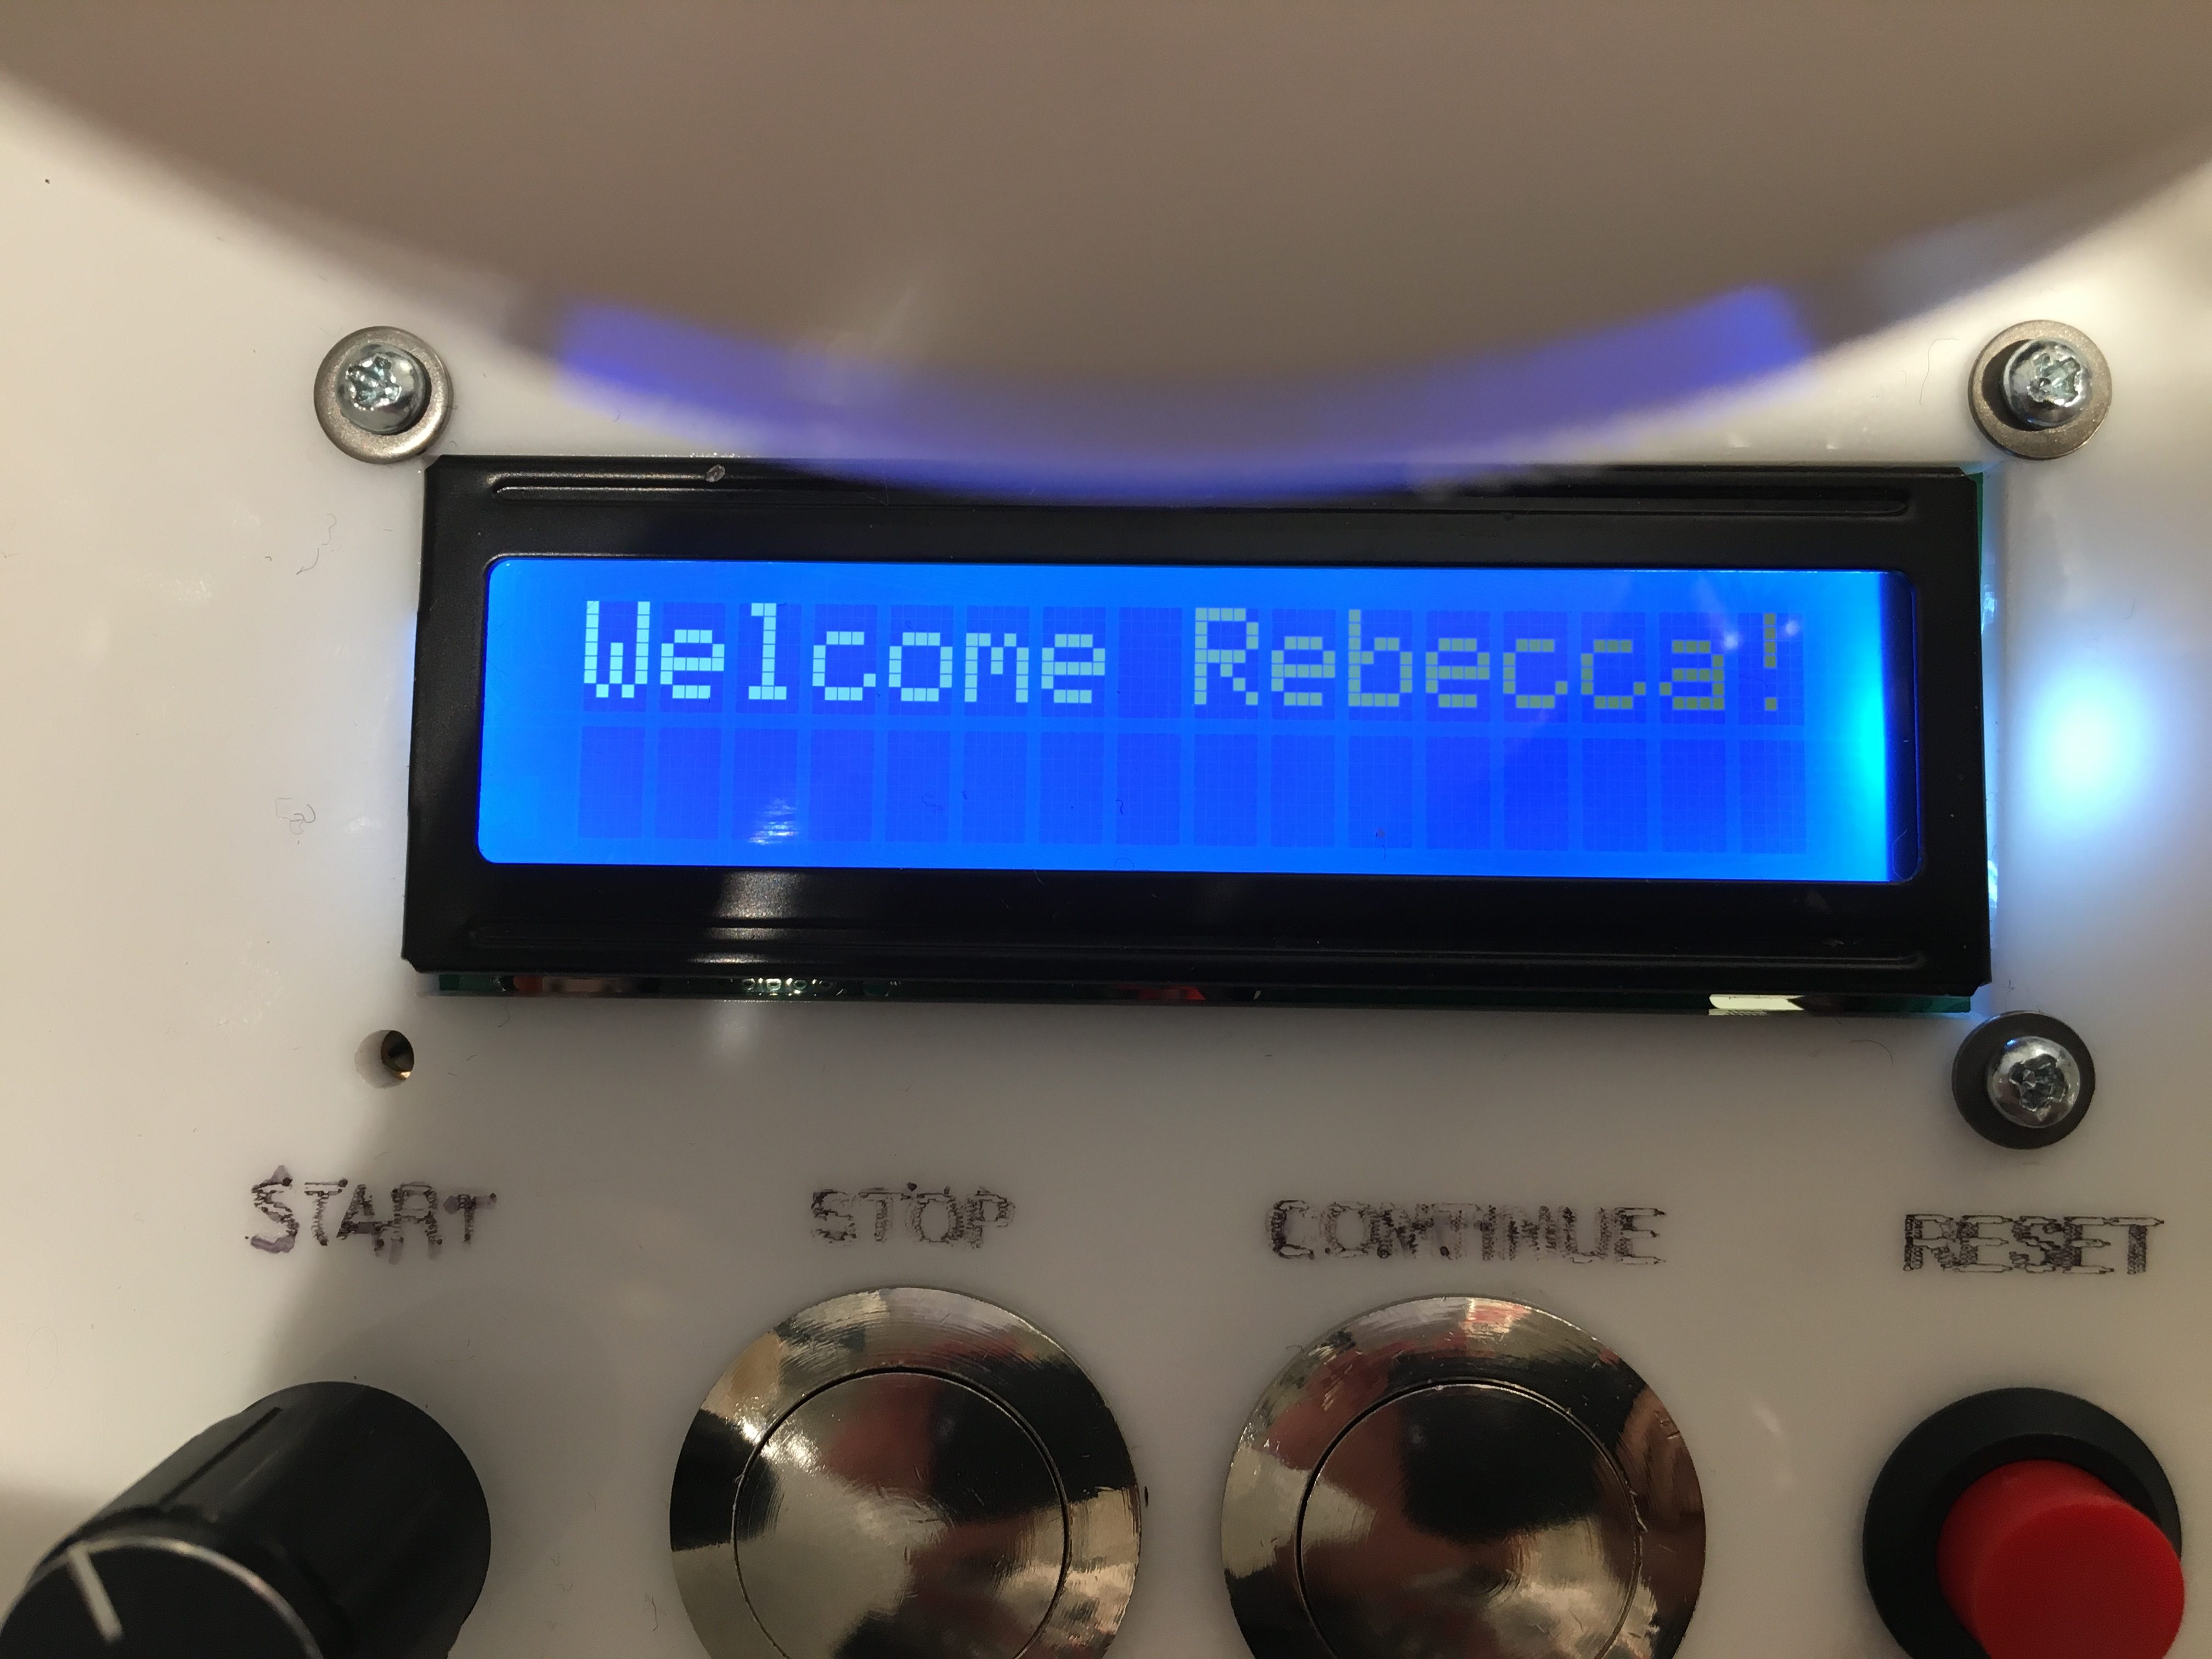
Welcome Screen
Winding Screen
We created a few “states” for the screen- two are shown above- one for the intro, where we welcome Rebecca, one where we ask how much she wants wound, one that shows how much has been wound, one if our winder emergency stops, and one for when it finishes.
Conclusions and Lessons Learned
The most rewarding thing about this project was the final critique. When we showed the project to Rebecca, something that she has been wanting for quite some time, she was so excited to bring the device home to use. The biggest motivator to making sure this device was working flawlessly was knowing that Rebecca would be using this daily and it would make such a positive impact in her life. Even during the creation process, many people who also had interests in fabrics and weaving reaffirmed the benefit of this device to us. We were surprised how much this device meant to her/other weavers and it was satisfying to create a project that had a purpose.
We also gained some important insights from others during the final critique process. One person suggested to “[have] a flap to keep the yarn on the disk” which would make it hard for the string to fall out as well. To fix this problem, Rebecca suggested we use a piece of tape would be an easy way to incorporate this idea. Another suggestion was to have an “adjustable speed, so customers can change the tightness themselves”. This would be an interesting component to add in case different types of yarn break under different pressures. Thus, having an adjustable speed or tension setting would account for more types of fibers.
Had we had more time to perfect the device, we would have tested the length of string over 600 yards. Even though Rebecca typically uses between 250-450 yards of string, we want to make sure that no matter how long the string is that the reading is accurate. During this entire process, one of the most educational aspects was realizing to test components as we go. After having the device begin to smoke up after plugging in power to our initial final product with a sultered final board, we had to go back to our board and take apart each component to isolate the problem. We found that testing each piece as we went was a much easier way to deal with this problem in the future.
Final Presentation with Rebecca.
Technical details
Code
- /*
- Automatic Ball Winder
- Jenny Han
- Ghalya Alsanea
- Megan Roche
- The following code uses an Arduino, stepper moter, two rotary encoders, buttons
- and LCD Display.
- It maintains four states: Welcome, Winding, Emergency Stop, and Finished.
- Welcome allows users to input the amount of yarn that the user needs.
- Winding starts the motor to collect the yarn into a ball as well as
- counting amountof yarn wound.
- Emergency Stop detects if the yarn fell off and displays how much
- yarn was wound at that instant.
- Finished stops the motor when the distance wanted is achieved.
- */
- #include <Encoder.h>
- #include <AccelStepper.h>
- #include <Wire.h>
- #include <LiquidCrystal_I2C.h>
- LiquidCrystal_I2C lcd(0x27, 16, 2);
- unsigned long timer = 0;
- long int stepsToDo = 0;
- //output rotary encoder: distance measuring
- const int O_CLK = 2;
- const int O_DT = 3;
- const int O_SW = 4;
- //input rotary encoder: distance input
- const int I_CLK = 5;
- const int I_DT = 6;
- const int I_SW = 7;
- //buttons for emergency stop and continue
- const int ESTOP = 11;
- const int CONTB = 12;
- long val;
- //current state that the device is in
- bool stateWelcome = false;
- bool stateWind = false;
- bool stateStop = false;
- bool stateFinished = false;
- bool winding = false;
- //variables to keep track of yarn wound
- long oldPosition = -999;
- long OLDLENGTH = -1;
- long NEWLENGTH;
- int CURRENTD;
- long TOTALD = 0;
- long int finalLen = 0;
- //stepper motor pins
- const int STEP_PIN = 8;
- const int DIR_PIN = 9;
- AccelStepper winderMotor(1, STEP_PIN, DIR_PIN);
- //initialize encoders
- Encoder encLength(O_CLK, O_DT);
- Encoder encInput(I_CLK, I_DT);
- void setup() {
- lcd.init();
- //Serial.begin(9600);
- lcd.backlight();
- lcd.setCursor(0, 0);
- lcd.print("Welcome Rebecca!");
- delay(4000);
- lcd.clear();
- pinMode(O_SW, INPUT);
- pinMode(I_SW, INPUT);
- winderMotor.setMaxSpeed(1000);
- winderMotor.setSpeed(400);
- pinMode(ESTOP, INPUT_PULLUP);
- pinMode(CONTB, INPUT_PULLUP);
- stateWelcome = true;
- }
- void loop() {
- //run welcome function
- if (stateWelcome) {
- stateWelcomeFunction();
- }
- //run winding
- if (stateWind) {
- stateWindFunction();
- }
- //run emergency stop
- if (stateStop) {
- stateStopFunction();
- }
- //run finished screen
- if (stateFinished) {
- stateFinishedFunction();
- }
- }
- //takes in distance desired
- void stateWelcomeFunction() {
- long newPosition = encInput.read();
- if (val < 0) {
- val = 0;
- }
- //starts at 350, average yarn length needed
- if (newPosition != oldPosition) {
- oldPosition = newPosition;
- val = 350 - 5* (newPosition/4);
- lcd.clear();
- lcd.leftToRight();
- lcd.setCursor(0, 0);
- lcd.print("Yards needed:");
- lcd.setCursor(0, 1);
- lcd.print(val);
- }
- //cannot go negative
- if (!digitalRead(I_SW)) {
- TOTALD = val;
- lcd.clear();
- lcd.leftToRight();
- lcd.setCursor(0, 0);
- lcd.print("Winding ");
- lcd.setCursor(0, 1);
- lcd.print(TOTALD);
- lcd.print(" Yards.");
- delay(2000);
- stateWelcome = false;
- stateWind = true;
- }
- }
- //starts winding motor and counts distance
- //checks if yarn fell off
- void stateWindFunction() {
- int rotNeeded = TOTALD * 6;
- int oldD = rotNeeded / 6;
- while (rotNeeded > 0) {
- //if stop pressed then go to state stop function
- bool stateStopButton = digitalRead(ESTOP);
- if (stateStopButton == 0) {
- stateWind = false;
- stateStop = true;
- break;
- }
- //every four seconds check if string fell off
- if (millis() - timer >= 4000 ) {
- // this happens once per 4 seconds
- NEWLENGTH = encLength.read();
- if ((NEWLENGTH == OLDLENGTH) && (NEWLENGTH != 0)) {
- stateWind = false;
- stateStop = true;
- break;
- }
- timer = millis();
- }
- NEWLENGTH = encLength.read();
- //calls for motor to run
- for (int i = 0; i < 700; i++) {
- winderMotor.runSpeed();
- }
- //update LCD screen
- if ((NEWLENGTH != OLDLENGTH)) {
- OLDLENGTH = NEWLENGTH;
- rotNeeded = (TOTALD * 6) - floor(abs(NEWLENGTH / 800));
- CURRENTD = rotNeeded / 6;
- if (CURRENTD != oldD) {
- oldD = CURRENTD;
- lcd.clear();
- lcd.setCursor(0, 0);
- lcd.print("TO GO : ");
- lcd.setCursor(0, 1);
- lcd.print(CURRENTD );
- lcd.print(" yards");
- }
- if (rotNeeded == 0) {
- stateWind = false;
- stateFinished = true;
- }
- }
- }
- }
- //finished state, restart button is the reset pin
- void stateFinishedFunction() {
- //if button press
- lcd.clear();
- lcd.setCursor(0, 0);
- lcd.print("Finished!");
- lcd.setCursor(0, 1);
- lcd.print("Wound ");
- lcd.print(TOTALD);
- lcd.print("yds");
- }
- //emergecy stop state, restart button is the reset pin
- void stateStopFunction() {
- lcd.clear();
- lcd.setCursor(0, 0);
- lcd.print("STOPPED!");
- lcd.setCursor(0, 1);
- lcd.print("Wound ");
- lcd.print(TOTALD - CURRENTD - 1);
- lcd.print("yds");
- int contbutton = digitalRead(CONTB);
- //continue
- if (contbutton == 0) {
- delay(100);
- stateStop = false;
- stateWind = true;
- stateFinished=false;
- stateWelcome = false;
- }
- }
Schematic and design files
Leave a Reply
You must be logged in to post a comment.