
Description
This device wakes me up when it detects that I am falling asleep while doing my work.
Final Product
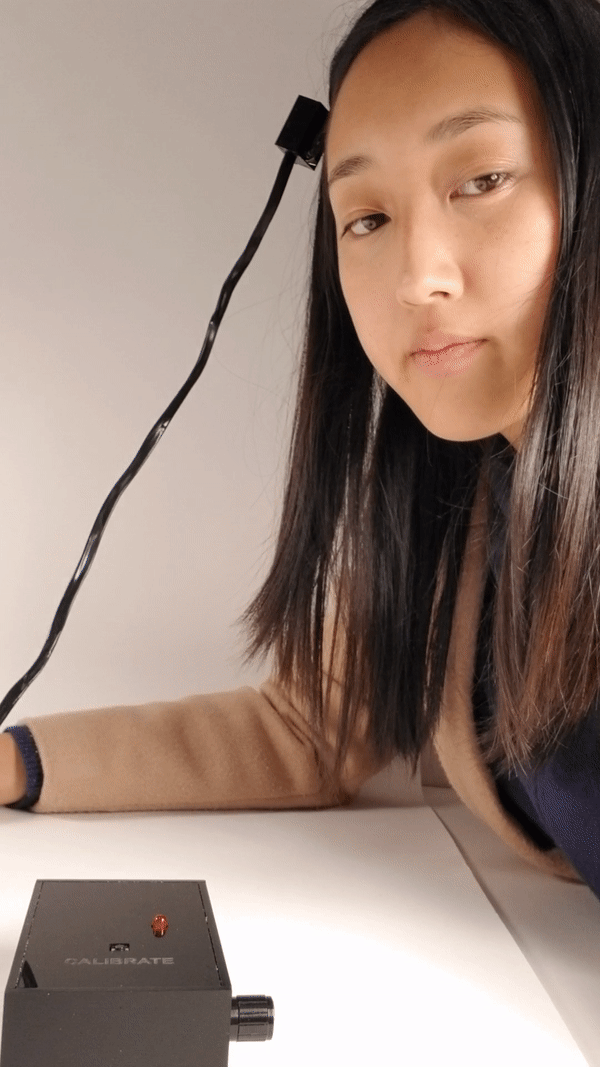
The device in use: the device makes a sound and lights up when I start falling asleep.
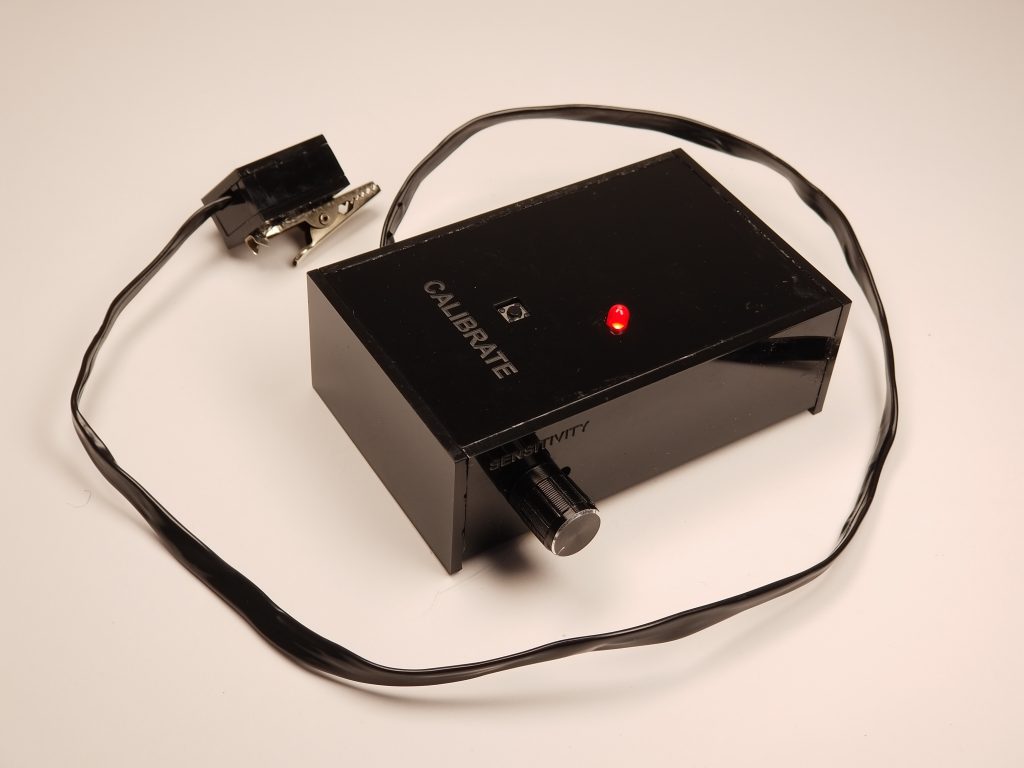
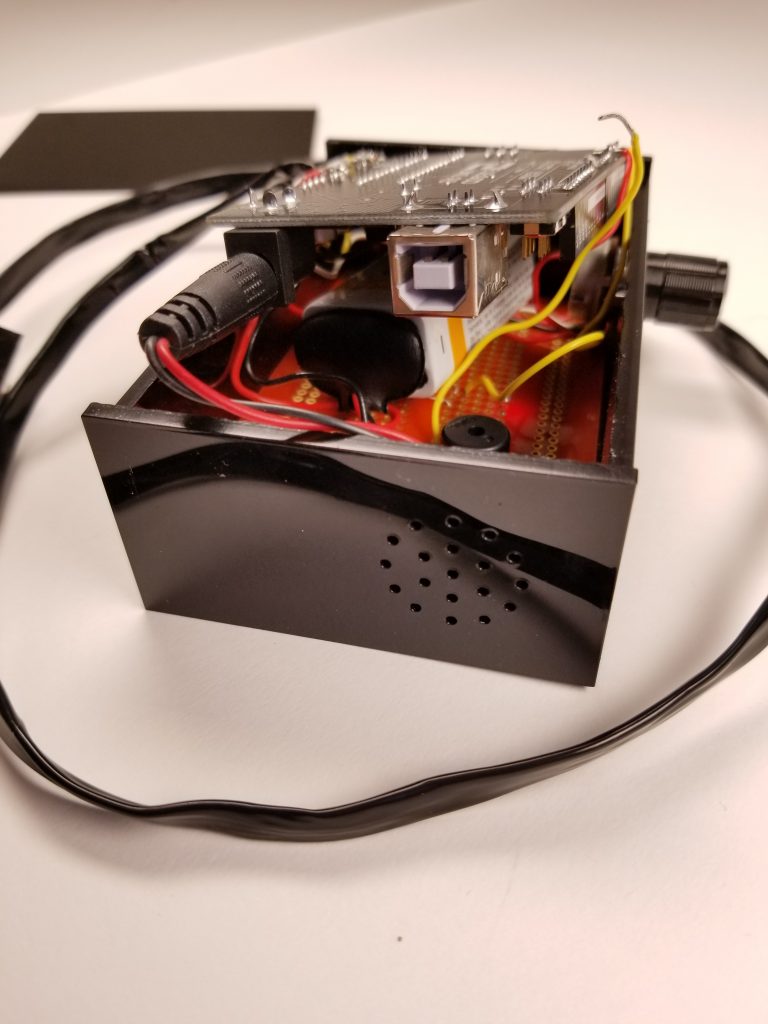
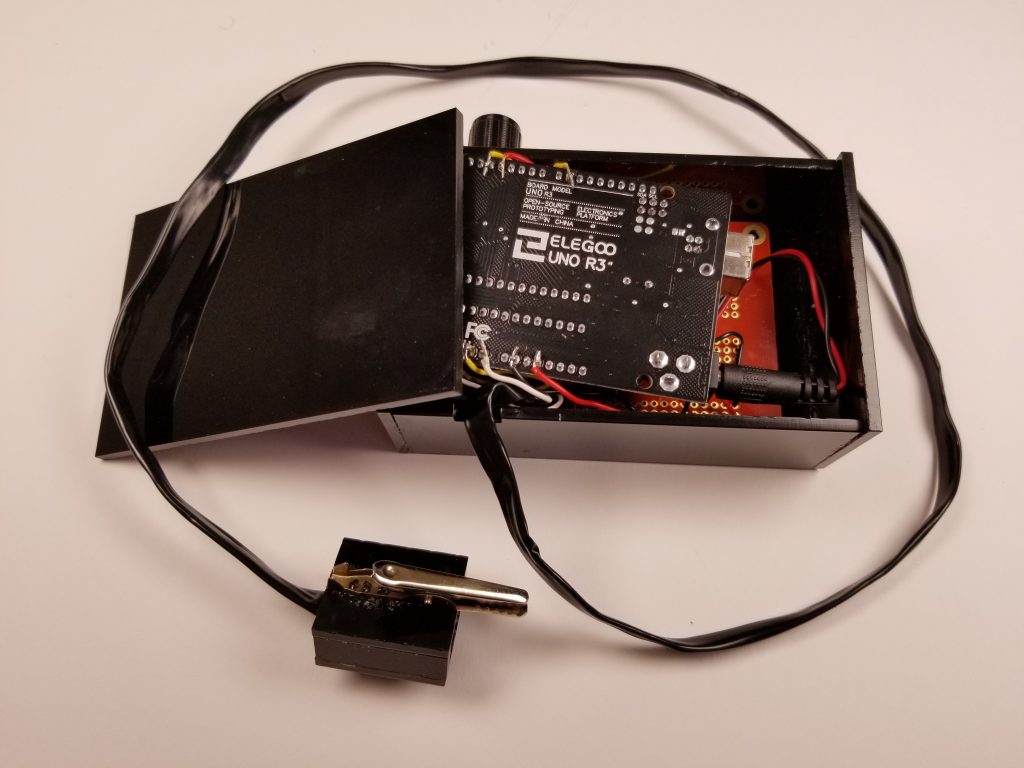
Overall photo: there is a box with an LED, button, and knob on the outside, with a speaker, battery, and Arduino on the inside.
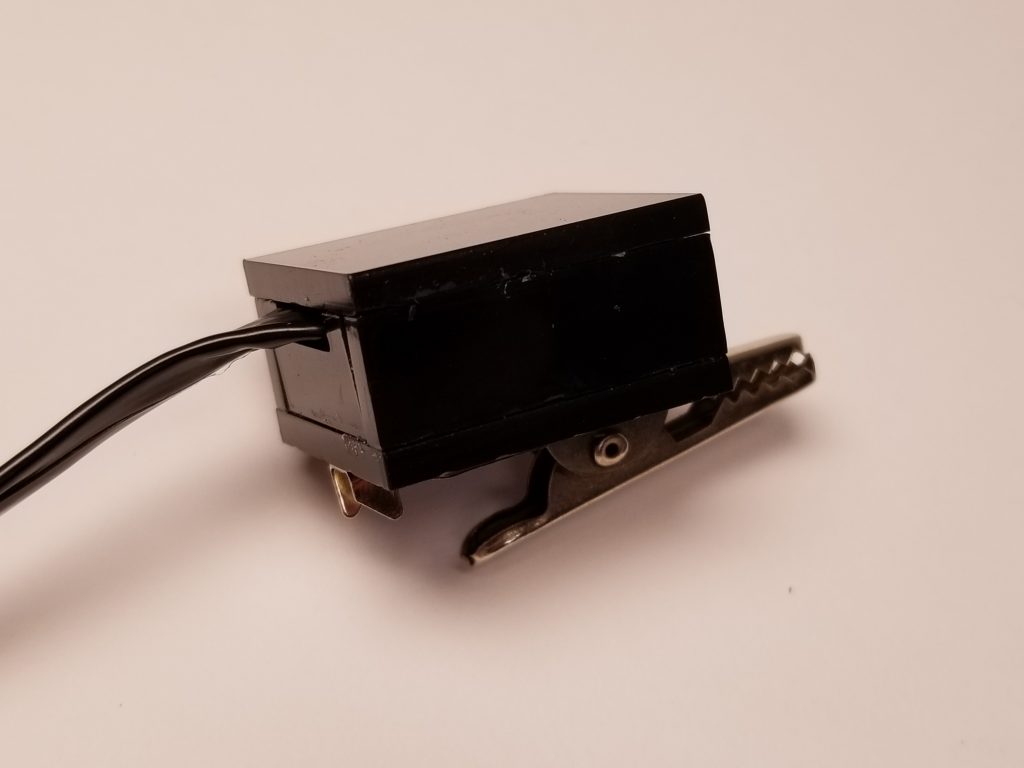
A close-up of the little “hair-clip” that contains the accelerometer.
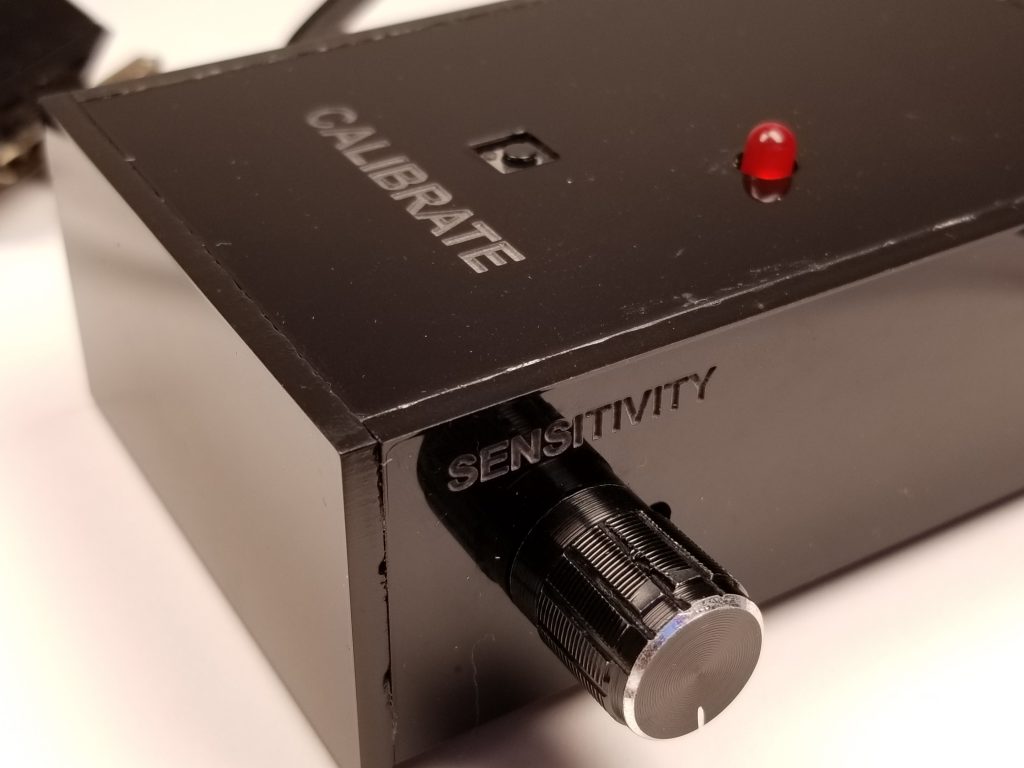
Close up of some of the box’s exterior: There is a calibration button and a sensitivity adjuster.
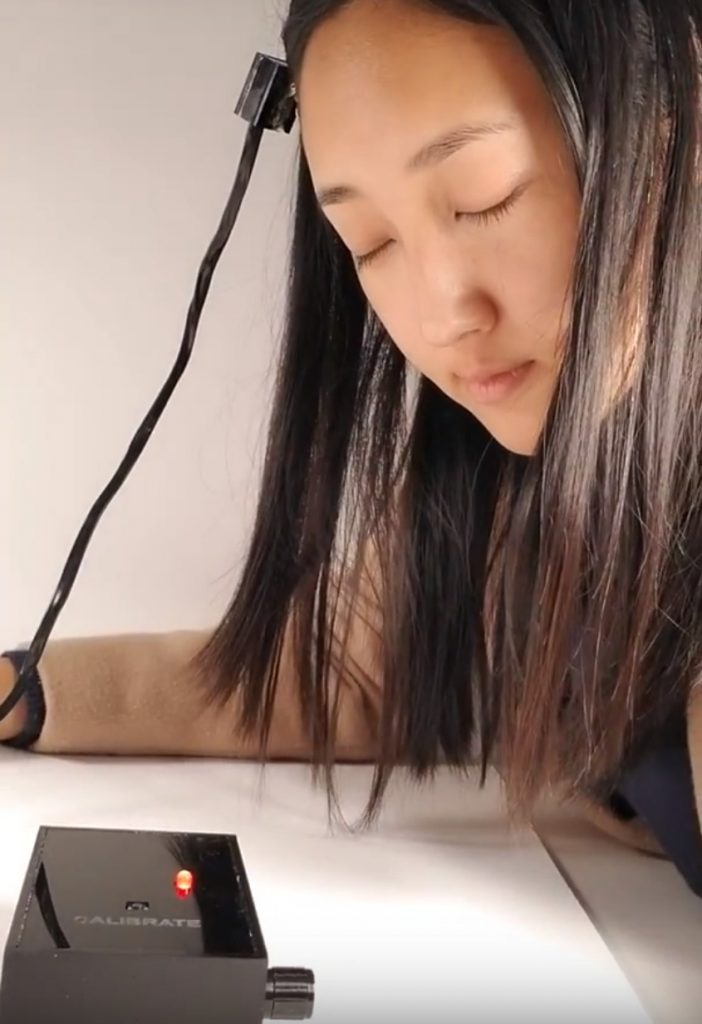
Device in use: I am falling asleep and the device will wake me up with a noise.
The Process

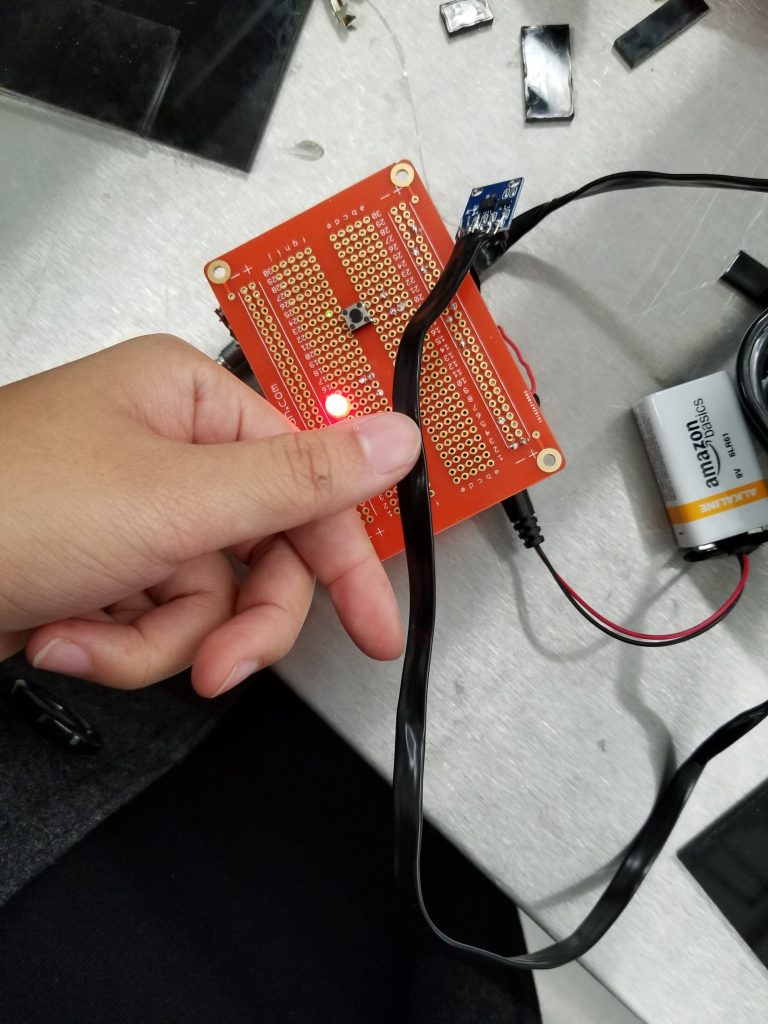
The electronic components on a breadboard for testing the wiring. I decided to add a potentiometer to control the sensitivity and a button to calibrate the accelerometer to my initial design.

After soldering everything to the breadboard and Arduino. I also covered the exposed wires with electrical tape. Mesuring the position and size of everything for laser cutting the casing took longer than I thought.
Soldering was a time-consuming process, the wires that I tried to solder to the Arduino kept becoming detached from it. I had to keep soldering the wires back on.
It was a tight fit putting everything into the laser cut box, had to cut out the parts multiple times. You can see one of the wires from the Arduino got detached again.
This was the first time laser cutting anything by myself so there was some trial and error: I forgot to take into account the thickness of the acrylic when doing initial measurements.
Discussion
For me, this project was a test of my own abilities from what I learned in this class so far. I didn’t want to make something overly complicated, but I also did not want to make something too “simple”. In a way, the principle of this was very simple: you move the accelerometer, the box notifies you when it moves out of range. However, I added some additional features like a calibration button and a sensitivity button to the initial design, after some feedback.
I’m happy with what I did within the limitations of what I was capable of doing, but I regret not asking about things that I didn’t know about, such as a louder speaker, or making the accelerometer wireless. I got some feedback that “maybe the cord should be longer” and that I “could make the sensor wireless,” and if I asked about making the sensor wireless maybe I could have found a solution to that. I wish I had been more creative in the process and curious, not just sticking to what I know would work.
One major problem I encountered was that the speaker was not loud enough. I should have asked about making the speaker louder, but for some reason I didn’t, probably because I was running out of time. I think it was louder when I had it on the solderless breadboard and then I’m not sure why, but the sound was very tiny when I soldered everything to a breadboard. At that point I probably got too lazy to change anything because I had already soldered everything. A feedback I received was to put a vibration as well as a sound, which I thought could be an improvement as well.
As for the aesthetics of my design, most of the feedback from my peers included a note about how they liked the appearance and design of it, how clean and simple it was. People said “very clean design for the interface,” “I like the box to hide the electronics,” “love how well it’s all contained… [and] the aesthetic choices,” and “I think that it’s very polished. Although it was my first time laser cutting by myself, I learned a lot about laser cutting and designing a laser-cut casing through trial and error. All that time I put into the outside seemed to pay off, since I got a lot of positive feedback for it. I should have made it a little more roomy on the inside, but I mistakenly just took my initial measurements of the breadboard and arduino and didn’t add any more room to that, not taking into account the wires and everything I would have to put inside. Fortunately, after cutting a few more times, I got a larger box. However, because I had only bought one sheet of 1×1 acrylic and finished cutting right before class, I was only able to make some parts of the box larger, so it was still a tight fit. Because everything was so tight, it would sometimes mess up the wiring. As painstaking as it is, I would want to make myself a new box if I were to use this regularly, and perhaps make the calibration button bigger.
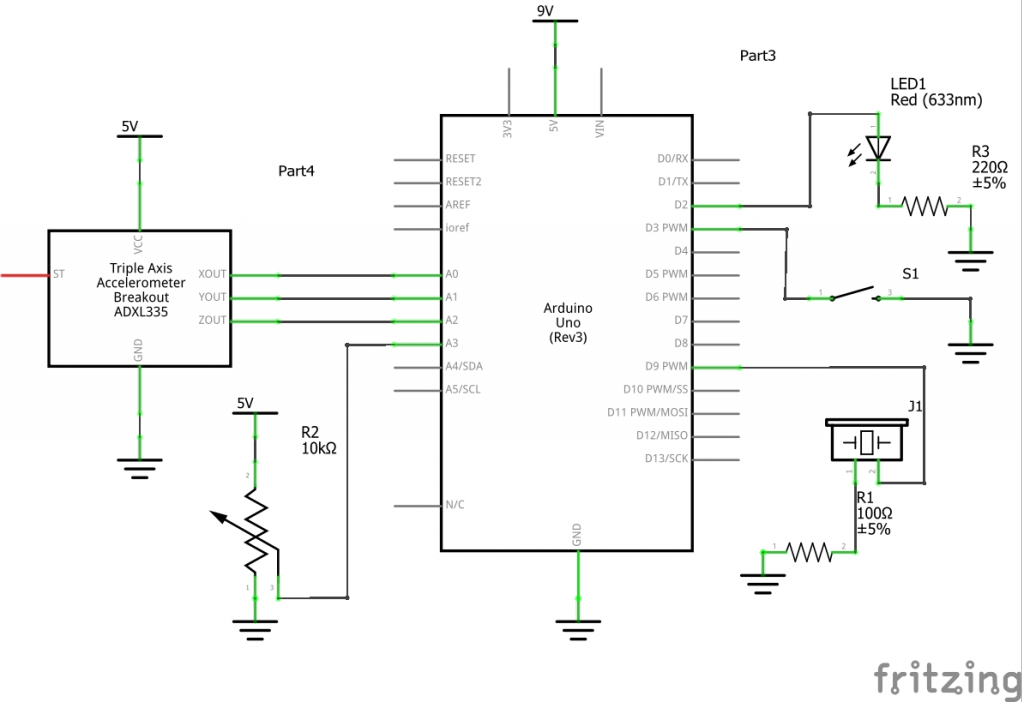
Schematic
Code
//Help I'm Falling Asleep
//This code turns an LED and speaker on when the accelerometer values
// go out of bounds, set by a potentiometer.

const int XPIN = A0;
const int YPIN = A1;
const int ZPIN = A2;
const int LED2 = 2;
const int BUT = 3;
const int SPKR = 9;
const int POT = A3;
int setX;
int setY;
int setZ;
int bound = 30;

void setup() {
  pinMode(XPIN, INPUT);
  pinMode(YPIN, INPUT);
  pinMode(ZPIN, INPUT);
  pinMode(LED2, OUTPUT);
  pinMode(BUT, INPUT_PULLUP);
  pinMode(POT, INPUT);
  Serial.begin(9600);
  setX = analogRead(XPIN);
  setY = analogRead(YPIN);
  setZ = analogRead(ZPIN);
  digitalWrite (LED2, LOW);
}

void loop() {
  int butState = digitalRead(BUT);
  int led2State = digitalRead(LED2);
  int x = analogRead(XPIN);
  int y = analogRead(YPIN);
  int z = analogRead(ZPIN);
  int potVal = analogRead(POT);
  bound = potVal/10;//sets value of bound from potentiometer
  Serial.println(bound);
  if(butState == LOW){//when button is pressed, turn off LED, calibrate current position to the "initial" position.
    setX = x;
    setY = y;
    setZ = z;
    digitalWrite (LED2, LOW);
  }

  if(butState == HIGH){//when button is not being pressed
    if(x > (setX + bound) || x < (setX - bound) ||//if accelerometer goes out of bounds, turn LED and speaker on
    y > (setY + bound) || y < (setY - bound) ||
    z > (setZ + bound) || z < (setZ - bound)){
      digitalWrite (LED2, HIGH);
      tone(SPKR,1000);
   }
   else{//turn off LED and speaker if not out of bounds
    digitalWrite (LED2, LOW);
    tone(SPKR, 0);
    }
  }
  //these are to make sure the potentiometer is working
  Serial.print(x);
  Serial.print(" ");    // spaces between values to separate them
  Serial.print(y);
  Serial.print(" ");
  Serial.println(z);     // line break only needed after the final value
  delay(50);
}
Leave a Reply
You must be logged in to post a comment.