Instead of getting stuck in the same cycle every day, Jar of Change is here motivate you into taking the first step out of your comfort zone!
Photos of the Final Project
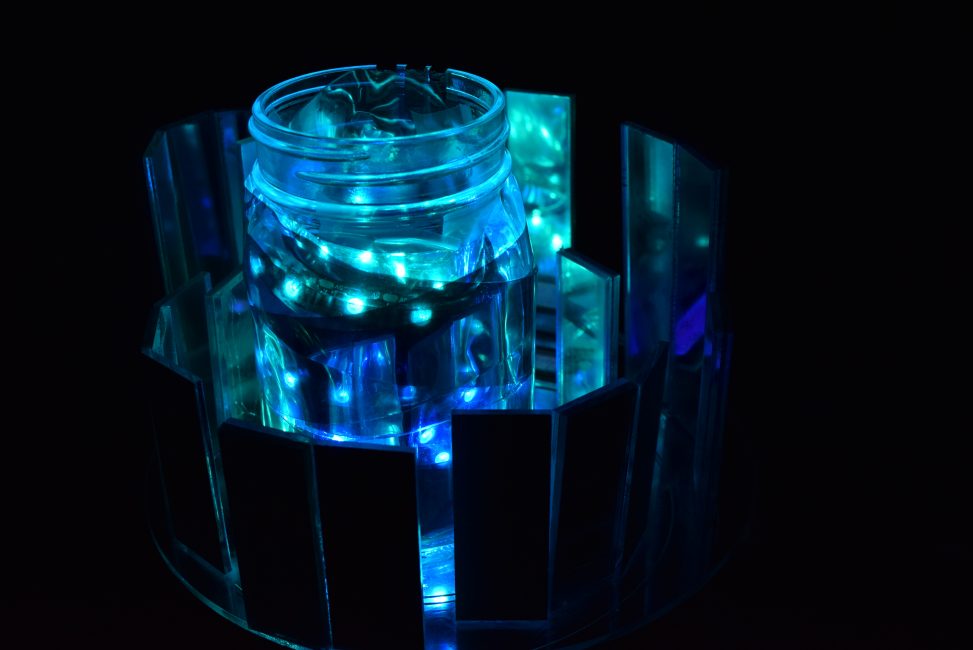
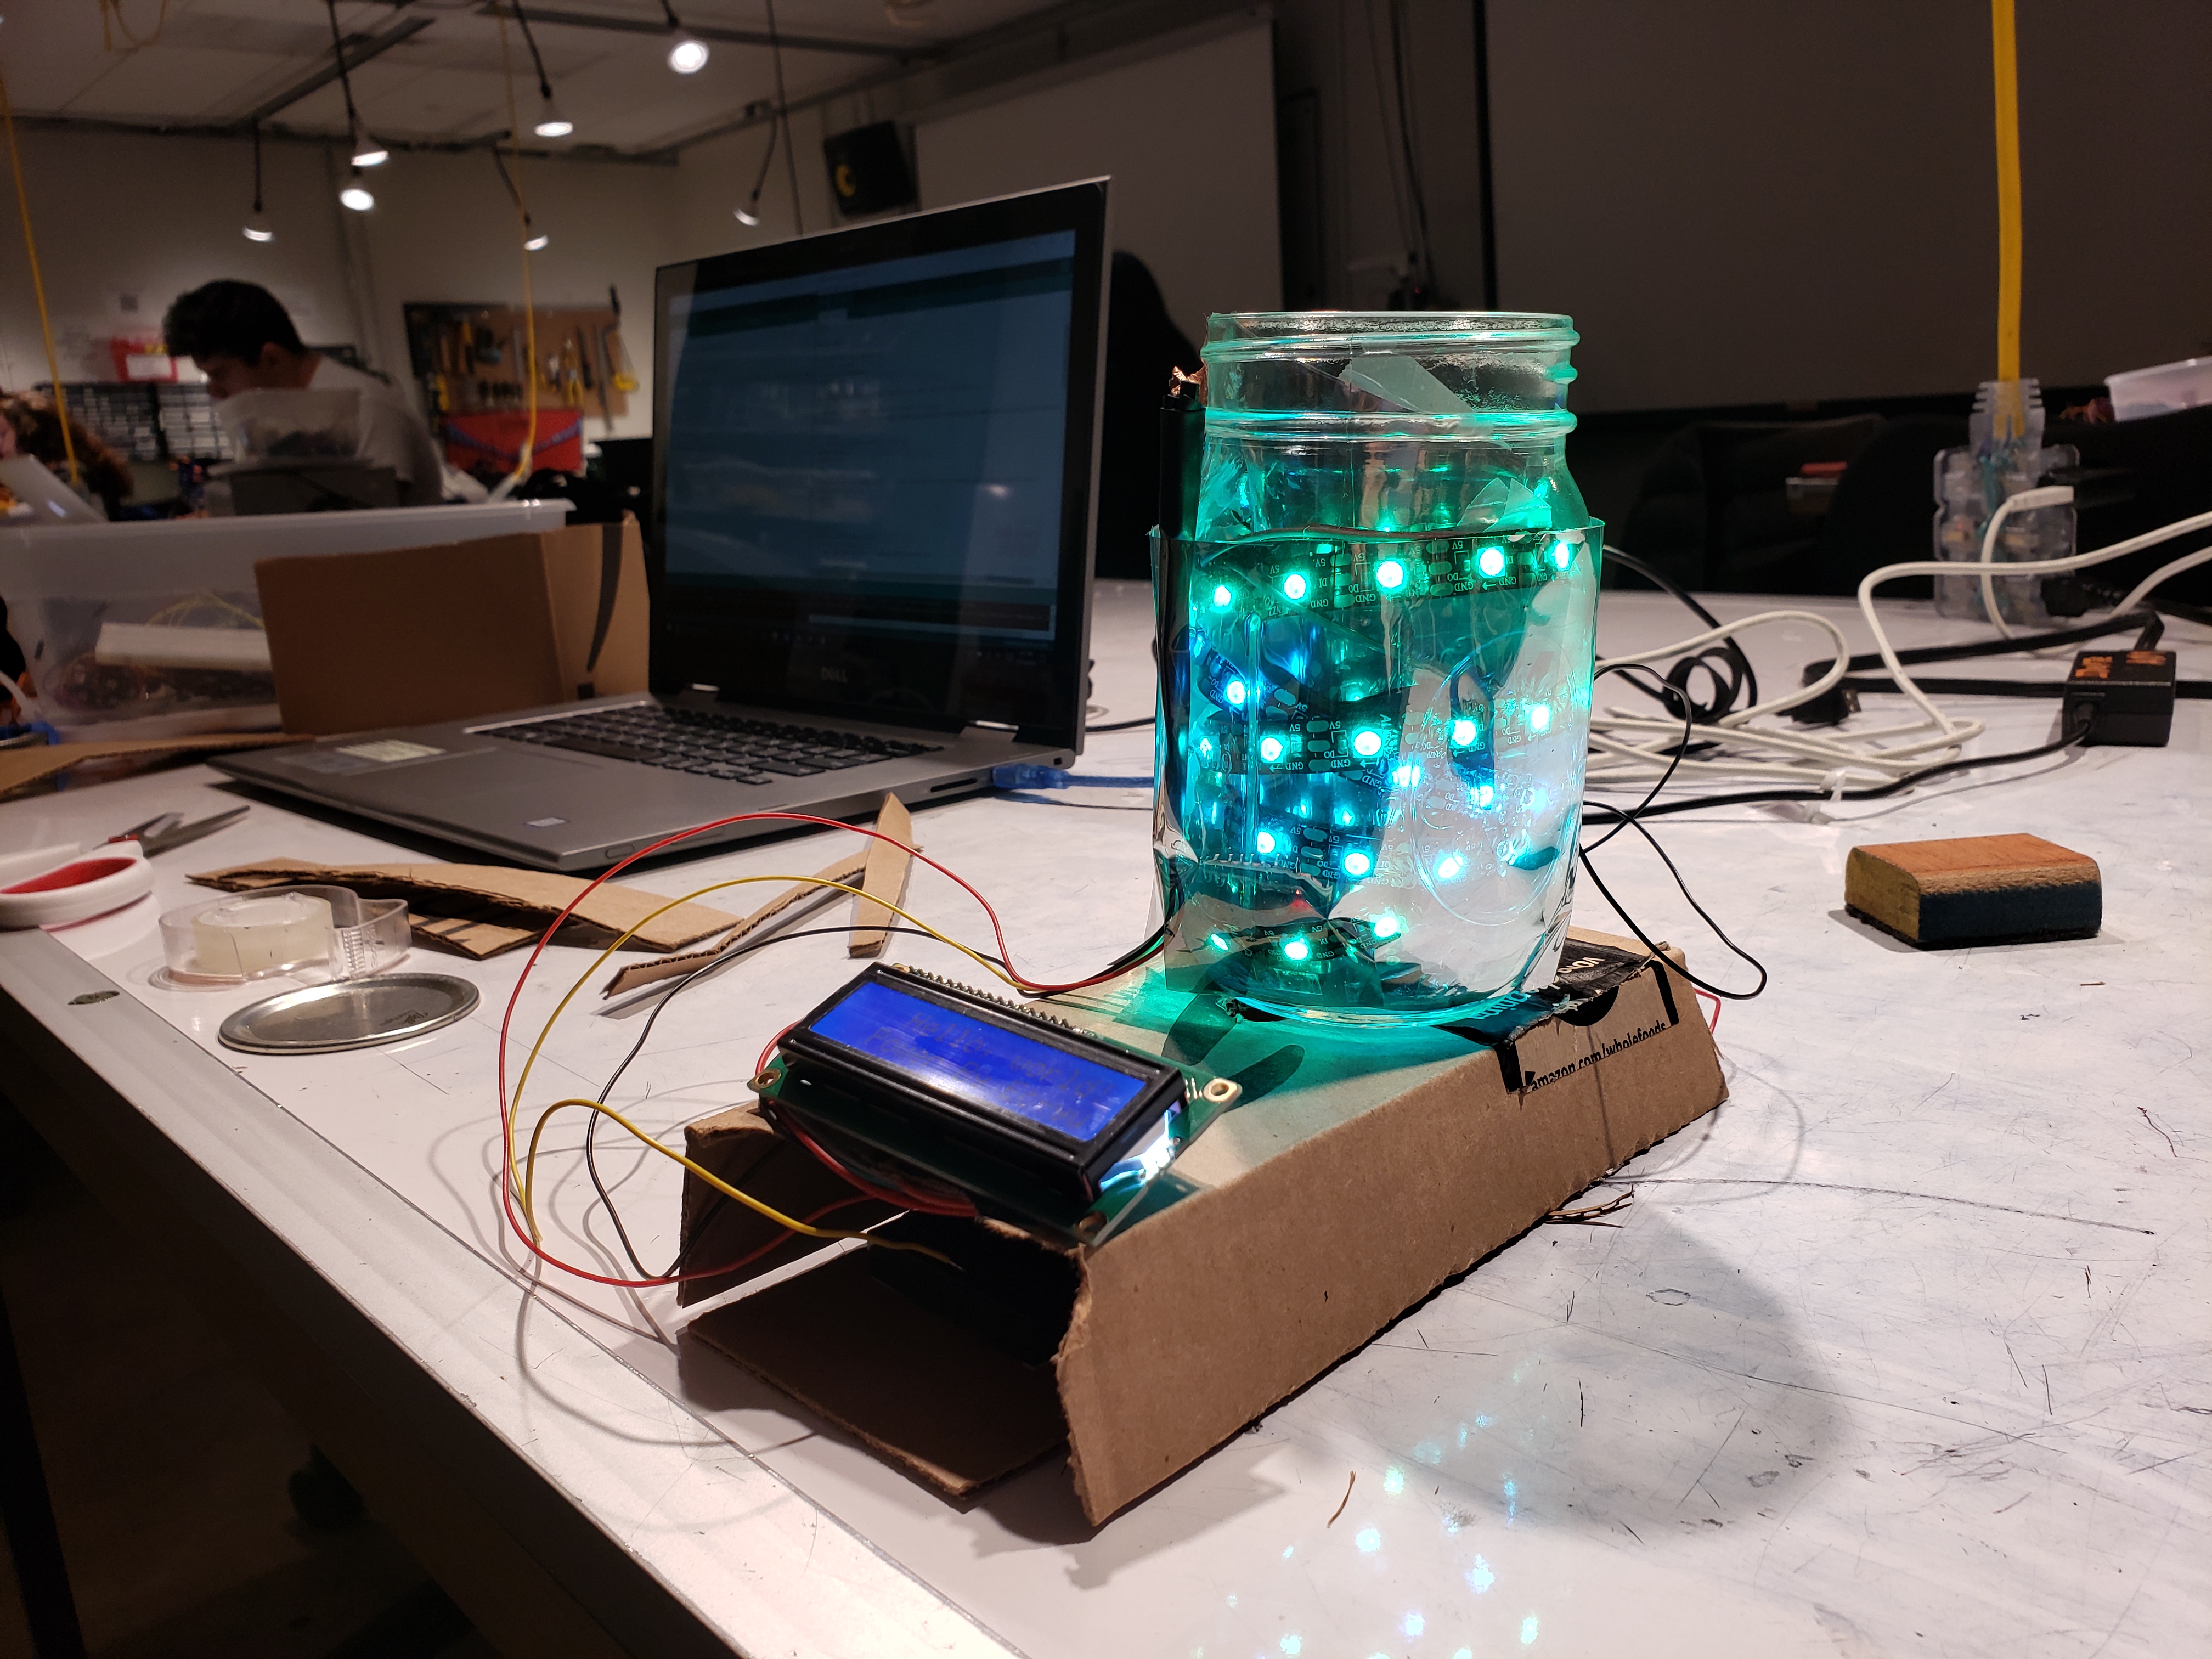
Jar of Change sequencing through the orange mode
Overall photo for proportion and scale
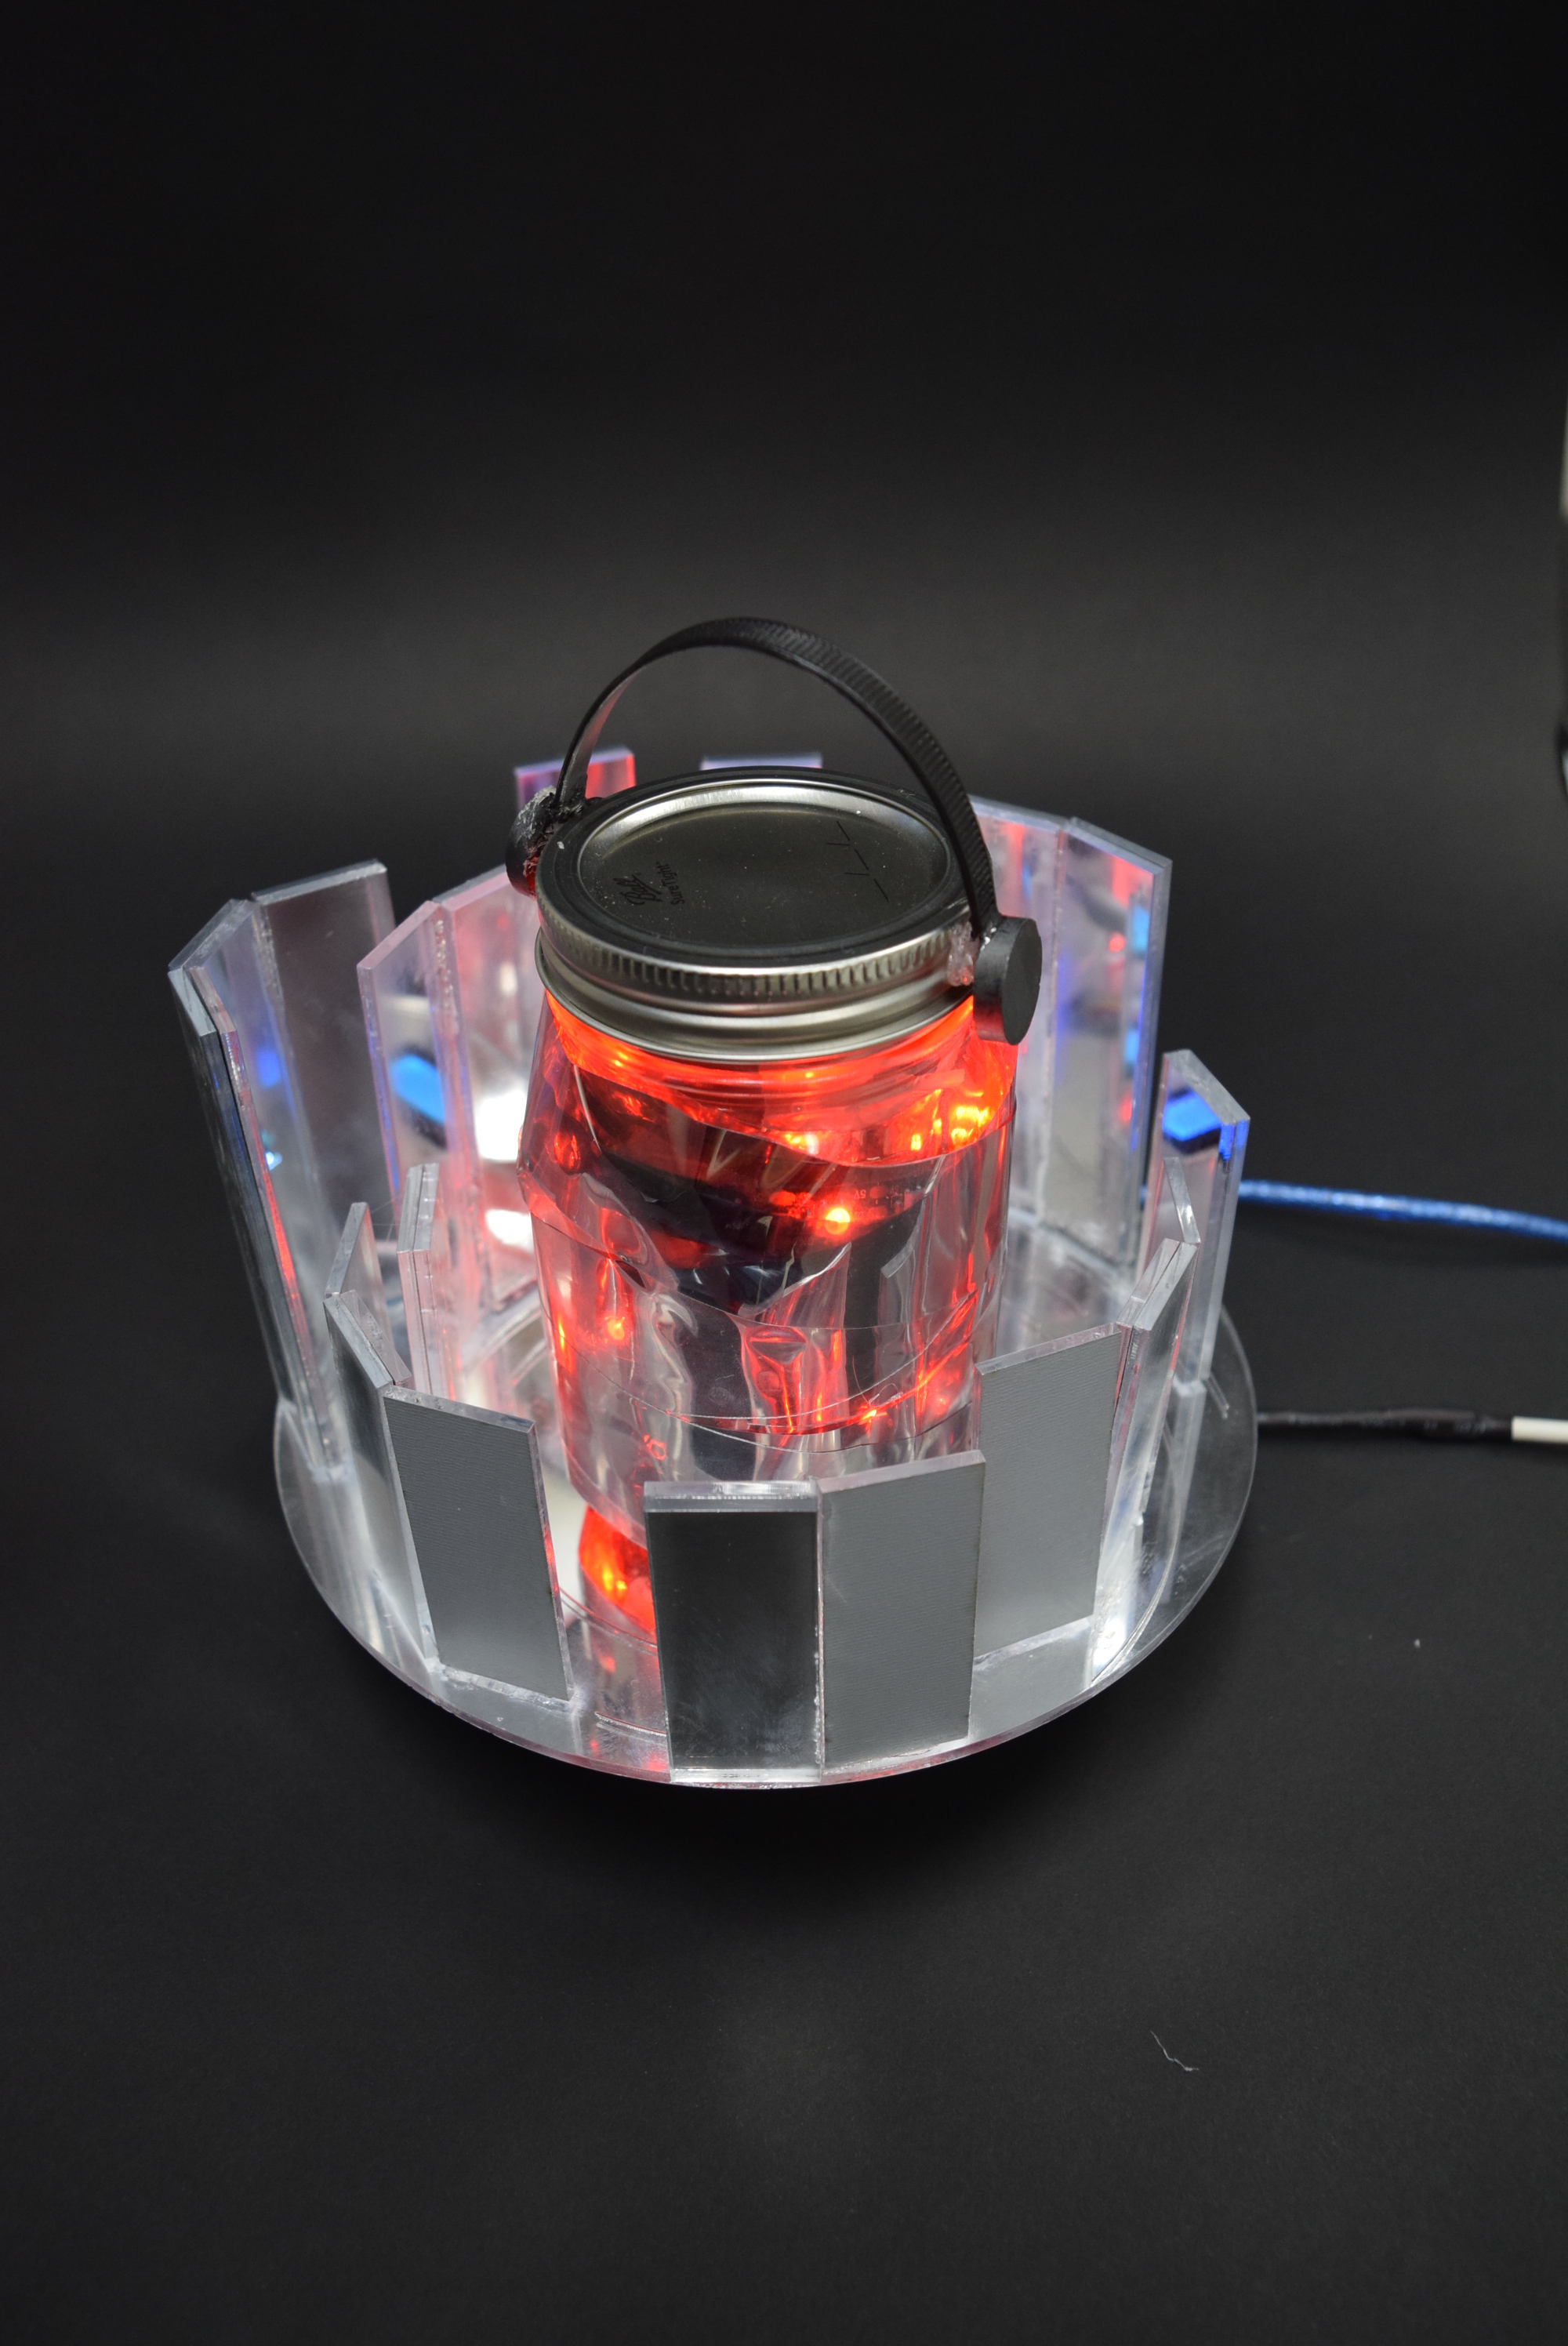
Overall photo for proportion and scale
The inside of the jar looks empty despite containing the LEDs due to a second layer of mylar on the other side of the LED strip
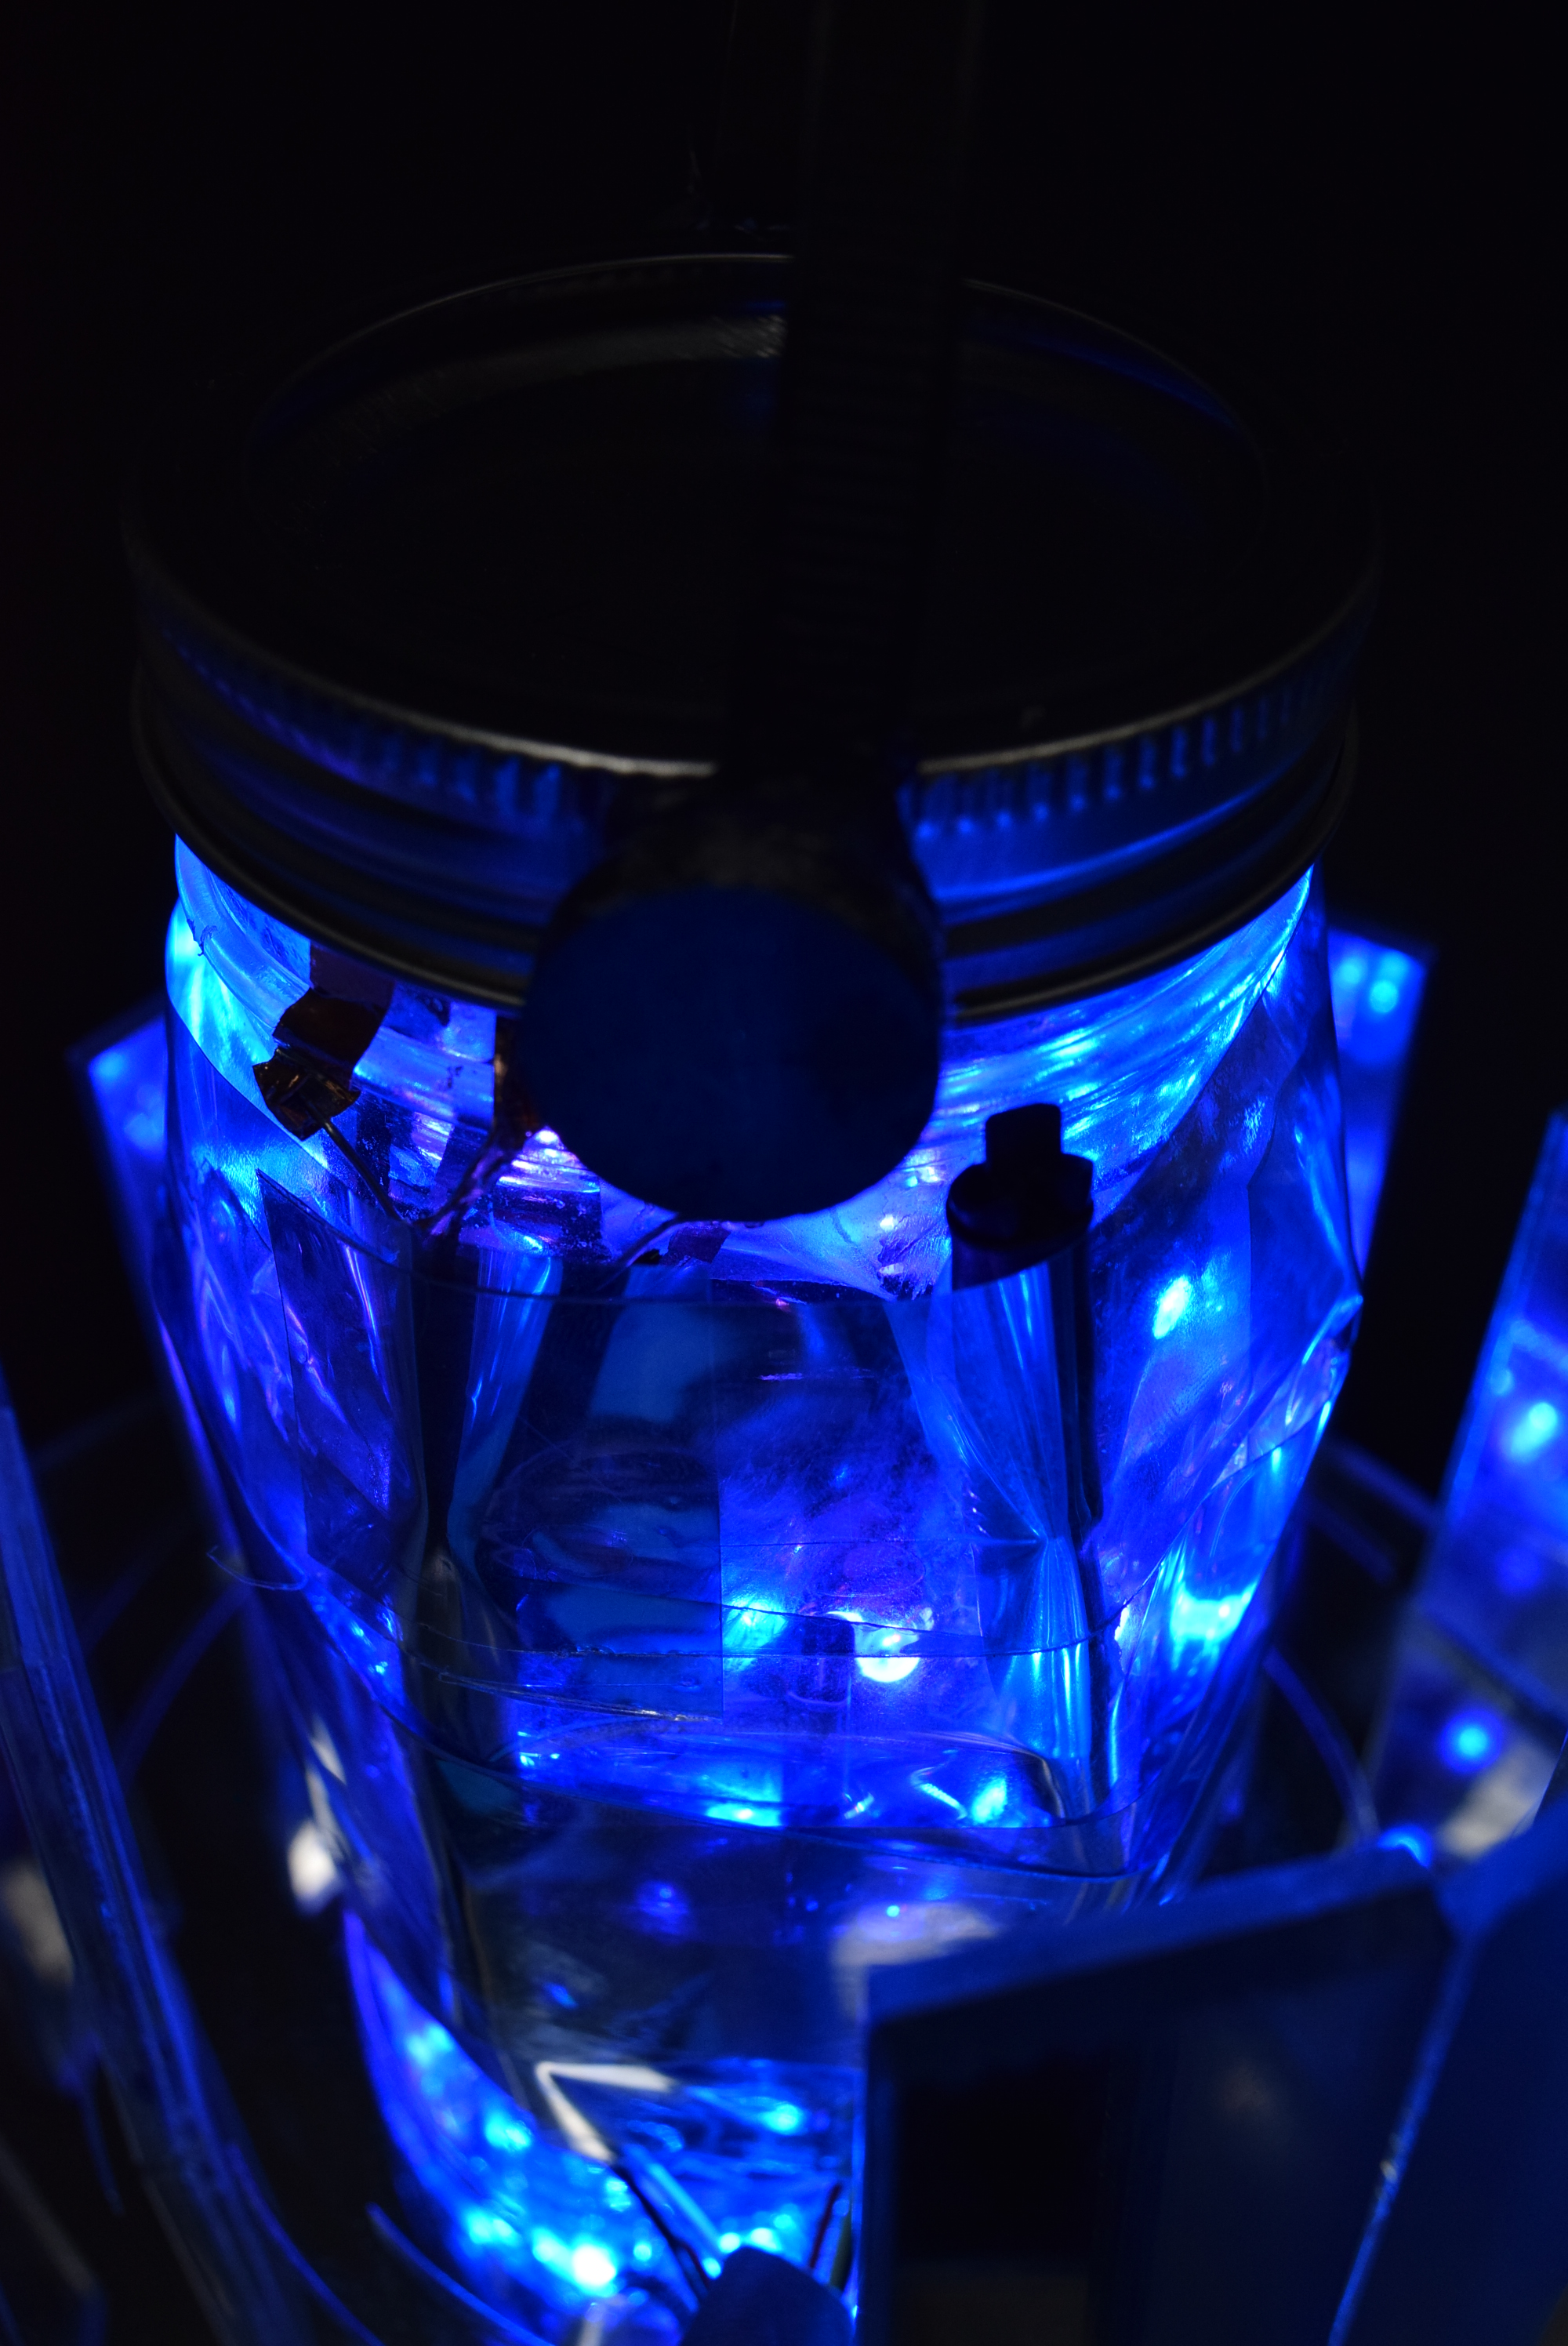
The Hall Sensor’s wiring is hiding under the mylar film and (hopefully) inconspicuous but close enough to the magnet to be triggered
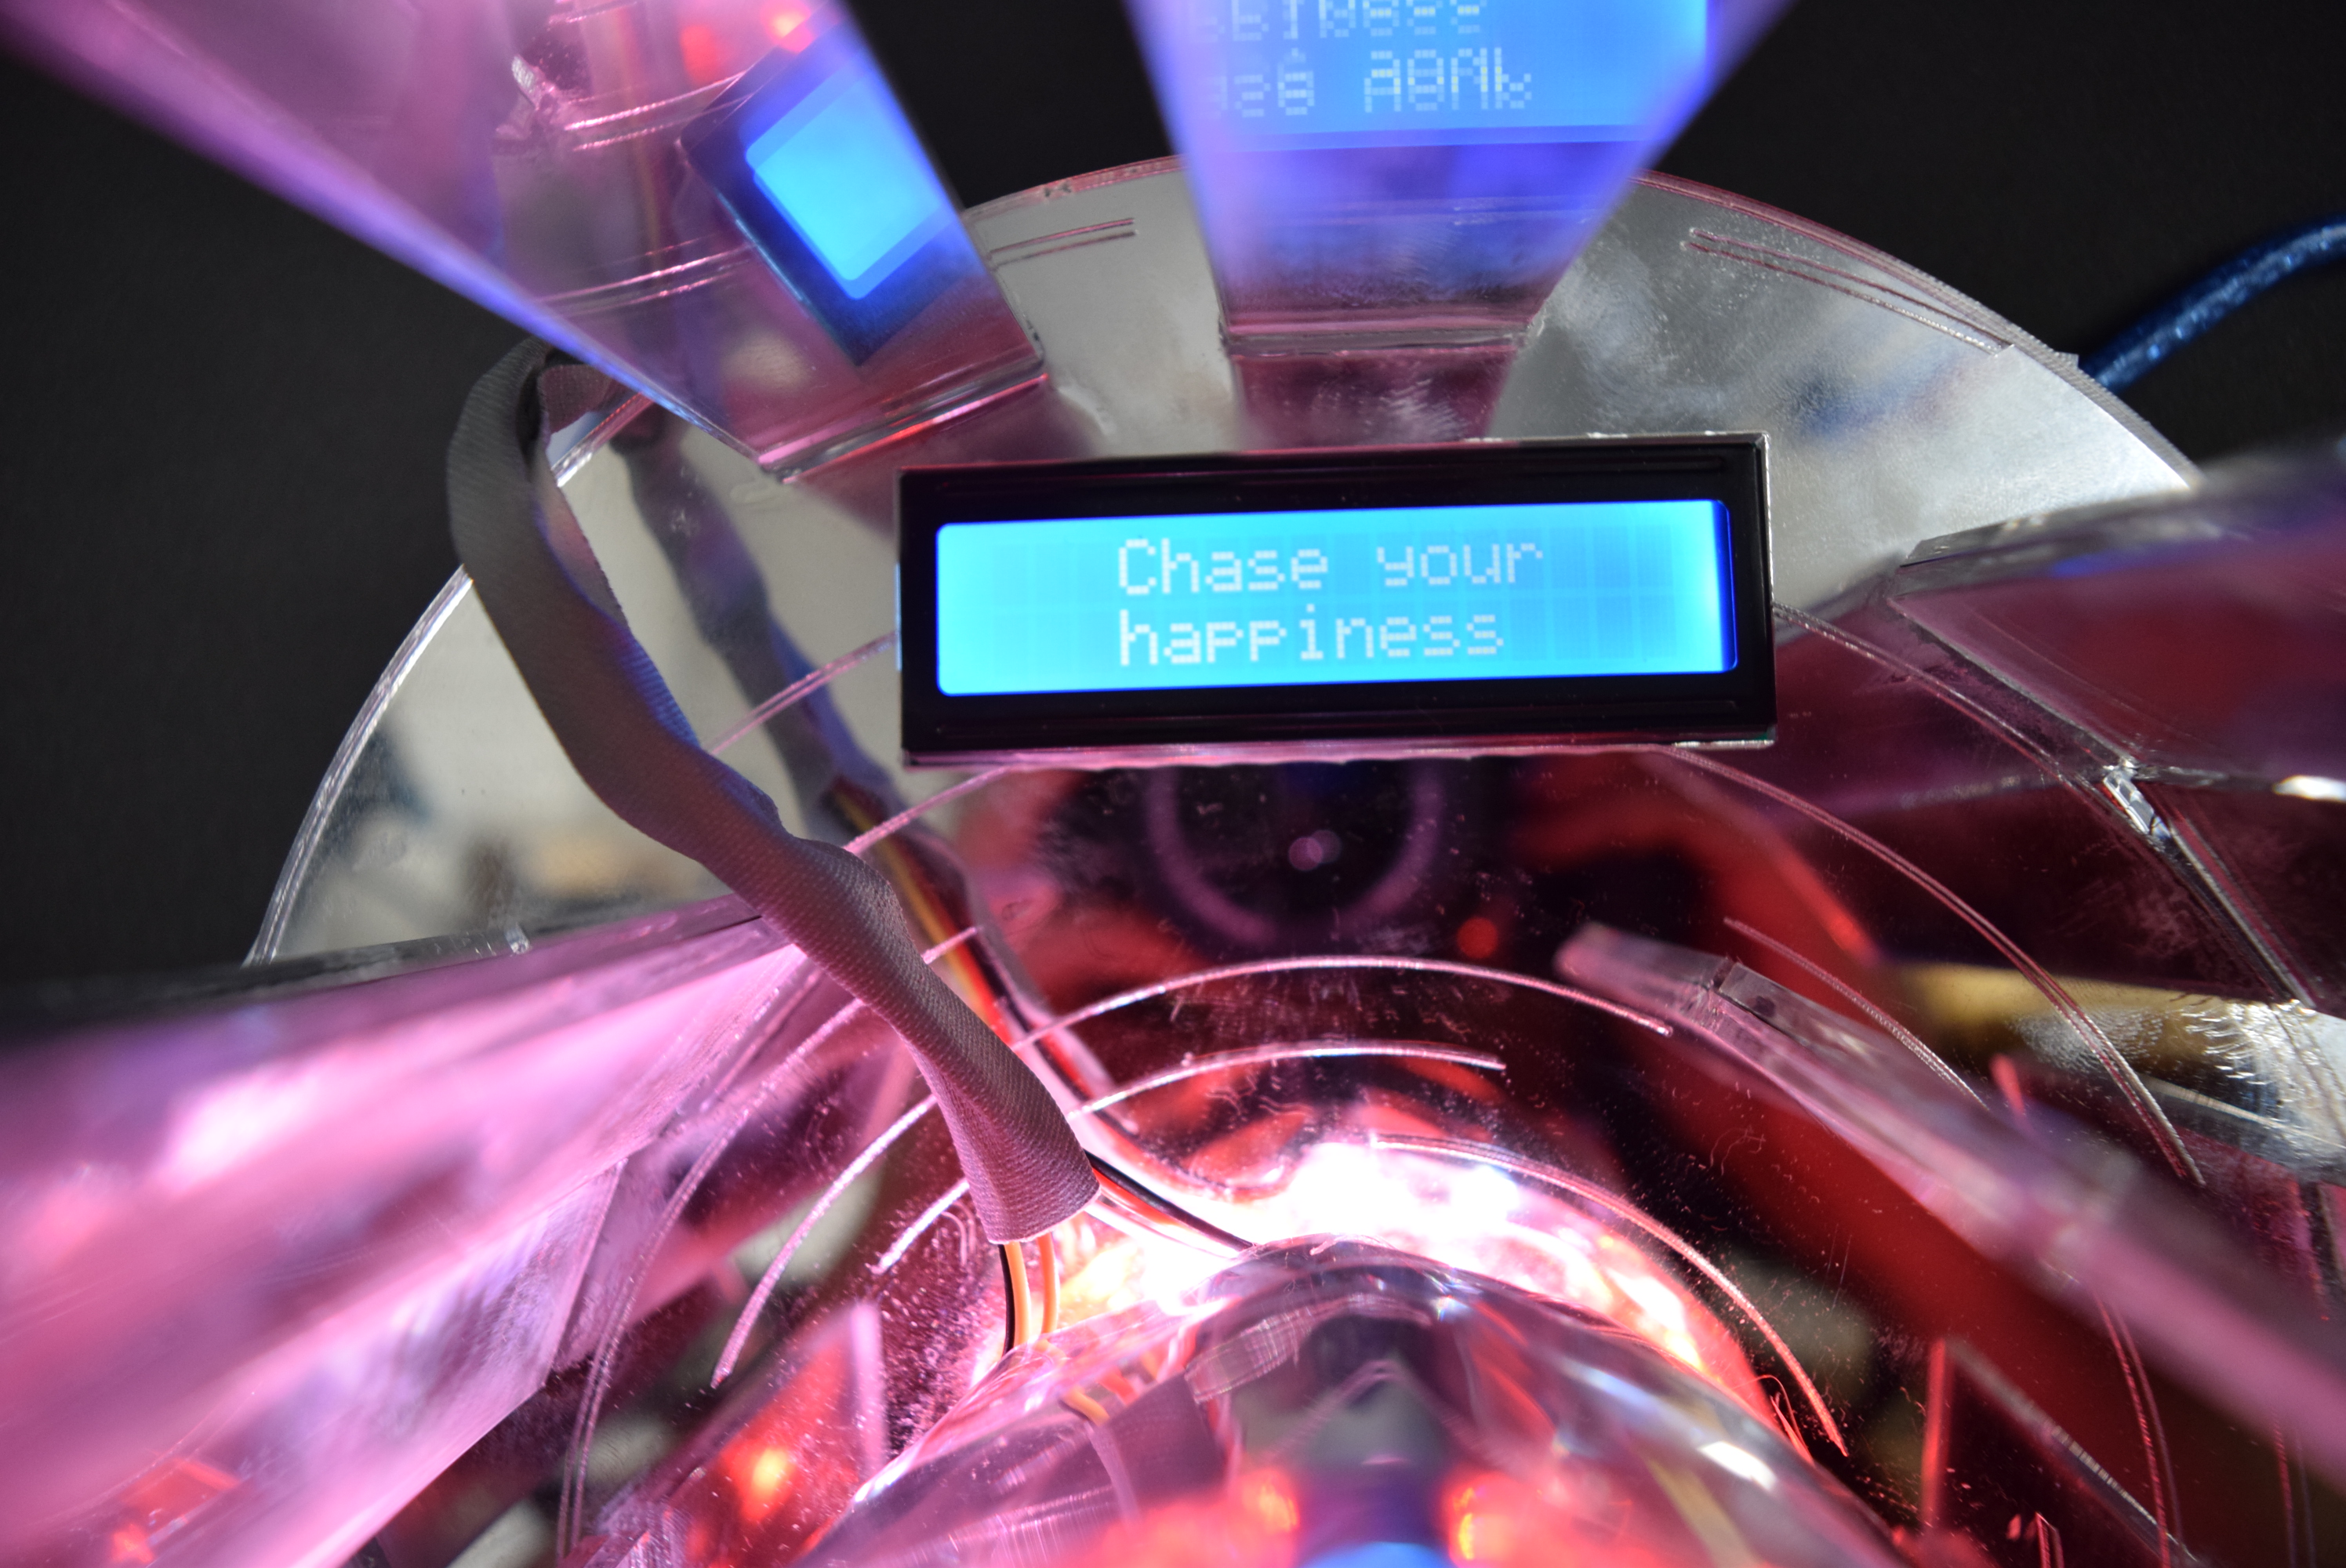
The LCD display showing different messages, words of encouragement or ideas for change, depending on the time counter
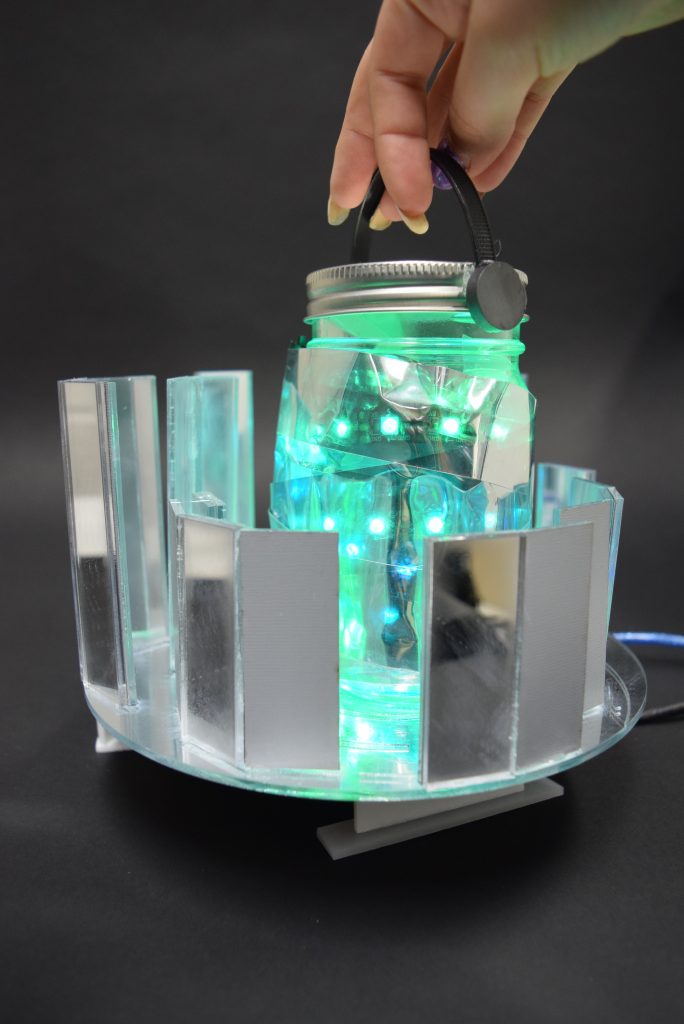
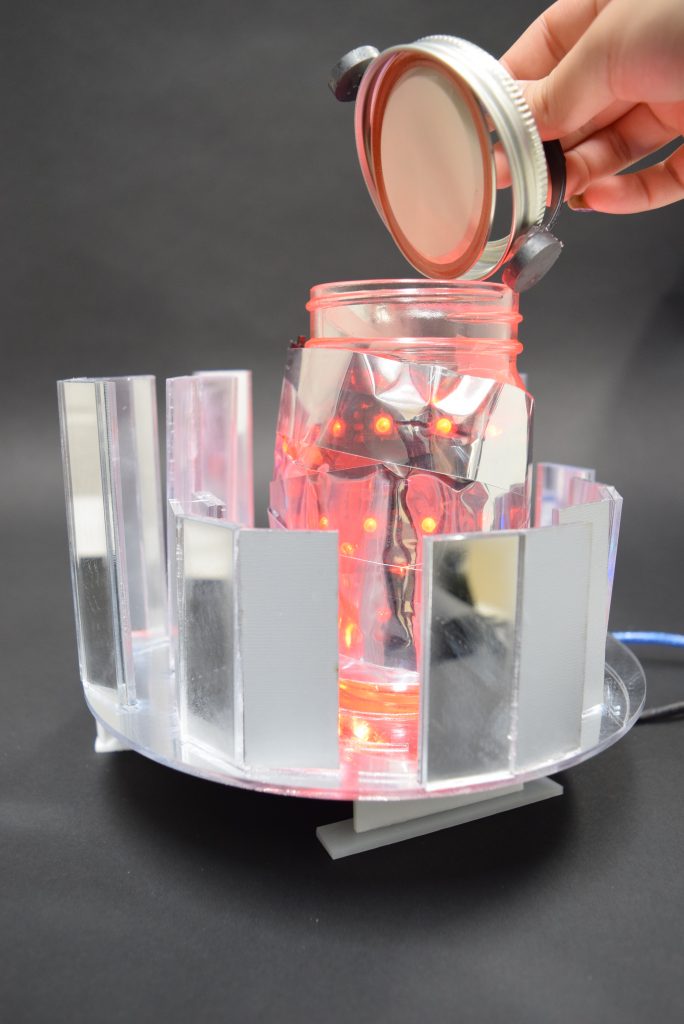
Images of the Jar of Change being used
Process Images and Review
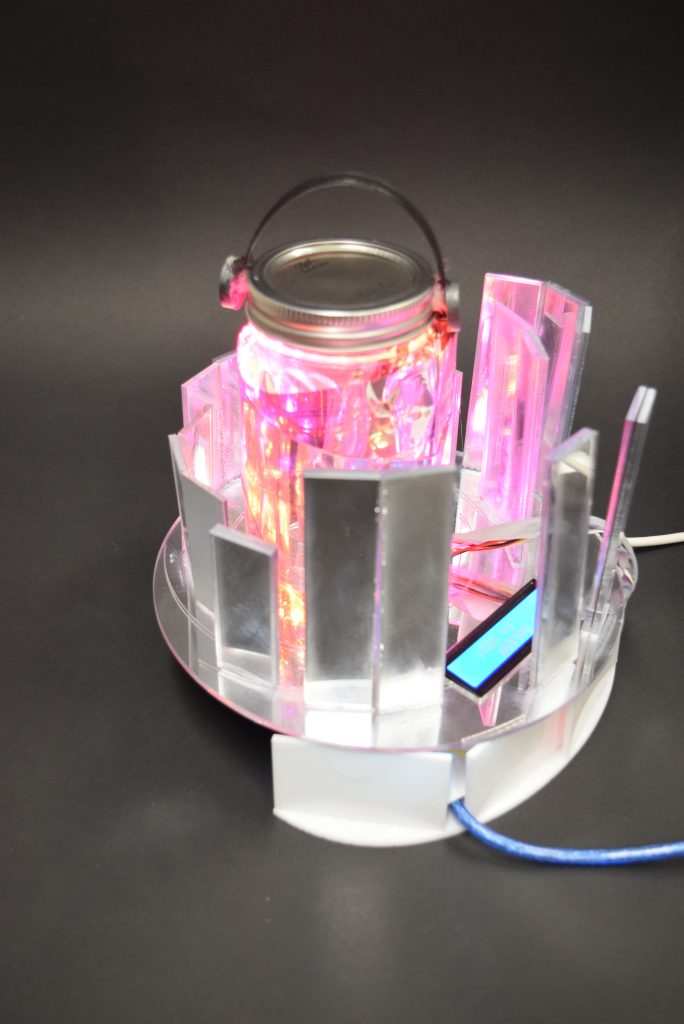
In this project, one major decision point I faced was when I realized that the LED lights on the outside of the jar was too bright. I experimented with a few different configurations and combinations, ultimately deciding that the best combination was to put them on the inside of the jar. I used mylar film to cover the outside of the jar in an attempt to diffuse them and I’d hoped to create an interesting effect with the mirroring and diffusing of light. I was trying to achieve a something similar to the effect of Yayoi Kusama’s work with infinity mirrors, in a much smaller scale.
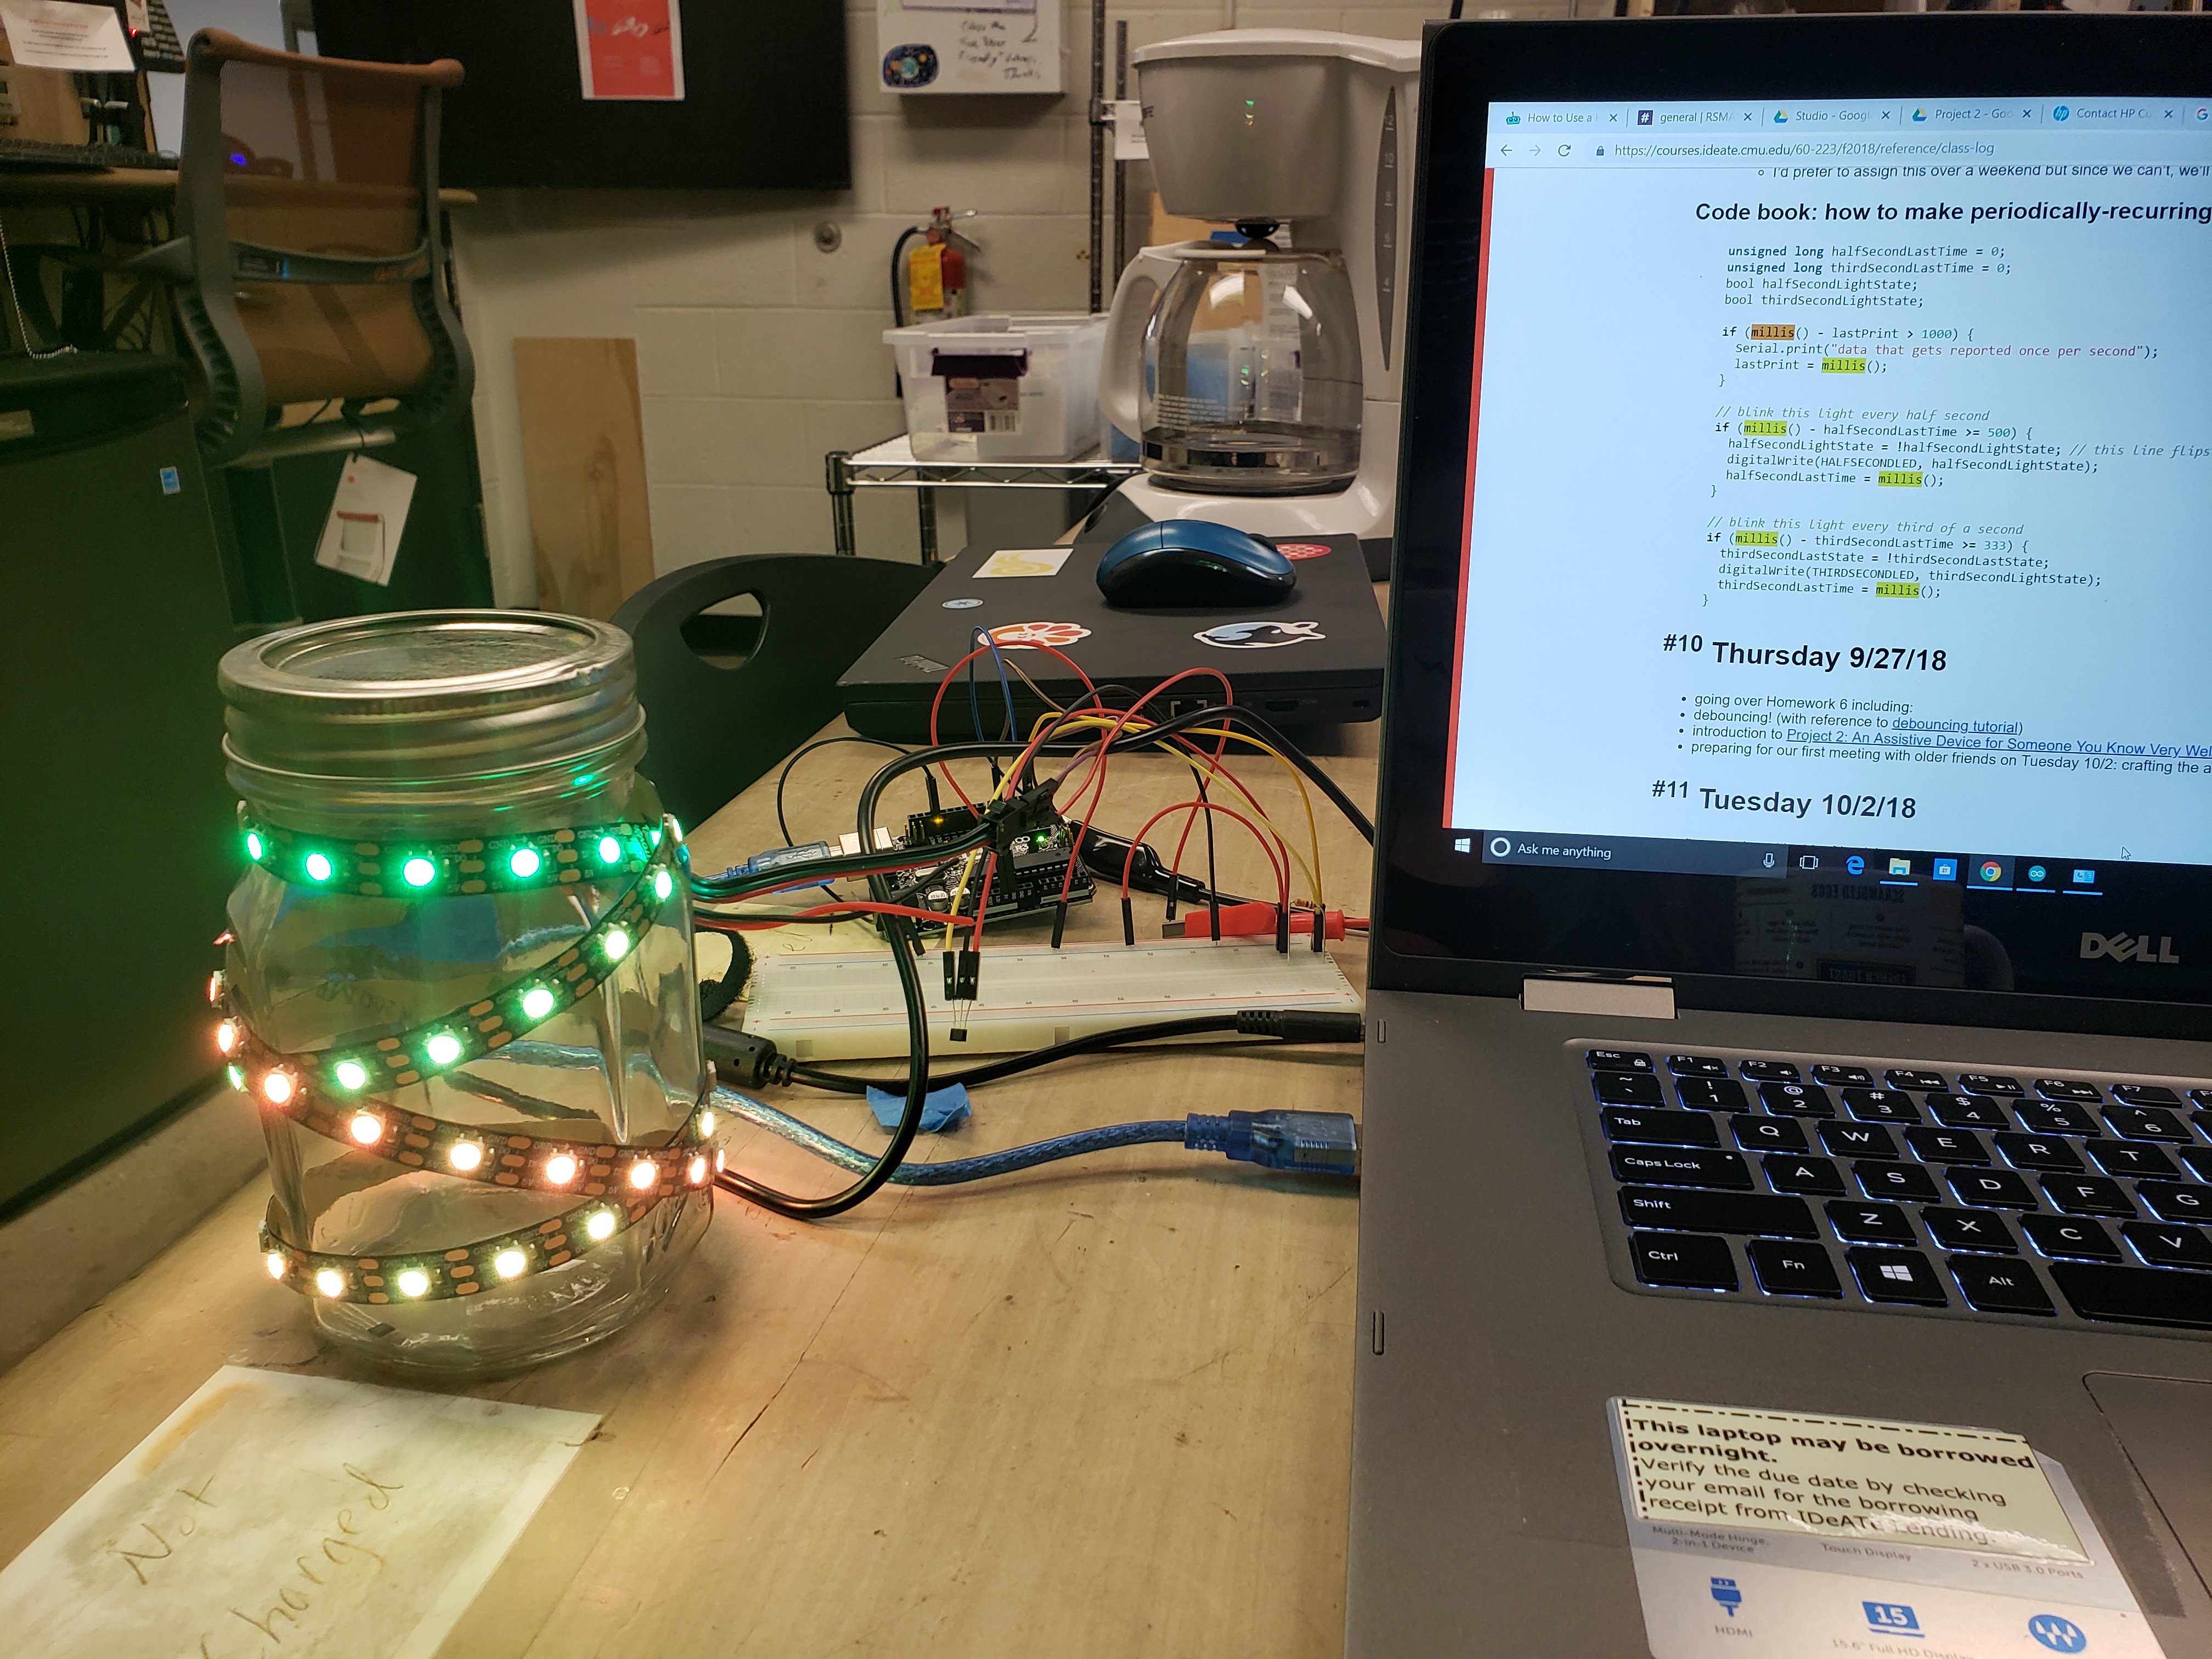
Jar of Change with lights on the outside
I’m not sure exactly why this didn’t work out but it was either because the mylar film didn’t exactly work like the one-way mirror effect I was looking for (both sides of the film appeared to reflect evenly versus the inside reflecting while the outside peers in without environmental light disrupting the effect) or the distance between the lights and the film were not enough. I had no experience with one way film, only one way mirrors and there’s not much I can do about increasing the distance between the glass and mylar without compromising the jar’s ability to store stuff so I didn’t bother to venture down that path. The reflectivity of the mylar had a cool effect and it did manage to mute the LEDs a bit which was my main goal, being someone who’s quite sensitive to light.
As a result of my decision to place the lights inside the jar, I had to figure out how to run the current from the outside of the jar where the Arduino and power supply is to the inside of the jar where the lights were when the lid is on. Zach advised I try using copper tape and though I had some frustrating first attempts, the lights were actually quite reliable after a while, as long as the lid wasn’t screwed on too tight.
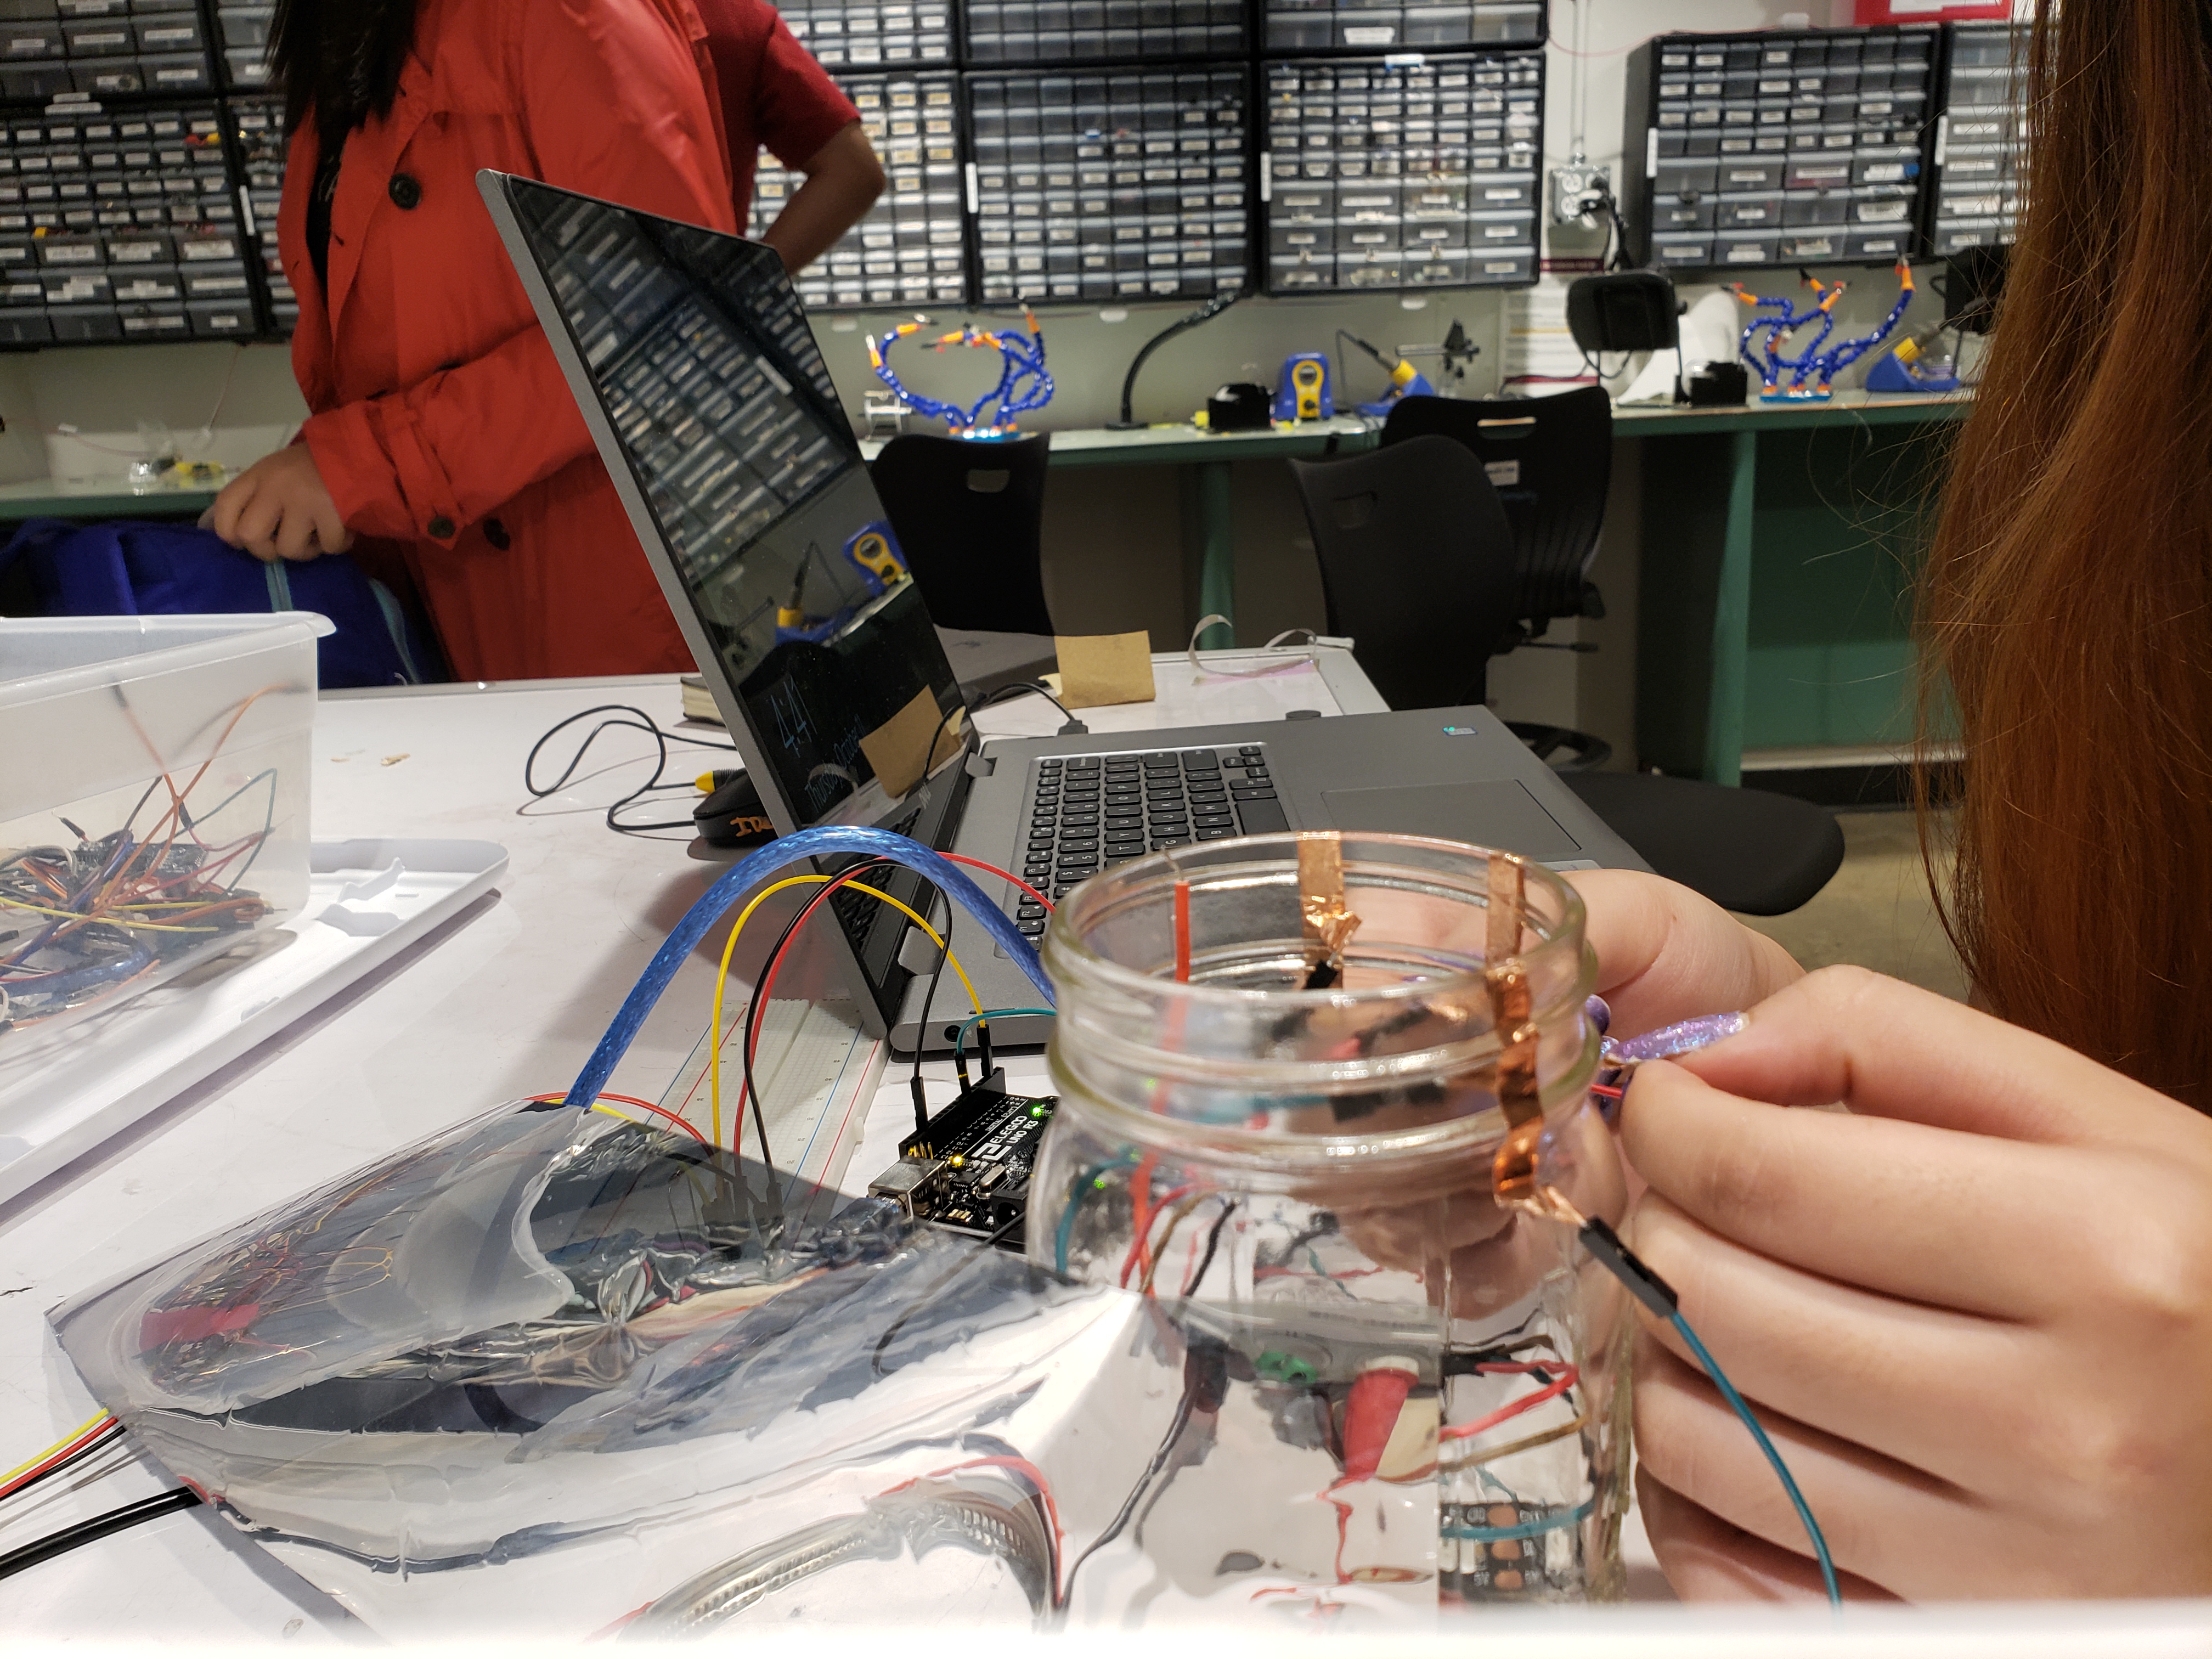
Testing the copper tape with the mylar partially undone for better access to the wires on the outside
The second big decision point was when I was debating the design of the “box” to hold the Arduino and some other electronic connections. First I estimated the amount of space needed by testing it with some scrap cardboard.
Testing with cardboard to accommodate LCD display, arduino, and other electronic parts
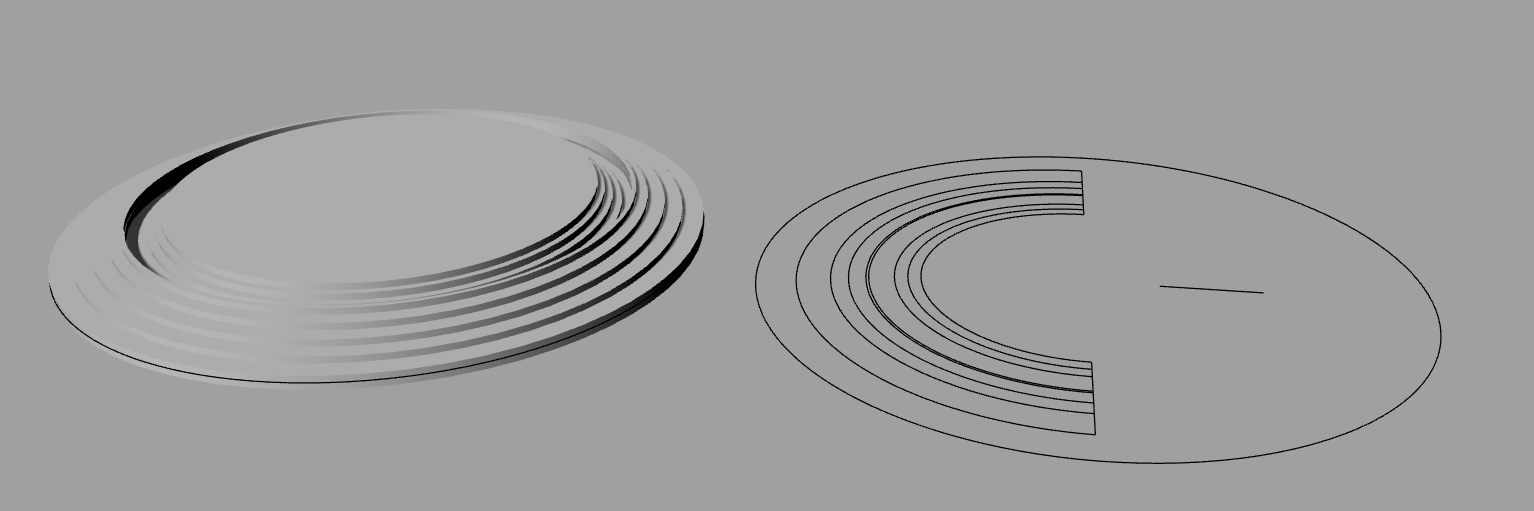
After getting the measurements for that, I made some sketches of the initial design. I wanted to make the based a circle to match the shape of the jar. I had the thought of using the mirrored acrylic to reflect the light and attempt to amplify it’s effects/create interesting, non-standard views. I had the idea of using ripples of water (whether etched or moving outward) to further emphasize the shape of the container. I planned for the bottom to be made of two parts that could combine to form one piece or come apart in case something messed up with the wiring. I wanted holes to run both the data cable from the computer to the arduino and from the 5V power supply to the LEDs.
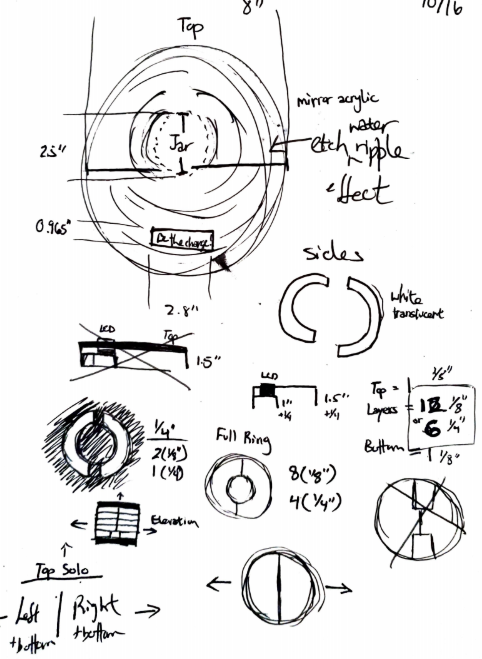
Sketch of original arduino container idea
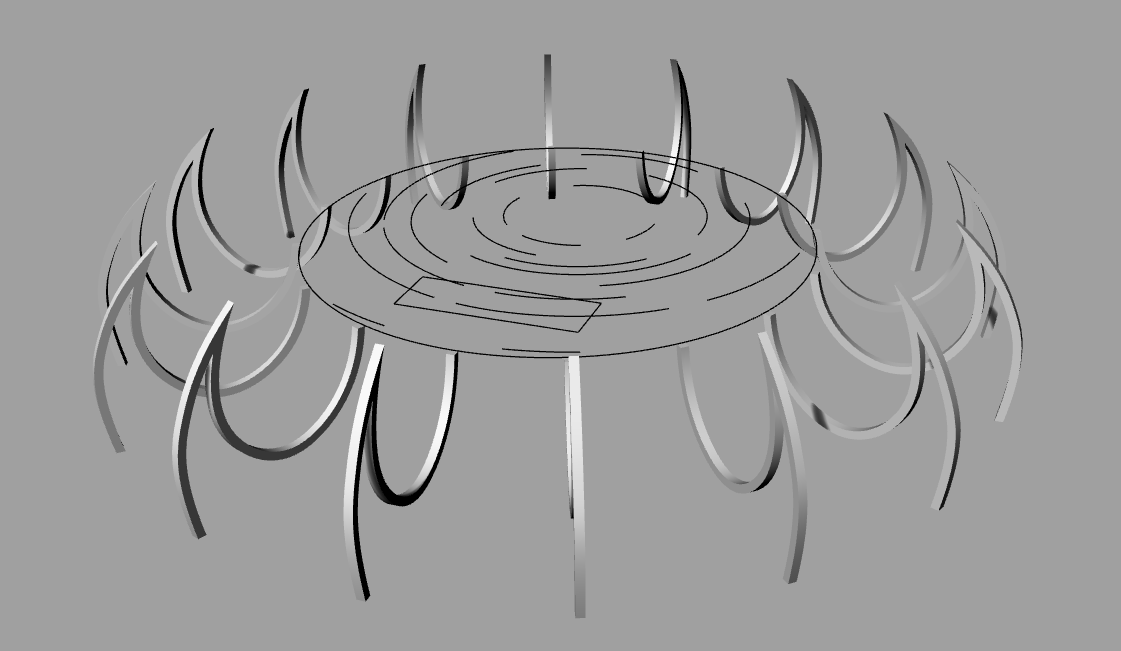
I first tried to Rhino model waves that would be made from stacked slices of mirrored acrylic. I was worried after a while about how much it would reflect facing up, how noticeable the wave effect would be, and how much mirrored acrylic I would be buying under the class budget (I didn’t want to waste too much money on something not vital to the functionality).
Then I attempted to try a few different methods of making the wave, the most notable being one with slices that would rotate around the jar with acrylic pieces that laid on it to reflect the light back at the jar. That method, though it would have been the most clear version of a wave, would have required at least a 2′ x 2′ piece of acrylic and I didn’t want to waste ~$25.
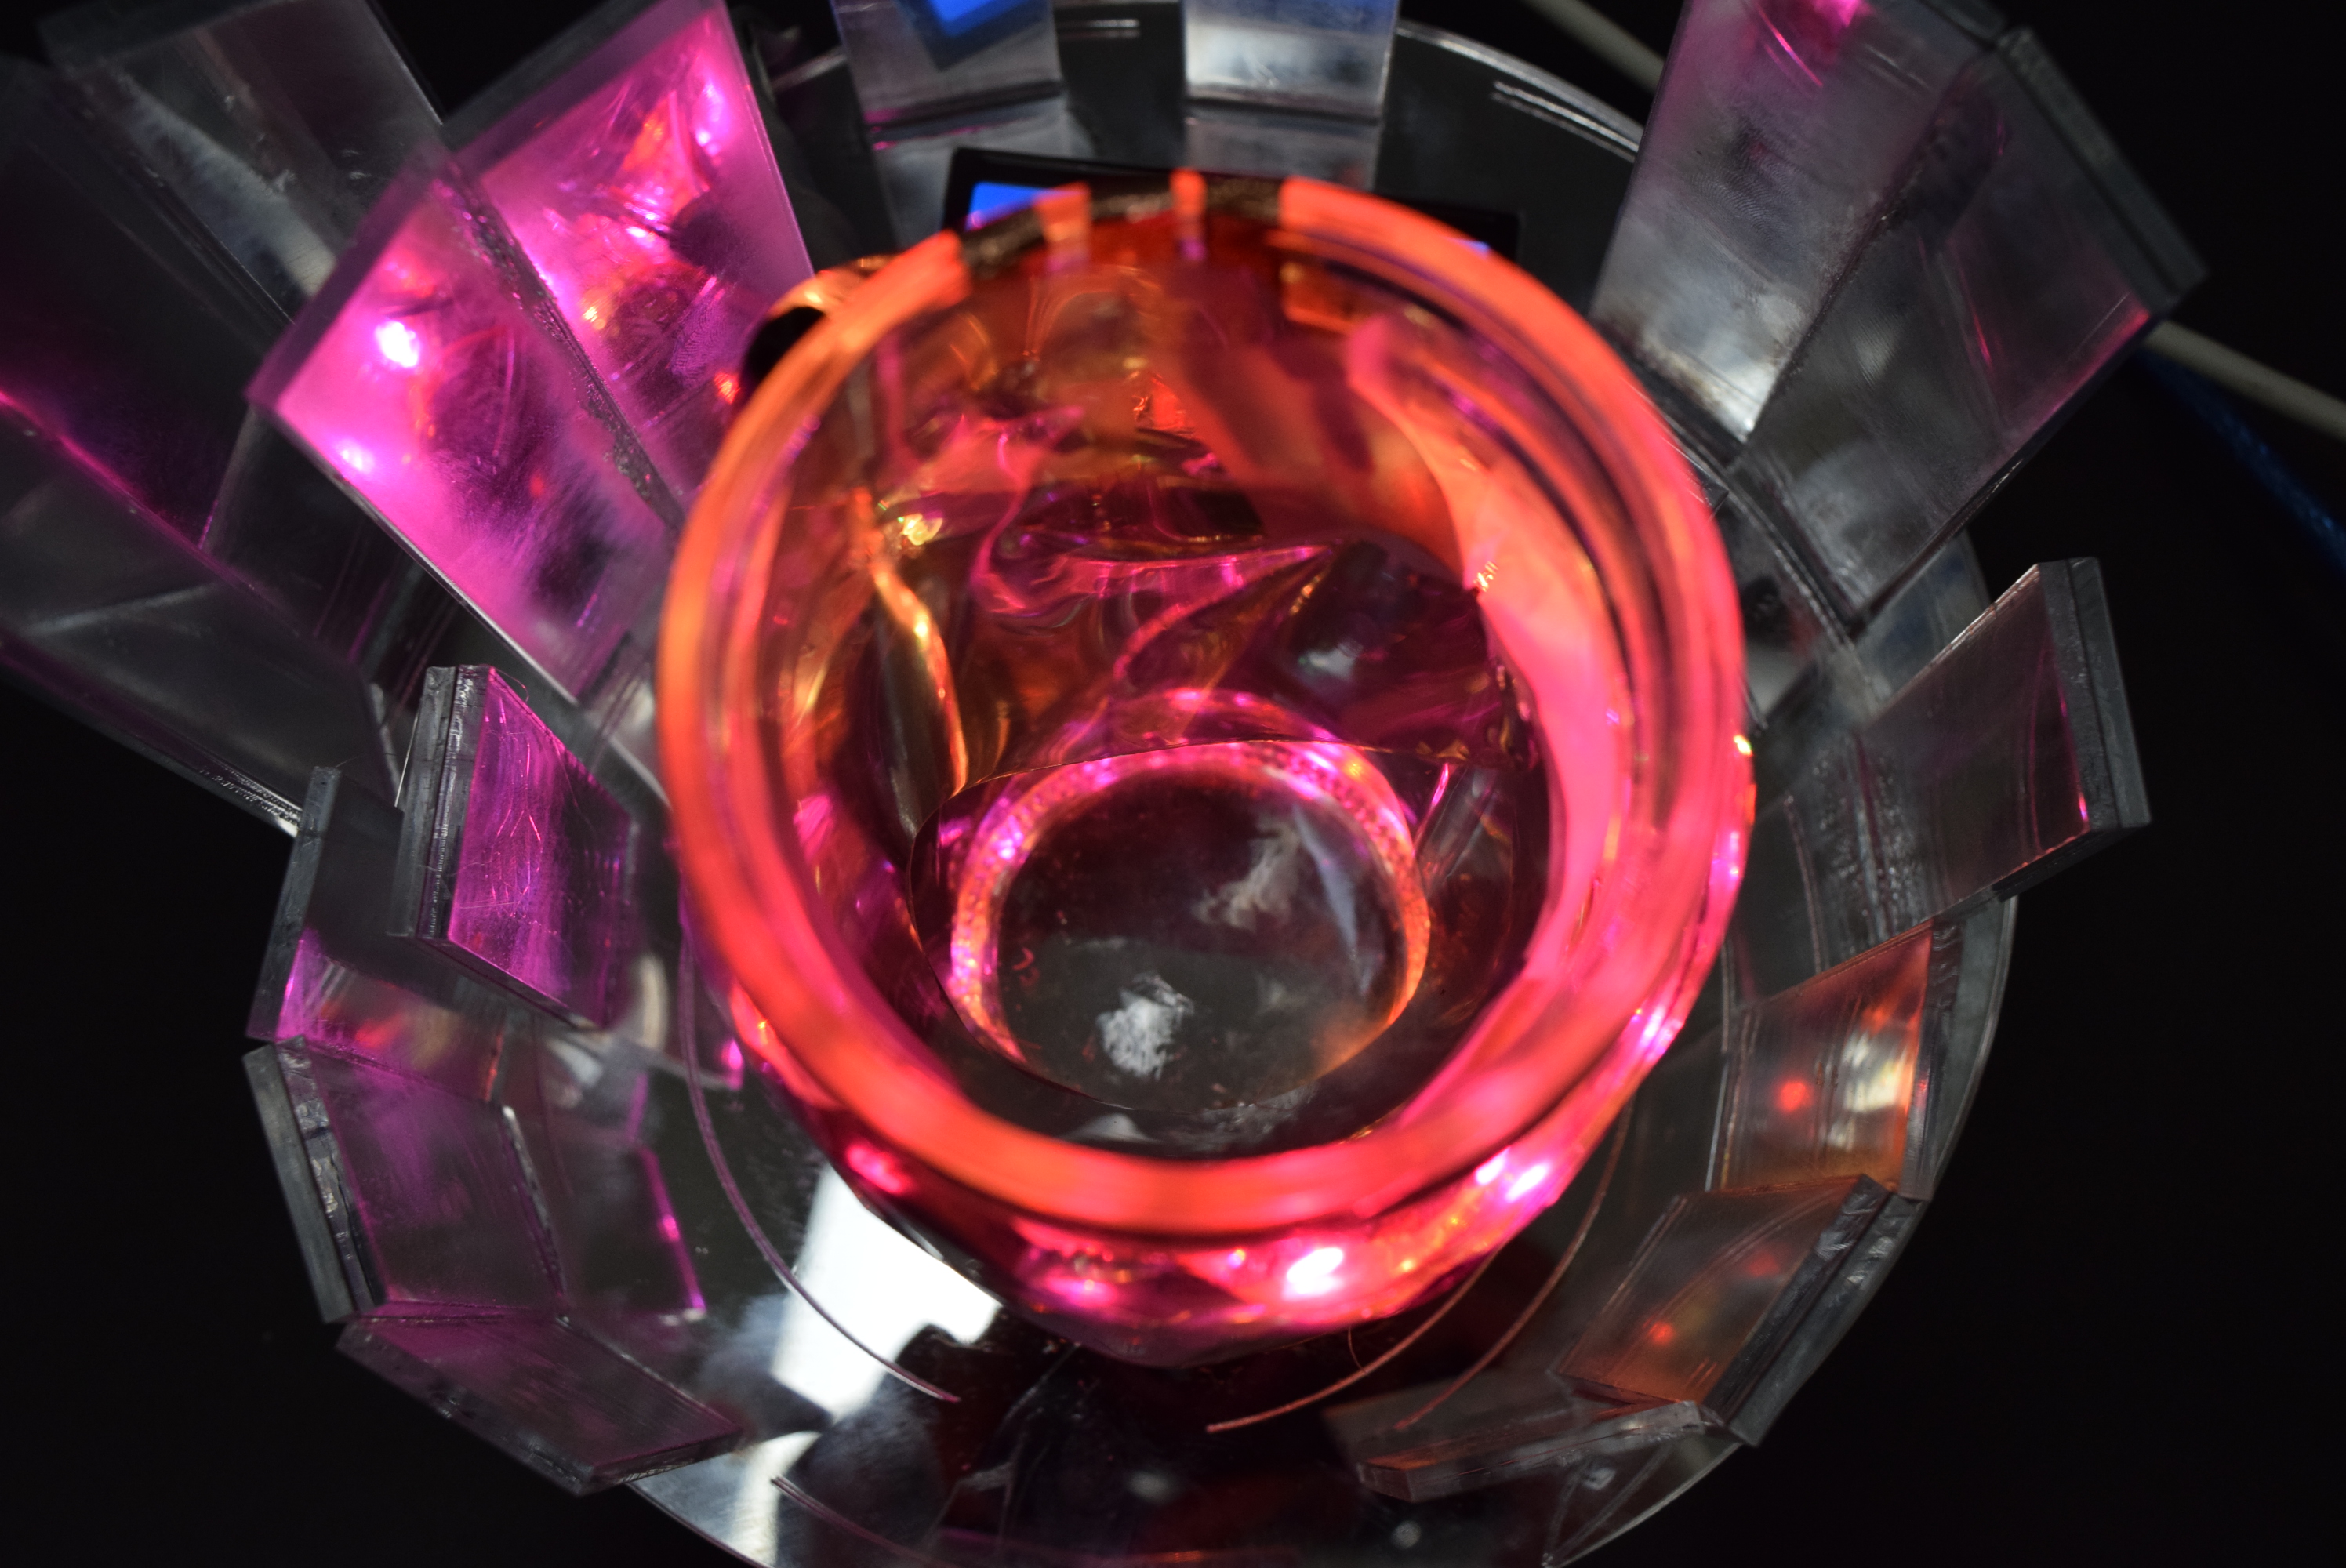
At the time I came to this conclusion, it was very late at night/early in the morning and the only piece that I’d laser cut had been the base (where the LCD display would be embedded and the jar would sit on top of) . I had an idea out of the blue to surround the jar with mirrored acrylic pieces following the rough pattern of the etched ripples on the surface to give a slight field of mirrors effect. The taller pieces would be around the LCD screen since that is the “top” of piece, farthest away from where my vantage point is. I was trying to explore the different views of the LEDs reflecting off the mirrors which was pretty successful on the brightest mode (rainbow lights) but still noticeable with the more subtle modes. Unfortunately I started building the box after I soldered the wires into the 5V power source and jar. I really did not want to have to redo any of those, especially since both are quite finicky so I just covered the wires with grey tape and ran them down the side, to where the Arduino was located. It doesn’t look the best visually but I made the most of it.

Reflections off the mirrored acrylic in the purple portion of the rainbow mode
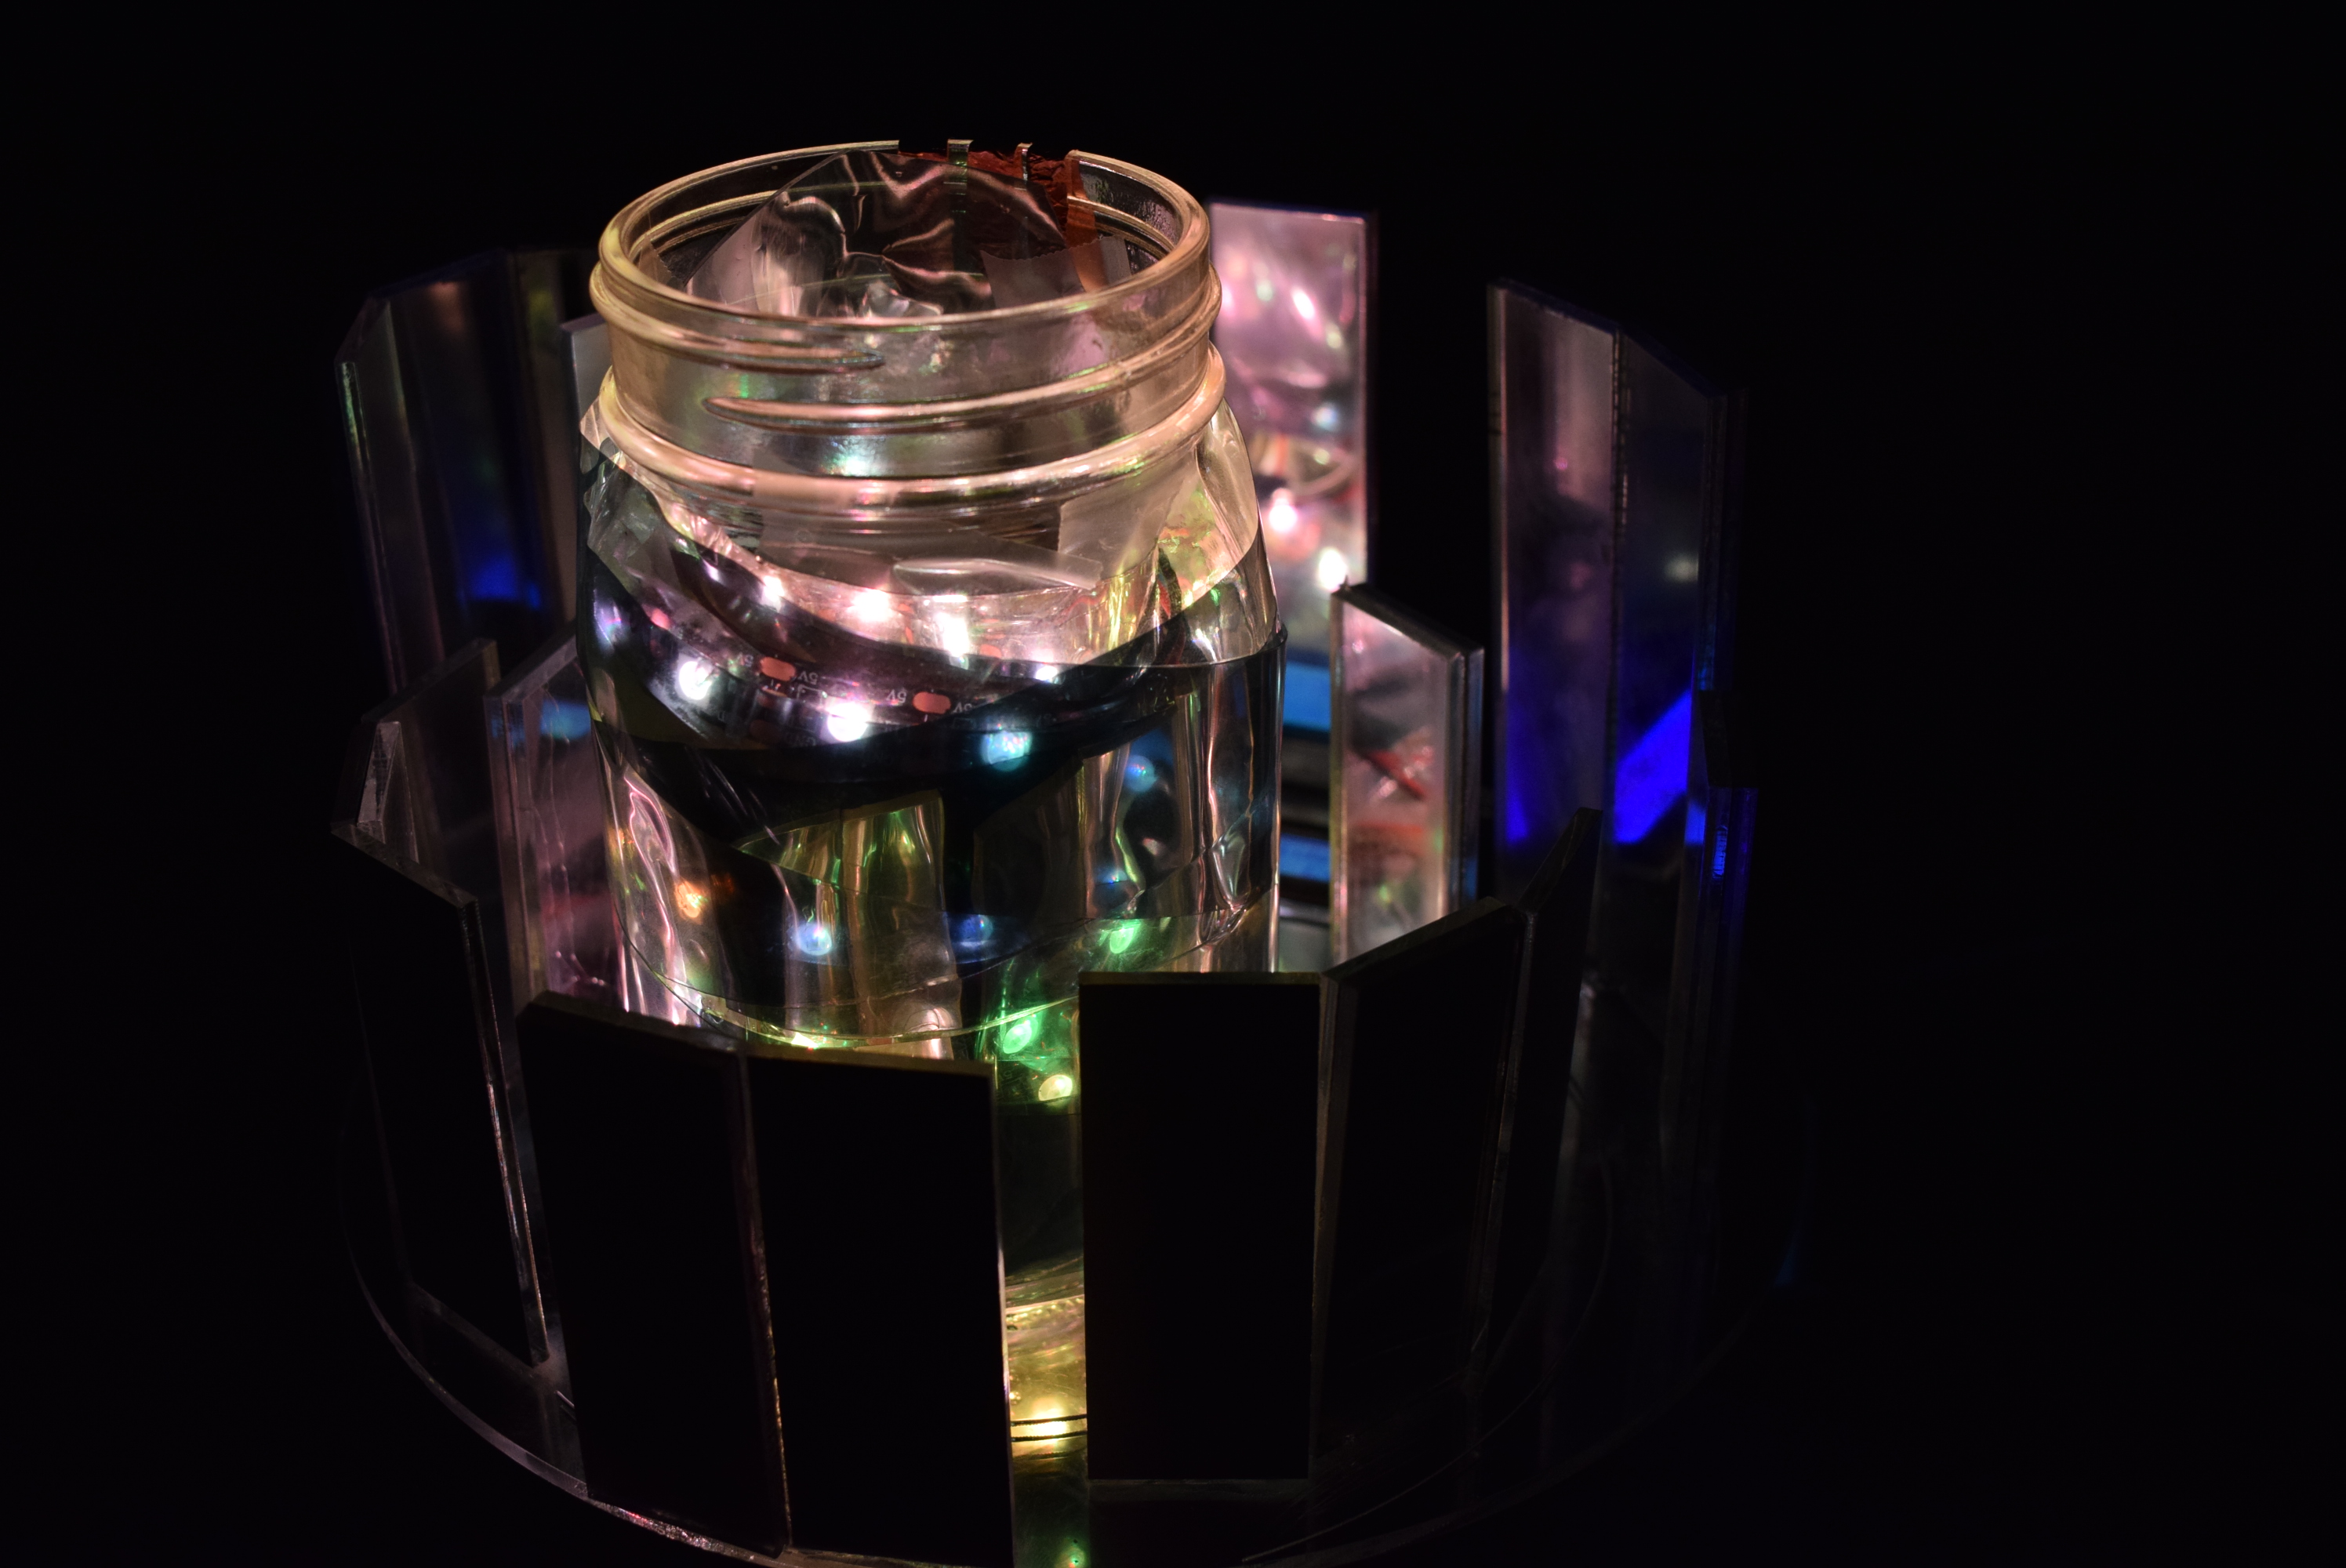
Reflections off the mirrored acrylic in the white portion of the orange mode
Ultimately I wish I spent less time on this and more on the project itself because maybe then I wouldn’t have overslept and not had the proper time to debug my code. Looking back, if I had more time, I would have made the form underneath (what holds the Arduino and other electronic components) better, I was sleep deprived while doing it. Ultimately it does have a nice angled effect that communicates with the mirrored panels on top, and is rarely seen from most views (shown in the photo below). I also would have like to experiment with different mirror panel height instead of just two. A possible venture of inquiry would have been using normal clear acrylic and covering them to mylar film to see how the effect would turn out. While taking the final photos, I realized it’s quite sad that the mirrored acrylic is opaque, blocking out the views of the lights. With mylar, the lights would be reflected in the back panels while the front panels could still be partially seen through.
Discussion
During the in class discussion, I was given a critique that “maybe a voice recorder that records your voice so the interaction is short and sweet” would make the project function better. I actually thought the critique was great and something that I didn’t even think of while creating this project. Though I don’t know how difficult it would be to deal with a voice recorder/how to store the audio files, the idea of having audio recordings instead of physical objects is quite lovely in my opinion. The only restriction is that the hall sensor is not reliable enough to realize when the jar is opened and closed. Often times it’ll only trigger once in one open and close sequence (versus one when it opens, one when it closes) so the details would need to be flushed out but it would be a wonderful function to explore if I go about tackling this project again.
Another critique that was also interesting was one asking ,”Is there a way to enclose magnets? [So that there is a] streamline lid?” I’d already taken this issue into account prior and cut a piece of zip tie, painted it black, and connected it to the two magnets painted black to give the resulting piece the appearance of headphones/a handle. Unfortunately I didn’t have it during the in class demo because I accidentally left it in my room and had to makeshift hot glue new magnets onto the lid. I originally had the design of the magnets inside the jar and the hall sensor outside but it wouldn’t register through the jar so I had to move the magnets outside and disguise them in some way. Though this probably could have been solved with a different sensor, I didn’t have enough time to troubleshoot the problem.
I would say in terms of this project, my biggest takeaway was relearning the dangerous side effect of dreaming too big. The biggest reason why I didn’t have a functional demo was because I was having problems with a portion of my code that was doing some weird behaviors. I multiplied the millis() by 86400000 because the desired goal is that one second of real time would equal three days to the Arduino (10 real seconds = 1 arduino month) and 3 days x 24 hours x 60 min x 60 sec x 1000ms = 259200. But ultimately the number became too big and would cause problems.
While realistically this would be what happened if I were to make this project actually function over the course of a few months like I planned for, it was more than I needed for the demo. Unfortunately I realized that I should have given up on this pursuit too late. It also would have been an option to make the device go through the modes with 1 month being the most extreme (flashing red) since I would run into problems after around 38 days but I didn’t think about that until it came time to document the process. While I was extremely unhappy with the results of the demo, I am happy with the physical final result of the project. I think with some small tweaks, this project can become a functional Jar of Change so that it can join my collection of strange light sources inside my bedroom.
As for the next step with this project, I would like to add a real time clock so that the Arduino can keep track of the time, even if there is a power shortage/the system gets turned off. I’d also need to change my code when I do that to get it to work with bigger numbers, probably storing them into some variable like days. It would also be a good idea to hook the Arduino up to a 9V battery at that point so the Jar of Change can work interdependent of my computer. If I feel really ambitious, I may even try to incorporate the voice recording function.
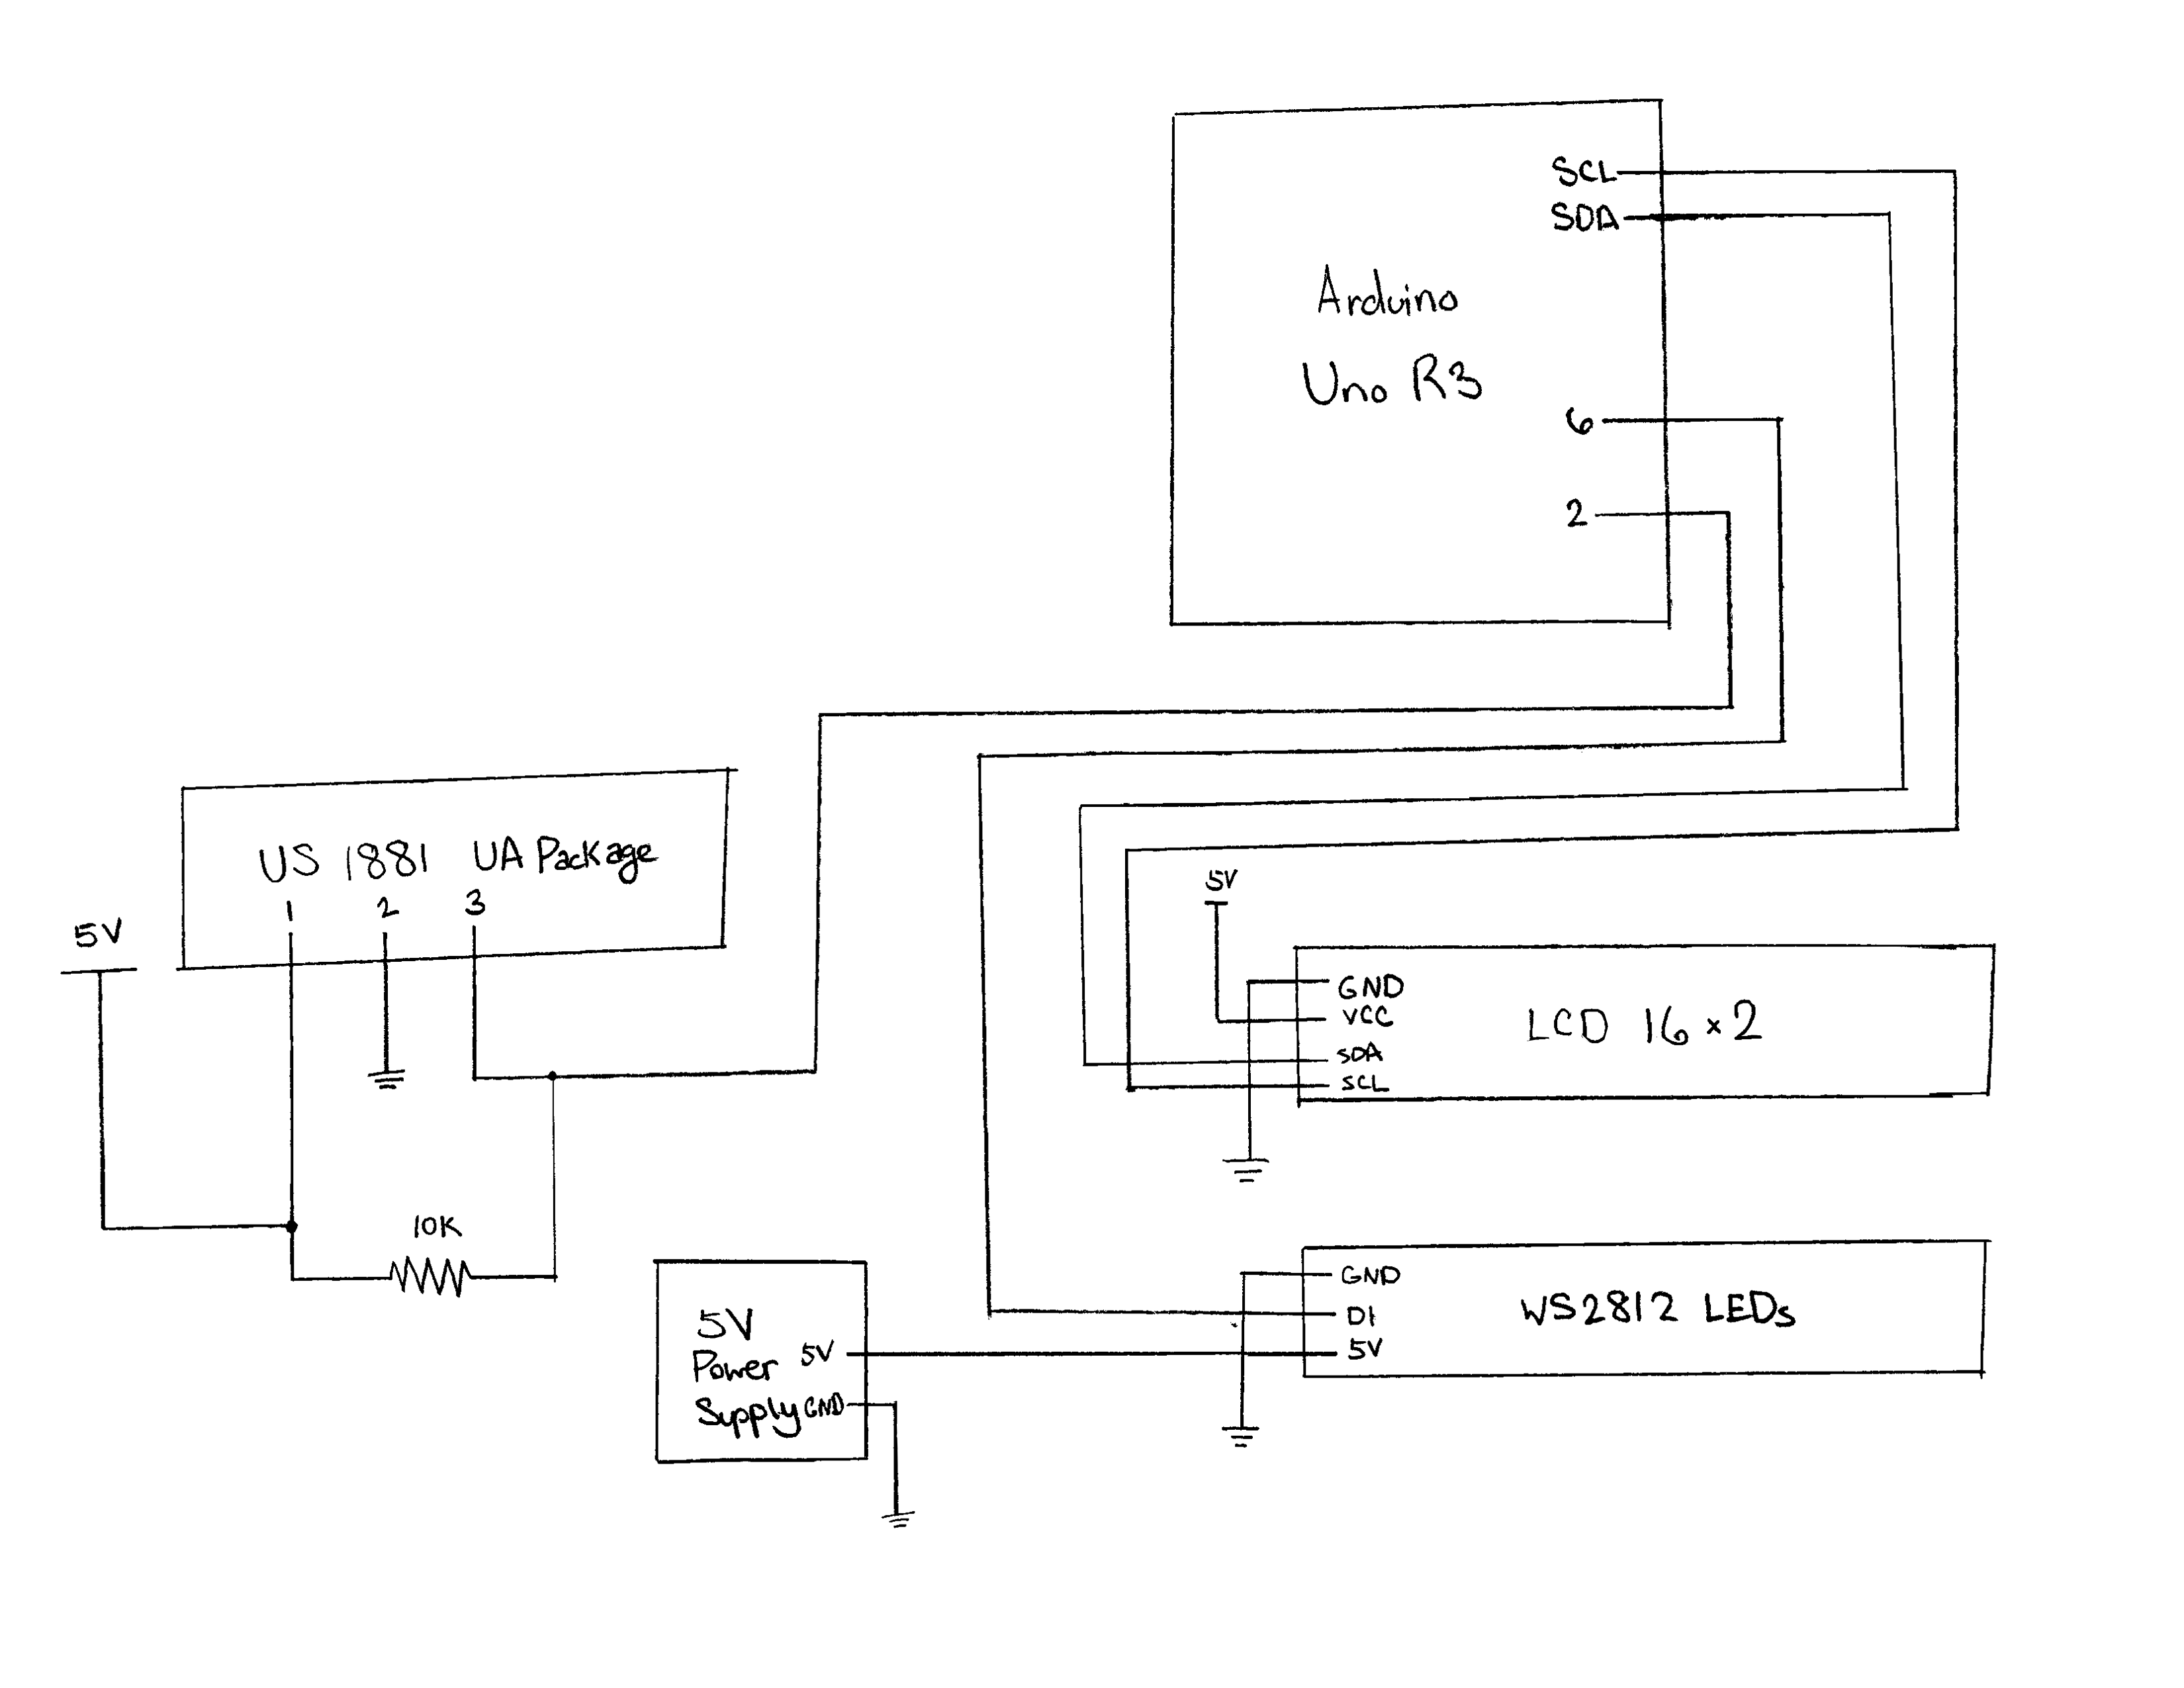
Schematic
Code Submission
/*

   60-223 Project 2 Code
   by Lexi Yan (yany1)
   Due Date: 10/18/18

   Code allows arduino to realize the passing of time, activating modes based off the time that changes the light
   patterns of the LEDs as well as the message being displayed on the LCD screen
   Pin 2 is the input for the hall sensor, pin 6 is the output for the LEDs

   Arduino Hall Sensor Code from https://maker.pro/arduino/tutorial/how-to-use-a-hall-effect-sensor-with-arduino
   NeoPixel code from Adafruit Neopixel example, strandtest
   LCD source code augmented from LiquidCrystal I2C library example, Hello World

*/


#include <Adafruit_NeoPixel.h>
#ifdef __AVR__
#include <avr/power.h>
#endif

#include <Wire.h>
#include <LiquidCrystal_I2C.h>

LiquidCrystal_I2C lcd(0x27, 20, 4); // set the LCD address to 0x27 for a 16 chars and 2 line display


#define PIN 6

volatile byte half_revolutions;
unsigned int rpm;
unsigned long timeold;
bool detected;

Adafruit_NeoPixel strip = Adafruit_NeoPixel(60, PIN, NEO_GRB + NEO_KHZ800);

// sets default state to rainbow (0), jar last opened time to 0
int state = 0;
unsigned long lastOpened = 0;

void magnet_detect()//This function is called whenever a magnet/interrupt is detected by the arduino
{
  half_revolutions++;
  detected = true;
}

//Theatre-style crawling lights.
void theaterChase(uint32_t c, uint8_t wait) {
  for (int j = 0; j < 10; j++) { //do 10 cycles of chasing
    for (int q = 0; q < 3; q++) {
      for (uint16_t i = 0; i < strip.numPixels(); i = i + 3) {
        strip.setPixelColor(i + q, c);  //turn every third pixel on
      }
      strip.show();

      delay(wait);

      for (uint16_t i = 0; i < strip.numPixels(); i = i + 3) {
        strip.setPixelColor(i + q, 0);      //turn every third pixel off
      }
    }
  }
}

// Input a value 0 to 255 to get a color value.
// The colours are a transition r - g - b - back to r.
uint32_t Wheel(byte WheelPos) {
  WheelPos = 255 - WheelPos;
  if (WheelPos < 85) {
    return strip.Color(255 - WheelPos * 3, 0, WheelPos * 3);
  }
  if (WheelPos < 170) {
    WheelPos -= 85;
    return strip.Color(0, WheelPos * 3, 255 - WheelPos * 3);
  }
  WheelPos -= 170;
  return strip.Color(WheelPos * 3, 255 - WheelPos * 3, 0);
}

// Warning color
void orange() {
  //Warning Colors
  colorWipe(strip.Color(244, 167, 66), 50); // Orange
  colorWipe(strip.Color(244, 220, 188), 20); // Light Orange
  colorWipe(strip.Color(0, 0, 0, 255), 50); // White RGBW
}

// Danger color
void red() {
  colorWipe(strip.Color(224, 21, 17), 50); // Red
  colorWipe(strip.Color(234, 155, 154), 20); // Pink
  colorWipe(strip.Color(0, 0, 0, 255), 50); // White RGBW
}

// Do something now color
void flash_red() {
  theaterChase(strip.Color(127, 0, 0), 50); // Red
}

// Fill the dots one after the other with a color
void colorWipe(uint32_t c, uint8_t wait) {
  for (uint16_t i = 0; i < strip.numPixels(); i++) {
    strip.setPixelColor(i, c);
    strip.show();
    delay(wait);
  }
}

void rainbow(uint8_t wait) {
  uint16_t i, j;

  for (j = 0; j < 256; j++) {
    for (i = 0; i < strip.numPixels(); i++) {
      strip.setPixelColor(i, Wheel((i + j) & 255));
    }
    strip.show();
    delay(wait);
  }
}

void setup() {

  Serial.begin(9600);

  // Neopixels Initiating with all pixels off
  strip.begin();
  strip.show();

  // Hall Sensor Code
  attachInterrupt(0, magnet_detect, RISING);//Initialize the intterrupt pin (Arduino digital pin 2)
  half_revolutions = 0;
  rpm = 0;
  timeold = 0;


}

void messageDisplay(){

  // Less than 1 month messages
  if (state == 0){
    if (timeSec > 10){
      lcd.init();
      lcd.init();
      lcd.backlight();
      lcd.setCursor(3, 0);
      lcd.print("Be confident");
      lcd.setCursor(2, 1);
      lcd.print("and happy Lexi");
    }

    else{
      lcd.init();
      lcd.init();
      lcd.backlight();
      lcd.setCursor(3, 0);
      lcd.print("I beLEAF");
      lcd.setCursor(2, 1);
      lcd.print("    in YOU!");
  }}

  // 1 month messages
  else if (state == 1){
    if (timeSec > 30){
      lcd.init();
      lcd.init();
      lcd.backlight();
      lcd.setCursor(3, 0);
      lcd.print("Chase your");
      lcd.setCursor(2, 1);
      lcd.print(" happiness");
    }

    else{
      lcd.init();
      lcd.init();
      lcd.backlight();
      lcd.setCursor(3, 0);
      lcd.print("Be brave!");
      lcd.setCursor(2, 1);
      lcd.print("Take risks!");
    }
  }

  // 2 month messages
  else if (state == 2){
    if (timeSec > 50){
       // initialize the lcd
      lcd.init();
      lcd.init();
      // Print a message to the LCD.
      lcd.backlight();
      lcd.setCursor(3, 0);
      lcd.print("Let's code");
      lcd.setCursor(2, 1);
      lcd.print("  a project!");
    }

    else{
      // initialize the lcd
      lcd.init();
      lcd.init();
      // Print a message to the LCD.
      lcd.backlight();
      lcd.setCursor(3, 0);
      lcd.print("New hobby?");
      lcd.setCursor(2, 1);
      lcd.print("Join a class!");
    }
  }

  // 3+ month messages
  else{

    if (timeSec > 70){
      // initialize the lcd
    lcd.init();
    lcd.init();
    // Print a message to the LCD.
    lcd.backlight();
    lcd.setCursor(3, 0);
    lcd.print("Music");
    lcd.setCursor(2, 1);
    lcd.print("Festival?");
    }

    else if (timeSec > 80){
      // initialize the lcd
    lcd.init();
    lcd.init();
    // Print a message to the LCD.
    lcd.backlight();
    lcd.setCursor(3, 0);
    lcd.print("Meet new friends!");
    lcd.setCursor(2, 1);
    lcd.print("Learn a skill!");
    }

    else if (timeSec > 90){
      // initialize the lcd
      lcd.init();
      lcd.init();
      // Print a message to the LCD.
      lcd.backlight();
      lcd.setCursor(3, 0);
      lcd.print("Explore a");
      lcd.setCursor(2, 1);
      lcd.print("new place!");
    }

    else{
      // initialize the lcd
    lcd.init();
    lcd.init();
    // Print a message to the LCD.
    lcd.backlight();
    lcd.setCursor(3, 0);
    lcd.print("Break out the");
    lcd.setCursor(2, 1);
    lcd.print("bucket list!");
    }

  }}


void loop() {

  //Set display message based on time
  messageDisplay();

  timeSec = (millis()/1000) - (lastOpened/1000);

  Serial.print(timeSec);
  Serial.println(" seconds");

  //When a minute (3 months) has passed, the red flashing state will be triggered
  if (timeSec >= 60 ){
    state = 3;
  }

  //When 40s (2 months) has passed, the red state will be triggered
  else if (timeSec >= 40 ){
    state = 2;
  }

  //When 20s (1 month) has passed, the orange state will be triggered
  else if (timeSec >= 20 ){
    state = 1;
  }

  //When it is under 20s, the rainbow state is active
  else{
    state = 0;
  }

  //If jar is opened: record time, set state to rainbow, turn detected off
  if (detected == true) {
    lastOpened = millis();
    state = 0;
    detected = false;
  }

  //flash light sequence depending on the current state
  if (state == 1) {
    orange();
  }
  else if (state == 2) {
    red();
  }
  else if (state == 3) {
    flash_red();
  }
  else {
    rainbow(20);
  }

  //Measure RPM for Hall Sensor
  if (half_revolutions >= 20) {
    rpm = 30 * 1000 / (millis() - timeold) * half_revolutions;
    timeold = millis();
    half_revolutions = 0;
    //Serial.println(rpm,DEC);
  }
}
Leave a Reply
You must be logged in to post a comment.