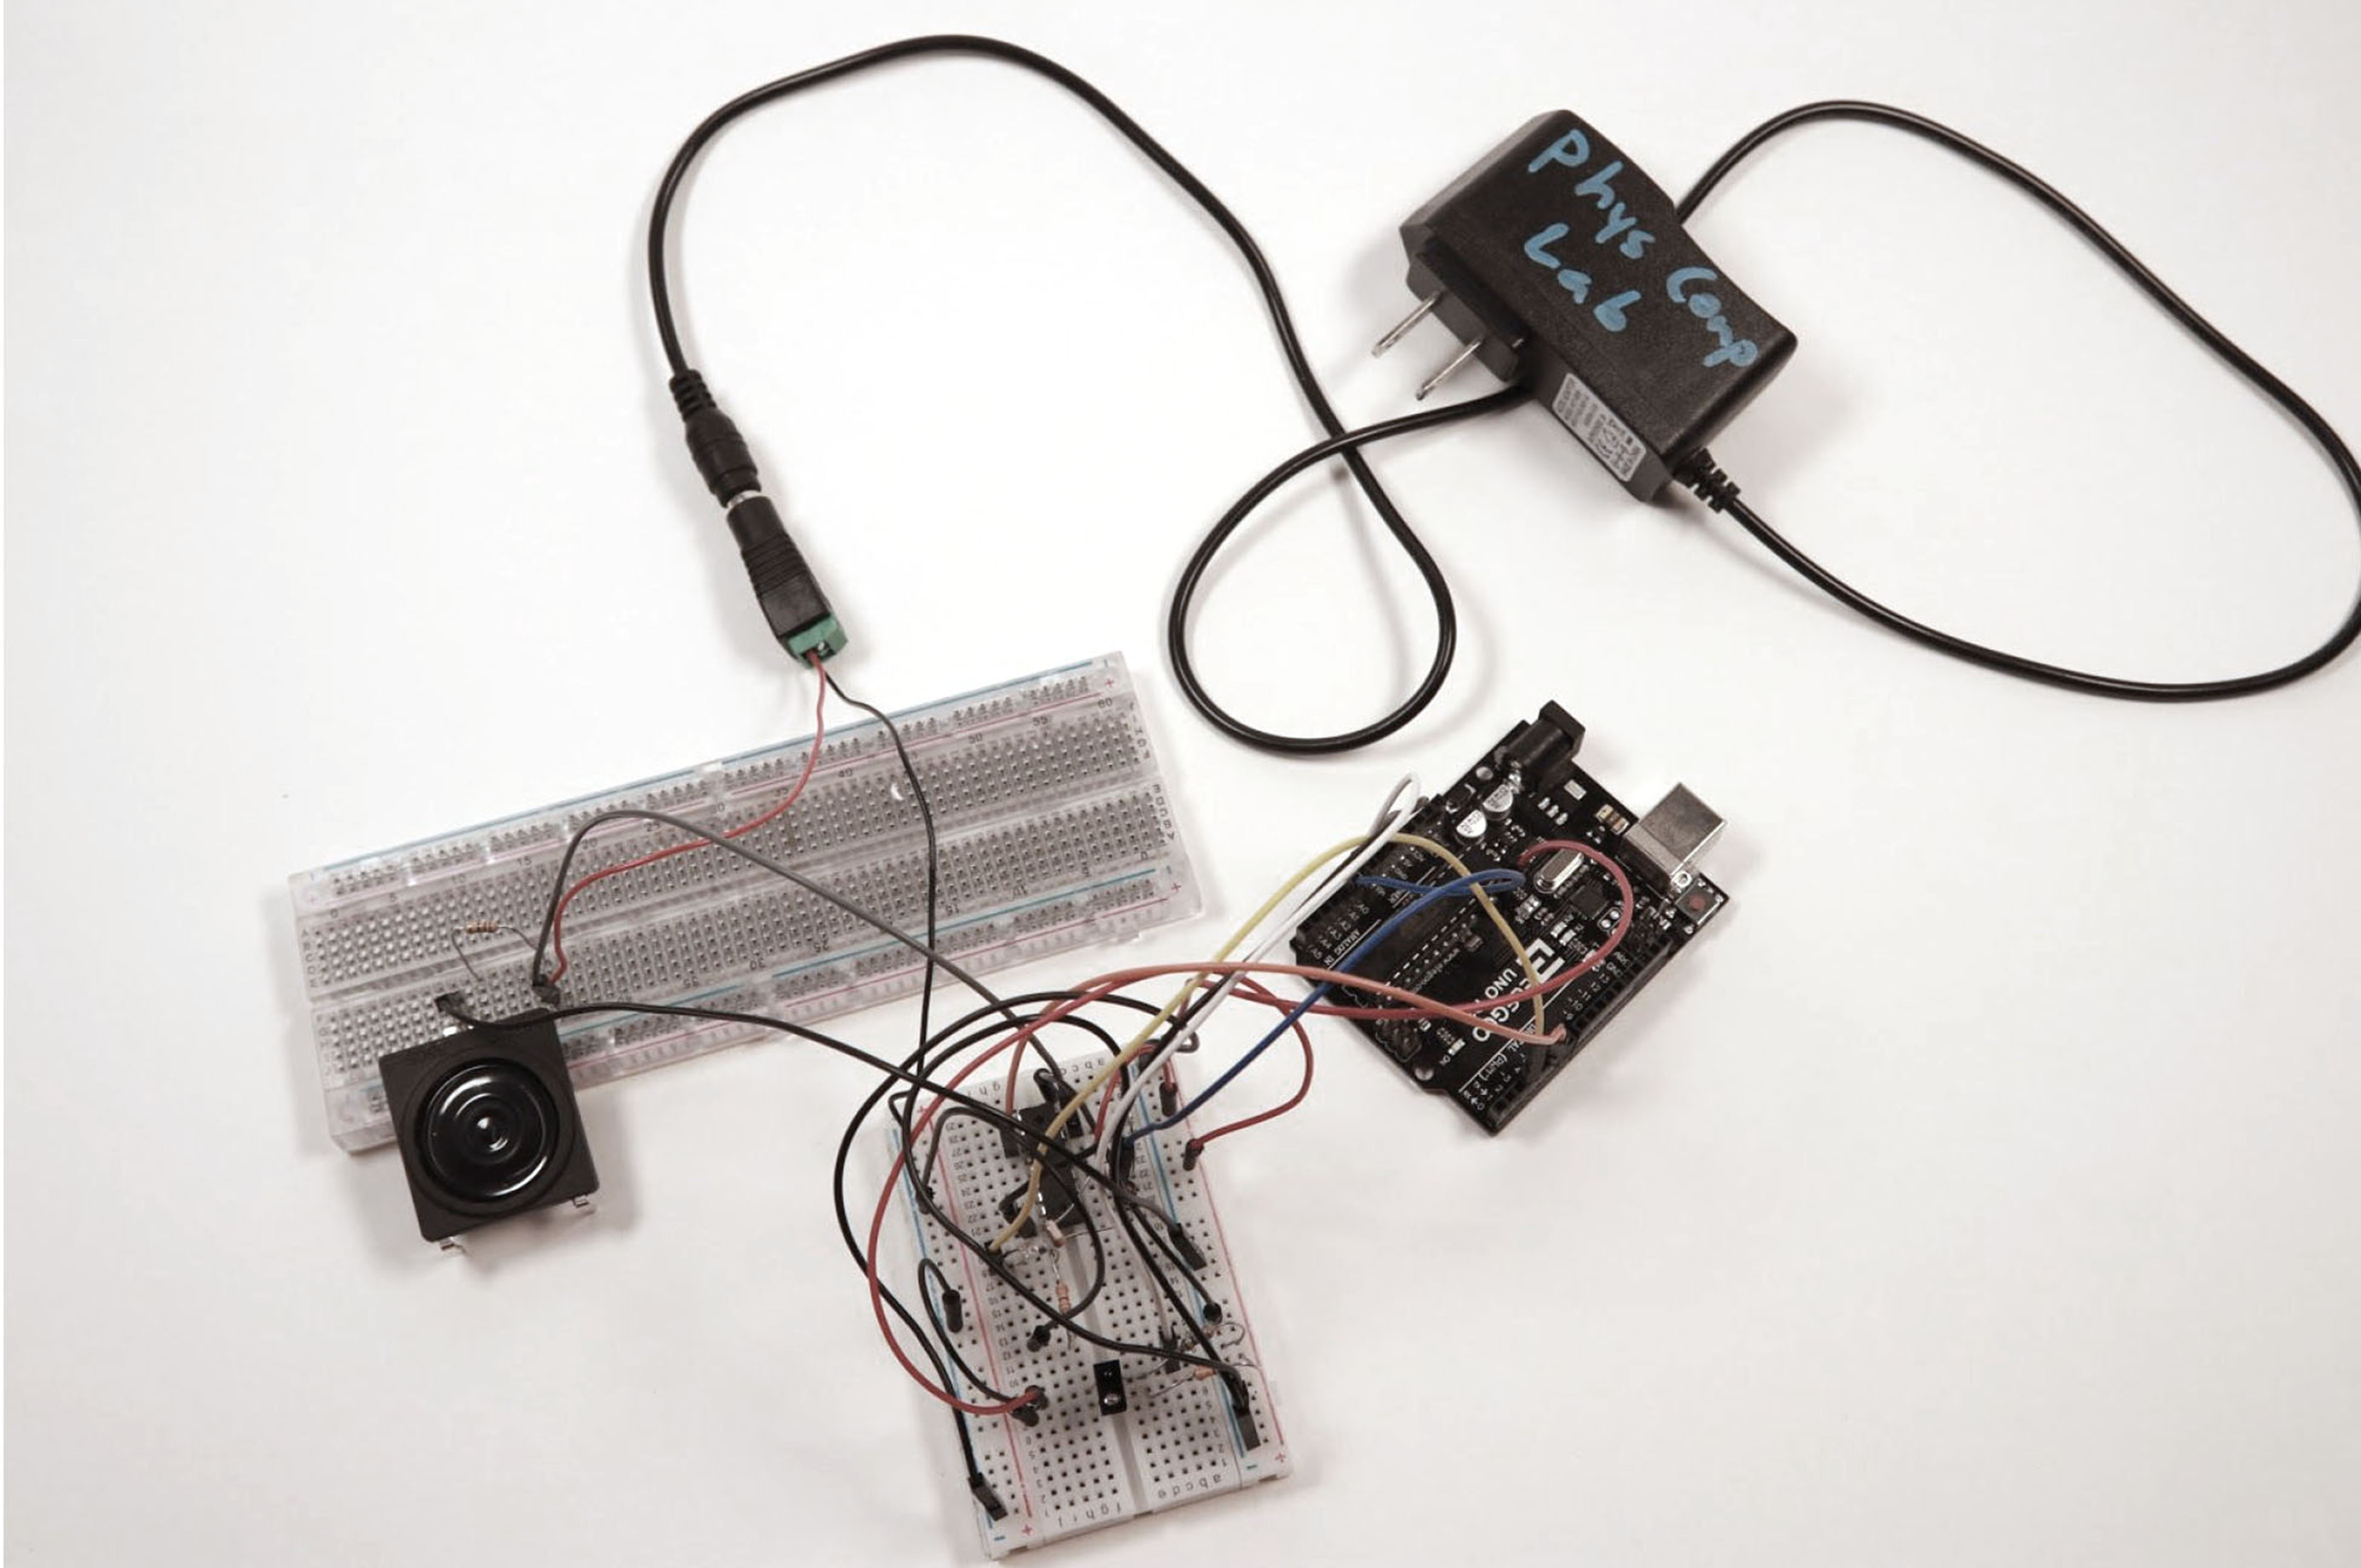
Description:
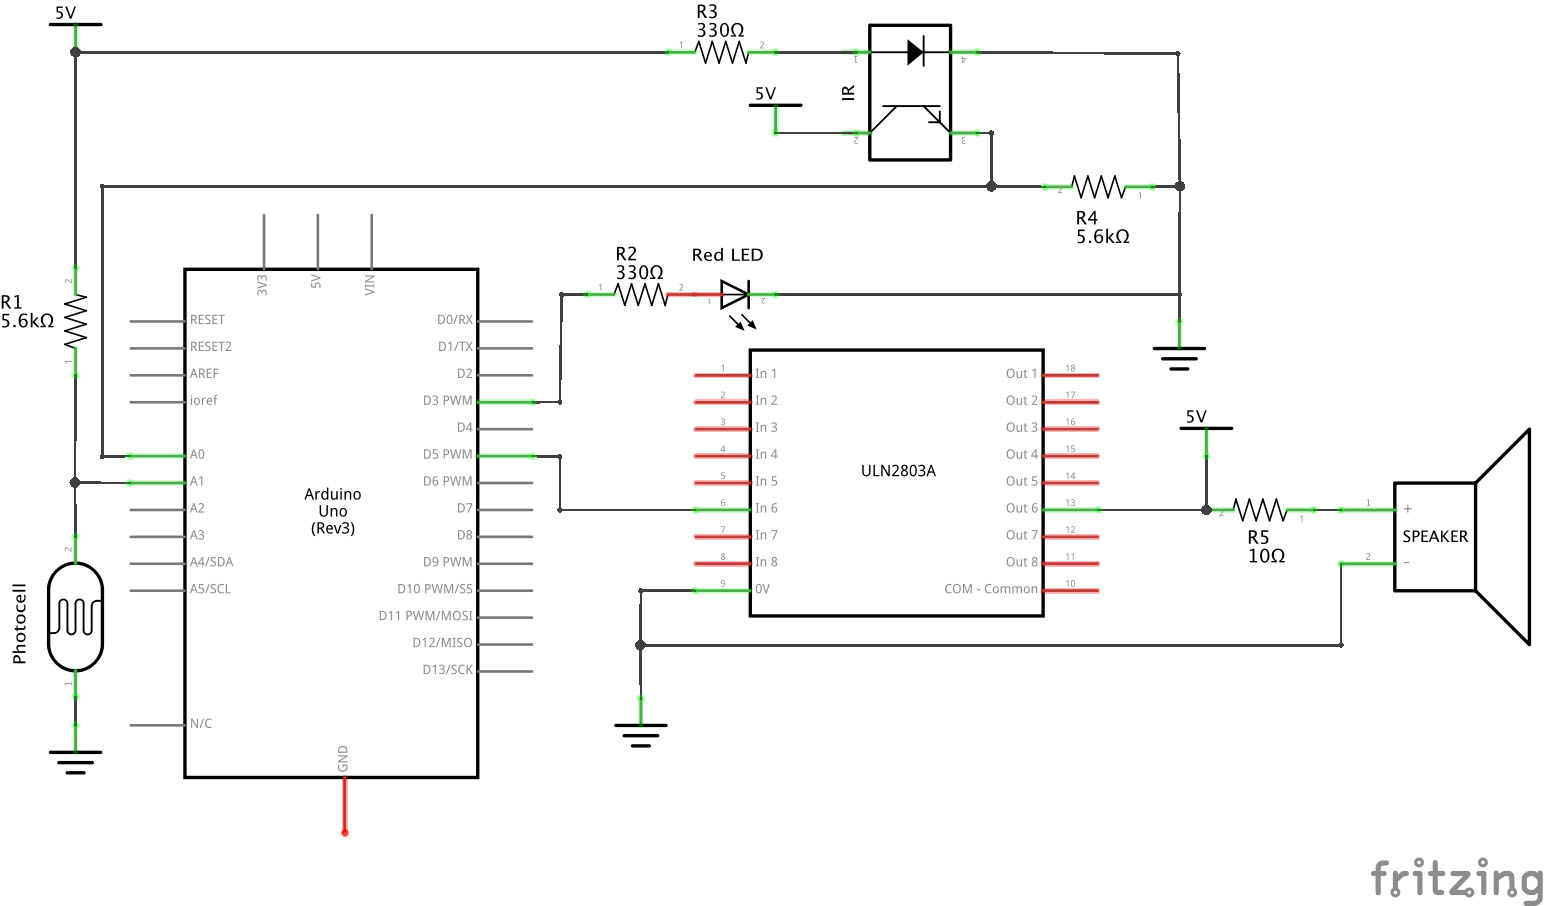
An infrared sensor detects the distance of an object away from it up to ten centimeters. As the object gets closer to the infrared sensor, a light shines brighter which is measured by a photocell. The measured brightness of the light is used to produce variable sound out of a speaker which gets louder, as the light shines brighter.
**************************************************************************************
56c01359e103486987b9603cc6ecd337
Video: Co-ordination and experimenting with the output group
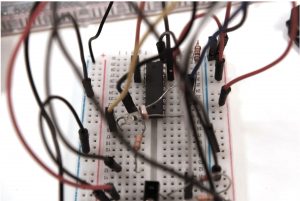
ULN2803 transistor and the LED with photocell up against it
*************************************************************************************
Discussion:
The first thing we set up and experimented with was an ultrasonic sensor to detect the distance between an object and the sensor. However, the ultrasonic sensor produced less accurate and more noisy data for the arduino to use. Also, in the beginning we used two LEDs which one was green and the other was red. The idea behind this was to implement color coordination with when the object was far away and when the object was close. Red for close, and green for far away. This proved to be ineffective, as it provided more error in measuring light for the photocell. Also, we tested these two LEDs with the ultrasonic sensor, so overall the two provided a bad reading for the photocell compared to the distance being measured. Since we wanted to prioritize the accuracy of this transducer, we decided to replace the two LEDs with one LED shining white light, and an infrared sensor instead of the ultrasonic sensor. The one LED proved to be more reliable, and the infrared sensor was more accurate in detecting the distance we wanted.
The final part of this double transducer was the speaker, and producing a variating volume out of the speaker was a challenge. First, we implemented an ULN2803 transistor which act as a communicator between the speaker and the arduino. The transistor acts as a switch to protect the arduino, as the arduino doesn’t need the external battery that we’ll connect for the speaker. A variating volume requires us to be able to change the voltage going to the speaker as fast as the distance reading changes from the infrared sensor. Changing the frequency of the speaker is easy because the arduino can send signals faster or slower to change frequency, but the arduino can’t change the voltage out of an analog or digital port. We were able to download a library of code to run that would trick the speaker to use a variable voltage, so we mapped the readings from the photocell to the readings that our new library could use. This library did indeed work, but it the speaker produced a very quiet noise that we wouldn’t be able to use. Now, all we needed was an extra voltage source to boost the volume of the speaker, so we added a 6 volt battery for the speaker to use. This produced a measurable volume for the next group to use as an input.
Overall, our double transducer was pretty simple, as we only used the sensors and gadgets that were introduced in class. However, we learned a lot about connecting and experimenting with specific elements with the arduino to optimize the project. This will surely help future projects and the processes we’ll have to go through to build them.
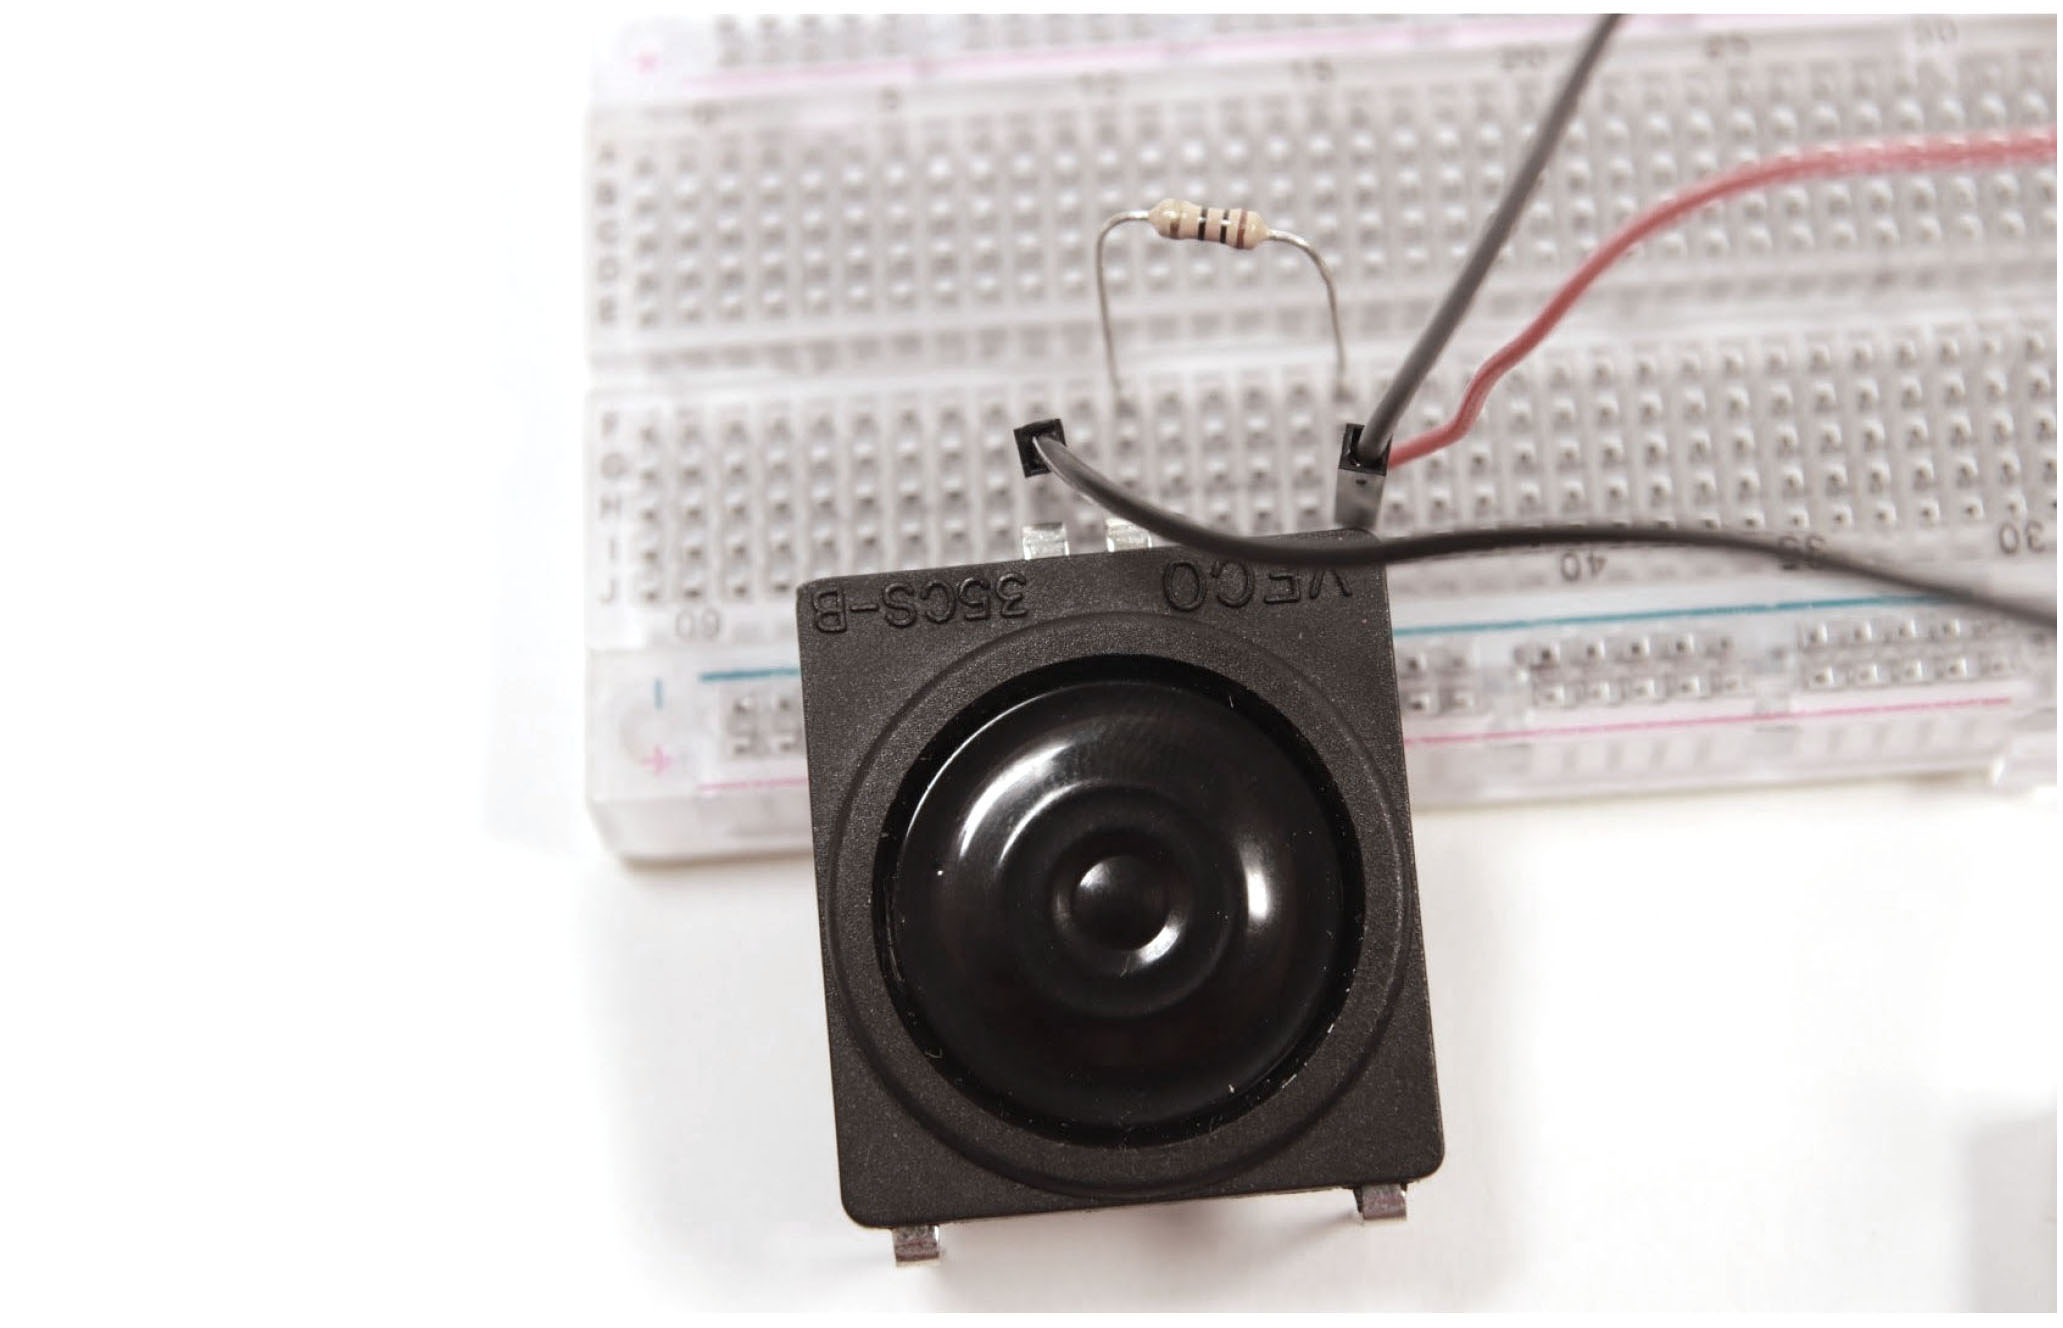
Speaker with additional voltage source attached to it
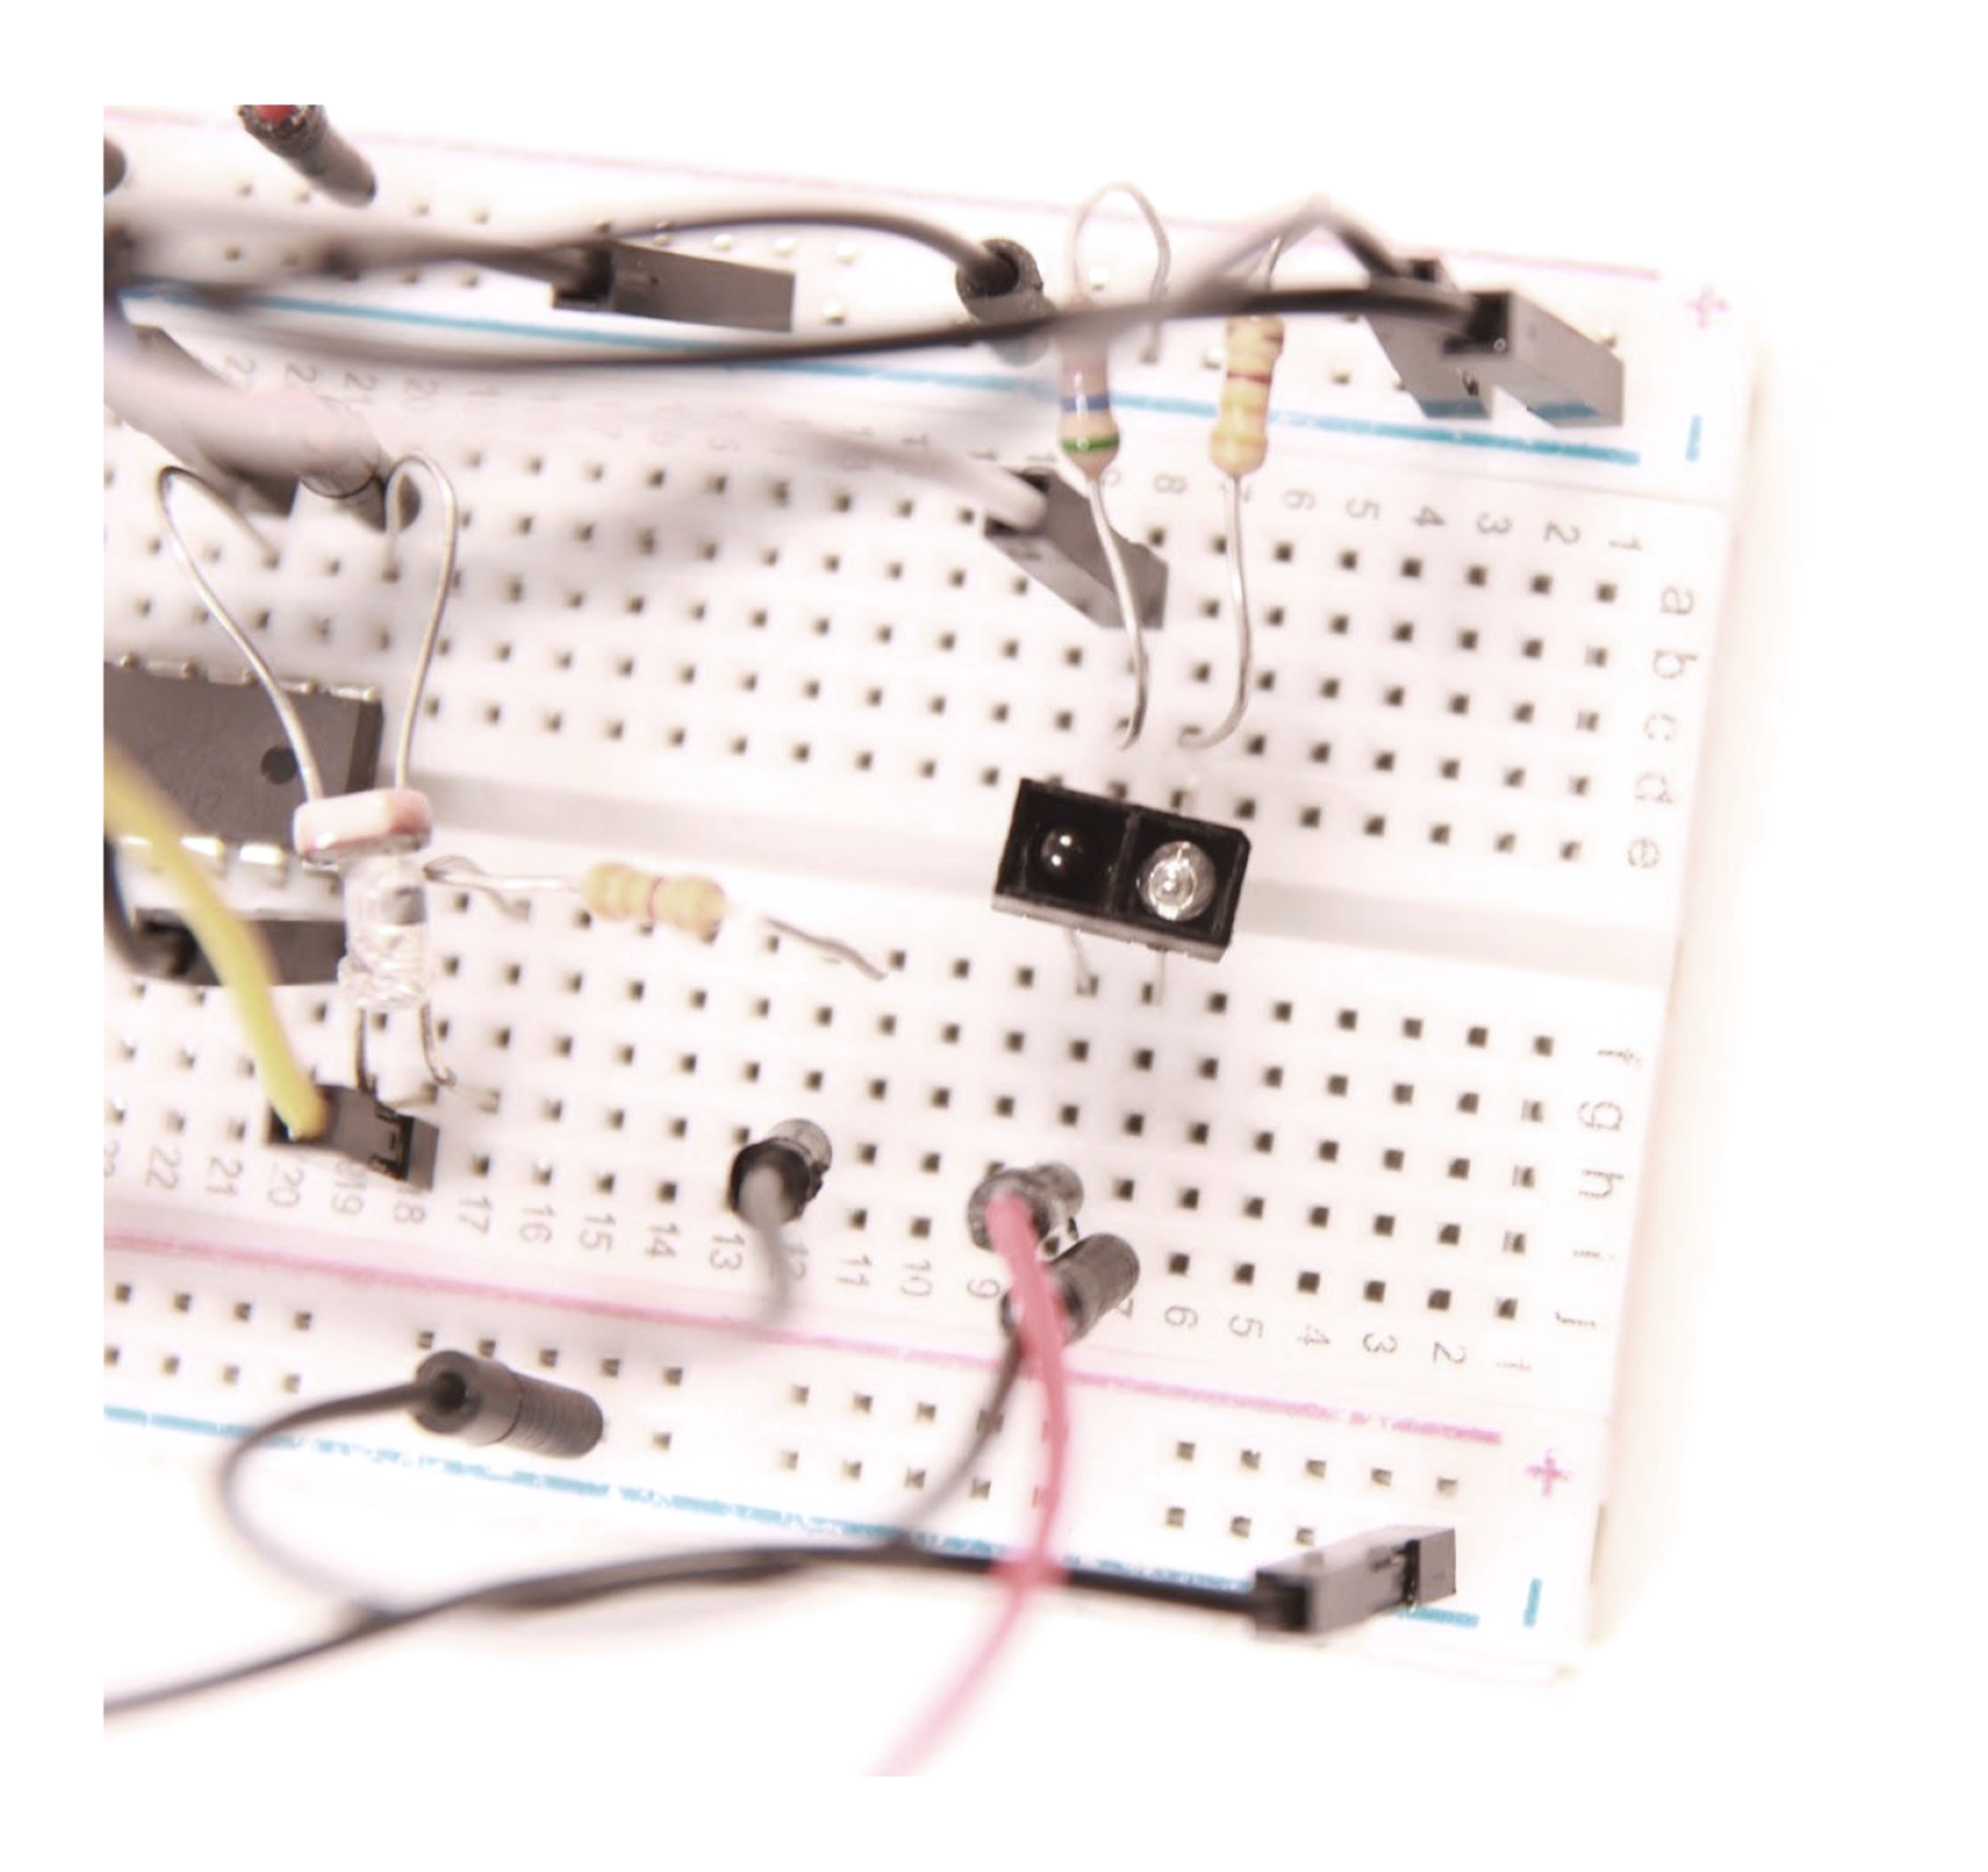
Picture of the infrared sensor
*******************************************************************************
*****************************************************************************************
// Project title: LLS
// Intro to Physical Computing @ Carnegie Mellon University

// Made by Maria Vlachostergiou and Leland Mersky

// Inputs:
// Arduino pin | Input
//     A0        IR sensor
//     A1        Photocell

// Outputs:
// Arduino pin | Output
//     3         white LED
//     5         Speaker

//Summary: Distance TO Light TO Sound
// Step1: We measure proximity. Step 2: We translate proximity into brightness.
// Step 3: We measure the amound of light and we turn it into sound volume and frequency.

***************************************************************************************

// Sound Library & declare a new object
#include <Volume.h>
Volume vol;

// IR SSENSOR for measuring the changing distance from the object
// LED for translating distance into amount of light
// PHOTO_CELL for measuring the amount of light produced
const int IR_SENSOR = A0;
const int PHOTO_CELL = A1;
const int LED = 3;
const int TRANSISTOR = 5;

int distance = 0;
int lightAmount = 0;
int LED_brightness = 0;
int volume = 0;
int frequency = 0;

void setup() {

  Serial.begin(9600);
  vol.begin();

  // INPUTS
  pinMode(IR_SENSOR, INPUT);
  pinMode(PHOTO_CELL, INPUT);
  //OUTPUTS
  pinMode(LED, OUTPUT);
  pinMode(TRANSISTOR, OUTPUT);

}

void loop() {

  // INPUTS VALUES
  distance = analogRead(IR_SENSOR);
  lightAmount = analogRead(PHOTO_CELL);

  // OUTPUTS VALUES
  LED_brightness = map(distance, 0, 300, 0, 255);
  if (distance < 15) {
    digitalWrite(LED, LOW);
  } else {
    analogWrite(LED, LED_brightness);
  }

  // The minimum and maximum lightAmount observed in serial readings were: min=50, max=940
  // Also, the minimun and maximum amount of volume for this speaker are: min=0, max= 256
  volume = map(lightAmount, 50, 940, 0, 256);
  // For different frequencies, the speaker produces different tones of sound. We choose the tones in the frequency range [300,800]
  frequency = map(lightAmount, 50, 940, 300, 800);
  vol.tone(frequency, volume);

  //vol.tone(300, volume);
  //vol.delay(200);
}

// SERIAL MONITOR (INPUTS & OUTPUTS)
Serial.print("The distance from object is: ");
Serial.print(distance);
Serial.print("   The brightness of the LED is: ");
Serial.print(LED_brightness);
Serial.print("   The amount of light is: ");
Serial.print(lightAmount);
Serial.print("   Volume is at: ");
Serial.print(volume);
Serial.print("   Frequency is at: ");
Serial.println(frequency);
Serial.println();

}
Comments are closed.