
Introduction
After our initial interview with Jim (which is documented here), we decided to have a follow-up interview to more specifically nail down an idea. After a substantial and creative conversation, we came up with a our idea.
A main feature of Jim’s living room is a large Boston grand piano which both Jim and his wife use extensively for pleasure and entertaining. One hassle, however, is that the piano requires a certain humidity to maintain its condition during the winter. In addition to their love of music, Jim and his wife also enjoy the sights and sounds of indoor fountains. After some discussion, these two themes seemed to complement each other nicely.
Our Idea: Build them a controllable fountain that provides both the tranquil sounds of moving water and also actively monitors and maintains the correct humidity for their piano.
Below we outline the process of creating our initial prototype for Jim’s new fountain.
Prototype
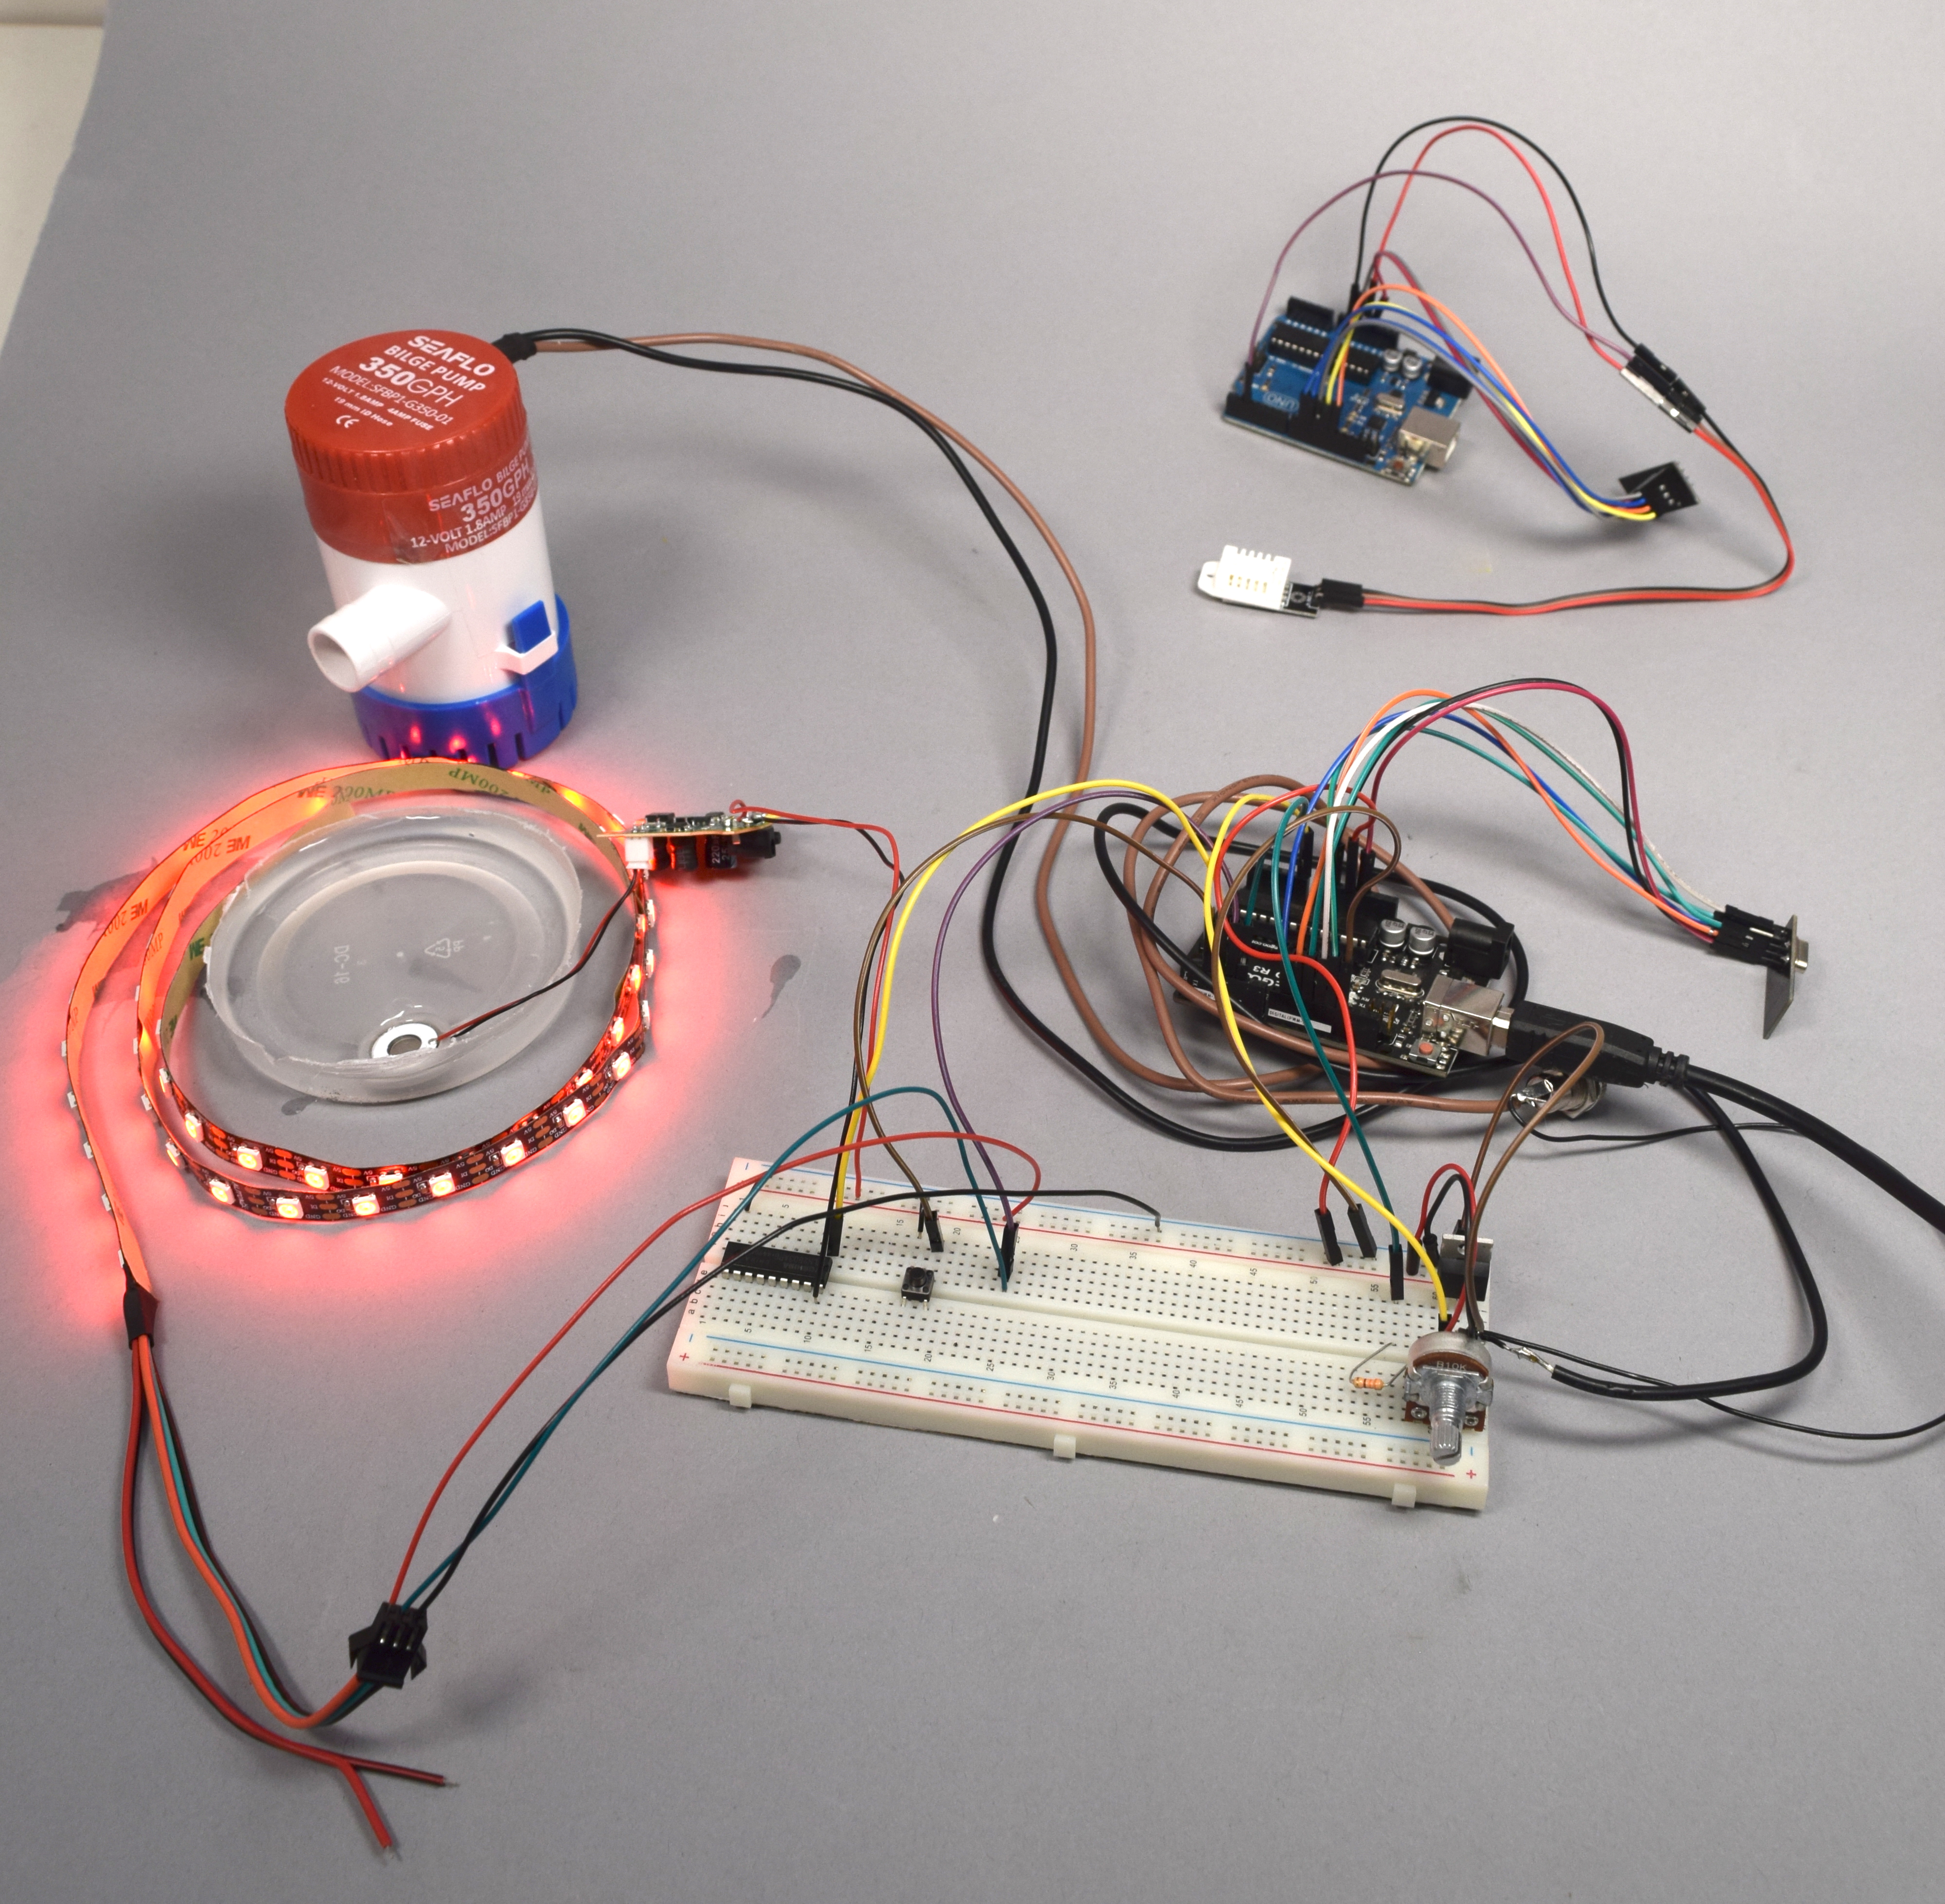
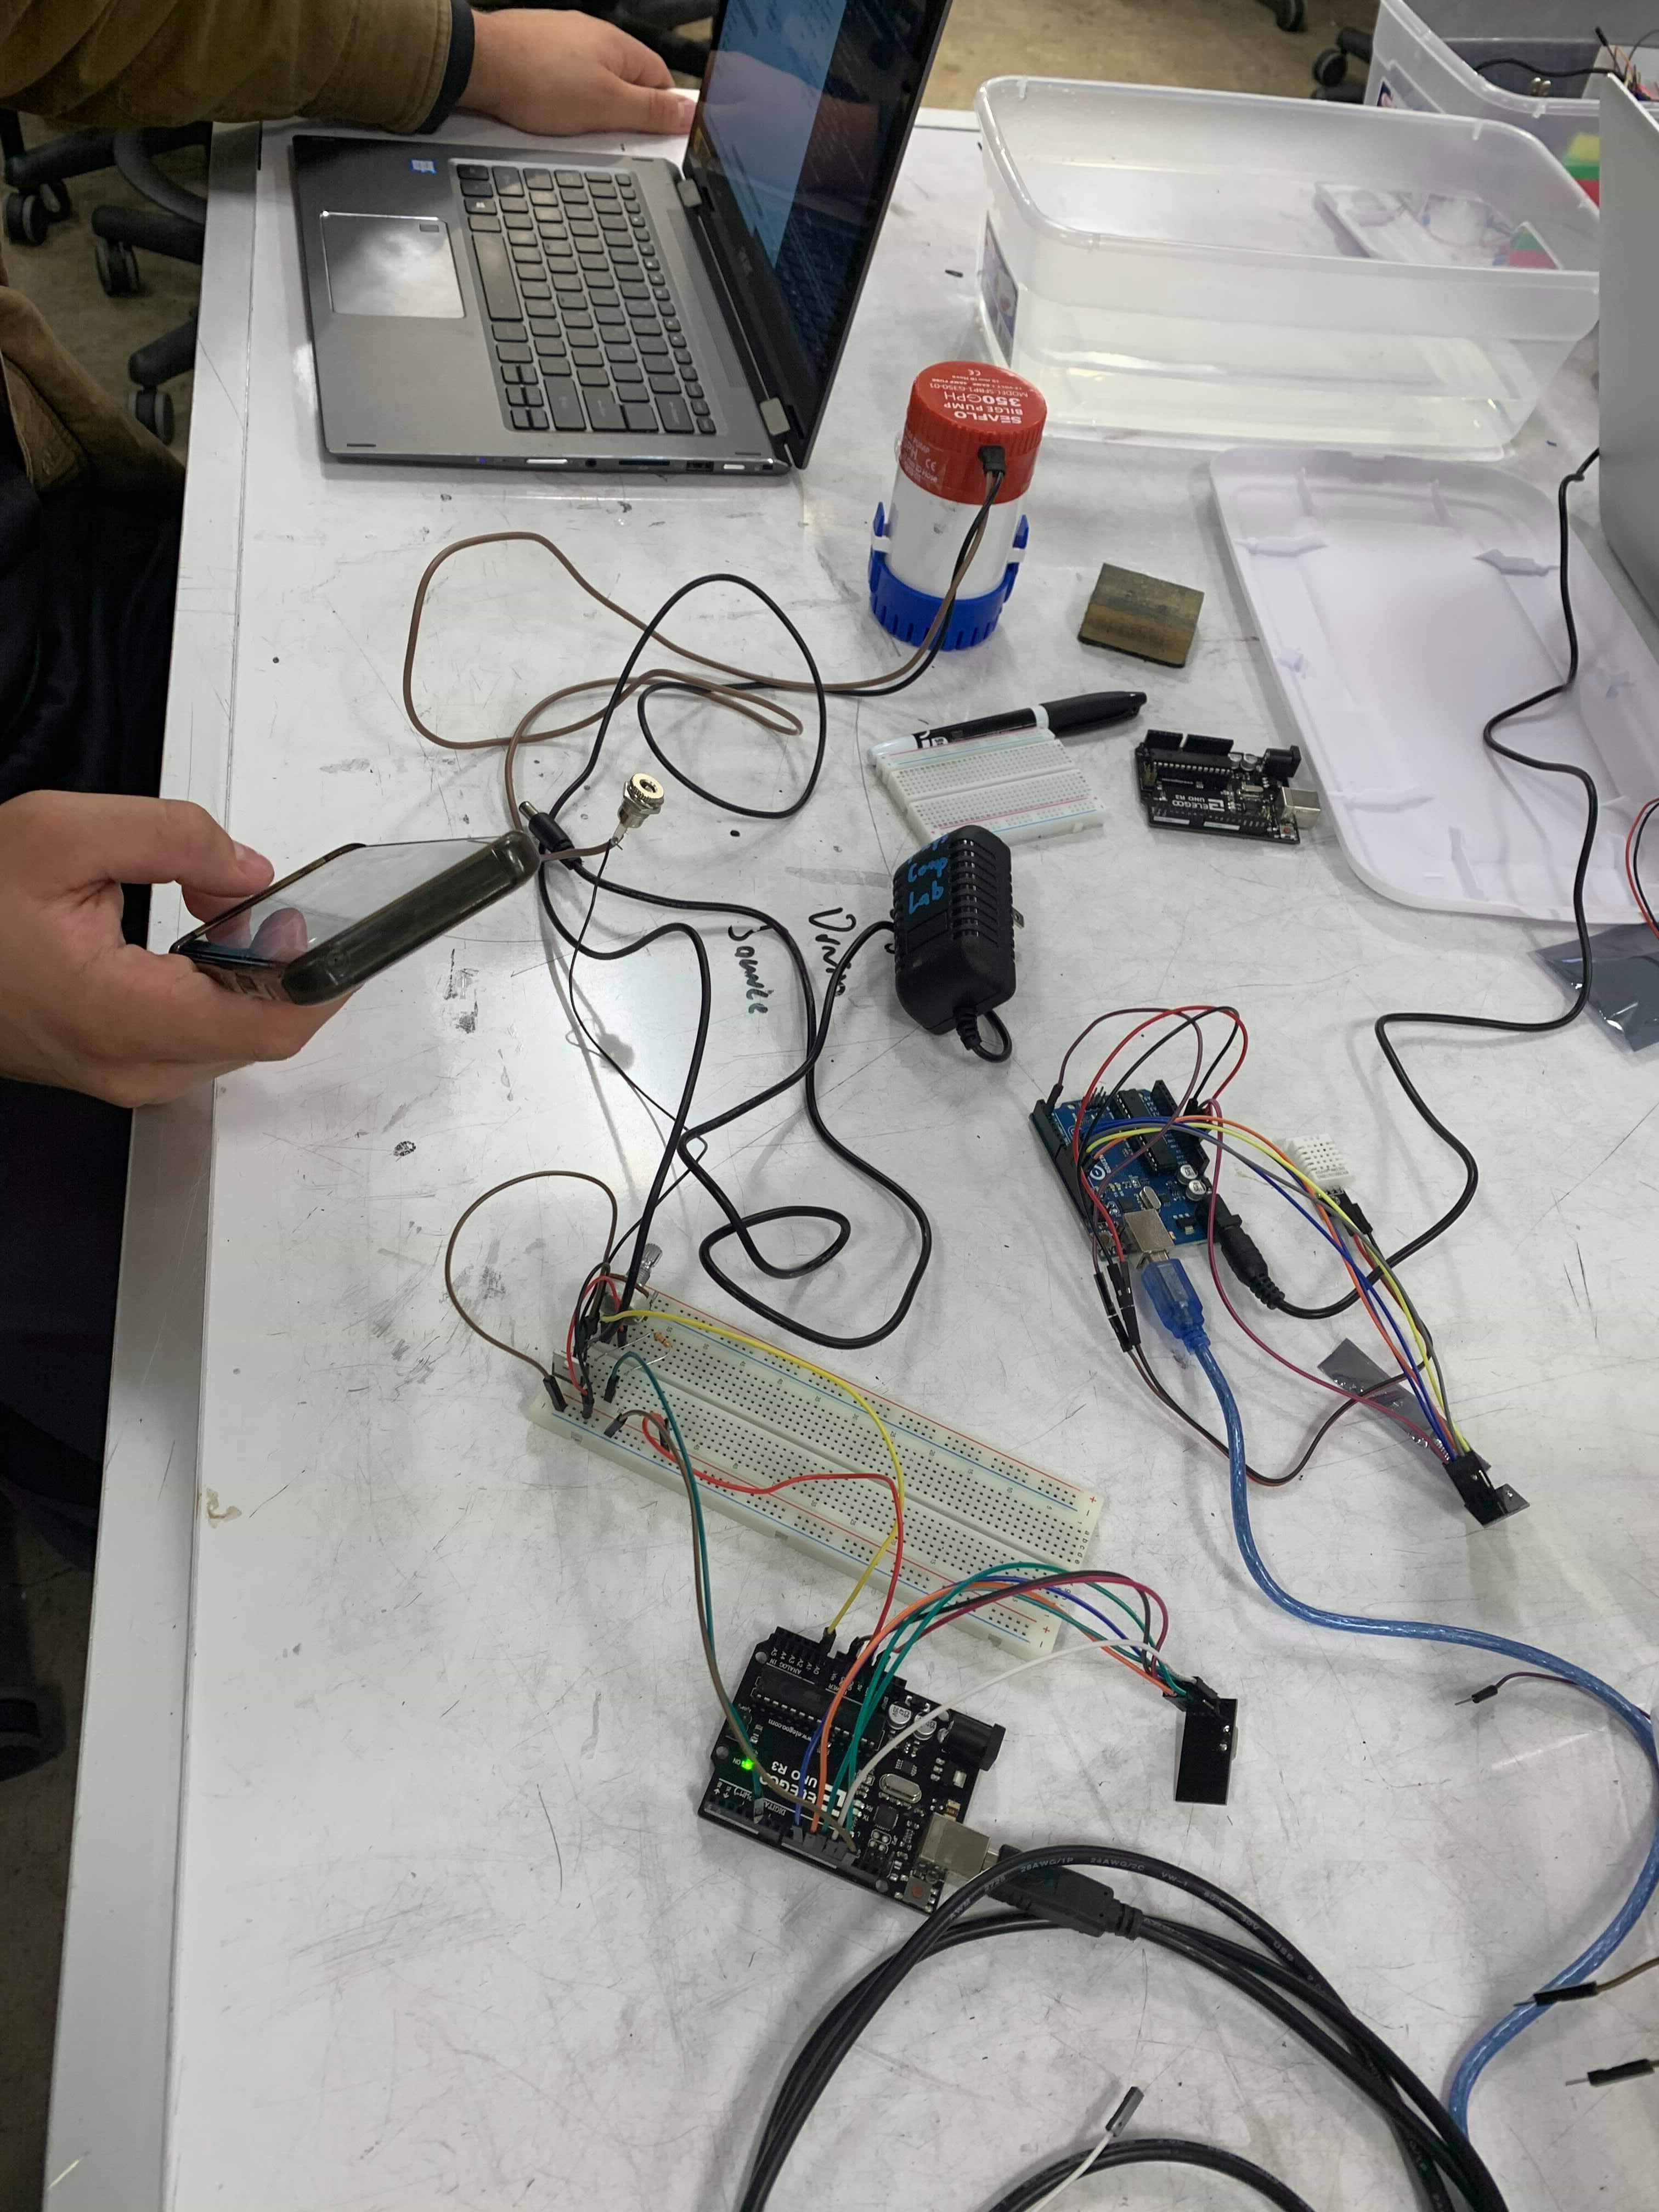
Our prototype has two separate parts: a fountain module (in the middle) with the pump, LED strip, humidifier and a radio receiver, and a remote module (top right) with a humidity detector and a radio transmitter.
Since our group had a relatively late start, we focused on finishing most of the technical components instead of the aesthetics. We decided to divide our project into two physically separate parts: the first one is the main fountain module with a pump, a humidifier, and LED indicator that shows the humidity level, and the second part is a remote module that detects humidity from a distance and sends radio signal back to the main module. Right now, the remote module will send signals back to the main controller every 5 or so seconds. If the primary module detects that the humidity is too low, it will simply turn on the humidifier until it detects that the humidity is no longer too low. The LED will accordingly respond as well. Currently rainbow colors indicate a correct humidity while red or blue indicate either too low or too high respectively. The pump’s power too can be adjusted using a small dial though it wines when it gets too weak as the our current model is not intended for varying speeds.
In the end, we intend for Jim only to have to interact with the primary fountain module. With full battery, the remote module should continue transmitting normally for ~6 months to mitigate the hassle for Jim, at which point he will simply have to replace a couple of AA batteries.
For the prototype, we have solved most of the technical challenges:
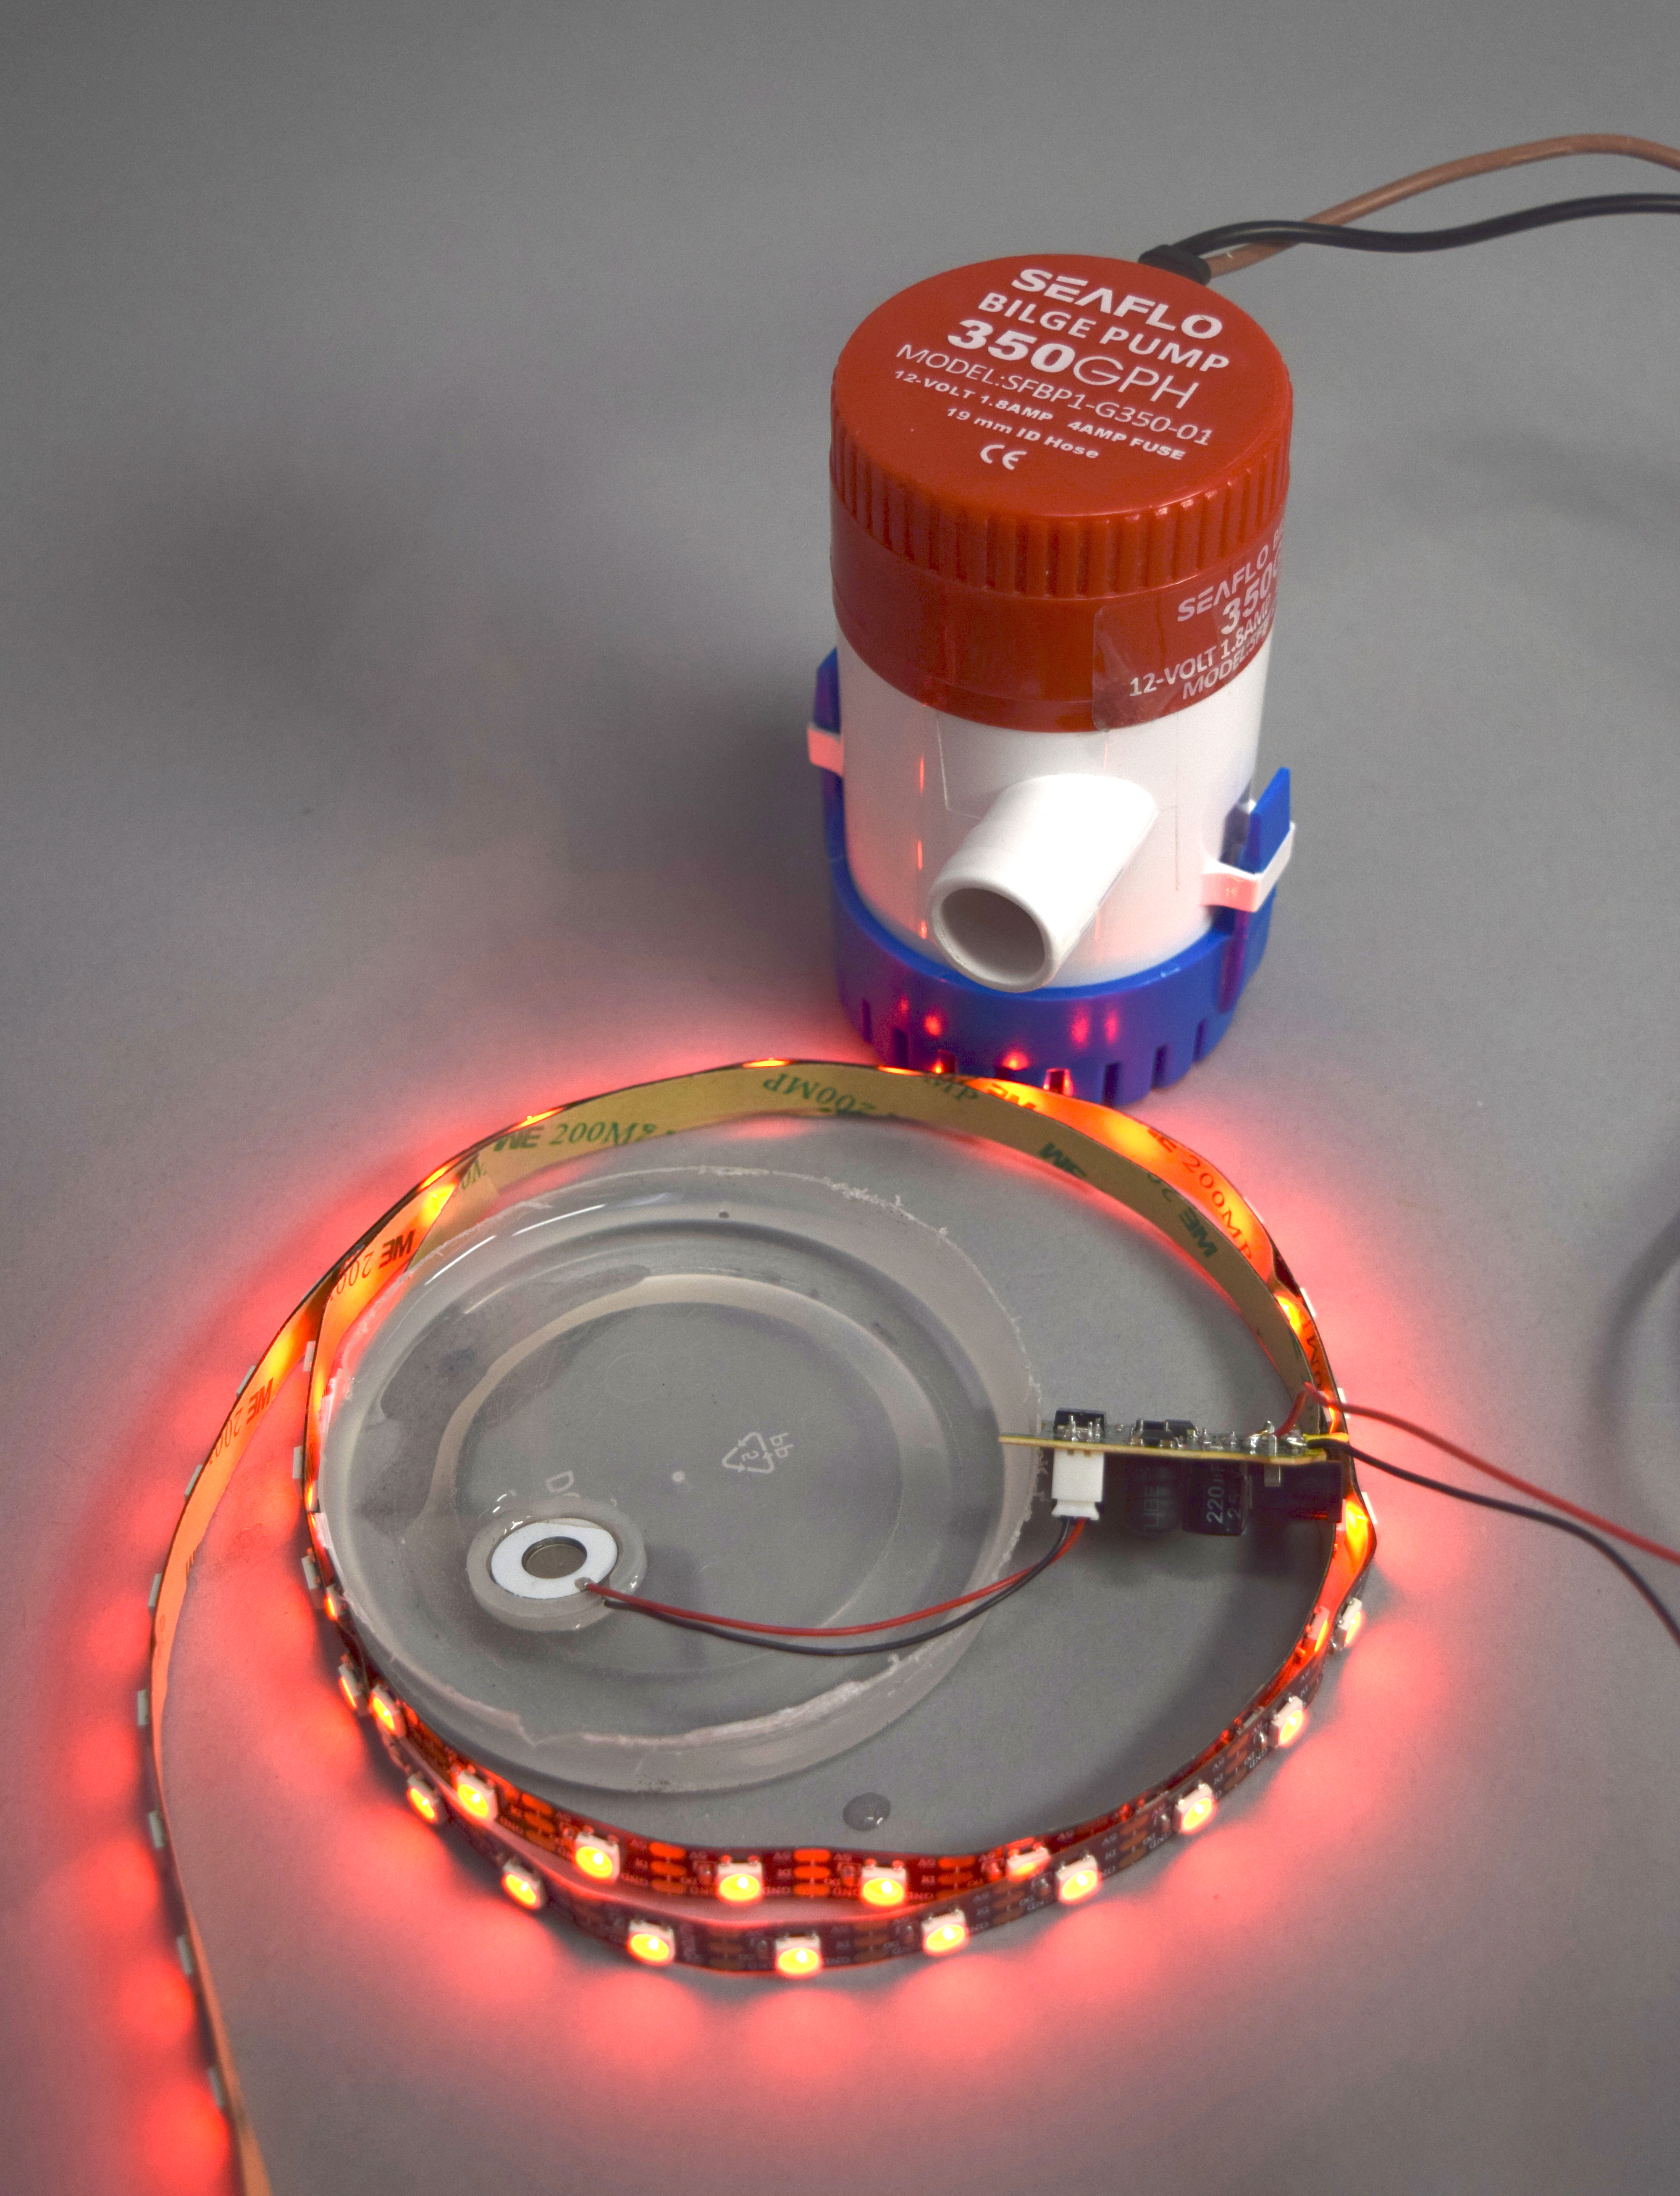
The “actual” fountain with the humidifier in shallow water, an LED strip and an adjustable pump. The humidifier disk has to be on the surface of shallow water to make the mist (this will be an important design consideration). The LED strip currently shows red because the humidity level is below the desired threshold.
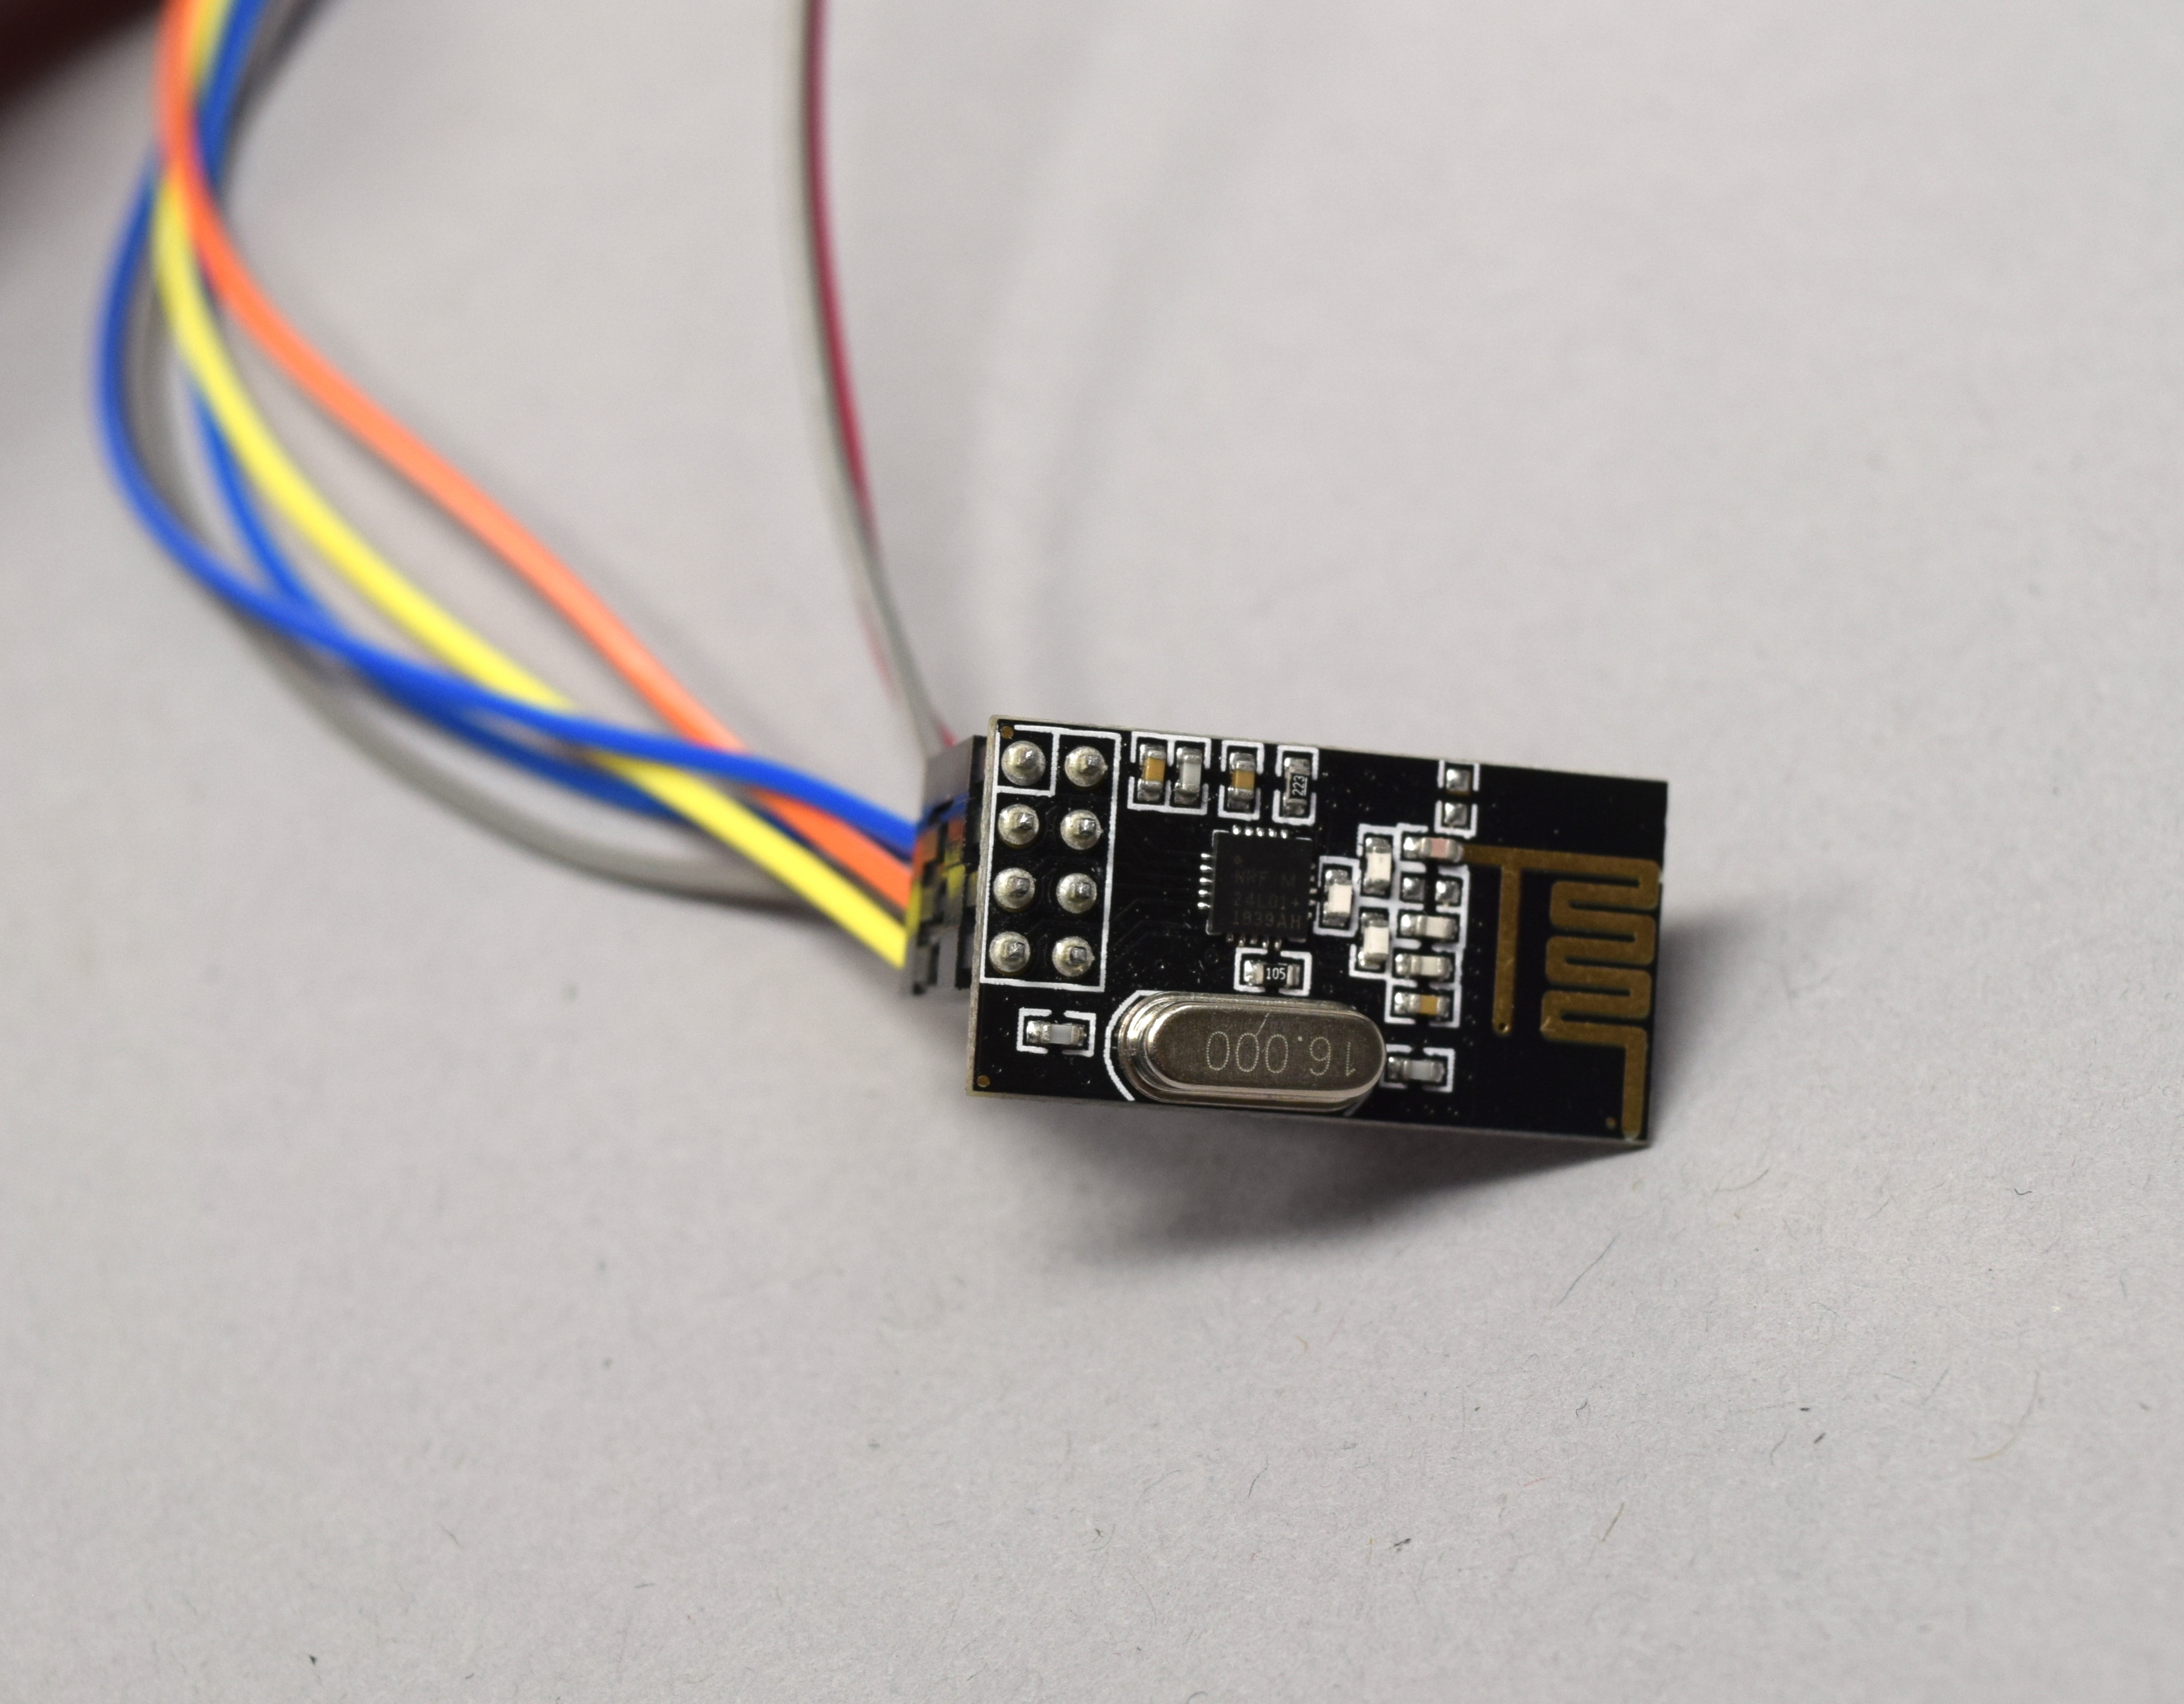
The radio transmitter for the main fountain module. This will be responsible for communication with the remote humidity module located near the piano.
For the main fountain part, we have:
- An adjustable pump
- LED strip that displays the humidity
- A humidifier that turns on when humidity is below a settable threshold
- A radio receiver
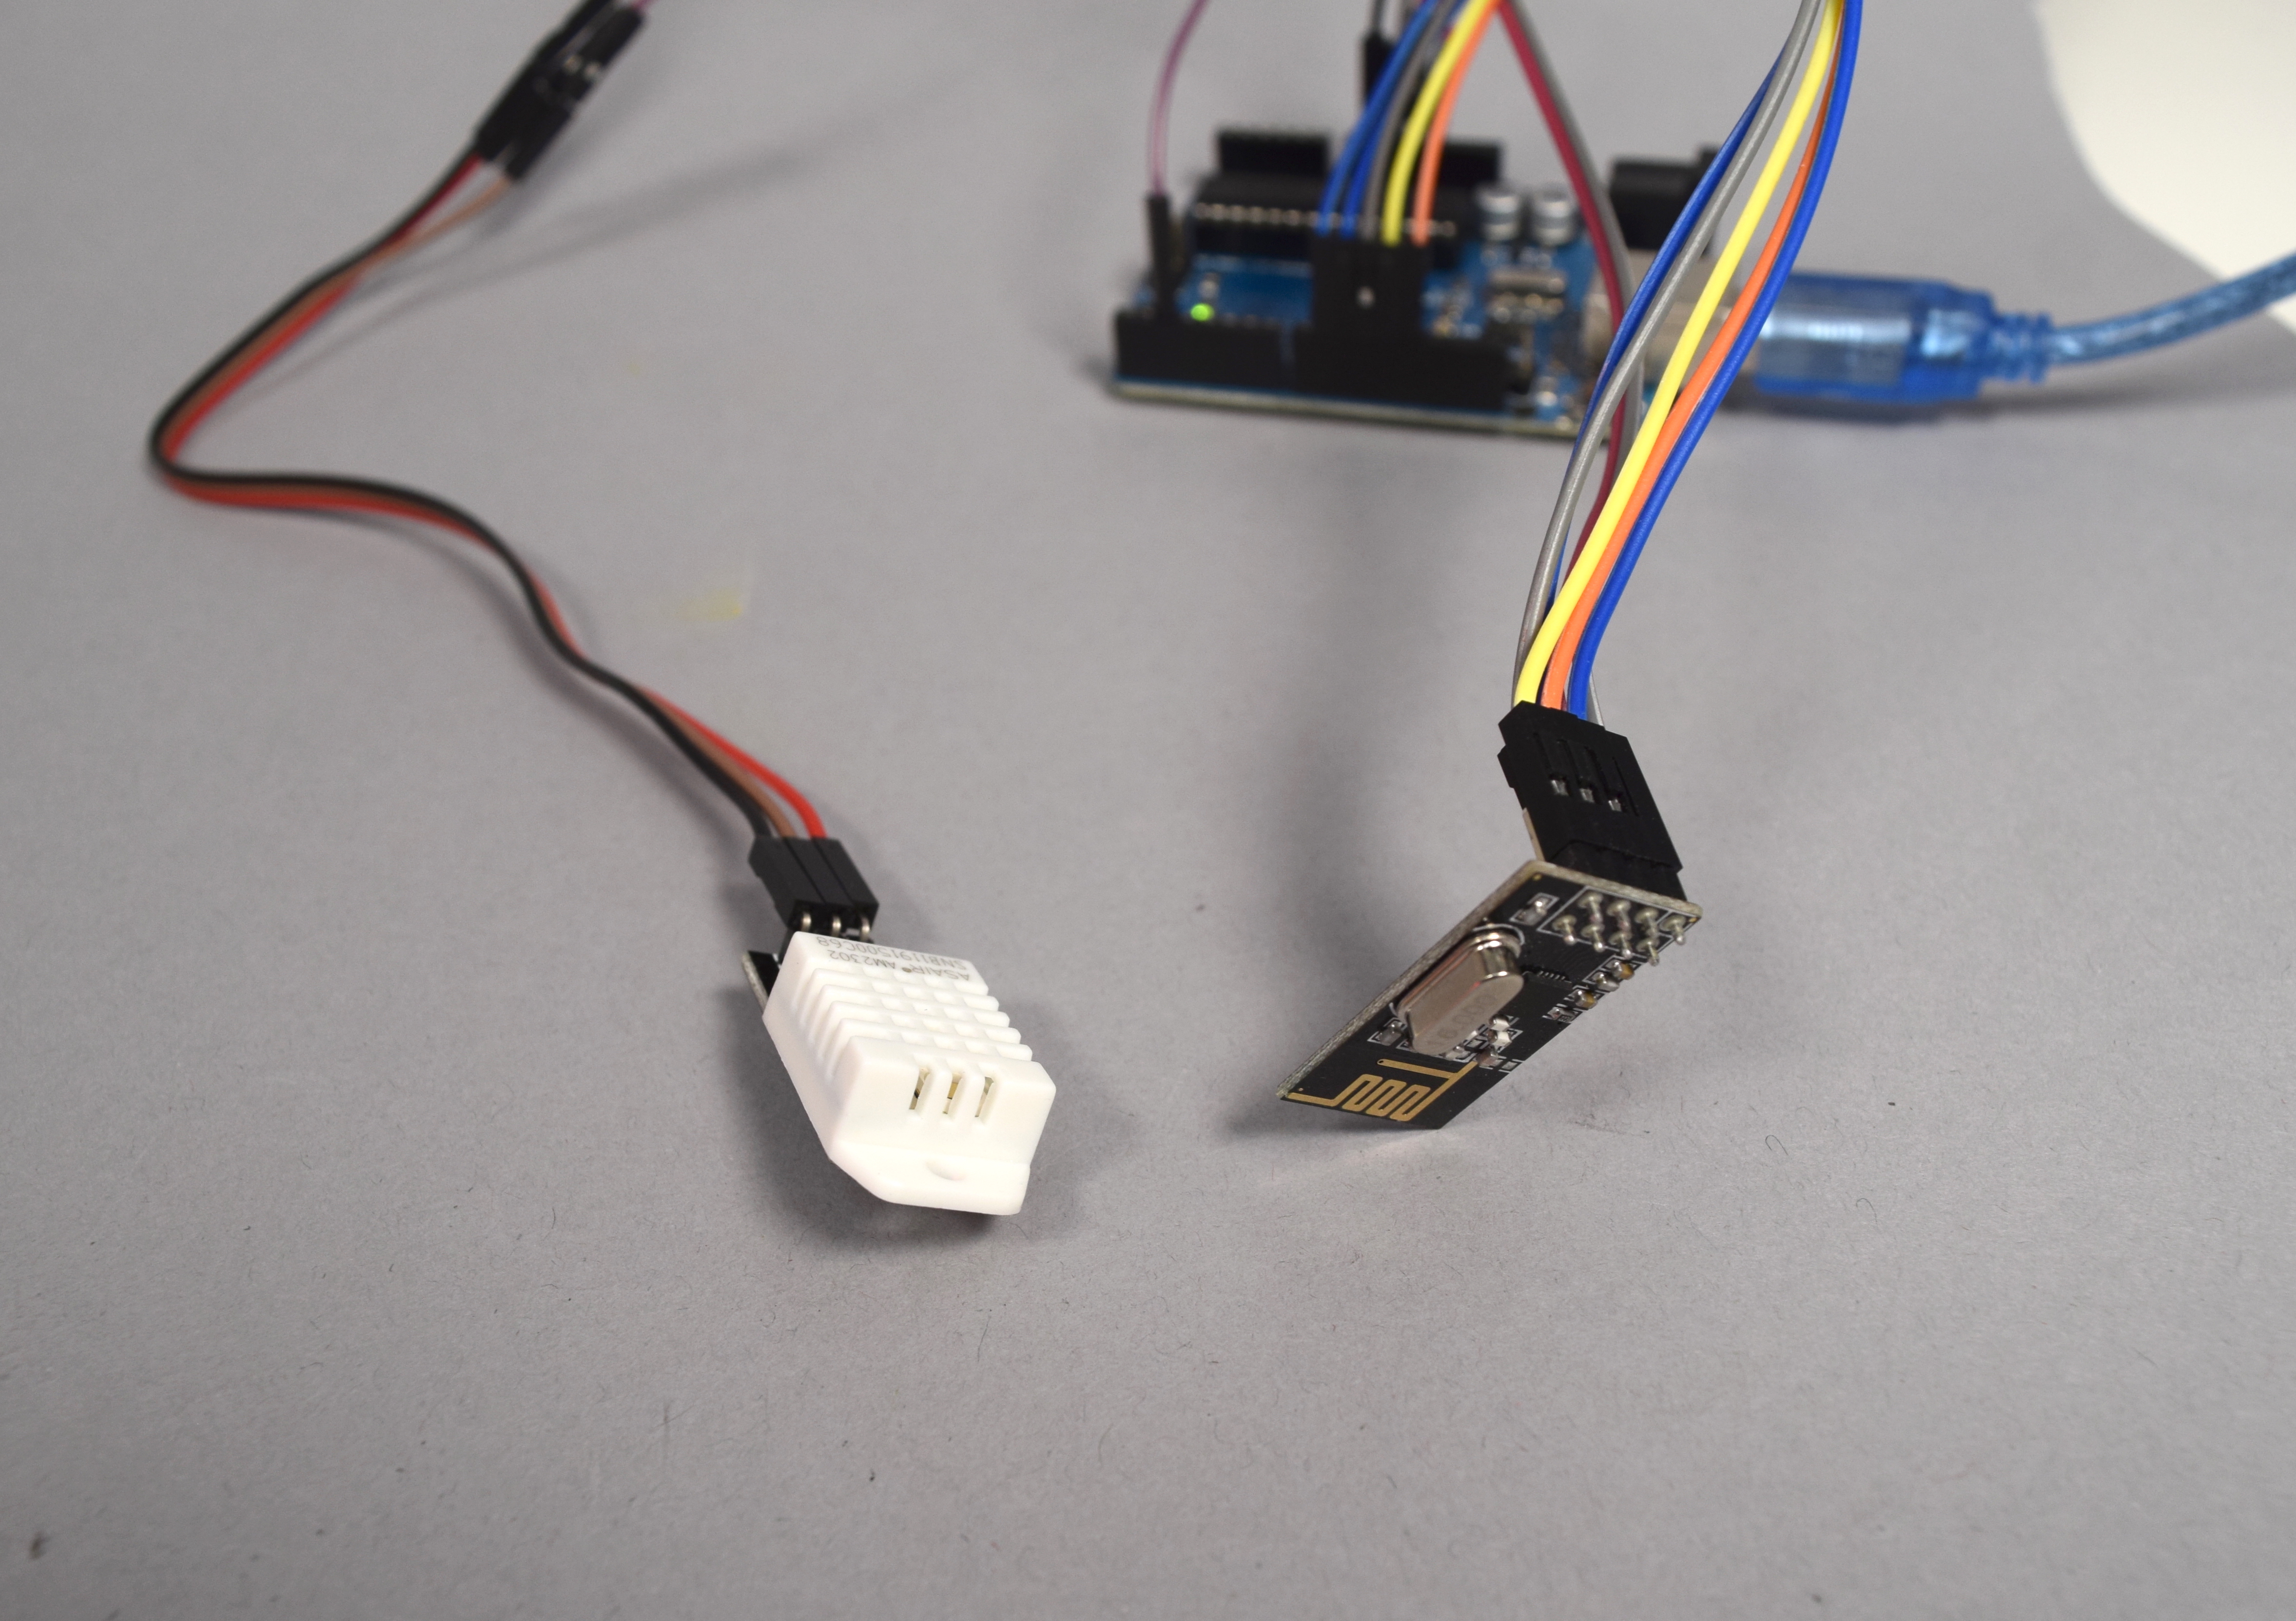
The remote module separate from the main fountain has a humidity detector (to the left) and a radio transmitter (to the right). These will be incorporated into a more compact package which will include a battery pack.
For the remote part, we have:
- Humidity detector
- A radio transmitter
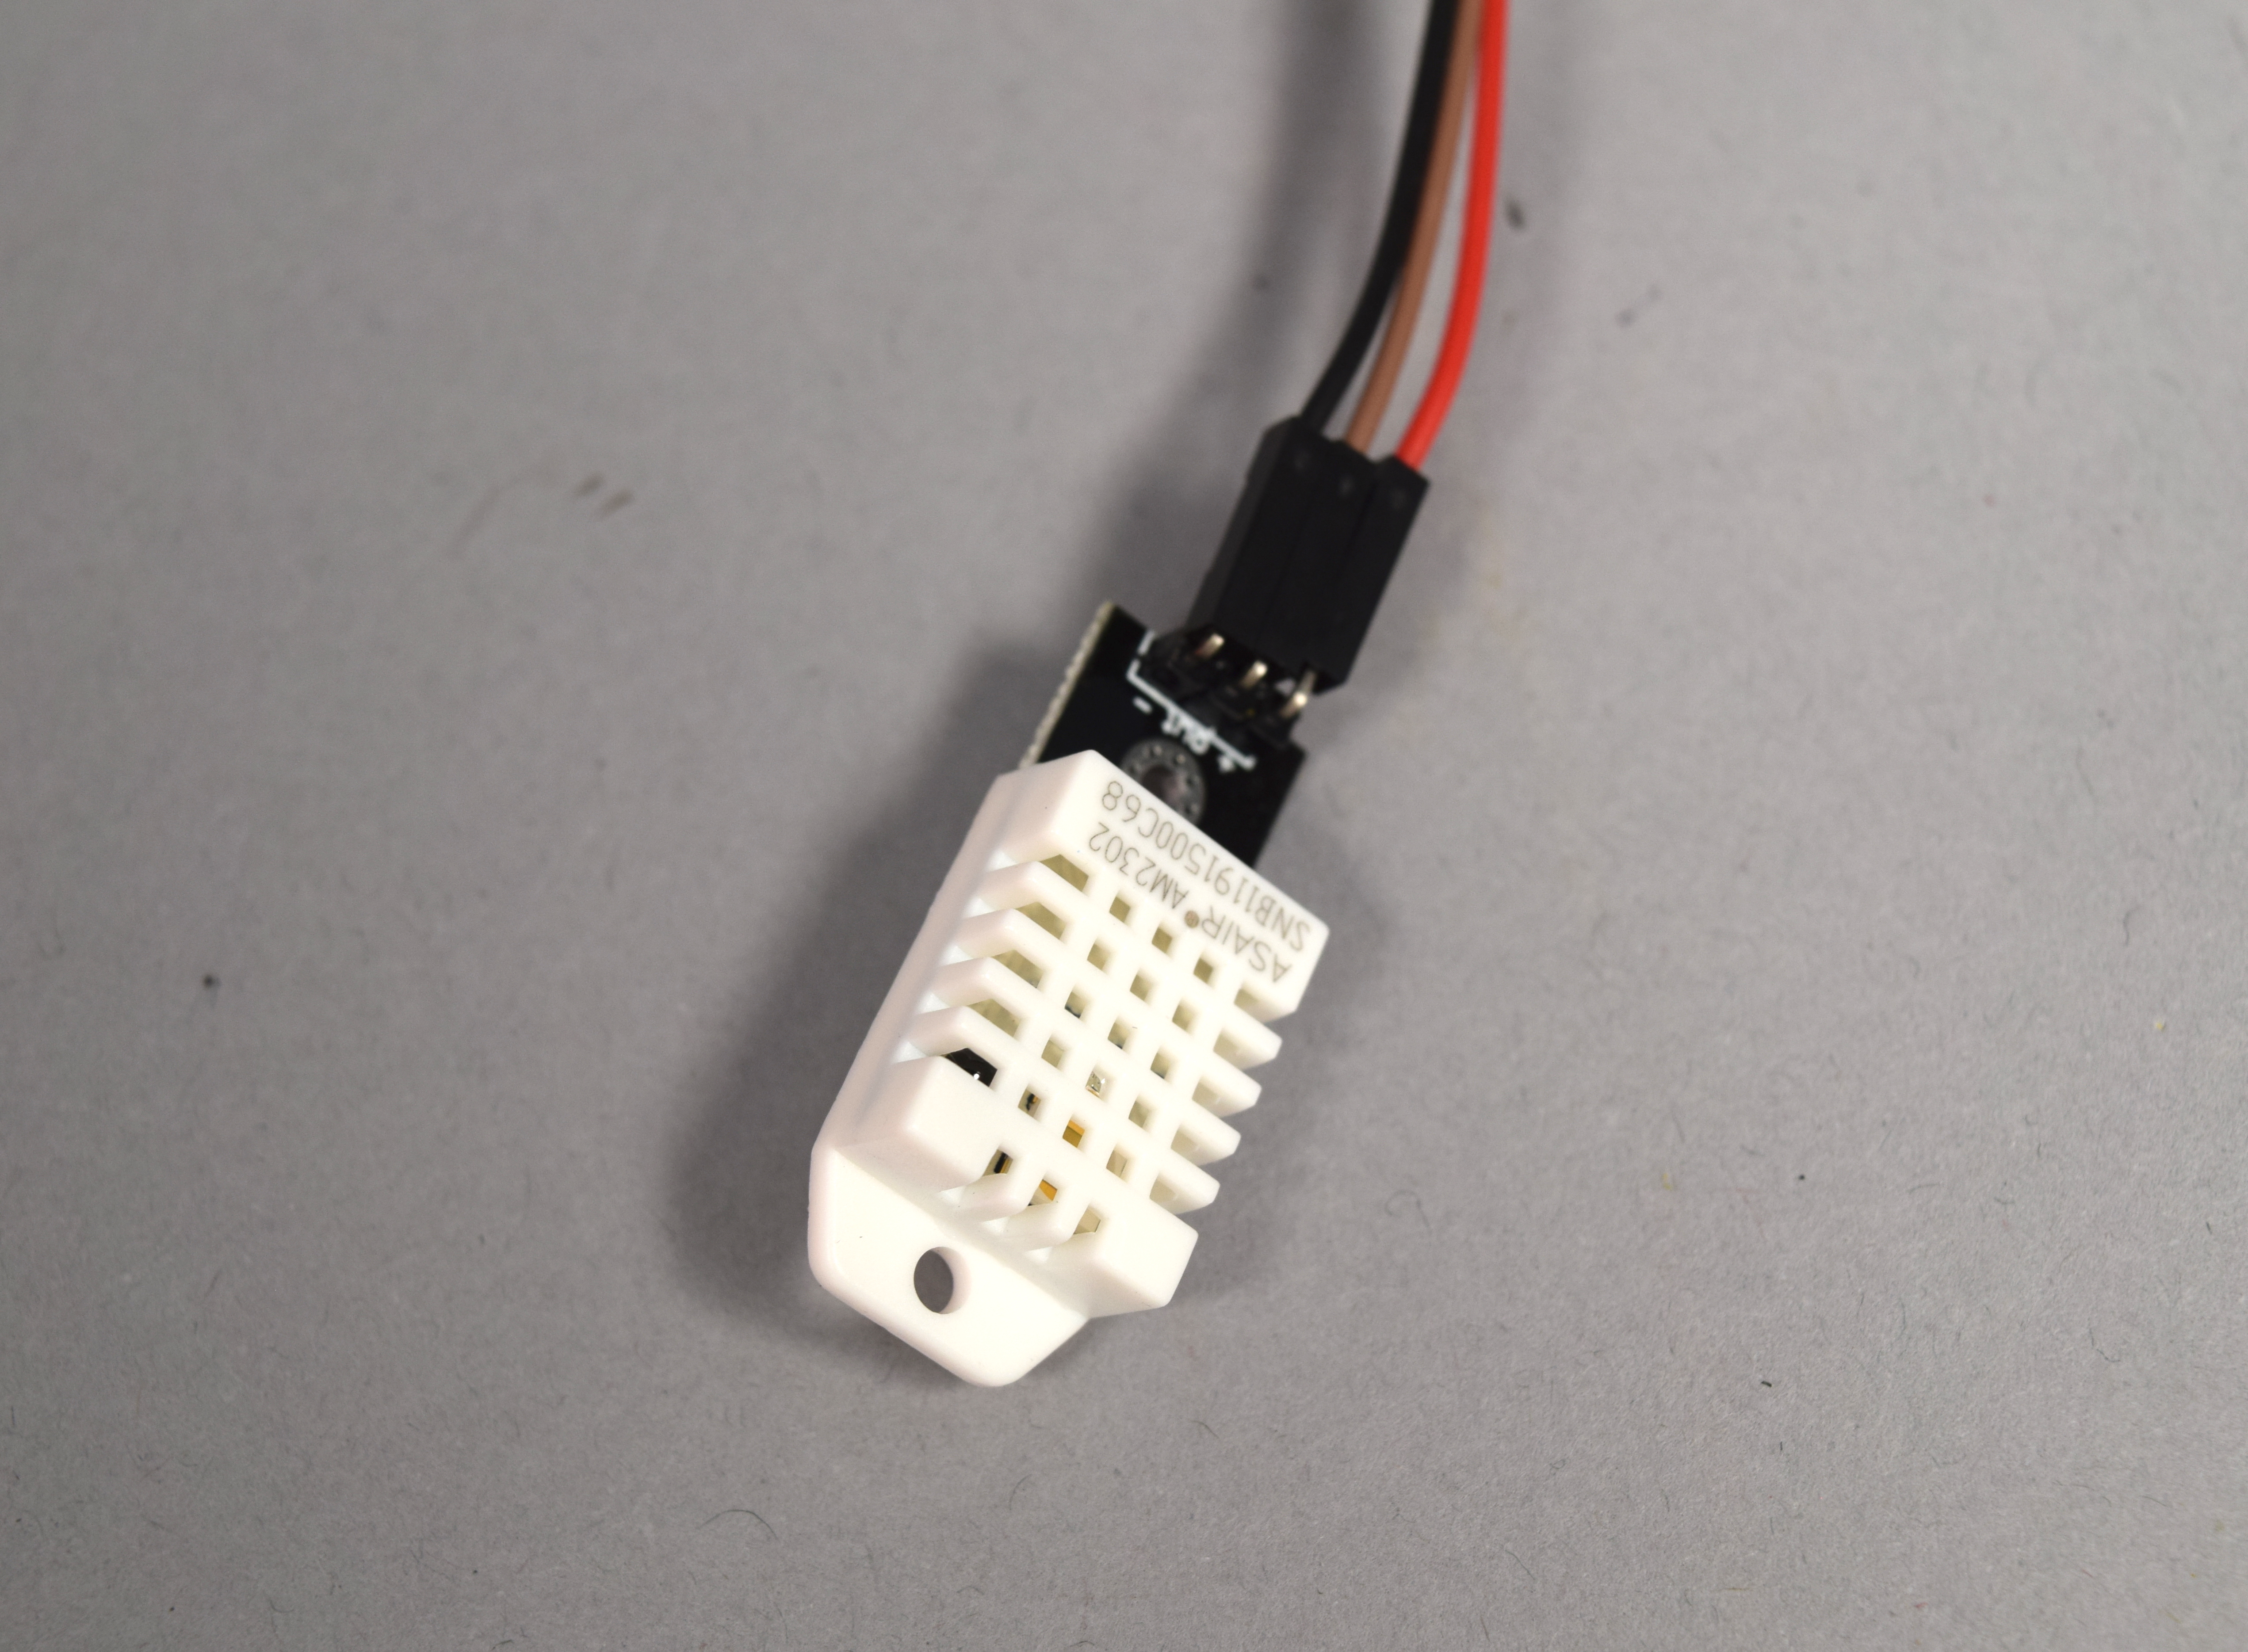
Combined humidity and temperature sensor for the remote module.
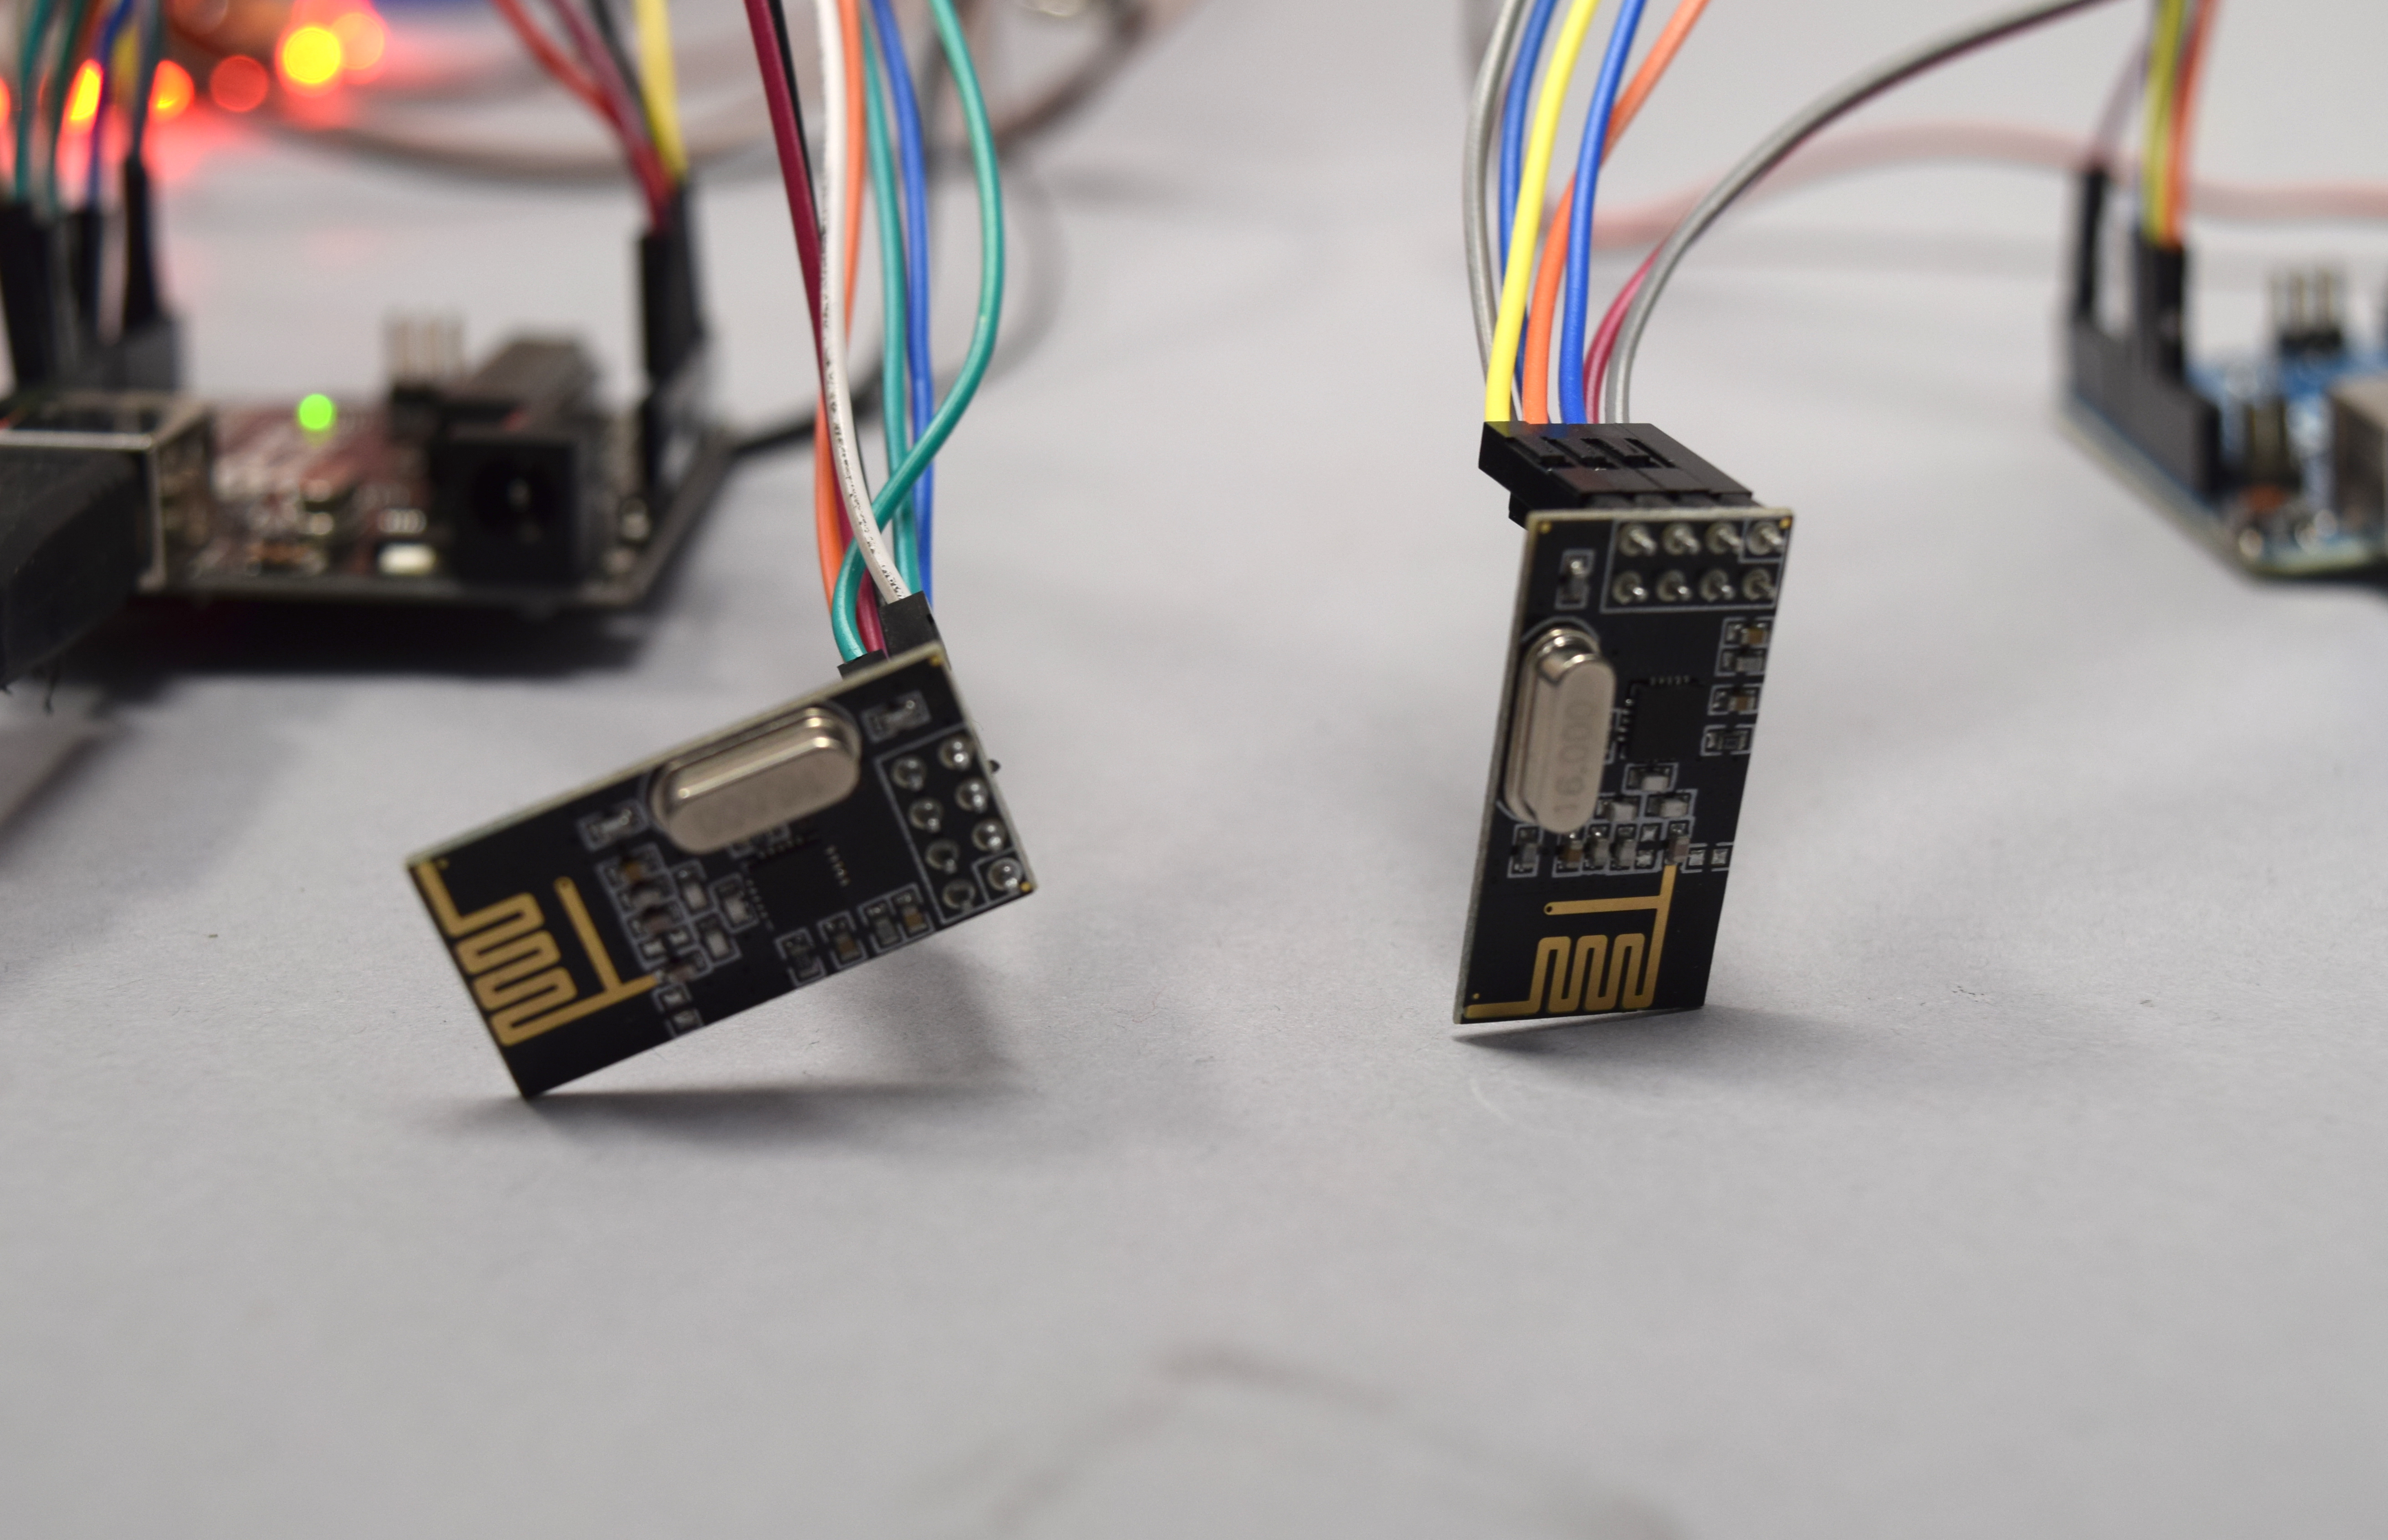
Radio receiver in the main fountain part (to the left) and radio transmitter in the remote module (to the right).
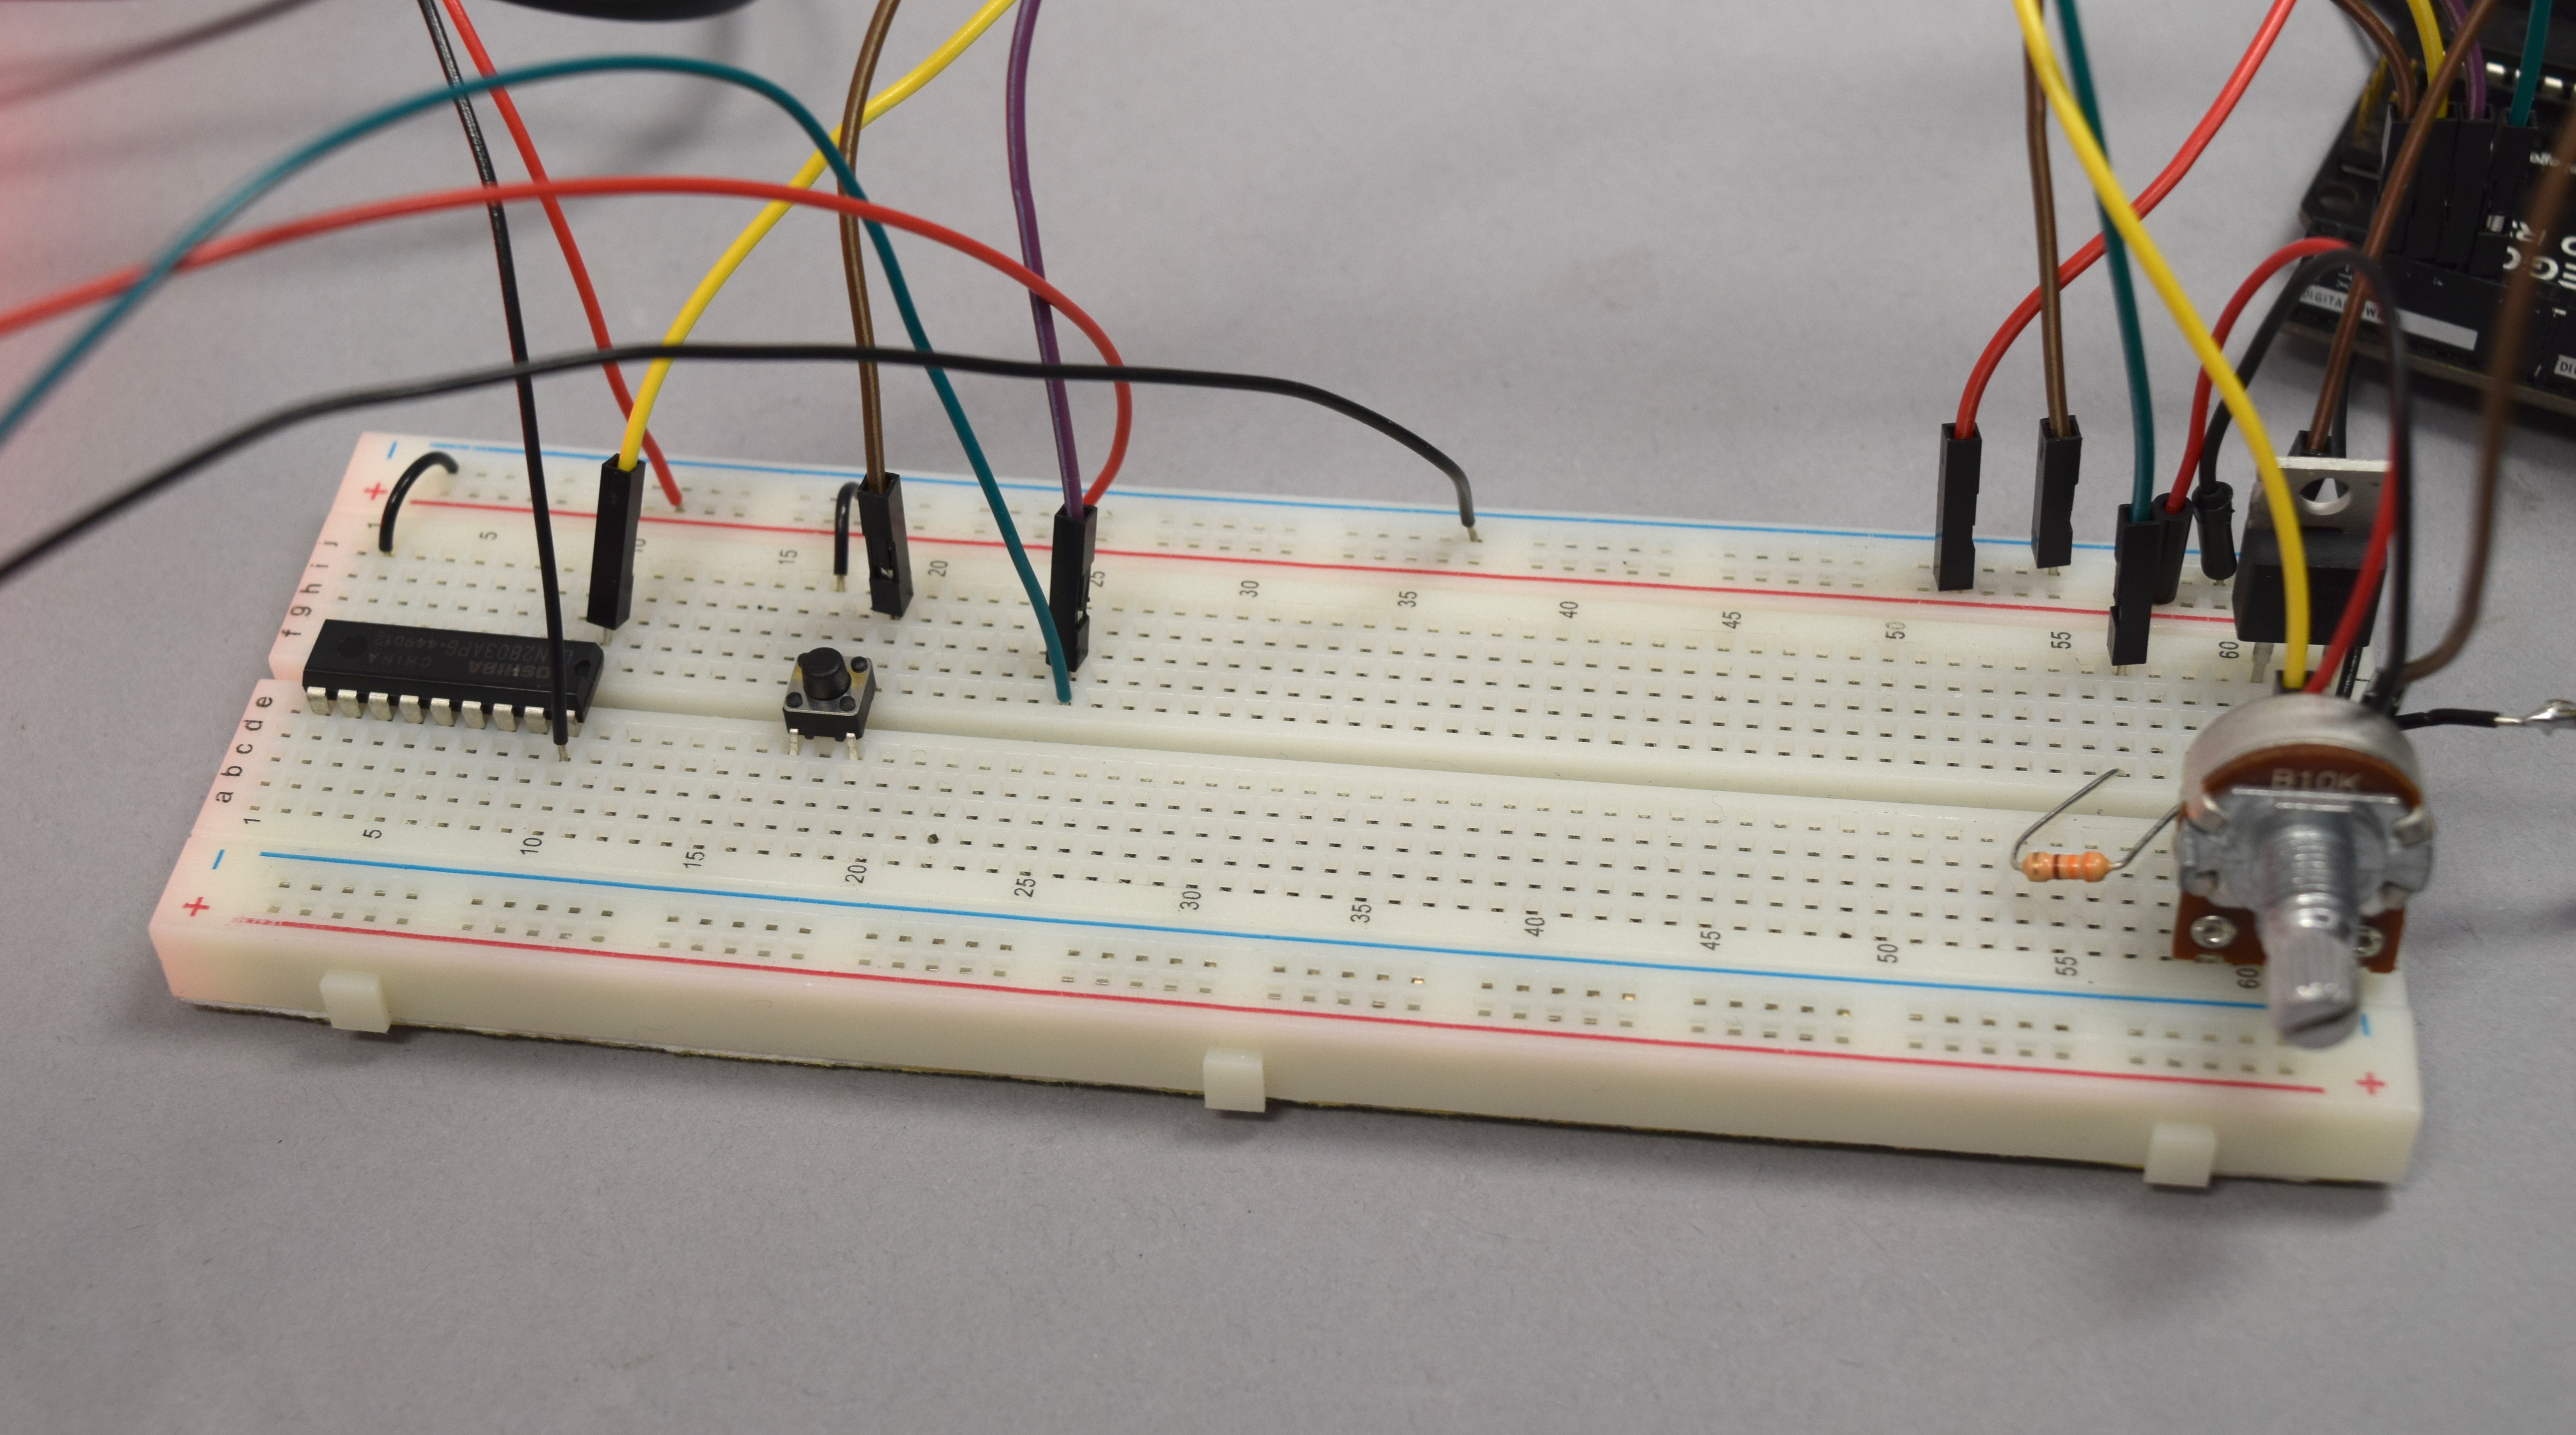
Breadboard that has a button to manually turn on the humidifier and a potentiometer that adjust the pump power.
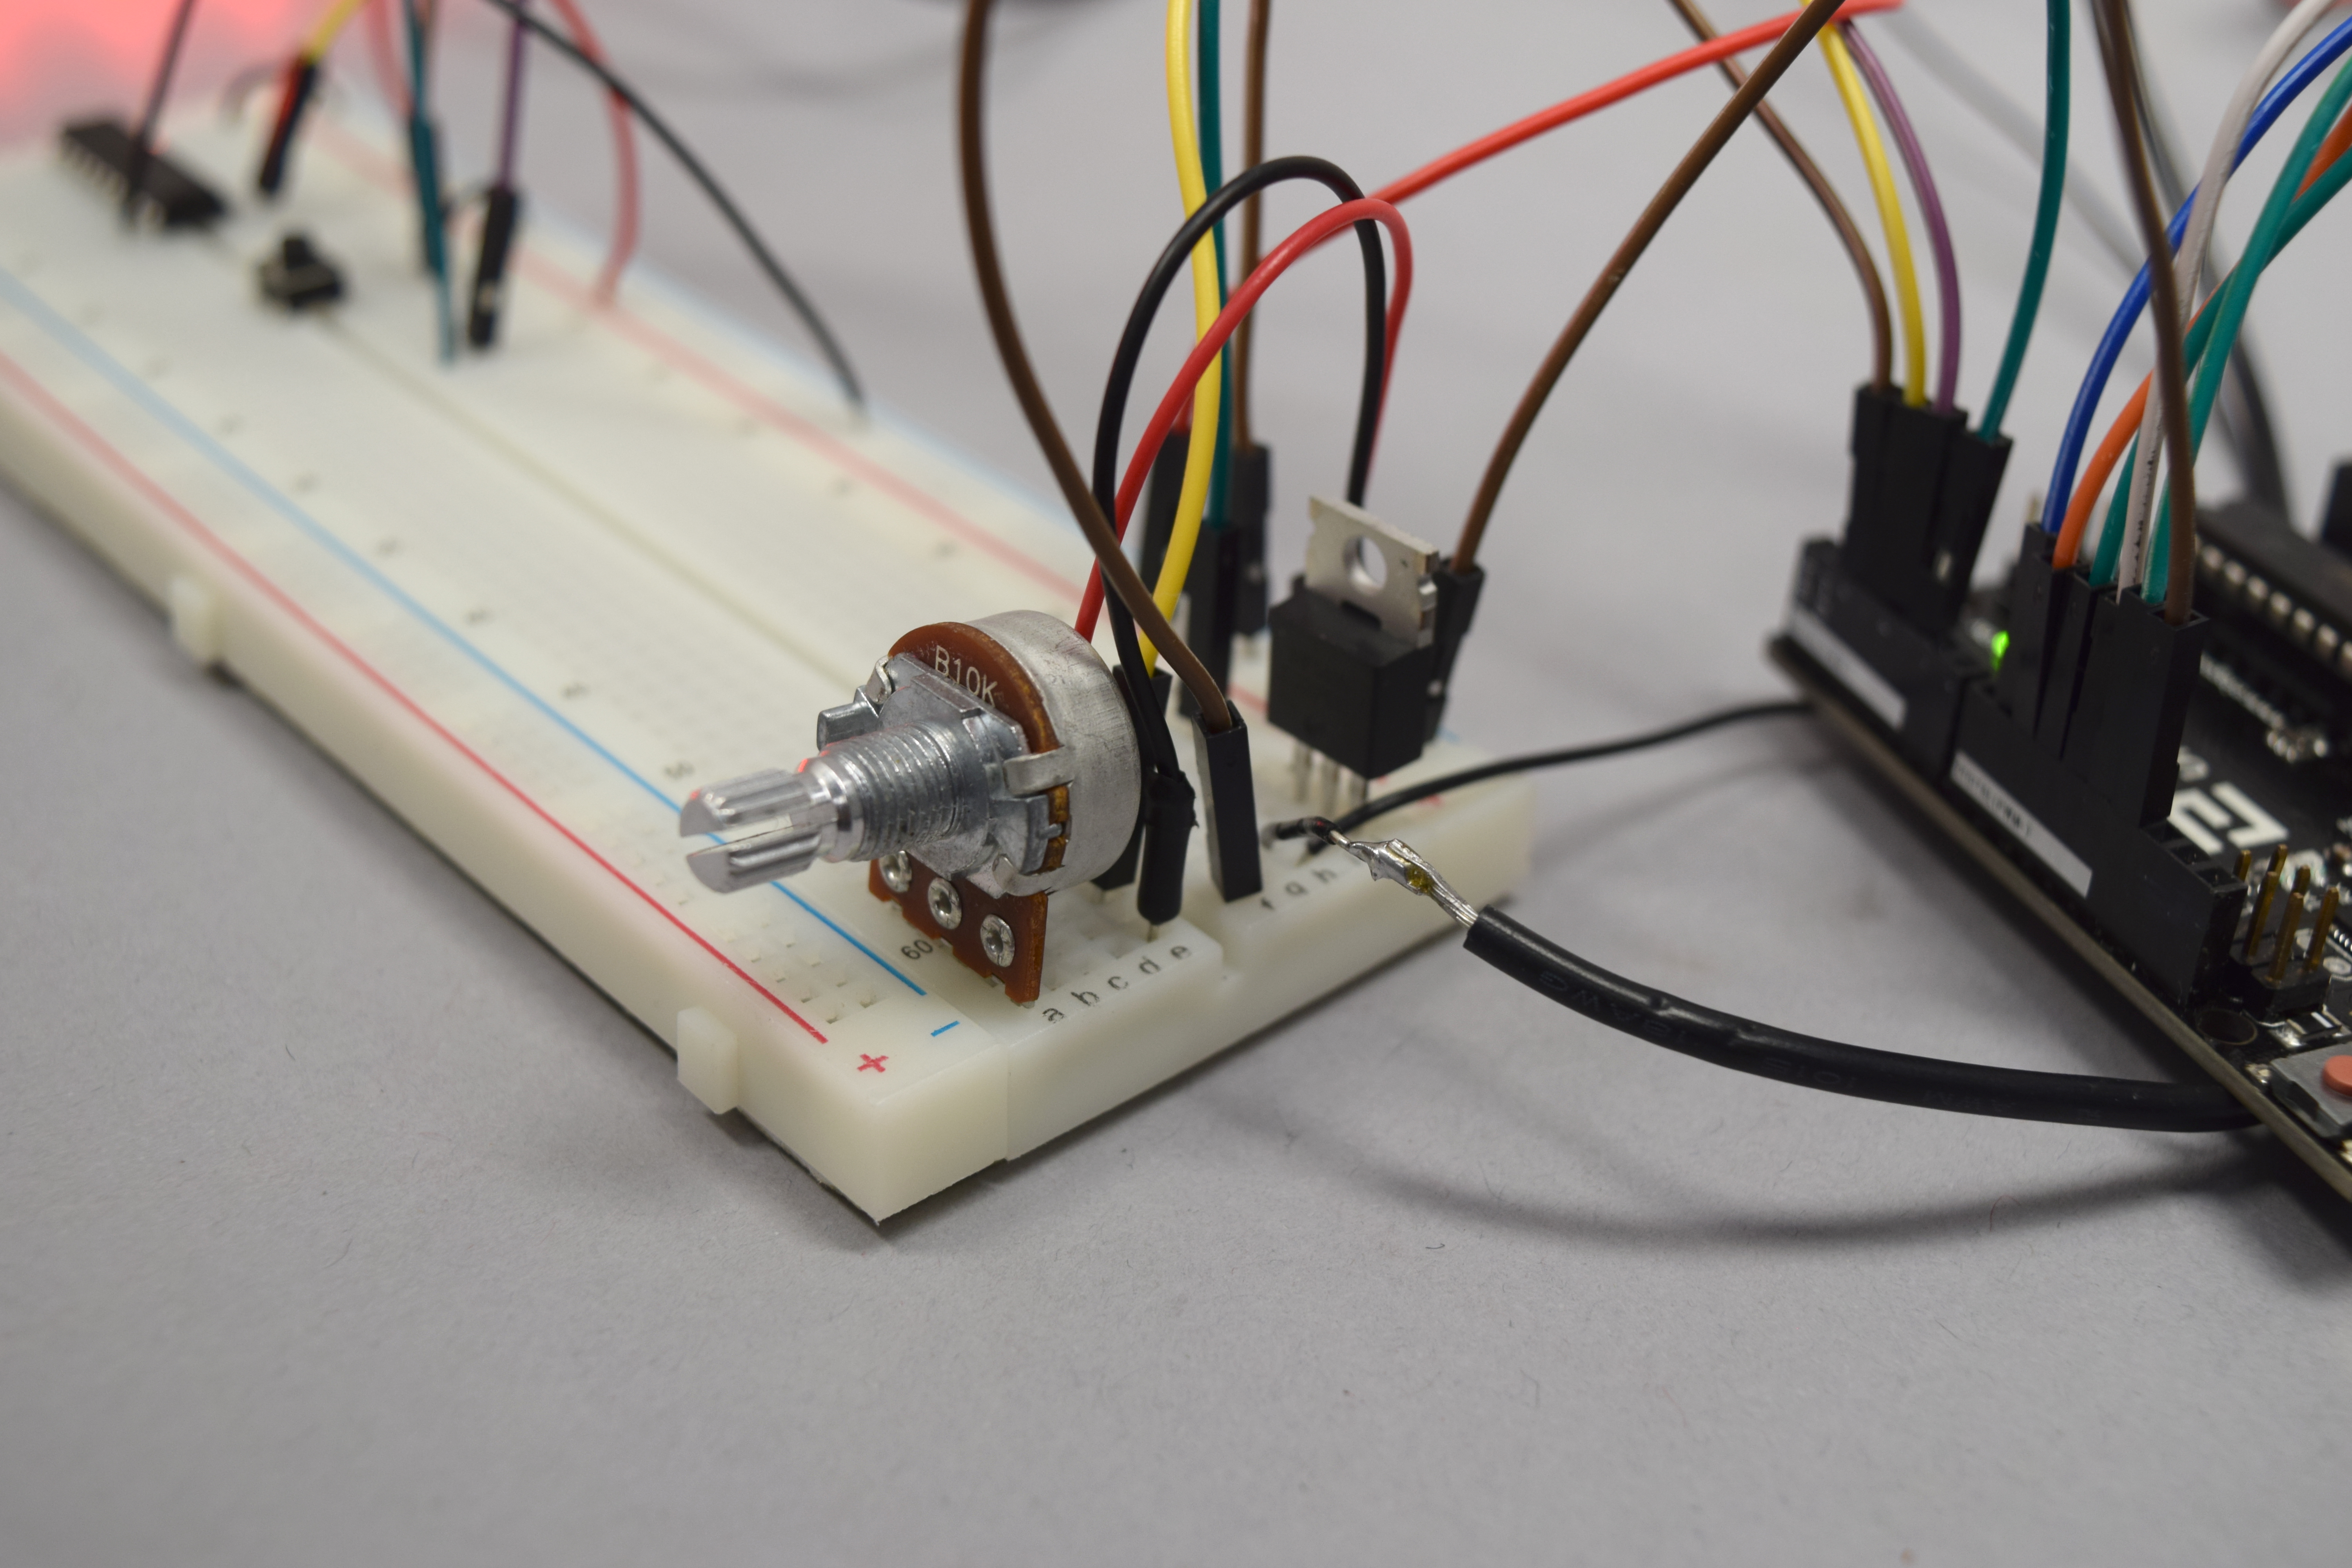
A potentiometer on a breadboard that adjusts the pump level
Process
The process of putting it all together:
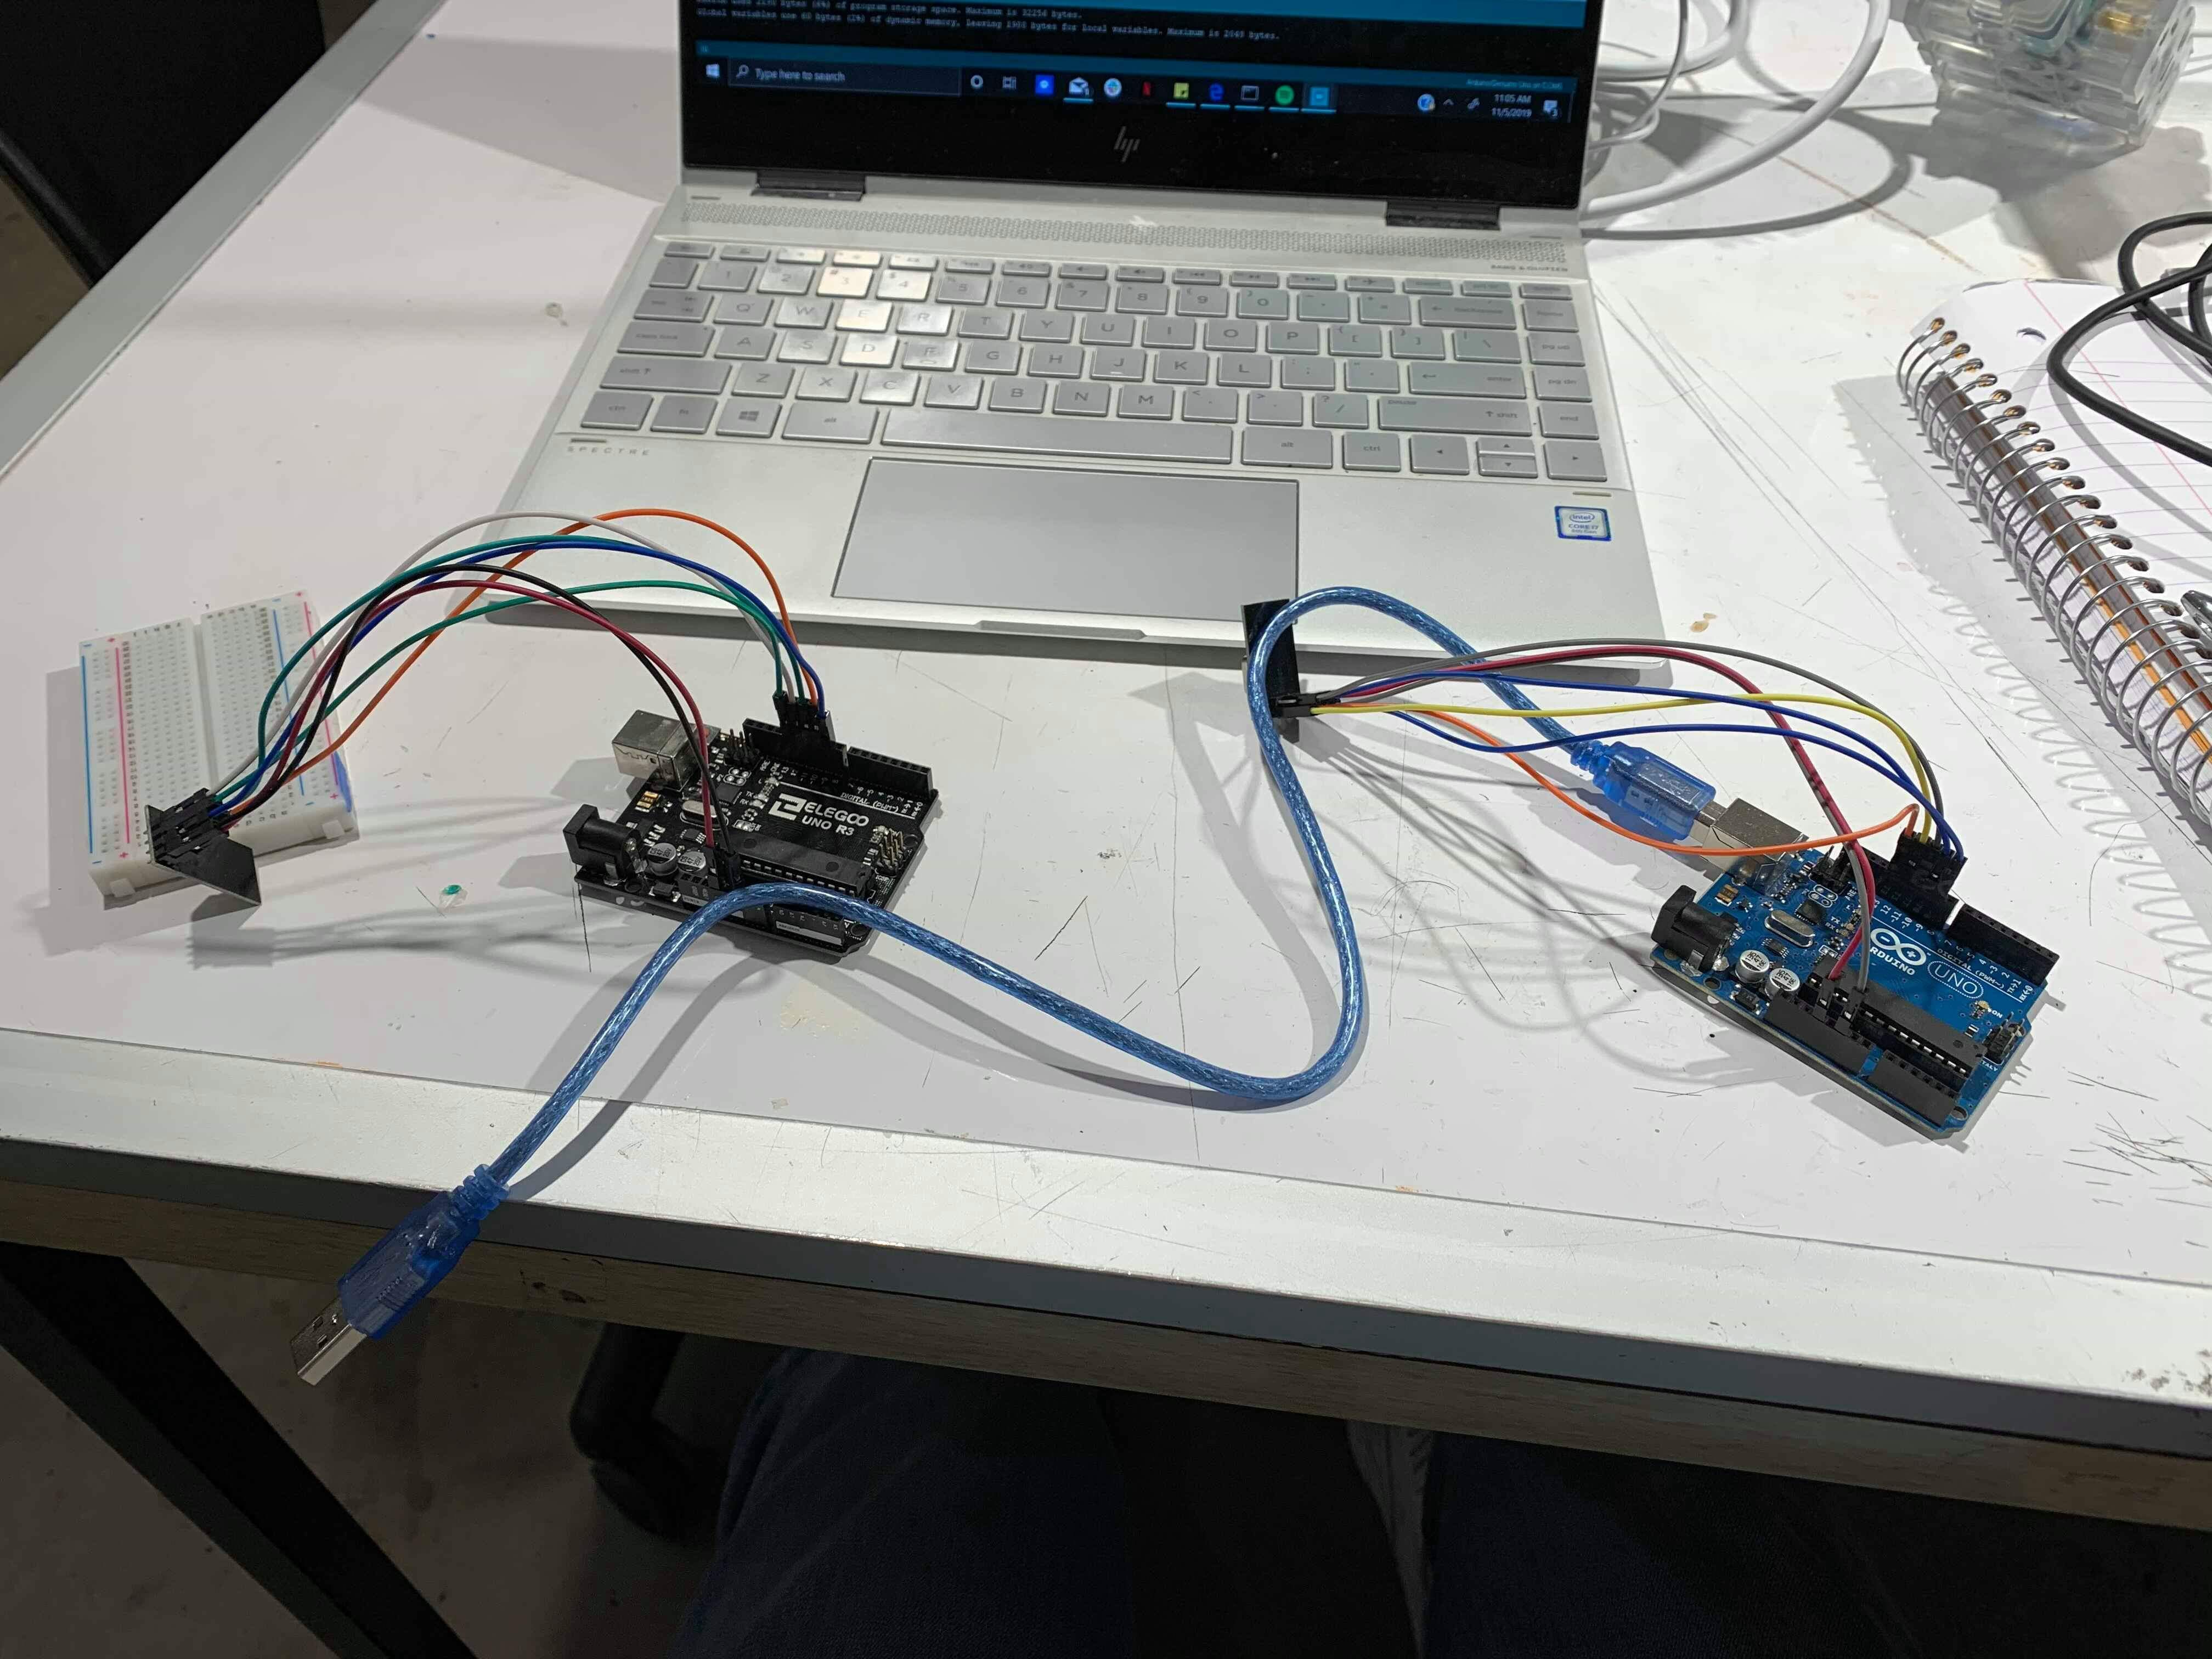
Here the separate radio modules are wire up together for the first time. At this point, either radio can act as a transmitter or receiver of data.
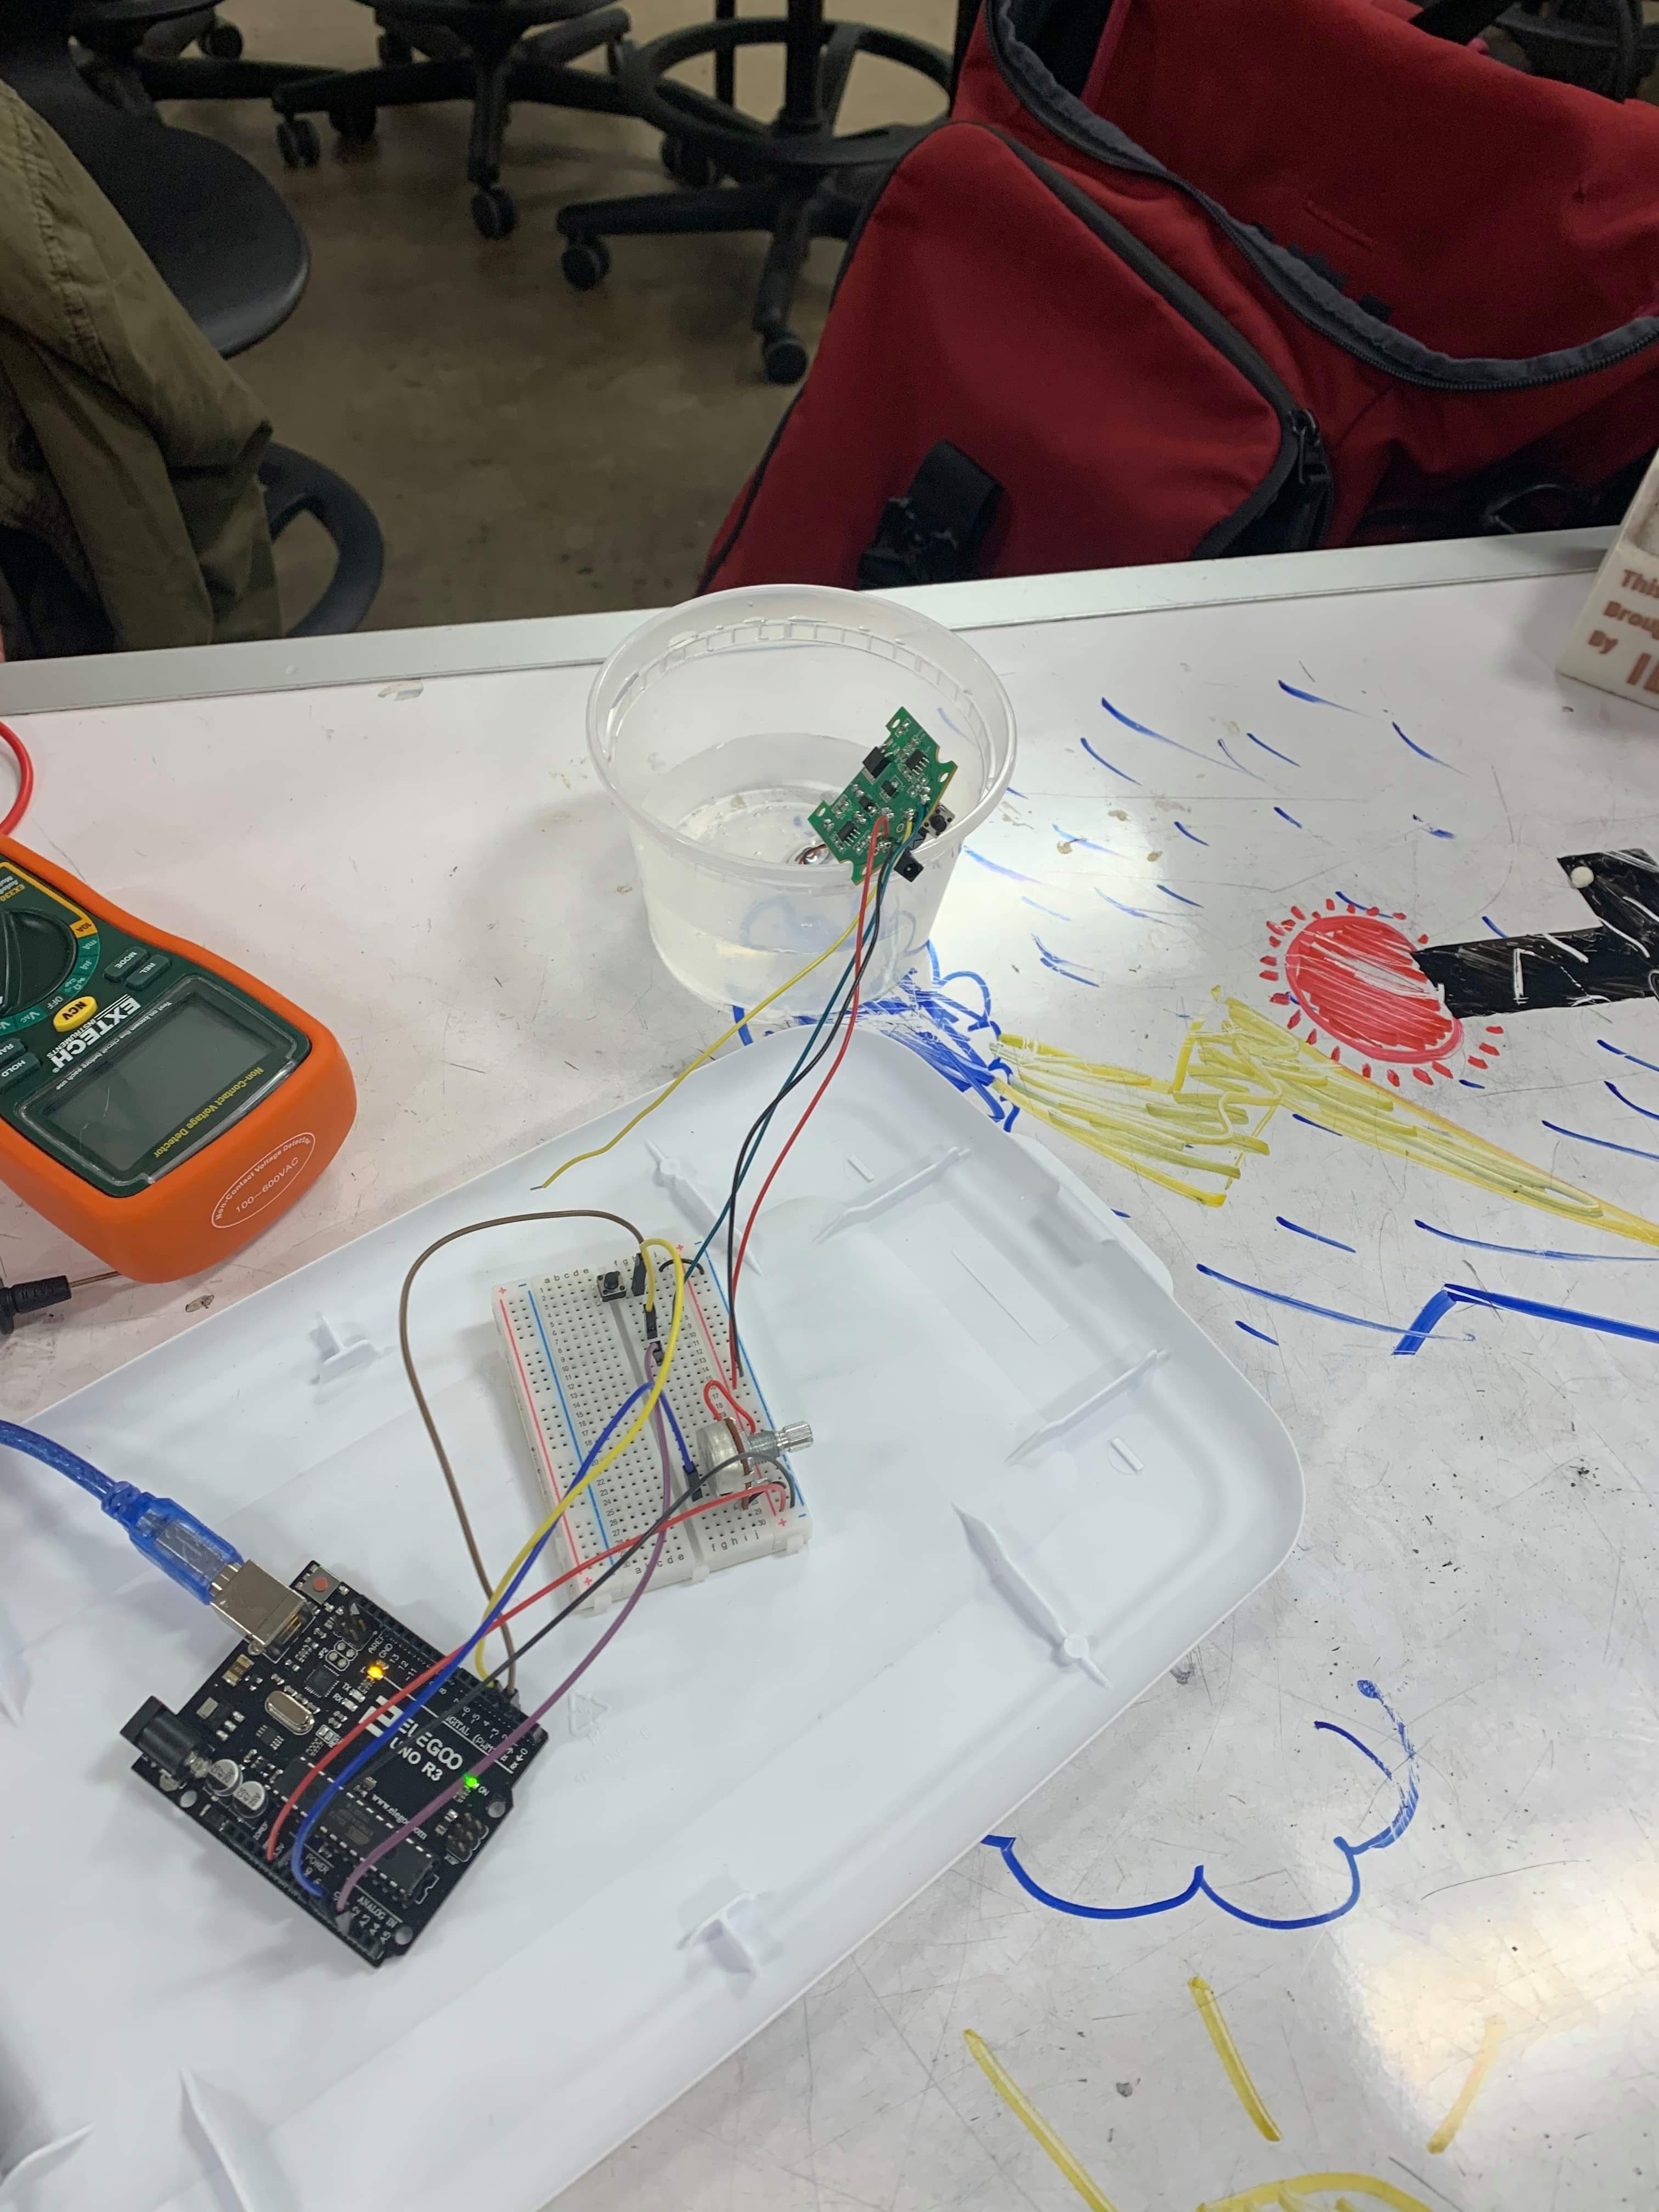
Here we are completing our first tests with the jerry-rigged humidifier module. We’ve attached our own wires to the pins we needed to the turn the attach pcb circuit on and off with our own button.
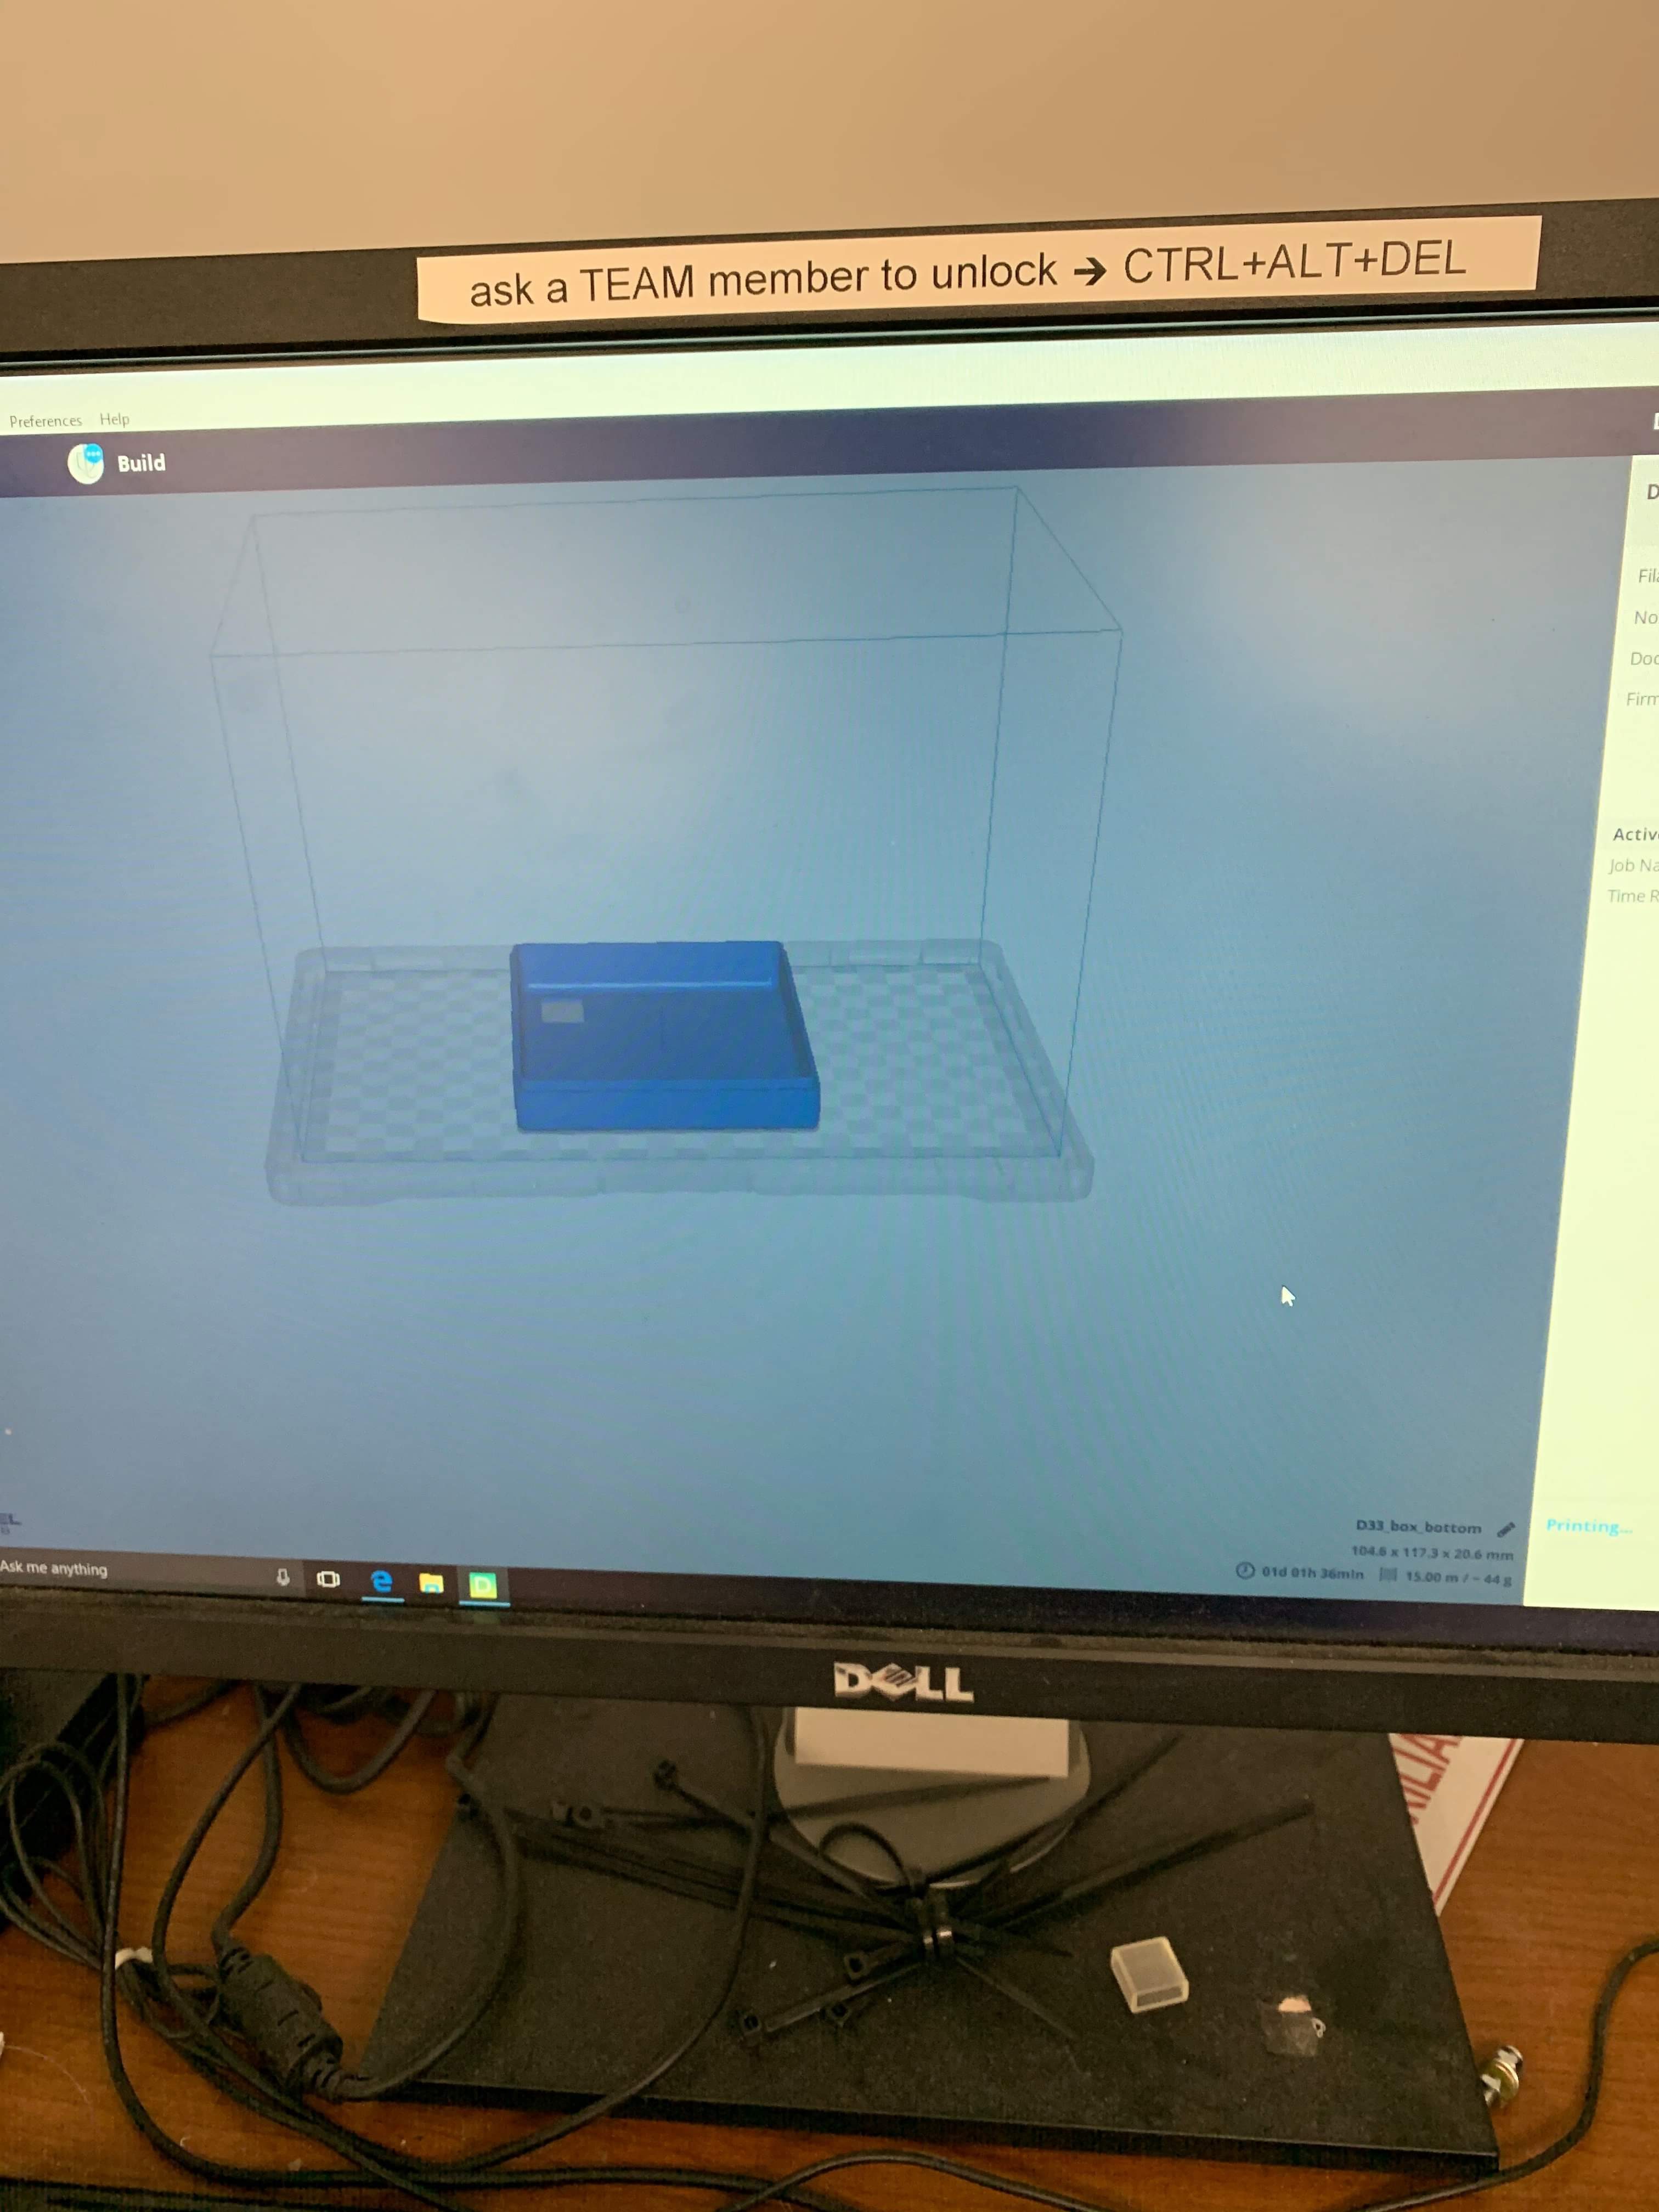
The updated design for the box that will hold our remote humidity sensor, transmitter, and battery is being 3D printed here. We had to increase the volume of our design in order to hold the necessary number of batteries.
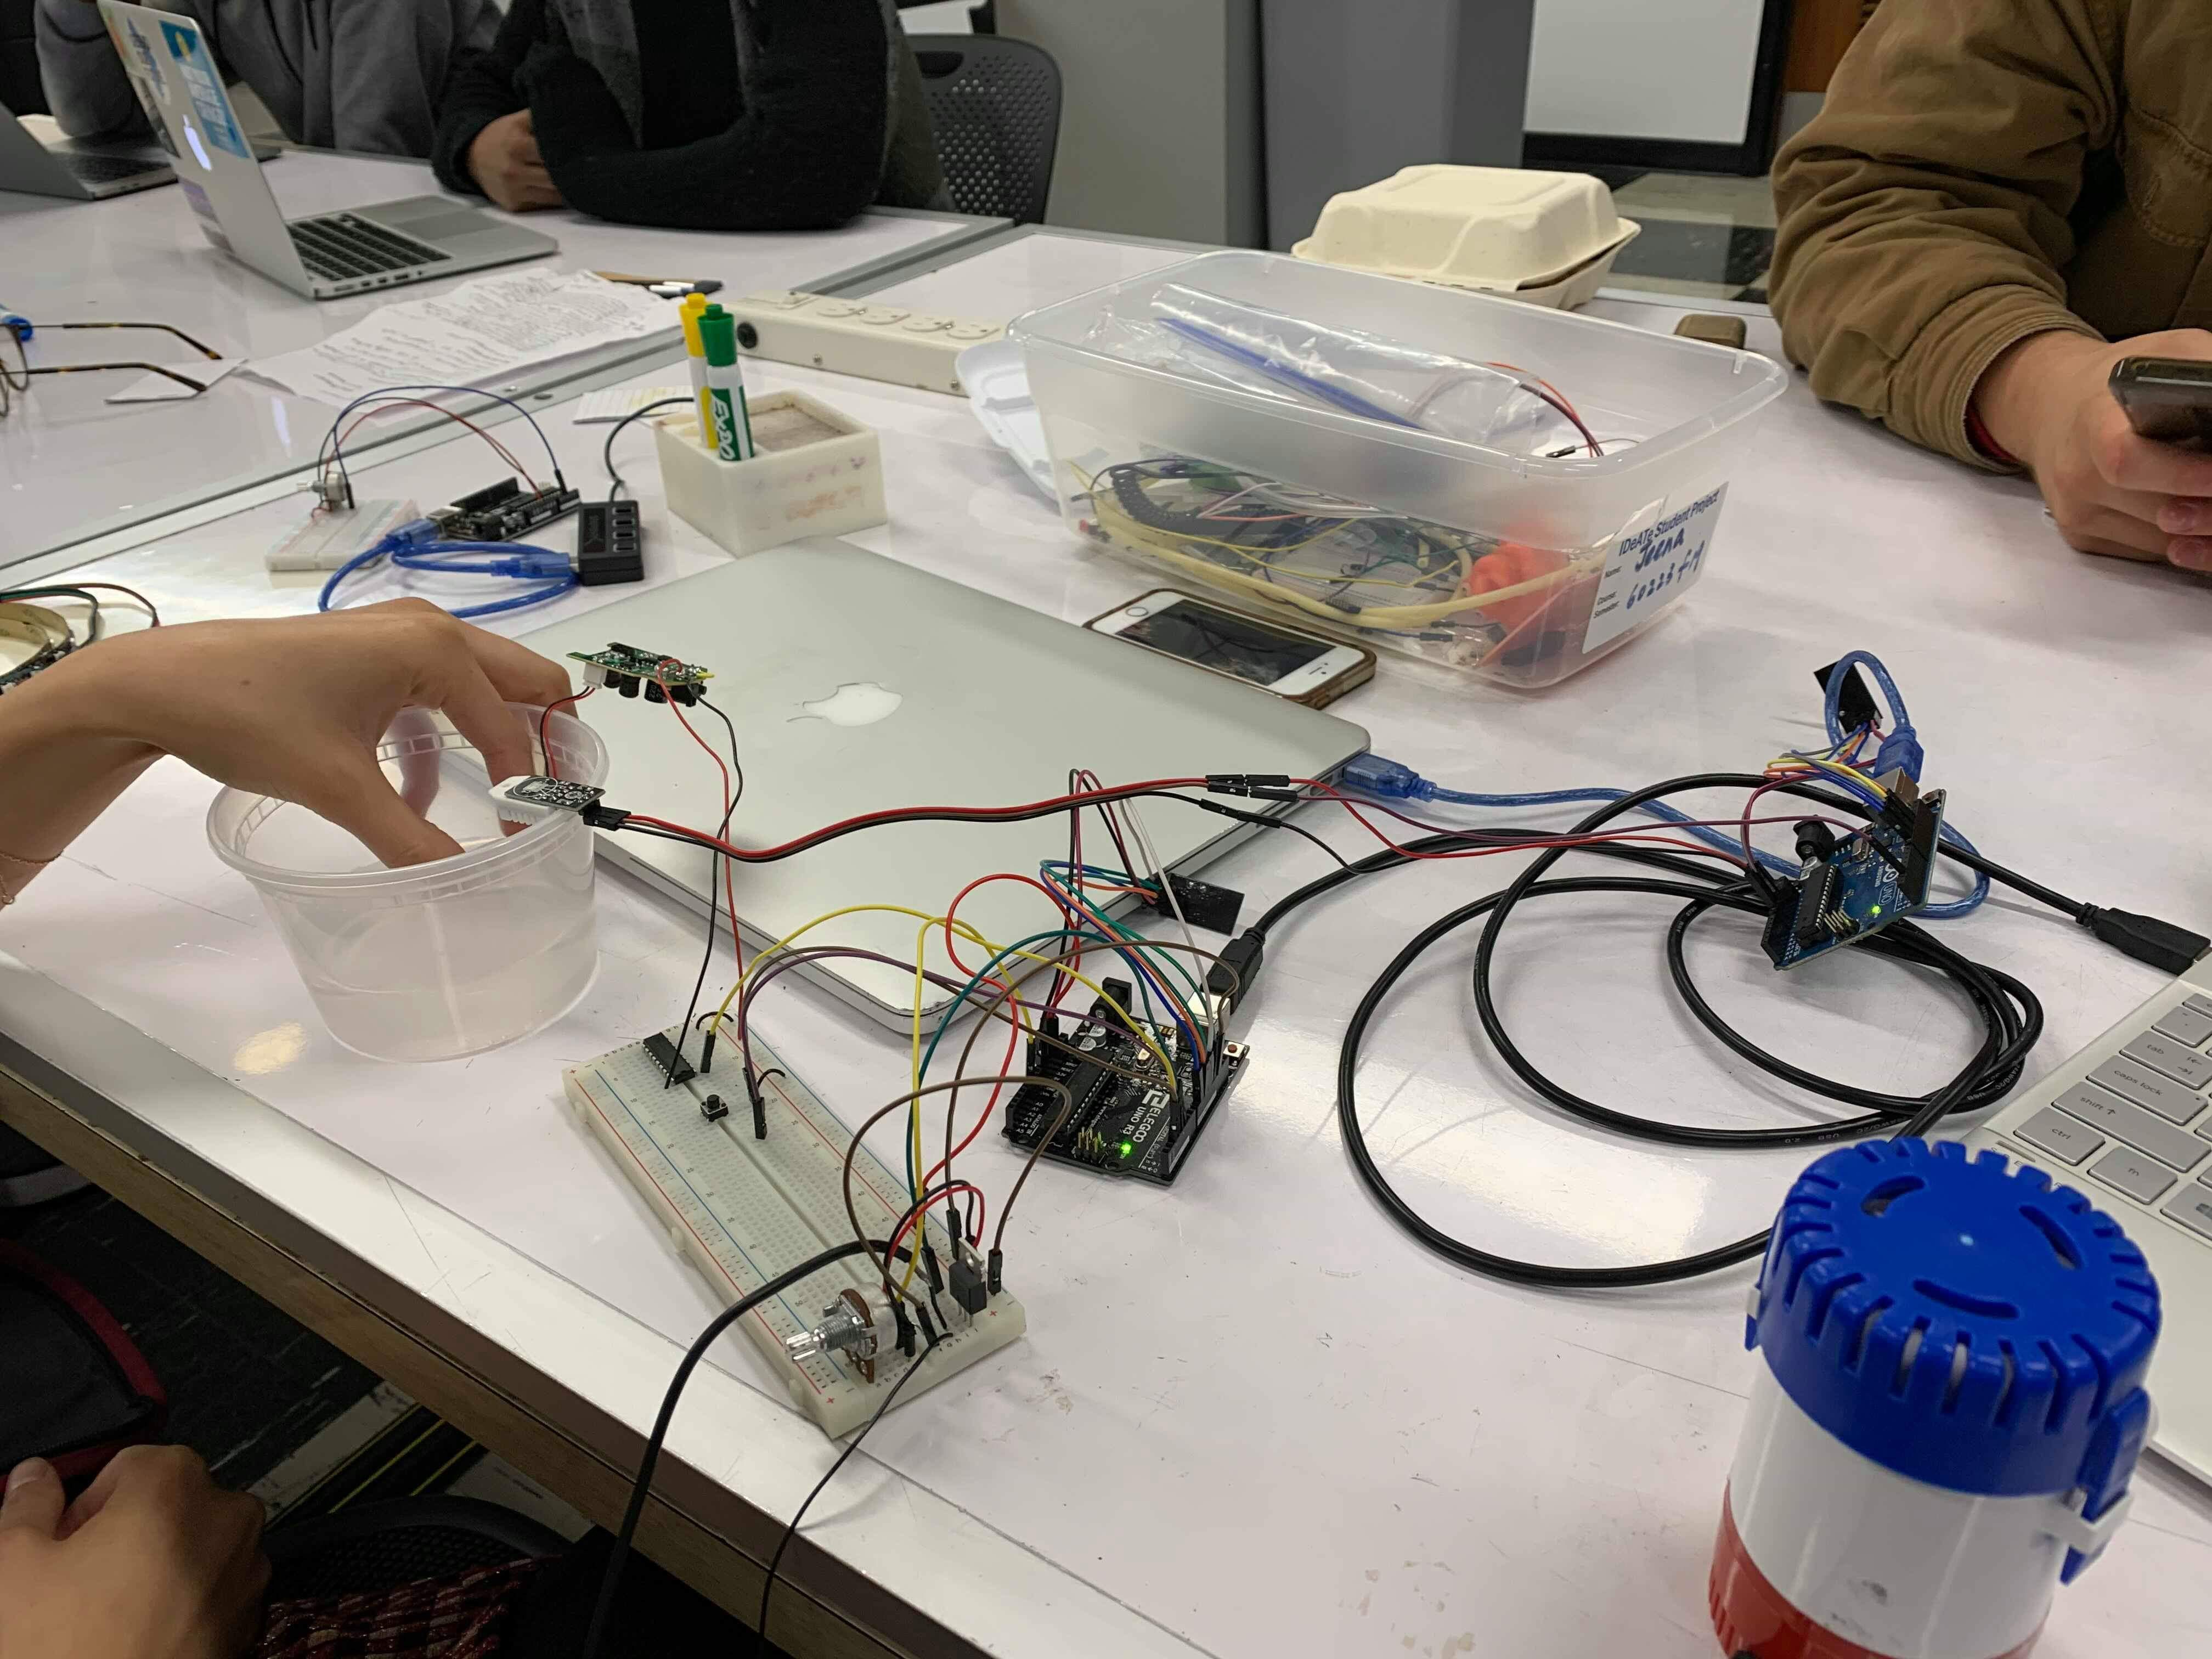
Different parts of the project start to be integrate. At this point we have a humidifier attached to the primary radio module while the humidity sensor and transmitter module are still sending data (picture at right).
All of the major components of our main module are combined. Now the pump is connected along with a potentiometer to control its speed. We tested both the humidifier and pump using a simple bucket of water.
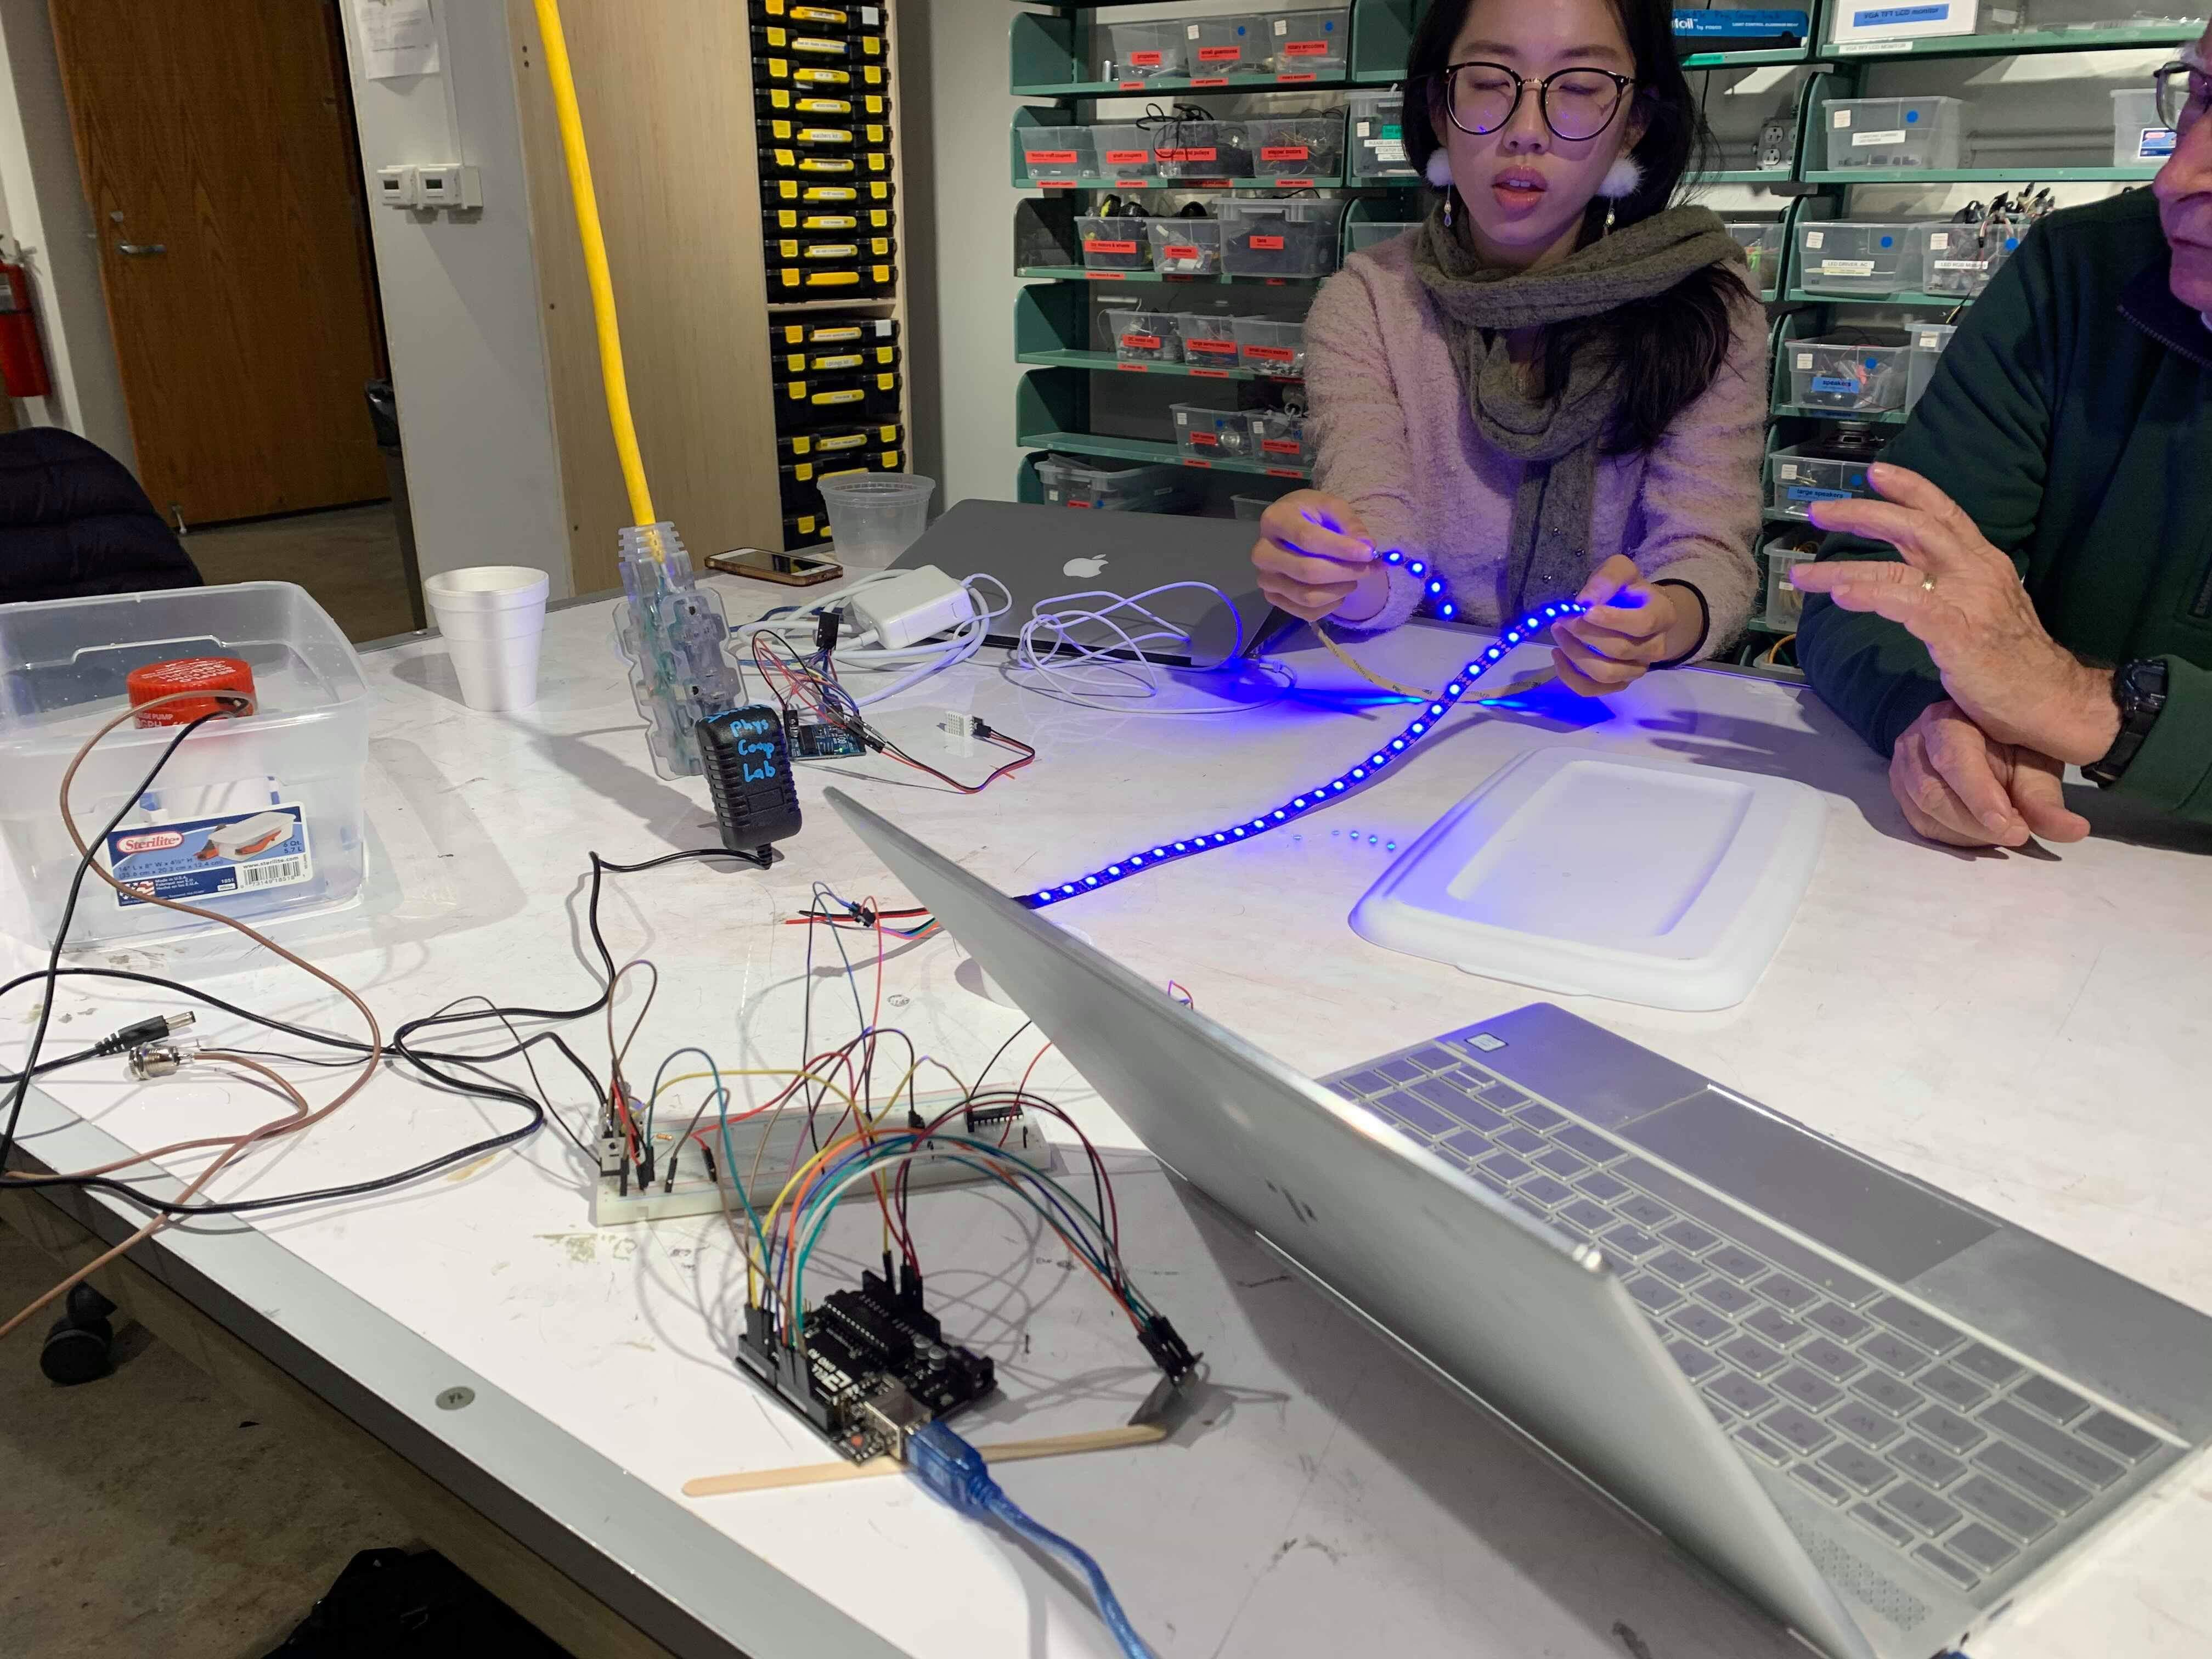
With the main module complete with an LED indicator strip, we demonstrate the basic functionality. At this point the humidifier is automatically responding to the readings from the remote humidity sensor module. Any time it senses humidity below 40%, it begin to atomize the water.
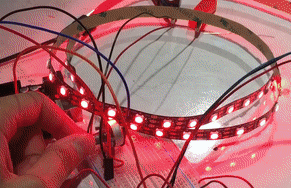
Adjustable LED strip: the LEDs turn red when the humidity level is below the threshold (40-), turn rainbow if it’s right above the threshold (40-50), and turn blue if it’s too much above the threshold (60+).
Discussion
We had a really great discussion with Jim during our hour-long conversation last Tuesday. Though we were initially a little unsure about whether we would be able to fill such a long stretch with continued conversation. To our pleasant surprise we learned a lot from Jim who seemed pleased with our progress so far, but was also very adamant and prepared to offer his own opinions on many different aspects of our product from design to hardware to the way we were implementing state-machine-like behavior in our code. One aspect that he had some great suggestions on was the remote humidifier module that we are developing. We learned that he would like to last for at least 6 months using battery power with a low-profile and a method for indicating low-battery power. All of these seemed feasible to us and were not something we had initially considered implementing. In addition, probably spawned from his love and background in physics, Jim also mentioned that he it would be great if the fountain could include a visual display showing things like humidity and estimated humidifier completion time (calculated using the diffusion equation, he added).
On the UX side, we tried to probe Jim on some of his preferences in terms of visuals or sounds. An interesting snippet from him was his mention of falling water and how much he loved the water pooled then trickled then splashed as it made its way through the property. To us, this Pittsburgh icon seemed like a great source of inspiration for us as we considered the aesthetic and design of our indoor fountain—especially since Jim has mentioned to us his love of architecture before! For the texture, we agreed that both smooth and rough landscapes had their charms, but agreed that for a fountain of this type, a rougher landscape could be more enjoyable and allow for a more dynamic flow of water into the basin. Small pebbles and shrubbery were also other elements that Jim had added to other fountains around his house and had enjoyed.
One idea of which we were a little skeptical was Jim’s suggestion that we use a pre-existing green ceramic basin that he had at his home. It seemed to us that it would limit the possibilities of the fountain’s footprint, we well as the kinds of I/O elements we might have wanted to integrate to the base (such as indicator LEDs and a small screen)—not to mention the fact that it didn’t seem big enough to fit a basin, pump, and electronics. Later on, however, Jim joined us in this sentiment with an email he sent us later on expressing that his basin was probably not ideal and he had enjoyed some of the sketches we had made up in class.
Moving Forward
Looking ahead, work will be divided into three primary areas: Fountain Design and Manufacturing, Electrical Miniaturization, and Final Assembly. In general, we are almost completely finished with most of the technical implementation of our fountain and its features. This just leaves miniaturizing all of our components to be neat and easily installable in our final fountain. The most difficult challenge facing our group from here on out will almost certainly be the design and manufacturing of the actual fountain. There will have to be a significant amount of time spent on the CAD of the fountain’s topology and figuring precisely out we will go about vacuum forming its bowl and other features. Some of the biggest features we will need will be an easily refillable reservoir, small pools in which to place the humidifiers, and a small OLED/LCD screen to display important measurements and metrics. Finally, with all of this (hopefully) finished, we will have to proceed with assembling all of our components. By now, everything should have been individually tested and then wired together and tested that way so that all the entire system requires is placing and securing components in our final package. At this point, our wireless transmitter is nearing this point, but we have been unable to reach a similar point until other components we have ordered have arrived. To ensure steady progress, we plan on having at least one of us working in Hunt every evening, especially for those nights when we have to finish especially time consuming tasks like CAD.
More specifically, we hope to keep ourselves to this timeline:
- Wednesday, Nov. 20th – Finalize fountain design CAD, and Electronics container
- Friday, Nov. 22 – Finish all electronic and integrate new parts
- Saturday, Nov. 23 to Nov. 24 – Begin and Finish fountain manufacturing (vacuum forming the bowl and all other 3D printing)
- Monday, Nov. 25 – Begin assembly and integration of all parts
- Sunday, Dec. 1 – Dec. 2 – Continue and Finish final integration
- Tuesday, Dec. 3 – Final Crit
Comments are closed.