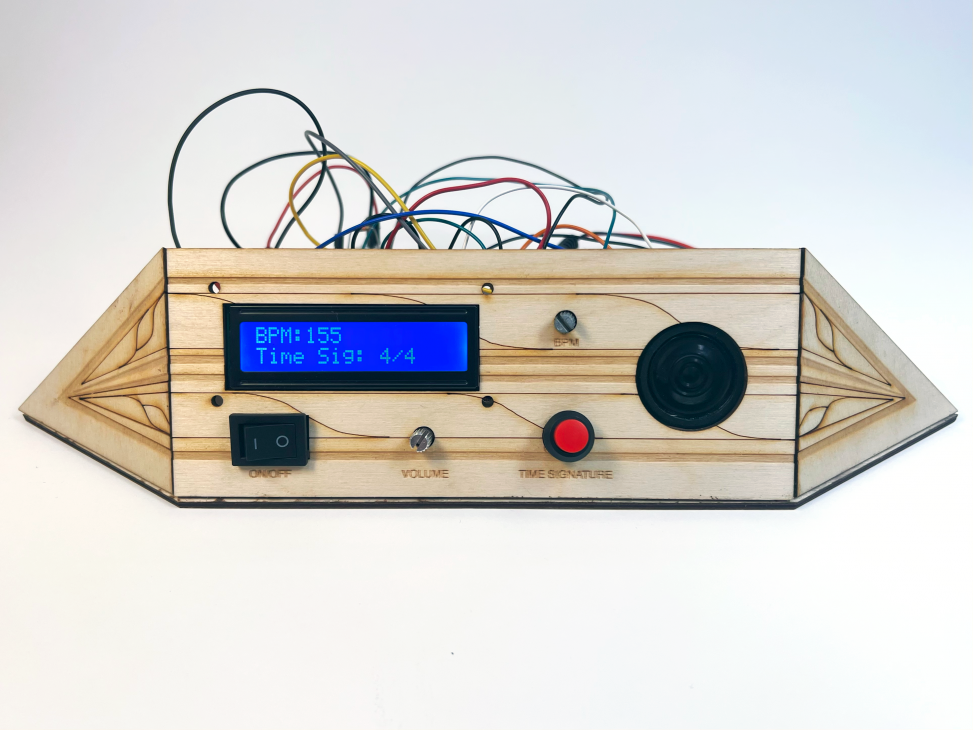
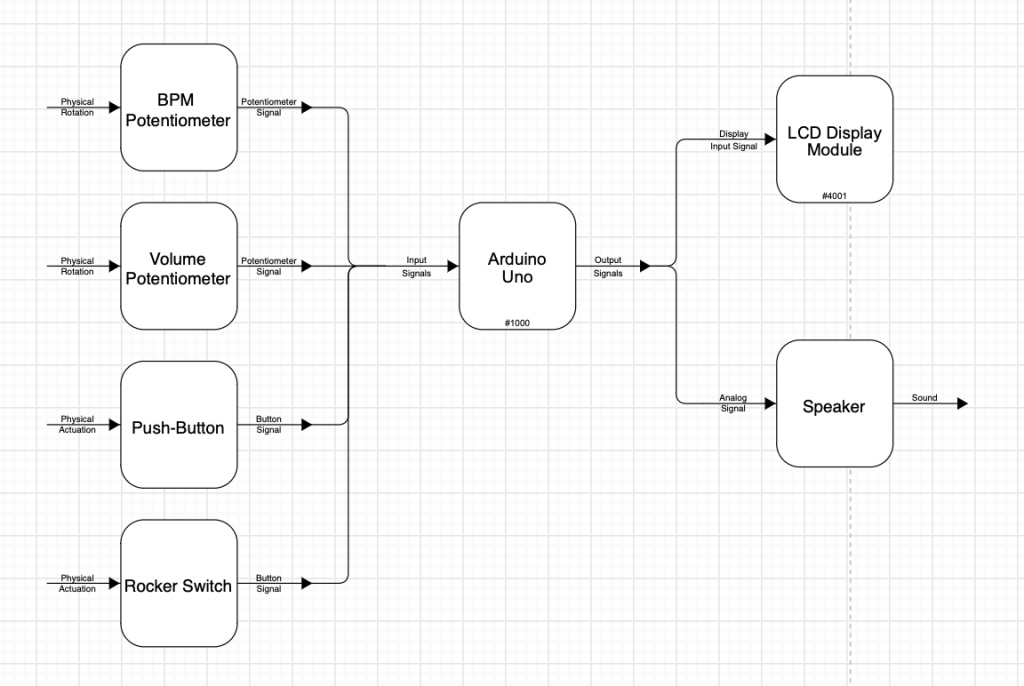
This metronome functions as a musician’s tool to easily control beats per minute, switch between time signatures, as well as adjust volume using buttons and potentiometers for a range of possibilities when practicing.
Close Up
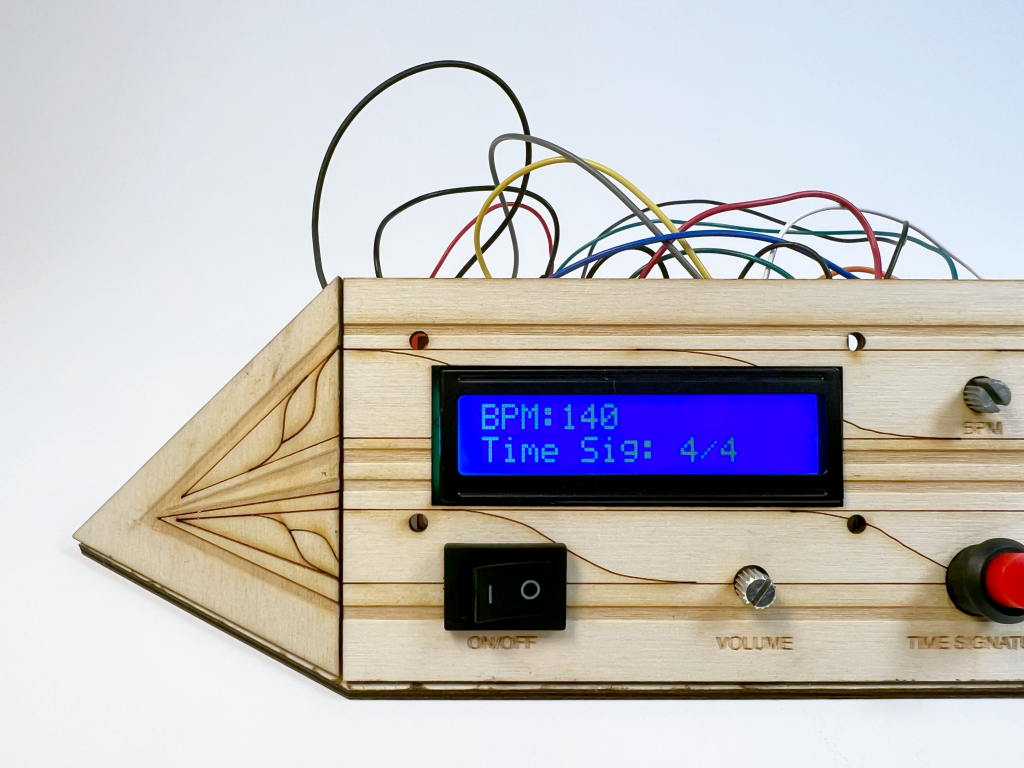
On/Off Button, Volume Control, and LCD Displaying BPM and Time Signature
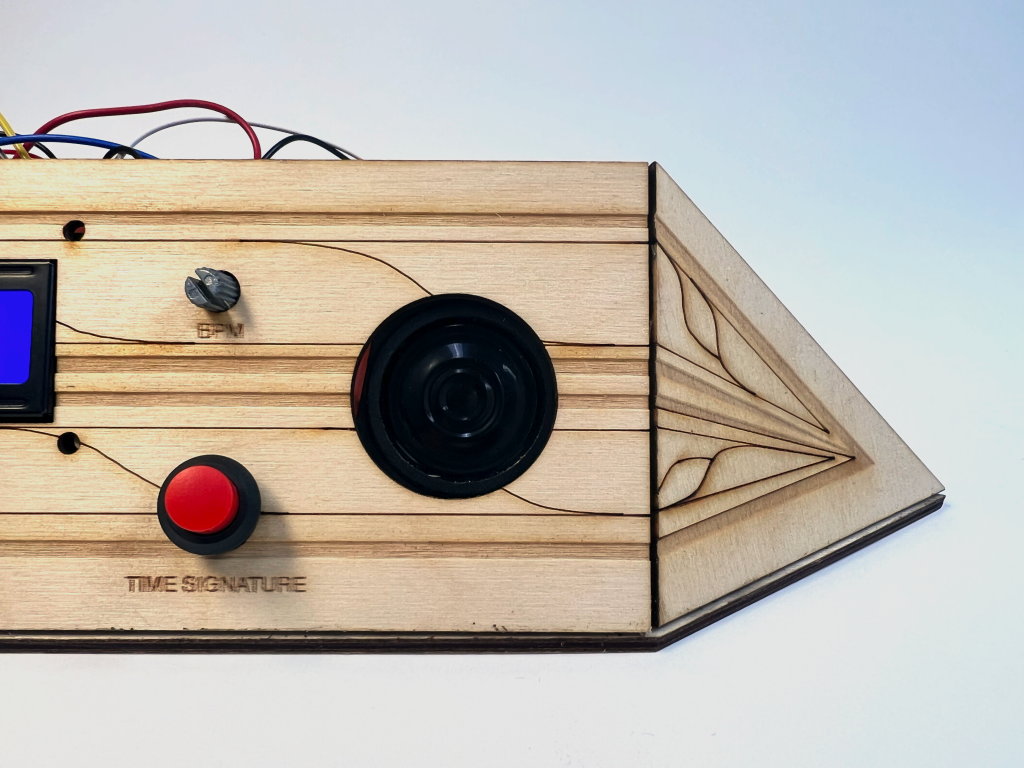
Speaker, BPM Control, Time Signature Button

Turning Potentiometer to Control BPM (beats per minute)
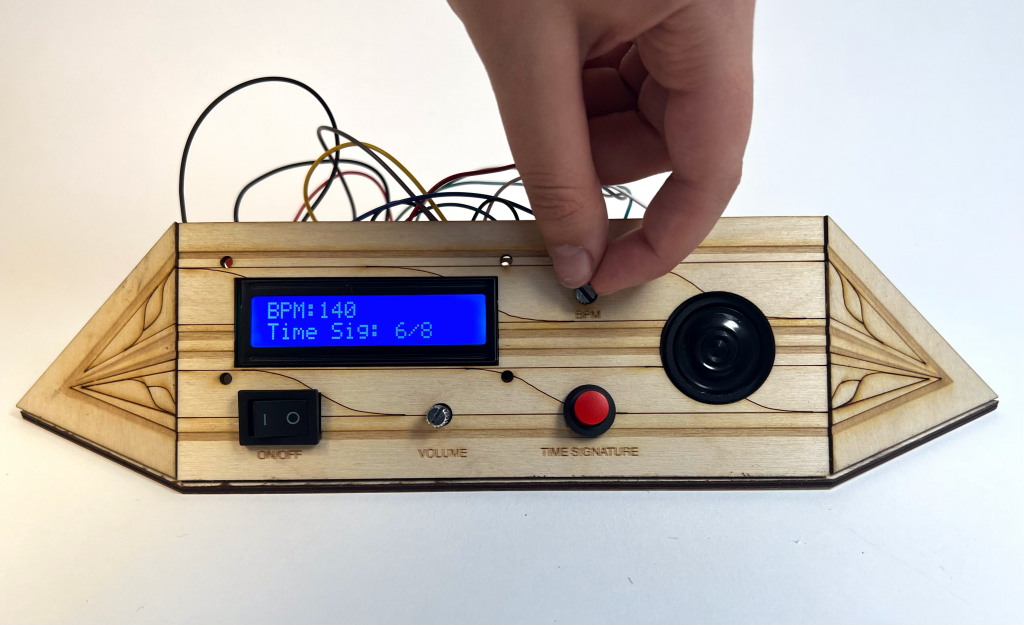
Pressing Button to Change Time Signature (4/4, 2/4, 6/8)
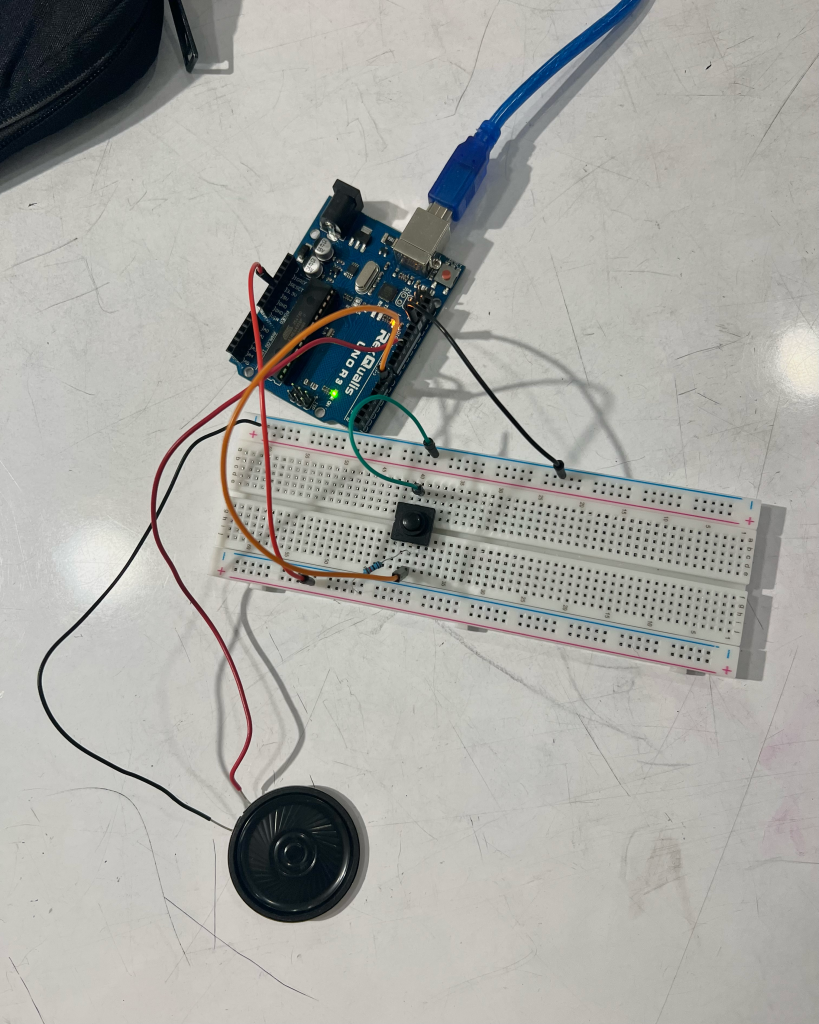
Switching Out Piezo Buzzer for Larger Speaker
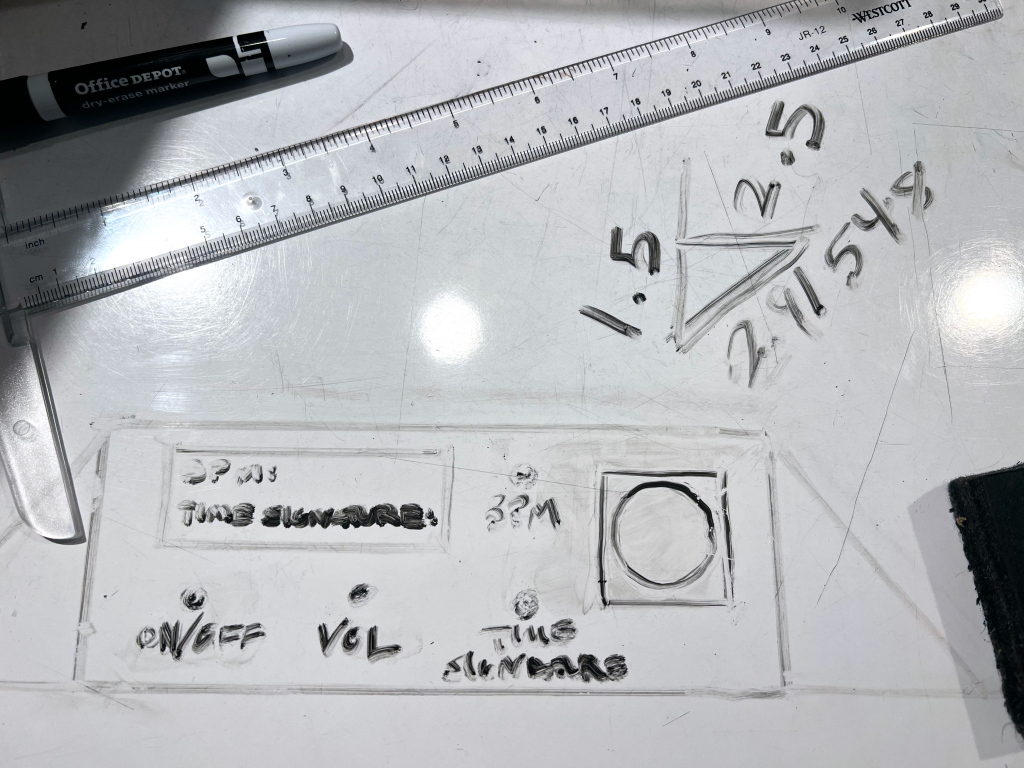
Moving from Usual Metronome Shape to Horizontal Design
Process
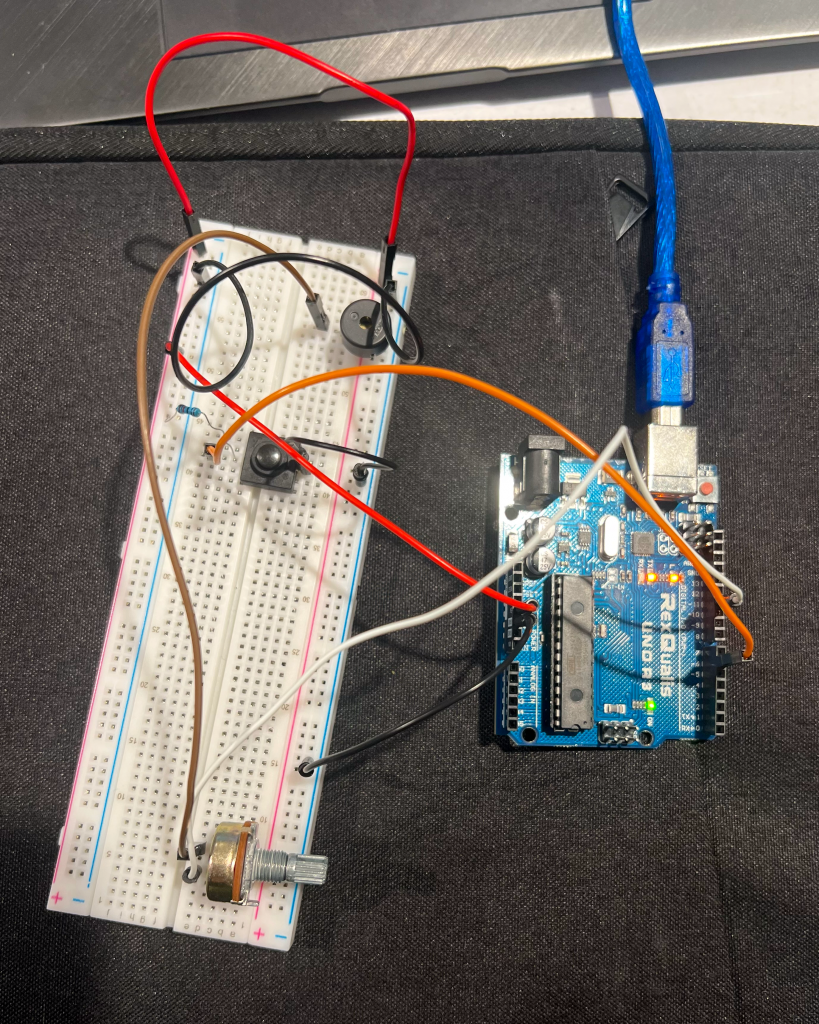
Using Potentiometer to Control Volume by Changing Resistance
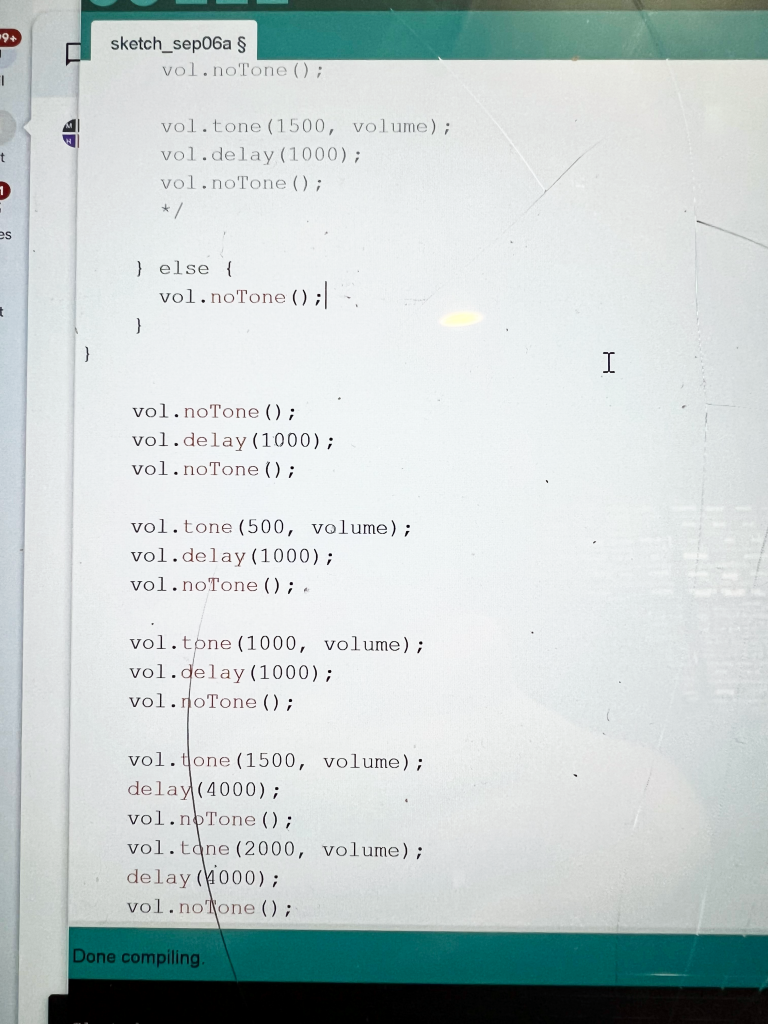
Code Used to Control Speaker Using Volume Library (Eventually Changed to mills())
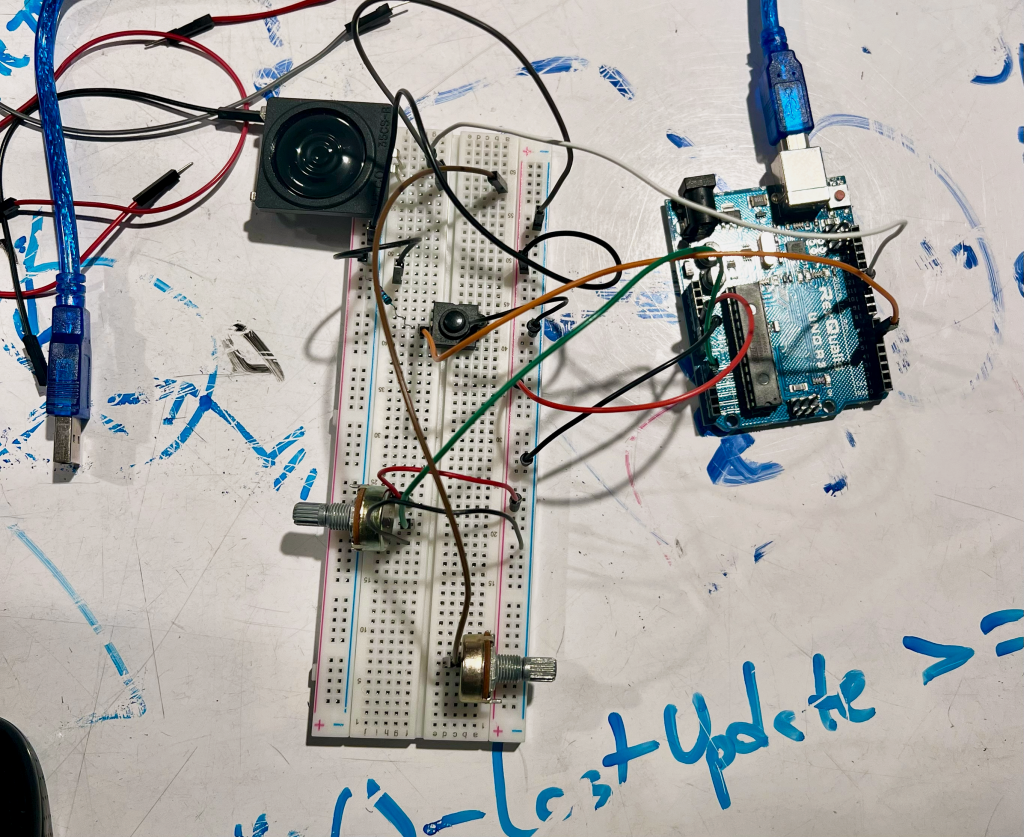
Adding Potentiometer that Controls BPM
Discussion
This project, though the idea of a metronome seems simple, posed problems along the way that required me to rework hardware and software many times throughout the project timeline. The constant reworking, though, allowed me to develop a project that I am ultimately proud of and will be using to assist me in my piano practice sessions. The final critique, I think, reflected what I thought about the project myself – the sound was “easy on the ear,” the design allowed for easy understanding, and the BPM and volume additions were helpful in making it more personalized than the metronome on my digital keyboard. However, I do agree with constructive comments I received – that I could add more time signatures (or even have the ability to input a desired one) and add phrases like “adagio” (slow tempo), though I believe the latter would be more complicated, as “adagio” has a range of BPM from 66 – 76, rather than a specific one. Ultimately, any simple idea has a world of possibilities to explore, and after critique, I will be adding some of their ideas as having more options becomes helpful. And though I am happy with the way it turned out, with the knowledge that I now have about coding after completing this project, I could make some small changes that would vastly improve the usability of the metronome. For example, the BPM was not reflected correctly on the LCD display and the piece didn’t fully close due to the breadboard and Arduino, but by editing the code to reflect the actual BPM and not the wait value, and using a solder breadboard and a smaller Arduino, I can easily get the interior hardware to fit inside the case I designed and have the LCD reflect exactly what I want. This project really opened my eyes to all the different ways you can code or set up something to have the exact same result. For example, my potentiometer that controlled volume needed to be set up differently from the usual VCC, GND, and output pins and instead was connected to ground through the piezo buzzer. I also had the same realization while coding when I was able to produce noise through a speaker, but in order to create time signatures, I had to scrap all of my code and begin again using millis() to make sure everything worked together. This was a recurring theme in my project – reworking – but, in the end, it came together and, with a bit of editing code and soldering, will be a fixture on my keyboard that I will continue to use and develop beyond the end of this class.
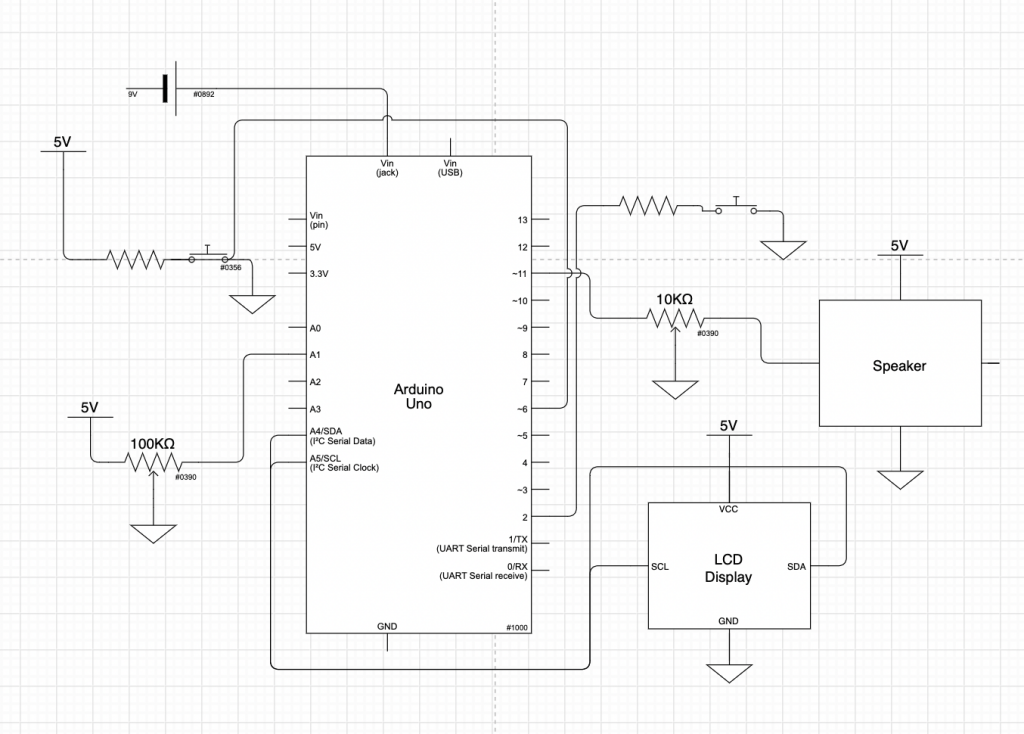
Functional Block Diagram and Schematic
Code
/* Metronome
 *
 * The following code works to create a metronome that controls BPM (beats per minute), volume, and time signature.
 * The time signature and BPM are displayed on an LCD Display.
 * The time signature begins at 2/4. When the time signature button is pressed, time signature becomes 4/4.
 * When pressed a third time, time signature becomes 6/8. When pressed again, the time signature will
 * become 2/4 and repeat again when button is pressed.
 *
 * Pin Mapping:
 *
 * Arduino Pin /  Role   / Description
 *      A1        INPUT     Controls BPM
 *      2         INPUT     Controls time signature
 *      6         INPUT     Turns metronome on or off
 *      11        OUTPUT    Controls speaker
 *
 * Francesca Menendez, 2022 */


#include <Wire.h>
#include <LiquidCrystal_I2C.h>
const int SPEAKERPIN = 11; /
const int TIMESIGPIN = 2;
const int ONOFFPIN = 6;
int WAITPIN = A1;
int wait = 500; /* Gap between beats */
unsigned long timeGoal = 0;
unsigned long lastTime;
unsigned long counter = 0;
int state = 0; /* State begins at 0 */
bool on = false;
int potVal = 0;
int frequency = 500;
LiquidCrystal_I2C screen(0x27, 16, 2);

void setup() {
/* Sets Up Pins Used */
  pinMode(SPEAKERPIN, OUTPUT);
  pinMode(ONOFFPIN, INPUT);
  pinMode(WAITPIN, INPUT);
  pinMode(TIMESIGPIN, INPUT);

/* Setup for LCD Display */
  Wire.begin();
  screen.init();
  screen.backlight();
  screen.home();

  Serial.begin(9600);
}

void loop() {
  /* Creates timer using millis() to then set up time signatures */
  int timer = millis();
  wait = map(wait, 0, 1023, 10, 2000);
  wait = analogRead(WAITPIN);

  if(digitalRead(ONOFFPIN)== HIGH) {

/* When time signature button is pressed, state increases */
    if (digitalRead(TIMSIGPIN) == HIGH) {
      state++;
      delay(100);
    }

/* Metronome begins at 2/4 time signature */
    if (state%3 == 0) {
      if (counter % 2 == 0) {
        frequency = 800;
      }
      else {
        frequency = 500;
      }
    }
/* When time signature button is pressed, time signature becomes 4/4 */
    if (state%3 == 1) {
      if (counter % 4 == 0) {
        frequency = 800;
      }
      else {
        frequency = 500;
      }
    }
/* When time signature is pressed a third time, time signature becomes 6/8 */
    if (state%3 == 2) {
      if (counter % 6 == 0) {
        frequency = 800;
      }
      else if (counter % 3 == 0) {
        frequency = 400;
      }
      else {
        frequency = 500;
      }
    }

  if (millis() - lastTime >= wait) {
    tone(SPEAKERPIN, frequency, 100);
    counter++;
    lastTime = millis();
  }

  /* LCD updates every half of a second */
  if(millis()%250 == 0 ) {
    screen.clear();
  }

/* Prints BPM and Time Signature to LCD Display */
  if(1000 < millis() - timer) {
      screen.setCursor(0, 0);
      screen.print("BPM:");
      screen.setCursor(4,0);
      screen.print(wait);
      screen.setCursor(0, 1);
      if(state%3 == 0) {
        screen.print("Time Sig: 2/4");
      }
      if(state%3 == 1) {
        screen.print("Time Sig: 4/4");
      }
      if(state%3 == 2) {
        screen.print("Time Sig: 6/8");
      }
      timer = millis();
    }
  }
}