I created a phone stand that helps me stay focused when I should be working, making sure I’m not using my phone by emitting an annoying beep when my phone is not on the phone stand.
Images + Videos of Project
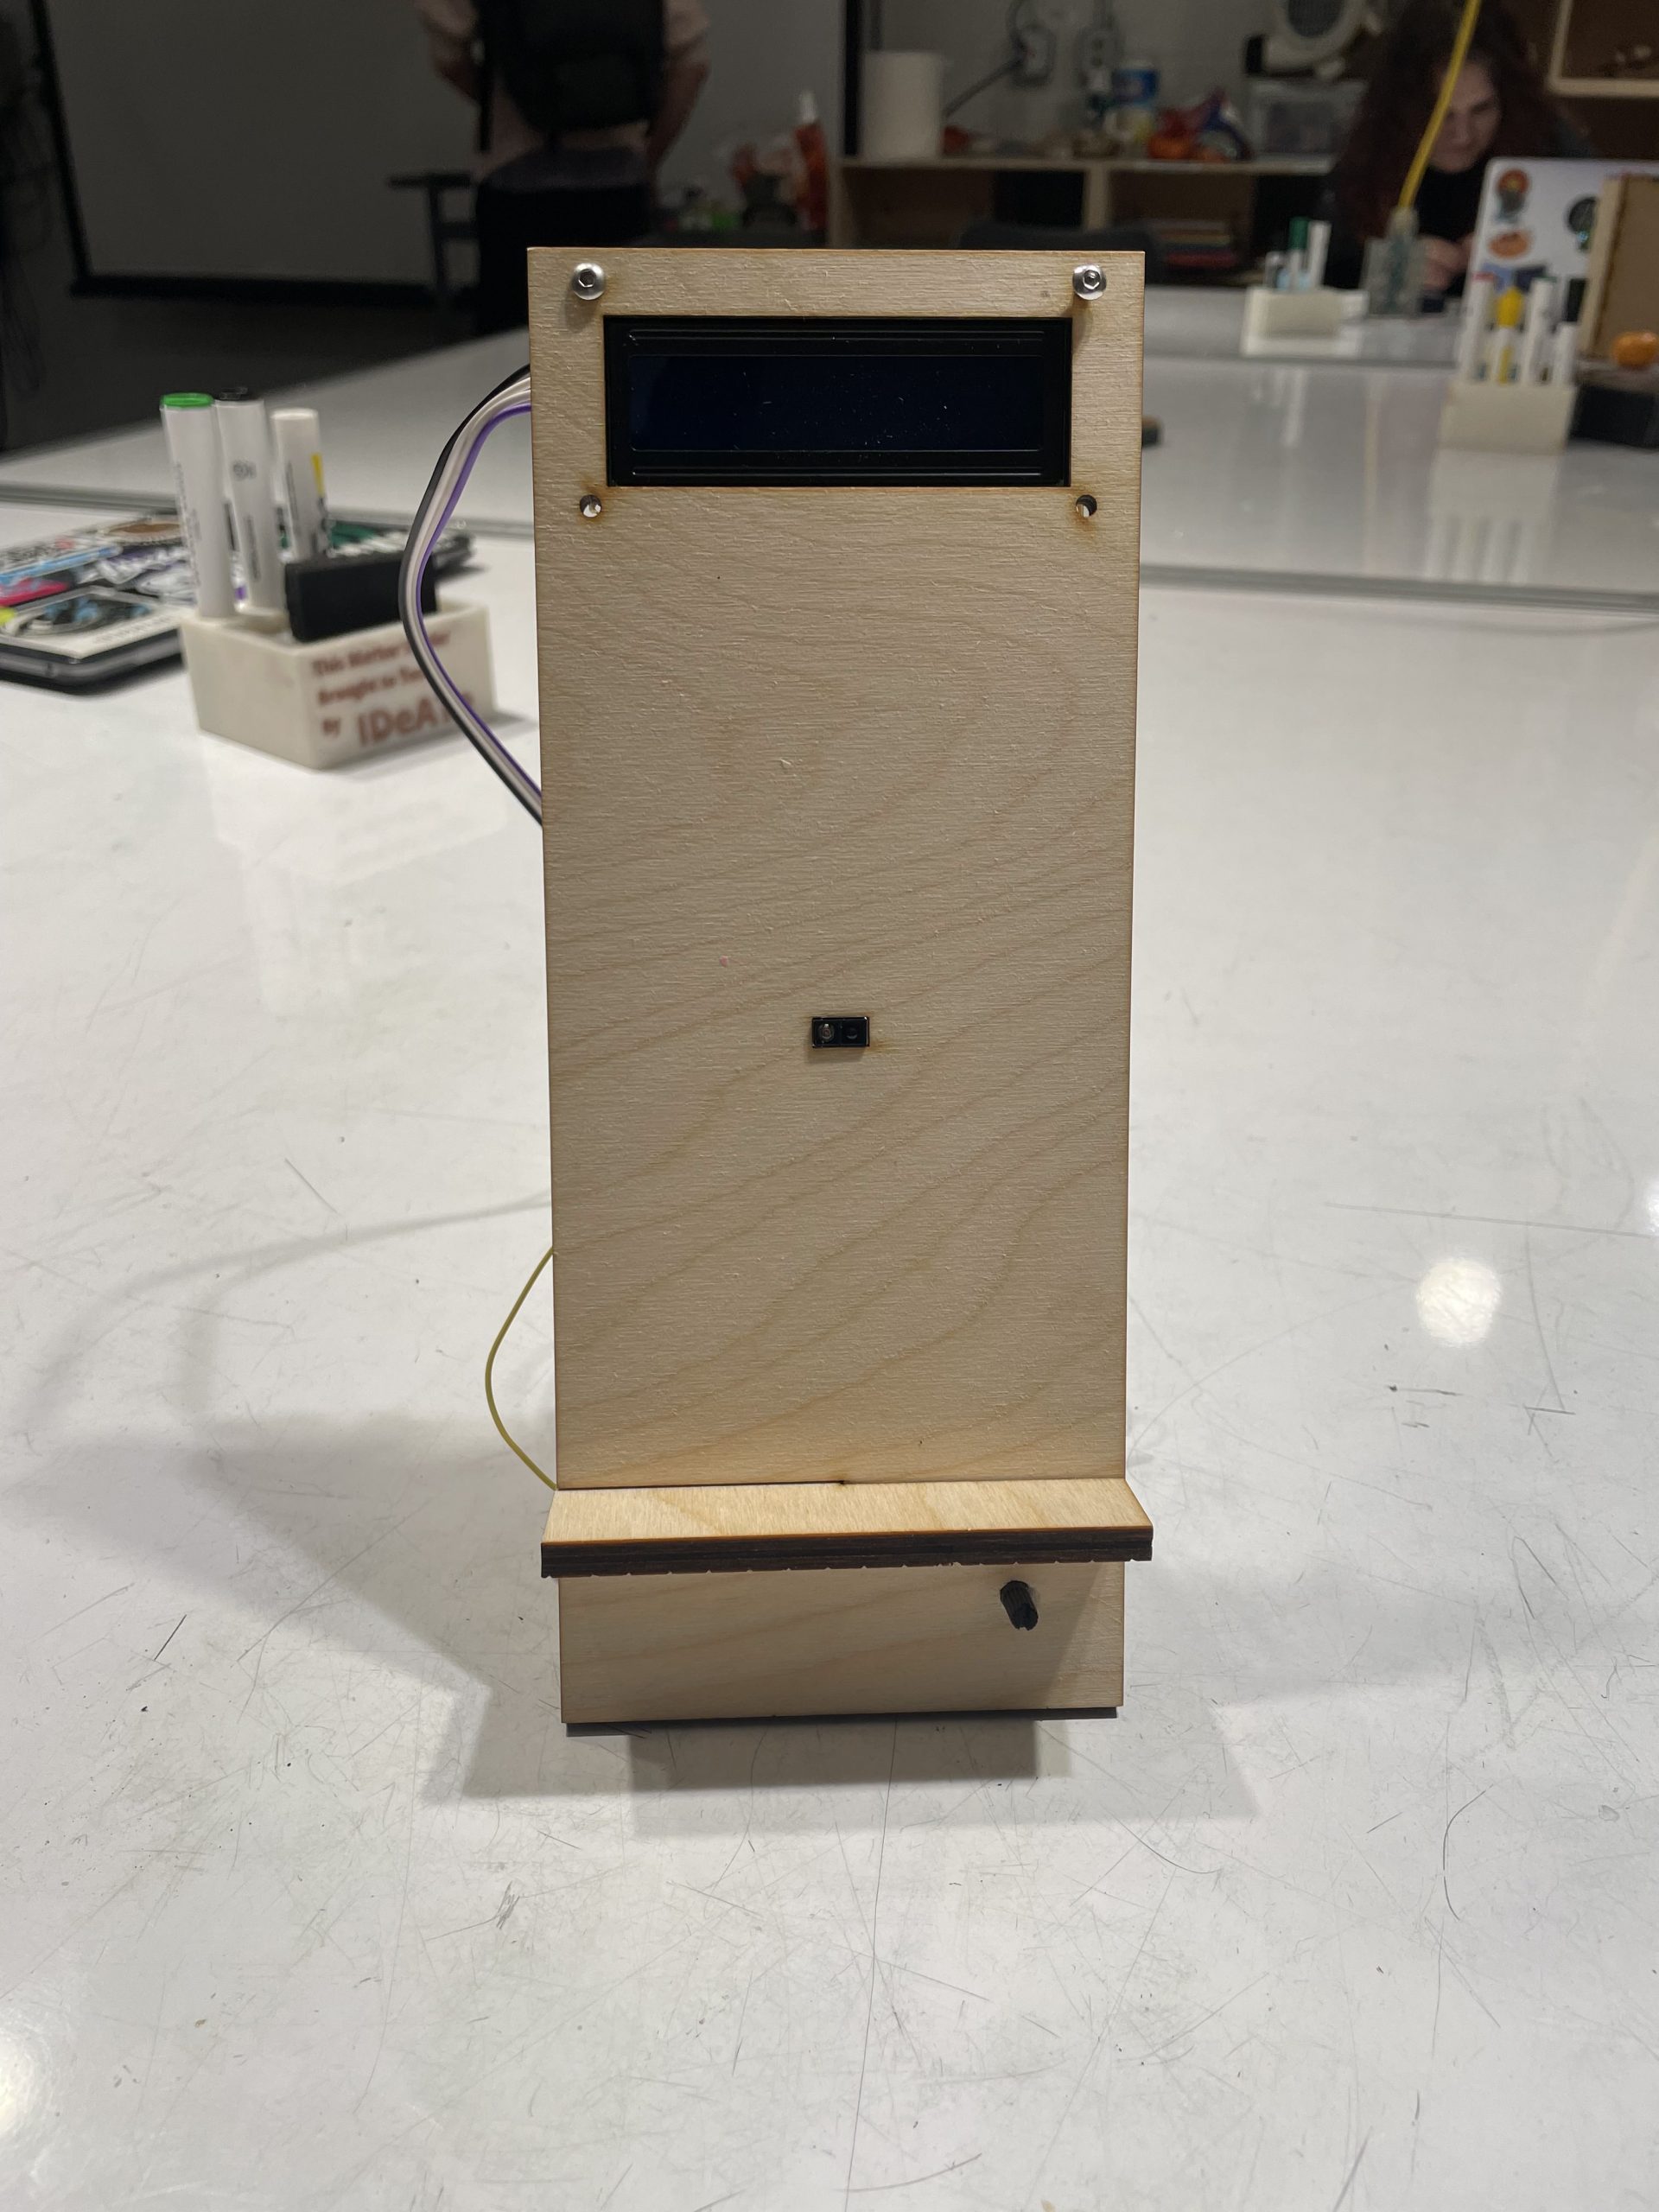
Front view of the phone stand.

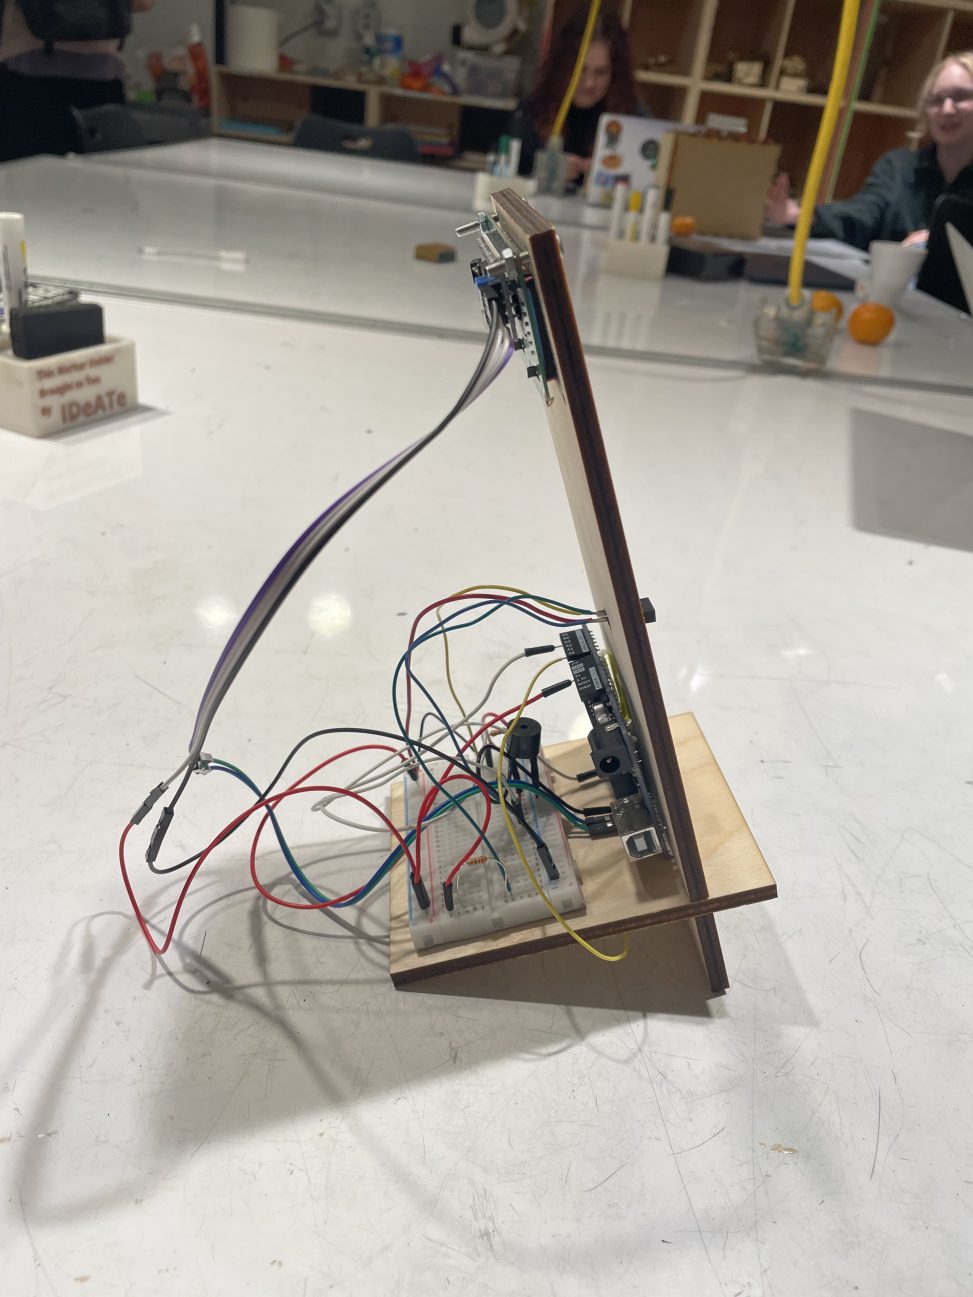
Overall photo for proportion and scale.
Detail Photos
Detail photo of the electronics on the back of the phone stand.
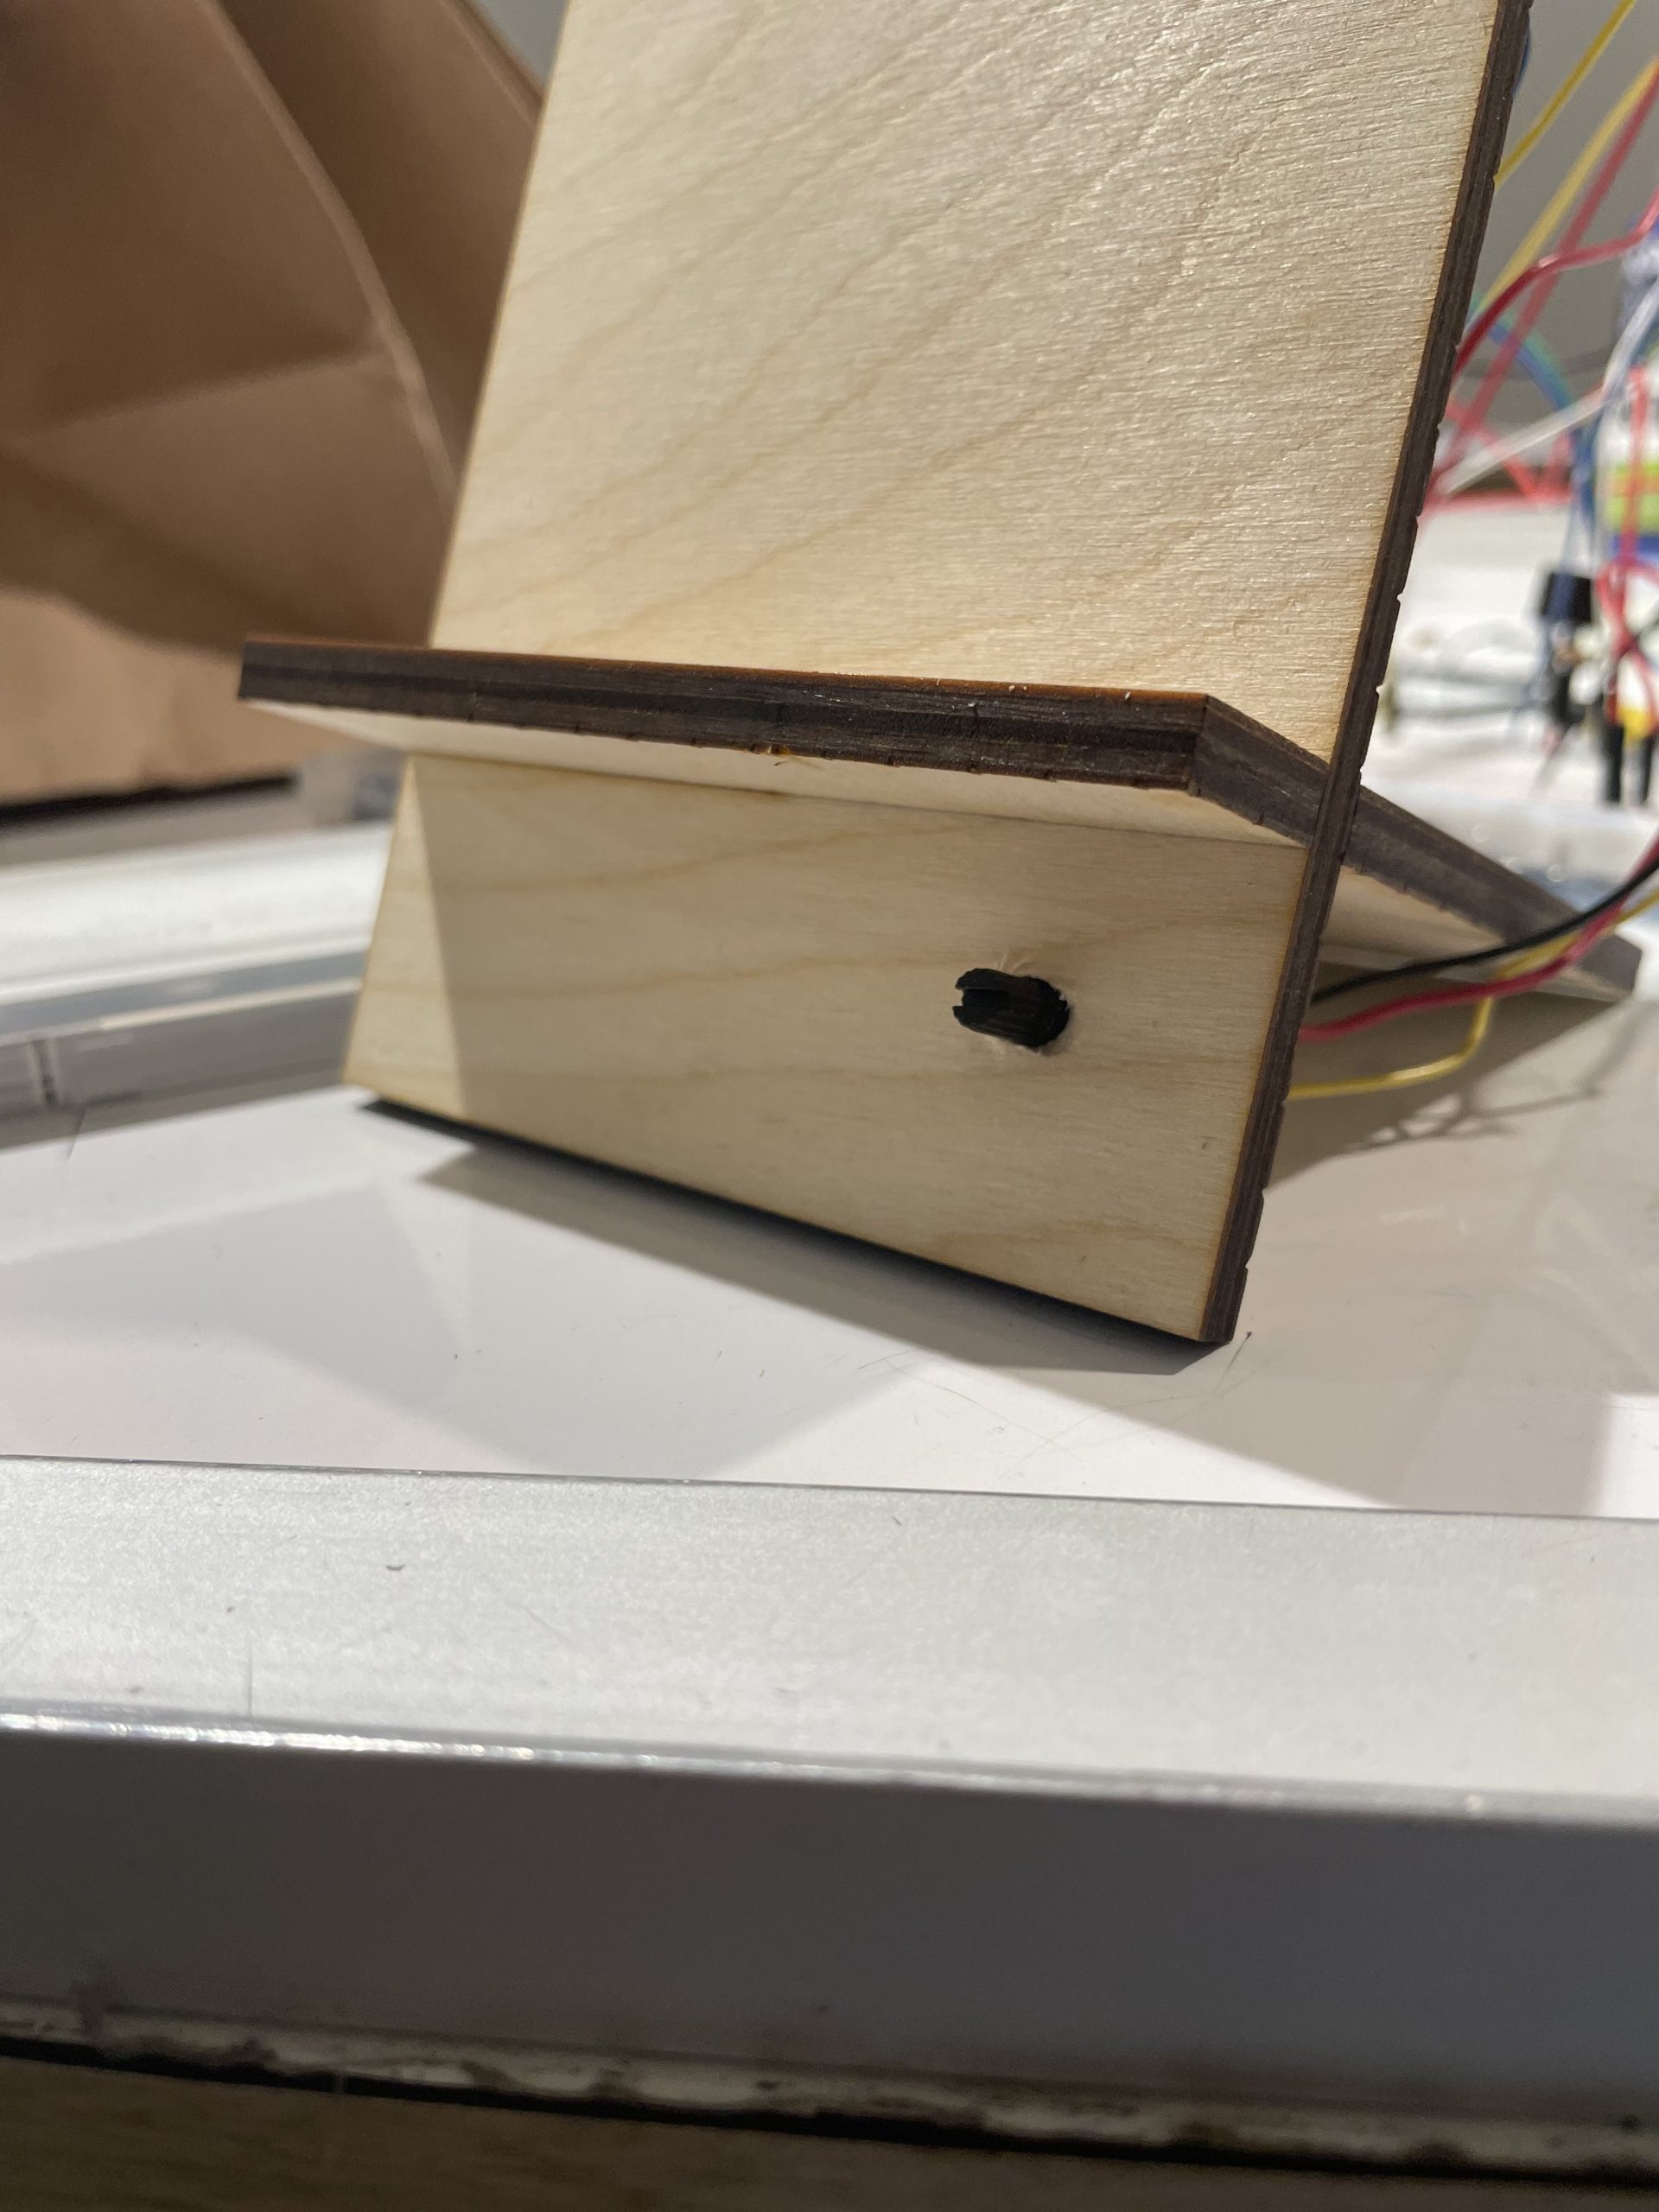
Detail photo of the potentiometer cutout.
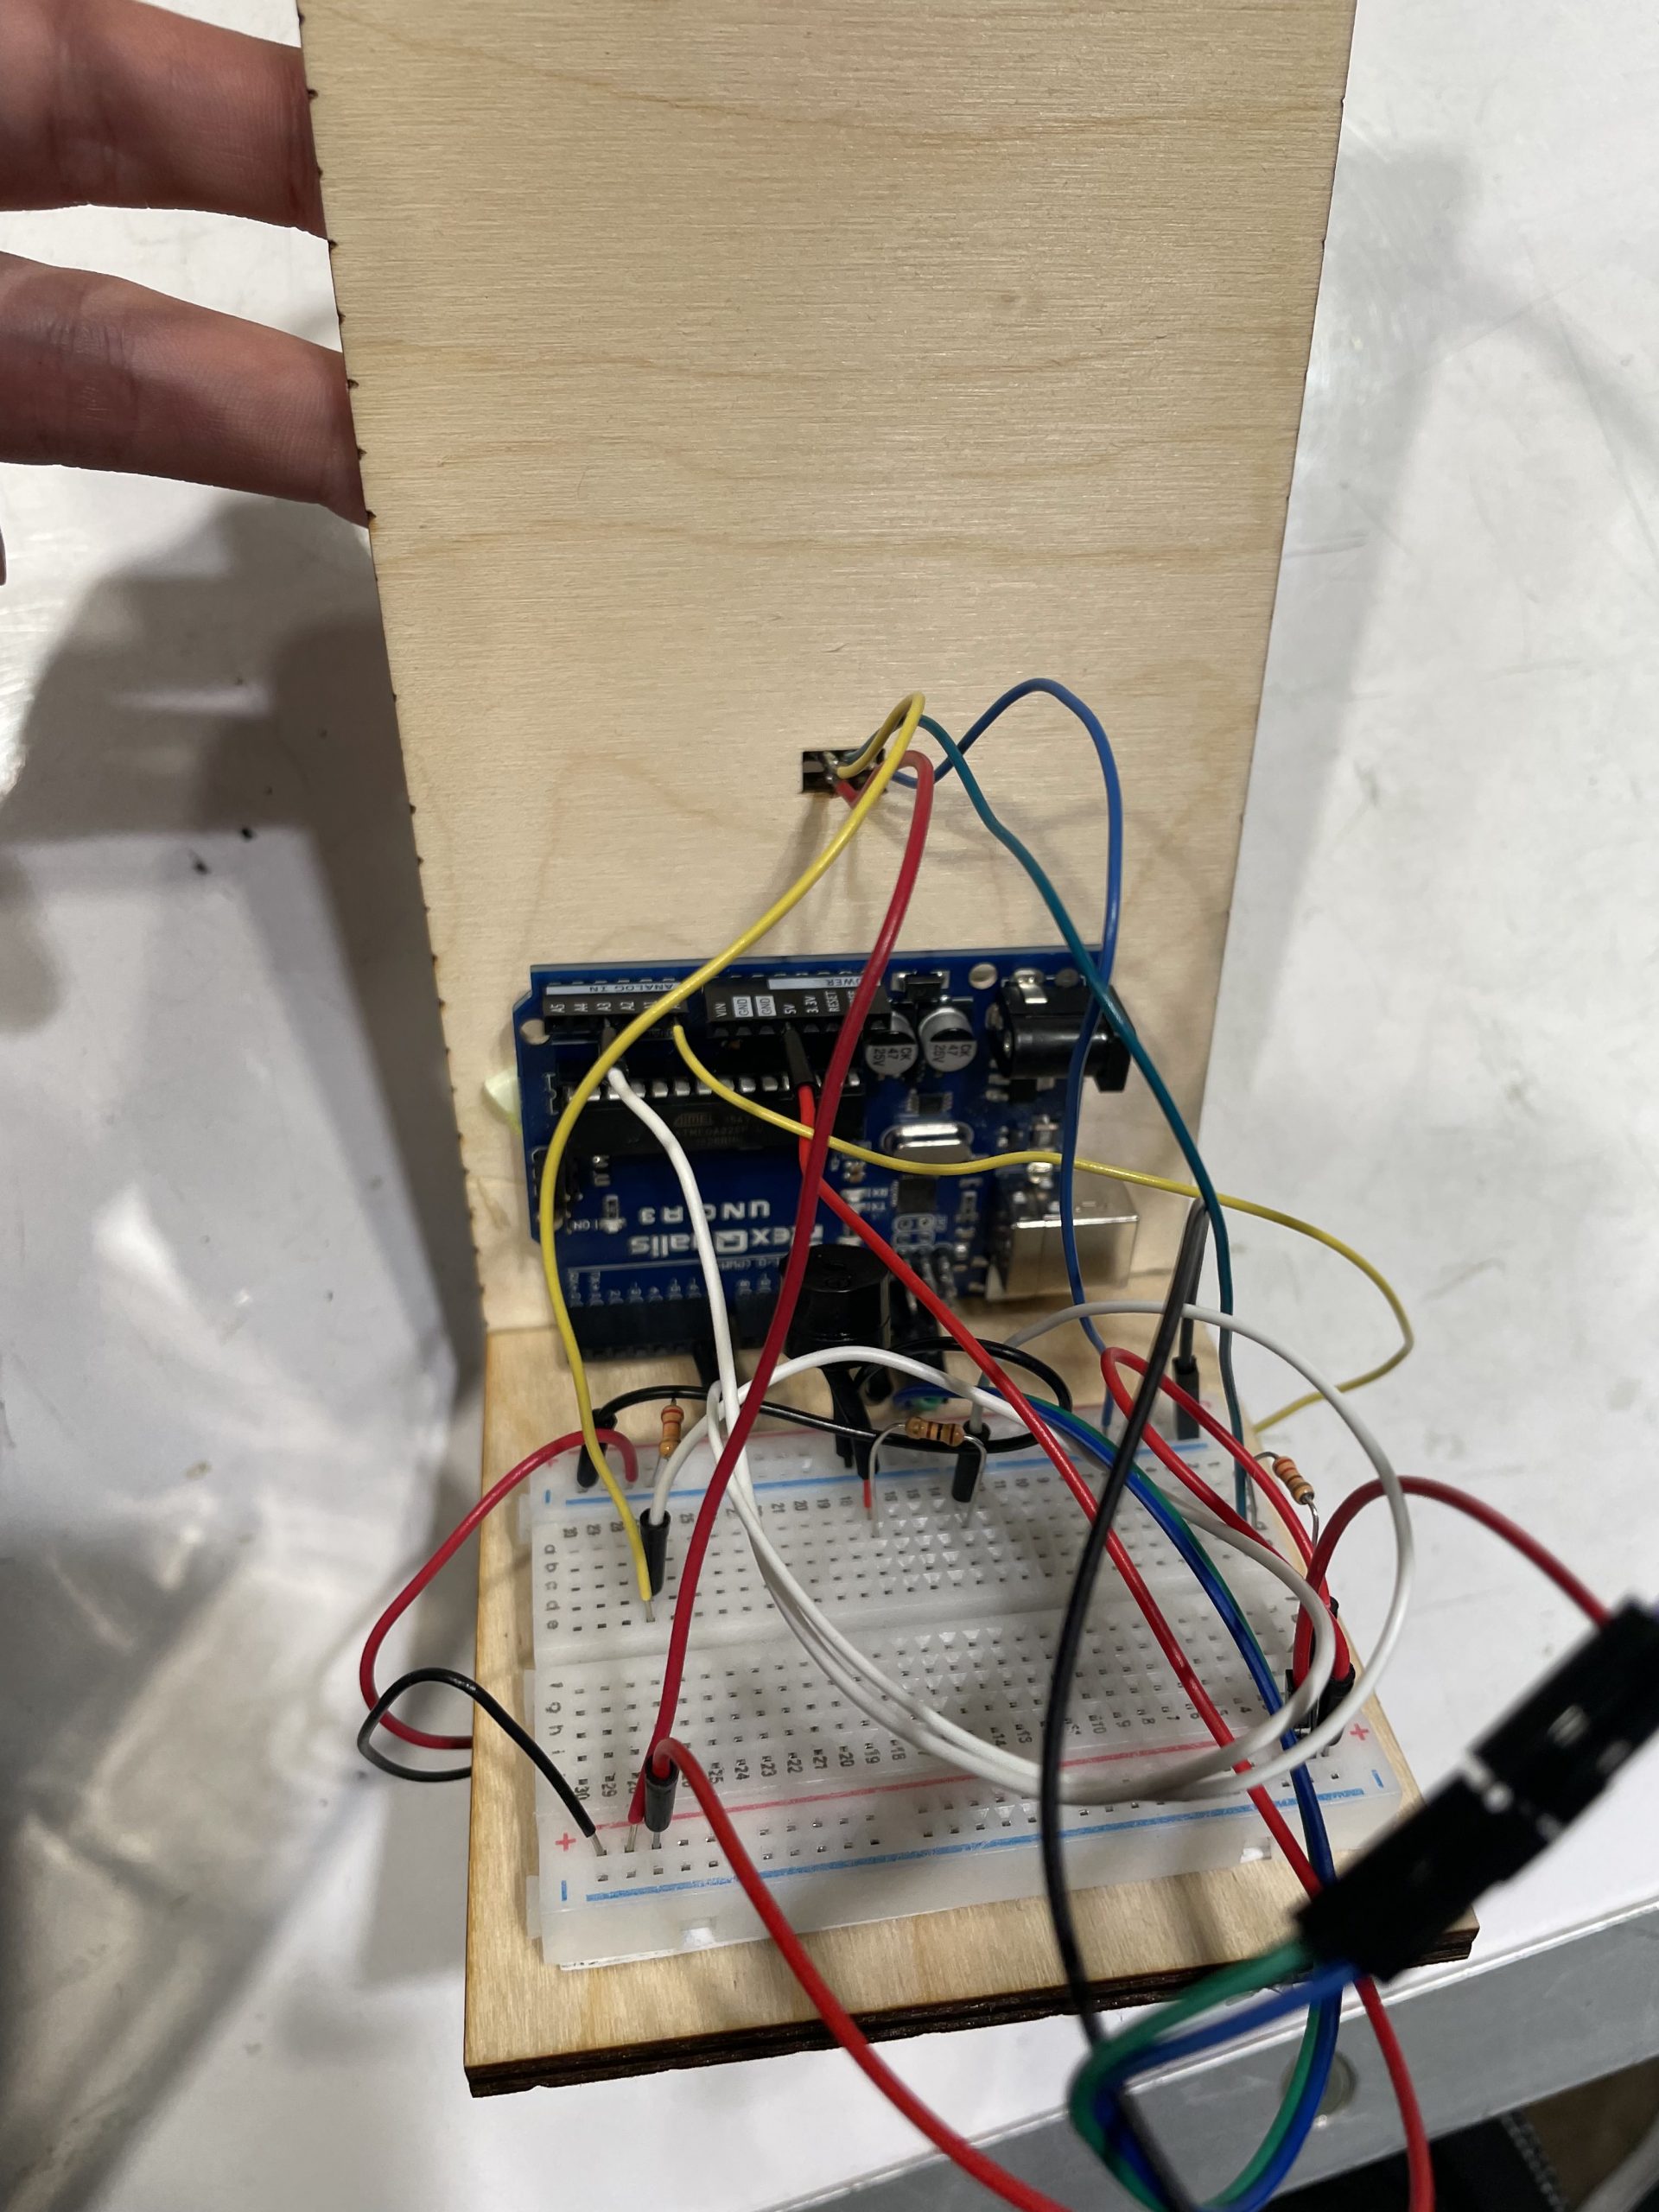
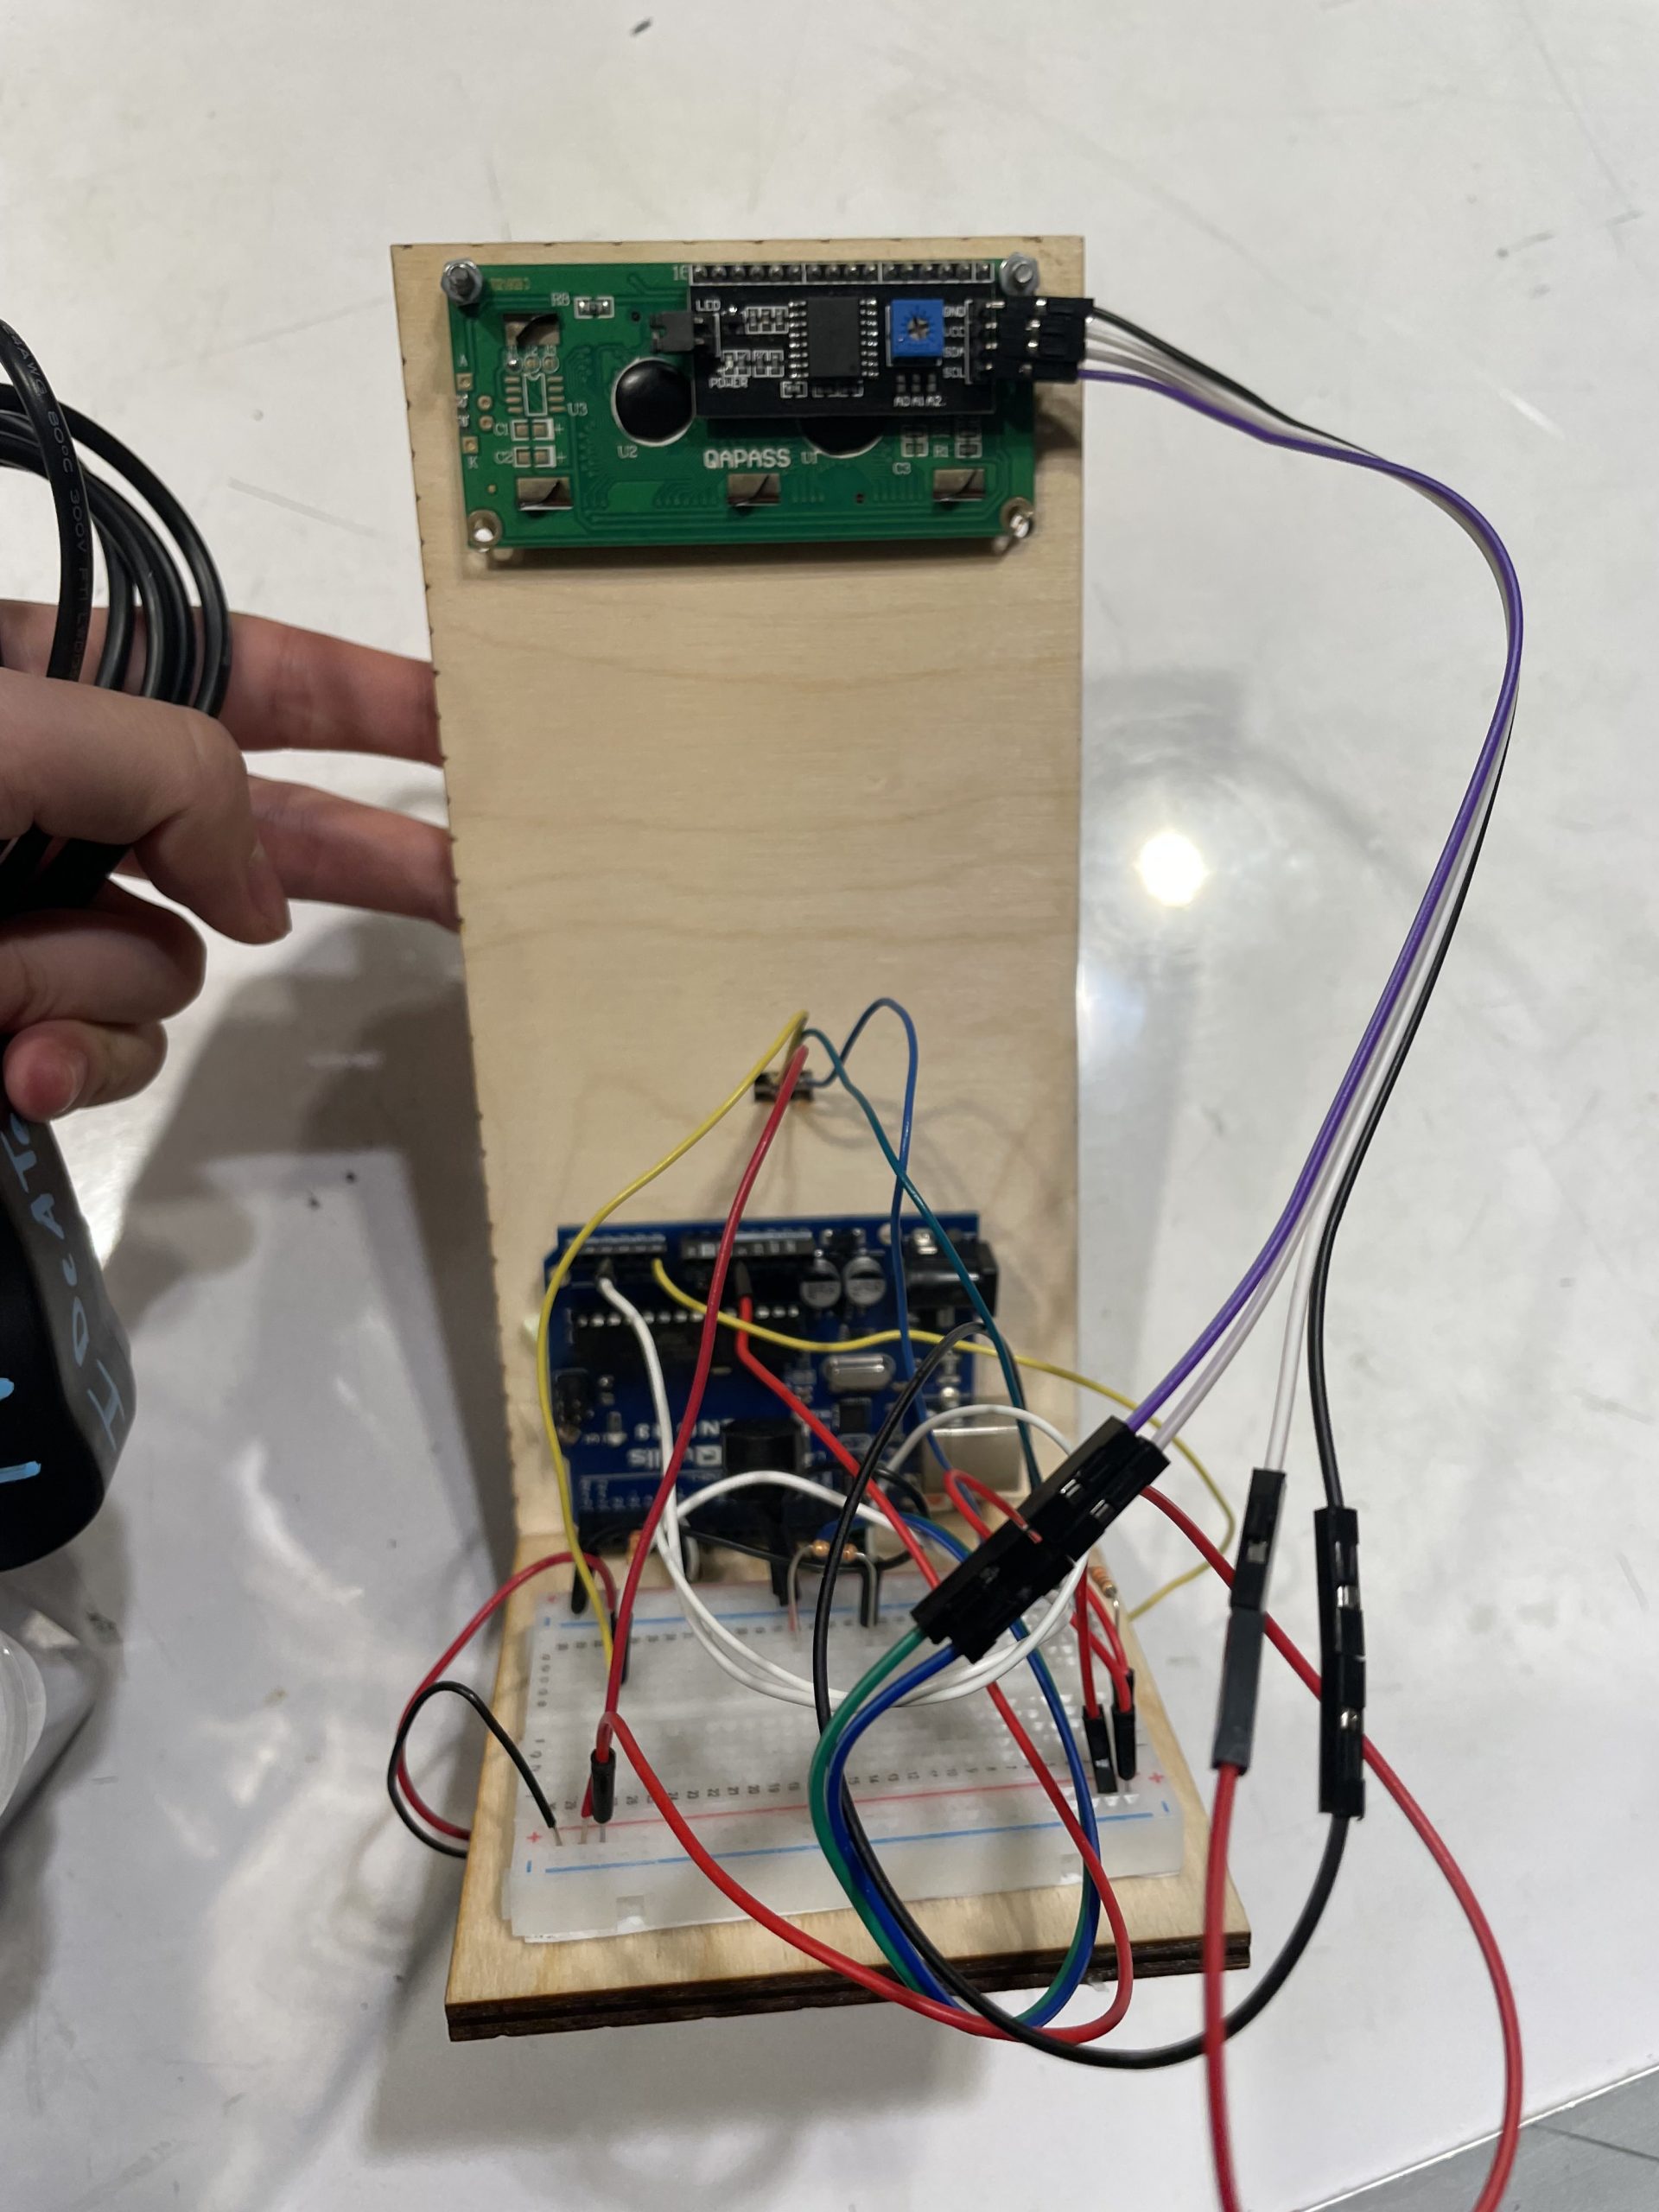
Detail photo of breadboard and Arduino connections.
Process
I wouldn’t say that there were significant milestones within the project, as from the beginning I had a good idea of the steps I needed to take. I would say that I broke the project down into smaller parts, however.
First, I got the LCD display to count down values according to a Pomodoro timer. This, in my opinion, was the most challenging part, as my software skills aren’t particularly strong, and I had to manipulate some event timers to get it to work. I combined that with a potentiometer, and I had a changeable Pomodoro display.
Then, I did some wrestling with the IR sensor, and after the hardware challenges I had to figure out with the resistors, and non-functional IR sensors, I included the distance value to my LCD display.
The final step was adding a buzzer, which wasn’t particularly challenging hardware nor software wise, and incorporating my electronics with my laser cut phone stand, which I had completed beforehand.
Process Images
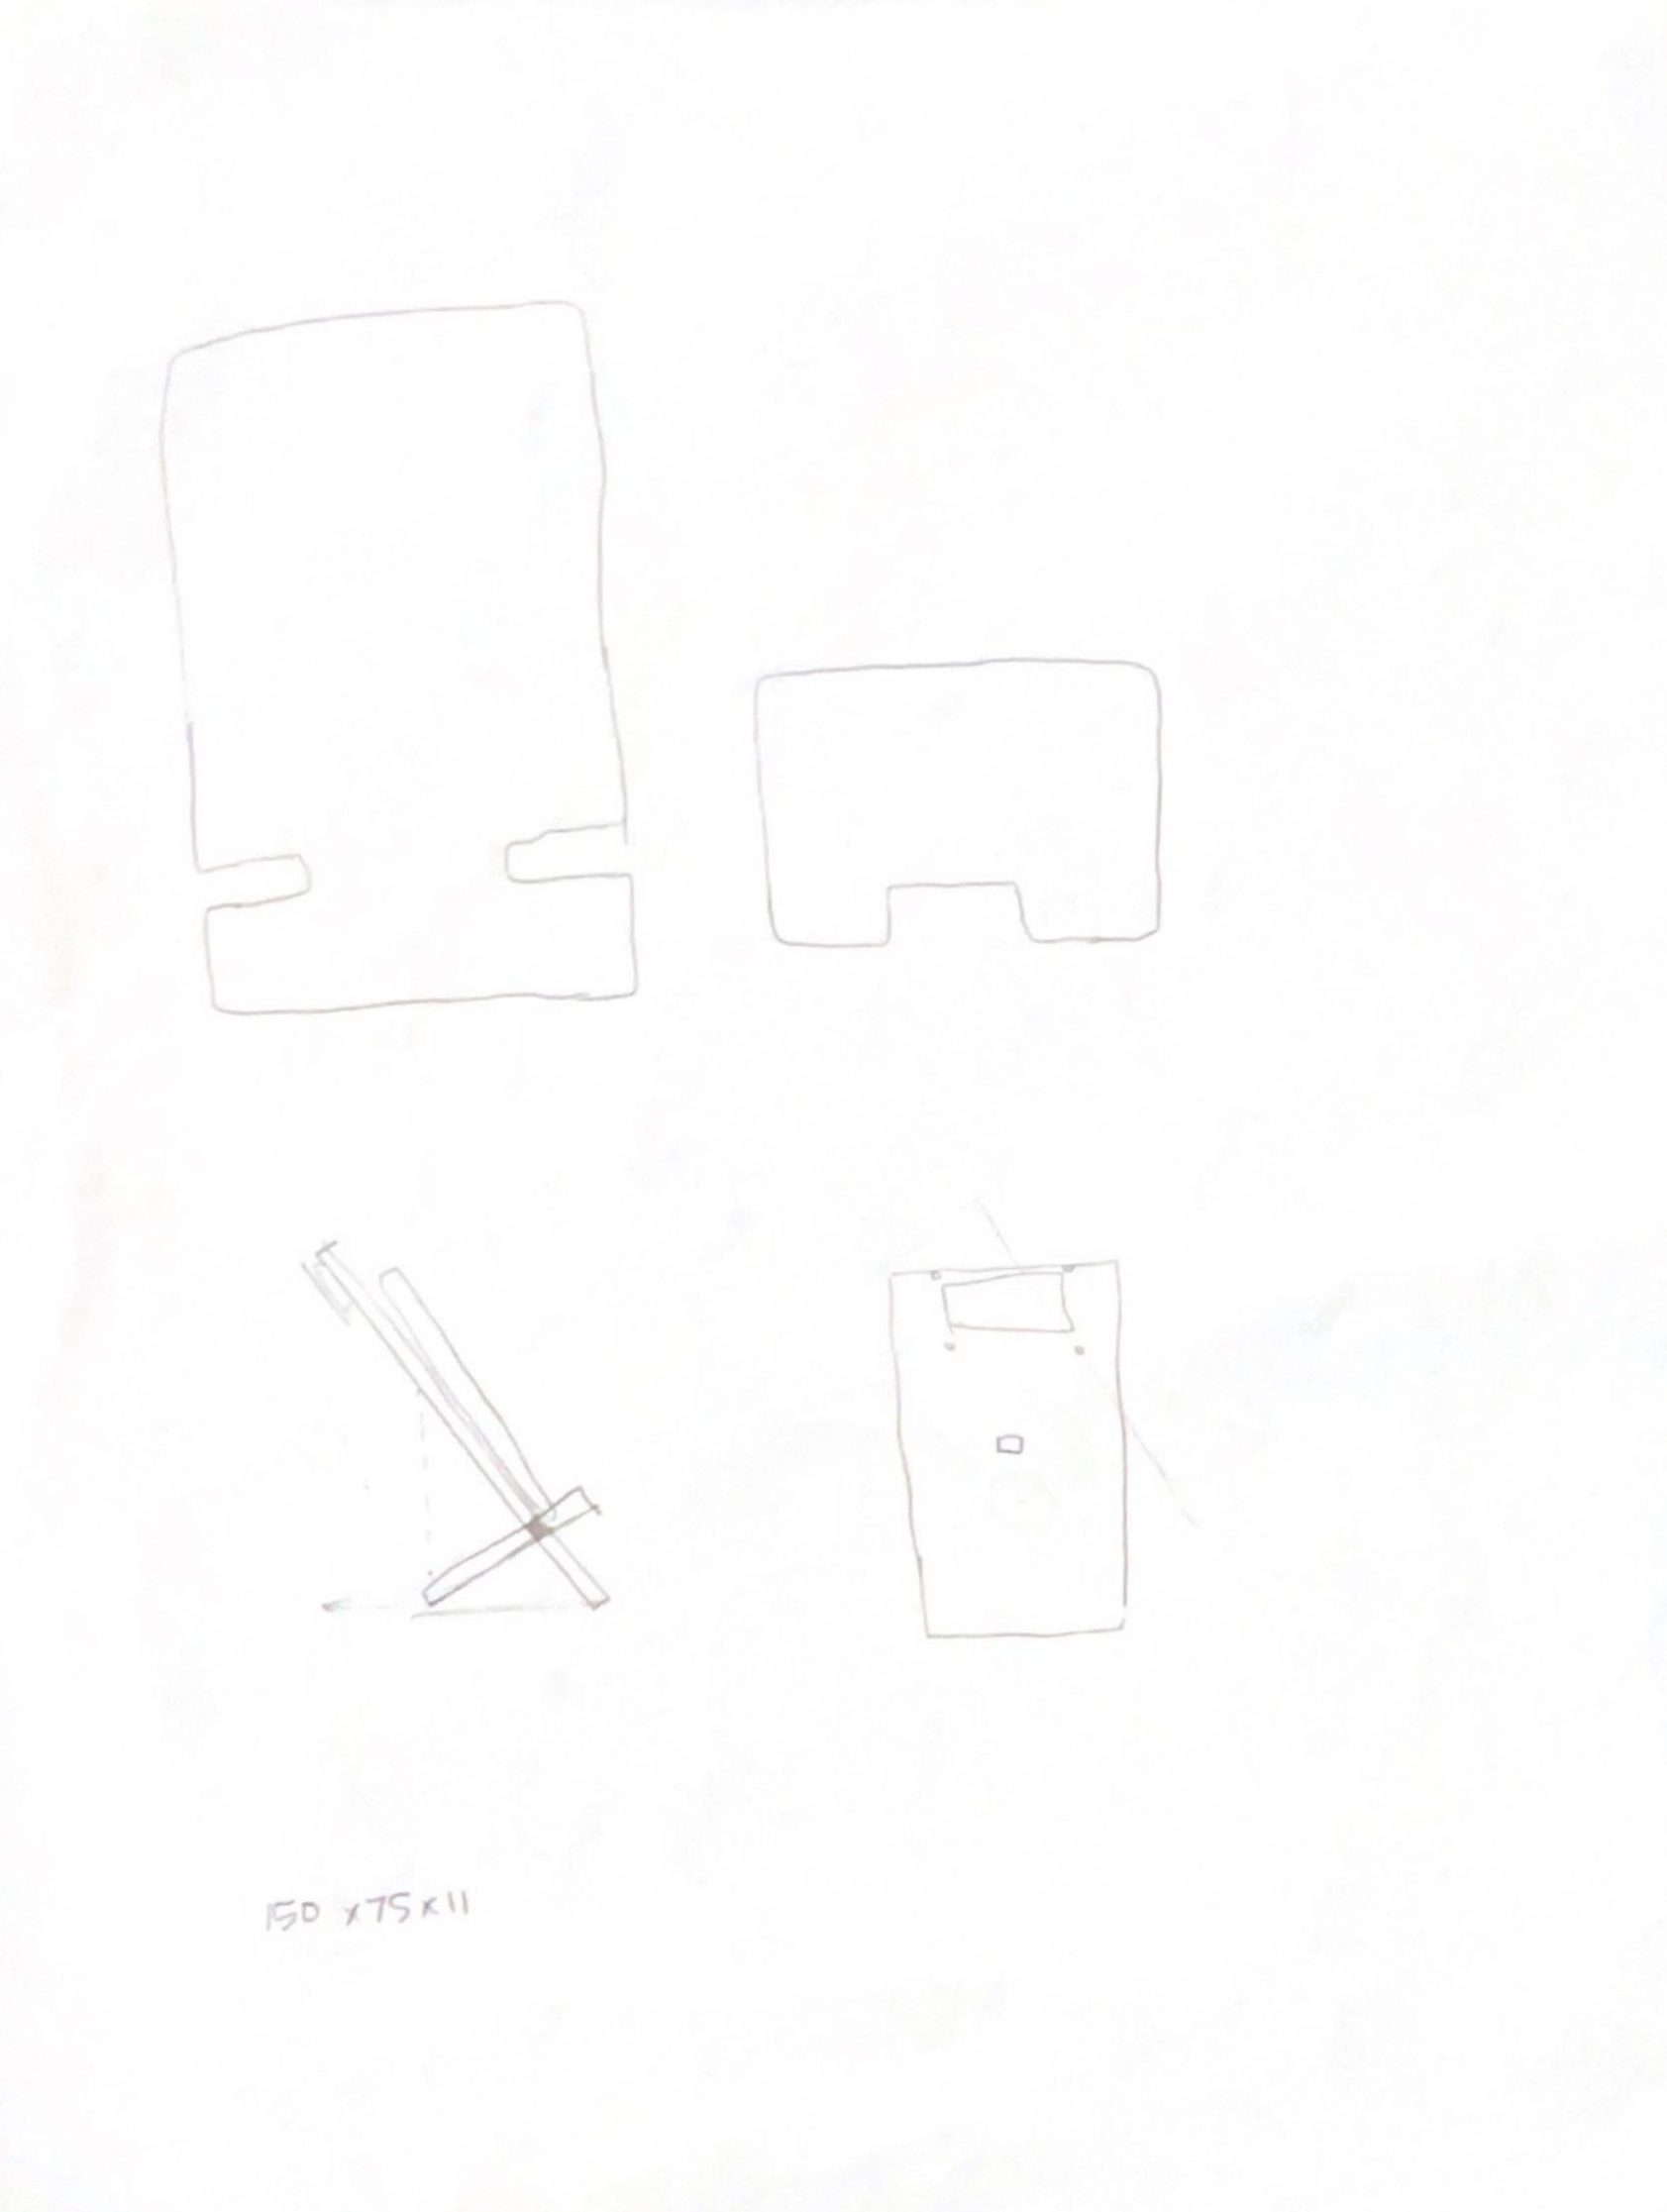
Ideation sketches for the laser cutting component of the phone stand.
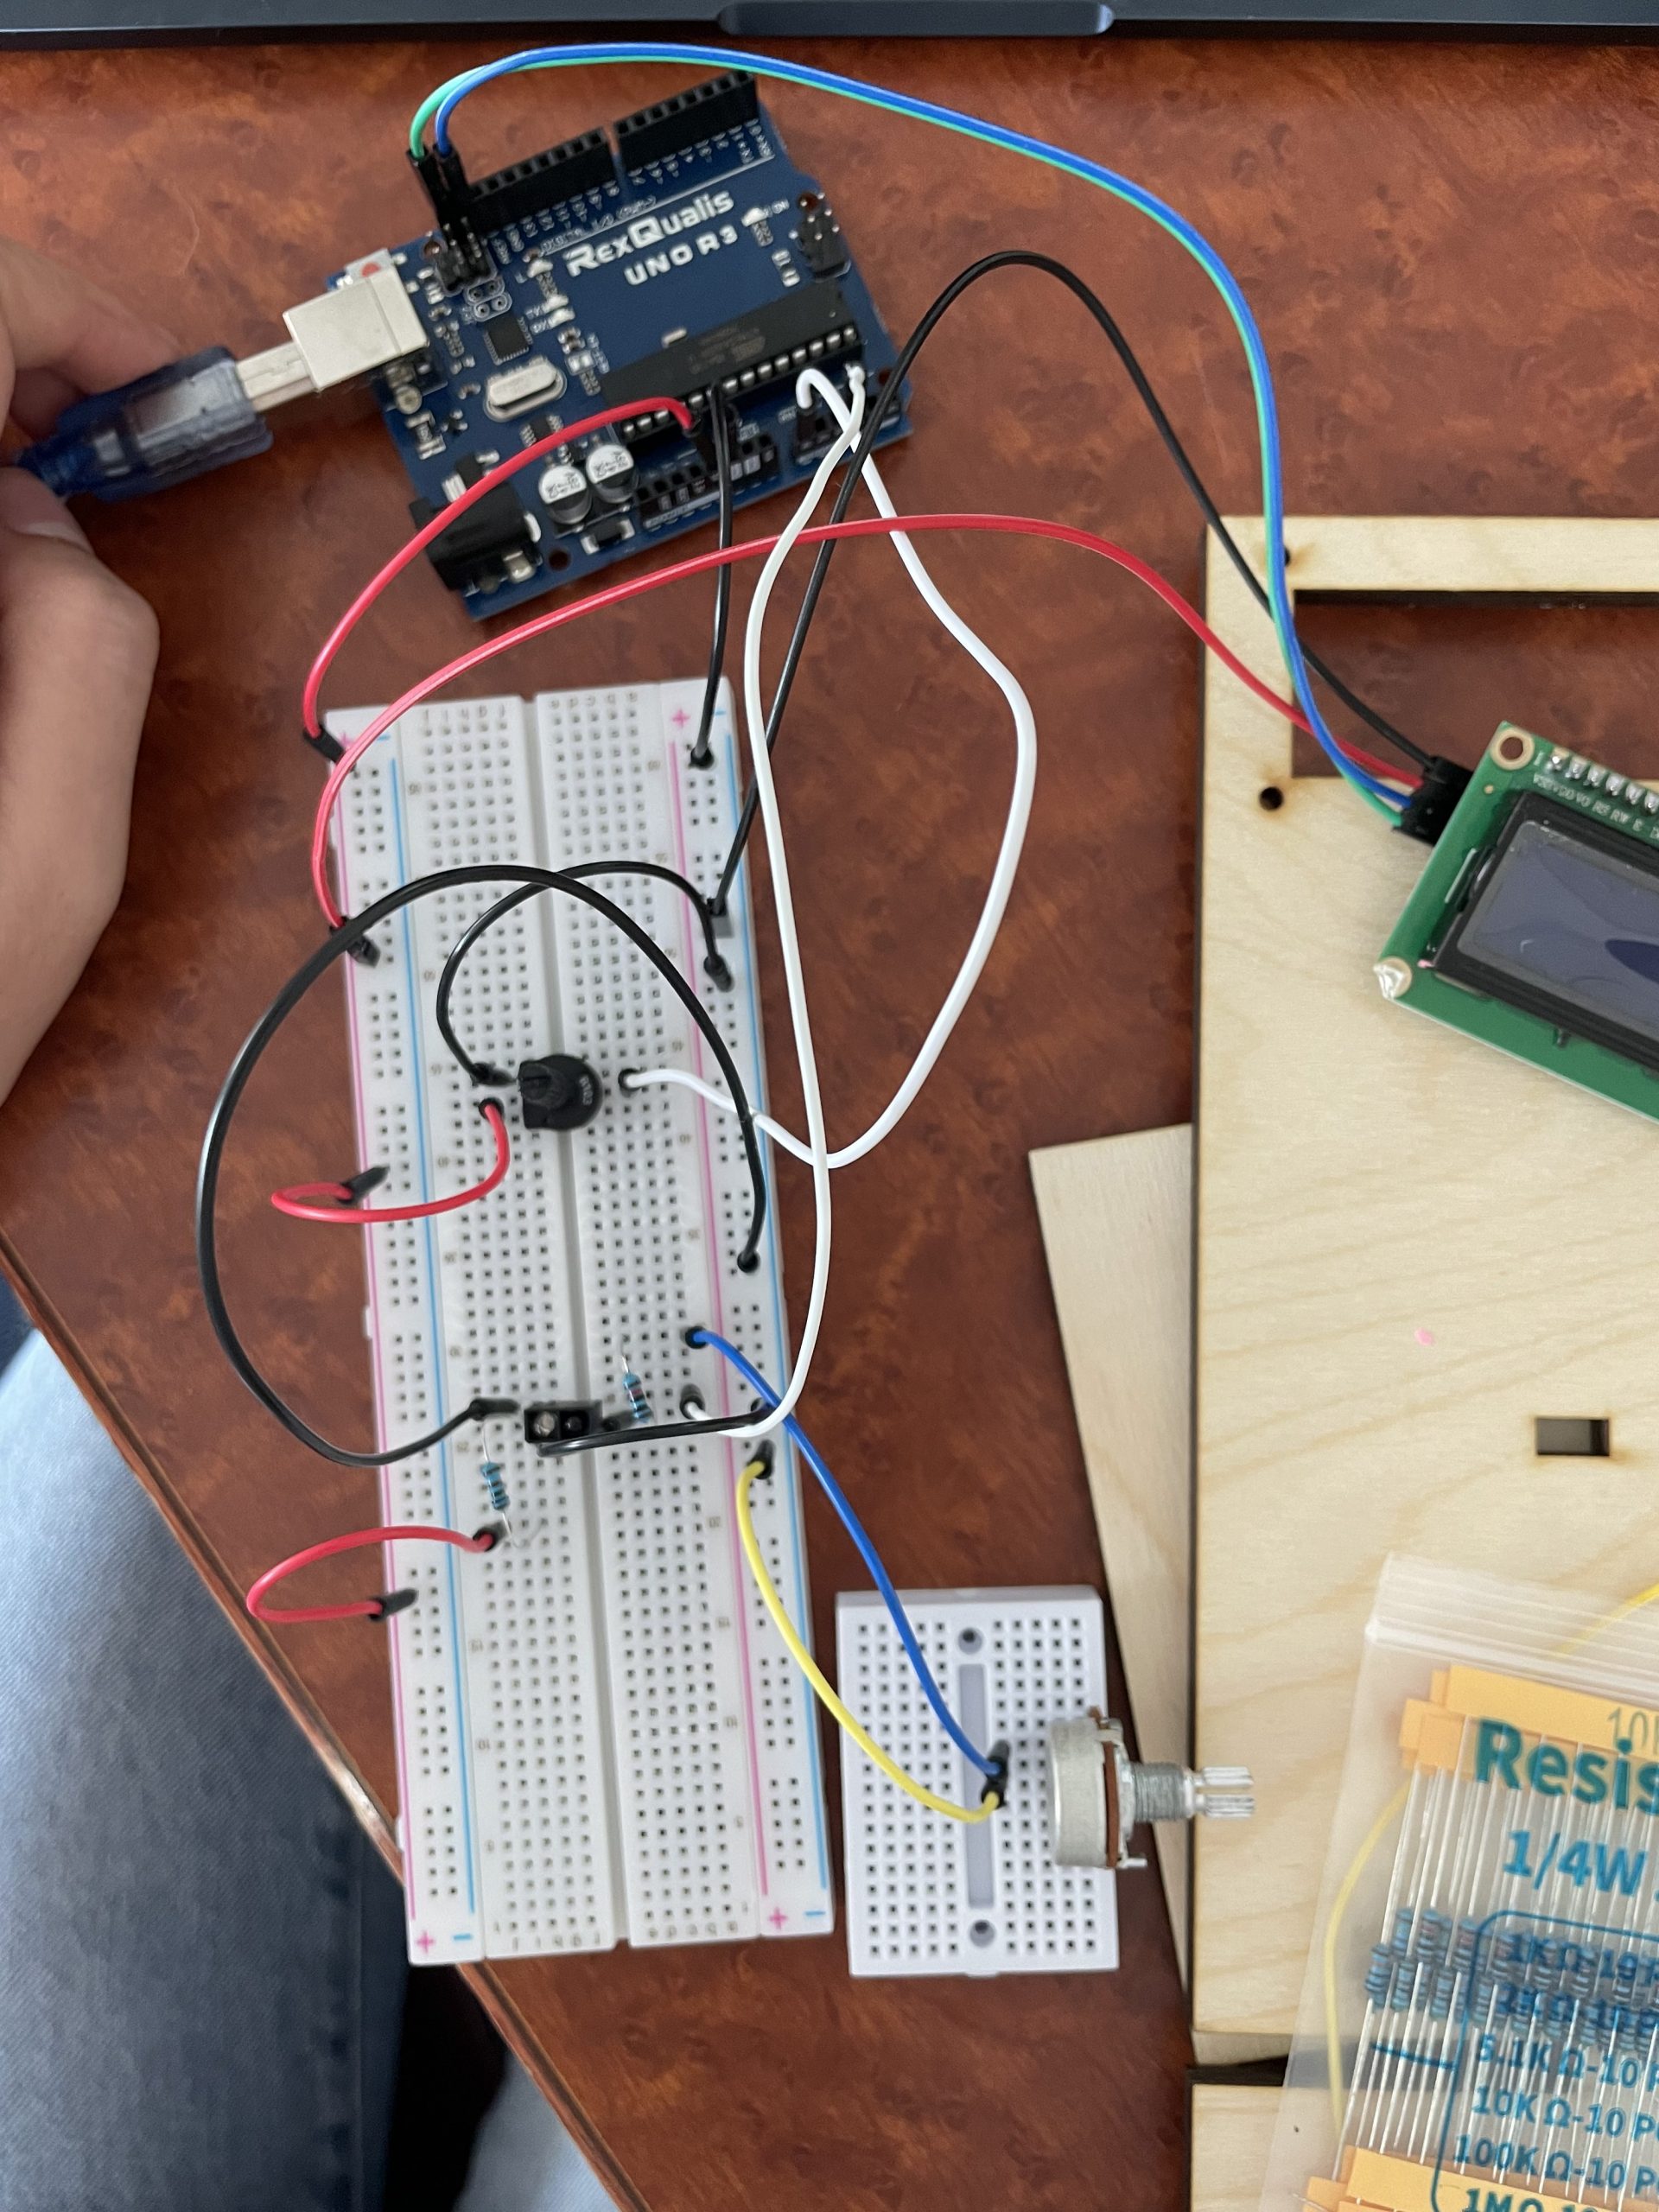
Trying (unsuccessfully) to get potentiometer + IR sensor + LCD all working in conjunction

Functioning electronics of the IR sensor.
Discussion
I would say that overall, I think my project went about as well as I expected it to go.
One critique I received was that the phone stand might be improved if “the wires and electronics were hidden in some type of enclosure”, and I would say that I definitely agree with that comment, as the back of the phone stand worked, but didn’t look very nice. When I was designing my device, the aesthetics were one of my last considerations, and I simply thought that by hiding all the wires behind the phone stand, to the user, the wiring wouldn’t be too obvious and not that much of a concern. While I think that held true, looking back, when I laser cut my phone stand, I could have easily incorporated some sort of box to store my electronics. Though I don’t expect to make another iteration of this project, if I were to make another phone stand, I would probably include some sort of box to store the electronics behind the phone stand, and I would also recut my cutouts for the LCD display/potentiometer to the correct measurements. Most of my focus in this project focused on the technical elements of the project, as I thought that my limitations in coding and hardware would make the project a bit challenging for me. With the help of Zach, I learned how to laser cut, and the coding wasn’t as challenging as I thought it would be, as using the event loops and different conditions, I managed to make a semi-working phone stand. Though my code did have bugs, it was mostly functional, so I was quite pleasantly surprised with my skills.
Another comment I received during the critique stated “The distance sensor was very accurate and the design as simple yet effective”, which I appreciated. Lots of comments commented on the simplicity and cleanliness of my design, and I would also agree with those comments. All in all, I think I learned a lot from this project, as it allowed me to build my skills with software as well as prototyping, and laser cutting. I think the idea I had from the beginning was pretty straightforward, and I had a good vision for what I needed to accomplish and reasonable expectations for myself, which contributed to the successes of my project.
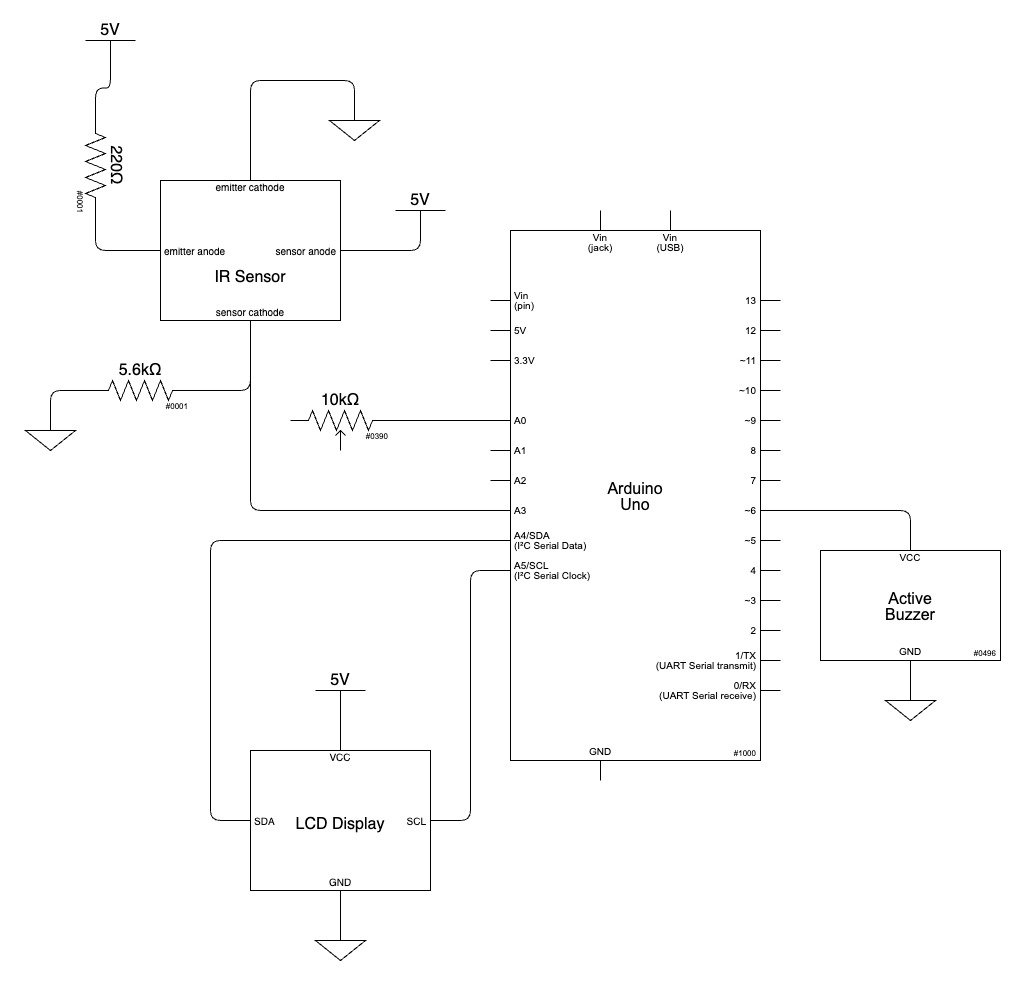
Schematic Diagram
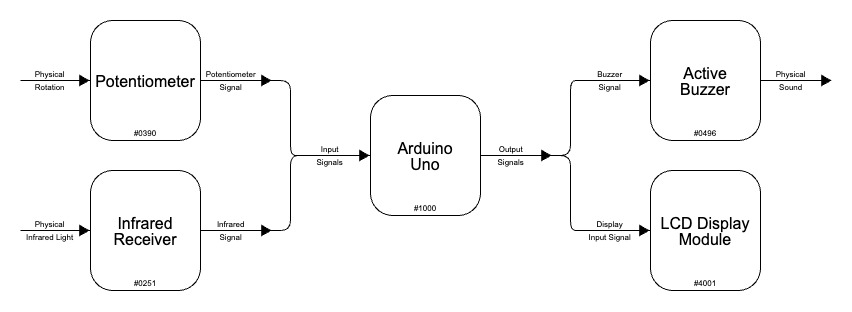
Block Diagram
Code
/*
 * Pomodoro Productivity Phone Stand
 * Frances Adiwijaya
 *
 * Description:
 *
 * This code controls the arduino behind a pomodoro phone stand.
 * It will display, on an LCD, the work/break time left in varying
 * pomodoro intervals, changeable by a potentiometer.
 * It will also use a speaker to beep when the phone is far from an
 * IR sensor, and the LCD will display a message to tell the user
 * to return the phone to the phone stand
 *
 * Pin Mapping:
 *
 * Arduino Pin   |   Description
 * ------------------------------
 * A0            |   Potentiometer
 * A3            |   Infrared Sensor
 * 6             |   Buzzer
 * SDA           |   SDA pin on LCD
 * SCL           |   SCL pin on LCD
 *
 * Sources:
 *
 * LCD Code:
 * https://courses.ideate.cmu.edu/60-223/f2022/tutorials/I2C-lcd
 * IR Code:
 * https://courses.ideate.cmu.edu/60-223/f2022/tutorials/IR-proximity-sensor
 * Event Timer Code:
 * https://courses.ideate.cmu.edu/60-223/f2022/tutorials/code-bites#blink-without-blocking
 * Buzzer Code:
 * https://create.arduino.cc/projecthub/SURYATEJA/use-a-buzzer-module-piezo-speaker-using-arduino-uno-89df45
 *
 */

//import necessary libraries
#include <Wire.h>
#include <LiquidCrystal_I2C.h>

LiquidCrystal_I2C screen(0x27, 16, 2);

// set up the (constant) variables
// for the mode: work = 0, break = 1, longbreak = 2
int mode = 0;
int breakcount = 0;
unsigned long workTimer = 0;
unsigned long breakTimer = 0;
unsigned long longbreakTimer = 0;
unsigned long updateTimer = 0;
long UPDATEWAIT = 1000;
const int POTPIN = A0;
const int IRPIN = A3;
long interval = 1000;
long BREAKWAIT = 0;
long WORKWAIT = 0;
long LONGBREAKWAIT = 0;
int breakcounter = BREAKWAIT / 1000;
int workcounter = WORKWAIT / 1000;
int longbreakcounter = LONGBREAKWAIT / 1000;
const int BUZZERPIN = 6;


// initialize screen and pins
void setup() {
  // put your setup code here, to run once:
  pinMode(POTPIN, INPUT);
  pinMode(IRPIN, INPUT);
  Serial.begin(9600);
  Serial.println("starting...");
  screen.init();
  screen.backlight();
  pinMode(BUZZERPIN, OUTPUT);

}

void loop() {
  // check the value of the potentiometer and map it to the time intervals
  unsigned long potVal;
  potVal = analogRead(POTPIN);
  potVal = map(potVal, 0, 1023, 1000, 30000);
  unsigned long breaktime = potVal / 5;

  int distanceVal = analogRead(IRPIN);
  Serial.println(distanceVal);

  // create the pomodoro intervals
  BREAKWAIT = breaktime;
  WORKWAIT = potVal;
  LONGBREAKWAIT = breaktime * 4;


  // put your main code here, to run repeatedly:
  // if we're in break mode:
  if (mode == 1) {
    // if the break timer is up enter the statement
    if ((millis() - breakTimer >= BREAKWAIT)) {
      Serial.println("switching to work");
      // increment the short break count
      breakcount += 1;
      // reset all timers
      longbreakTimer = millis();
      workTimer = millis();
      breakTimer = millis();
      // recheck the intervals
      breakcounter = BREAKWAIT / 1000;
      workcounter = WORKWAIT / 1000;
      longbreakcounter = LONGBREAKWAIT / 1000;
      // switch to work mode
      mode = 0;
    }
    // update the LCD display every second, and count down
    if ((millis() - updateTimer >= UPDATEWAIT)) {
      screen.clear();
      screen.setCursor(0, 0);
      screen.print("break: ");
      breakcounter = breakcounter - 1;
      Serial.println(breakcounter);
      screen.print(breakcounter+1);
      updateTimer = millis();
    }
  }
  // if we're in work mode:
  if (mode == 0) {
    // if the work timer is up
    if ((millis() - workTimer >= WORKWAIT)) {
      //check if we're on a break or a long break
      //if next is a longbreak, enter the statement
      if (breakcount > 3) {
        Serial.println("switching to longbreak");
        // reset all timers
        longbreakTimer = millis();
        workTimer = millis();
        breakTimer = millis();
        breakcounter = BREAKWAIT / 1000;
        workcounter = WORKWAIT / 1000;
        longbreakcounter = LONGBREAKWAIT / 1000;
        // switch to longbreak mode
        mode = 2;
      }
      //if next is a regular break, enter the statement
      else {
        Serial.println("switching to break");
        // reset all timers
        longbreakTimer = millis();
        workTimer = millis();
        breakTimer = millis();
        breakcounter = BREAKWAIT / 1000;
        workcounter = WORKWAIT / 1000;
        longbreakcounter = LONGBREAKWAIT / 1000;
        // switch to break mode
        mode = 1;
      }
    }
    // if the IR distance sensor registers a value too large, enter the loop
    if ((distanceVal < 200)) {
      // display a message on the LCD
      screen.clear();
      screen.setCursor(0, 0);
      screen.print("Put Phone Back!");
      Serial.println("IR Val");
      Serial.println(distanceVal);
      // beep the buzzer
      delay(200);
      tone(BUZZERPIN, 1000); // Send 1KHz sound signal...
      delay(1000);        // ...for 1 sec
      noTone(BUZZERPIN);     // Stop sound...
      delay(1000);        // ...for 1sec
    }
    // update LCD to count down every second
    if ((millis() - updateTimer >= UPDATEWAIT)) {
      screen.clear();
      screen.setCursor(0, 0);
      screen.print("work: ");
      workcounter = workcounter - 1;
      Serial.println(workcounter);
      screen.print(workcounter);
      updateTimer = millis();
    }
  }
  // if we're in longbreak mode
  if (mode == 2) {
    // if the timer is over, enter the statement
    if (millis() - longbreakTimer >= LONGBREAKWAIT) {
      Serial.println("switching to work");
      // reset the breakcount
      breakcount = 0;
      // reset all timers
      longbreakTimer = millis();
      workTimer = millis();
      breakTimer = millis();
      breakcounter = BREAKWAIT / 1000;
      workcounter = WORKWAIT / 1000;
      longbreakcounter = LONGBREAKWAIT / 1000;
      // switch to work mode
      mode = 0;
    }
    // count down on LCD
    if ((millis() - updateTimer >= UPDATEWAIT)) {
      screen.clear();
      screen.setCursor(0, 0);
      screen.print("long break: ");
      longbreakcounter = longbreakcounter - 1;
      Serial.println(longbreakcounter);
      screen.print(longbreakcounter+1);
      updateTimer = millis();
    }
  }
}