
Overview
Slap on light switch
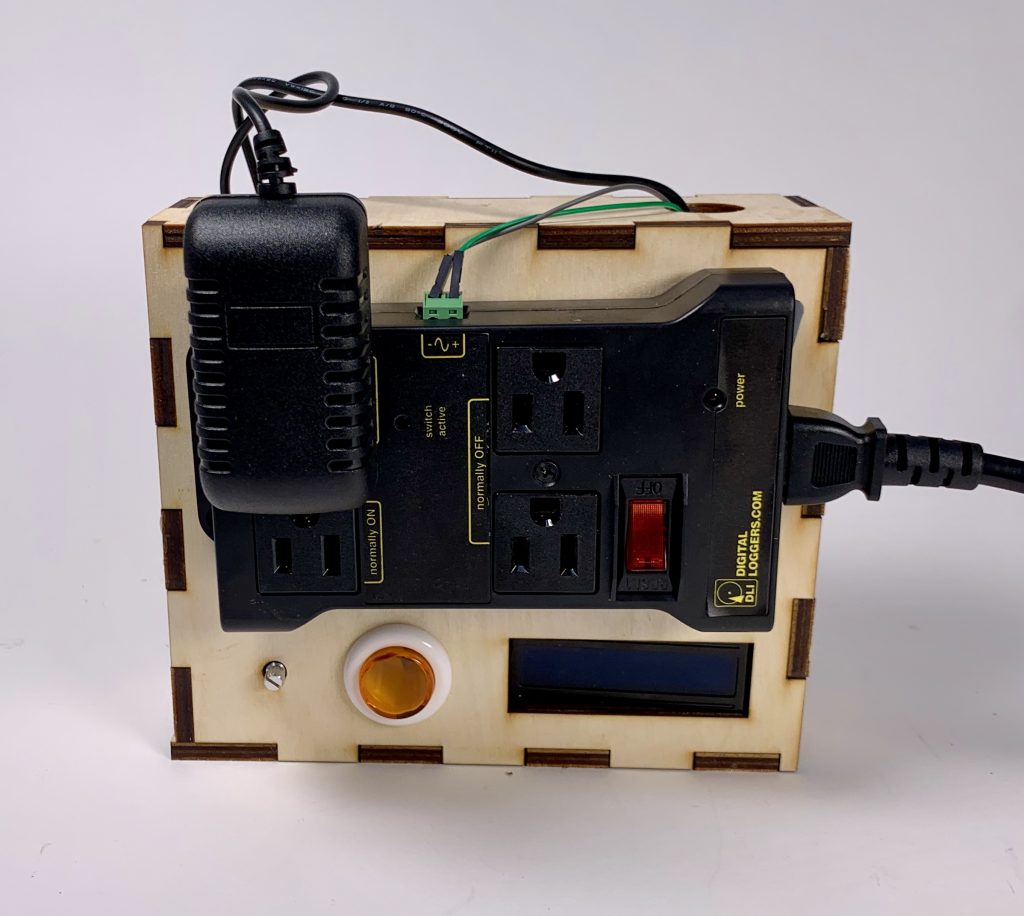
Front face of the Slap On Light Switch
The device detects vibrations of a dry wall, and toggles a power source for lights and other everyday appliances.
Process
design choices made
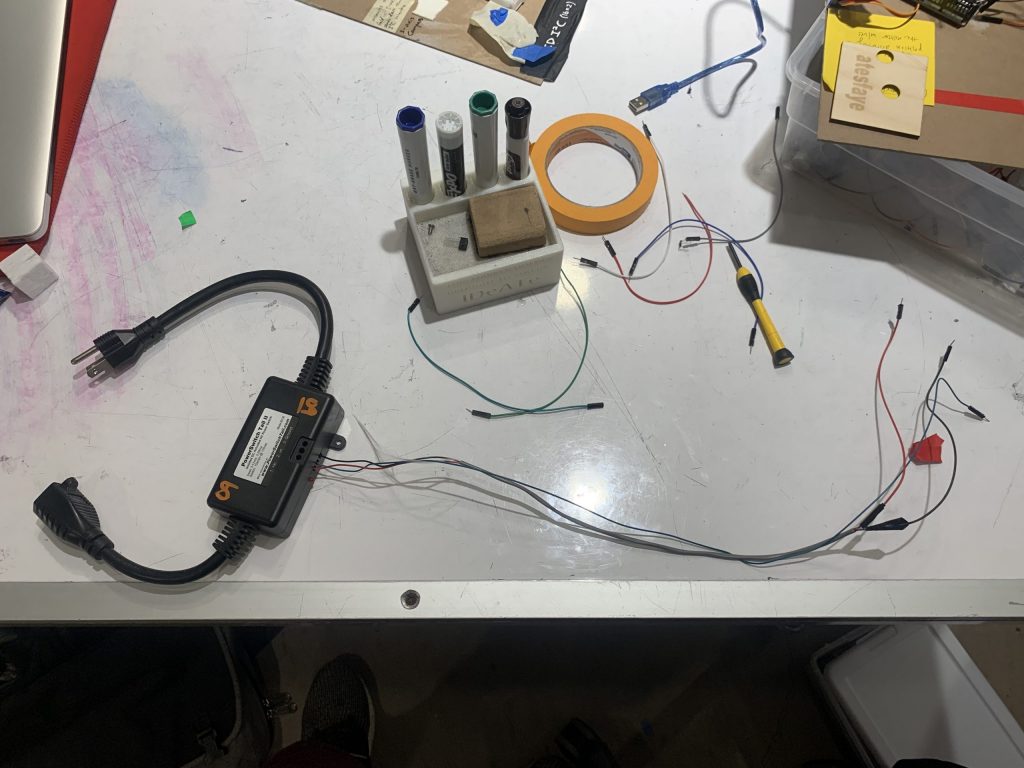
Wiring of the Powerswitch Tail before changing hardware
In my first working prototype, I was able to use a Powerswitch Tail from adafruit which was lended from IDeATe. The Powerswitch Tail is a discontinued device that takes 5V input to toggle a 120V outlet. The use of the Powerswitch Tail allowed me to work with high voltage wall plugs without actually wiring into it. However, I decided that it would seem pointless to make a device to help with my everyday life if I had to return it after the project. So I had to look for an alternative. This choice meant I had to push back the hardware testing and exterior design of the project, but I felt like it was worth it. I was able to find an alternative Four Outlet Power Relay Module. It was bulkier but worked after tweaking the code as instead of a power, ground, data input found in the Powerswitch Tail, it was just a Vin and Vout.
Addition of button to the circuitry
Another choice I had to make was the process of resetting the device. Originally, I had wanted zero input beyond the wall knocking into the device to simplify the process. However, this would’ve meant that anytime I needed to debug, I would need to connect the arduino to my laptop. I decided that the two main things I needed to ever edit was the zero and the sensitivity of the device. So I added a button and a potentiometer to my project.
additional process photos
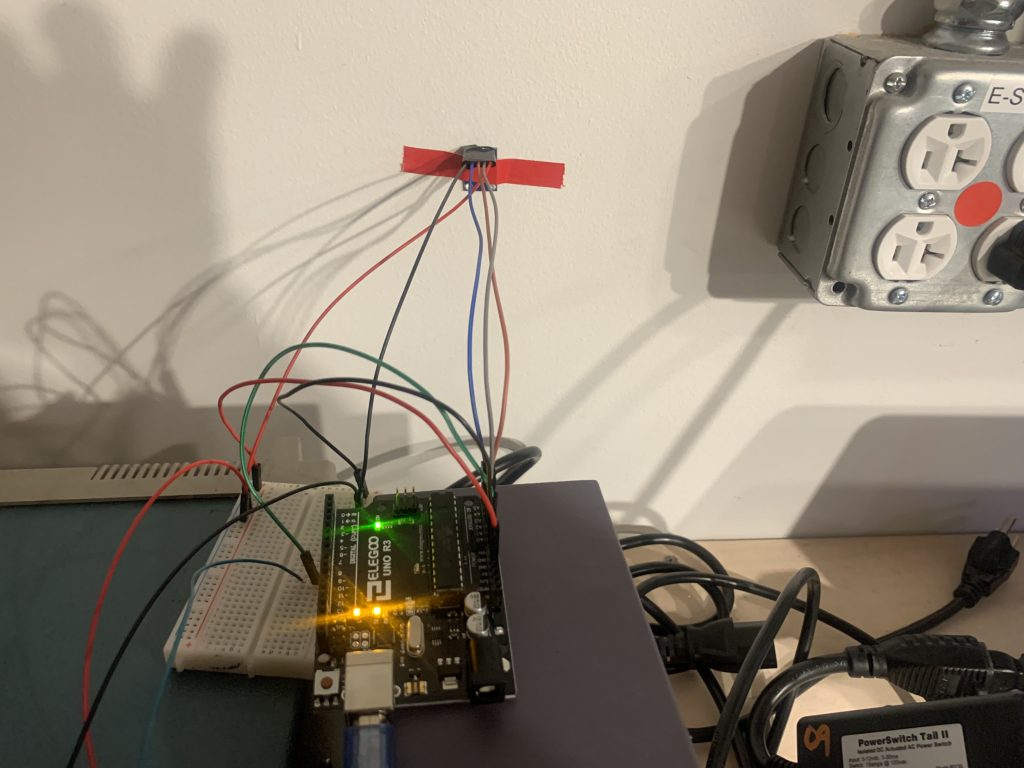
Testing data input from accelerometer’s reaction to dry wall knocking. As I only theorized about the detection during the planning phase
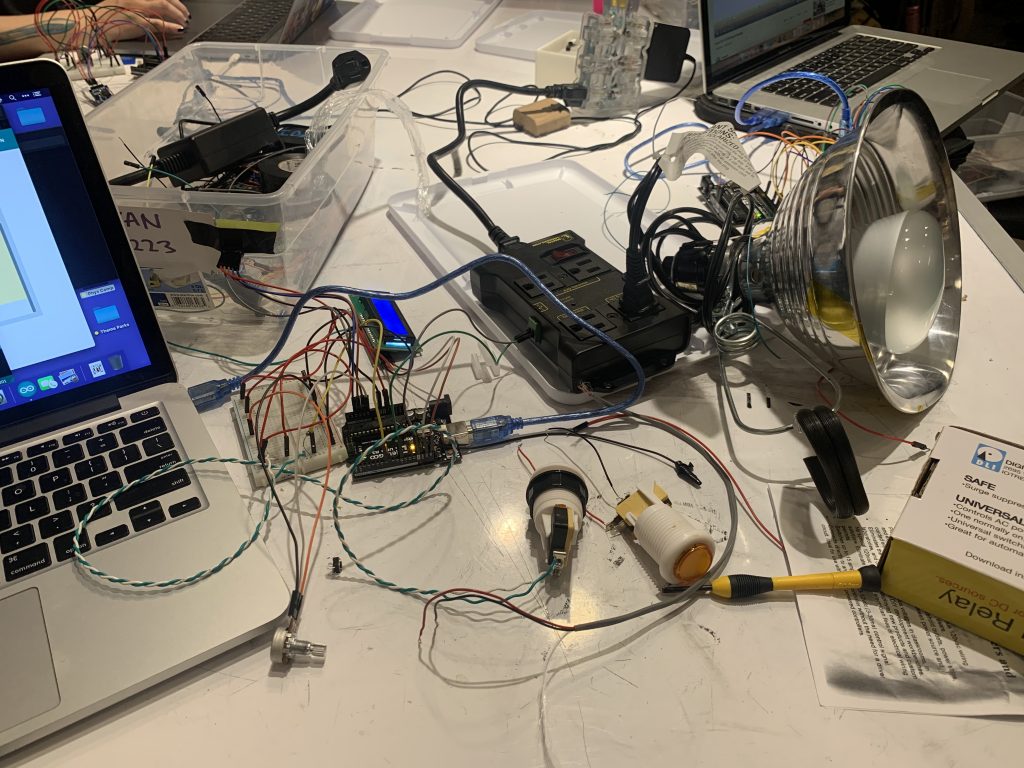
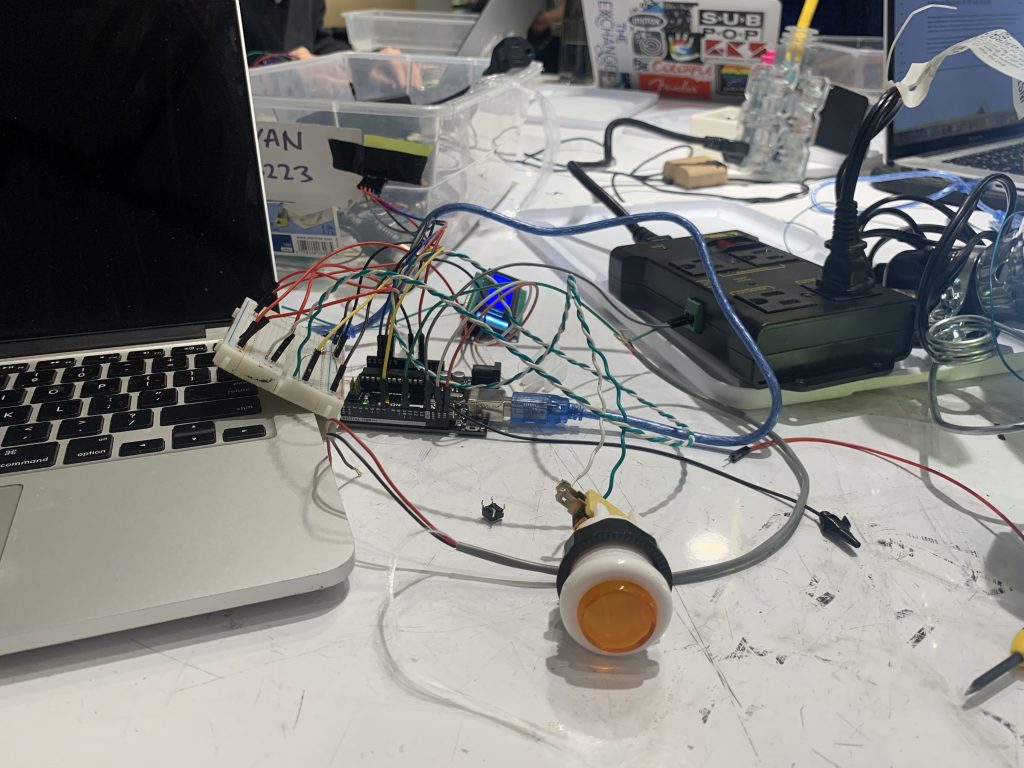
Complete Circuitry with accelerometer, potentiometer, button, Power Relay, and LCD output
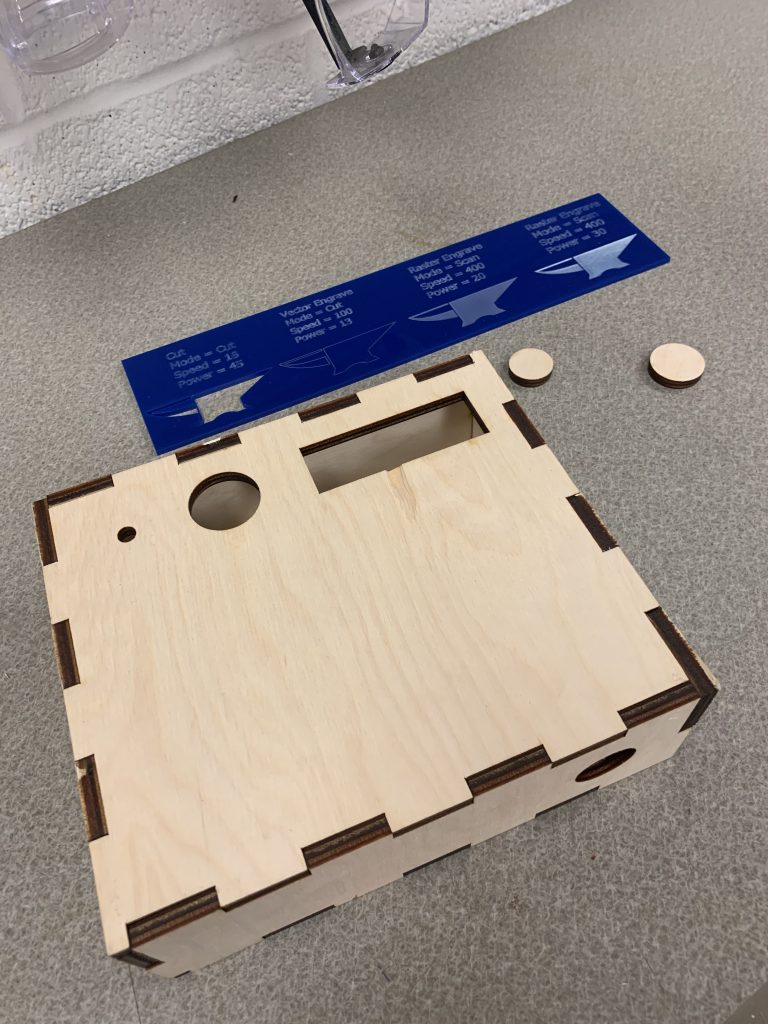
Complete laser cut exterior
Discussion
Response
“It looks neatly done.It’s not very marketable in the sense that there is a very specific reason you wanted to make this. It works great.”
I think that it is actually very marketable as it is very versatile. Since the device controls just a regular wall plug, it could apply to a lot of different devices. I can see that the input could be too specific, but there are dry walls in every building, and it could work very well in an apartment or house if the dry wall separates two rooms of the same house.
I like the novelty of the device. Good catch with the debouncing filter as well. Seems quite cathartic too (if you’re using knocks to toggle the light).
I think I should explore the therapeutic aspect of the device more. A lot of feedback, written and verbal, talked about how cathartic and fun it is to use.
self critique
I am very happy with the project. This is the first “thing” I think I’ve made on my own since coming to CMU, so the design process not something I was familiar with. As such, I think I gave myself an easier task technology wise. I think I have created what I had in mind. I do think I could’ve done better with the designing stage, as I am prone to just play around with parts and tinker until I figure everything out.
what I’ve learned
It was the first time I used the laser cutter for a project like this. I think that I am now better and designing and planning out a box using the laser cutter, as I think I spent ages on figuring out the corners and slots for the box. I’ve also learned how bright and intense LCD lights are, which defeats the purpose of my light switch if I have a constant LCD light shining in the corner.
next steps
I think the next step is downsizing the device. I think that will take using an arduino nano, as well as figuring out how the power relay works so that I can custom make my own. I would separate the accelerometer from the rest of the device so that I could attach it further away from the wall plug. I have found that the more central the sensor is, the more sensitive it is – which makes sense from a physics perspective, the center of a string moves more during a vibration, say on a guitar.
Technical Information
schematic
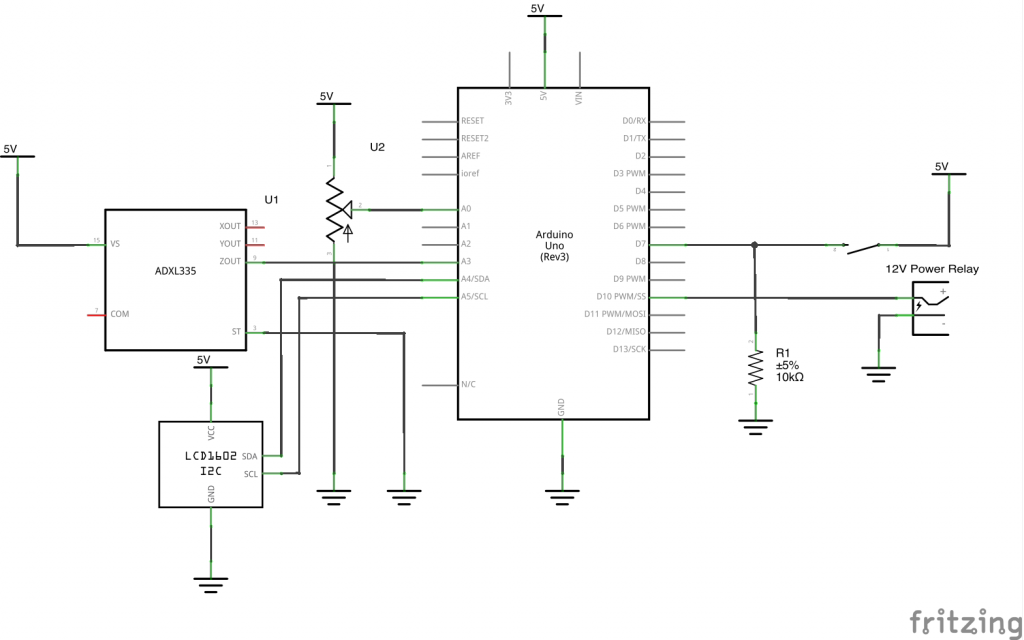
Schematic from fritzing
Code
/*
 * Slap On Light Switch
 *
 * Description: Detects variation in the z-axis of the accelerometer, and
 * toggles the power relay by sending toggling the 5V power supply to the
 * relay. The detection is controlled by a potentiometer for its sensitivity
 * and button for its zero
 *
 * pin mapping:
 *
 * pin      mode      descr
 * A0       input     potentiometer to control sensitivity
 * A3       input     z-axis of accelerometer
 * SDA/SCL            I2C LCD Display
 * 7        input     button to zero
 * 10       output    Power Relay Toggle
 */

#include <Wire.h>
#include <LiquidCrystal_I2C.h>
LiquidCrystal_I2C screen(0x27, 16, 2); //create screen called screen

//setup timing
unsigned long timer = 0;
const int INTERVAL = 500;

// read the three axes of an analog accelerometer
const int ZPIN = A3;
const int TAILPIN = 10;
const int RESETPIN = 7;
const int POTPIN = A0;
int threshold;
int sensitive;
bool lightmode = false;

void setup() {
  //pin setups
  pinMode(ZPIN, INPUT);
  pinMode(TAILPIN, OUTPUT);
  pinMode(RESETPIN, INPUT);
  pinMode(POTPIN, INPUT);

  Serial.begin(9600);
  //turn off power relay
  digitalWrite(TAILPIN, HIGH);
  threshold = analogRead(ZPIN);

  //set up screen
  screen.init();
  screen.backlight();
  screen.home();
  screen.print("booting up");

  delay(500);

  if (threshold == analogRead(ZPIN)){
    threshold = analogRead(ZPIN);
  } else {
    threshold = analogRead(ZPIN);
  }
}

void loop() {
  int measured = analogRead(ZPIN);
  int reset = digitalRead(RESETPIN);
  //set sensitivity
  sensitive = map(analogRead(POTPIN), 0, 1022, 1, 20);

  //detects knock input toggle switch
  if (abs(measured - threshold) > sensitive) {
    if (lightmode){
      digitalWrite(TAILPIN, HIGH);
      lightmode = false;
      screen.setCursor(8,1);
      screen.print(" ON");
      delay(500);
    }
    else {
      digitalWrite(TAILPIN, LOW);
      lightmode = true;
      screen.setCursor(8,1);
      screen.print("OFF");
      delay(500);
    }}

  //resetting the zero
  if (reset == HIGH){
    screen.clear();
    screen.print("resetting");
    threshold = analogRead(ZPIN);
    delay(500);
  }

  //timer for LCD
  if (millis() >= timer){
      //reset screen
      screen.clear();
      screen.setCursor(0, 0);
      screen.print("b:      m:");
      screen.setCursor(0, 1);
      screen.print("s:");

      //print numbers
      screen.setCursor(2,0);
      screen.print(threshold);
      screen.setCursor(10,0);
      screen.print(measured);
      screen.setCursor(2,1);
      screen.print(sensitive);
      screen.setCursor(8,1);
      if (lightmode){
        screen.print(" ON");
      } else {
        screen.print("OFF");
      }
      timer = millis() + INTERVAL;
  }
  Serial.print(threshold);
  Serial.print(",");
  Serial.print(measured);
  Serial.print(",");
  Serial.print(lightmode);
  Serial.print(",");
  Serial.println(reset);
}
Comments are closed.