Introduction
This is a documentation for Team Emily’s prototyping for the mouse detector idea that we decided to build for Emily after our initial meeting with her. Yun made a looks-like/behaves-like prototype, Youie made a looks-like prototype, and Alan made a works-like prototype. This documentation includes the descriptions and pictures of our prototypes, discussion of our prototyping process, feedback, and future work.
Prototypes
1. Looks-Like/Behaves-like Prototype (Yun)
Despite there being similar products such as mice traps and detectors in the market, what makes this product special is in interesting notifications. Due to the COVID-19 situation, Emily needs to social-distance herself at her house, and, thus, wanted something that could entertain her. This prototype was designed to help answer whether this device is entertaining, and furthermore, easy and safe to use in general.
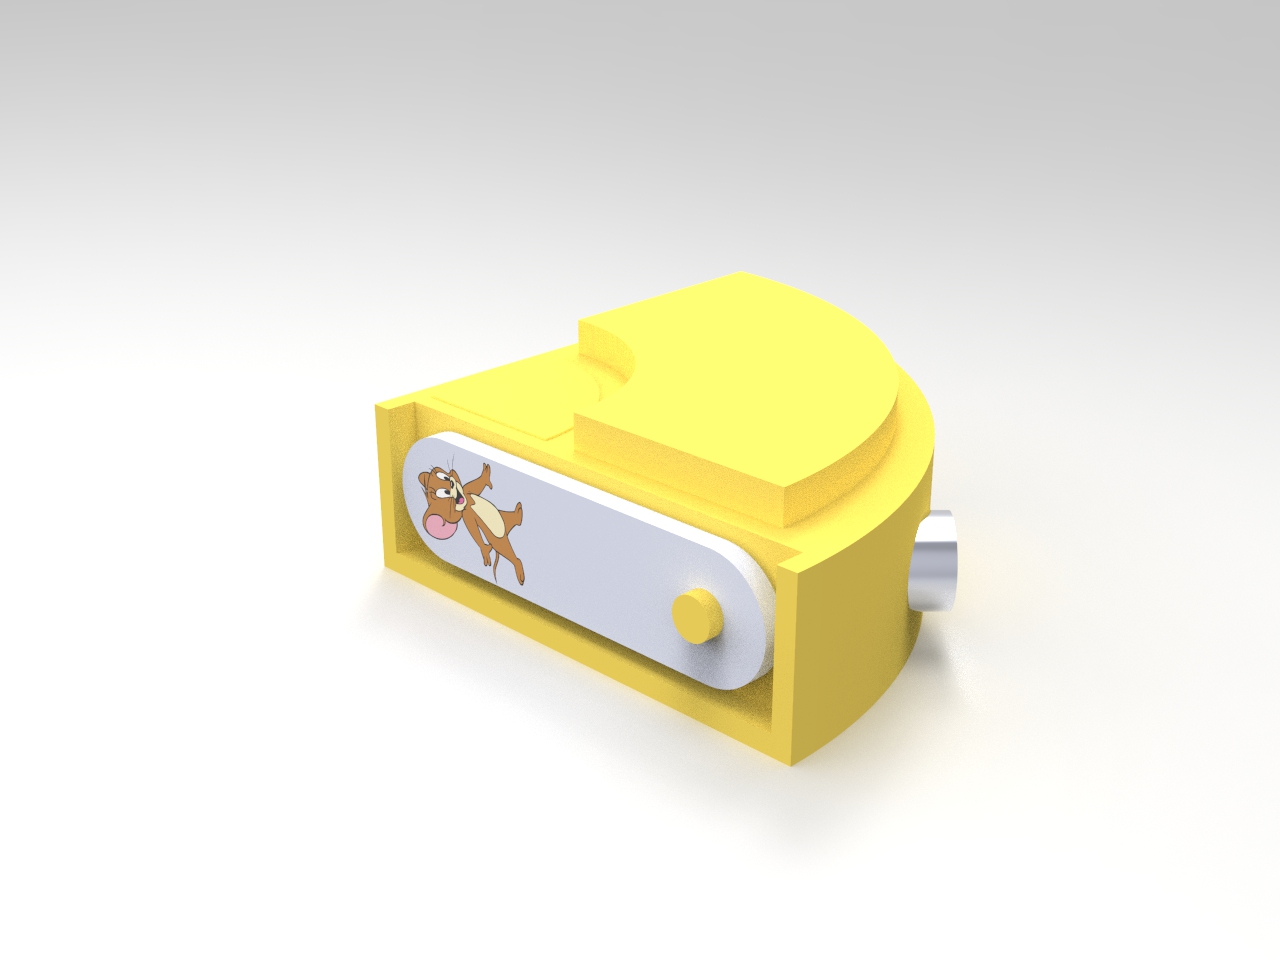
The prototype is in a stereotypical cheese shape, and is built out of yellow corrugated cardboard sheet. On one side, it has a hole that represents a mouse detecting PIR sensor, and on the other side, it has a mouse shape panel, which will rotate and appear when the mouse appears, working as one of the notification systems. On the top, it has multiple circular corrugated cardboard sheets, which are part of the design choice, but also represent a speaker unit that will play Tom and Jerry music when the device detects a mouse. In the bottom, it has three identical springs, which represent a reset button that Emily can press with her foot.
An initial sketch of the prototype design
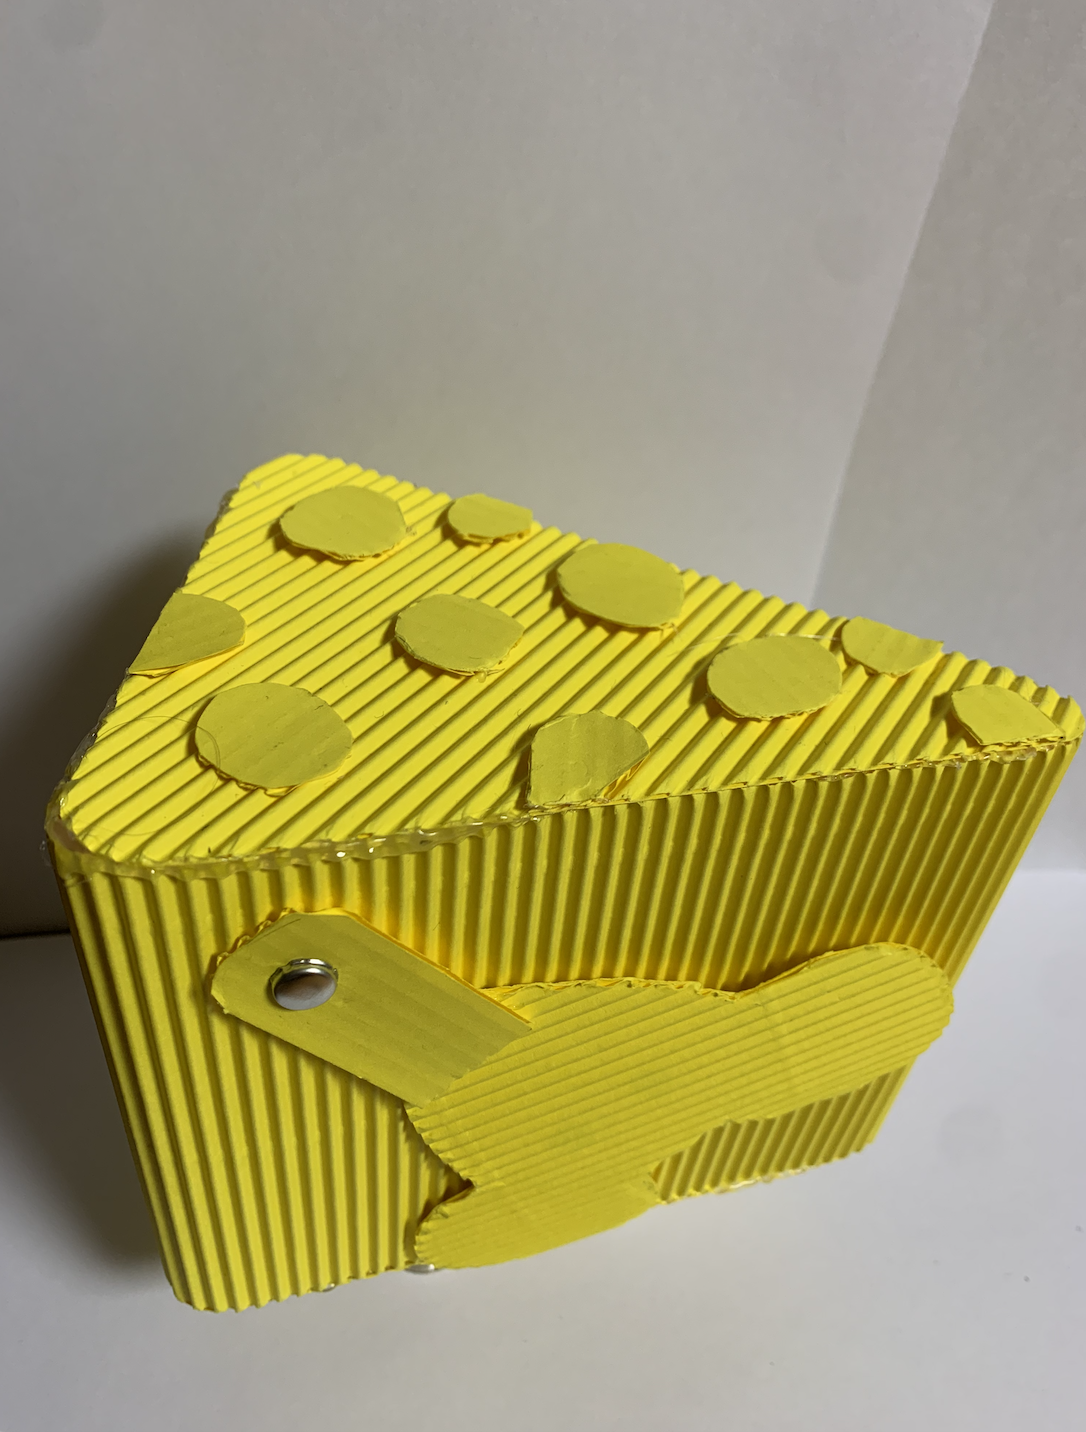
The overview of the prototype with a speaker unit on the top

A side of the prototype with a sensor
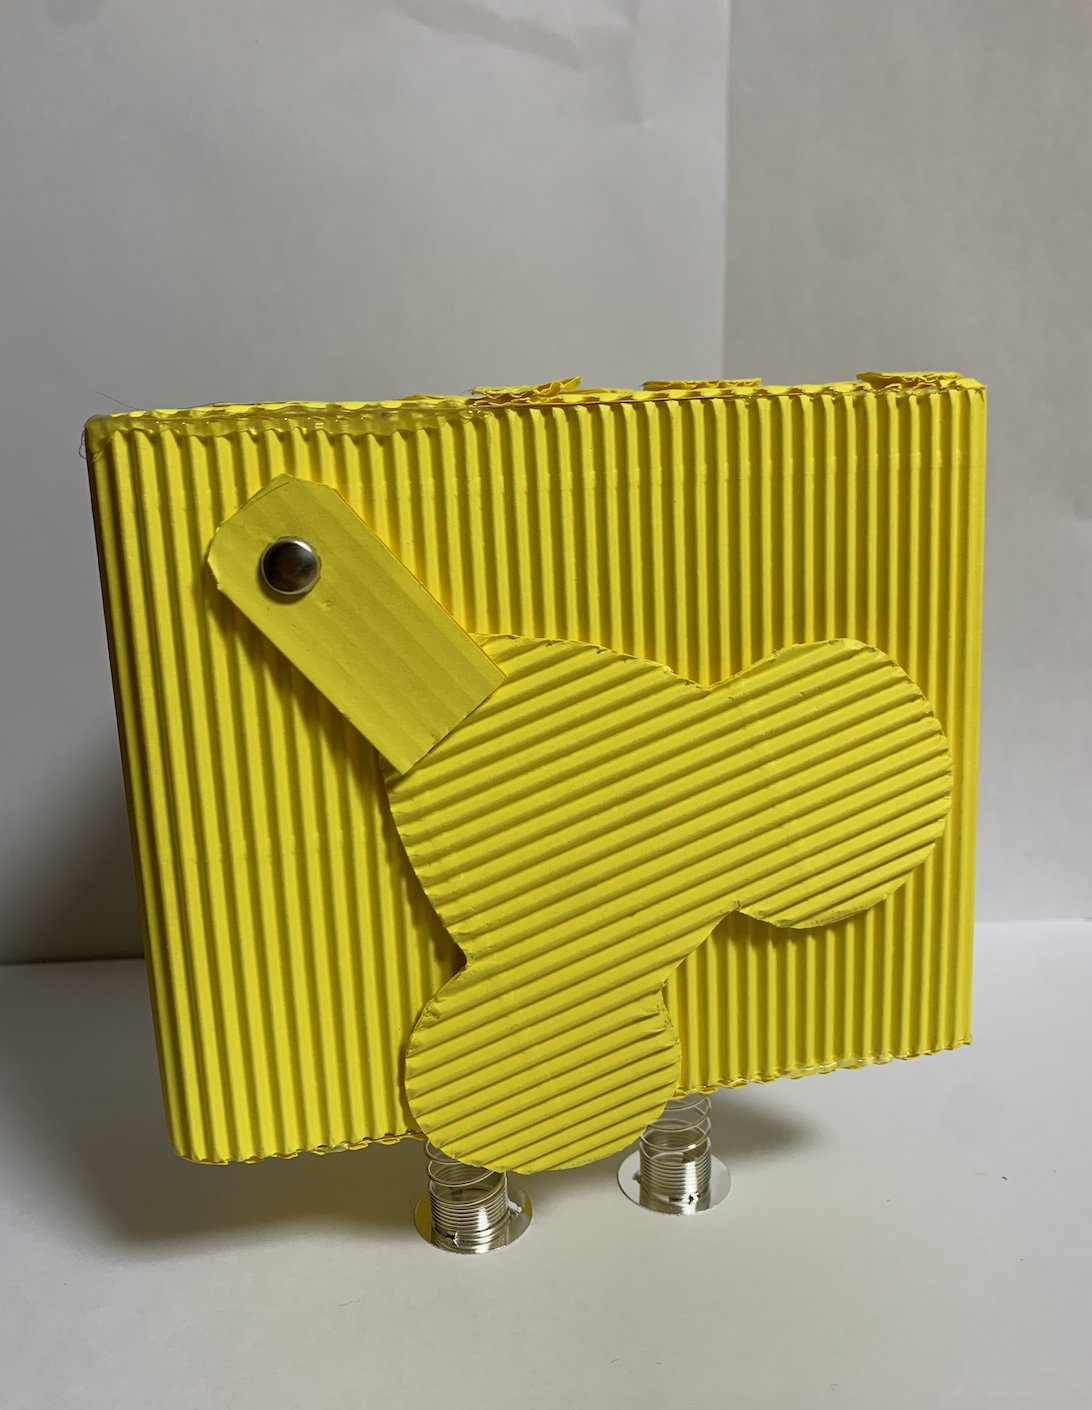
A side of the prototype with a mouse panel notification
When the device detects a mouse with the sensor, it will show up the mouse panel from the back
My mom gave me some feedback on design and safety. When she tried to push the reset button by pressing the device with her foot, it was hard to balance her body so she needed to put her one hand on the wall. She suggested having a handle on the wall that has the device. However, I thought there can be other ways I can solve the problem within the device rather than installing extra devices elsewhere, and decided to make the device shorter and wider. On top of that, my teammate Youie suggested to put a button on the top of the device rather than on the bottom, which will definitely make the device safer for Emily to use.
Emily herself liked the design and entertainment components of the device: the cheese shape, Tom and Jerry music, and the mouse shape panel. However, she said the music I chose may be too loud that can startle her often. Thus, I got some different music track candidates such as Ratatouille soundtrack or The Cat and the Mouse piano, which are more soothing, but can still remind Emily of mice.
Moreover, she originally wanted the device to be around the wall and corner; however, during the prototype feedback session she let us know that mice appear near her refrigerator so it might be better to install the device around there. On top of that she was concerned that the sensor might detect small kids at her house as mice, and suggested the device to be a tunnel shape that can attract mice into it. We thought of the tunnel shape prototype as well in the beginning, but decided not to have it as the device is not meant to trap mice; however her concern was very reasonable that we are trying to improve the design considering both Emily’s concern and the space we are given.
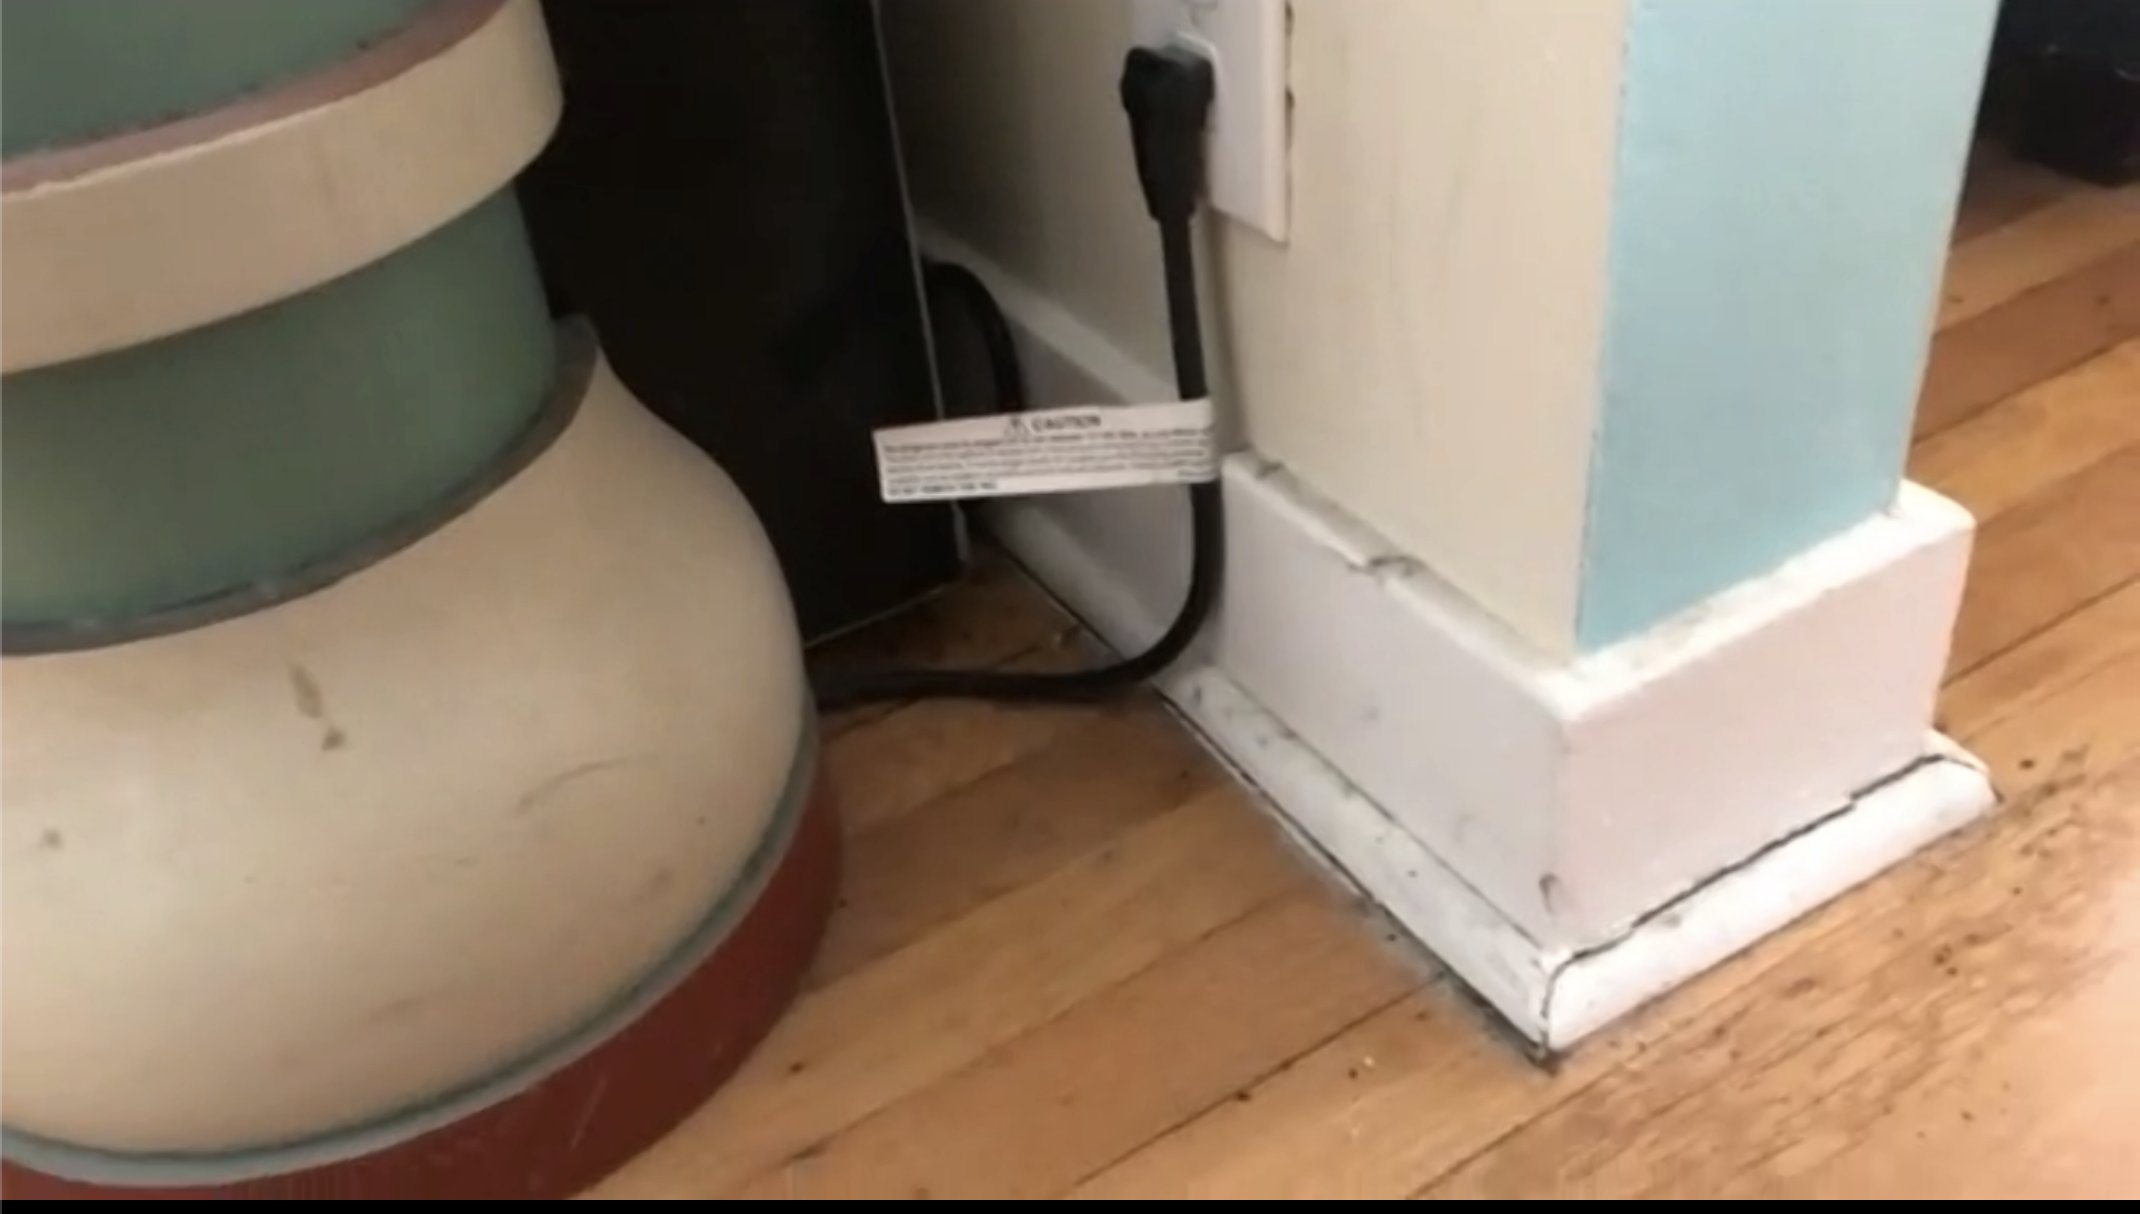
A potential space Emily suggested for installing the device
2. Looks-Like Prototype (Youie)
This prototype was designed to help visualize a relatively concise design and stable structure that would fit well with the context.
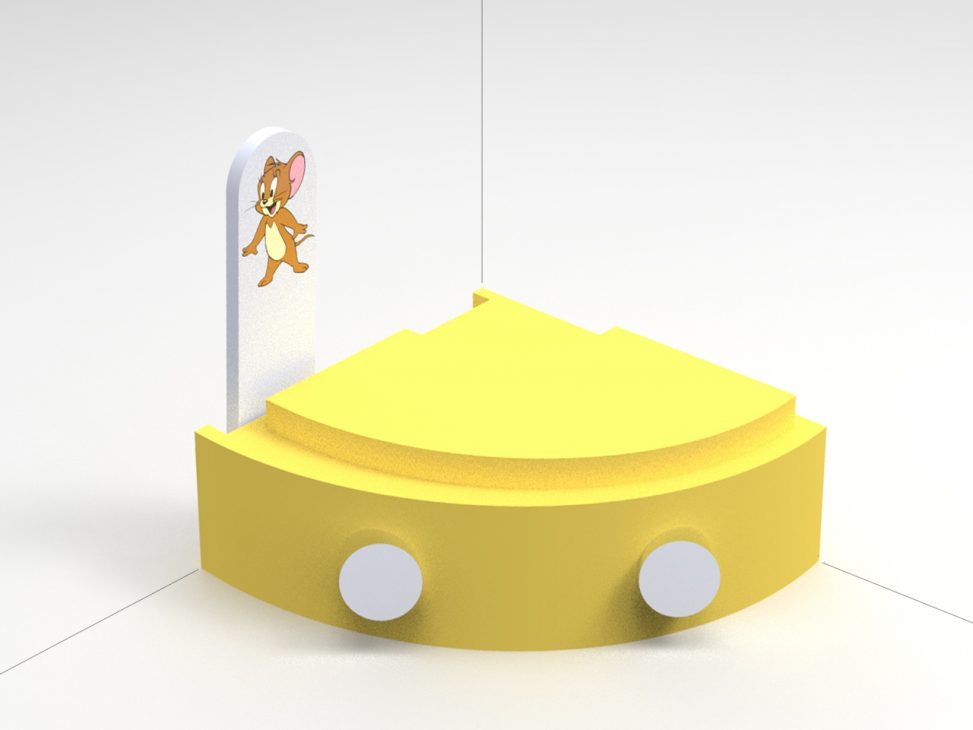
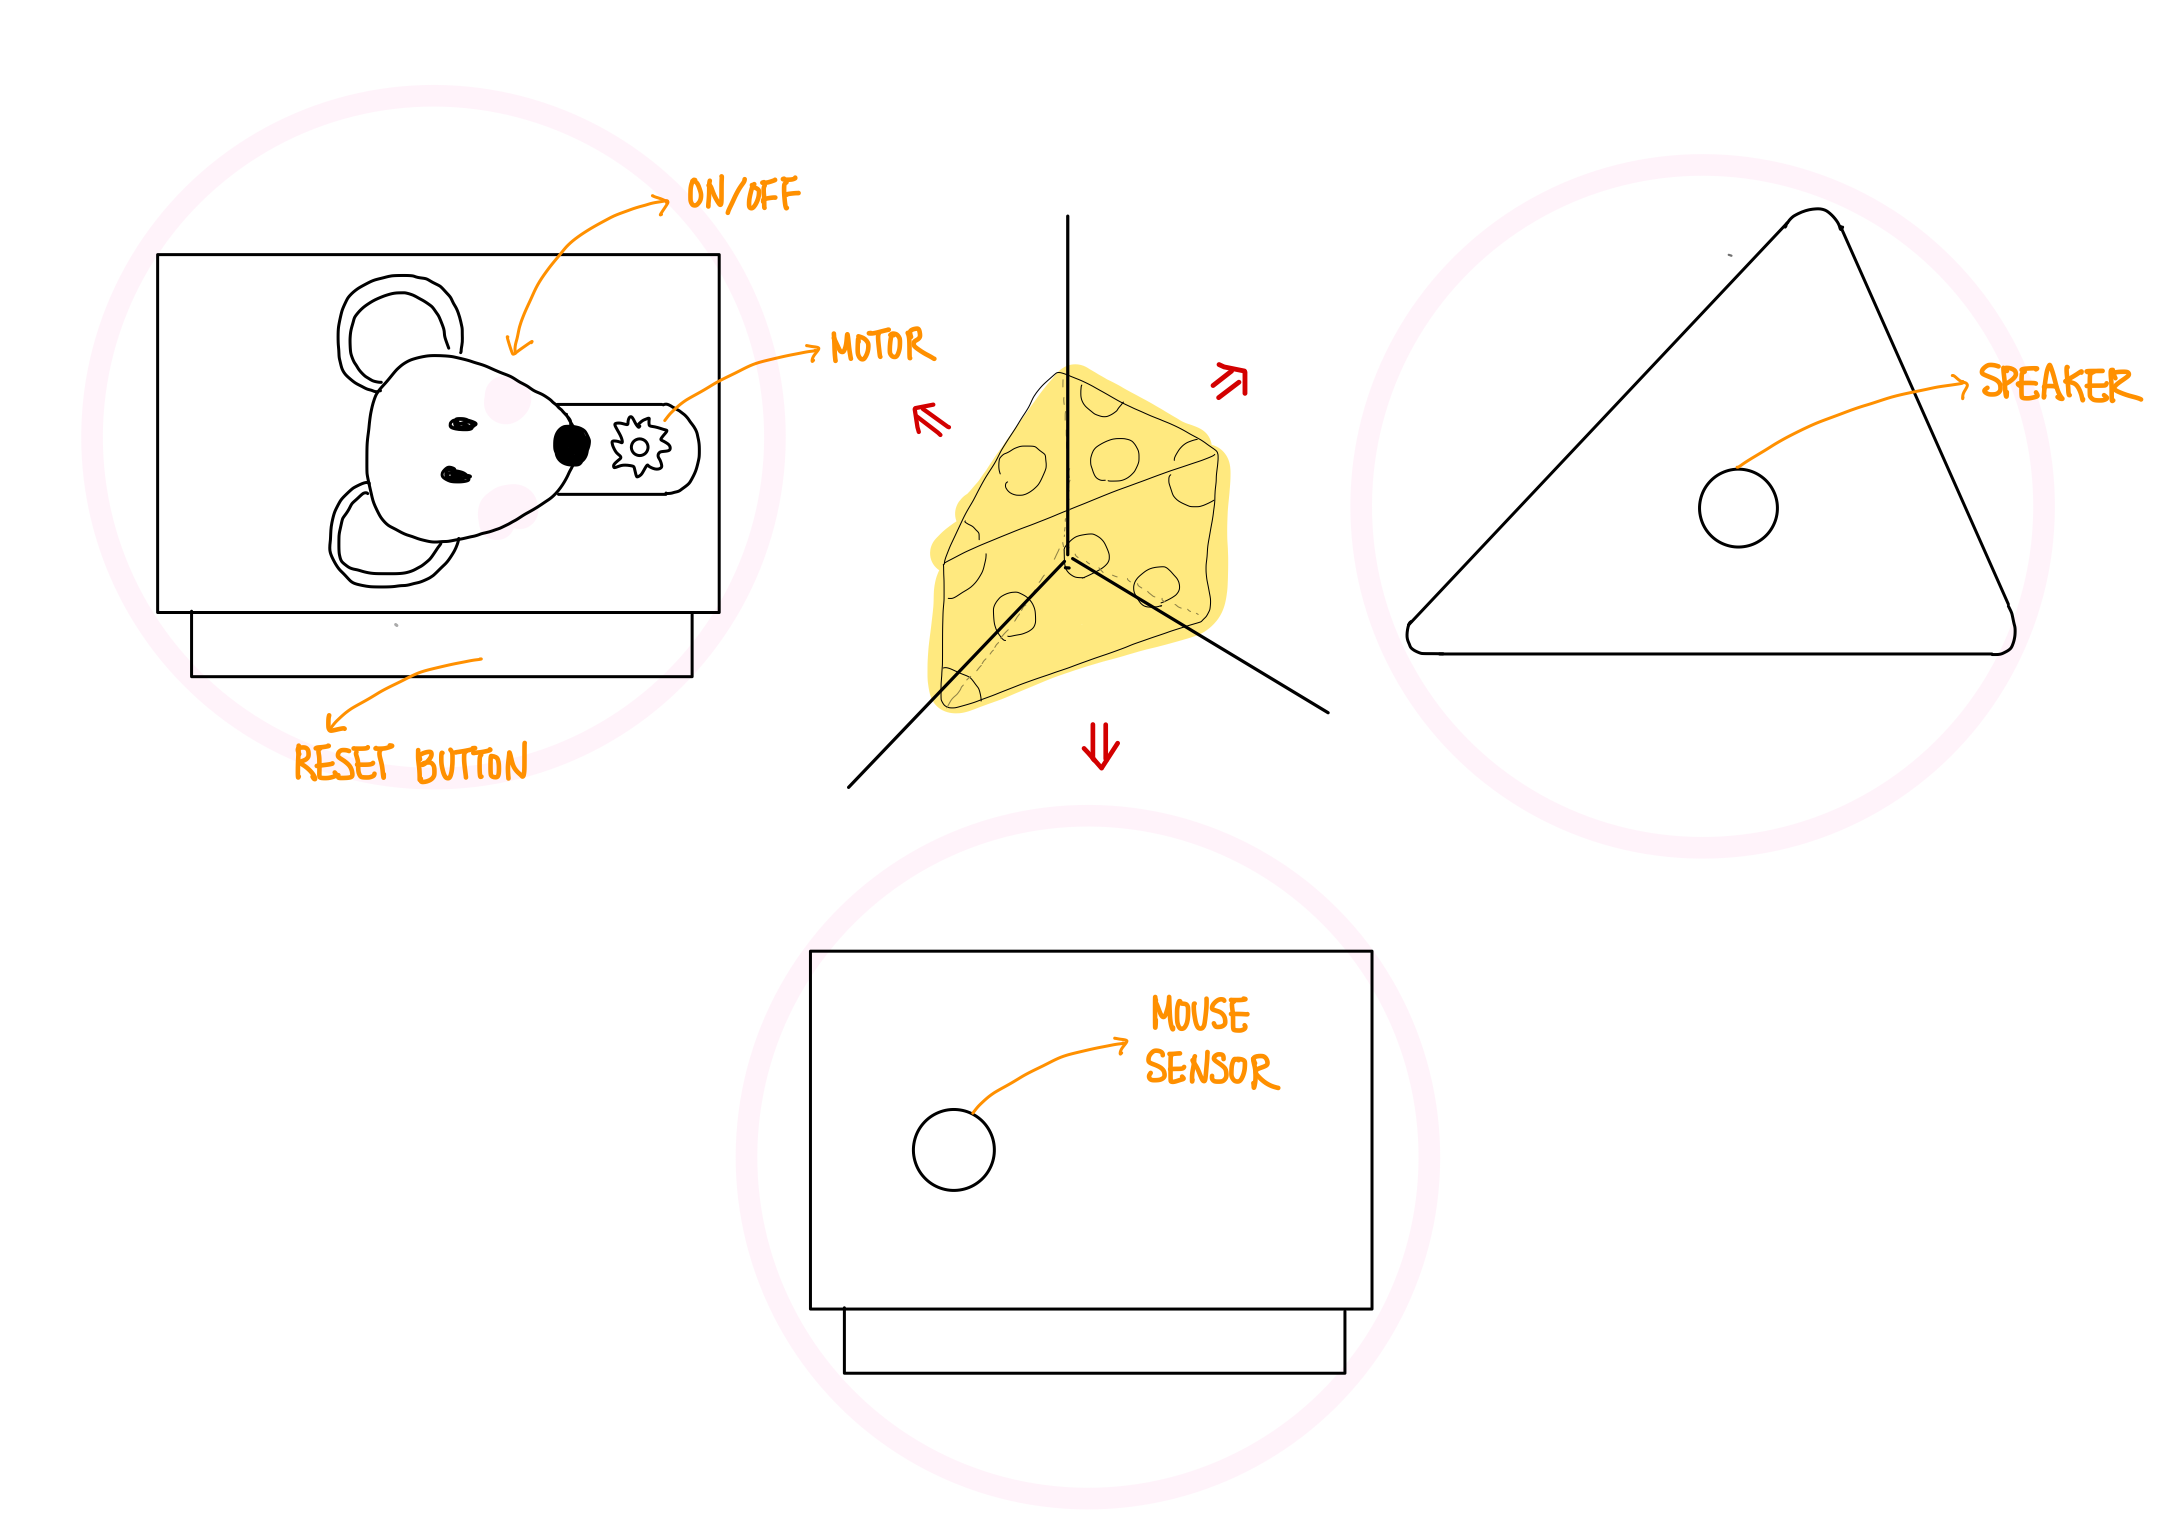
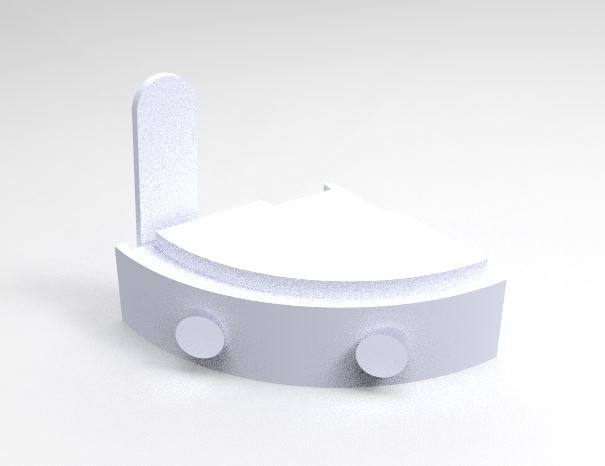
This design is shaped like a quarter of a thin cylinder with a swinging panel for a visual notification, a speaker for an audible notification, a reset button to stop the notification, and sensors to detect mice for notification. It is generally yellow with a white swinging panel that also has an illustration of Jerry from Tom and Jerry. What I intend to communicate was that this panel will have to be visually distinct from the rest of the detector to stand out. The reset button can be pressed down with anything or simply stepped on. Yellow was chosen to make the detector seem rather entertaining.
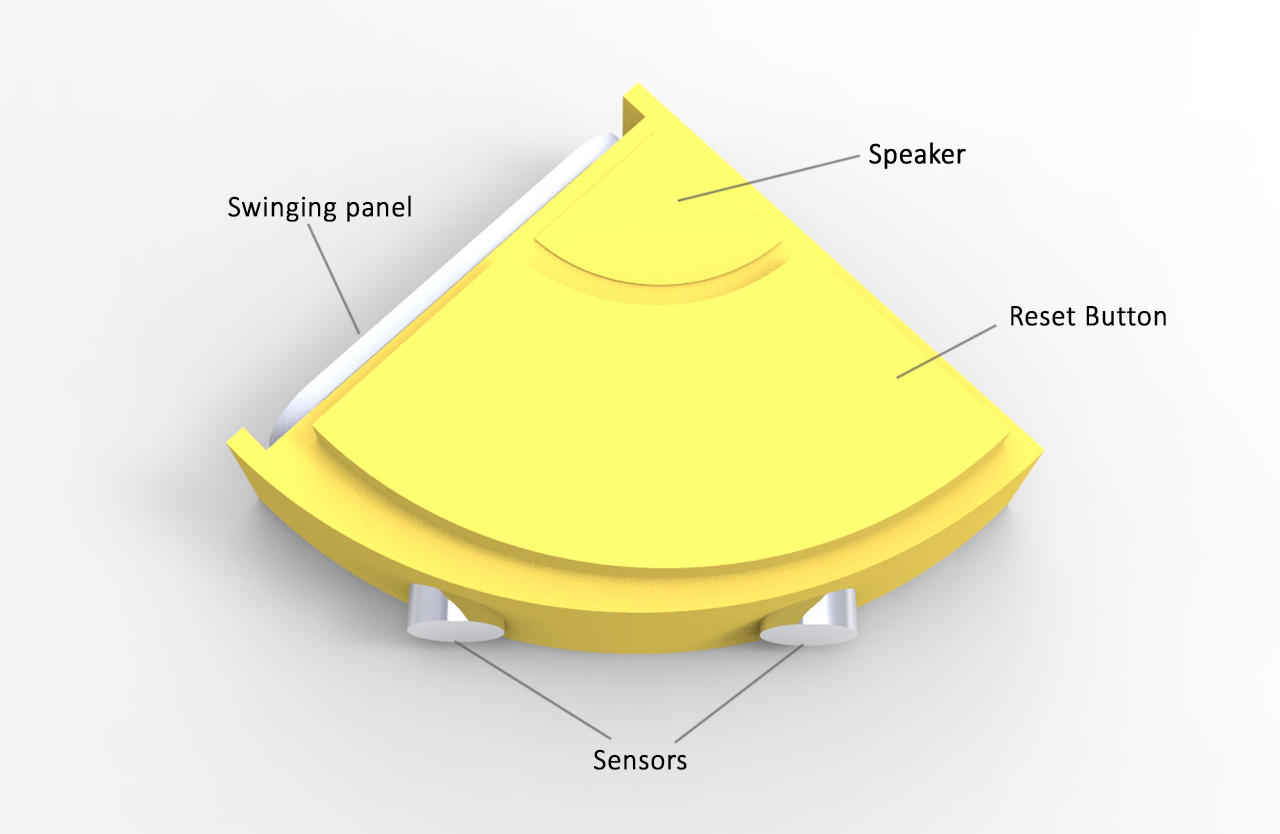
Part labels

Fitting into a corner
Back side with the panel pivot mechanism
Popping up (for notification) and going back down (after pressing reset button)
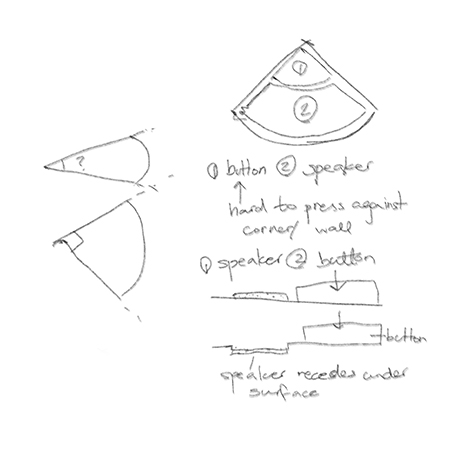
Ideation sketch about feature arrangement and form

Building assembly in SolidWorks
Initial rendering with one material done in Keyshot
When I showed the prototype to my mom, she said that I will carefully have to think about the size and thickness so that it would be safe, and not get in the way of Emily when she is walking around. Because this is not something that I have been thinking about very much nor our team has discussed extensively, I will definitely keep this in mind. I think scale will also be critical so that the visual notification will be clear enough for Emily, and also to be able to fit the parts inside appropriately.
3. Works Like Prototype (Alan)
This prototype was designed to simulate the Arduino circuit that would be used for the mouse detector, and to test the possibility of implementing some of our ideas from the sketch electronically.
The simulated circuit is made on Tinkercad with Arduino code. There are 5 input components and 3 output components. The outputs are a servo which would be attached to the mouse sign, which would rotate 90 degrees to show the mouse sign when a mouse is detected; a LED which would light up when a mouse is detected; a piezo simulating a speaker that would play a melody when a mouse is detected and if it is daytime. The inputs are a PIR sensor to detect the presence of a mouse, a photoresistor to sense ambient light to detect whether if it is daytime, an “ambient sensor knob” potentiometer to set the gate value of the photoresistor, a “brightness knob” potentiometer to set the brightness of the LED, and a “reset button” pushbutton to turn of the LED and reset the servomotor to its original position.
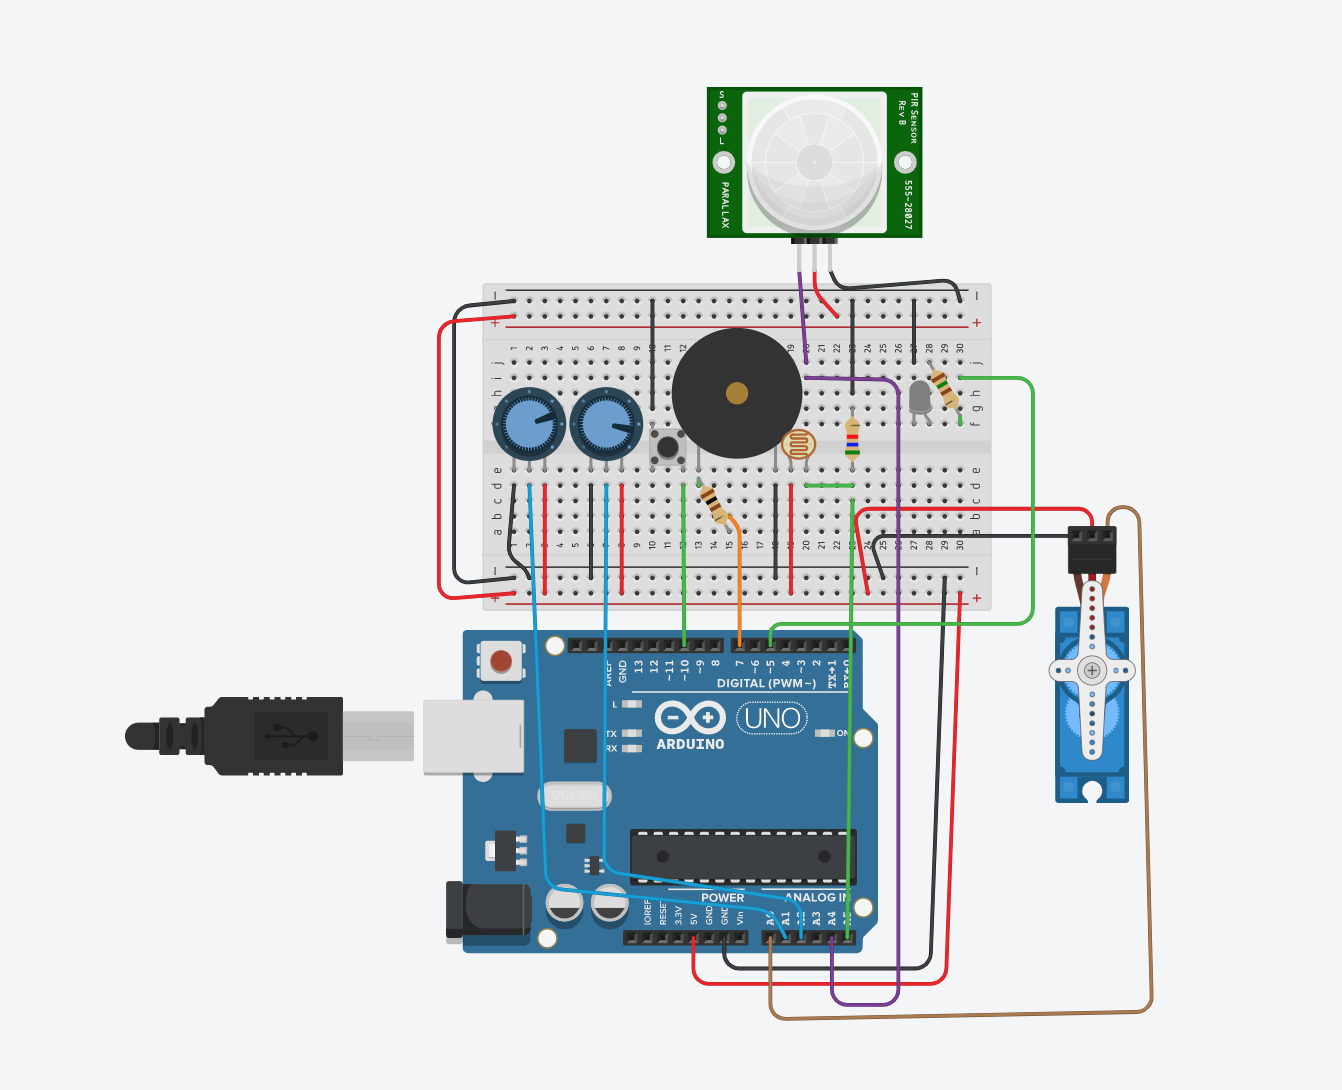
Full Tinkercad circuit
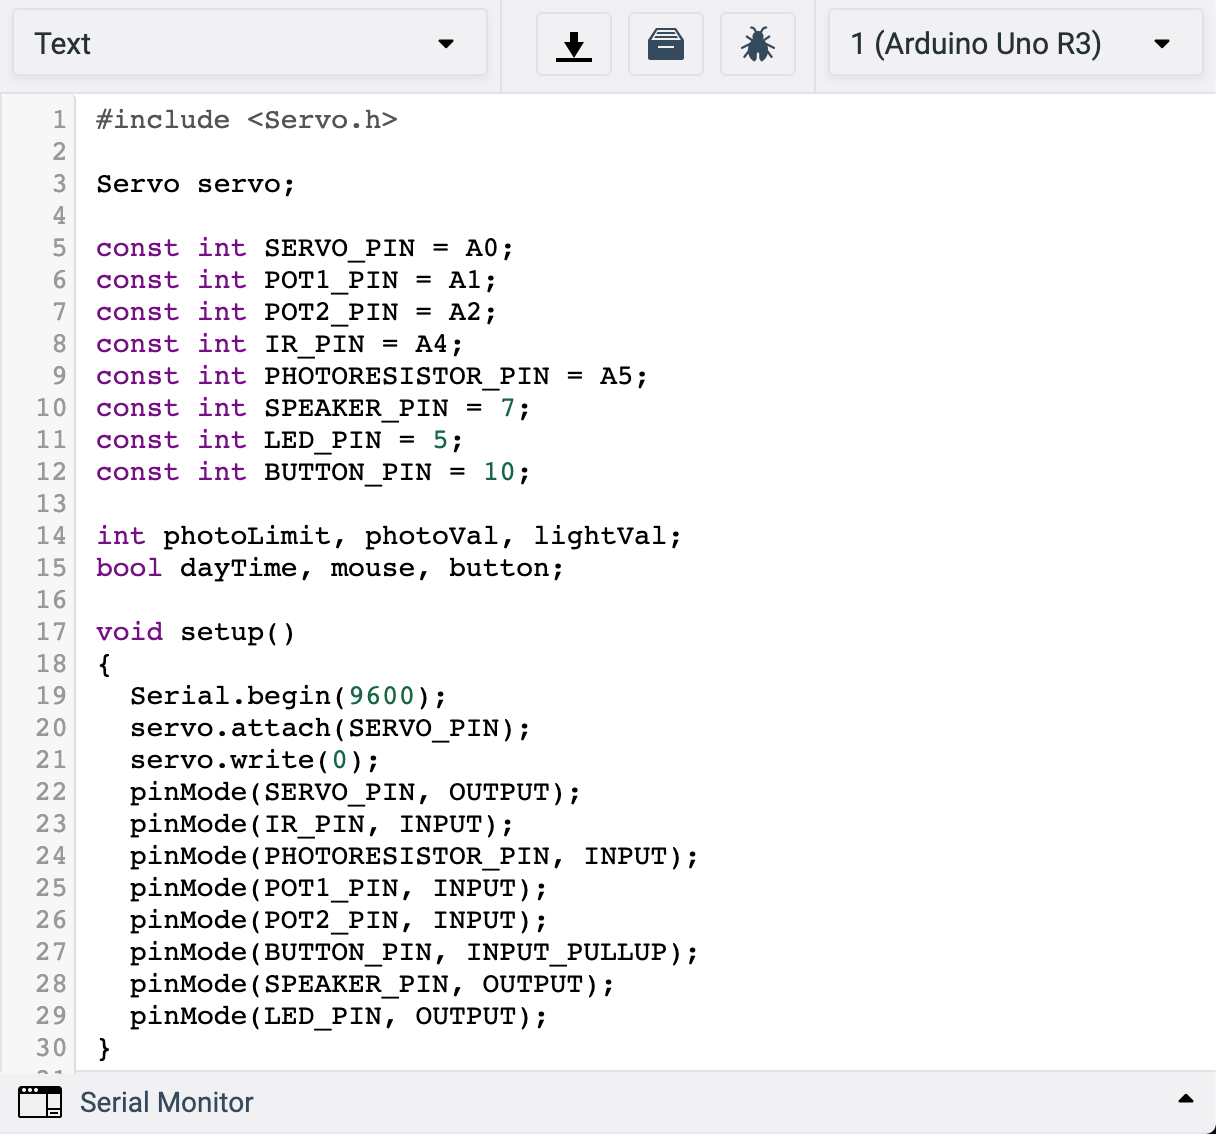
A snippet of the Arduino code on Tinkercad
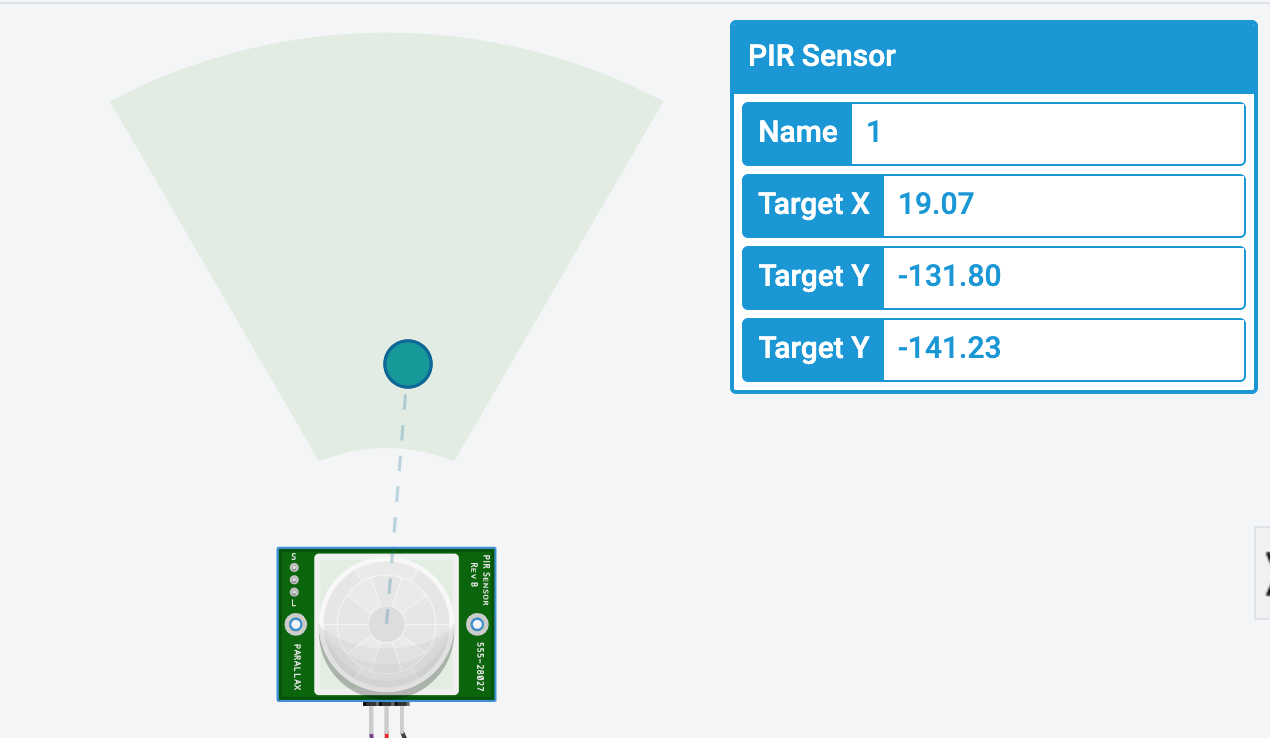
how Tinkercad simulates a PIR sensor
a short video showing the simulation on Tinkercad
Process Images:
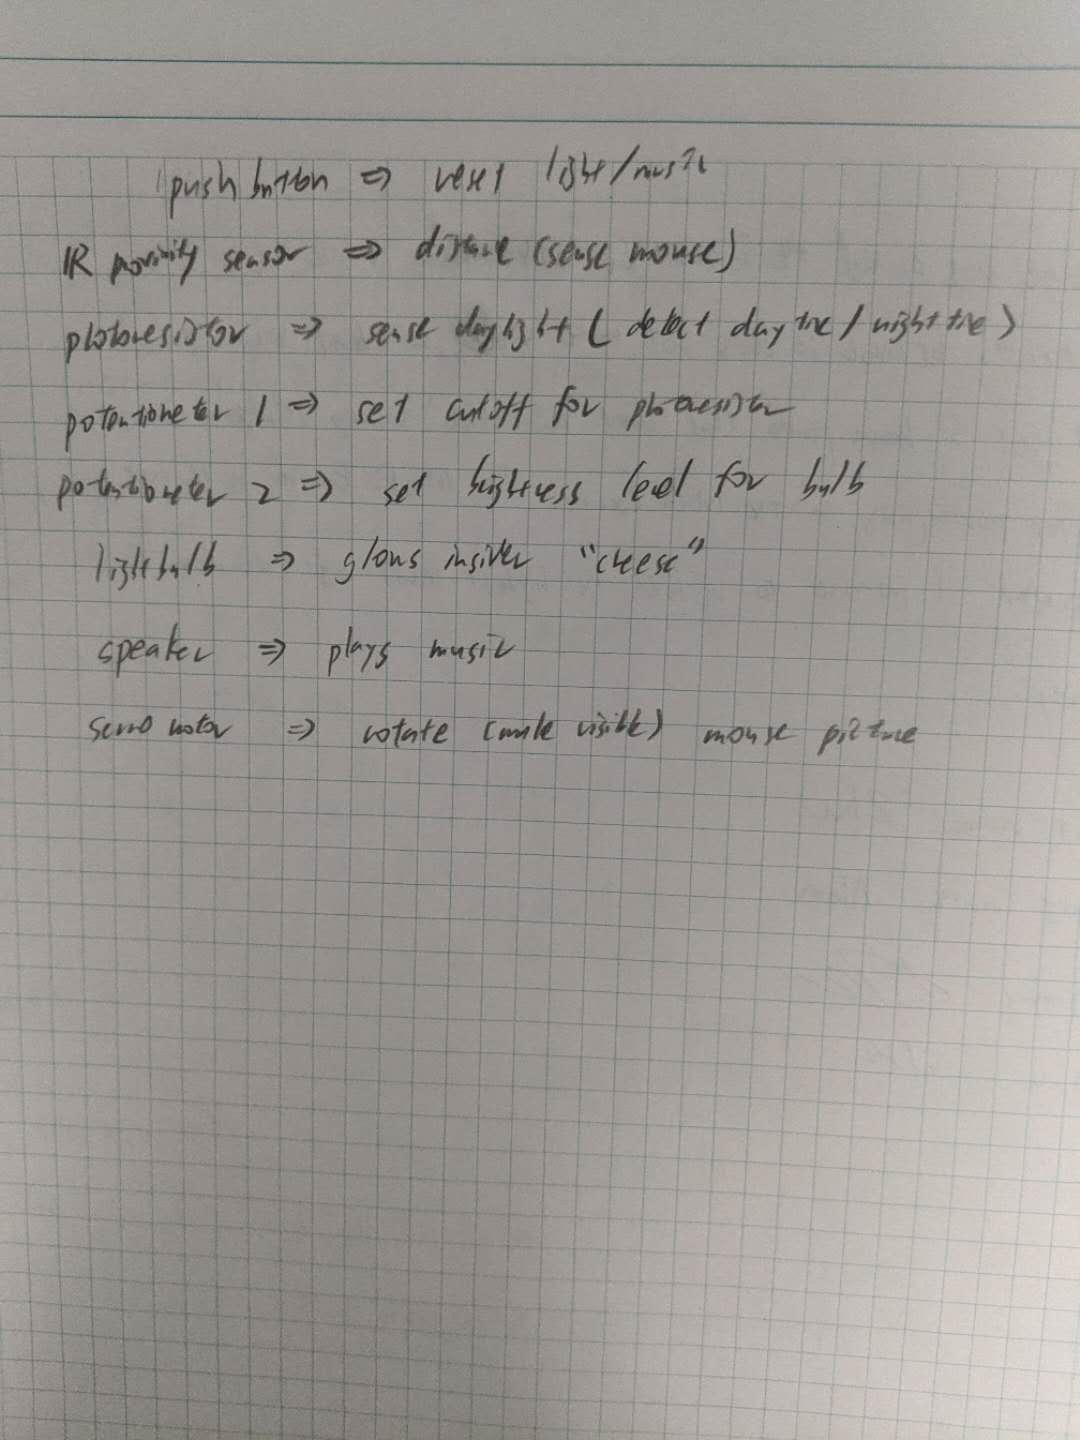
Planning the components on paper
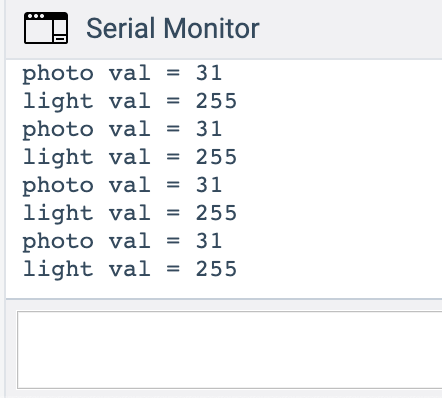
Testing photoresistor values using serial feedback
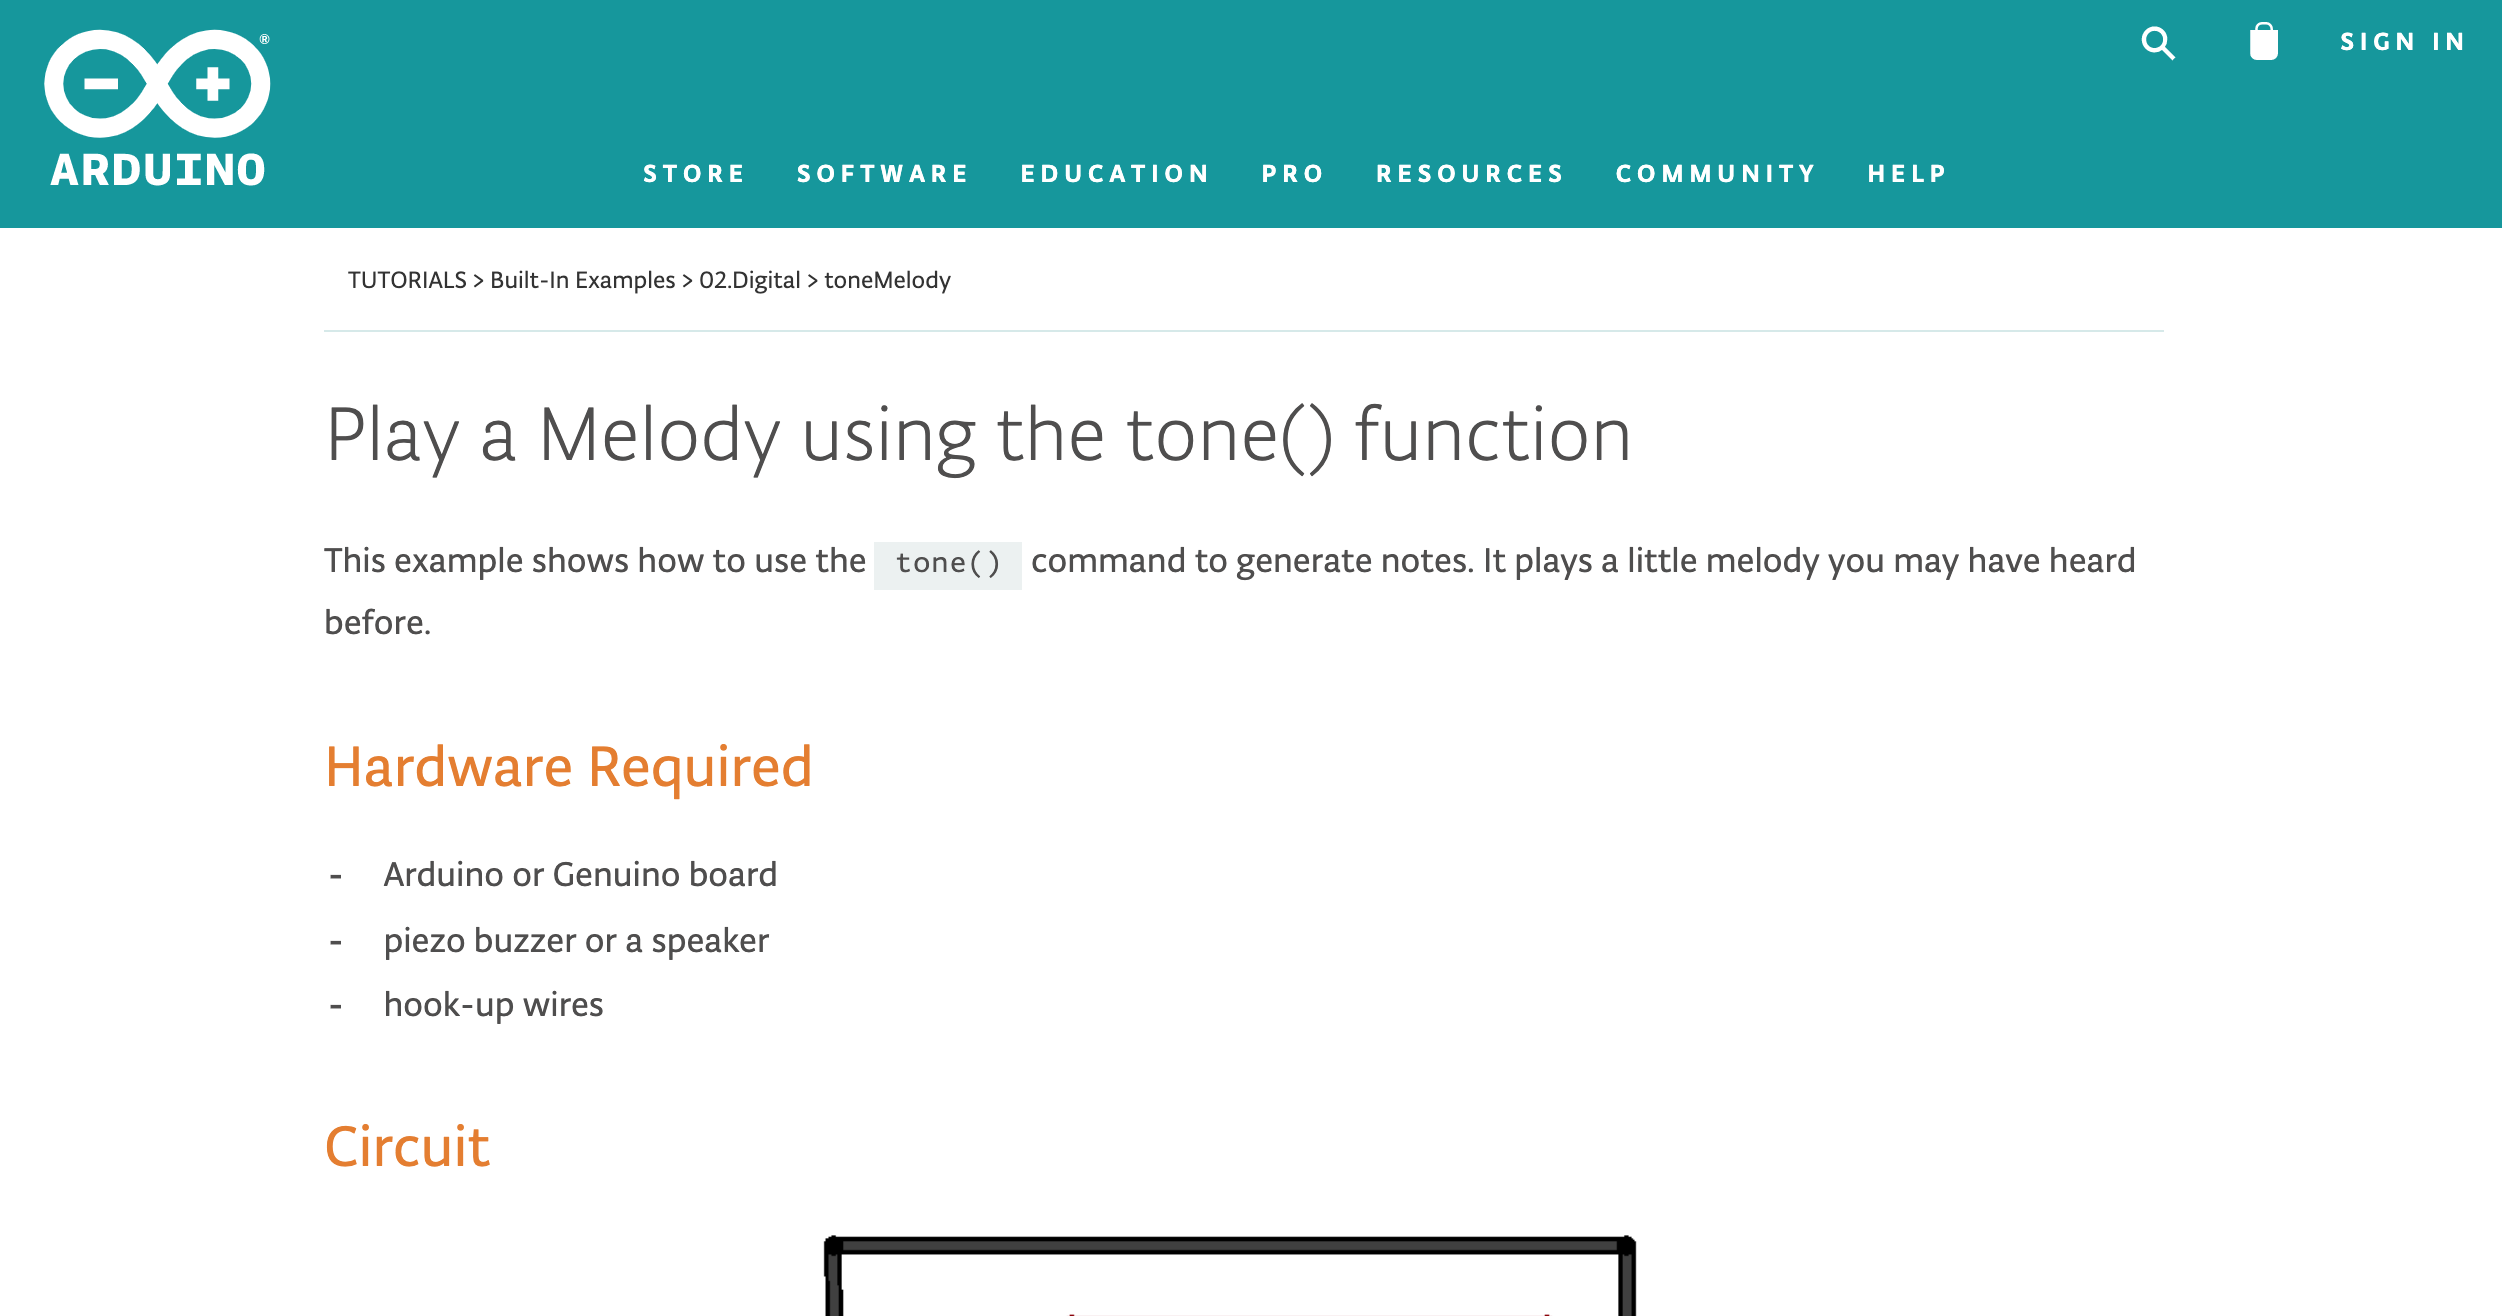
Learning how to program a piezo on Arduino
During the prototyping, I had a hard time using Tinkercad, because it does not simulate the circuit in real-time speed and its clock is very slow. That made functions involved with time difficult, in this case playing a melody using the tone() function. However, Tinkercad does do a decent job simulating the inputs such as the PIR sensor and the photoresistor, which made simulating potential situations possible.
Because I am currently living by myself, I couldn’t show this prototype to anyone in-person, but I did show it to my teammates to get feedback. Yun said she would preferred if I could integrate a real-time clock into the circuit instead of using a photoresistor and a potentiometer to control it. I liked that idea, but because Tinkercad does not have that ability, I cannot implement it; if we can physically build a circuit, that might be a possibility. They liked that I added an extra knob to adjust the brightness of the LED/lightbulb, and we discussed a possibility of adding another knob to adjust the volume of the music. This is a good idea, and I would like to integrate it, but again that is not possible with Tinkercad and its piezo component.
Moving Forward
When we talked through our prototype presentation with Emily, she told us that she would actually like if the detector was against a wall next to her fridge, connected to the power outlet there. This is the spot that most of the mice appear in her house. I was a little surprised to realize that it was quite hard to design a looks-like model without knowing where exactly to put it, so it was nice when she showed us the location on Zoom. In terms of how our design will look, we still need to decide how this will change our design, as well as a potential tunnel that we will have for the mice to stay within (so that the sensor won’t detect other people or Emily’s son’s cat). Then, although I did not address it in this prototype, we may add a glow (light going on inside) for visual notification, and I think the panel may not be necessary, depending on how effective the glowing up will be. The glowing can stay turned on until she presses the reset button, while the audible notification can just turn off after 30 seconds, etc. We also need to think about what will happen with the detector when Emily is not at home. I think at this stage of the project, we got a lot of critical feedback and there wasn’t much to ignore.
It was meaningful to make a behaves-like prototype using some miscellaneous crafts in that we could get the feedback from other people who were not involved in the ideation and design process. However, it could have been better if Emily herself could interact with the device and giver feedback based on the real experience whether the device is safe and comfortable to use, whether the design is appropriate for the space she want it to be, and some evaluations on the entertainment factors. For creating a CAD prototype, we did not have a particularly difficult situation from the fact that we could not physically show. Nevertheless, it was unfortunate that we couldn’t actually visit her house to make observations. In comparison, making a works-like prototype without building a physical circuit is quite frustrating due to the limited functions of Tinkercad. It made it impossible for us to add components useful for the mouse detector, but not already on Tinkercad.
We will look into how to make the mouse detector only detect mouse by putting it in a tunnel that only a mouse would fit. That would involve designing the tunnel and re-designing some of the structure and electronic components. We will refine the features and forms of the parts, and figure out how to add any new features (ex. volume controller). We will also be looking into what kinds of material will be good for durability, appropriate for glowing, etc.
Comments are closed.