Overview
The Lockbox is a safe designed to lock away distractions, keeping it out of the user’s grasp for however long a time they want.
Final Video and Pictures
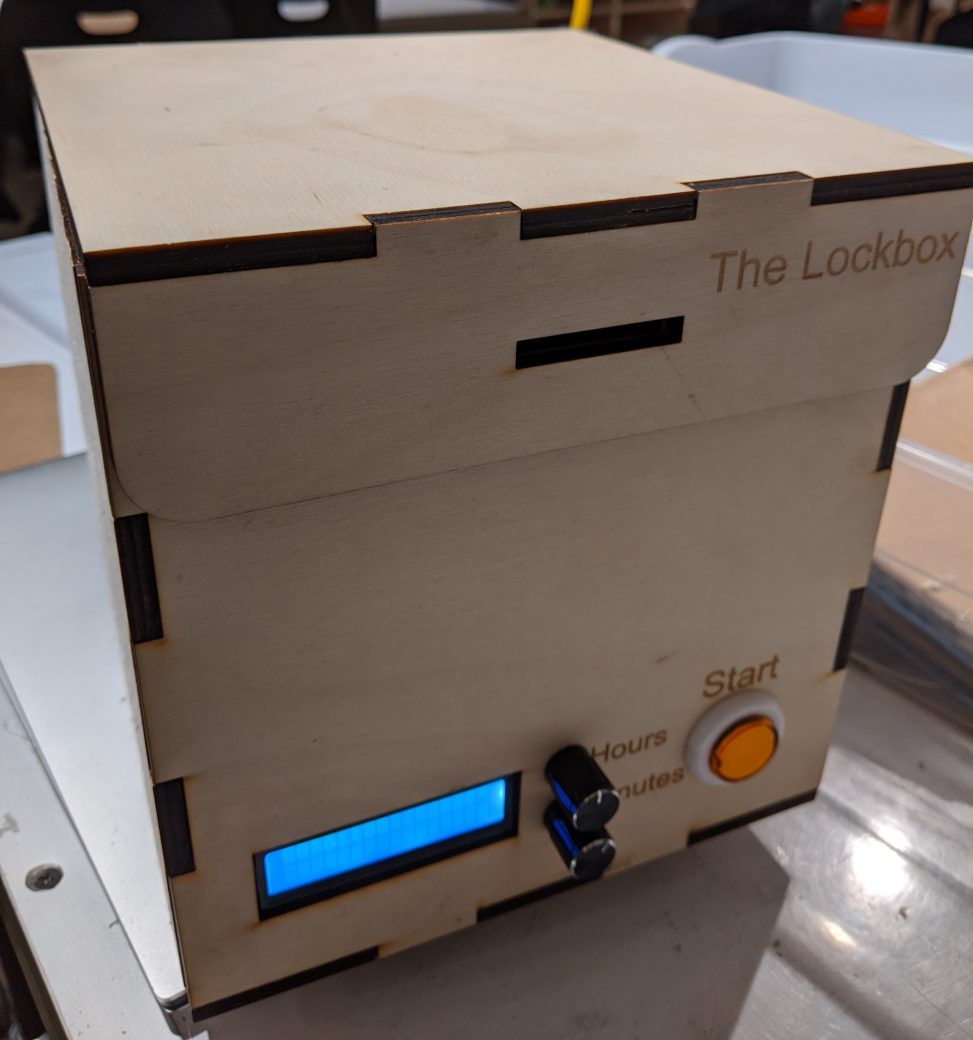
The timer is set using the two dials to determine the hours and minutes. Once the start button is pressed, the servo slides the lock into place. Thus, the user is unable to open the box or access whatever they put inside.
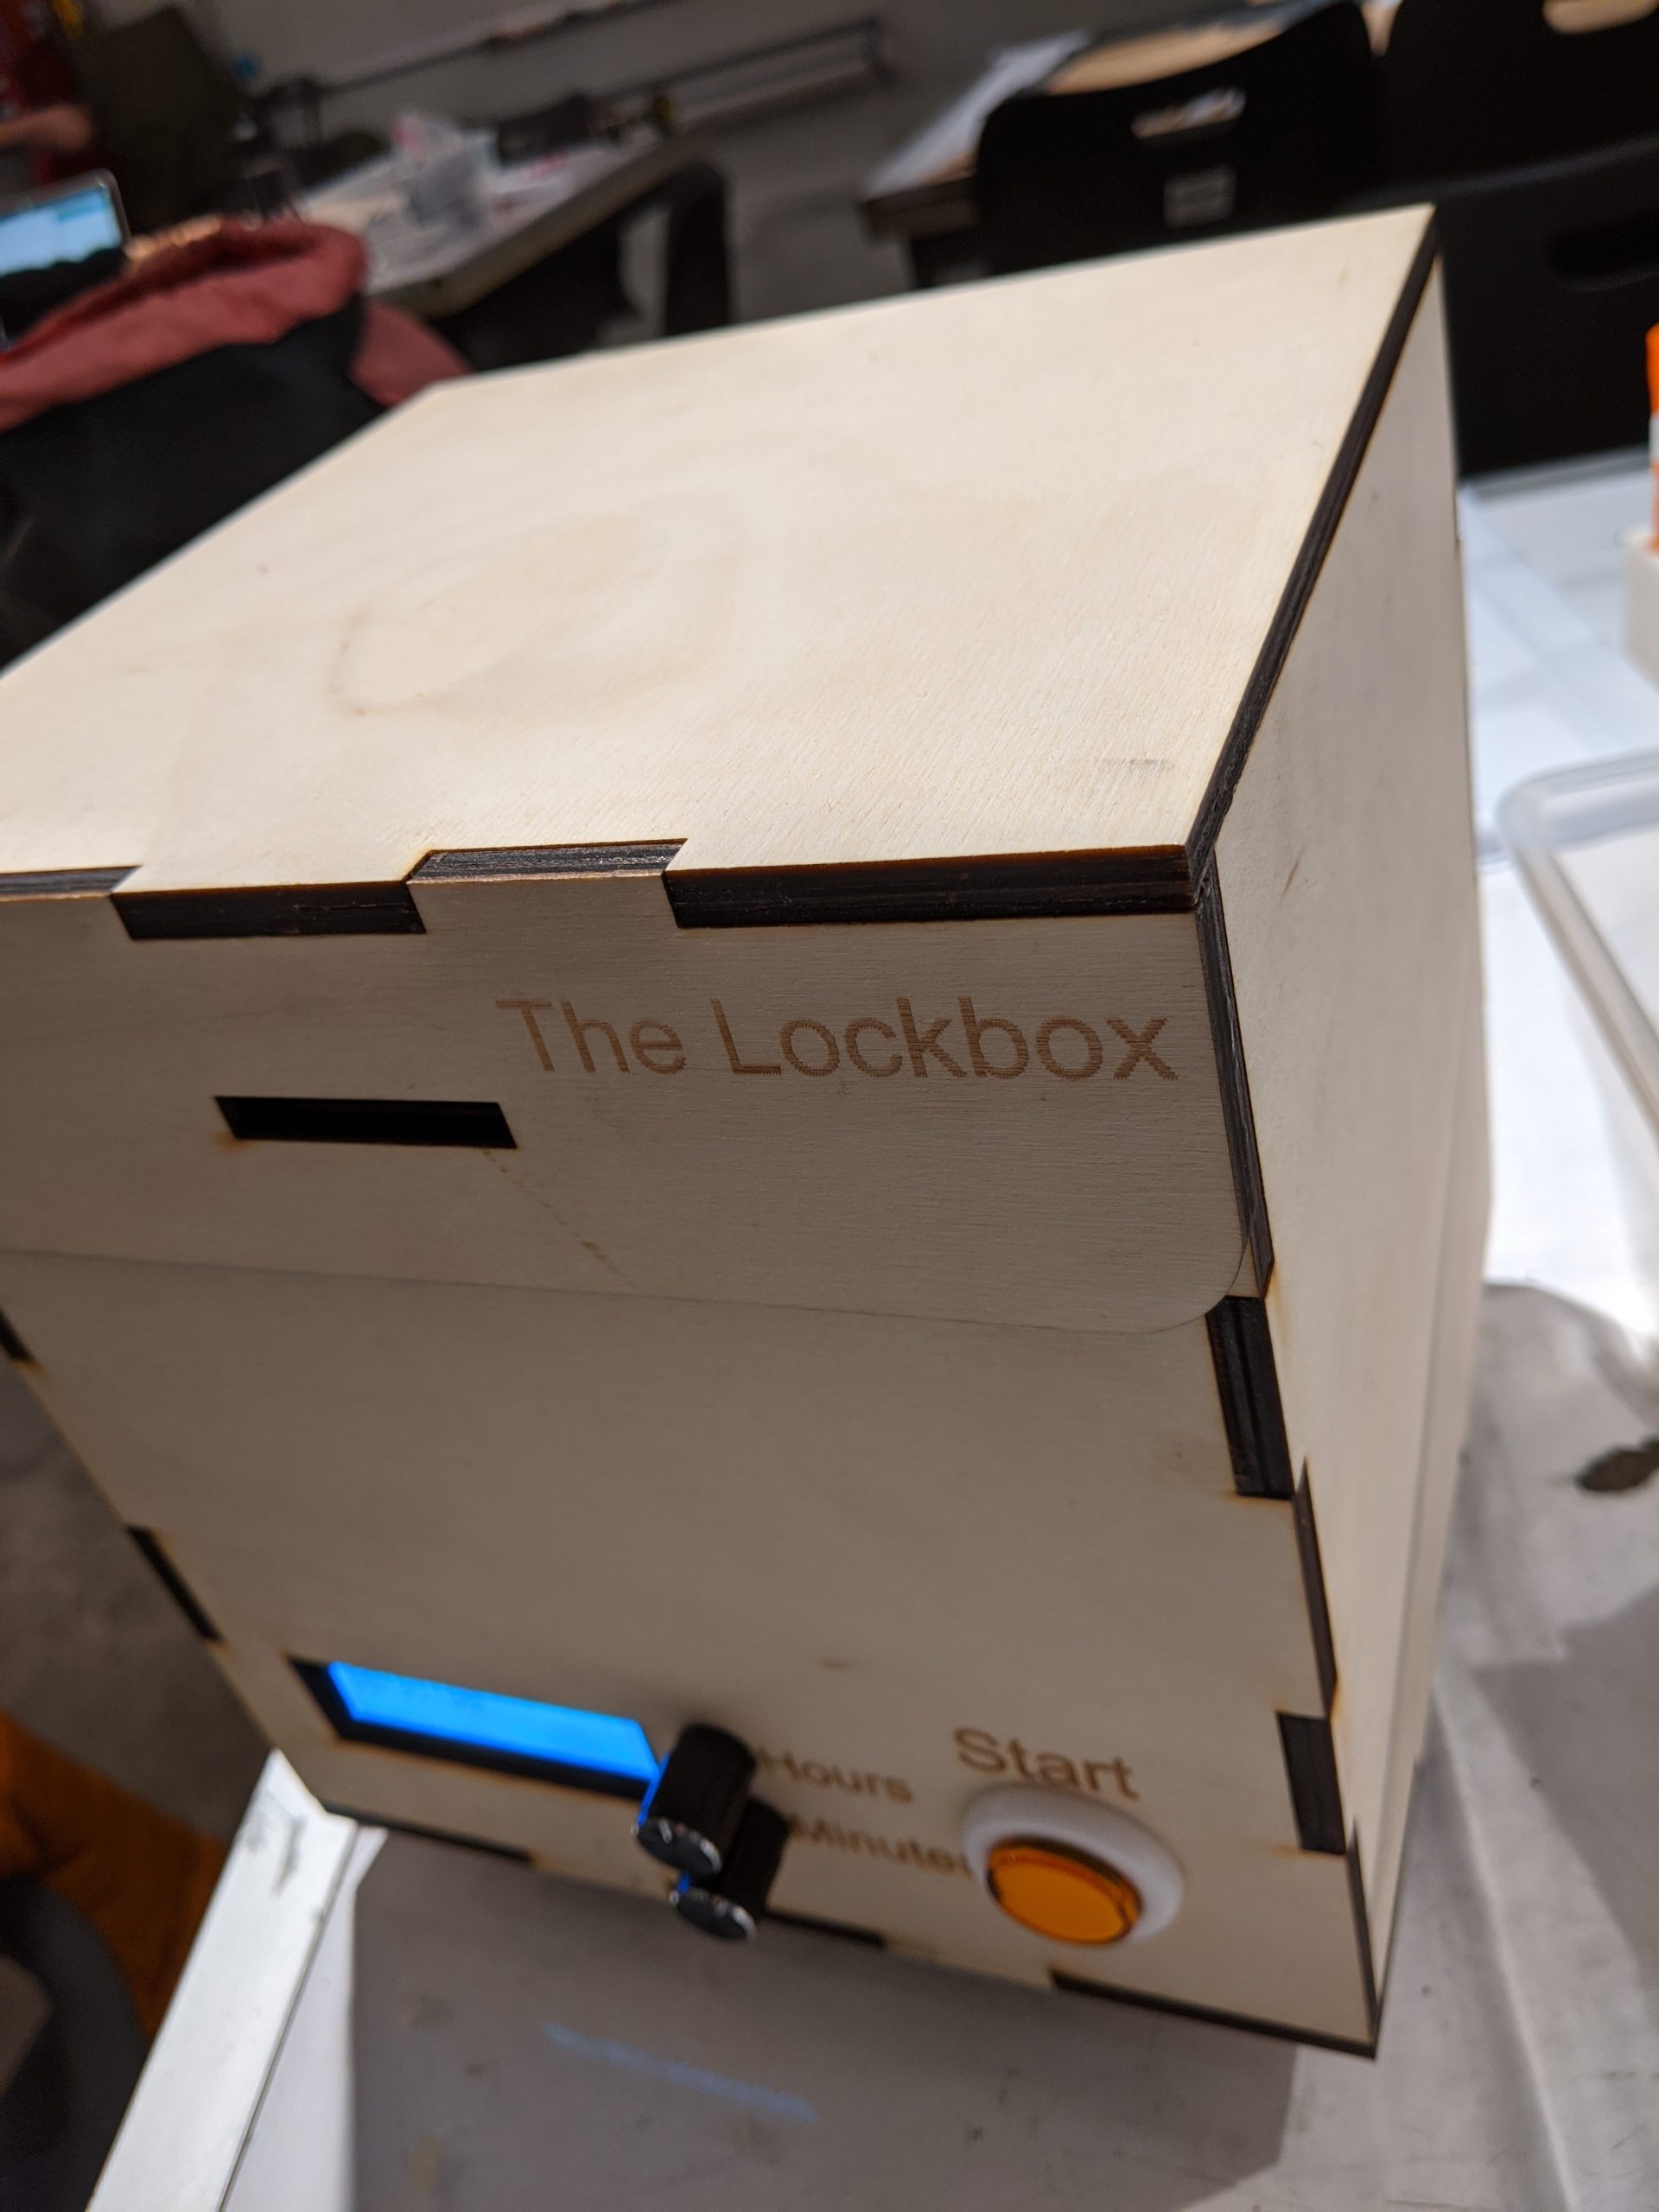
The finished box with the dimensions 20cm x 20cm x 20cm
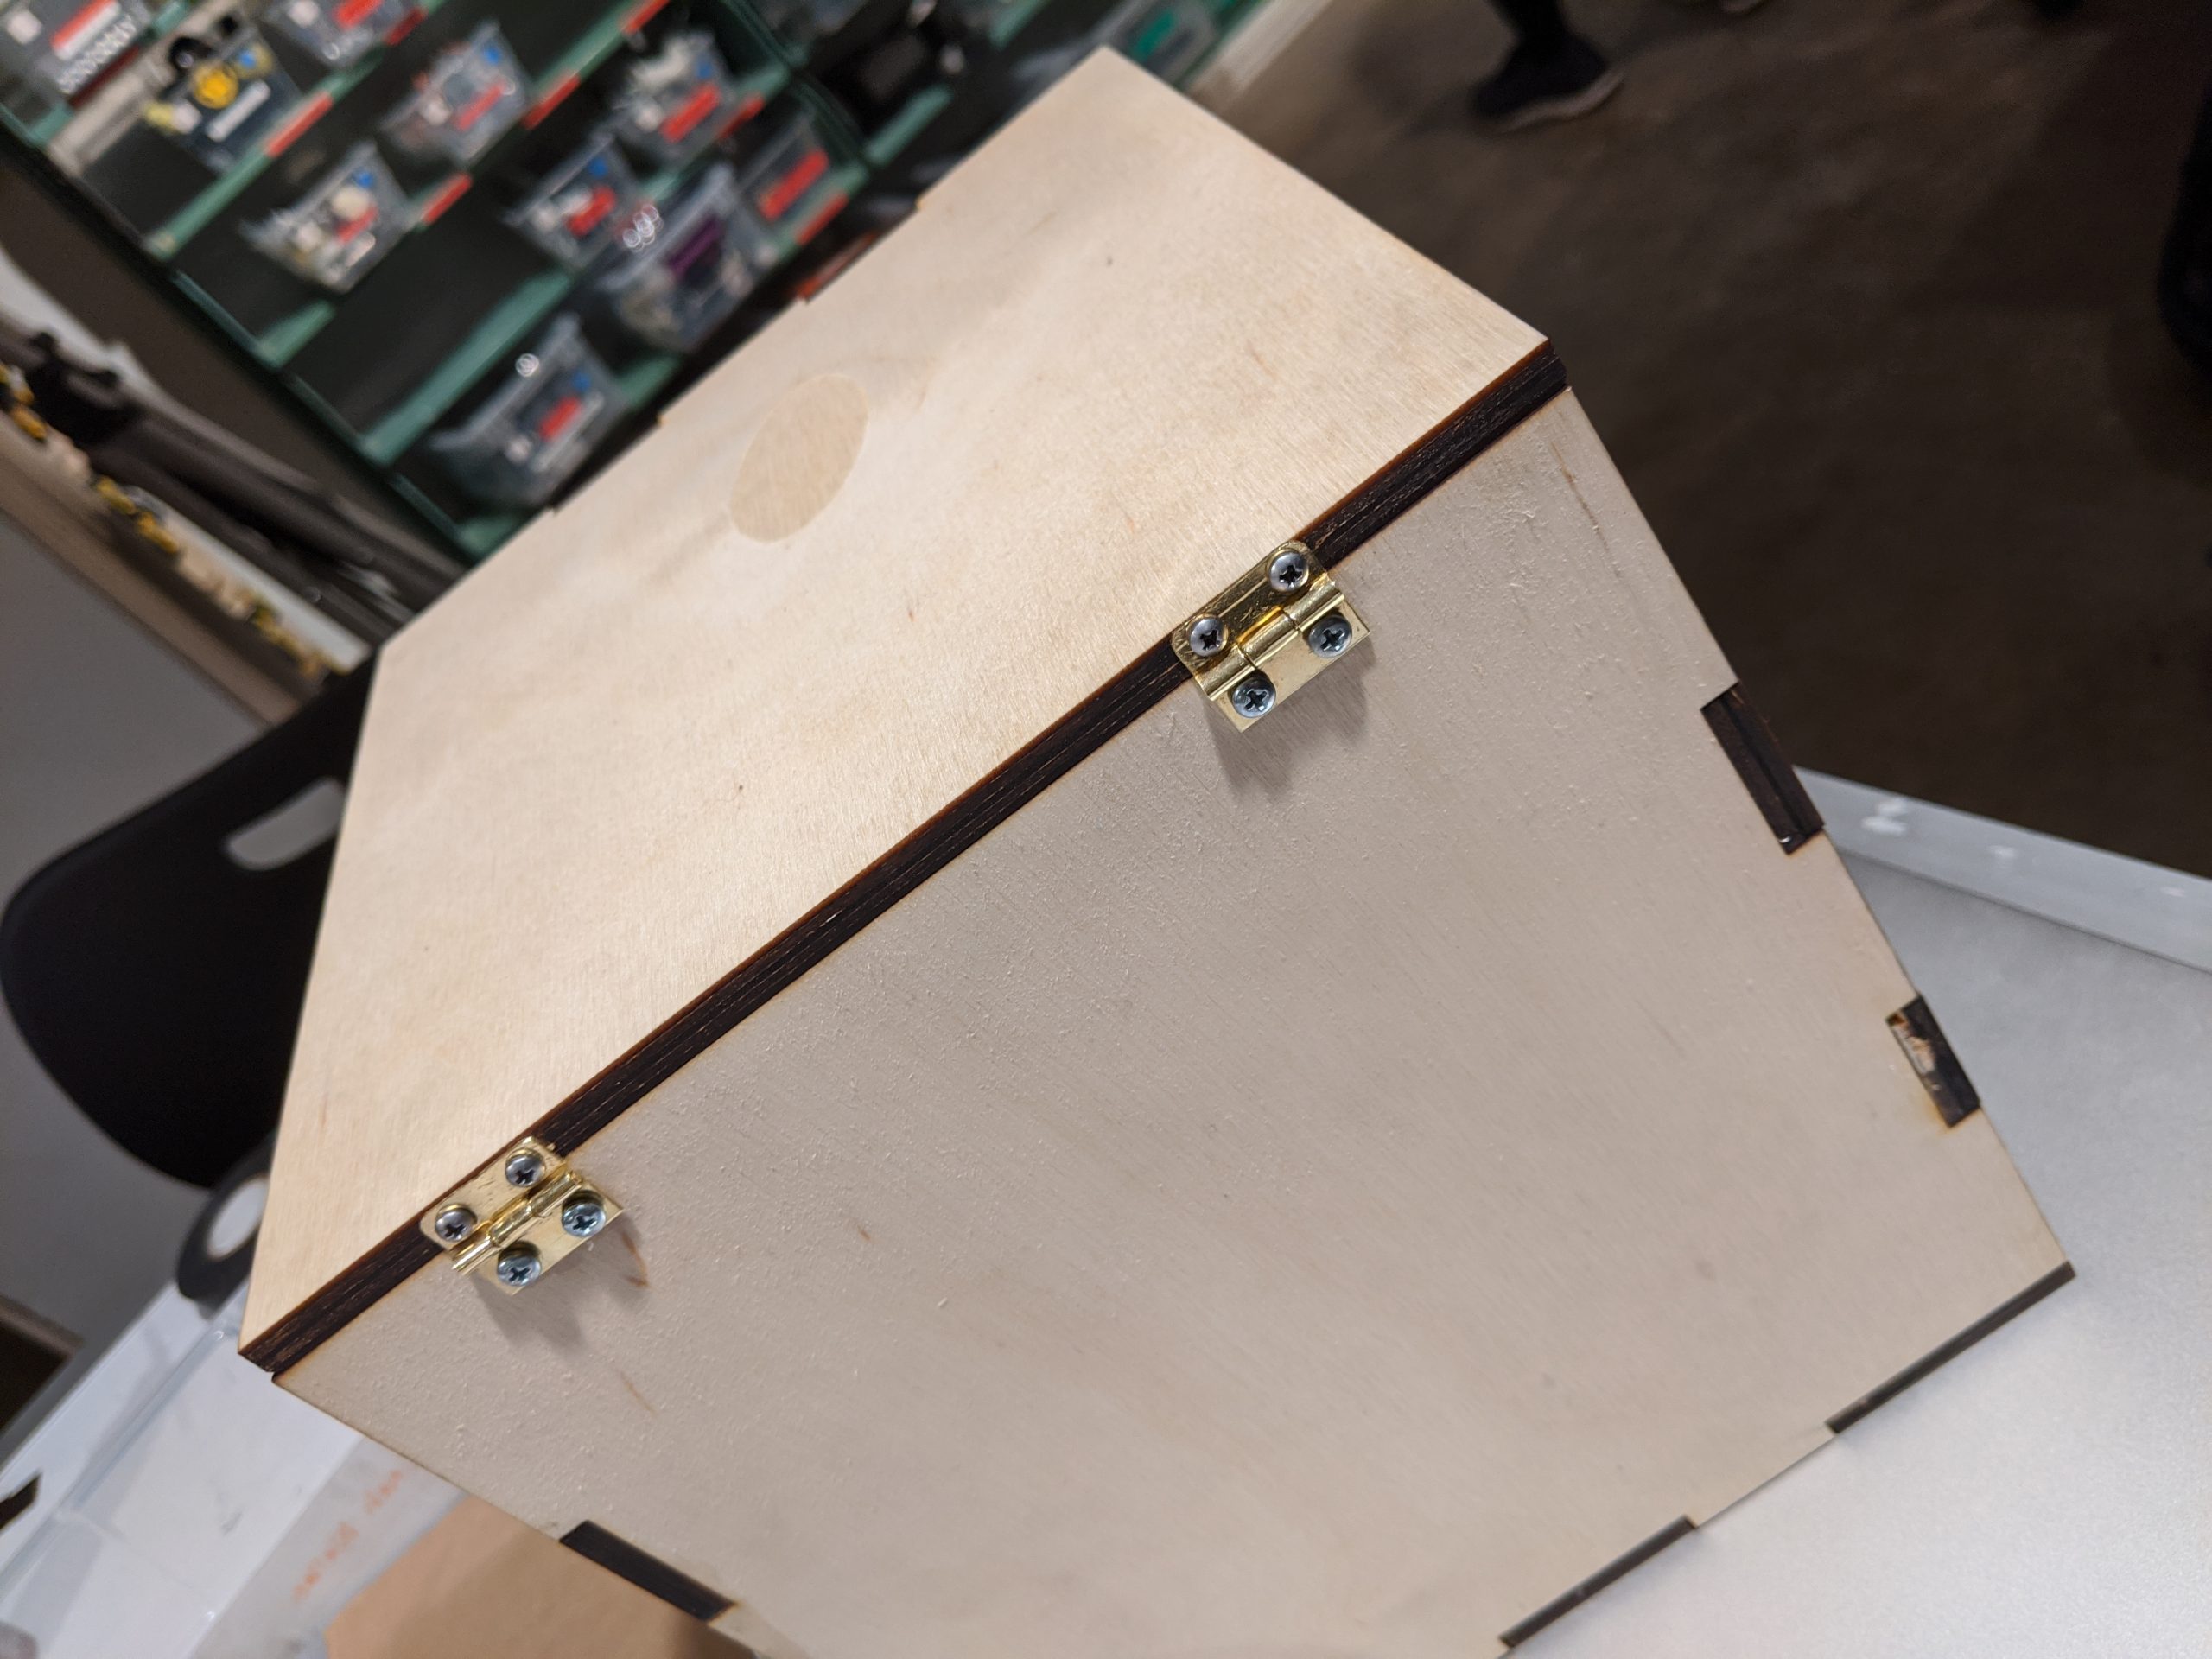
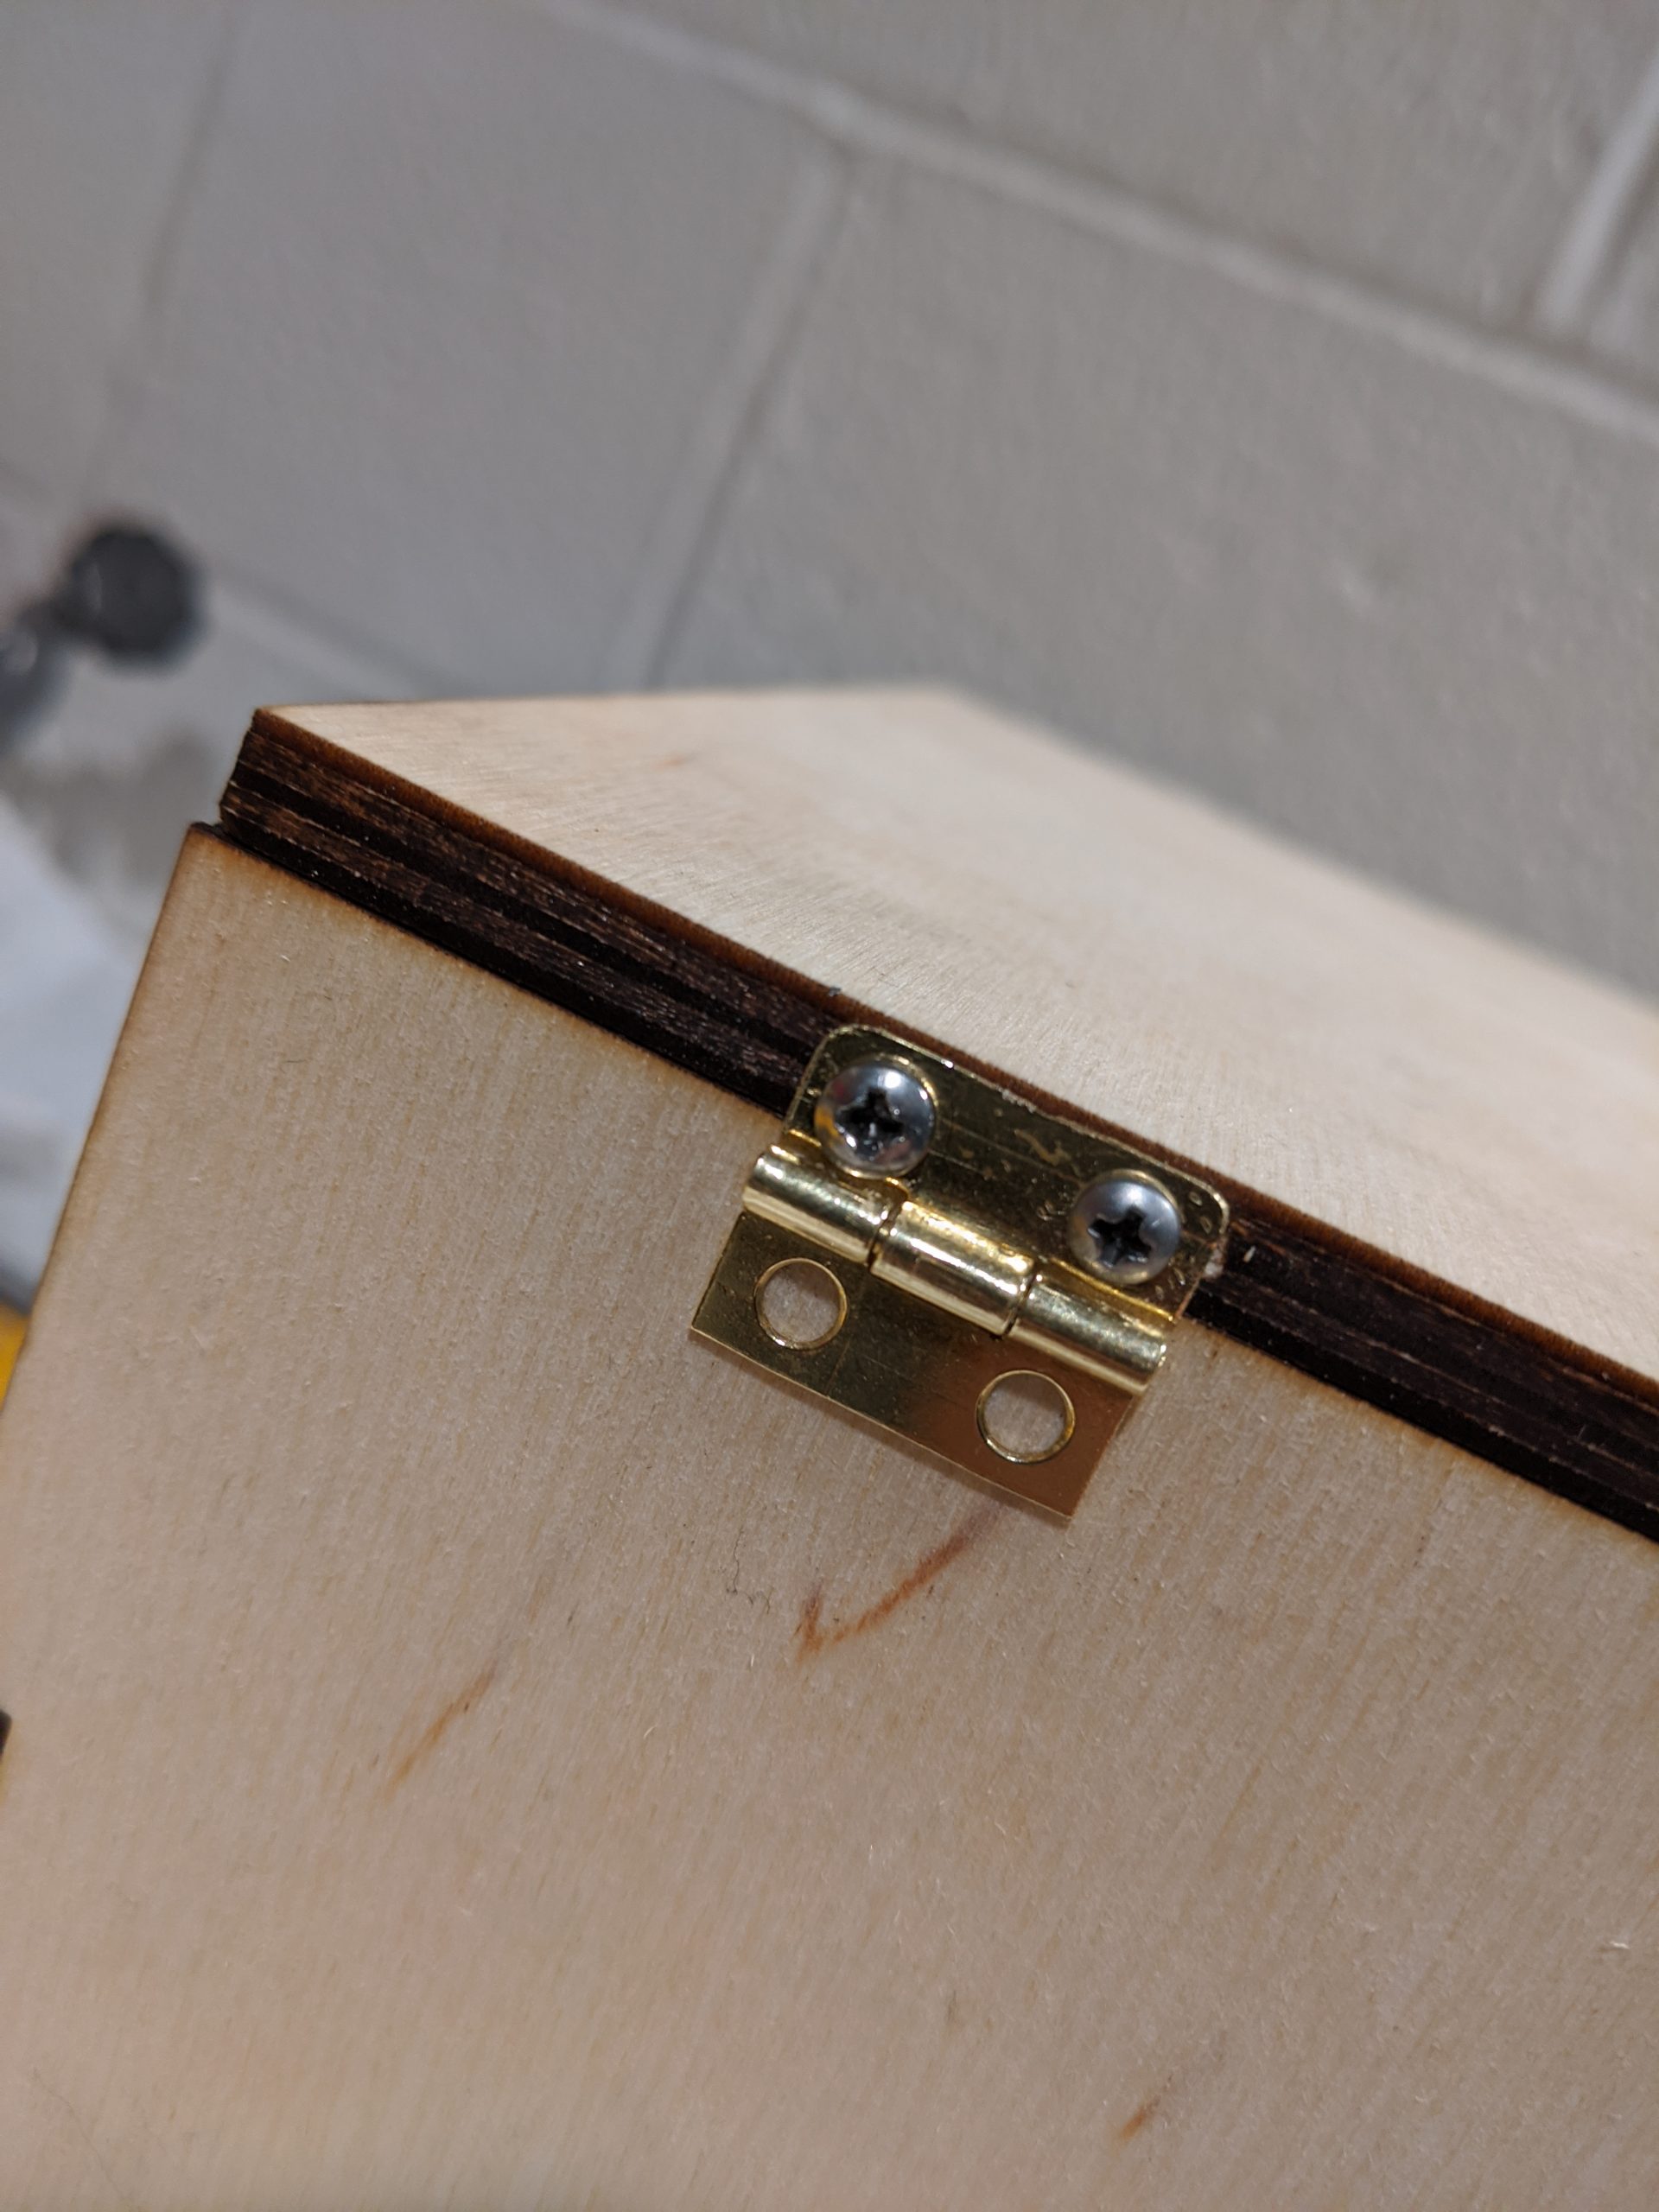
The back of the box, showing the hinges attaching the lid to the box
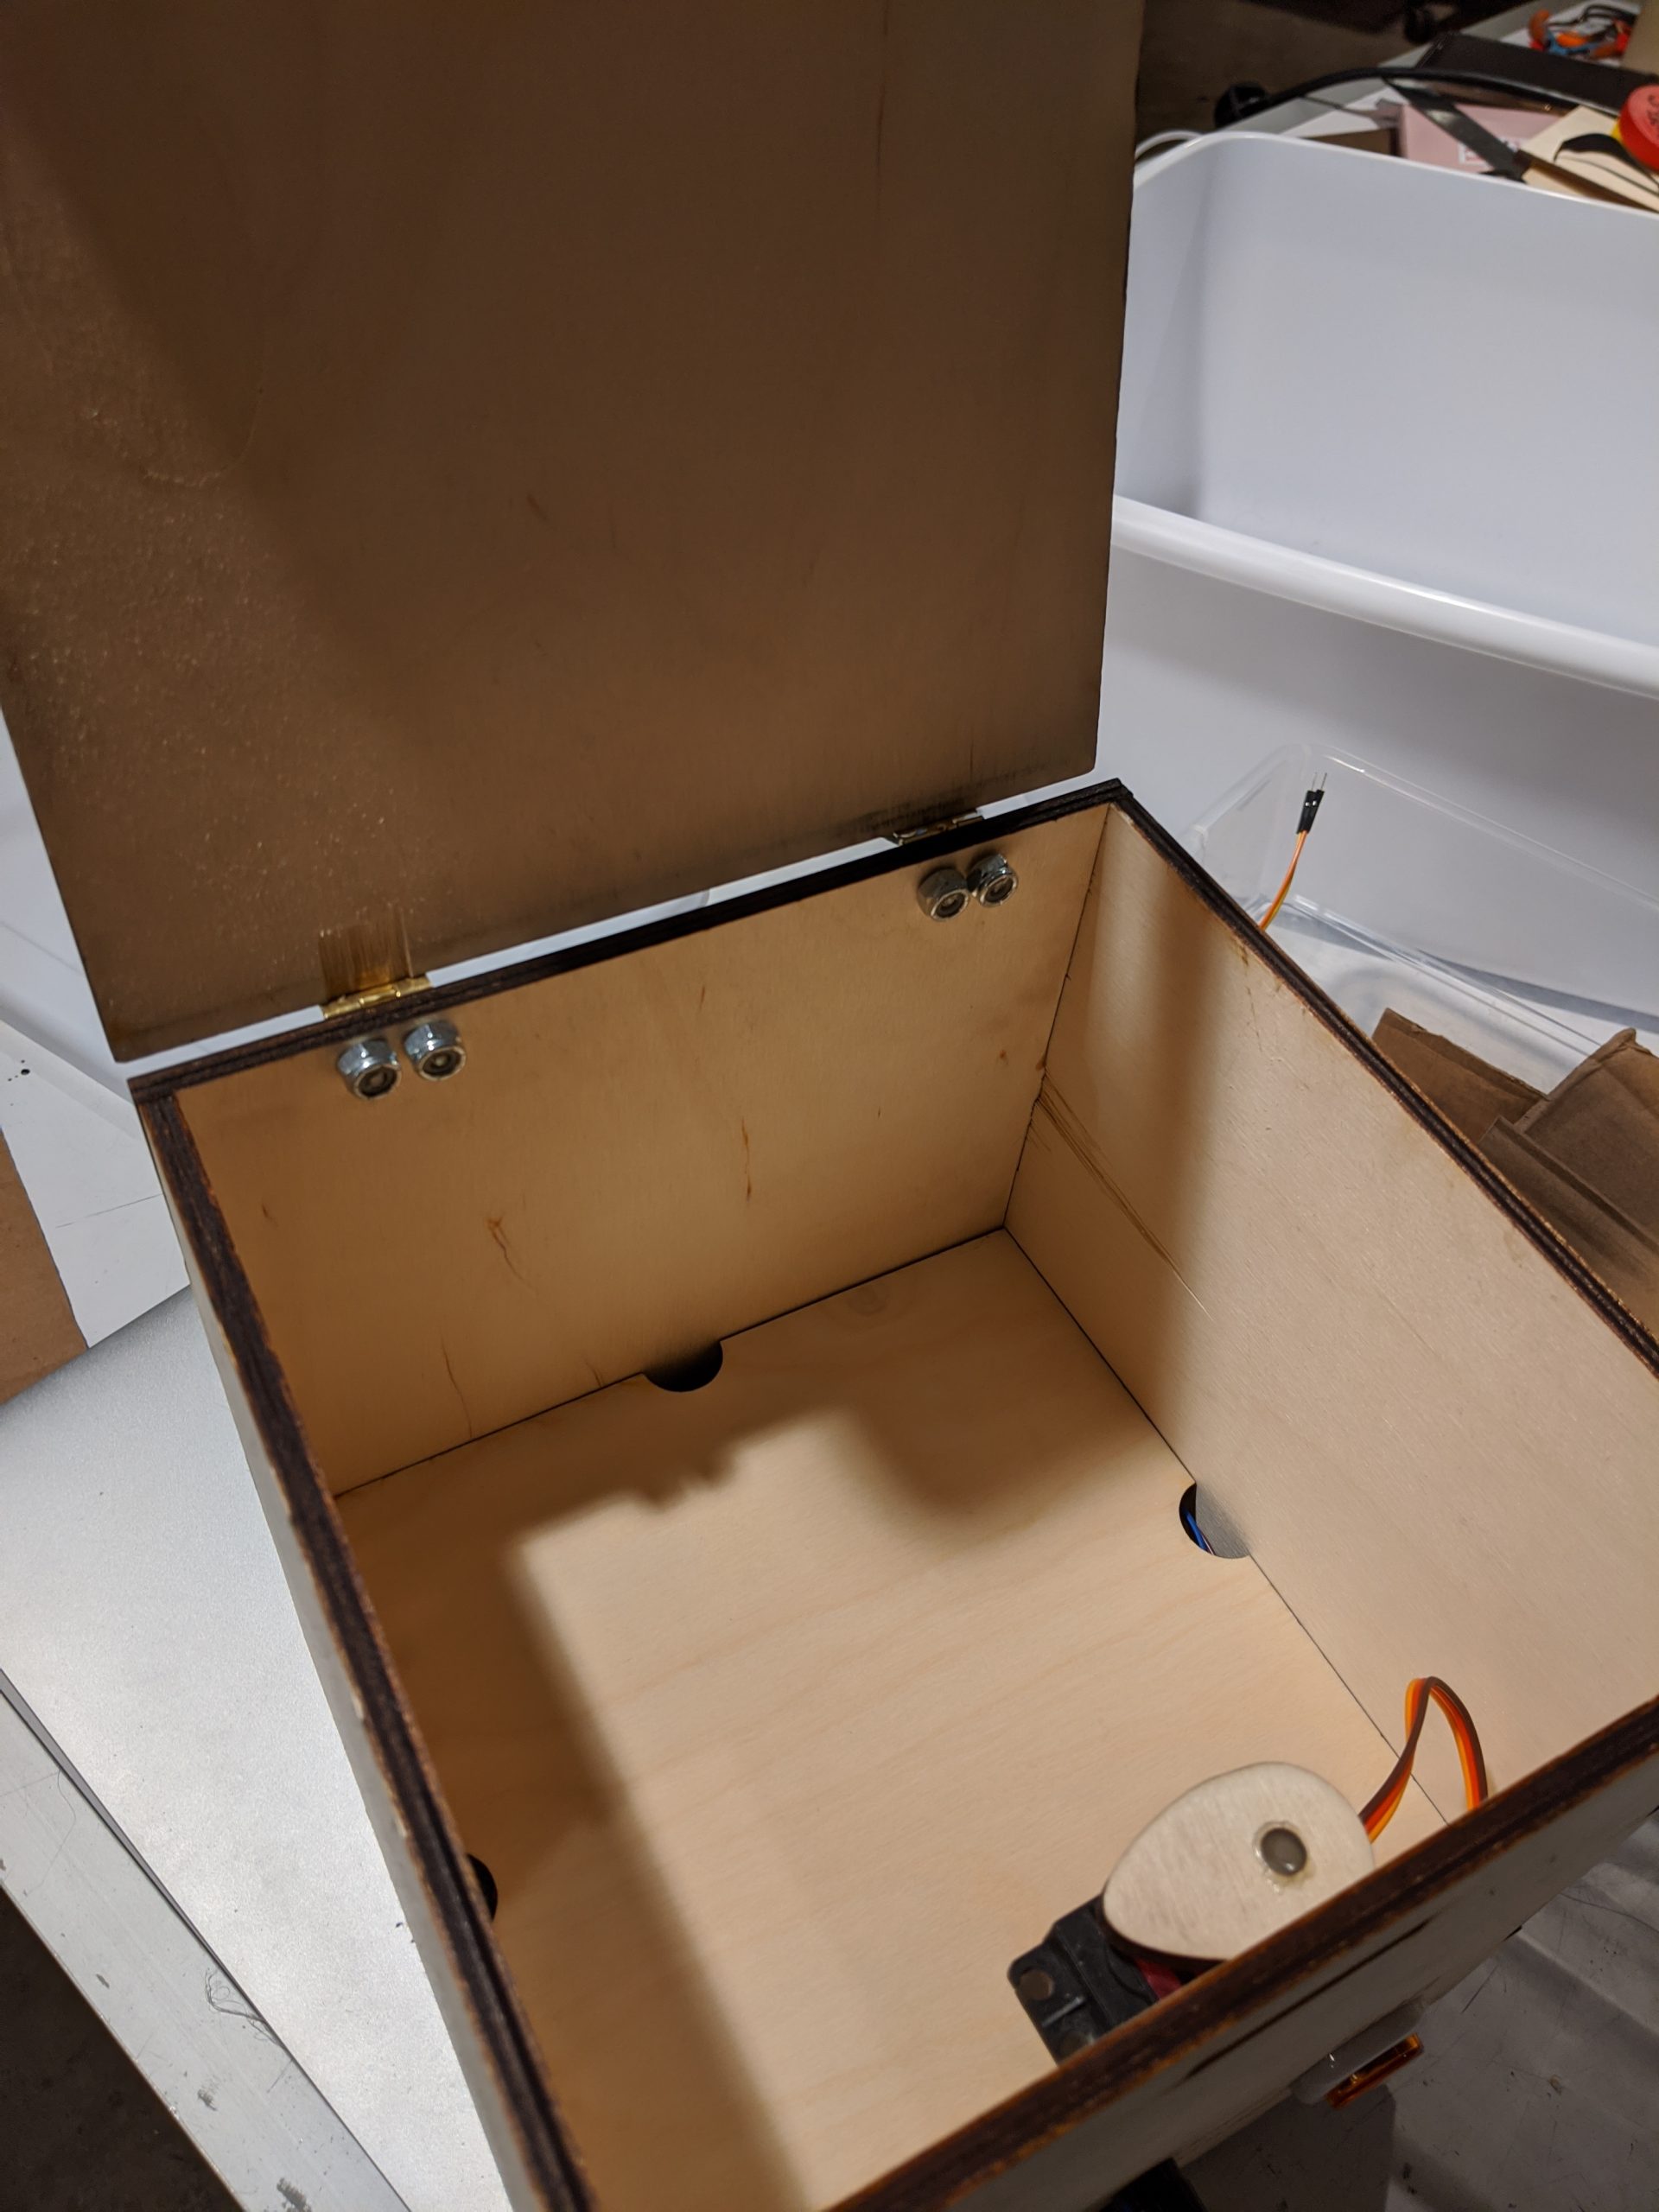
The inside of the box. A removable wood panel covers the circuitry and provides a base.
Process Images and Review
Originally, my design had the control panel located at the top of the box.
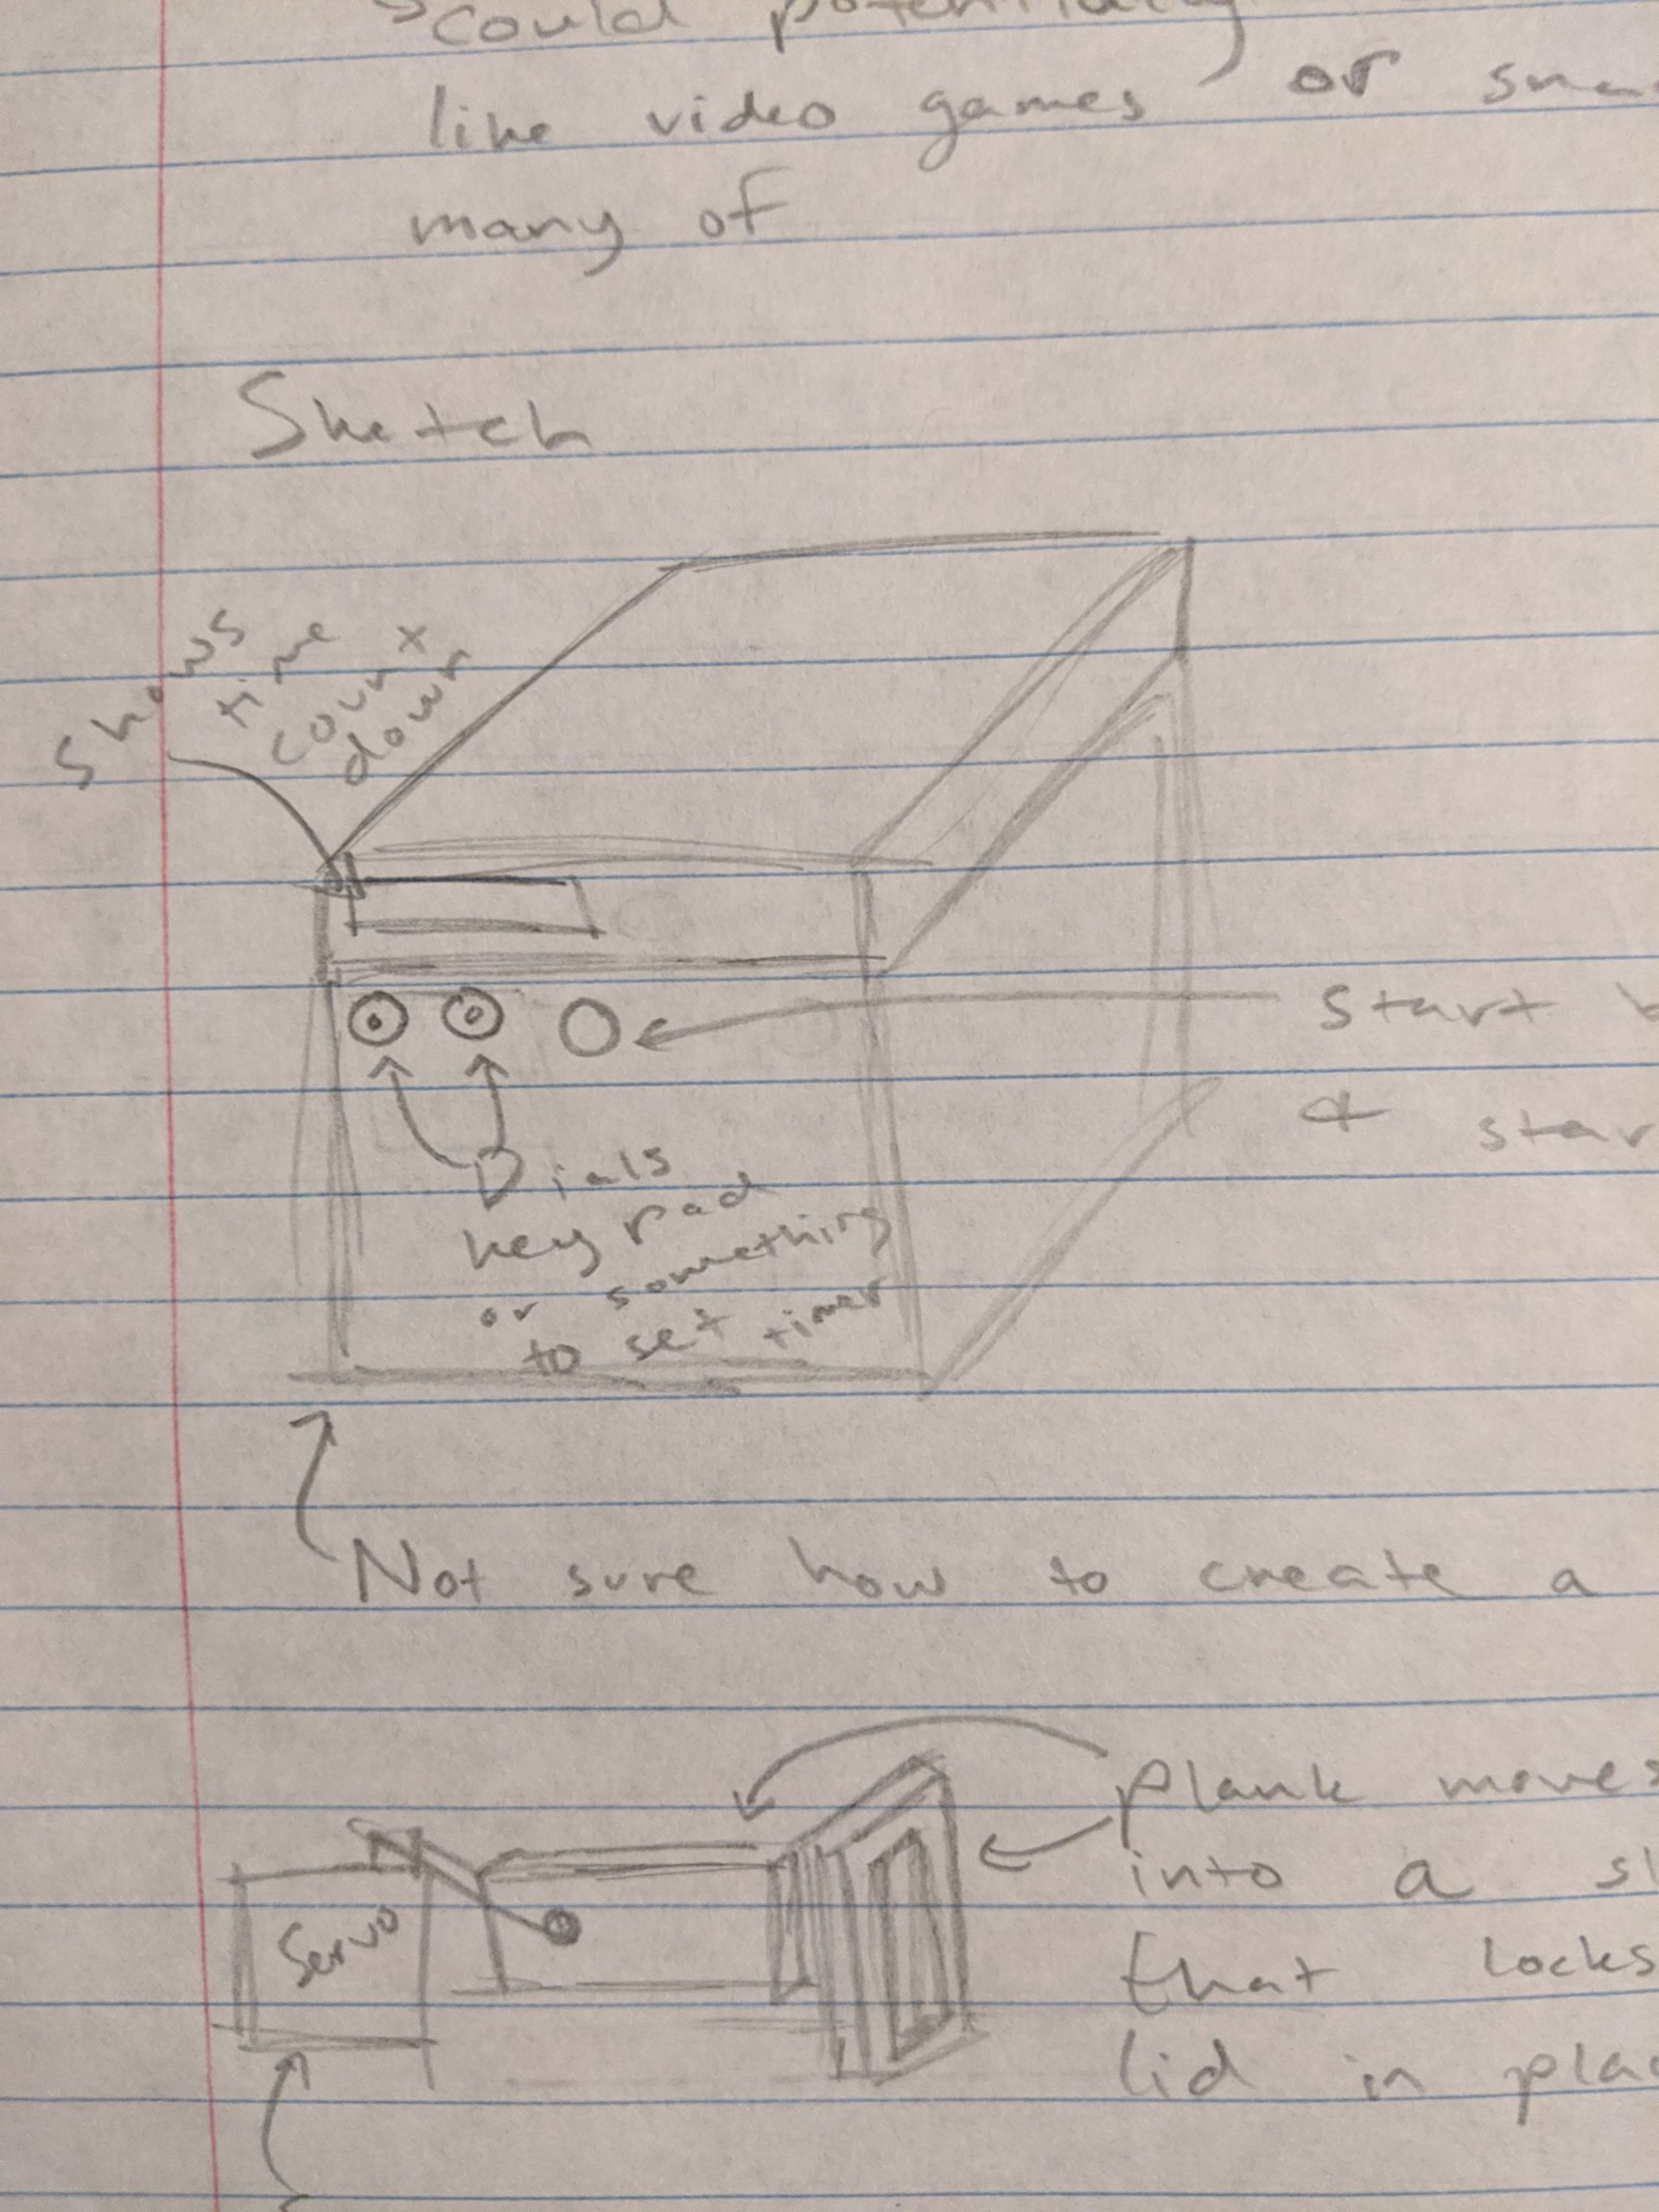
Original sketch of the box
Upon working with the material and the circuitry when making the prototype, I realized it was impractical to place the electronics at the top of the box or to stretch the wires that far. Thus, I had to relocate everything for the prototype and the final at the bottom.
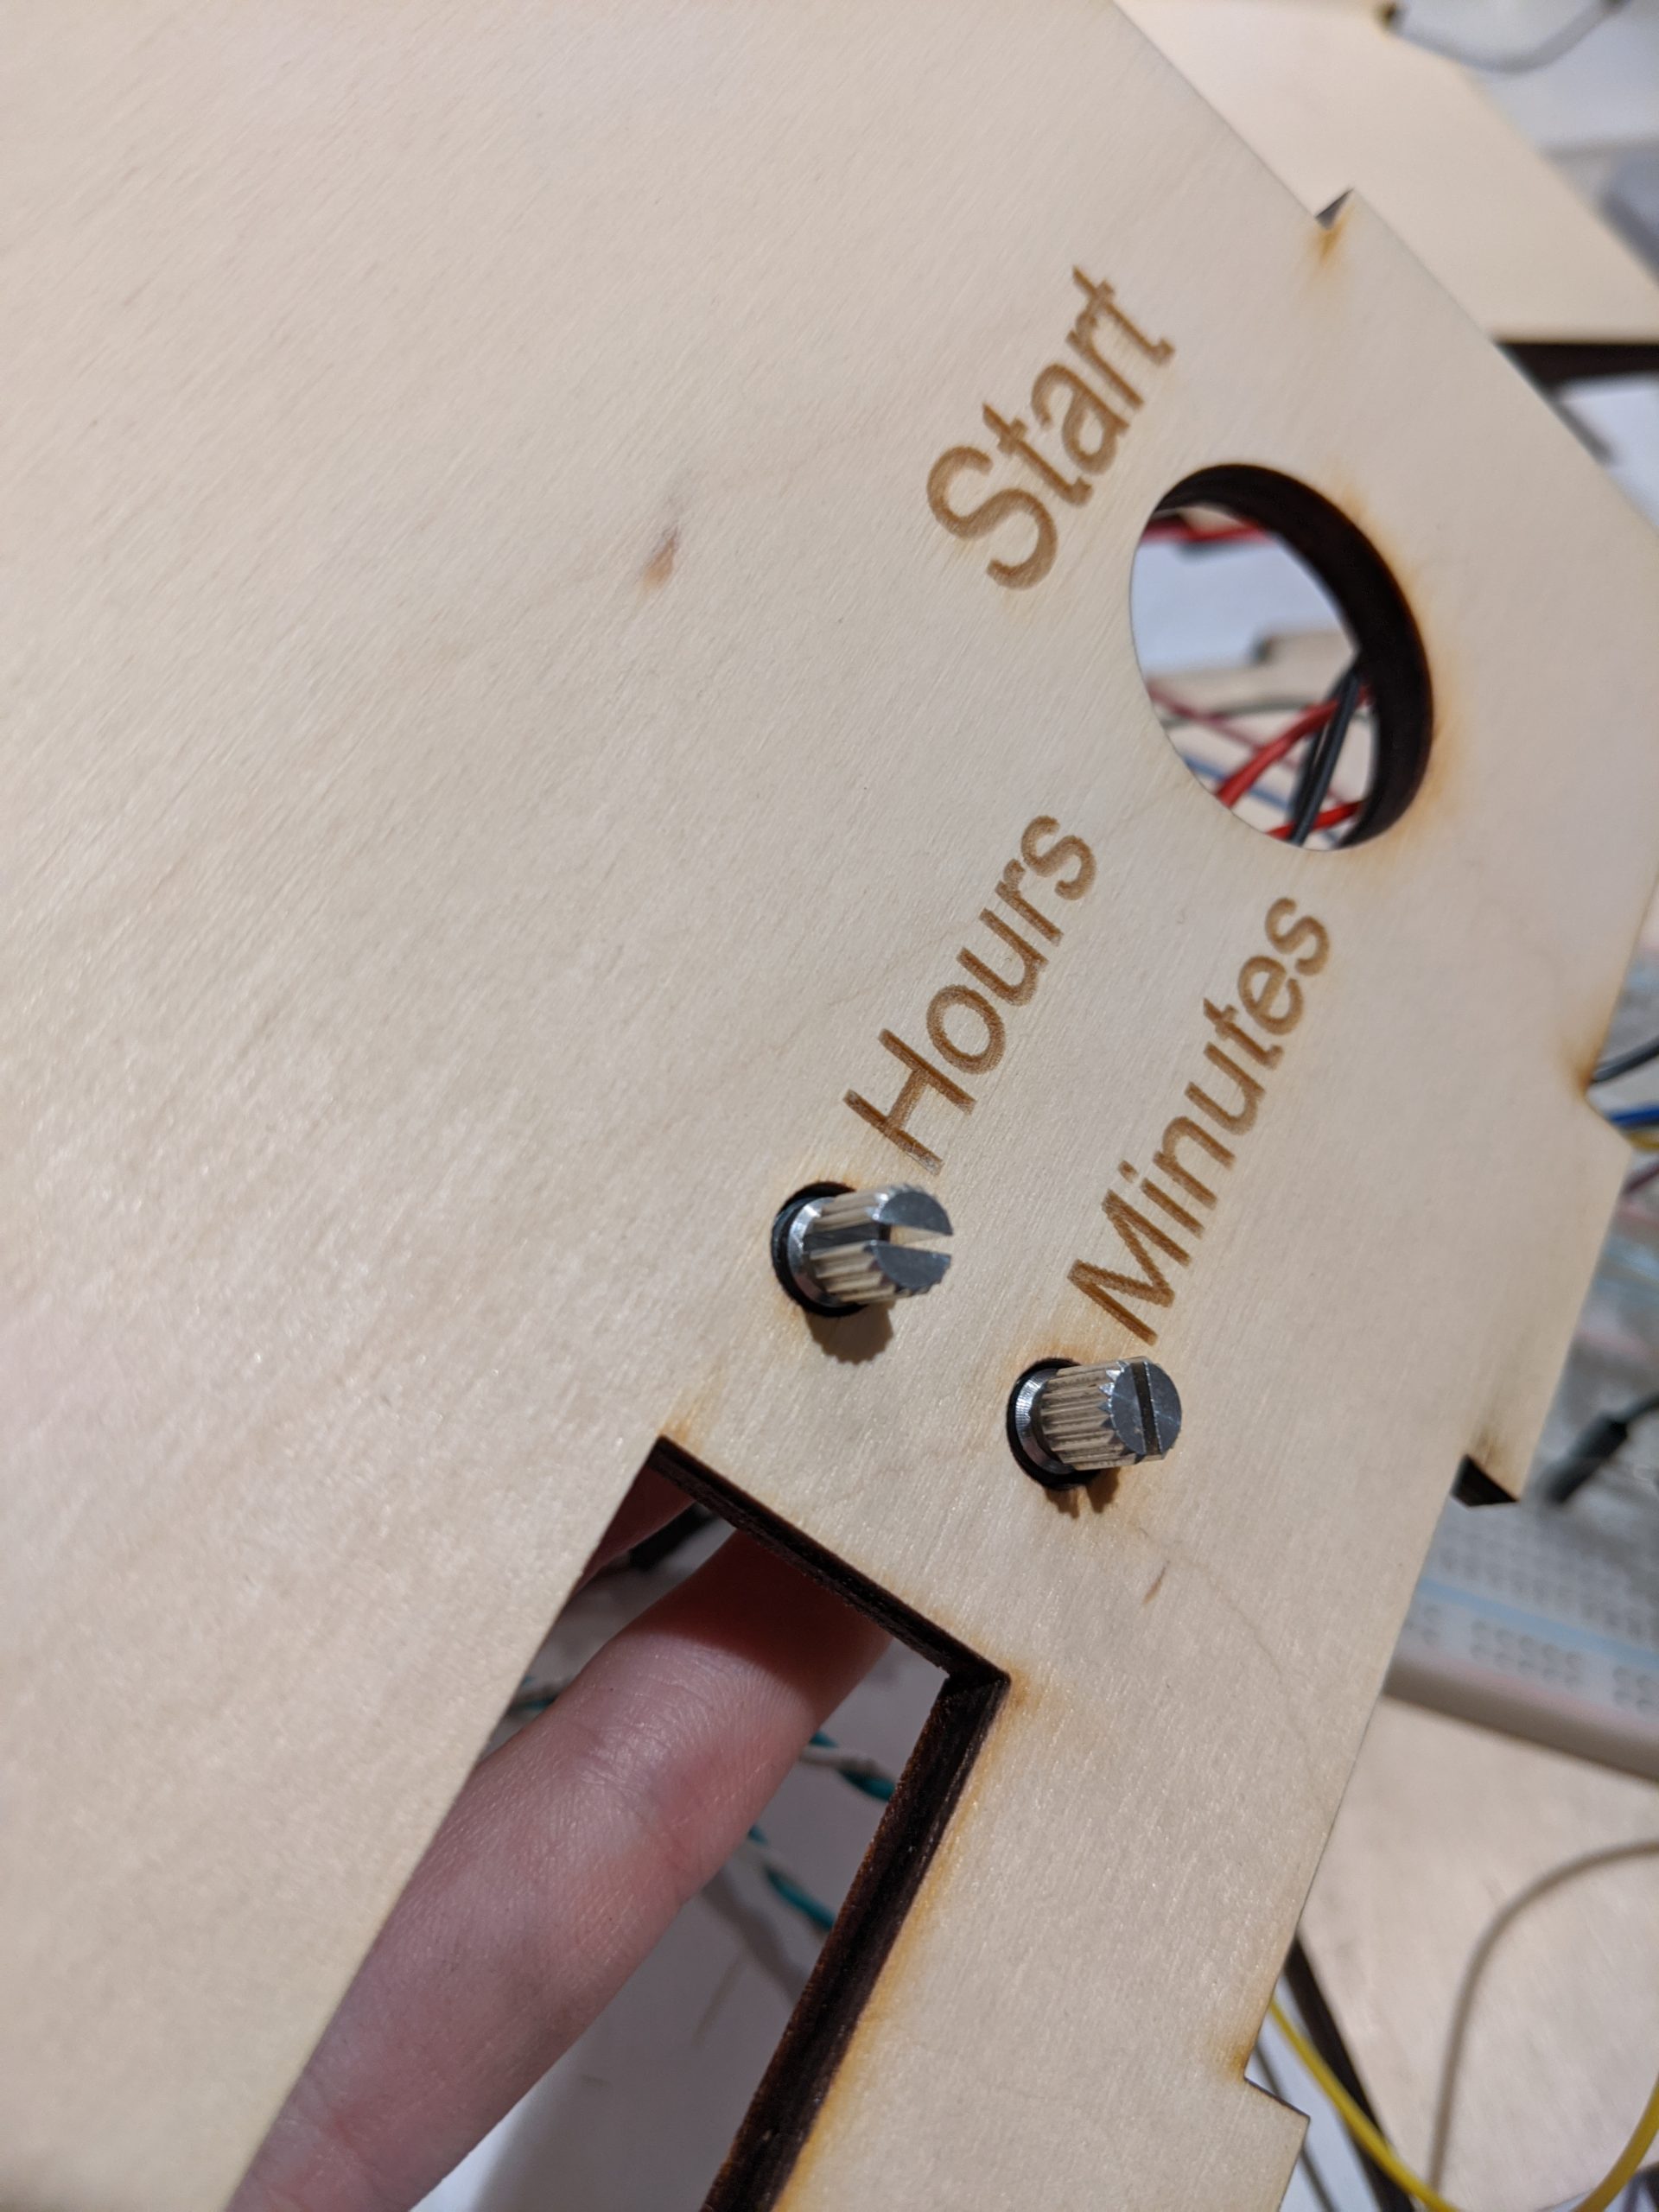
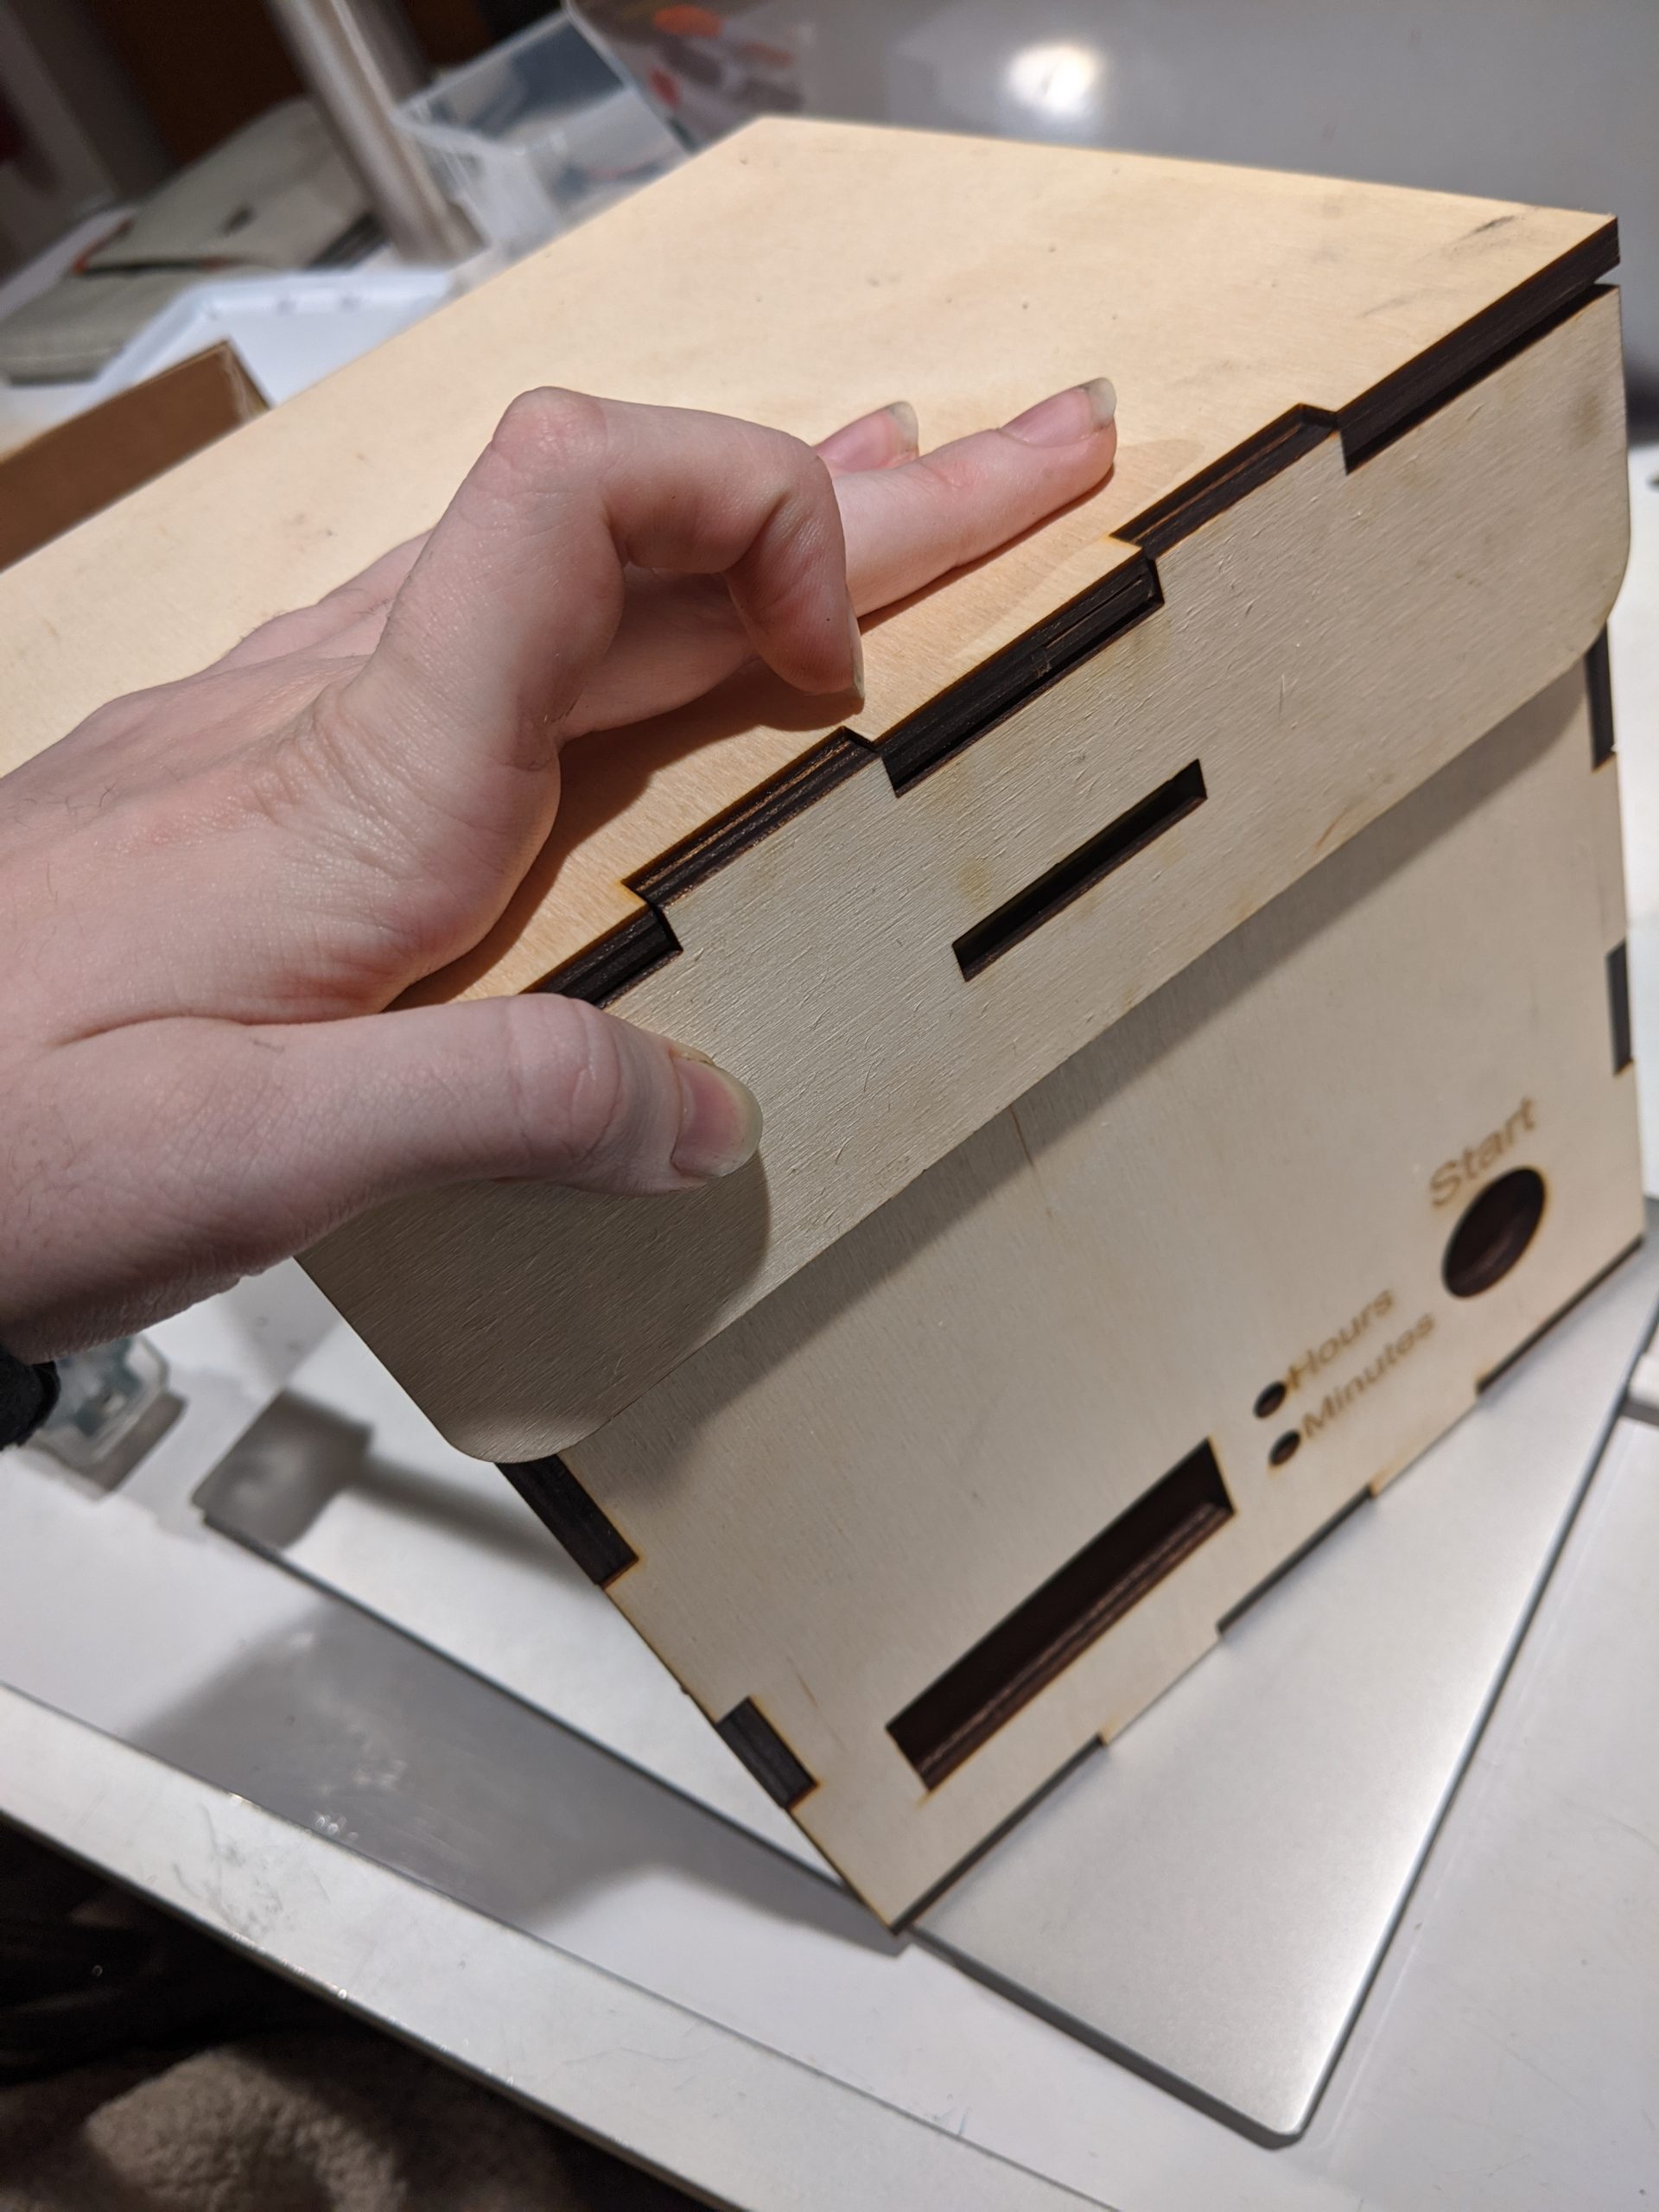
The front panel with the cut outs for the button, dials, and LED display
Additionally, when I made the prototype the planned lock mechanism was different from how I made it in the end.
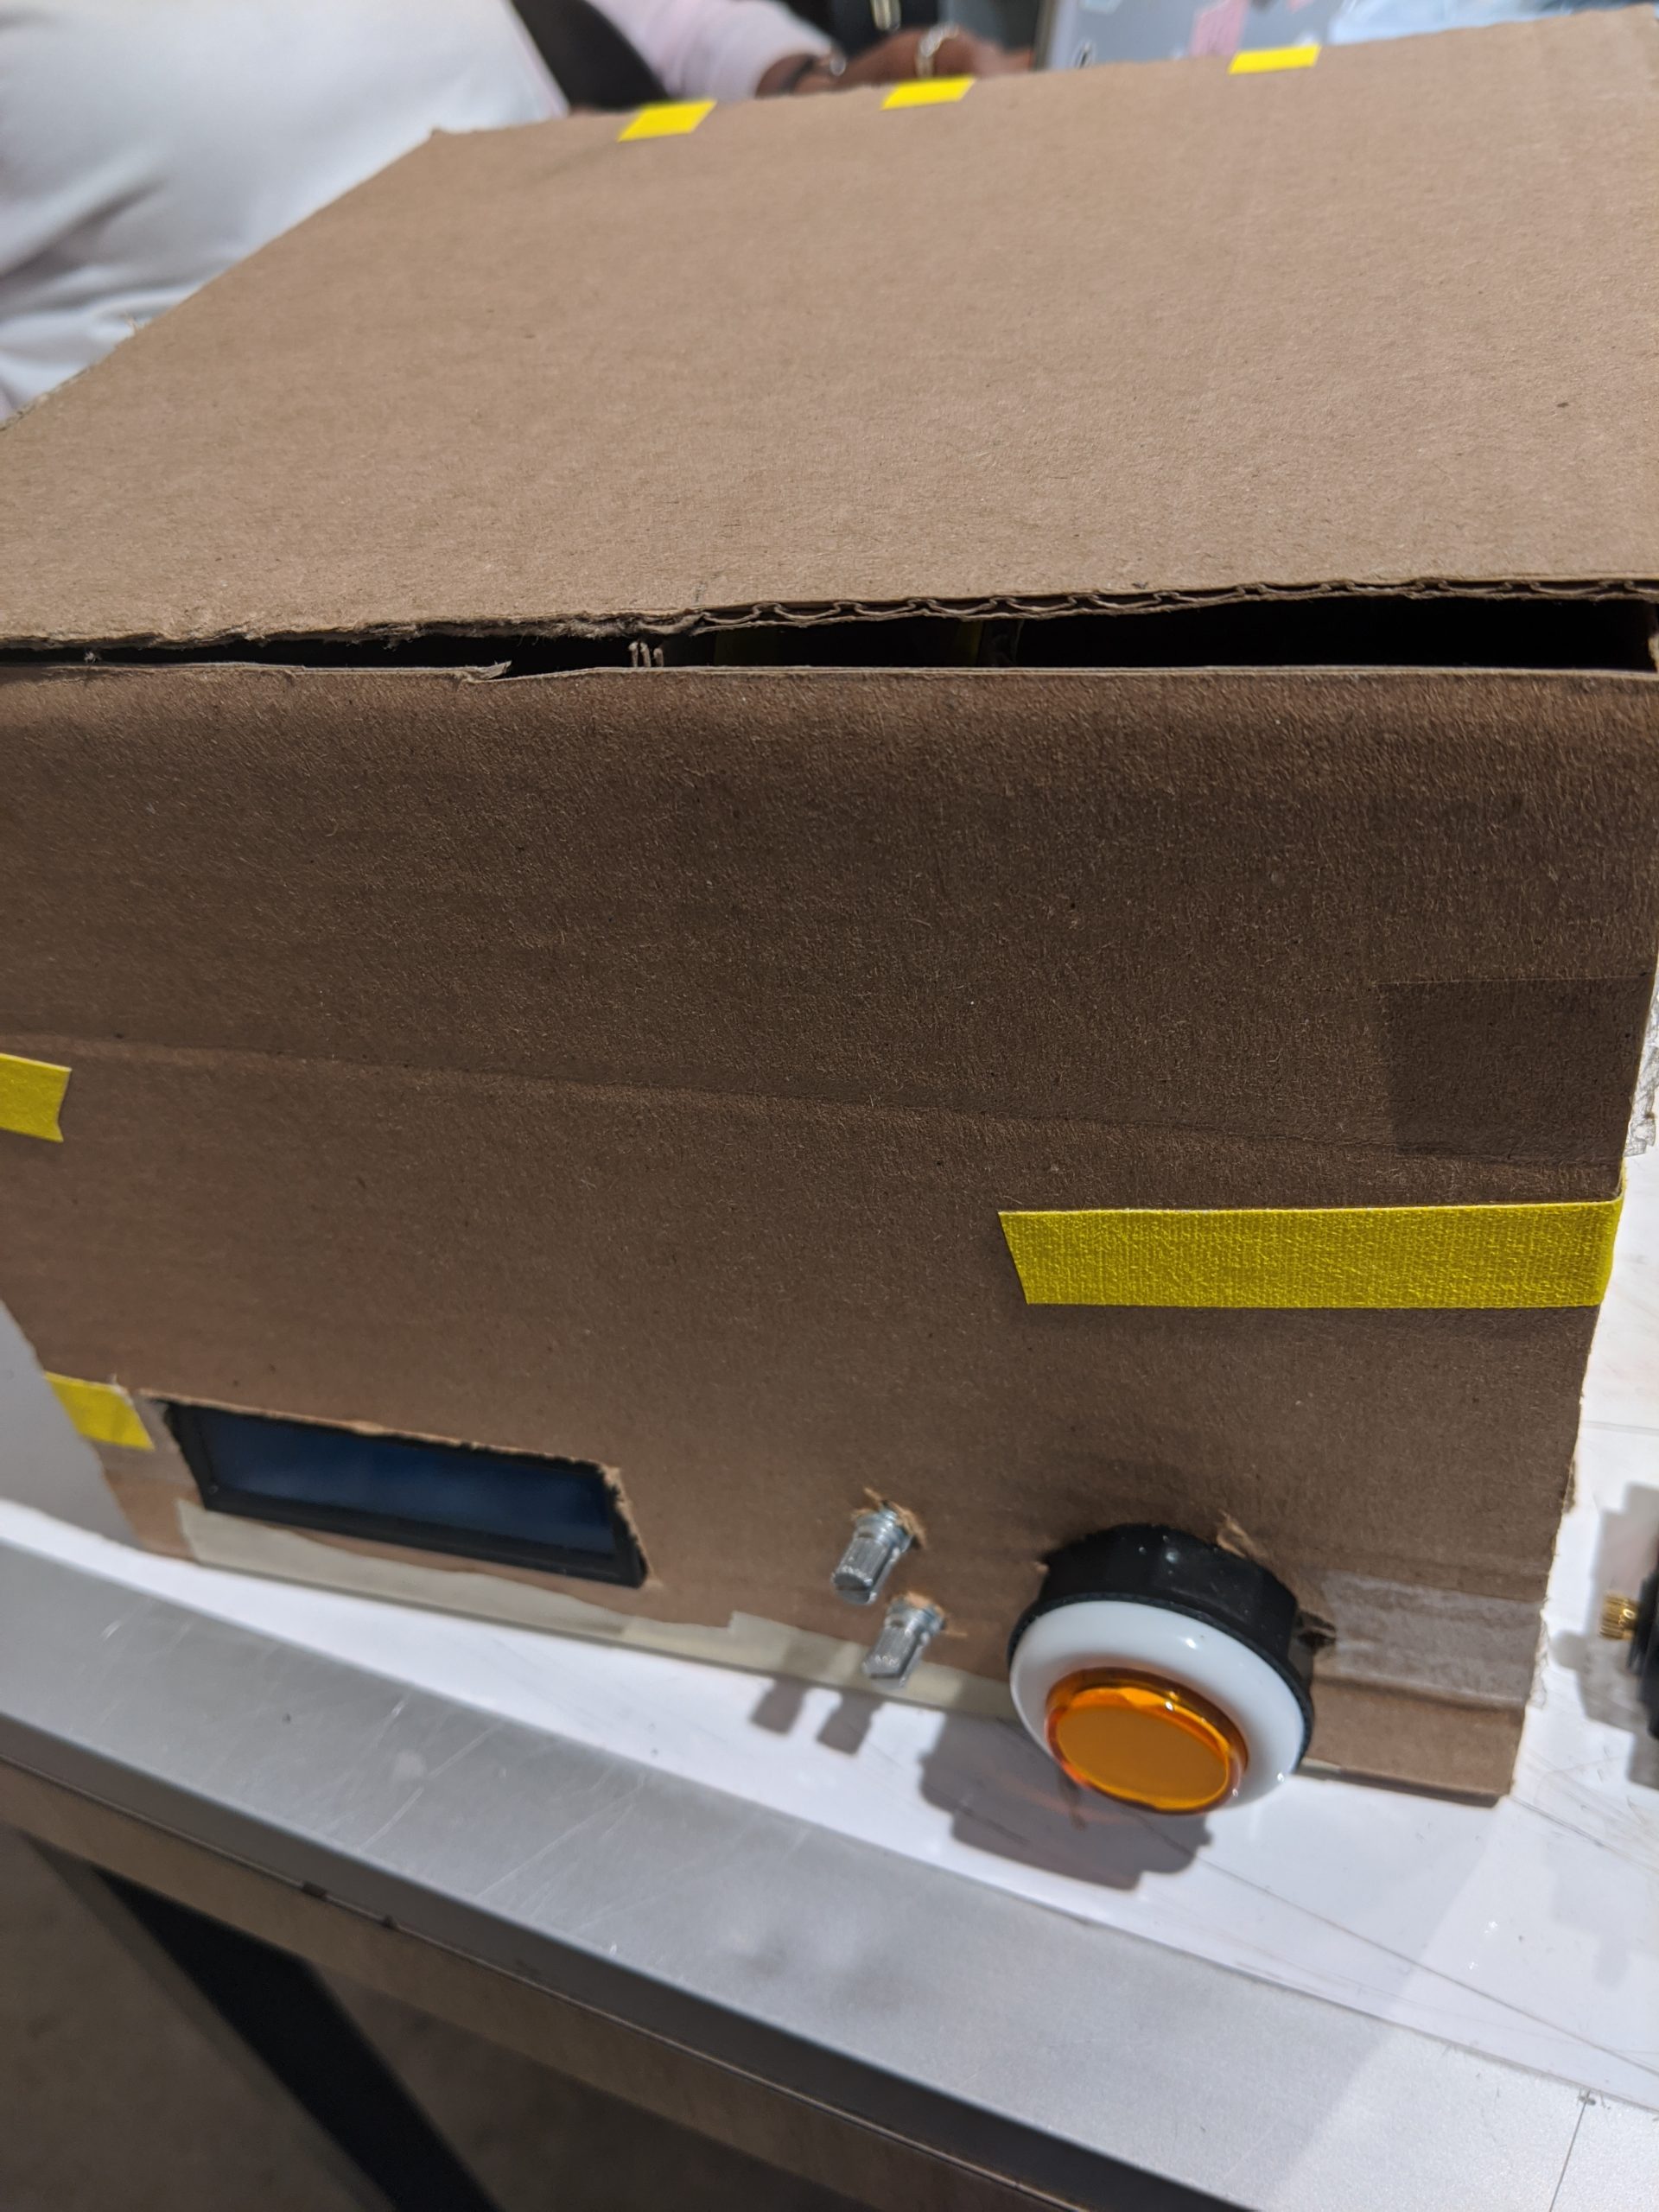
Picture of the prototype model
In the prototype, the piece of material attached to the servo slid into a slot in a block of material attached to the lid. I realized this locking mechanism was over complicated, and it might not have worked in the end. In the final project, a piece of wood slides through a slot in both the front of the box and the lid, preventing the box from being opened.
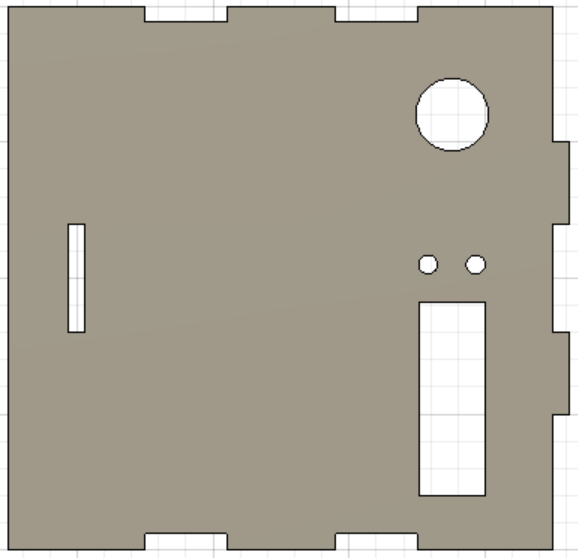
The front design of the box with a slot for the lock
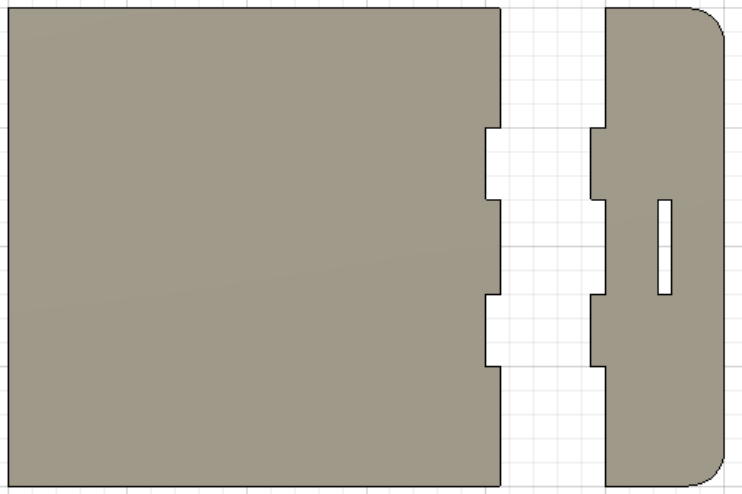
The design created using Fusion with a slot for the lock
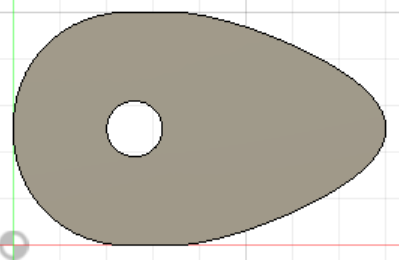
The wood lock attached to the servo motor
In order for everything to operate smoothly, the wood lock had to be sanded down for the piece in fit through the slots. Additionally, the front panel had to be laser cut again, as I had originally made an error in measurements. I had to ensure none of the wood glue I used during assembly was visible and that the hinges were perfectly screwed in. The box required more work during assembly than I anticipated, but it managed to turn out well.
Checking the box fit together before I glued it together
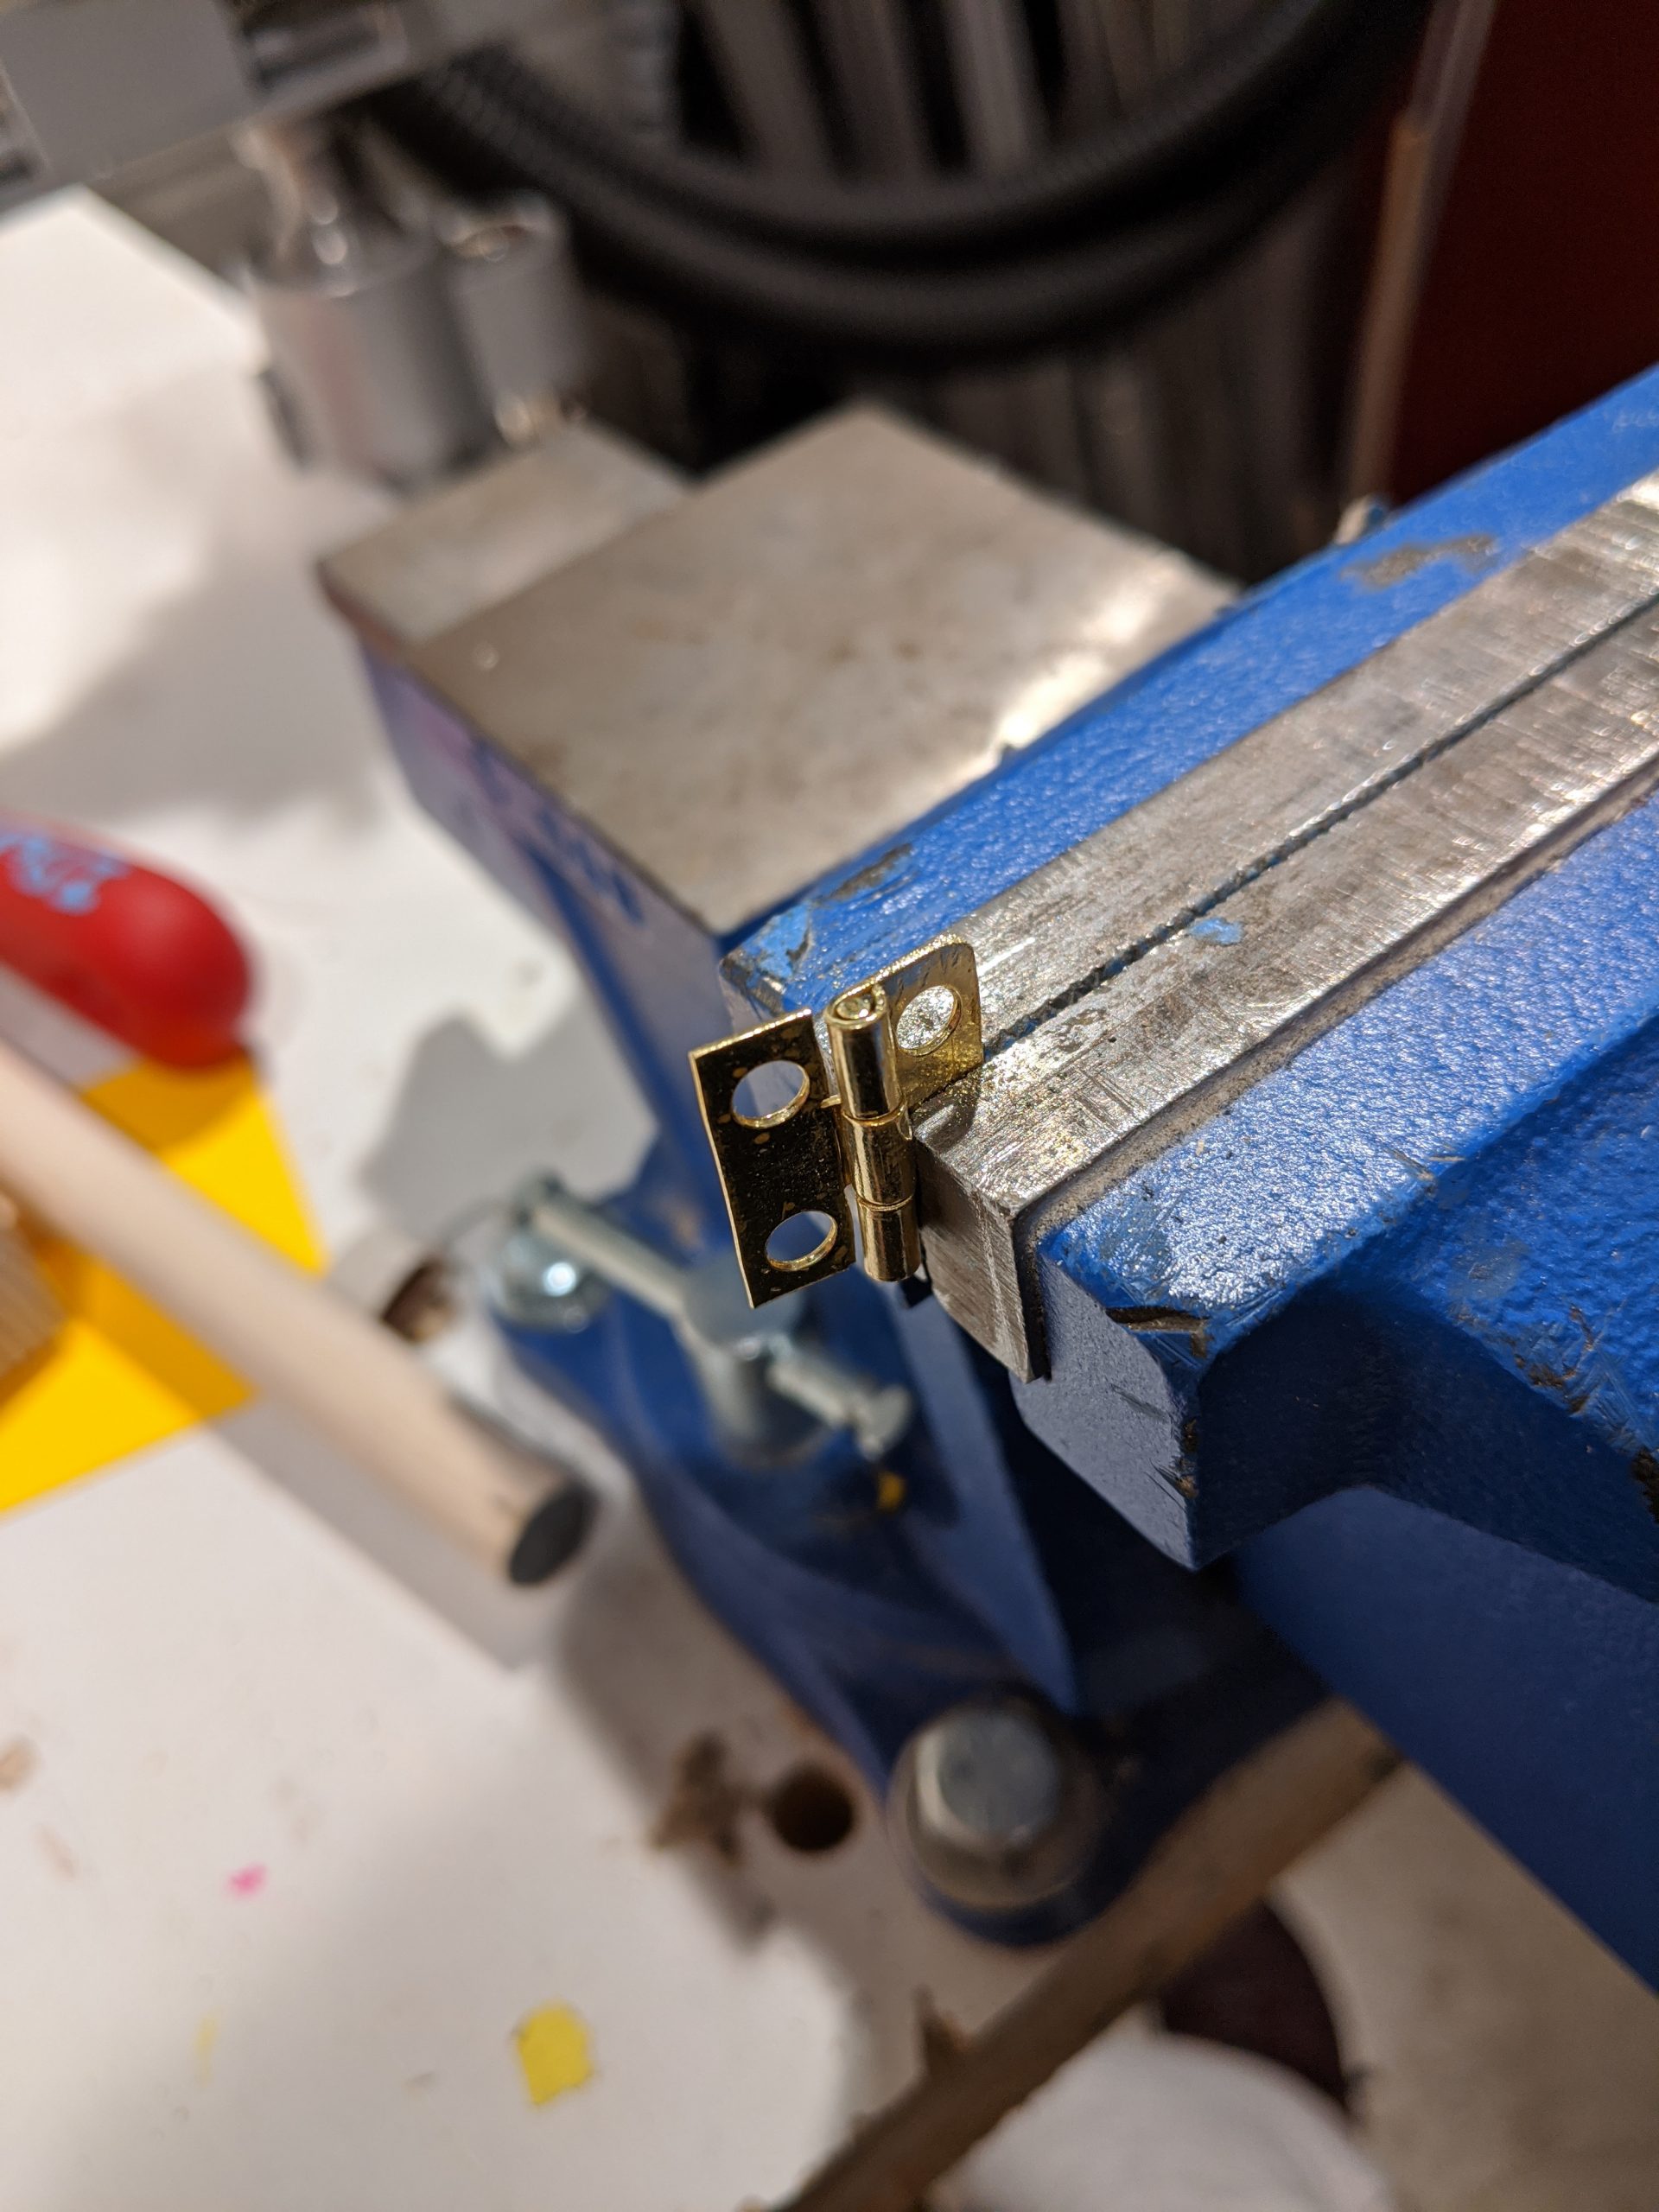
Grinding the edges of the hinges down for the lid
Drilling the screws into the box to make a working lid
Discussion
I am very happy with how my project turned out. The device I wanted to make didn’t require very complex coding, and I didn’t have many problems wiring it. However, it required me to delve deeper into fabrication than I ever have. One of my goals in this project was to get more experience using CAD, the laser cutter, and other tools. Through this project, I gained valuable experience and I’ve made (in my opinion) a beautiful box that works well at locking away any distractions. I made some errors in the process of creating the CAD for the box, but I managed to learn how to operate the laser cutter and other key aspects of the assembly process. I’m satisfied with my finished project. Still, there are more improvements I could make, as pointed out by my classmates:
“I think it is a great idea and can scale for different things. But there seems to be some edge cases that you haven’t thought about.”
“Nice job with the design. Consider adding a routine that measures battery voltage and refuses to lock if the battery is too low.”
I agree with both comments. When making it, I failed to account for the fact that if the battery runs out of power when the box is locked then it would remain stuck like that. As mentioned in the comments, I should have considered this case when making the box. There are other cases I failed to consider, such as if an emergency arises and my phone is stuck in the box. When making my next iteration of the Lockbox, I should have the box automatically unlock whenever it is low on battery. I’m not sure how to solve the other problem without ruining the purpose of the box, but I should consider it as I’m making the next one. I am planning to make another one. As mentioned in the first critique, I could scale the box for different objects. For example, another classmate said I could make a laptop-sized one, and I think that is a good idea. I had a lot of fun making this one, so I would like to make another differently sized Lockbox which makes the above stated improvements.
While working on this project, I learned a lot about my own approaches to building things. When making my prototype, I gathered unnecessary amounts of cardboard from recycling bins that I didn’t end up using. In retrospect, I could have used the extra cardboard to test out multiple lock designs. Furthermore, I ordered a lot of hinges of varying sizes instead of just making the needed measurements before ordering all of them. I obtained more material than I realistically needed. My advice to my past self would be to take advantage of the material I have and to measure things before making purchases. I learned that I love using the laser cutter through this project, though, so I will definitely try to make future use of it. Furthermore, brainstorming throughout the week was helpful, as it was easier to write ideas as I got them instead of forcing myself to sit down and think of many all at one time. For future assignments, I am going to aim to employ that strategy.
Technical Information
Code:
- <span class="com">/*
- Project 2
- Leah Walko (lwalko)
- Description: It is a lockbox. The user can set a timer. As soon as
- the user presses the start button, the timer will count down and
- until time is up the box will be locked. The user can set the time
- to be for hours or mere minutes.
- Collaboration: Seth helped me with laser cutting. I designed and assembled
- everything myself, but he was there to assist me with the laser cut
- machine.
- Pin mapping:
- pin | mode | description
- ------|--------|----------------------------------------------
- A1 | input | potentiometer controlling hours
- A2 | input | potentiometer controlling minutes
- 10 | input | push button to start timer
- 2 | output | servo motor moves position to lock and unlock
- SCL | output | I2C LCD
- SDA | output | I2C LCD
- */</span><span class="pln">
- </span><span class="com">#include</span><span class="pln"> </span><span class="str"><Servo.h></span><span class="pln">
- </span><span class="typ">Servo</span><span class="pln"> </span><span class="kwd">lock</span><span class="pun">;</span><span class="pln">
- </span><span class="com">#include</span><span class="pln"> </span><span class="str"><Wire.h></span><span class="pln">
- </span><span class="com">#include</span><span class="pln"> </span><span class="str"><LiquidCrystal_I2C.h></span><span class="pln">
- </span><span class="typ">LiquidCrystal_I2C</span><span class="pln"> screen</span><span class="pun">(</span><span class="lit">0x27</span><span class="pun">,</span><span class="pln"> </span><span class="lit">16</span><span class="pun">,</span><span class="pln"> </span><span class="lit">2</span><span class="pun">);</span><span class="pln">
- </span><span class="com">// variables for counting time</span><span class="pln">
- </span><span class="kwd">unsigned</span><span class="pln"> </span><span class="kwd">long</span><span class="pln"> timer </span><span class="pun">=</span><span class="pln"> </span><span class="lit">0</span><span class="pun">;</span><span class="pln">
- </span><span class="kwd">const</span><span class="pln"> </span><span class="kwd">int</span><span class="pln"> INTERVAL </span><span class="pun">=</span><span class="pln"> </span><span class="lit">1000</span><span class="pun">;</span><span class="pln">
- </span><span class="com">// box state</span><span class="pln">
- </span><span class="kwd">bool</span><span class="pln"> isLocked </span><span class="pun">=</span><span class="pln"> </span><span class="kwd">false</span><span class="pun">;</span><span class="pln">
- </span><span class="kwd">const</span><span class="pln"> </span><span class="kwd">int</span><span class="pln"> HOURPIN </span><span class="pun">=</span><span class="pln"> A1</span><span class="pun">;</span><span class="pln">
- </span><span class="kwd">const</span><span class="pln"> </span><span class="kwd">int</span><span class="pln"> MINPIN </span><span class="pun">=</span><span class="pln"> A2</span><span class="pun">;</span><span class="pln">
- </span><span class="kwd">const</span><span class="pln"> </span><span class="kwd">int</span><span class="pln"> BUTTONPIN </span><span class="pun">=</span><span class="pln"> </span><span class="lit">10</span><span class="pun">;</span><span class="pln">
- </span><span class="kwd">const</span><span class="pln"> </span><span class="kwd">int</span><span class="pln"> SERVOPIN </span><span class="pun">=</span><span class="pln"> </span><span class="lit">2</span><span class="pun">;</span><span class="pln">
- </span><span class="com">// current dial numbers</span><span class="pln">
- </span><span class="kwd">unsigned</span><span class="pln"> </span><span class="kwd">long</span><span class="pln"> hour </span><span class="pun">=</span><span class="pln"> </span><span class="lit">0</span><span class="pun">;</span><span class="pln">
- </span><span class="kwd">unsigned</span><span class="pln"> </span><span class="kwd">long</span><span class="pln"> minute </span><span class="pun">=</span><span class="pln"> </span><span class="lit">0</span><span class="pun">;</span><span class="pln">
- </span><span class="kwd">unsigned</span><span class="pln"> </span><span class="kwd">long</span><span class="pln"> second </span><span class="pun">=</span><span class="pln"> </span><span class="lit">0</span><span class="pun">;</span><span class="pln">
- </span><span class="kwd">void</span><span class="pln"> setup</span><span class="pun">()</span><span class="pln"> </span><span class="pun">{</span><span class="pln">
- </span><span class="com">// setup the screen</span><span class="pln">
- screen</span><span class="pun">.</span><span class="pln">init</span><span class="pun">();</span><span class="pln">
- screen</span><span class="pun">.</span><span class="pln">backlight</span><span class="pun">();</span><span class="pln"> </span><span class="com">// turn on the backlight to start</span><span class="pln">
- screen</span><span class="pun">.</span><span class="pln">home</span><span class="pun">();</span><span class="pln"> </span><span class="com">// set cursor to home position</span><span class="pln">
- </span><span class="com">// create servo object</span><span class="pln">
- </span><span class="kwd">lock</span><span class="pun">.</span><span class="pln">attach</span><span class="pun">(</span><span class="pln">SERVOPIN</span><span class="pun">);</span><span class="pln">
- </span><span class="com">// set up the pins</span><span class="pln">
- pinMode</span><span class="pun">(</span><span class="pln">HOURPIN</span><span class="pun">,</span><span class="pln"> INPUT</span><span class="pun">);</span><span class="pln">
- pinMode</span><span class="pun">(</span><span class="pln">MINPIN</span><span class="pun">,</span><span class="pln"> INPUT</span><span class="pun">);</span><span class="pln">
- pinMode</span><span class="pun">(</span><span class="pln">BUTTONPIN</span><span class="pun">,</span><span class="pln"> INPUT</span><span class="pun">);</span><span class="pln">
- </span><span class="pun">}</span><span class="pln">
- </span><span class="kwd">void</span><span class="pln"> loop</span><span class="pun">()</span><span class="pln"> </span><span class="pun">{</span><span class="pln">
- </span><span class="com">// if it isn't currently locked</span><span class="pln">
- </span><span class="kwd">if</span><span class="pun">(!</span><span class="pln">isLocked</span><span class="pun">)</span><span class="pln"> </span><span class="pun">{</span><span class="pln">
- </span><span class="com">// gets hour and minute input</span><span class="pln">
- hour </span><span class="pun">=</span><span class="pln"> map</span><span class="pun">(</span><span class="pln">analogRead</span><span class="pun">(</span><span class="pln">HOURPIN</span><span class="pun">),</span><span class="pln"> </span><span class="lit">0</span><span class="pun">,</span><span class="pln"> </span><span class="lit">1032</span><span class="pun">,</span><span class="pln"> </span><span class="lit">0</span><span class="pun">,</span><span class="pln"> </span><span class="lit">25</span><span class="pun">);</span><span class="pln">
- minute </span><span class="pun">=</span><span class="pln"> map</span><span class="pun">(</span><span class="pln">analogRead</span><span class="pun">(</span><span class="pln">MINPIN</span><span class="pun">),</span><span class="pln"> </span><span class="lit">0</span><span class="pun">,</span><span class="pln"> </span><span class="lit">1023</span><span class="pun">,</span><span class="pln"> </span><span class="lit">0</span><span class="pun">,</span><span class="pln"> </span><span class="lit">59</span><span class="pun">);</span><span class="pln">
- second </span><span class="pun">=</span><span class="pln"> hour </span><span class="pun">*</span><span class="pln"> </span><span class="lit">60</span><span class="pln"> </span><span class="pun">*</span><span class="pln"> </span><span class="lit">60</span><span class="pln"> </span><span class="pun">+</span><span class="pln"> minute </span><span class="pun">*</span><span class="pln"> </span><span class="lit">60</span><span class="pun">;</span><span class="pln"> </span><span class="com">// keeps track of the entire time</span><span class="pln">
- </span><span class="com">// if the button is pressed the box locks</span><span class="pln">
- </span><span class="kwd">if</span><span class="pun">(</span><span class="pln">digitalRead</span><span class="pun">(</span><span class="pln">BUTTONPIN</span><span class="pun">)</span><span class="pln"> </span><span class="pun">==</span><span class="pln"> HIGH</span><span class="pun">)</span><span class="pln"> </span><span class="pun">{</span><span class="pln">
- isLocked </span><span class="pun">=</span><span class="pln"> </span><span class="kwd">true</span><span class="pun">;</span><span class="pln">
- </span><span class="pun">}</span><span class="pln">
- </span><span class="pun">}</span><span class="pln">
- </span><span class="com">// while the box is locked it will count down the timer</span><span class="pln">
- </span><span class="kwd">if</span><span class="pun">(</span><span class="pln">isLocked</span><span class="pun">)</span><span class="pln"> </span><span class="pun">{</span><span class="pln">
- </span><span class="com">// if a second passes </span><span class="pln">
- </span><span class="kwd">if</span><span class="pun">(</span><span class="pln">millis</span><span class="pun">()</span><span class="pln"> </span><span class="pun">-</span><span class="pln"> timer </span><span class="pun">>=</span><span class="pln"> INTERVAL</span><span class="pun">)</span><span class="pln"> </span><span class="pun">{</span><span class="pln">
- </span><span class="com">// count down each second</span><span class="pln">
- second</span><span class="pun">--;</span><span class="pln">
- timer </span><span class="pun">=</span><span class="pln"> millis</span><span class="pun">();</span><span class="pln">
- </span><span class="pun">}</span><span class="pln">
- </span><span class="com">// if time counts down to 0 then it unlocks the box</span><span class="pln">
- </span><span class="kwd">if</span><span class="pun">(</span><span class="pln">second </span><span class="pun">==</span><span class="pln"> </span><span class="lit">0</span><span class="pun">)</span><span class="pln"> </span><span class="pun">{</span><span class="pln">
- isLocked </span><span class="pun">=</span><span class="pln"> </span><span class="kwd">false</span><span class="pun">;</span><span class="pln">
- </span><span class="pun">}</span><span class="pln">
- </span><span class="com">// calculate the remaining hours and minutes to display</span><span class="pln">
- hour </span><span class="pun">=</span><span class="pln"> </span><span class="pun">(</span><span class="pln">second </span><span class="pun">/</span><span class="pln"> </span><span class="lit">60</span><span class="pun">)</span><span class="pln"> </span><span class="pun">/</span><span class="pln"> </span><span class="lit">60</span><span class="pun">;</span><span class="pln">
- minute </span><span class="pun">=</span><span class="pln"> </span><span class="pun">(</span><span class="pln">second </span><span class="pun">/</span><span class="pln"> </span><span class="lit">60</span><span class="pun">)</span><span class="pln"> </span><span class="pun">%</span><span class="pln"> </span><span class="lit">60</span><span class="pun">;</span><span class="pln">
- </span><span class="pun">}</span><span class="pln">
- </span><span class="com">// move servo lock based off whether or not it is locked</span><span class="pln">
- </span><span class="kwd">if</span><span class="pun">(</span><span class="pln">isLocked</span><span class="pun">){</span><span class="pln">
- </span><span class="kwd">lock</span><span class="pun">.</span><span class="pln">write</span><span class="pun">(</span><span class="lit">75</span><span class="pun">);</span><span class="pln">
- </span><span class="pun">}</span><span class="pln"> </span><span class="kwd">else</span><span class="pun">{</span><span class="pln">
- </span><span class="kwd">lock</span><span class="pun">.</span><span class="pln">write</span><span class="pun">(</span><span class="lit">0</span><span class="pun">);</span><span class="pln">
- </span><span class="pun">}</span><span class="pln">
- </span><span class="com">// print out the hours and minutes on the LCD screen</span><span class="pln">
- screen</span><span class="pun">.</span><span class="pln">setCursor</span><span class="pun">(</span><span class="lit">0</span><span class="pun">,</span><span class="pln"> </span><span class="lit">0</span><span class="pun">);</span><span class="pln">
- </span><span class="kwd">if</span><span class="pun">(</span><span class="pln">hour </span><span class="pun"><</span><span class="pln"> </span><span class="lit">10</span><span class="pun">){</span><span class="pln">
- screen</span><span class="pun">.</span><span class="kwd">print</span><span class="pun">(</span><span class="lit">0</span><span class="pun">);</span><span class="pln">
- </span><span class="pun">}</span><span class="pln">
- screen</span><span class="pun">.</span><span class="kwd">print</span><span class="pun">(</span><span class="pln">hour</span><span class="pun">);</span><span class="pln">
- screen</span><span class="pun">.</span><span class="kwd">print</span><span class="pun">(</span><span class="str">":"</span><span class="pun">);</span><span class="pln">
- </span><span class="kwd">if</span><span class="pun">(</span><span class="pln">minute </span><span class="pun"><</span><span class="pln"> </span><span class="lit">10</span><span class="pun">){</span><span class="pln">
- screen</span><span class="pun">.</span><span class="kwd">print</span><span class="pun">(</span><span class="lit">0</span><span class="pun">);</span><span class="pln">
- </span><span class="pun">}</span><span class="pln">
- screen</span><span class="pun">.</span><span class="kwd">print</span><span class="pun">(</span><span class="pln">minute</span><span class="pun">);</span><span class="pln">
- screen</span><span class="pun">.</span><span class="kwd">print</span><span class="pun">(</span><span class="str">":"</span><span class="pun">);</span><span class="pln">
- </span><span class="kwd">if</span><span class="pun">((</span><span class="pln">second </span><span class="pun">%</span><span class="pln"> </span><span class="lit">60</span><span class="pun">)</span><span class="pln"> </span><span class="pun"><</span><span class="pln"> </span><span class="lit">10</span><span class="pun">){</span><span class="pln">
- screen</span><span class="pun">.</span><span class="kwd">print</span><span class="pun">(</span><span class="lit">0</span><span class="pun">);</span><span class="pln">
- </span><span class="pun">}</span><span class="pln">
- screen</span><span class="pun">.</span><span class="kwd">print</span><span class="pun">(</span><span class="pln">second </span><span class="pun">%</span><span class="pln"> </span><span class="lit">60</span><span class="pun">);</span><span class="pln">
- </span><span class="pun">}</span>
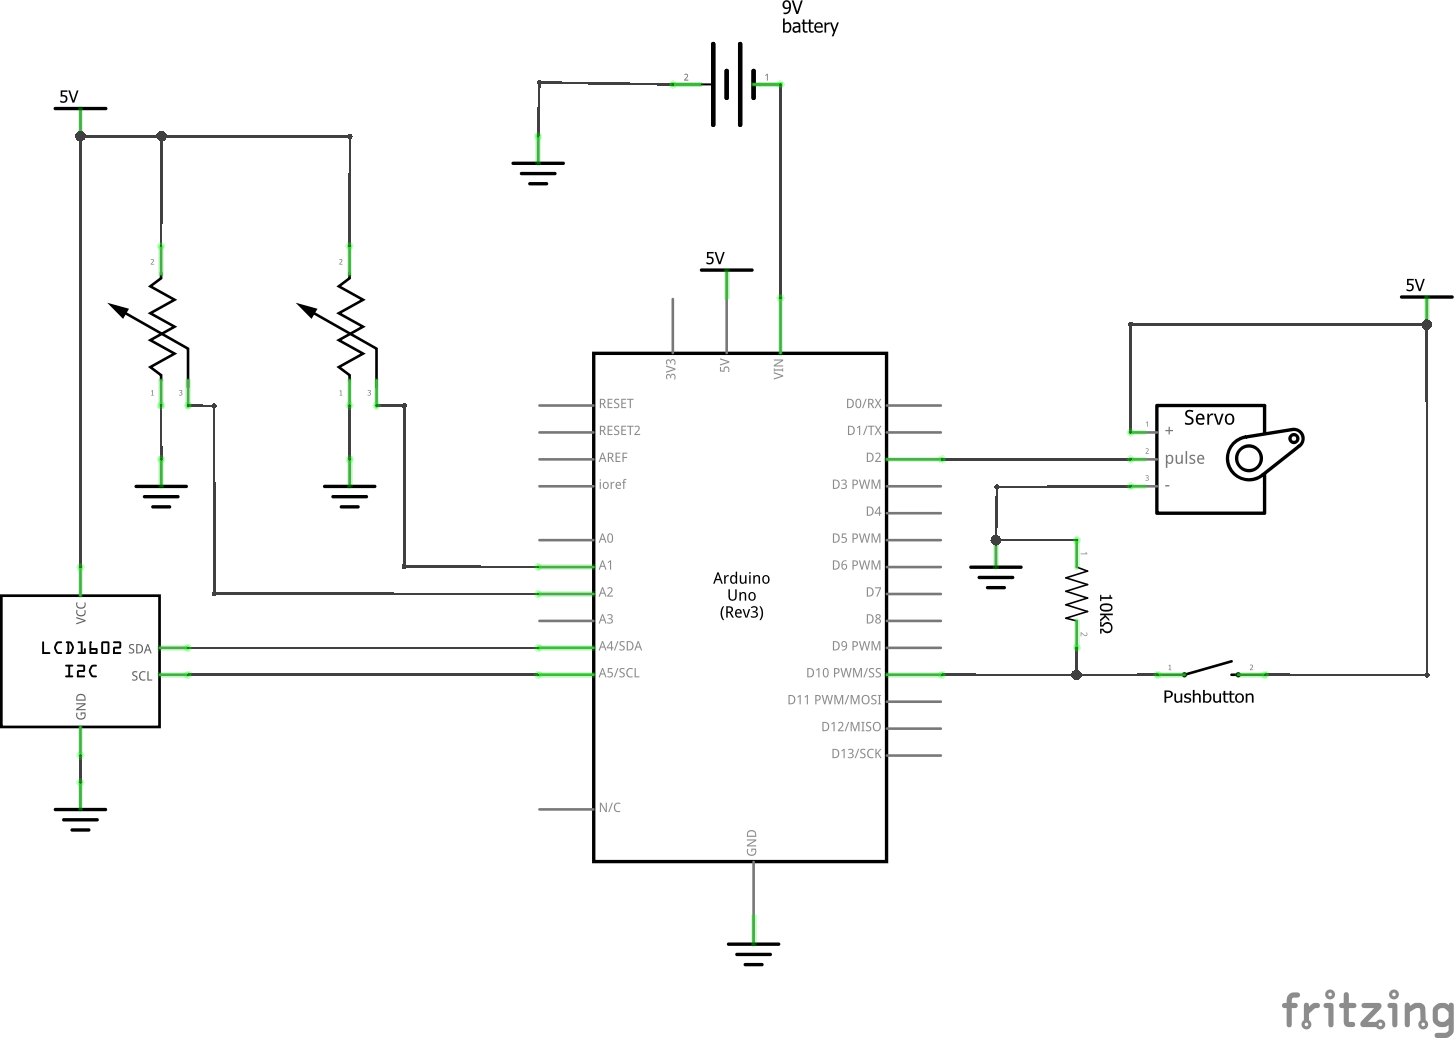
Schematic
Comments are closed.