
A servo-activated can of compressed air quickly teaches you to keep your distance from a monitor.
Video in Action:
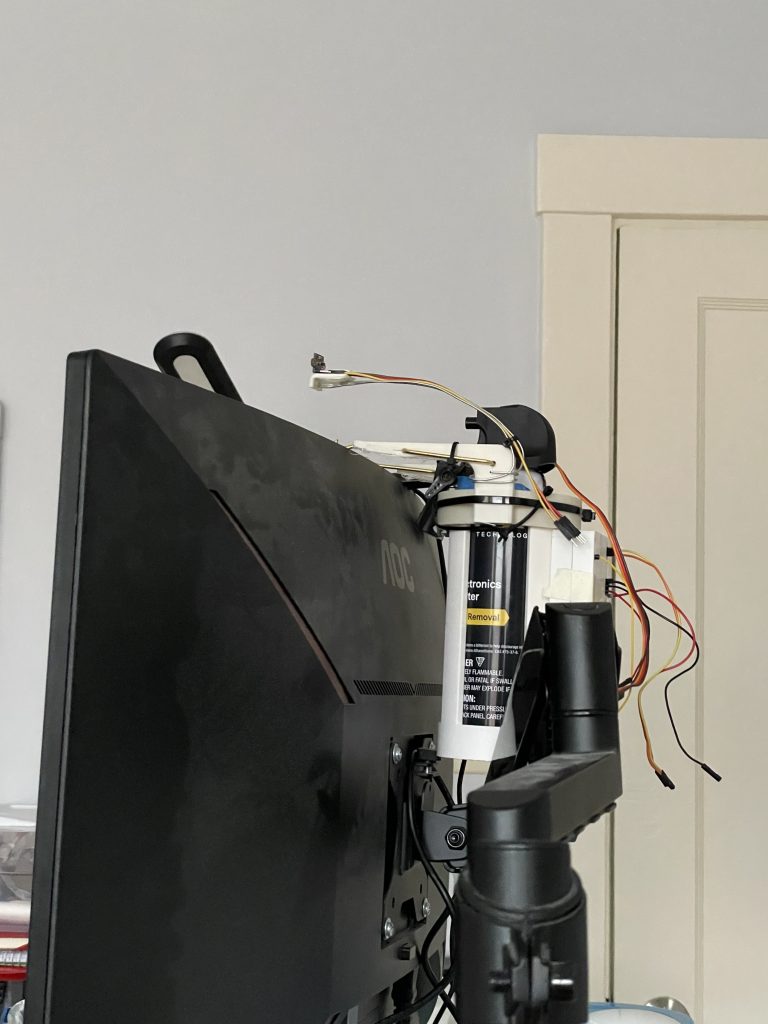
Detail Shots:
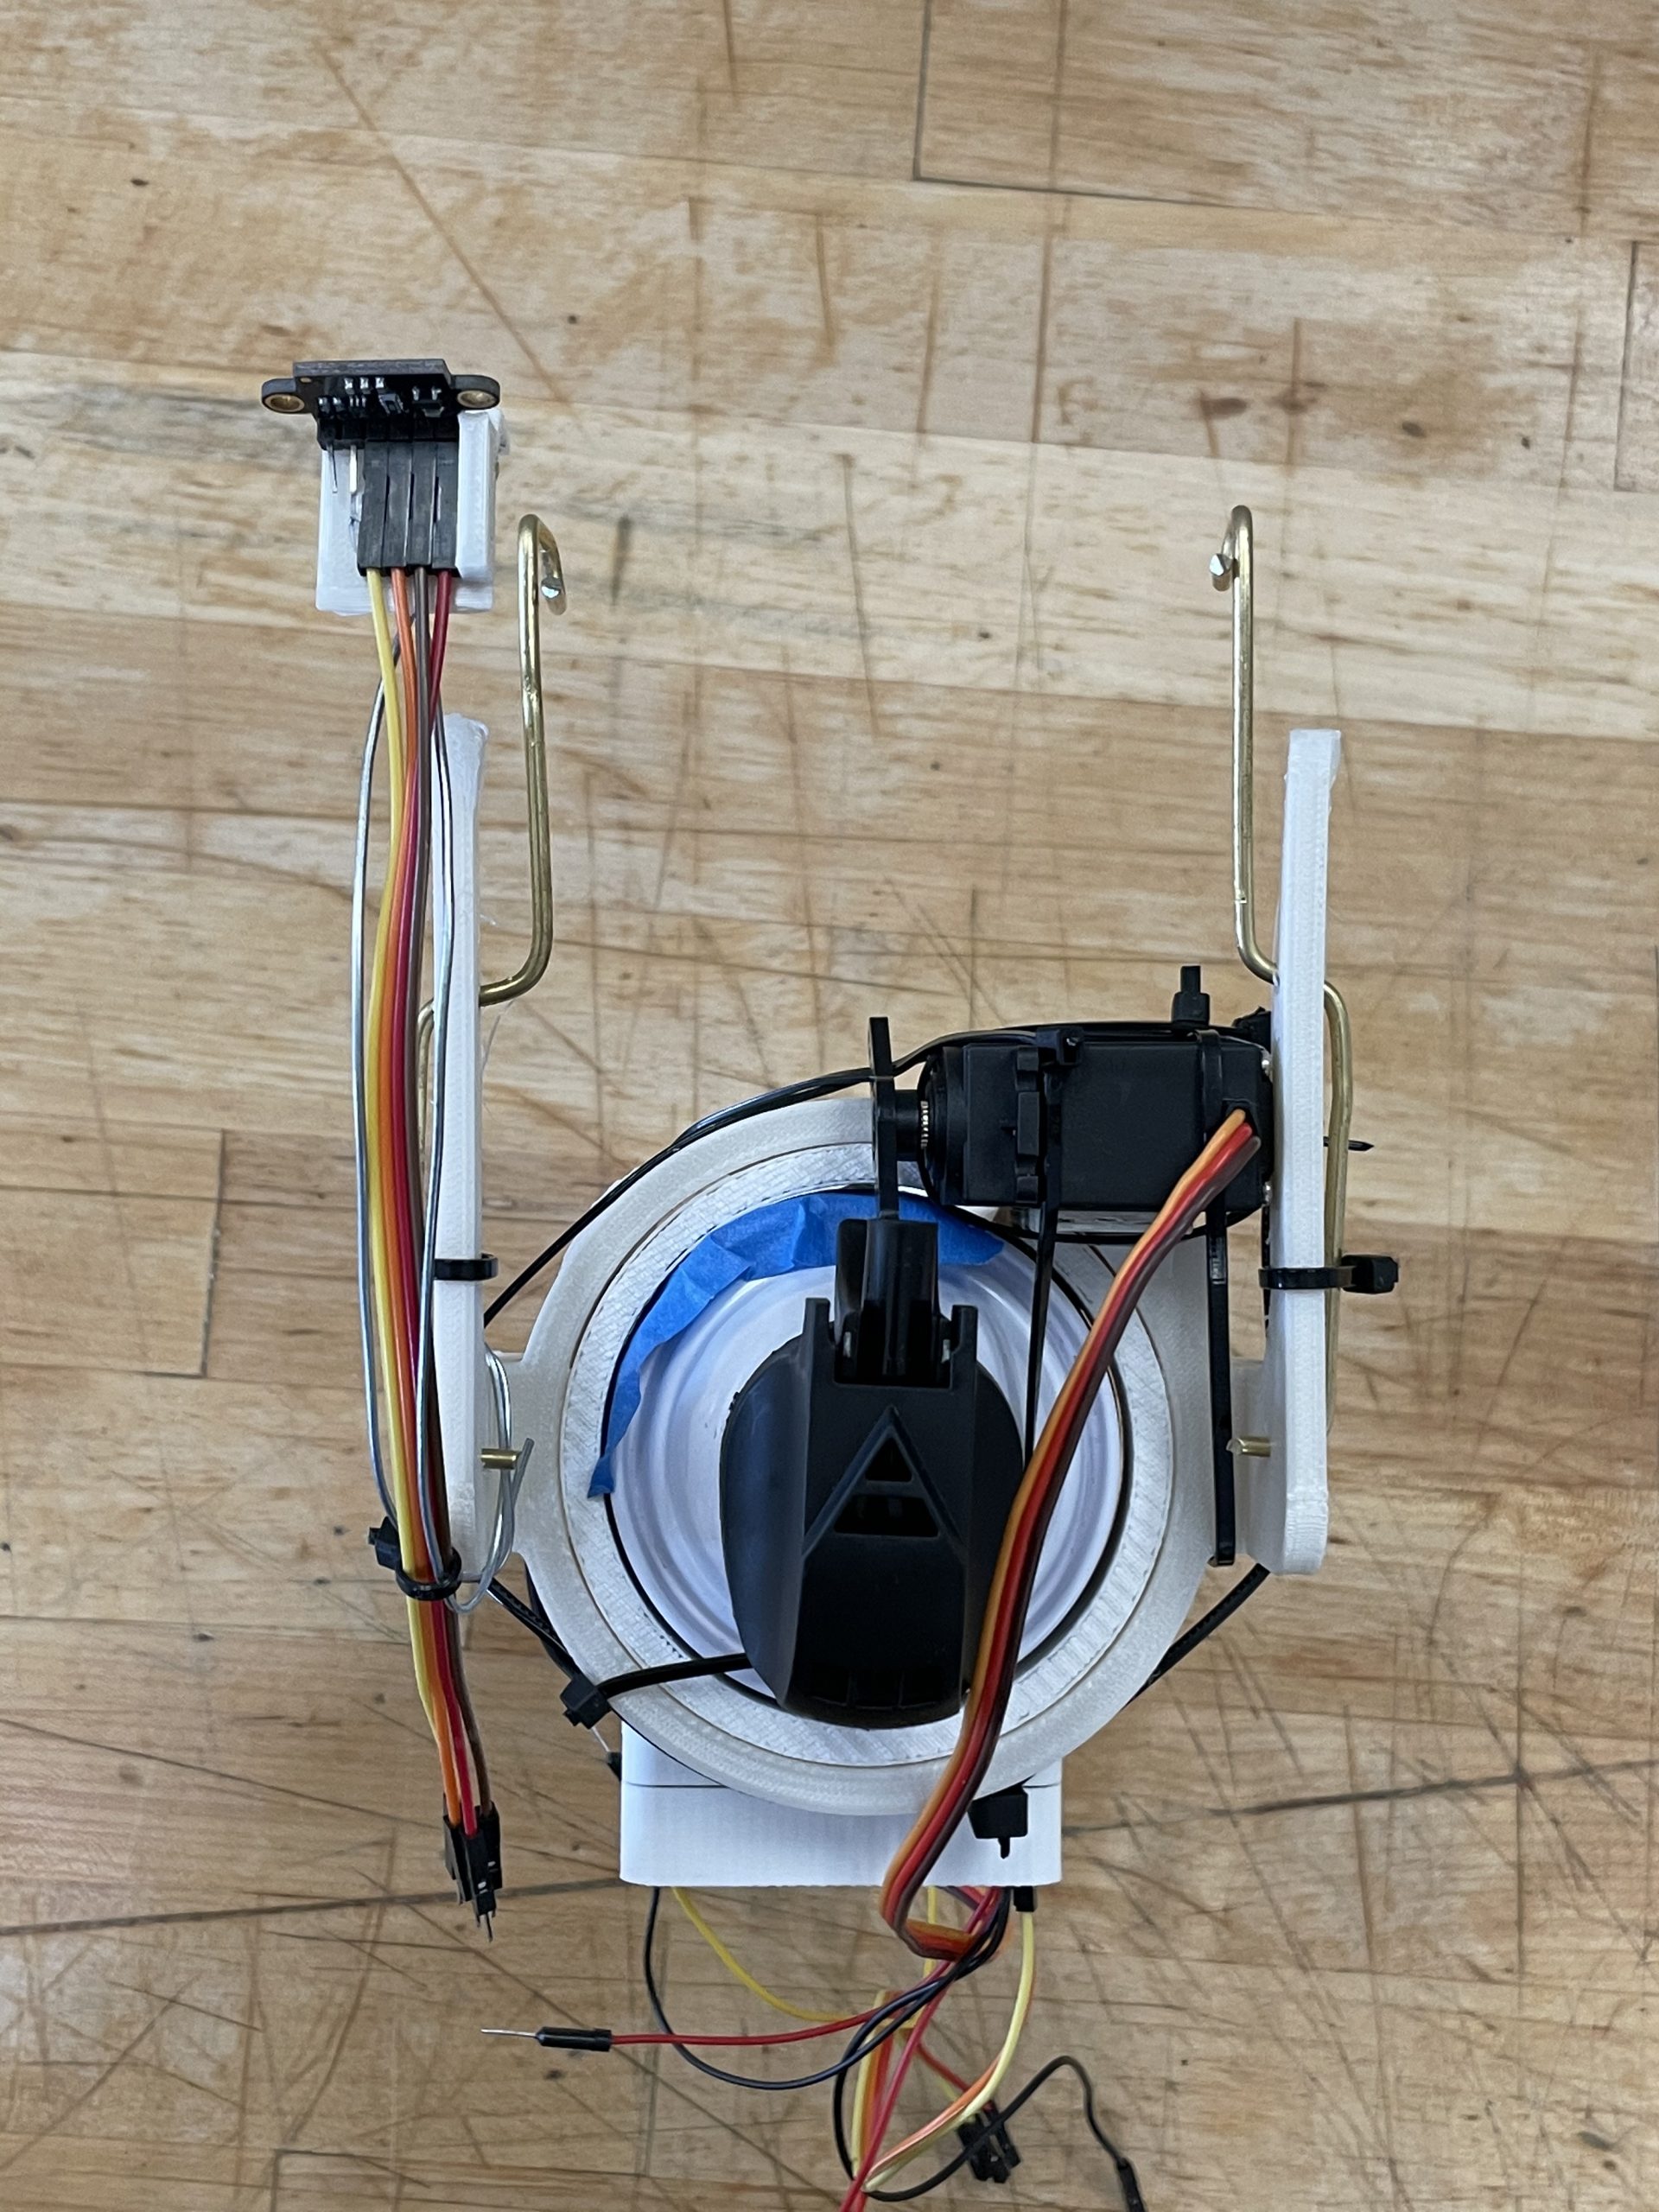
Top view.
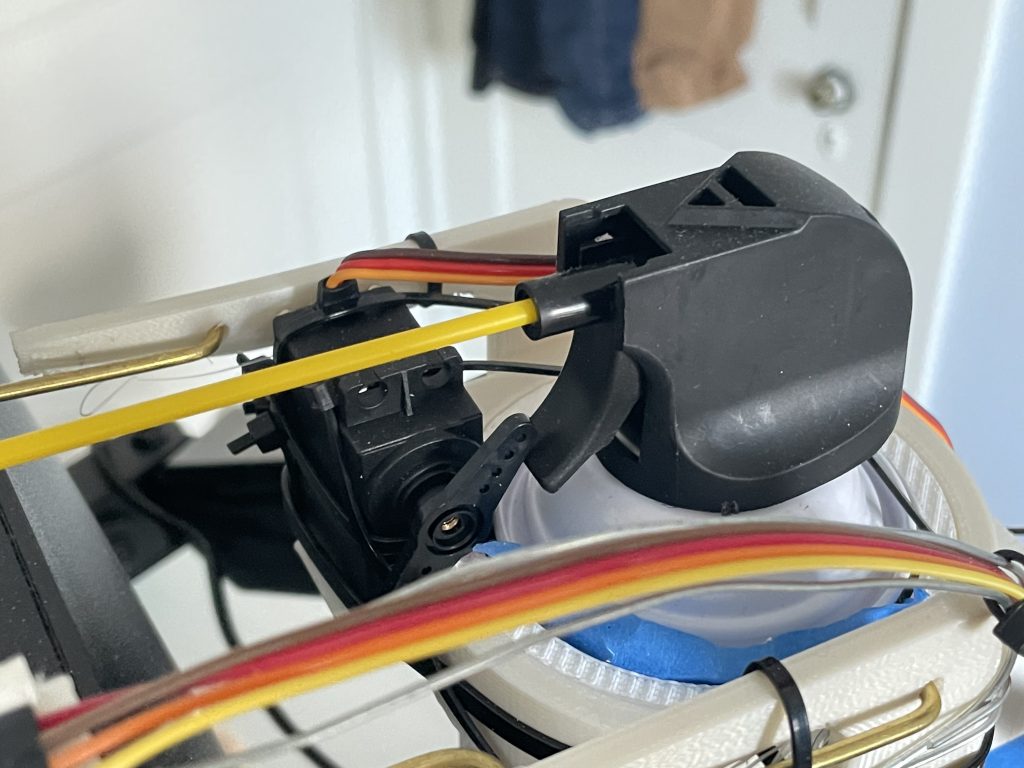
Closeup of servo arm and air duster trigger.
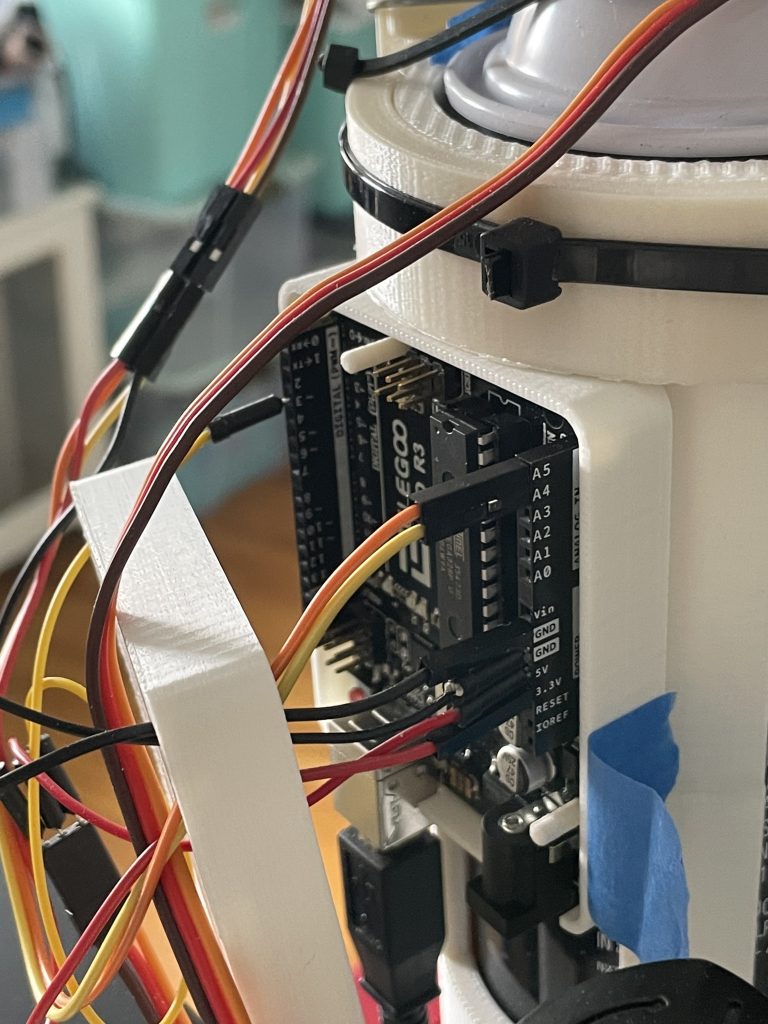
The Arduino inside the case.
Use:
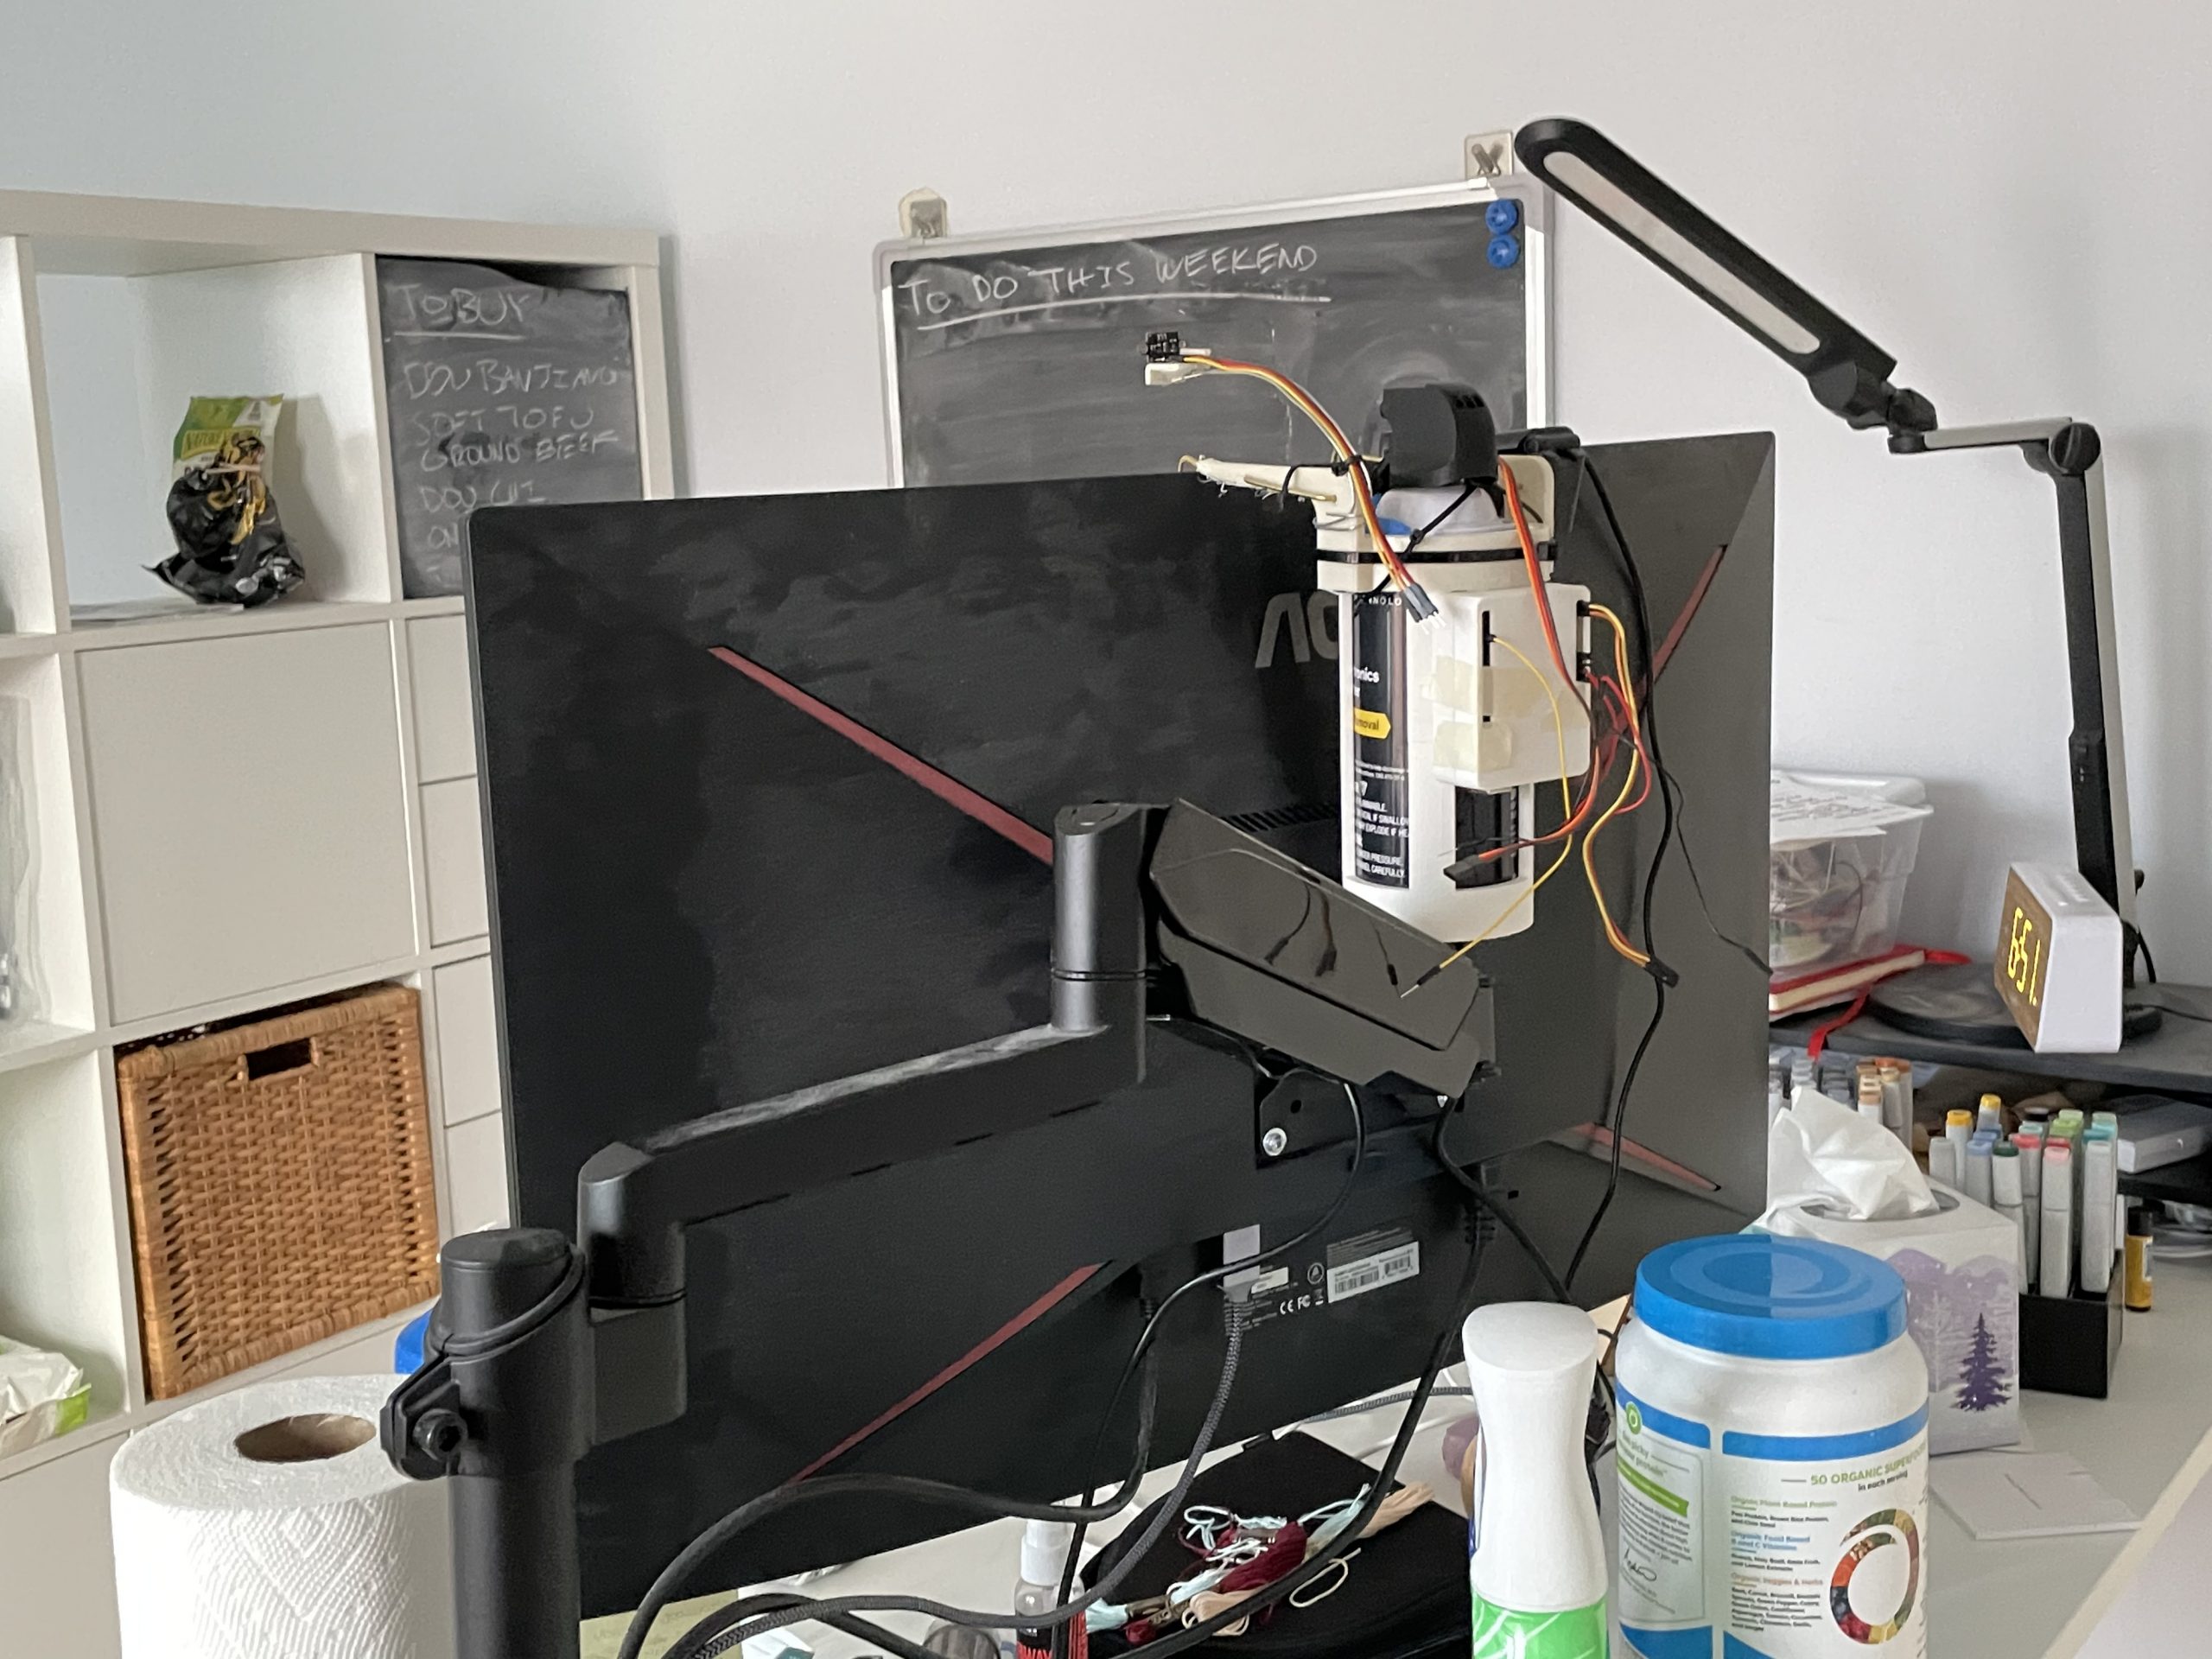
This screen distance repellant is meant to be mounted on a larger monitor. A laptop also works, but not as well.
Overall Process Pictures:
In the above test, I decided to go with the time-of-flight sensor over the ultrasonic ranger, since a tilted object was less likely to create inaccurate readings.

To design the mount, I started with sketches of how the different electronic parts could be mounted to the spray can.
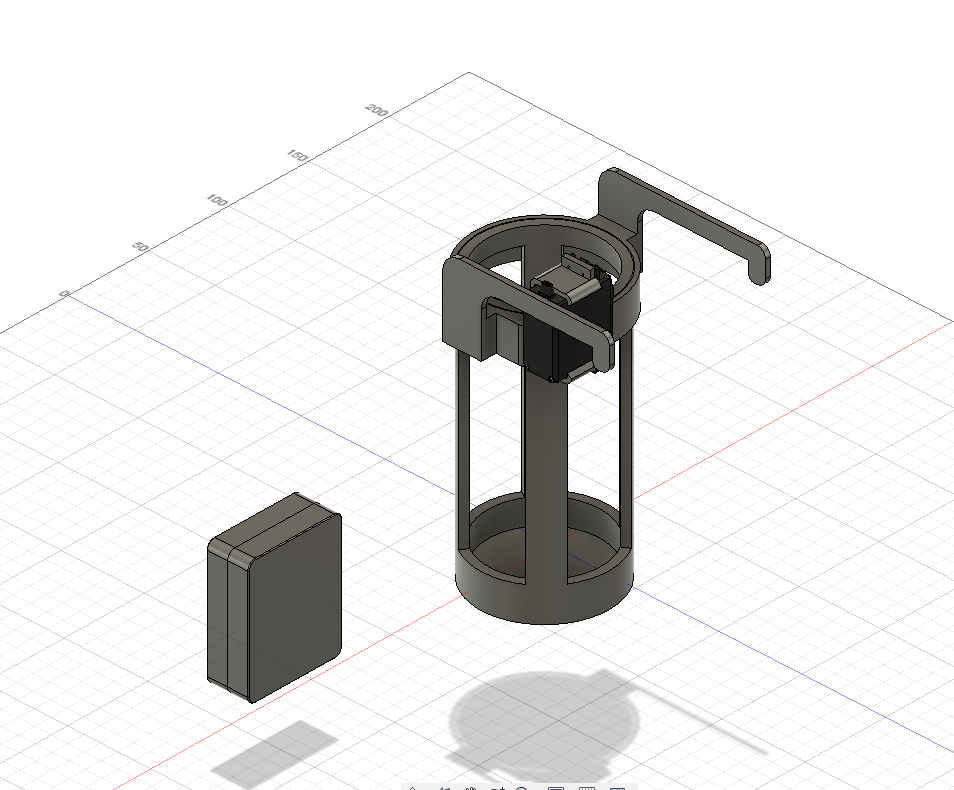
I modeled an Arduino case and servo / can mount in Fusion 360.
Decision Points:
1) Switch from delay() to millis() timing:
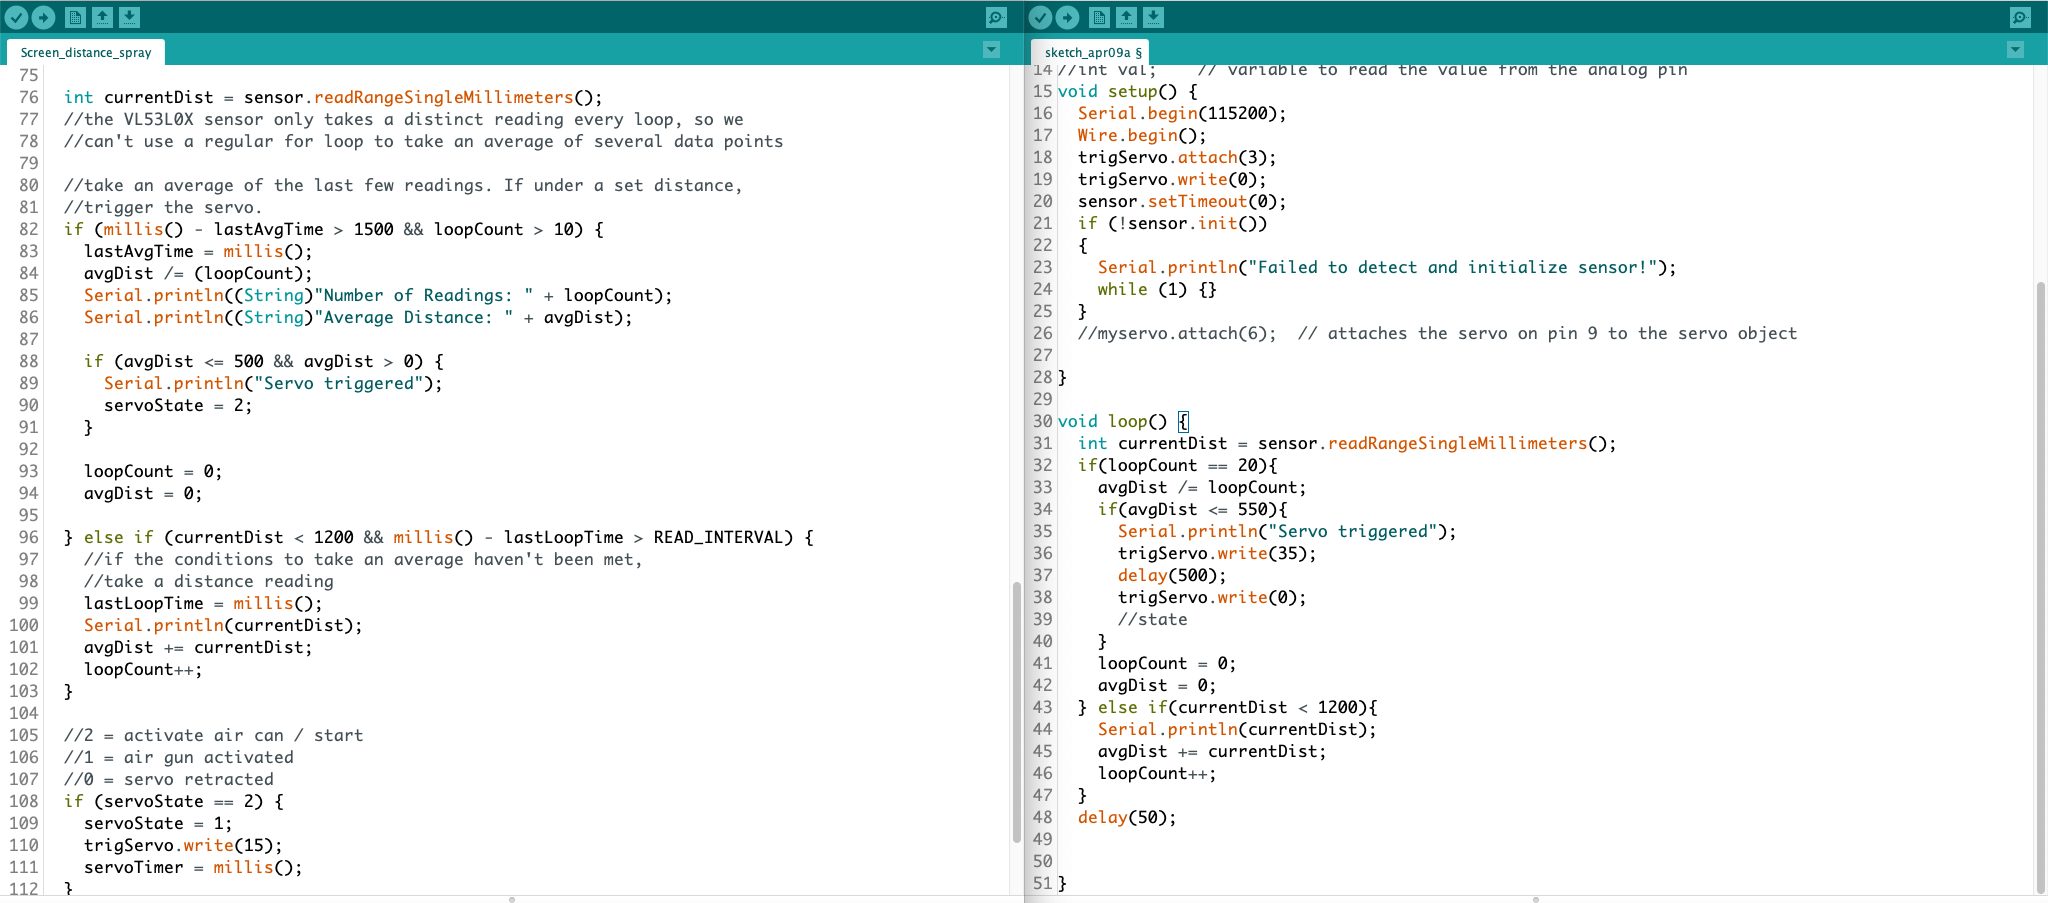
millis() version on left, delay() version on right.
Originally, I had written the code to function using delays. This meant that every time the servo activated, there was a half second delay where the TOF sensor didn’t take any readings. This also meant that the servo could only fire every second and a half, since it would have to wait for the previous activation to finish, take a second’s worth of readings, and then activate. Switching to millis() was a bit more complex and required a few variables to note timings for the sensor and servo as well as the state of the servo (the servo activation happened in several timed steps). However, the servo motor was much more trigger-happy as a result – a good thing.
2) Failed 3D print:
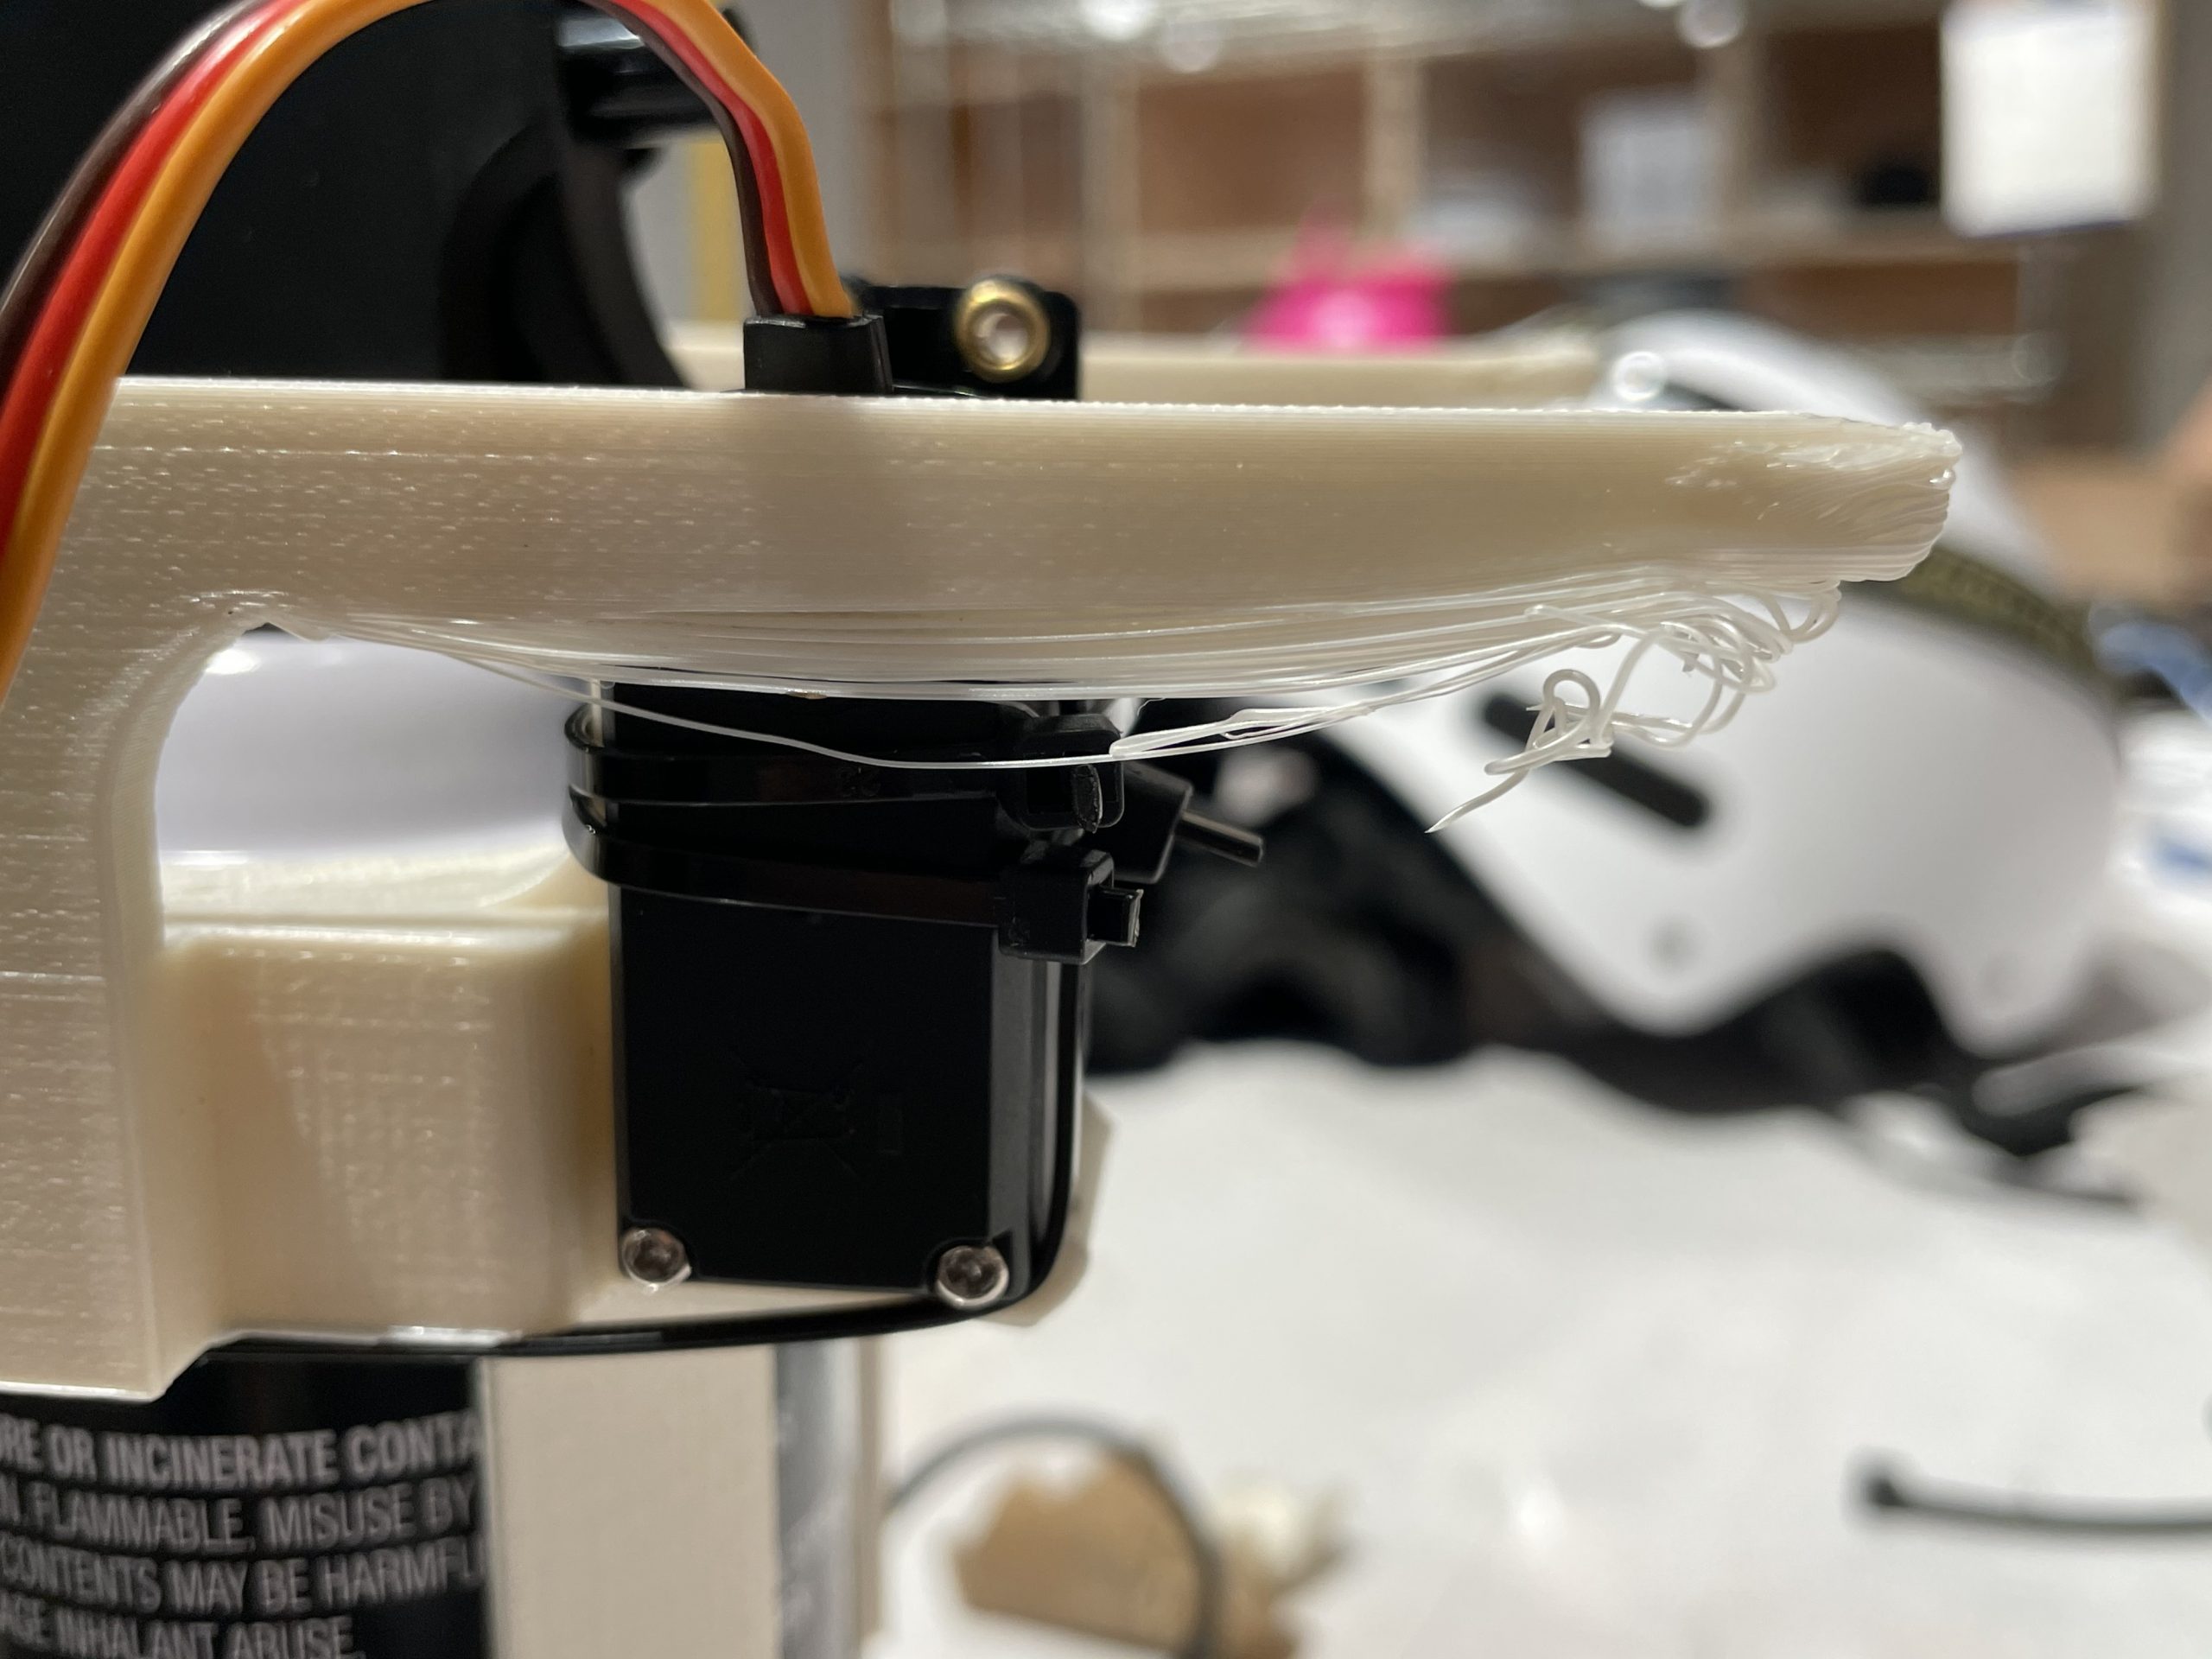
The hooks on the ends of the arms that would latch onto the monitor failed, so I had to rig up wire arms instead.
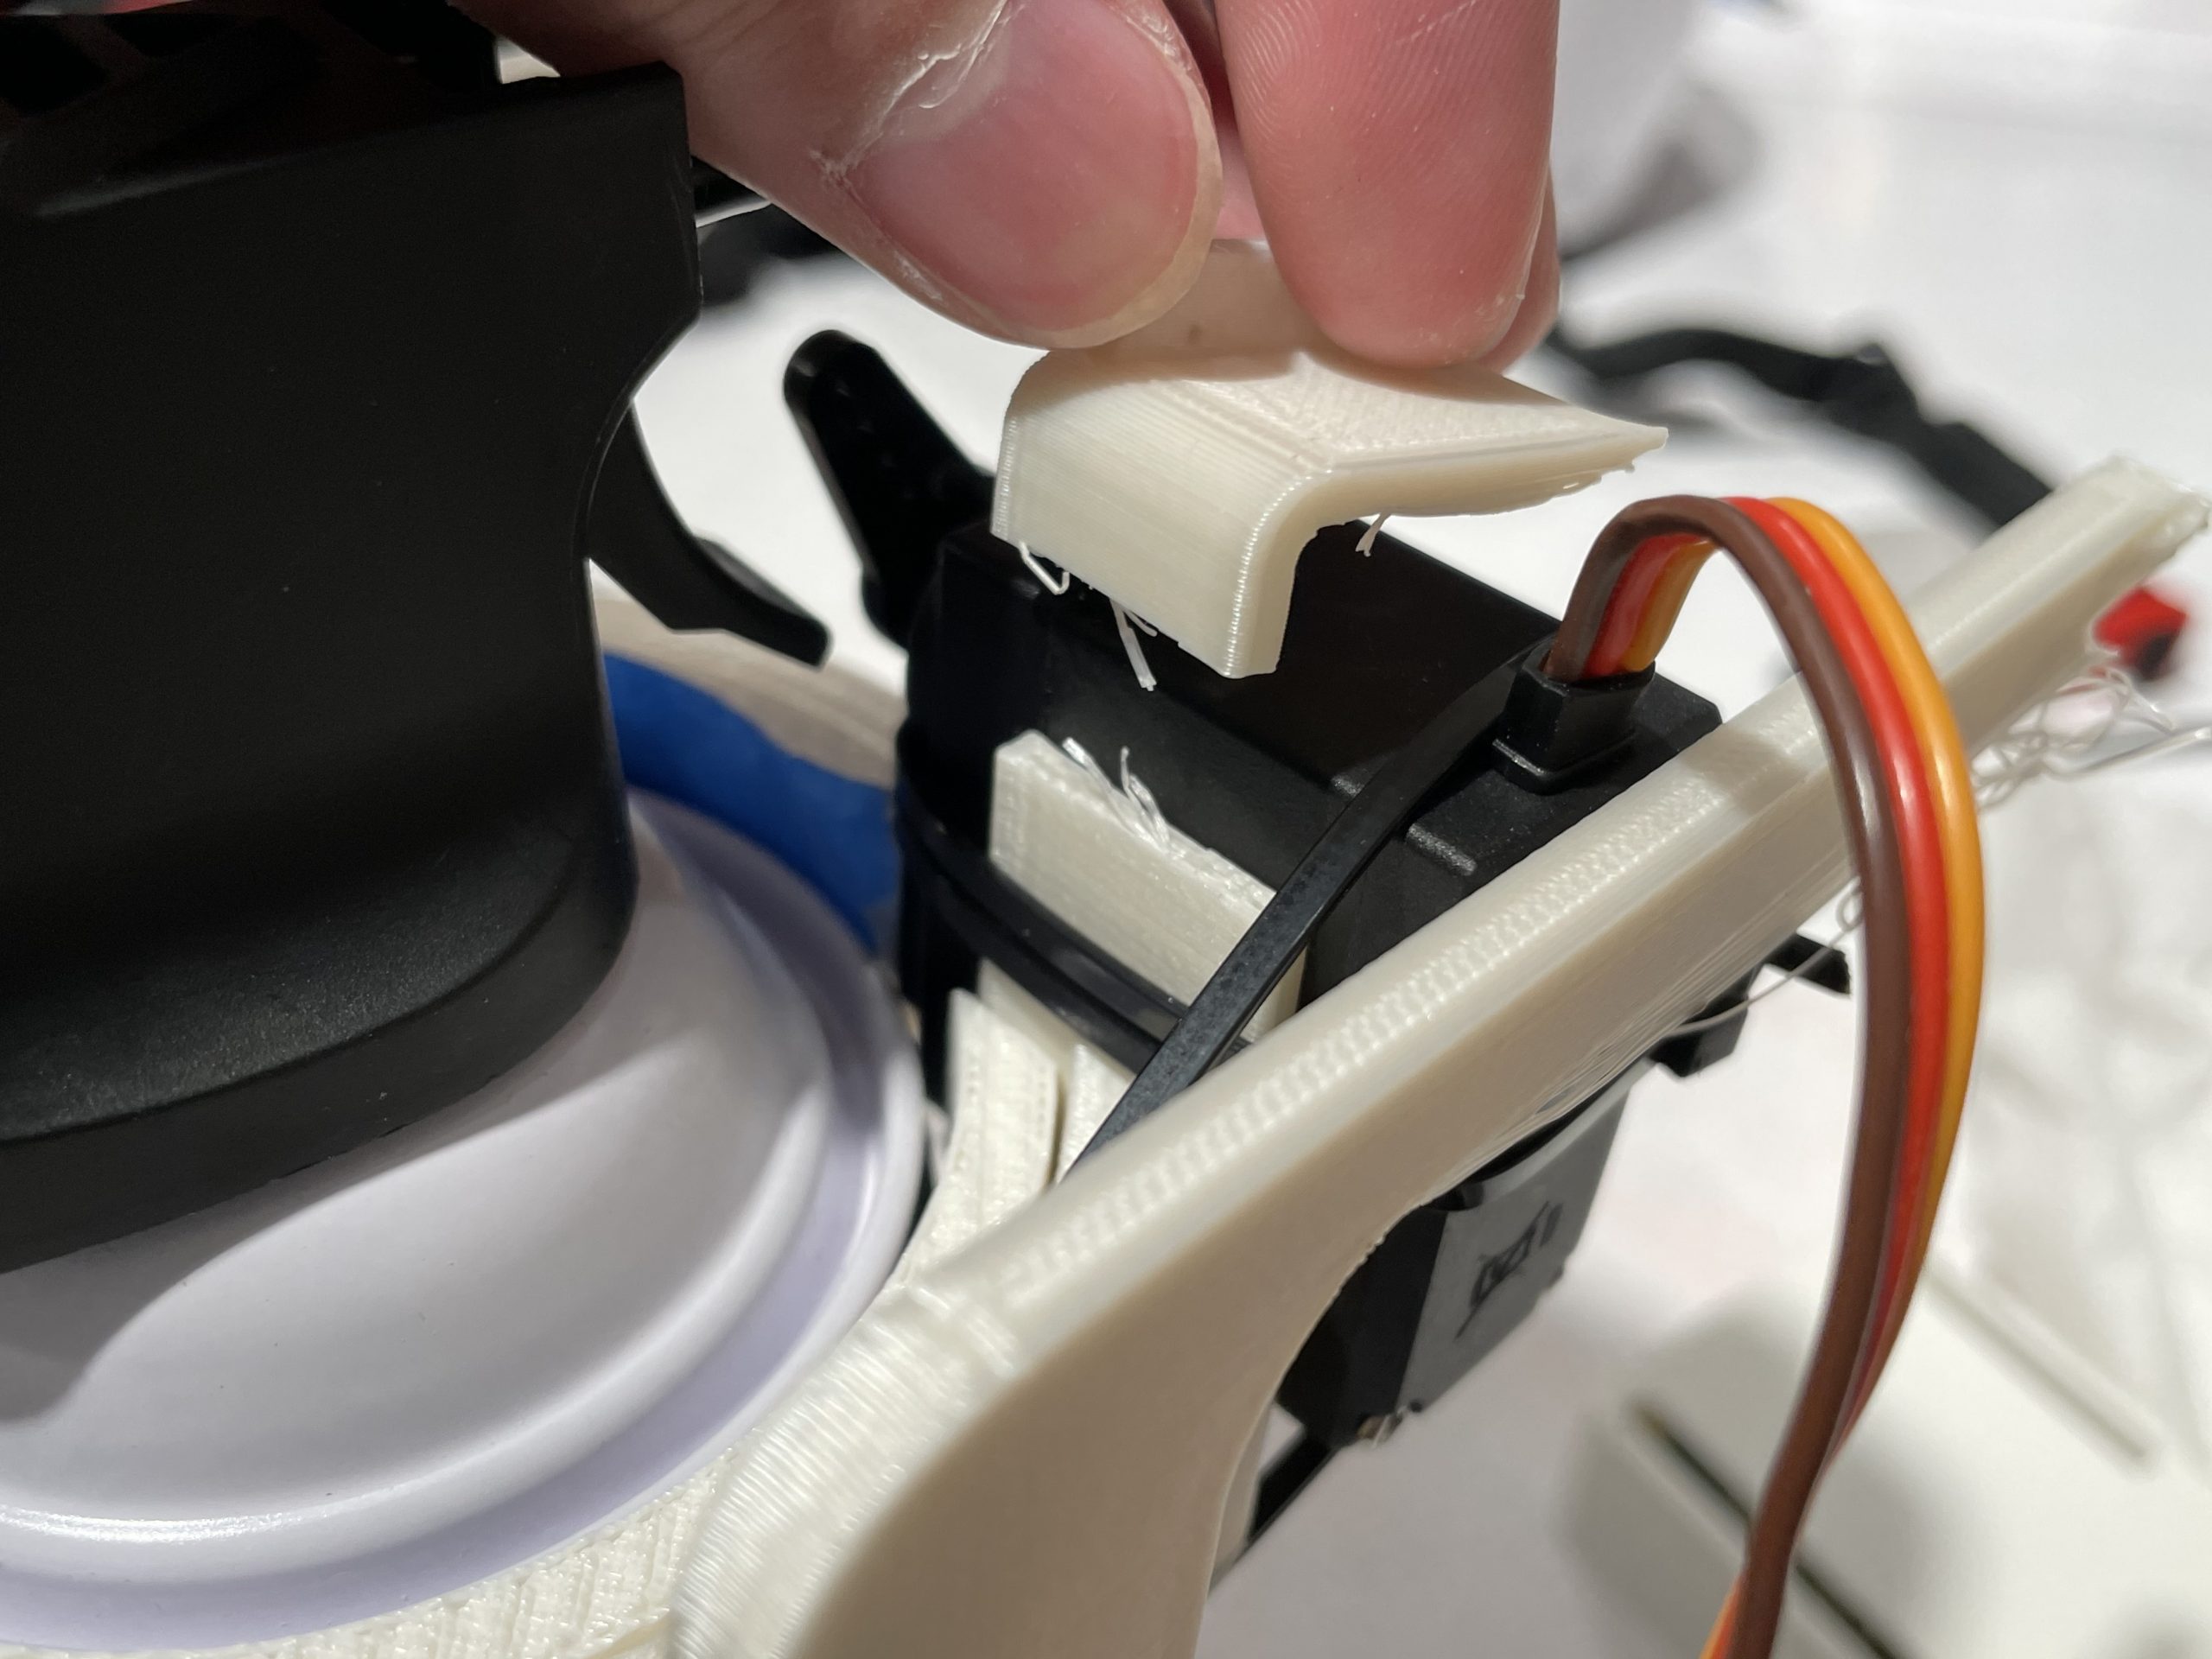
The servo mount broke, so I braced the servo using zip ties instead.
I ran into difficulties 3D printing a mount to hold the servo in place to press down on the air duster can. For one, the printer’s support extruder failed during the print, causing much of the top mount to turn into plastic spaghetti and the hooks to hold the whole thing against the monitor to fail as well. Furthermore, I didn’t add enough tolerance in the servo mount to fit the servo and it snapped when I wedged the motor in. Luckily, a handful of zip ties solved my problem and braced the servo well enough to hold up to pressing the air duster trigger.
Critiques:
“This project is meant to change a bad habit, and I like that aspect.”
This was the goal of my idea, and I can definitely say it’s worked. Pretty much as soon as I test fired the spray can after mounting it to my monitor, I was constantly aware of how close I was to the screen, because a surprise burst of air to the face is terrifying.
“Is the spray binary? (like it could give you a hiss warning before going to full blast)”
I didn’t consider this idea while coding the project, but it would be really easy to implement and make the sprayer a lot less scary to live with. However, I often work with noise cancelling headphones, so I’m not sure if I would be able to hear the hiss warning.
Reflection:

The first test-fire of the sprayer sold me completely, as I reacted with both glee and fear of the monster I created. I worked on this project with the assumption that I would get blasted by the air can frequently. However, in practice, the thought of being jumpscared by the spray can was scary enough for me to almost never lean towards the screen while the sprayer was active; in other words, the image of the sprayer became a passive deterrent without having to actually spray me much at all. Even though I’ve stopped using the sprayer now, I’m much more conscious of sitting close to my monitor and my sitting posture seems to have improved as a result.
As I expected, designing a mount for the servo, Arduino, and spray bottle was difficult, but 3D printing the mount posed extra challenges I wasn’t prepared for. In the end, the final sprayer was zip-tied together as I ran out of time to get a perfect 3D print. I guess I would start designing the physical parts earlier, but more time to work on this project in general would’ve helped!
Up until a few days ago, I really wanted to continue work on the sprayer, including redesigning the 3D printed mount and coding in a hissing warning. However, a few things have discouraged me from continuing. Occasionally, the sprayer will activate in error, whether it be from the Arduino crashing and restarting or the sensor throwing an error. Frankly, I’m tired of testing new versions of the code using my face and don’t really want a surprise blast if I’m actually focusing on something. Also, the chemicals in commercial duster cans are REALLY bad for you. As in, inhaling them can slowly kill brain cells. Even if the risk of brain damage isn’t as severe as an addict huffing a spray can, I’m still not willing to risk my health to use air duster cans. Additionally, a compressed air pump or water jet, despite being healthier, have their own drawbacks, whether they be cost or damage to my electronics and work.
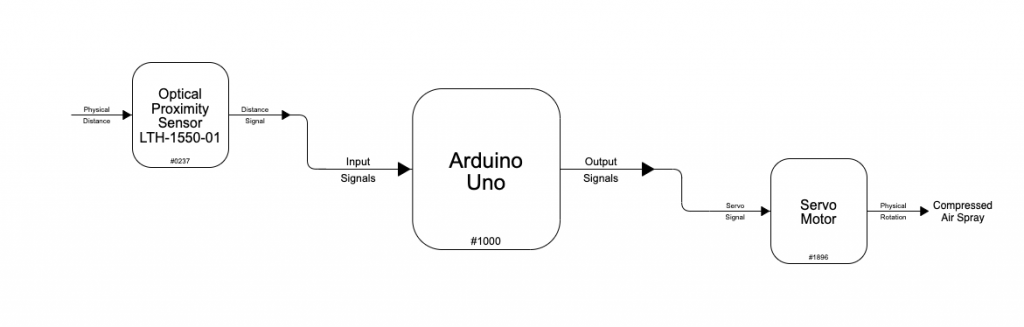
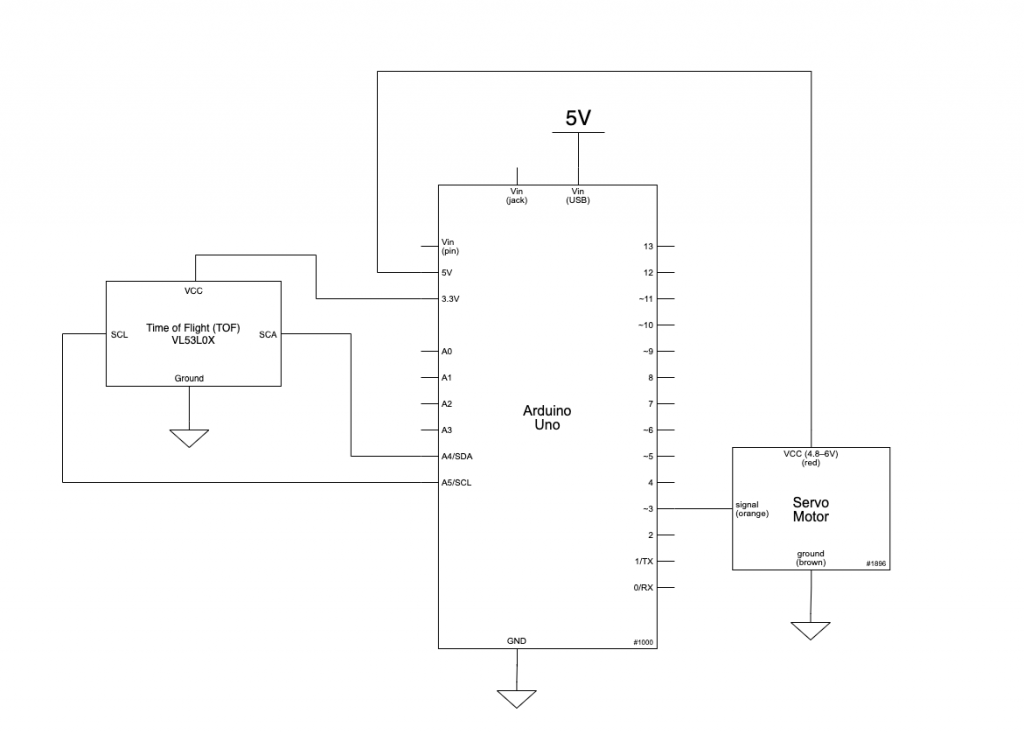
Schematic and Block Diagrams:
Code:
/*
  60-223, Project 2
  Eric Zhao (ezhao2)
  time spent: 20+ hours (including physical fabrication)
**
  Collaboration and sources:
  1) The Pololu VL53L0X Library was used to program the TOF sensor.
  2) Referenced my own code from Homework 4 to time everything using millis().
**
  Challenge(s):
  1) Going from delay to millis timing. I had to reference some of my other
  code to get this to work but was able to implement it quickly.
  2) The TOF sensor had a timeout function written in that would disable the
   sensor
  if no data in range was received after a period of time. I had to switch
  libraries and read up on the replacement library's documentation to disable
  this timeout feature.
**
  Next time: I'll start by writing comments or pseudo-code
  before trying to write the actual code. I think this
  will reduce my getting tangled around the code
  structure by forcing me to think through the underlying
  ideas more clearly.
**
  Description: The screen distance sprayer utilizes a time-of-flight distance
  sensor, servo motor, and a can of compressed airto punish you for staring
  too close to a computer screen. If you get too close to the sensor, the
  servo will activate, triggering the can of compressed air and sending a
  blast to your face. This is all mounted in a 3D-printed casing and hung
  from the top of the chosen screen (works best for large monitors).
**
  Pin mapping:

  Arduino pin | type | description
  ------------|--------|-------------
  A4      input    TOF Sensor I2C SDA
  A5      input    TOF Sensor I2C SCL
  3       output    Servo signal pin

*/

#include <Wire.h>
#include <VL53L0X.h>
#include <Servo.h>

VL53L0X sensor;
Servo trigServo;
unsigned long lastLoopTime = 0;
unsigned long lastAvgTime = 0;
unsigned long servoTimer = 0;

const int READ_INTERVAL = 50; //how often to measure distance
int servoState = 0;
int loopCount = 0;
int lastDist = 0;
long avgDist = 0;

void setup() {
  Serial.begin(115200);
  Wire.begin();

  trigServo.write(35);
  trigServo.attach(3);

  sensor.setTimeout(0);
  if (!sensor.init())
  {
    Serial.println("Failed to detect and initialize sensor!");
    while (1) {}
  }

}

void loop() {

  int currentDist = sensor.readRangeSingleMillimeters();
  //the VL53L0X sensor only takes a distinct reading every loop, so we
  //can't use a regular for loop to take an average of several data points

  //take an average of the last few readings. If under a set distance,
  //trigger the servo.
  if (millis() - lastAvgTime > 1500 && loopCount > 10) {
    lastAvgTime = millis();
    avgDist /= (loopCount);
    Serial.println((String)"Number of Readings: " + loopCount);
    Serial.println((String)"Average Distance: " + avgDist);

    if (avgDist <= 500 && avgDist > 0) {
      Serial.println("Servo triggered");
      servoState = 2;
    }

    loopCount = 0;
    avgDist = 0;

  } else if (currentDist < 1200 && millis() - lastLoopTime > READ_INTERVAL) {
    //if the conditions to take an average haven't been met,
    //take a distance reading
    lastLoopTime = millis();
    Serial.println(currentDist);
    avgDist += currentDist;
    loopCount++;
  }

  //2 = activate air can / start
  //1 = air gun activated
  //0 = servo retracted
  if (servoState == 2) {
    servoState = 1;
    trigServo.write(15);
    servoTimer = millis();
  }

  if (servoState == 1 && millis() - servoTimer > 500) {
    servoState = 0;
    trigServo.write(40);
  }

}