
Gallery
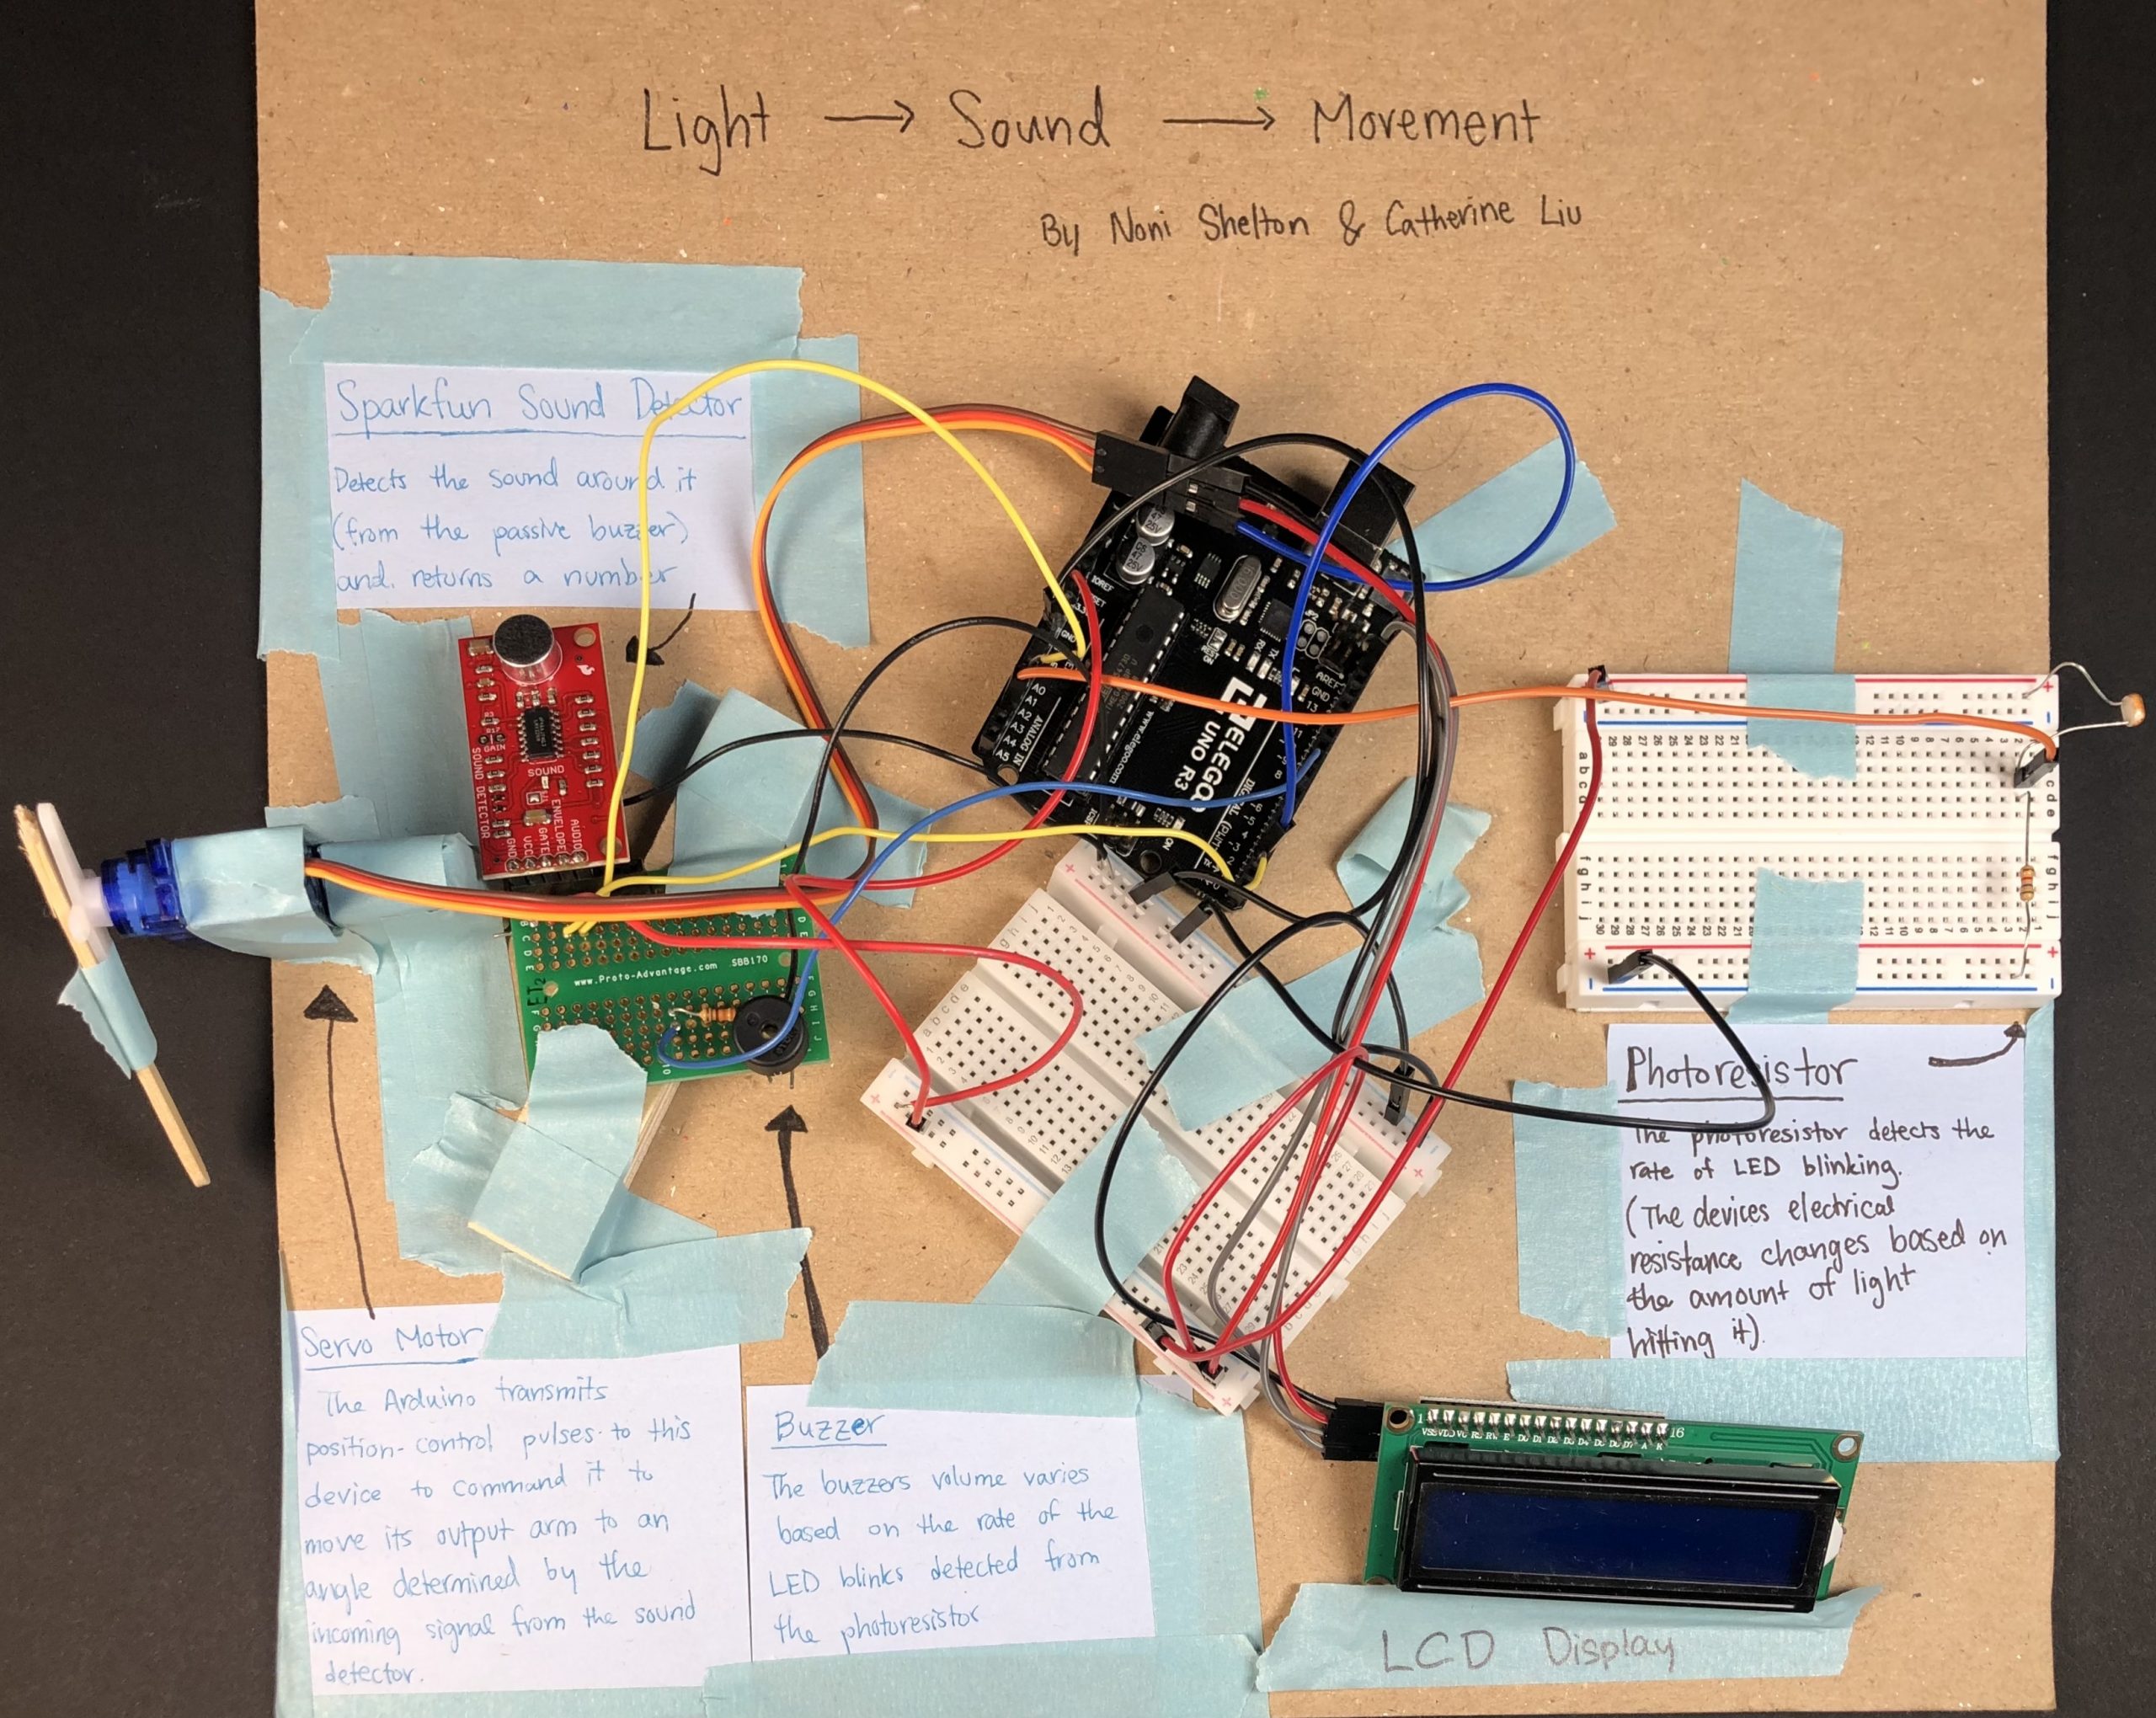
[Noni] View of the completed double transistor with the input (photoresistor) on the right and the output (rotational position) on the left
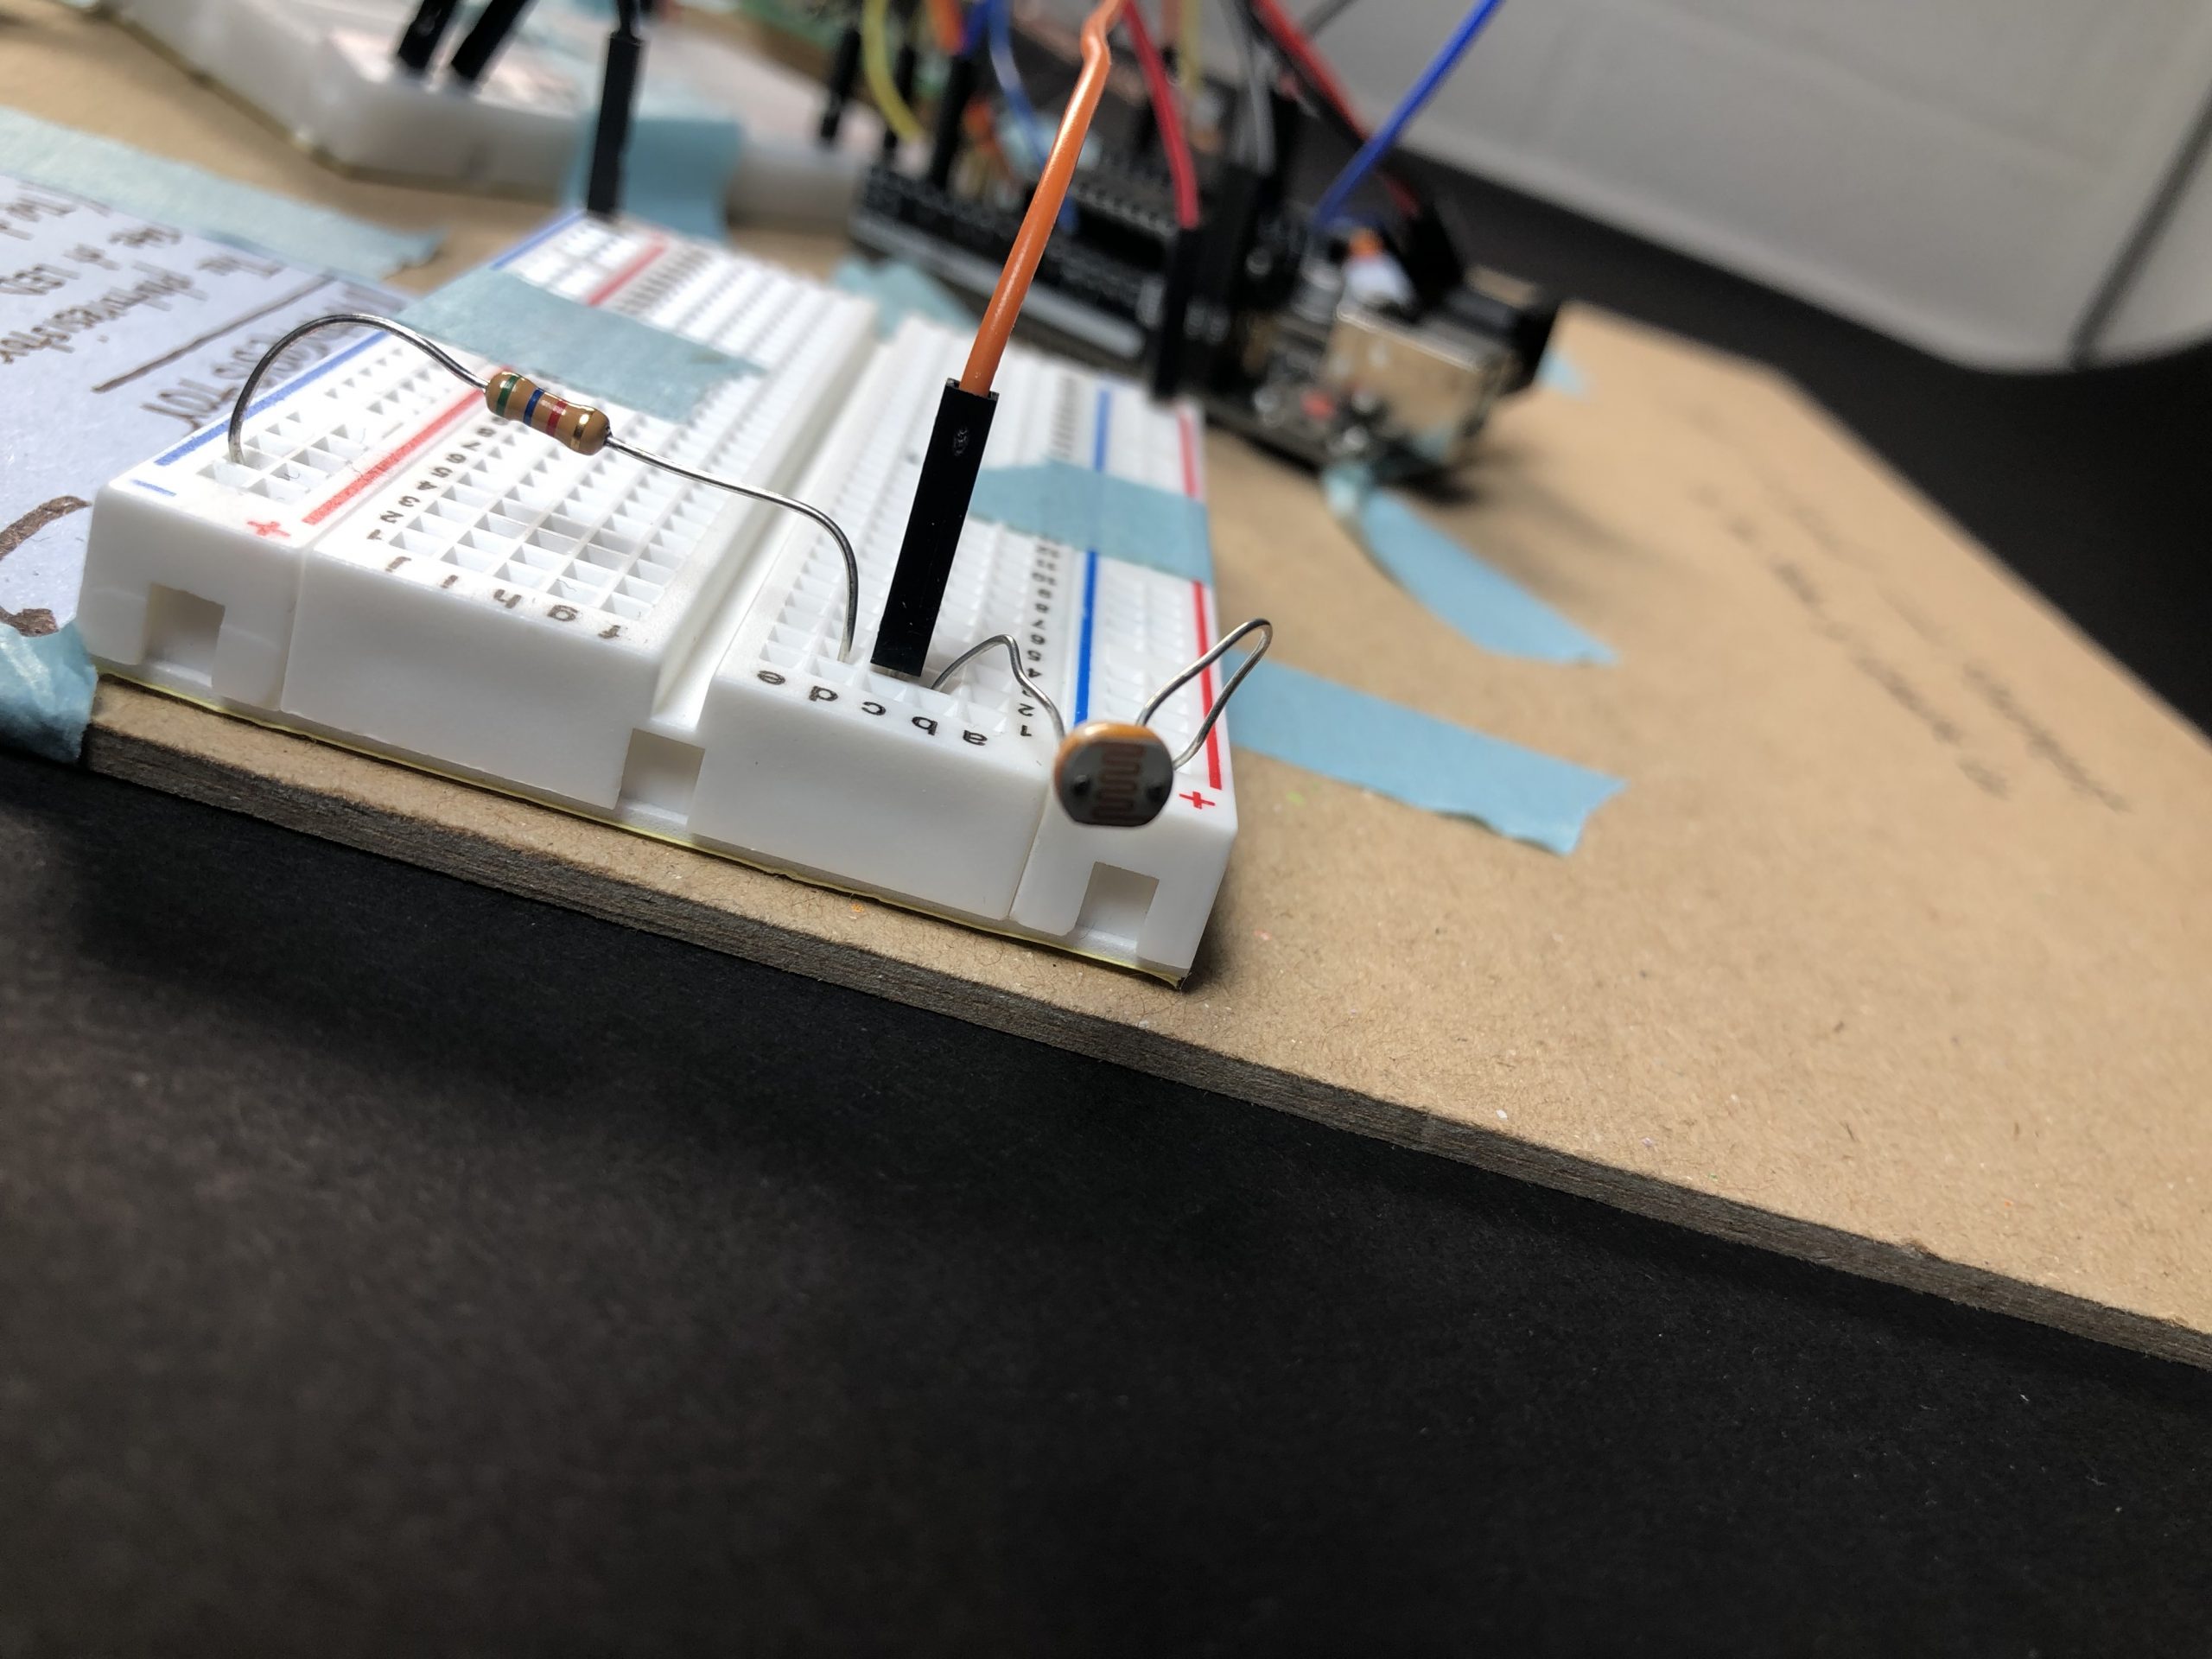
A detailed view of the photoresistor that bends to make contact with the blinking LED
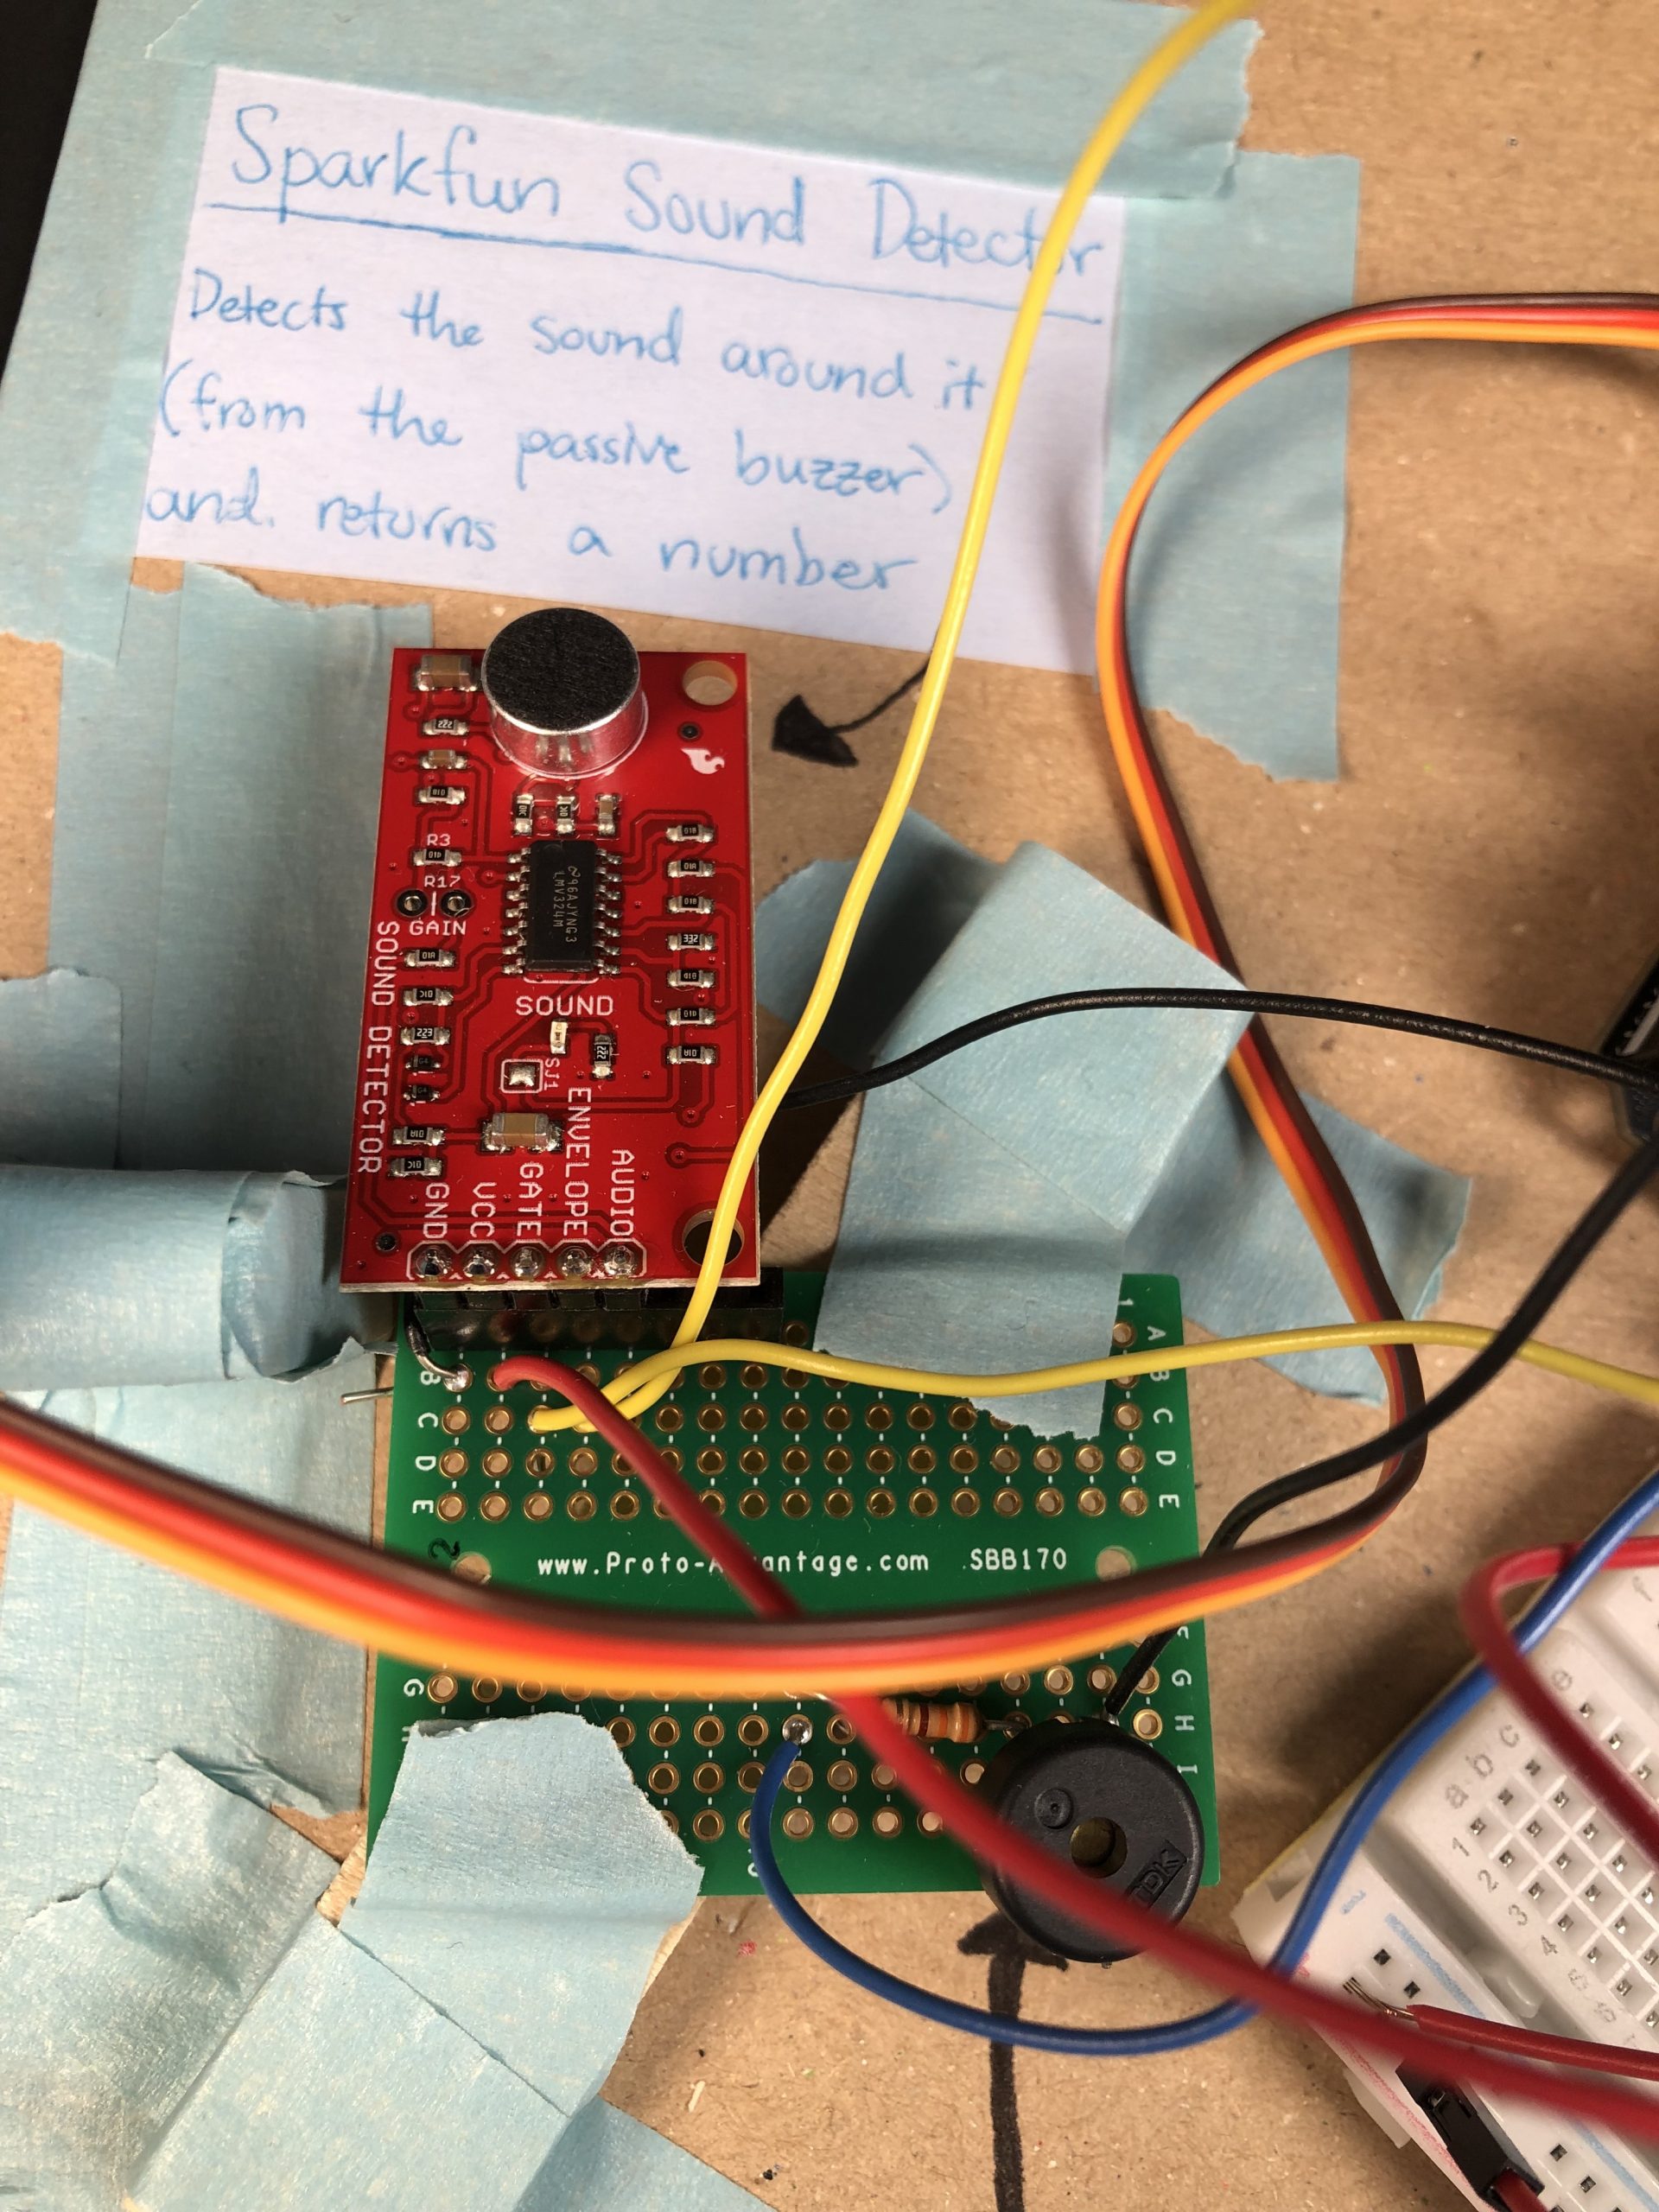
A close-up of the buzzer and Sparkfun Sound Detector soldered.
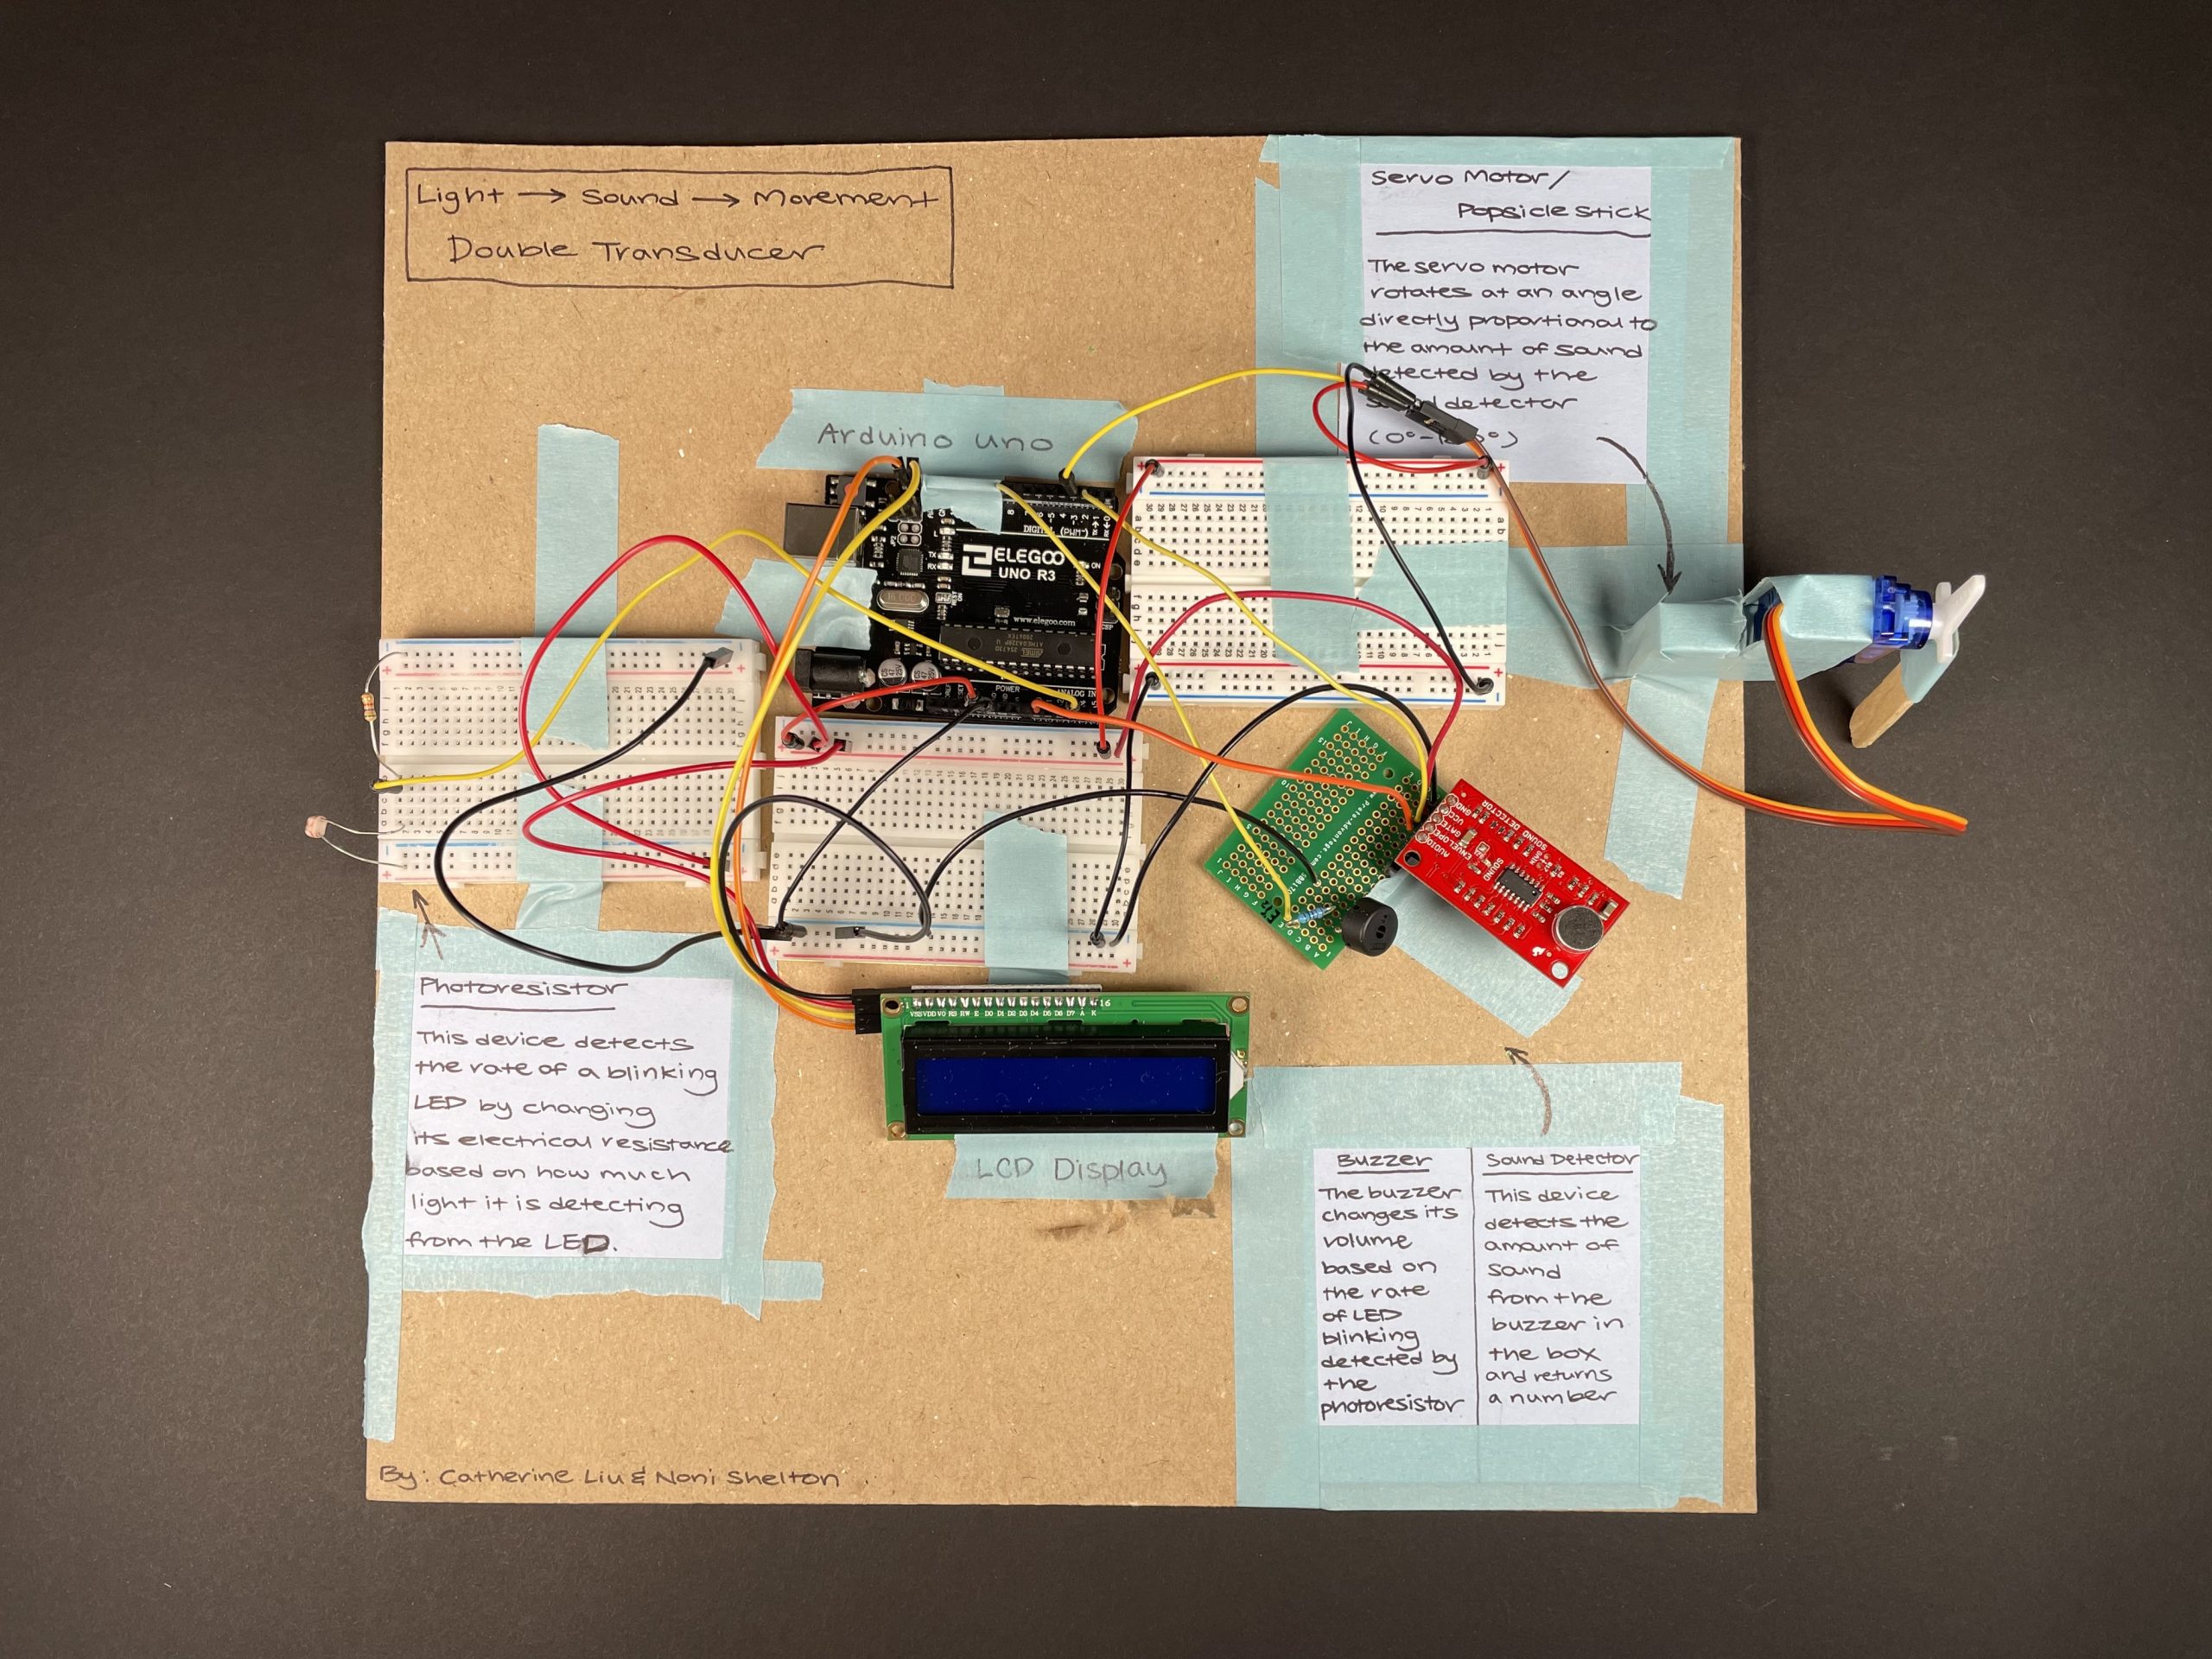
[Catherine] View of the completed double transistor with the input (photoresistor) on the left and the output (rotational position) on the right
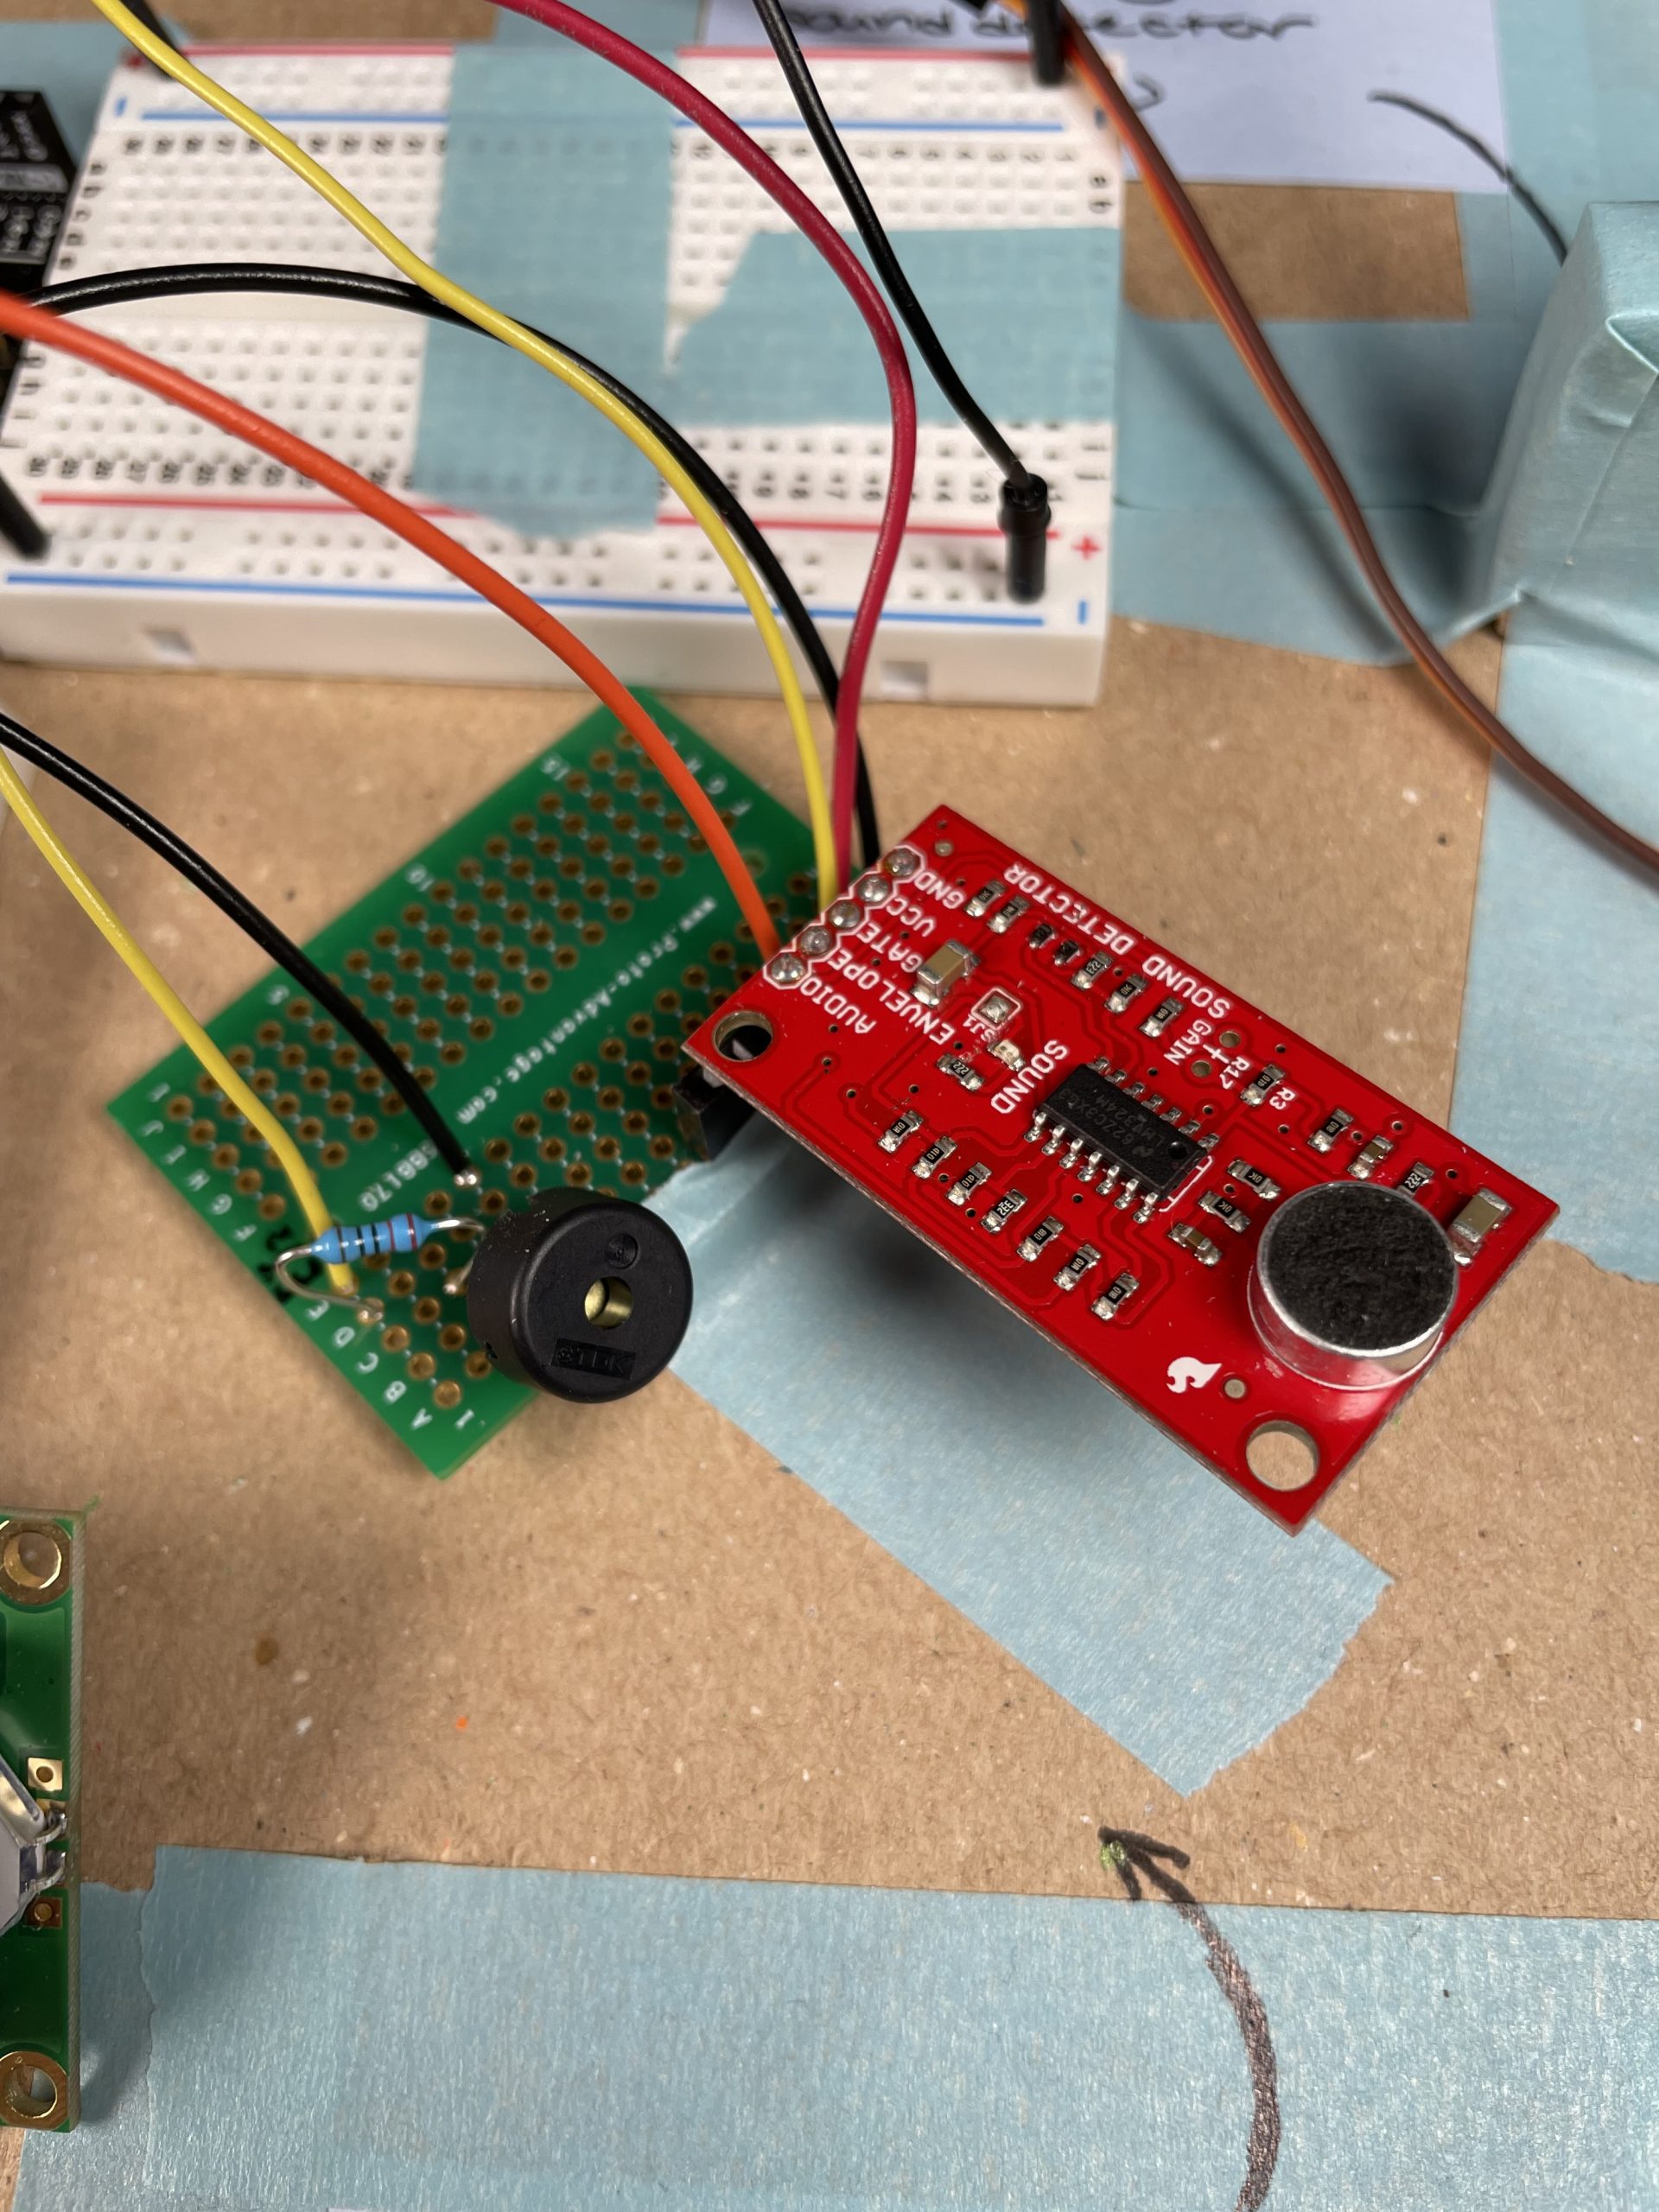
[Catherine] A close-up of the passive buzzer and the Sparkfun Sound Detector
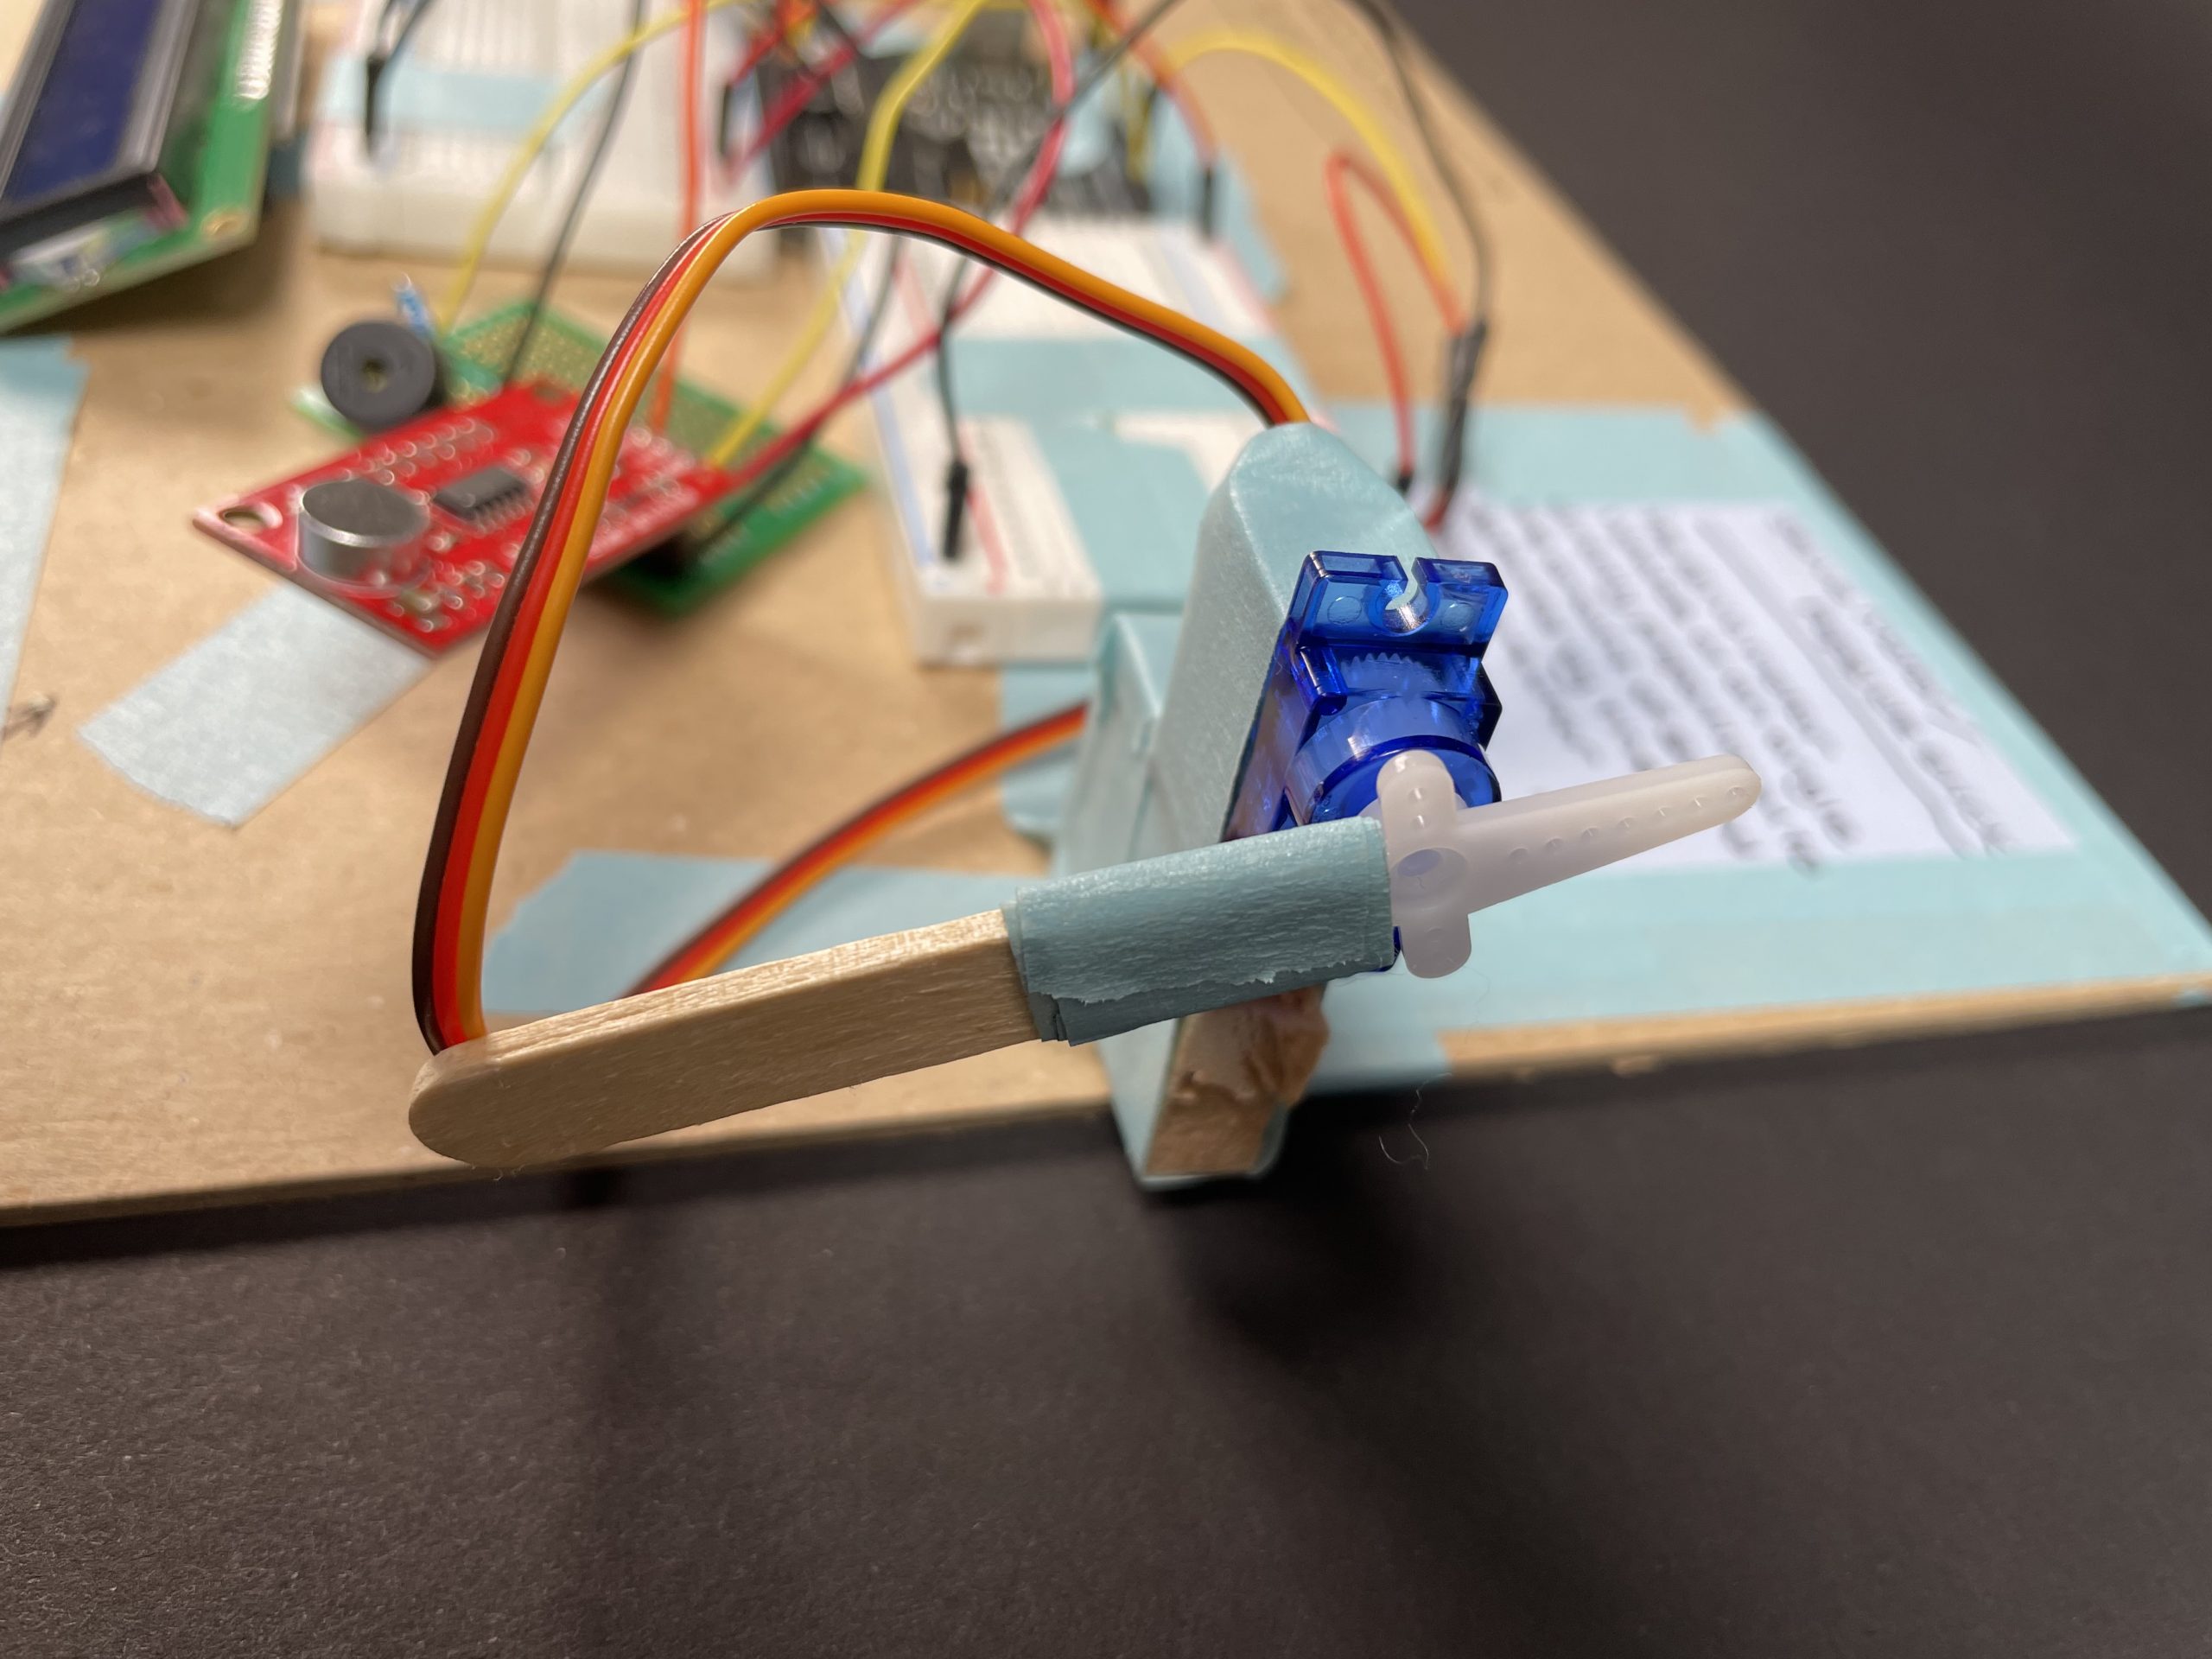
[Catherine] A close up of the servo motor and popsicle stick rotation
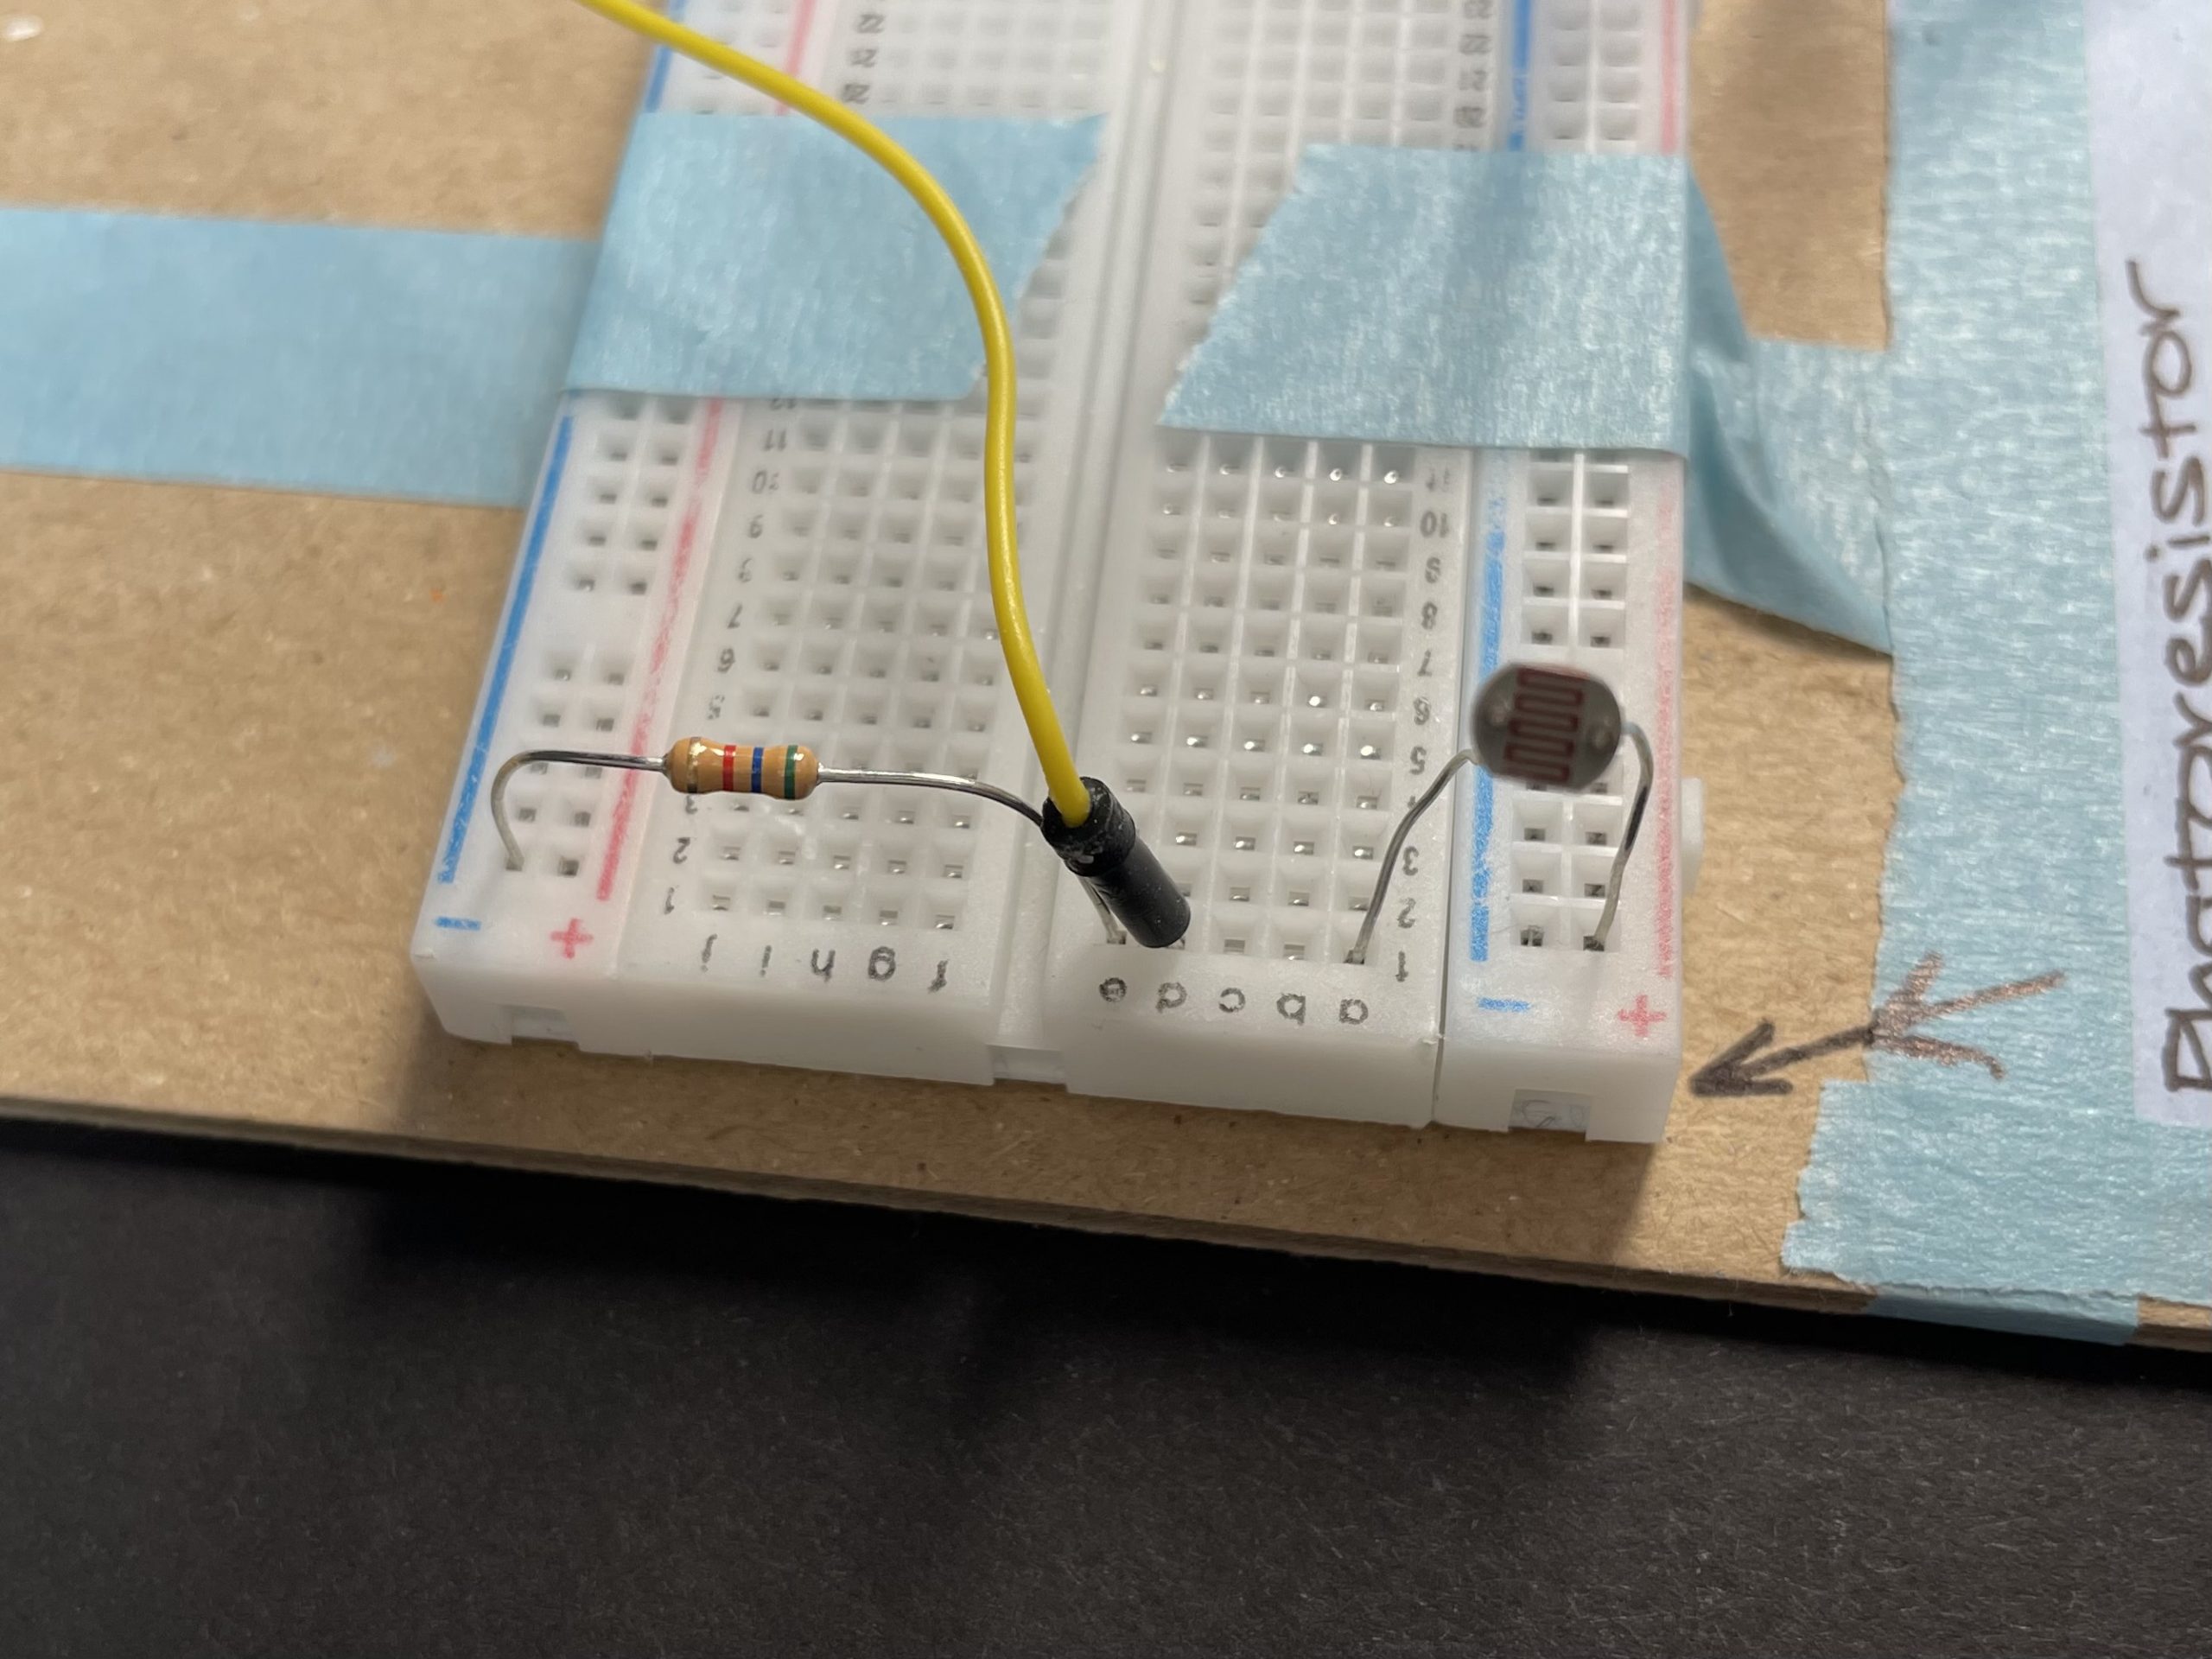
[Catherine] A detailed view of the photoresistor
Description
This device transfers light into sound, into movement. A small device measures light. An LED light will blink at different rates, and depending on how fast it blinks it, a sound will play with varying volume (faster blinks = higher volume). Another device will then measure the volume, and will tell a popsicle to move a certain angle.
Process
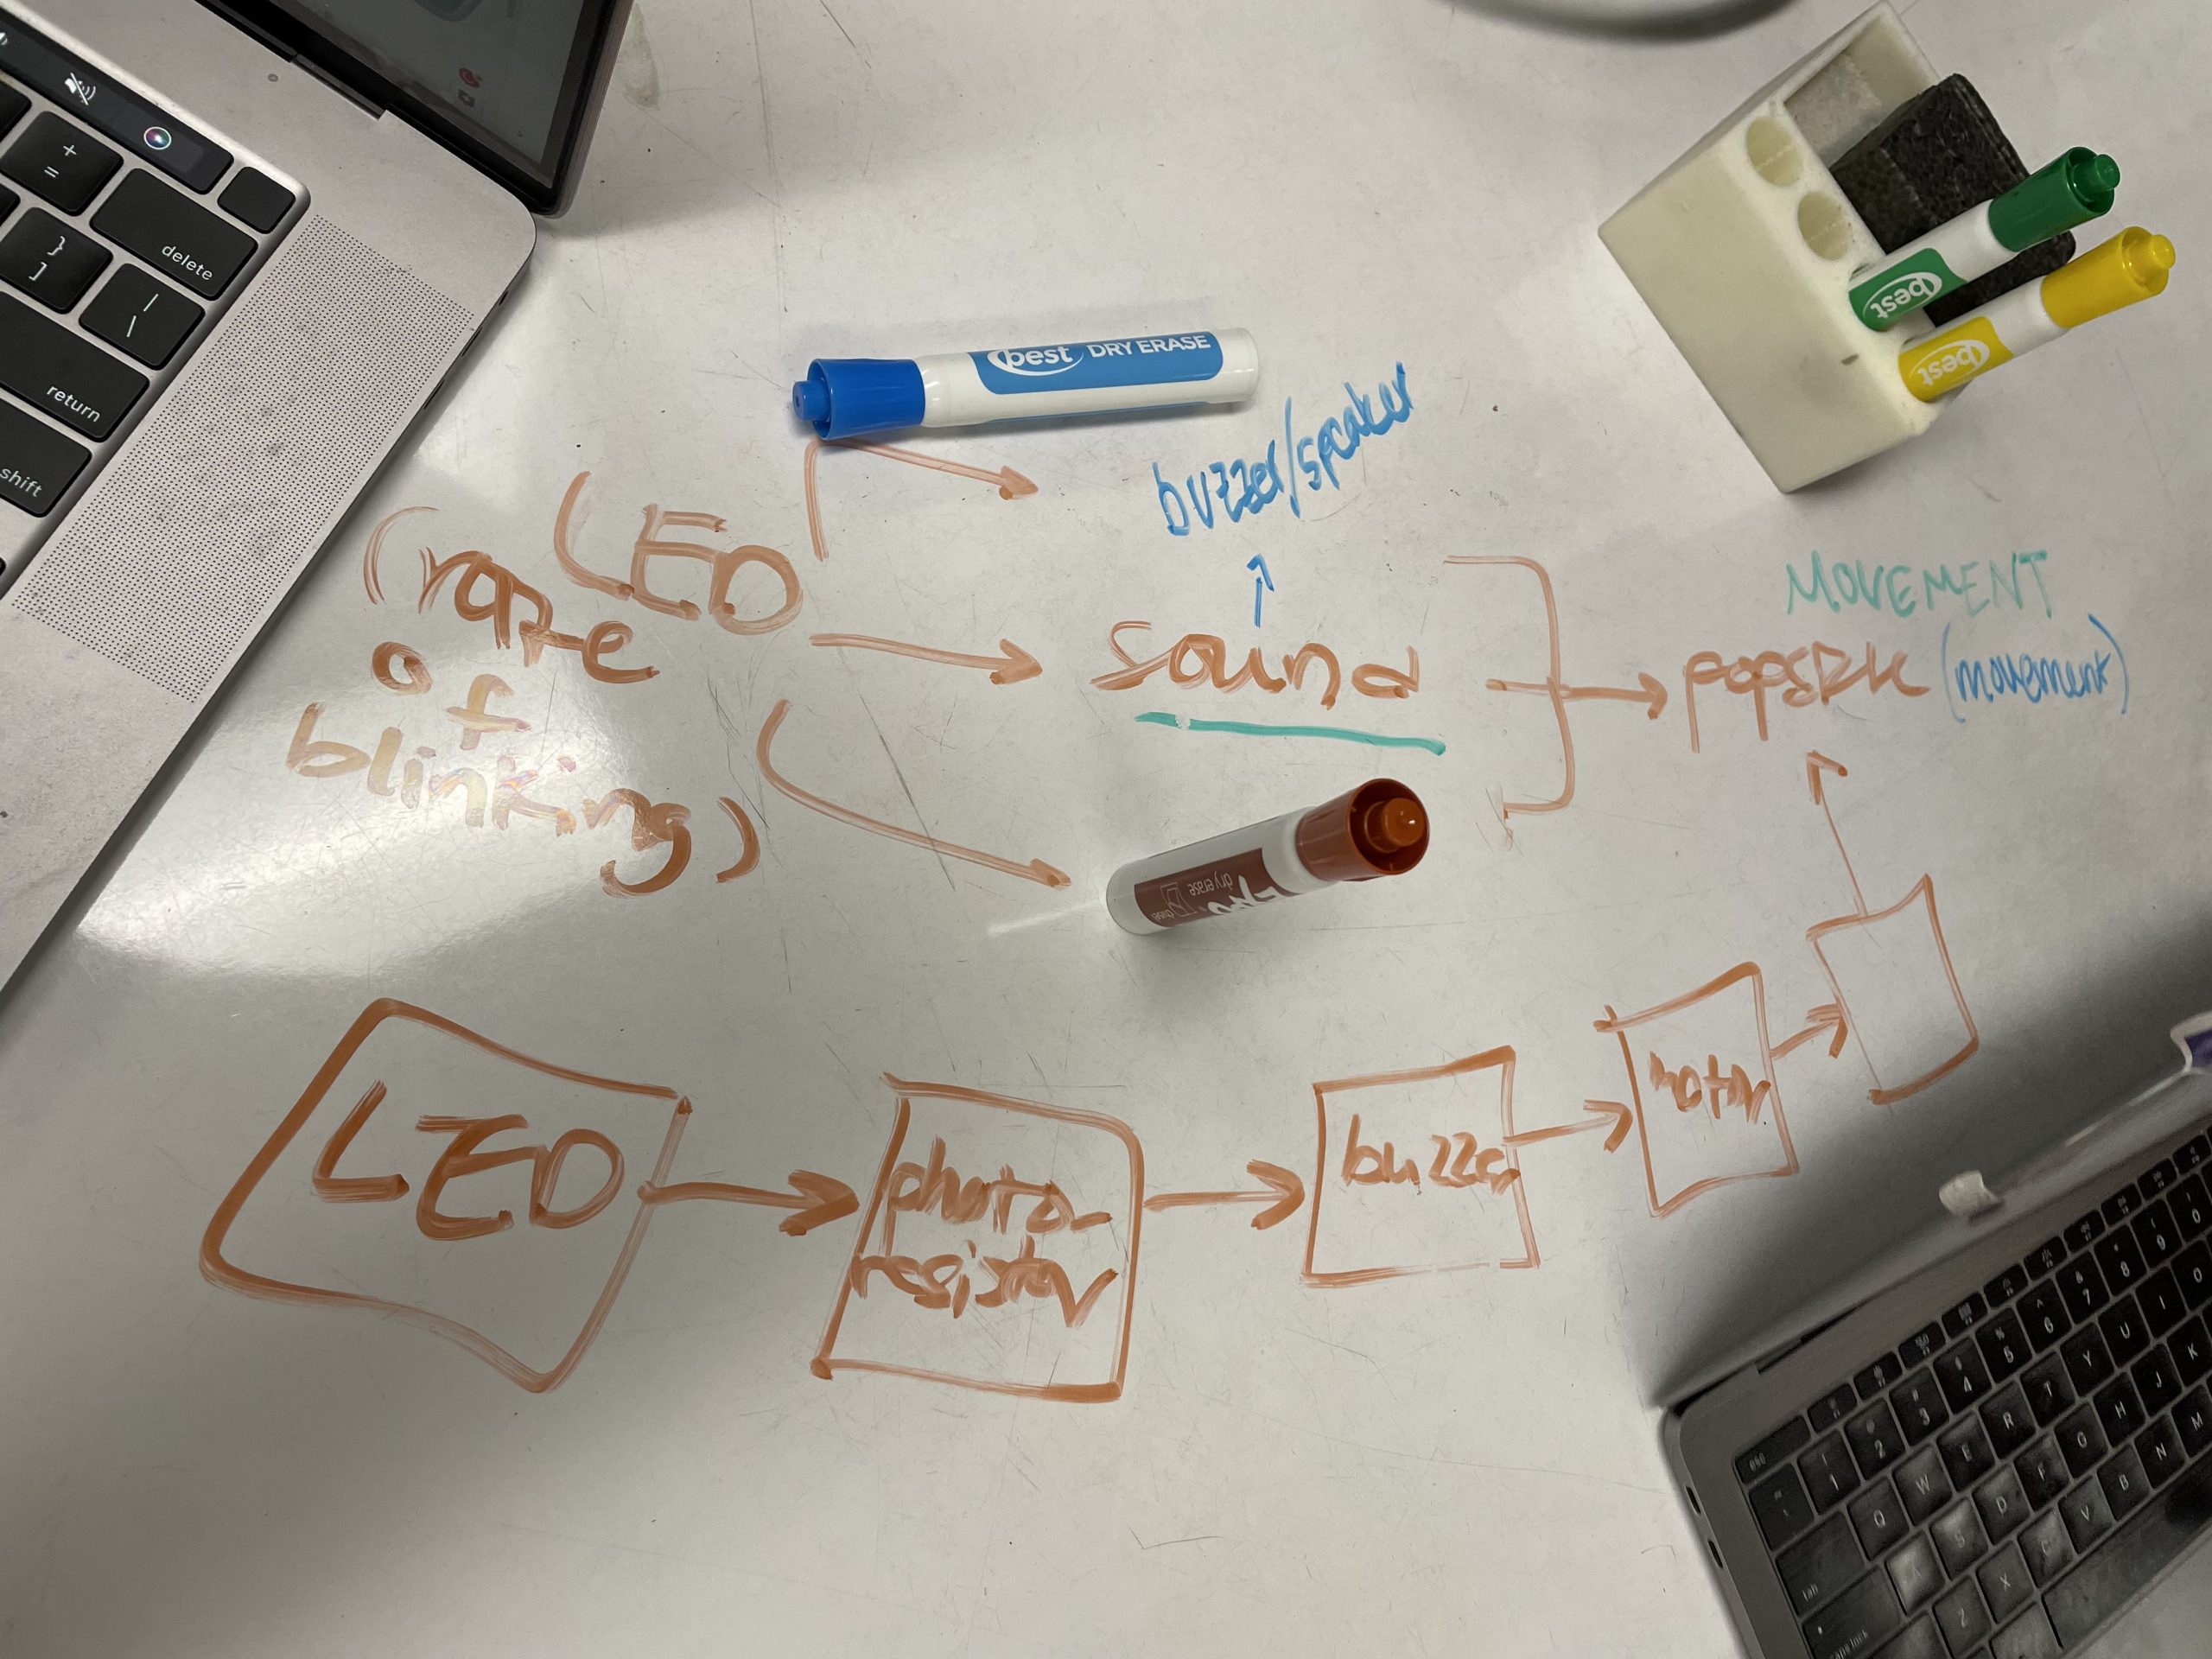
The first stage of understanding how the circuit would function and what the inputs and outputs would be
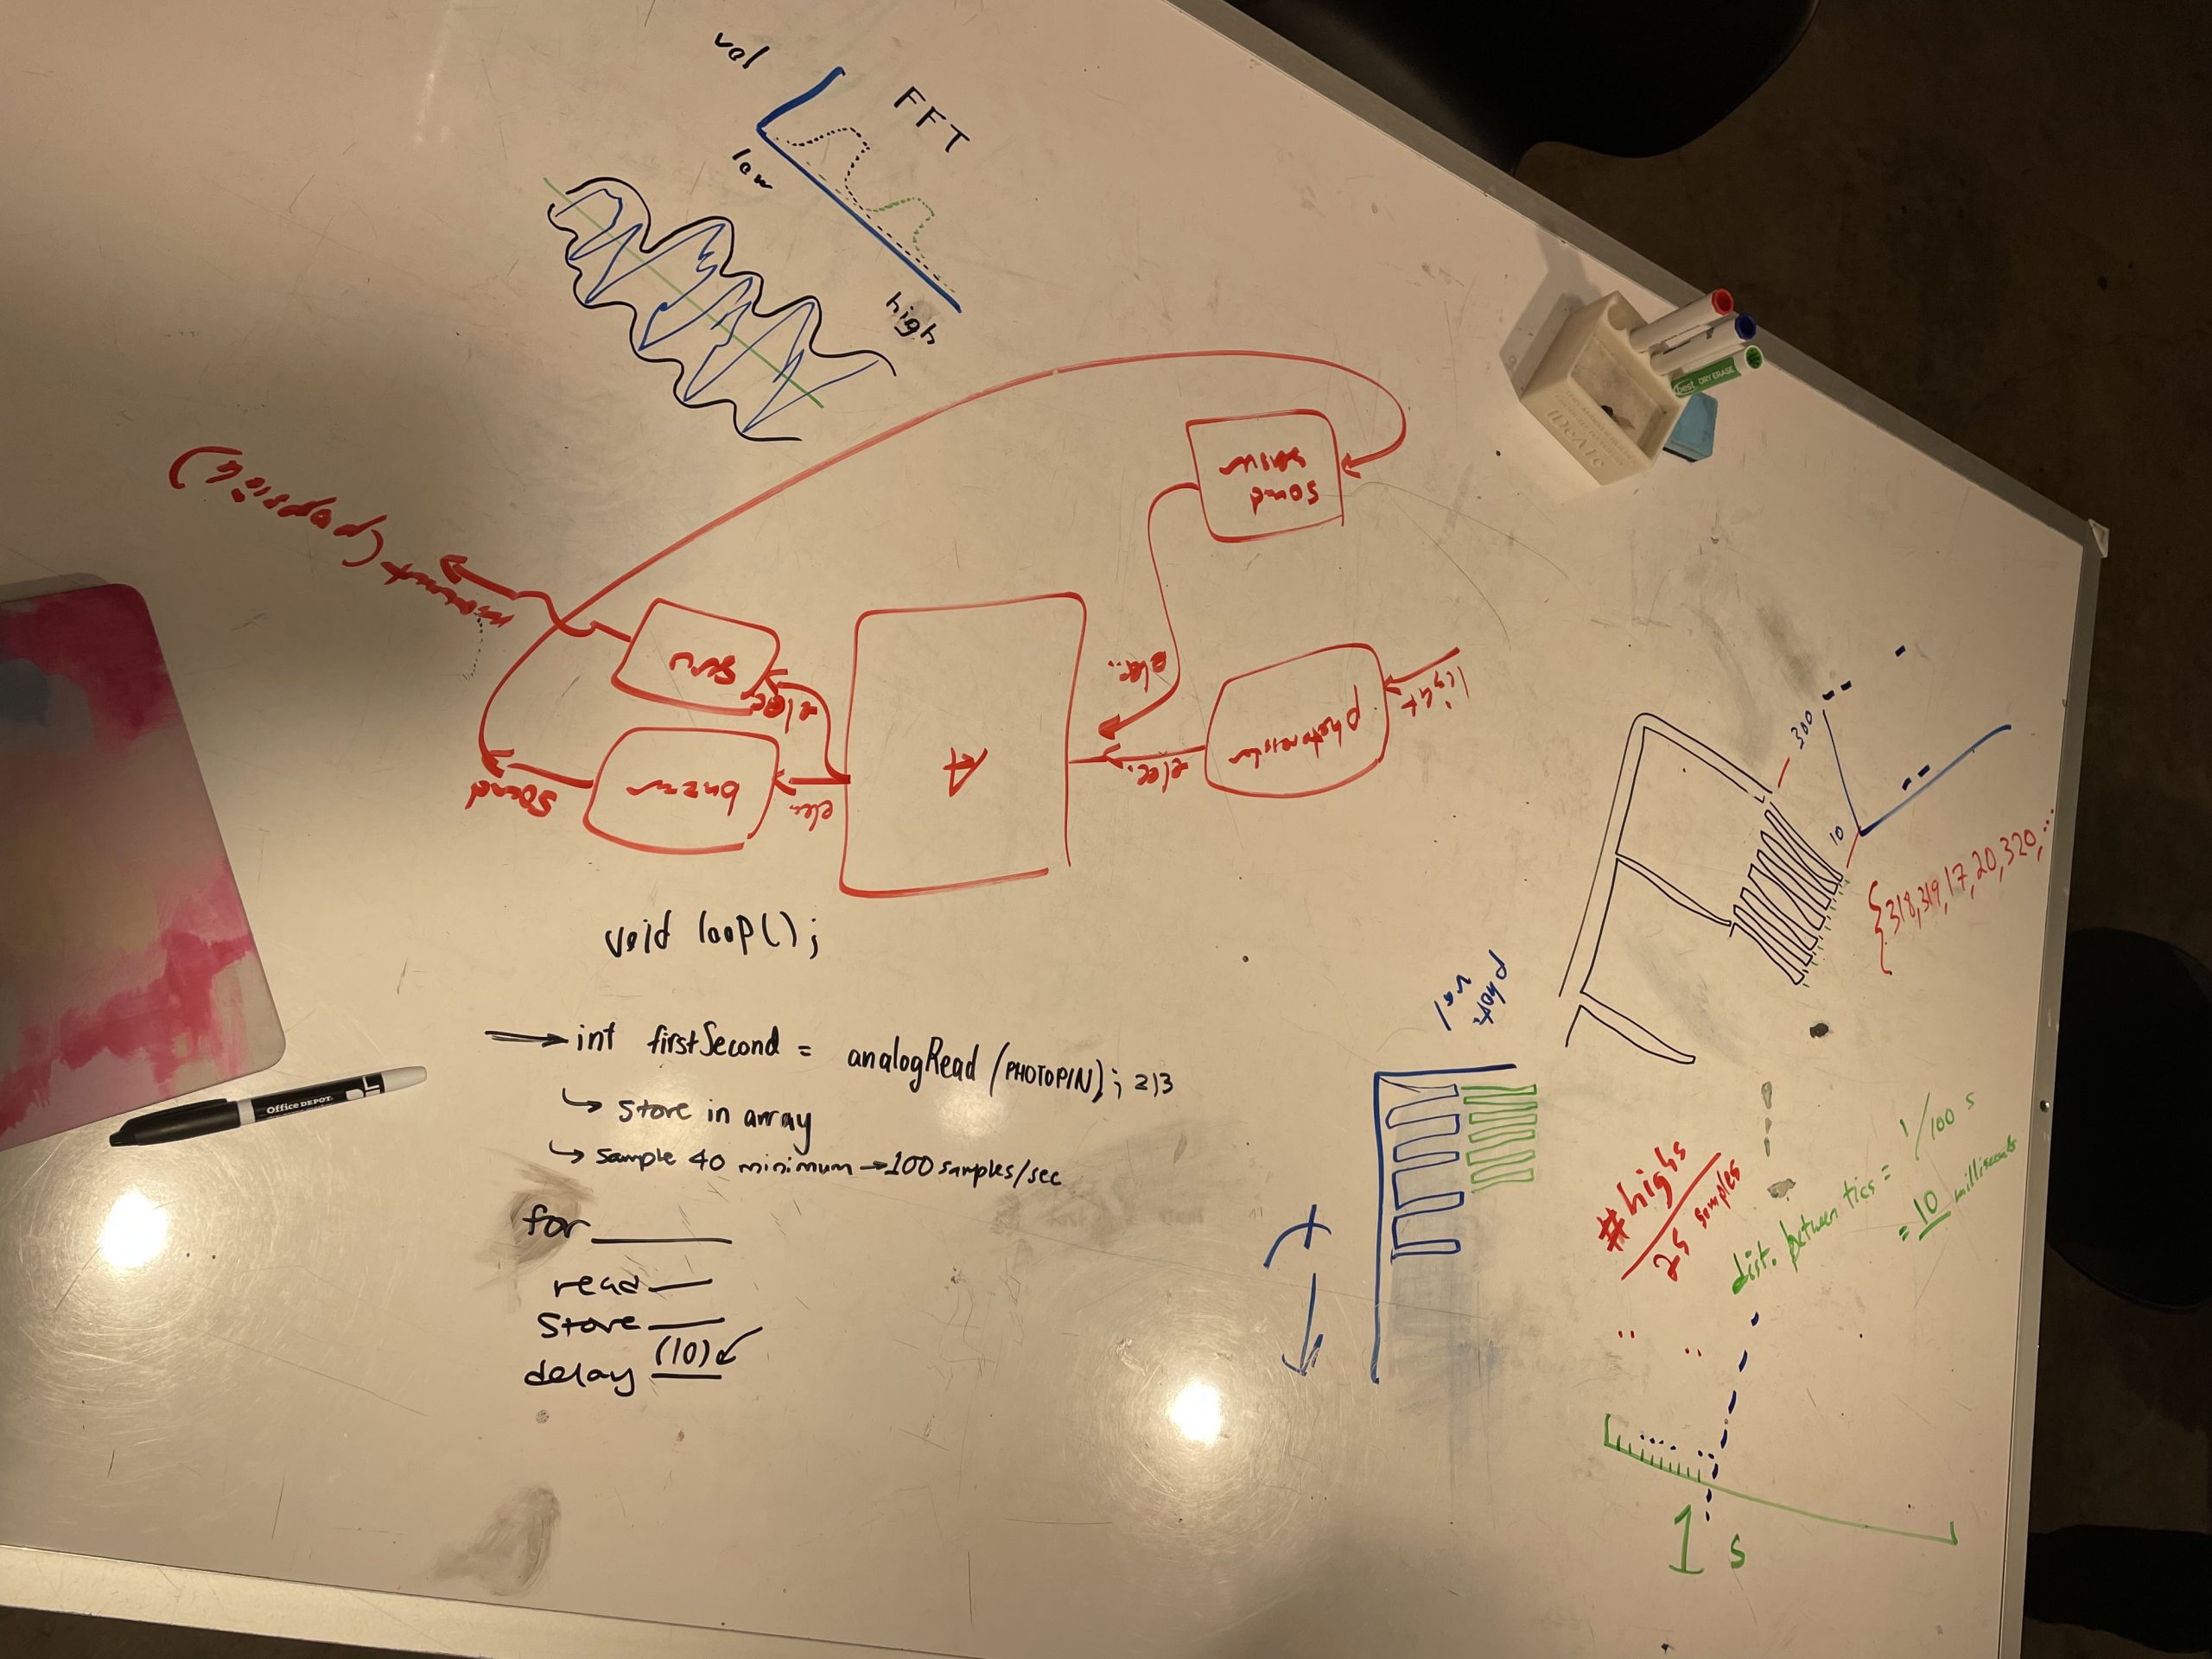
The ideation of how to properly detect a blinking LED
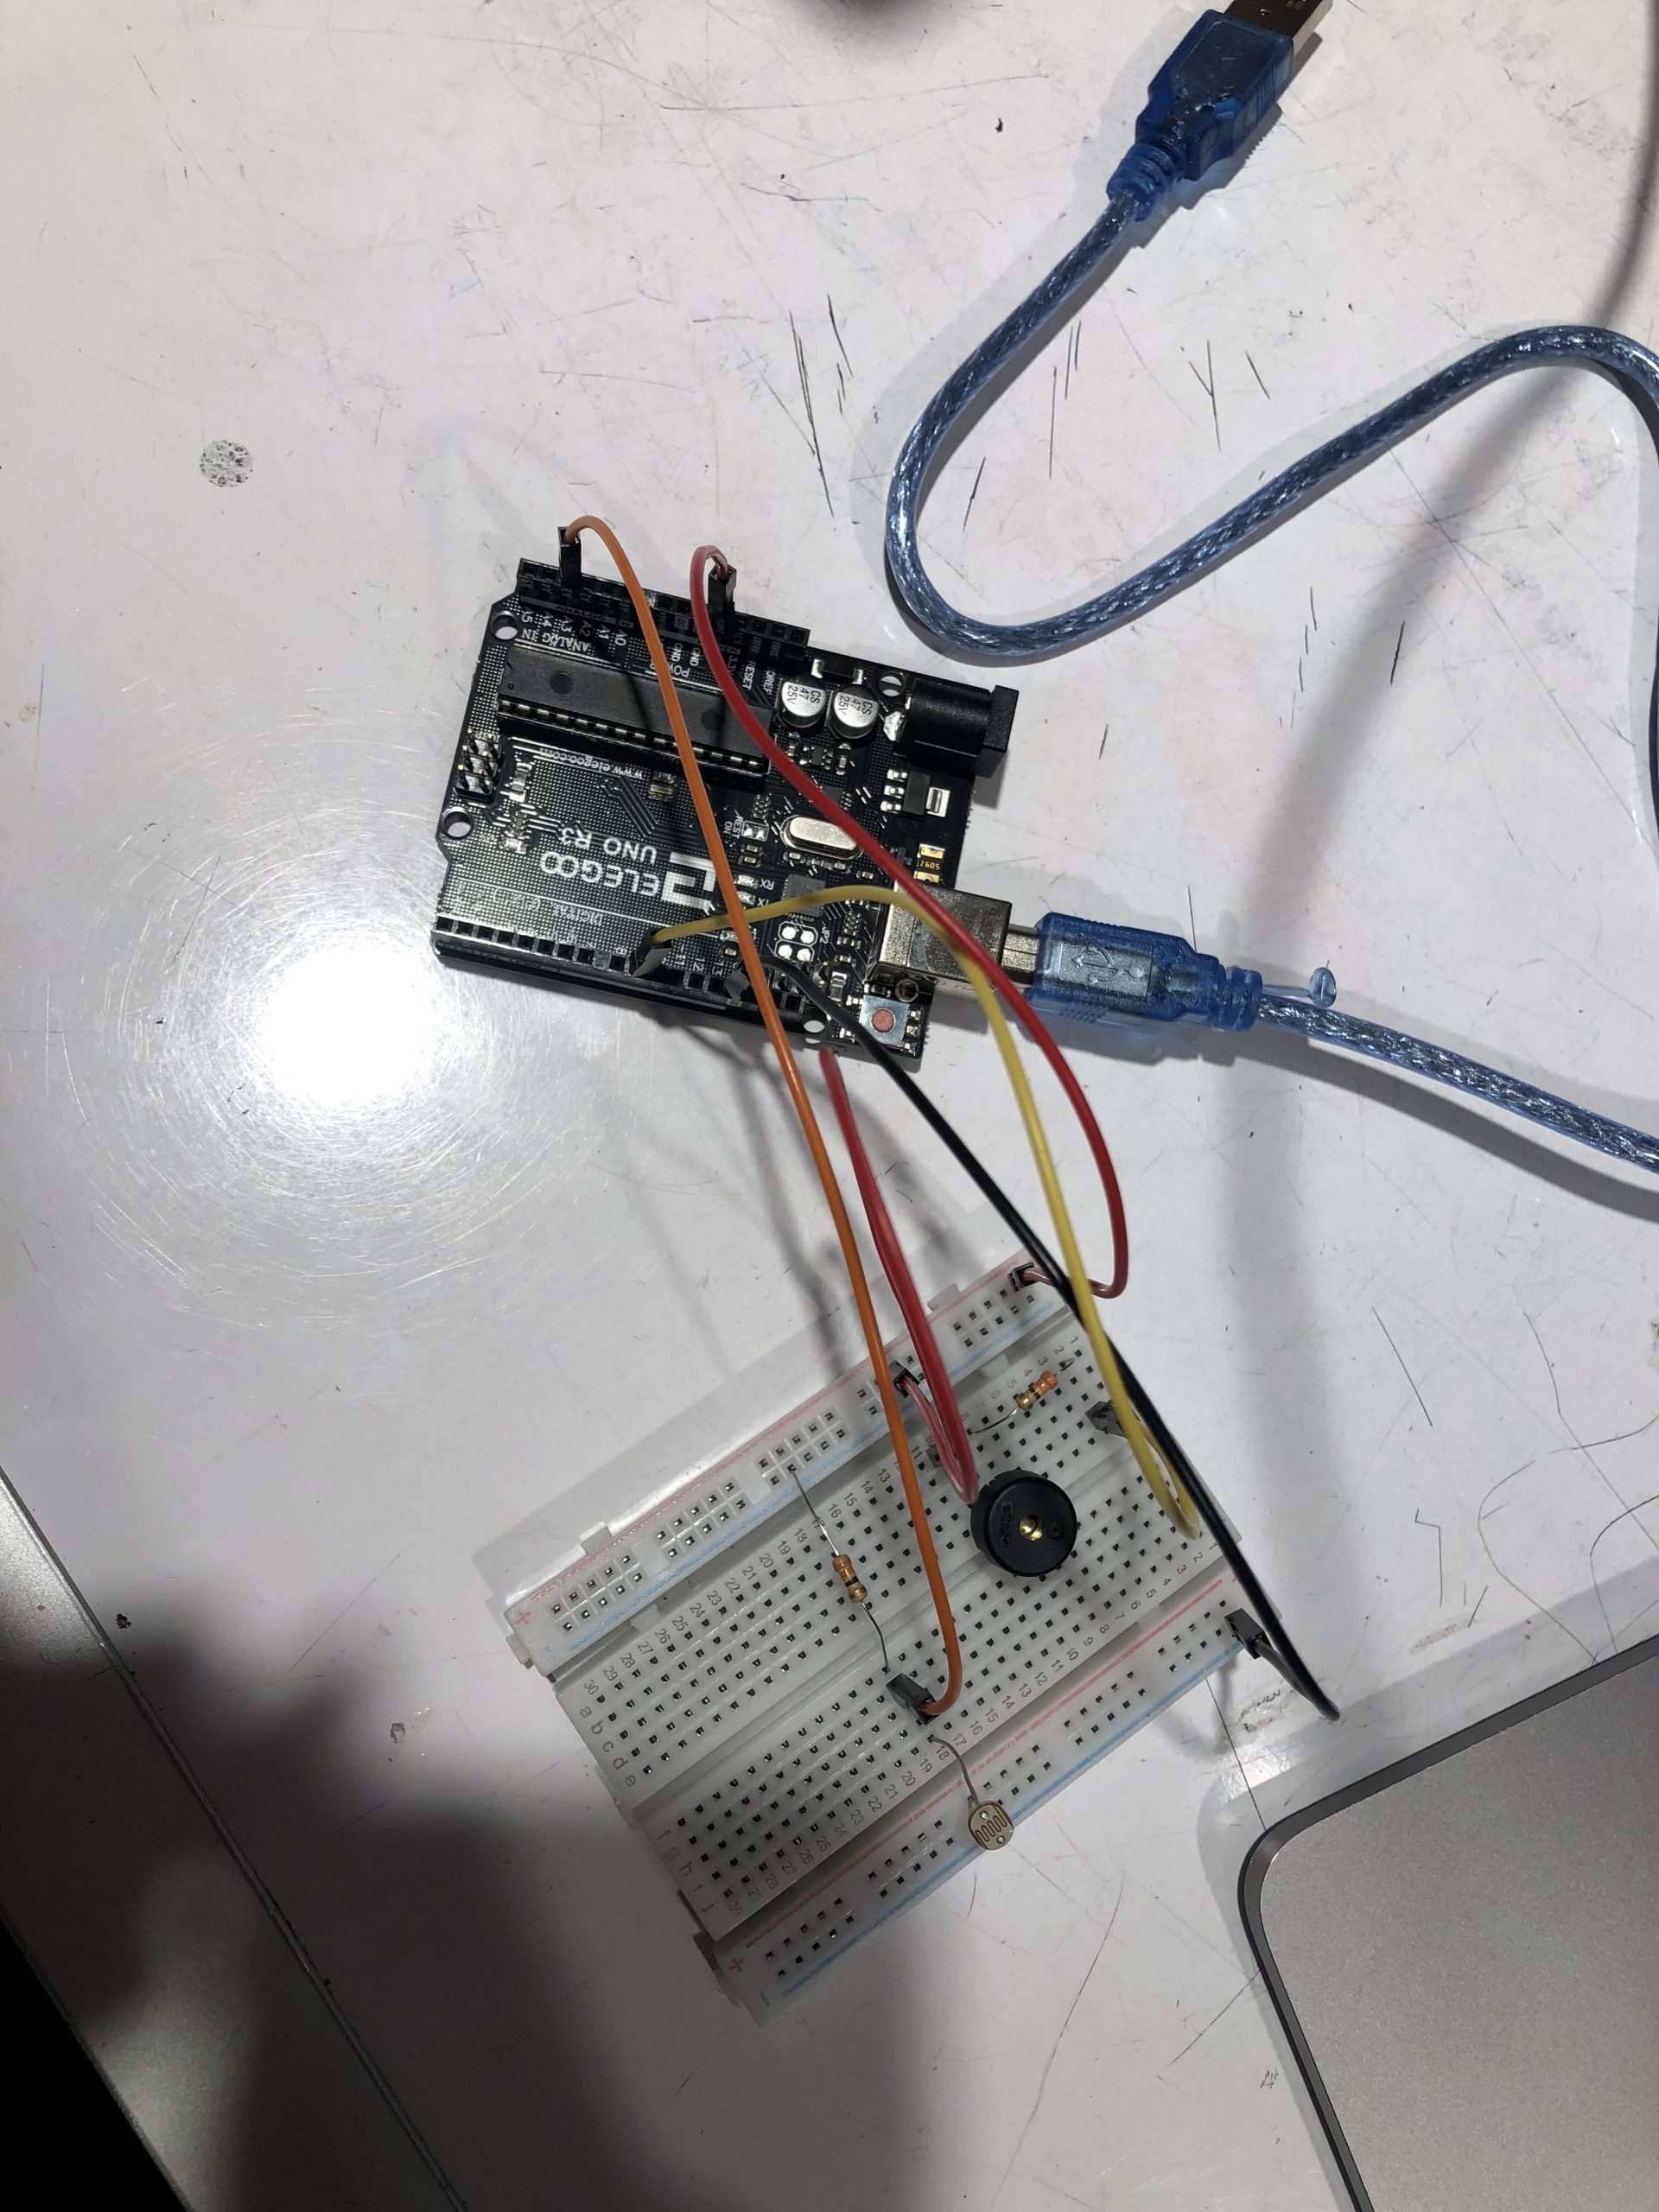
This was the first stage of finding the correct buzzer (passive vs. active) and wiring it up to start the code process.
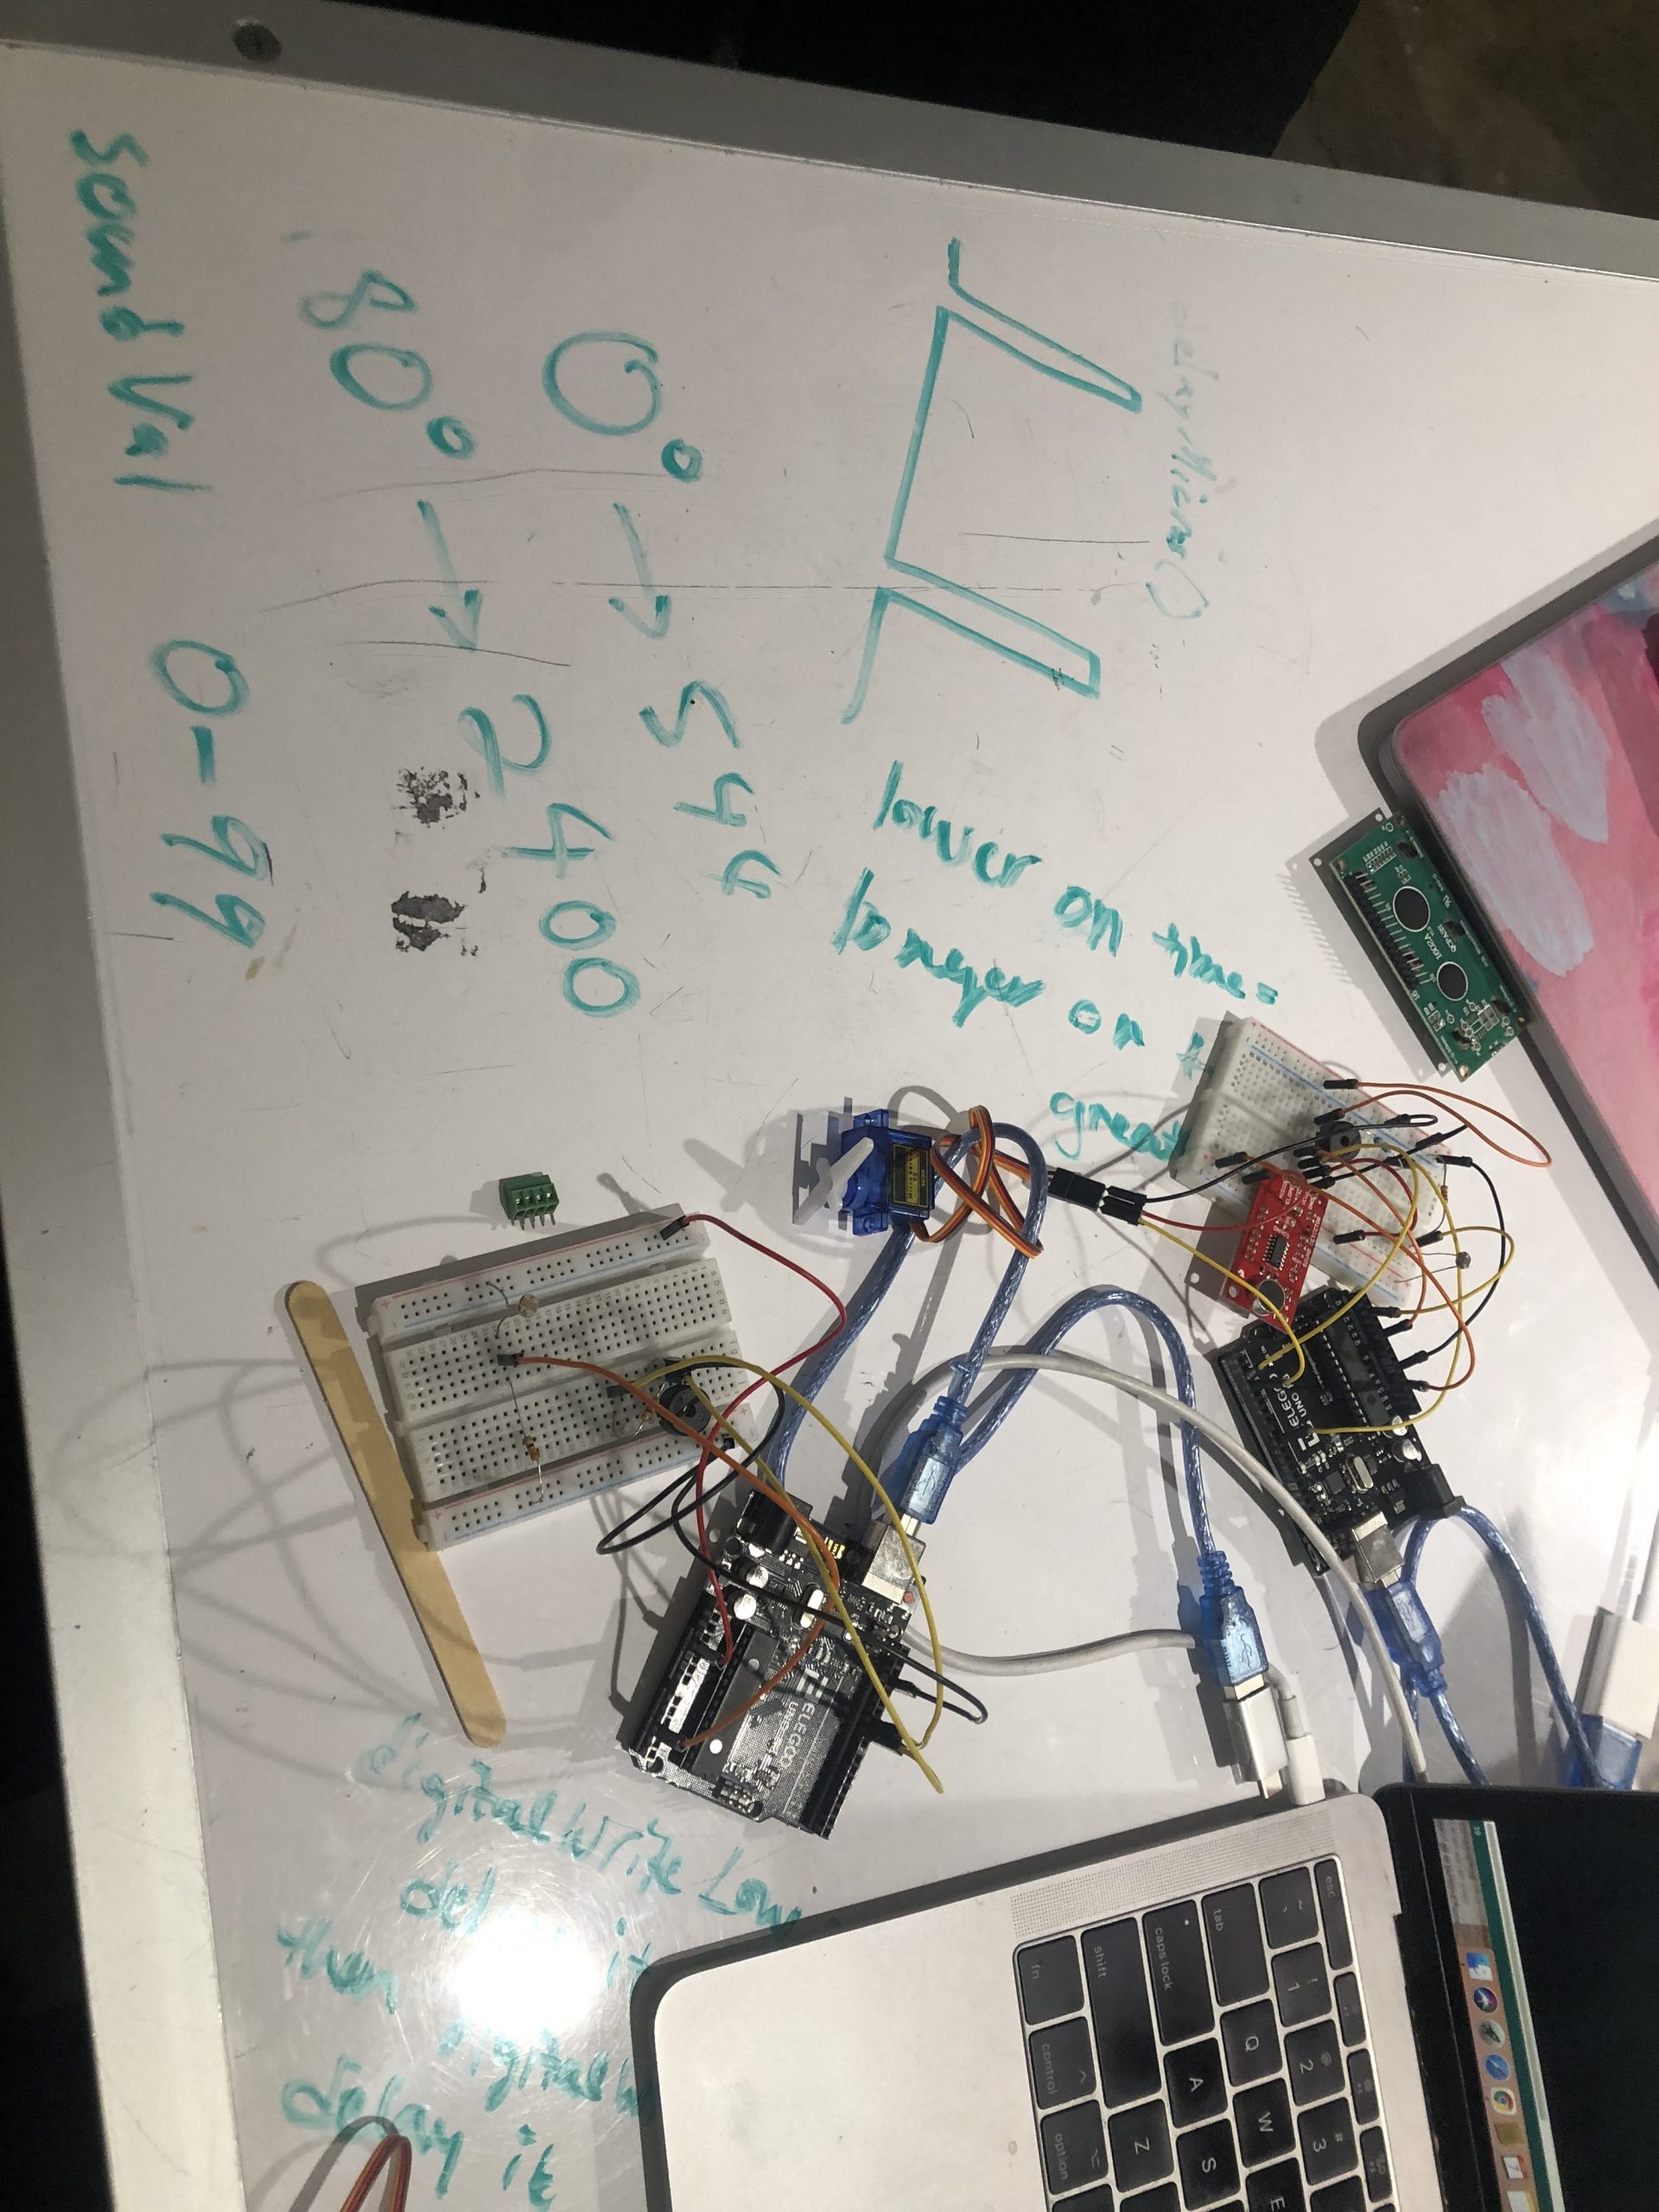
At this stage, we were trying to understand how to get the rate of the LED blinks to map to the volume of the buzzer.
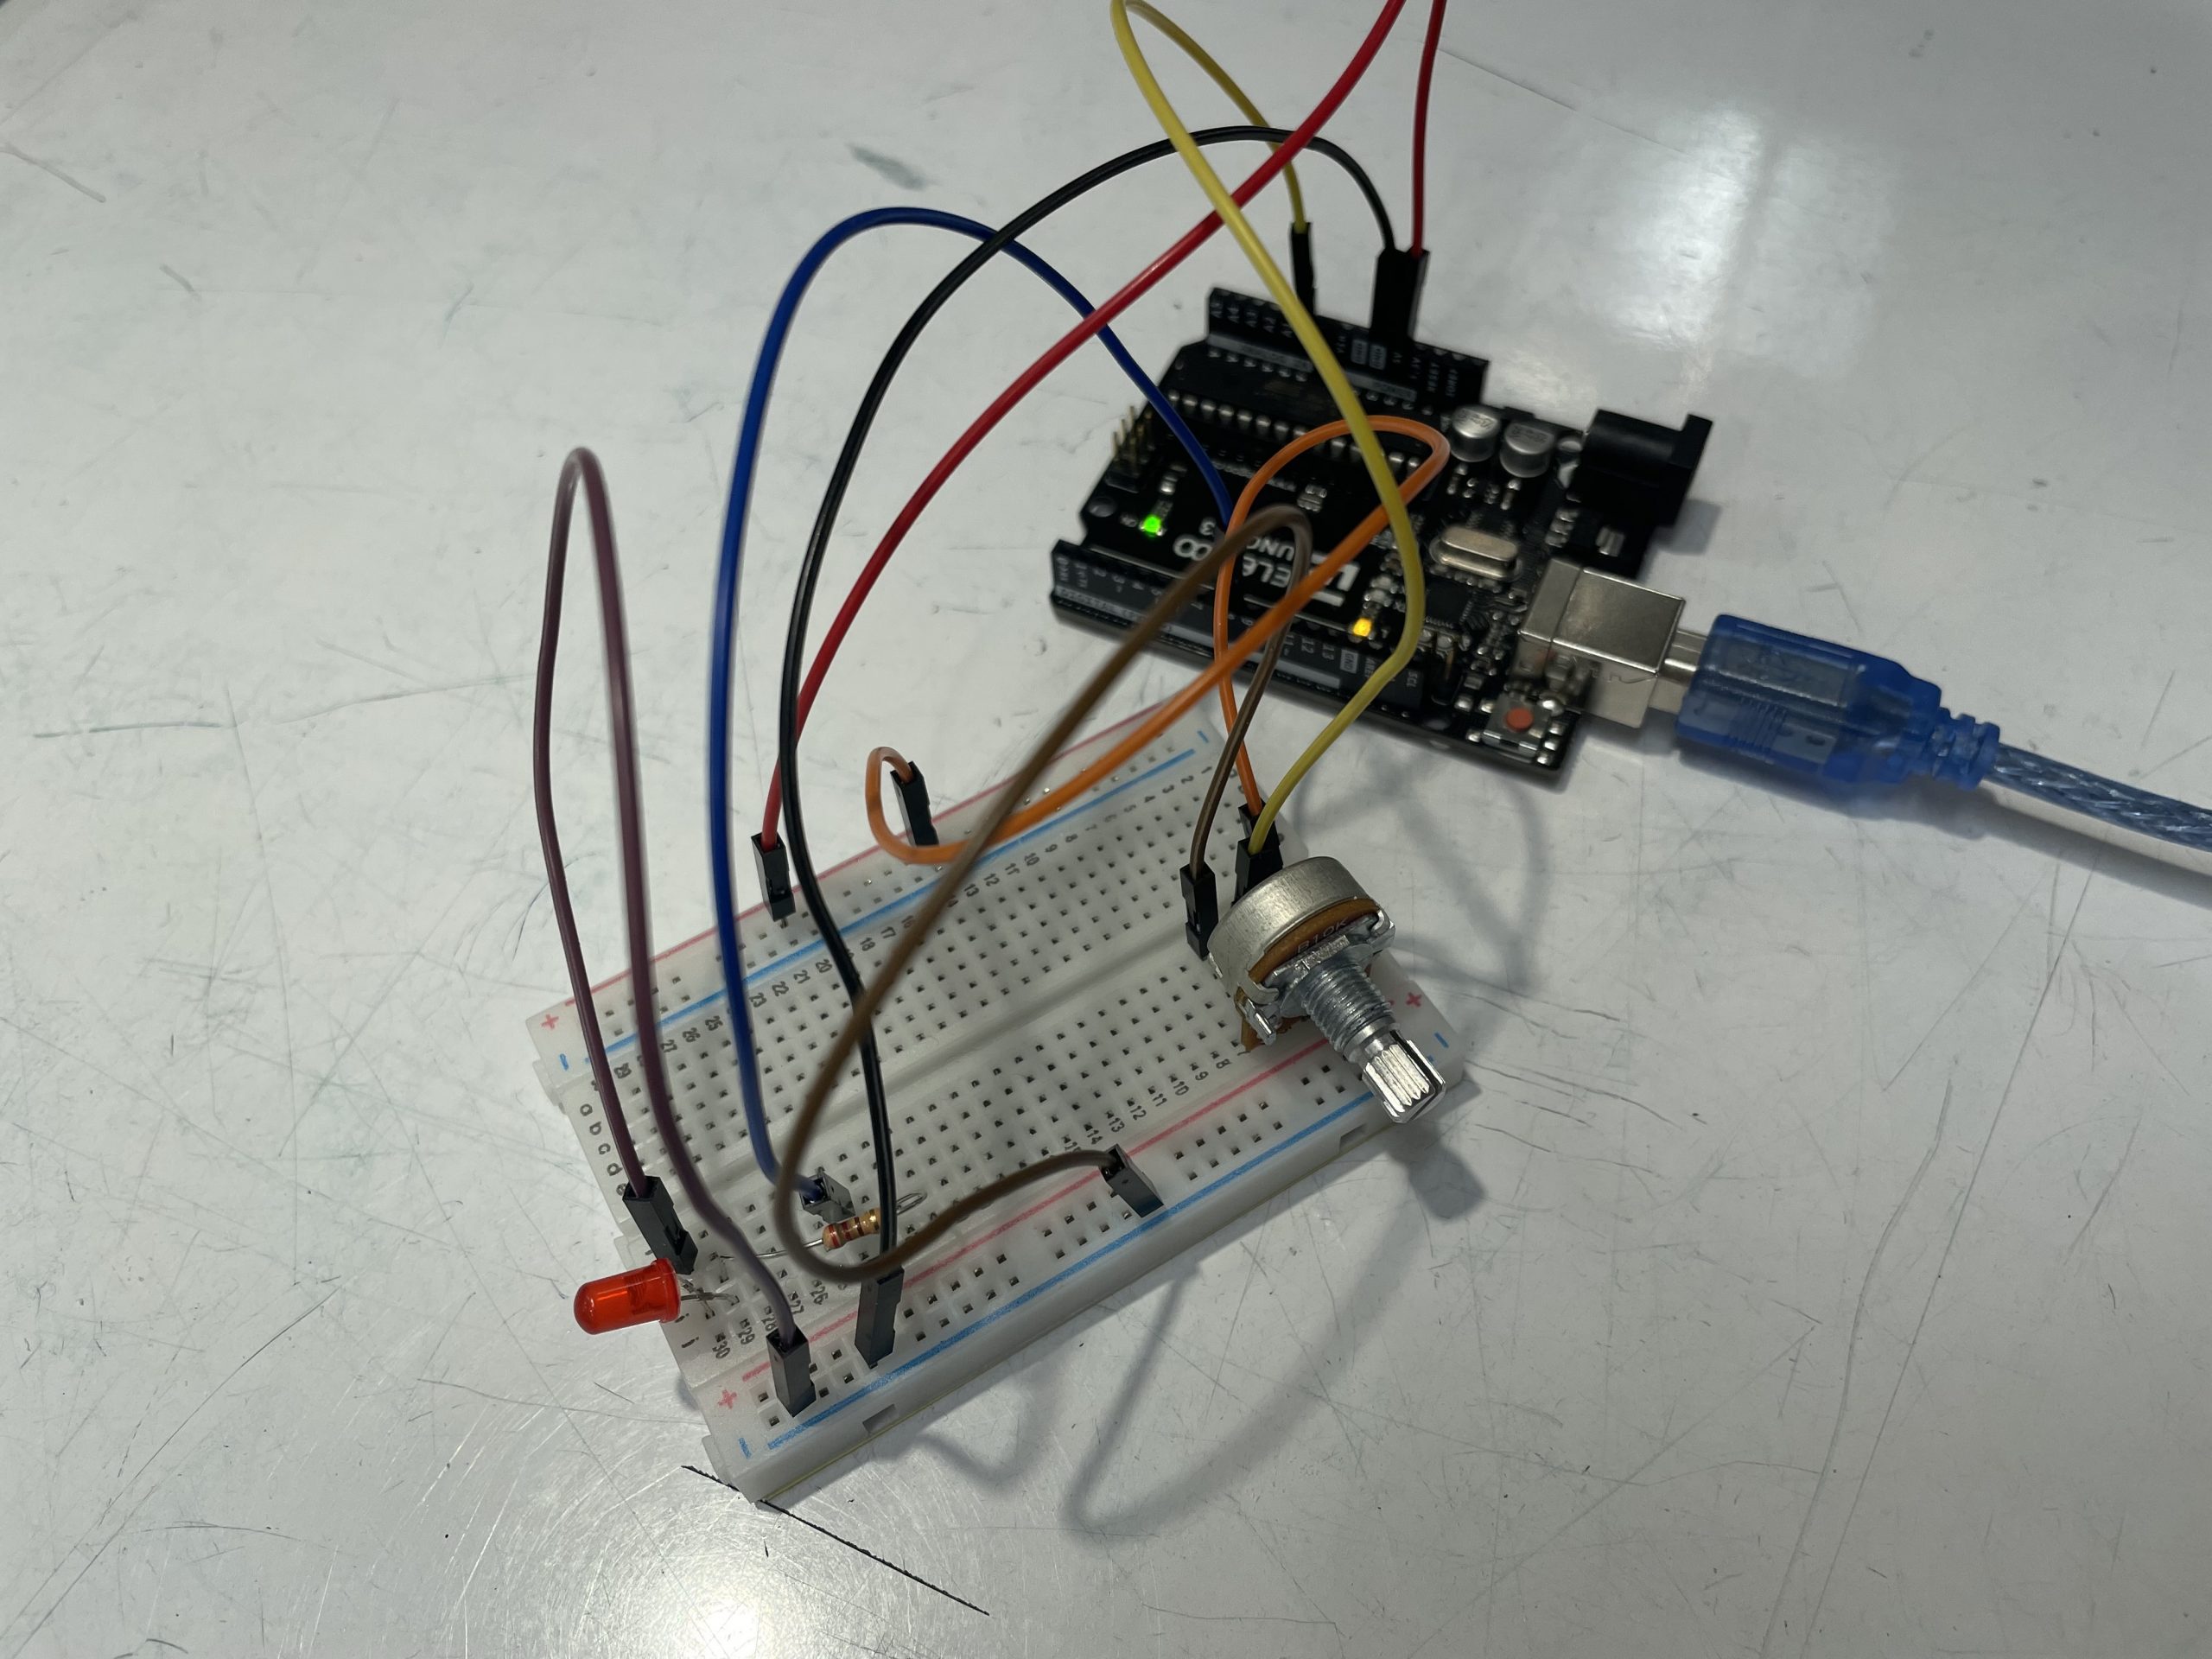
When we were ready to test our project, we built a blinking LED to mimic the input we were going to measure
Discussion
While some aspects of this project were simple, some were quite challenging. Wiring the physical components was fairly straightforward, as well as trouble-shooting the buzzer, and getting it to work properly. With enough insight from our instructors, such as the fact that the millis() timer could not be shared by both the passive buzzer ToneAC library and the servo motor (h library), we were able to provide an alternative method to get the motor to properly move the popsicle stick.
It was really difficult to update all of the components in real time. Thus, getting the LCD screen to blink 4 times per second while also getting the servo motor to properly update it’s angle. Individually everything made sense, but having everything work together nicely was a different story. Thus, distributing the data into the servo motor and output the proper angle in real time, and properly getting the data onto the LCD screen and having it reflect the right numbers and components – it was a lot of troubleshooting to get to our result.
Conceptualizing and actually coding the photoresistor to understand the varying rates of blinks from the LED was really difficult. Thankfully we asked for help early on in the process and Zach was able to sit with us and have an hour long talk where we conceptualized everything and created a solution. However going from pseudocode to actually putting it in the Arduino software in tandem with all of the other components was difficult. There was a point when we reached exactly what we were looking for – the code written was able to determine when the LED went on and off and at what rate it blinked, but even with this major component down – our servo motor decided not to work. Thus, even more troubleshooting was needed.
There was a lot of math involved in this, and likewise a lot of math functions. It took a lot of work to figure these parameters and math requirements out in order to get the correct angles and such.
Overall, we enjoyed working with each other and through challenges together. As a design major and creative writing major, we did not have strong coding backgrounds so we found the project slightly challenging but in a good way. We also each used our strengths in other areas to add to the project so despite the slightly less than satisfactory outcome, we learned a lot through the process, not just about physical computing, but also about each other. We also found that we had the same birthday and same white converse shoes which was very cool.
Schematic and Block Diagram
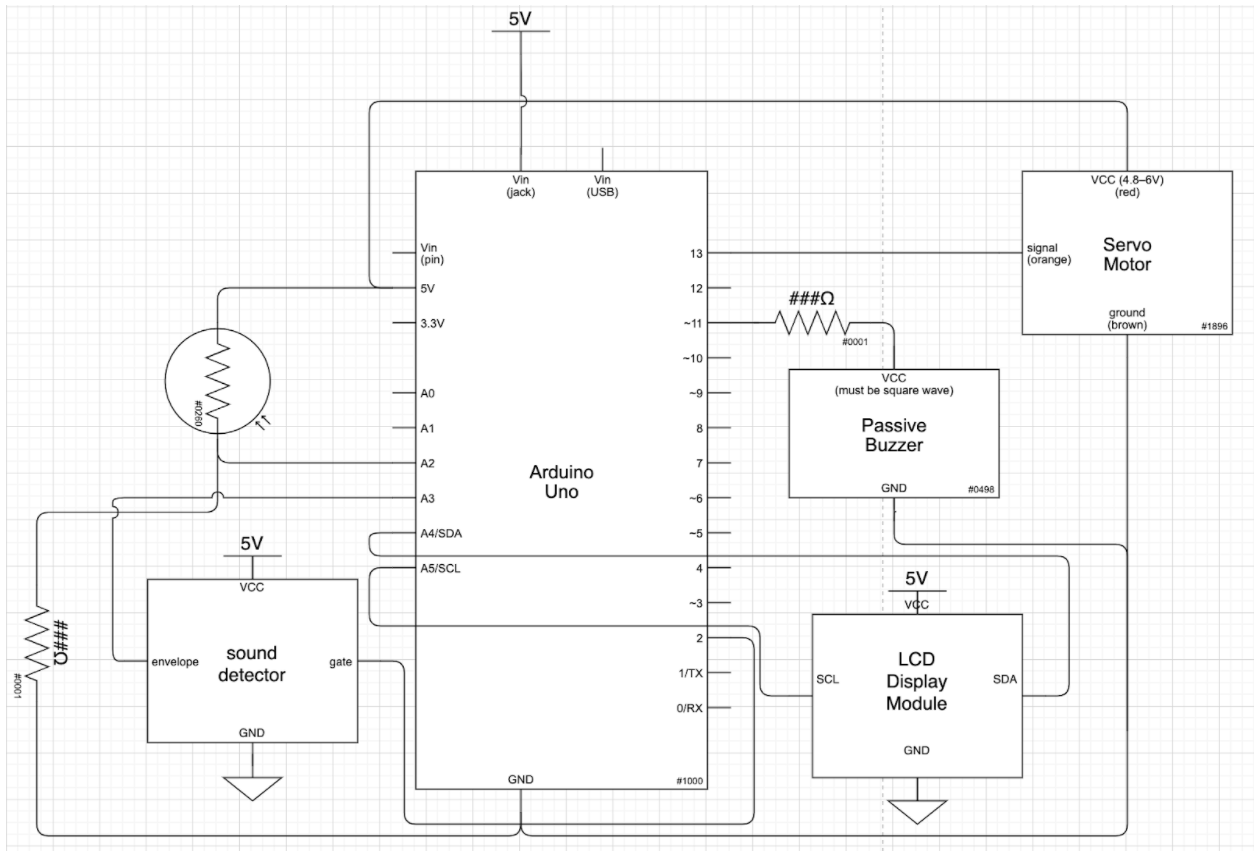
Functional Schematic
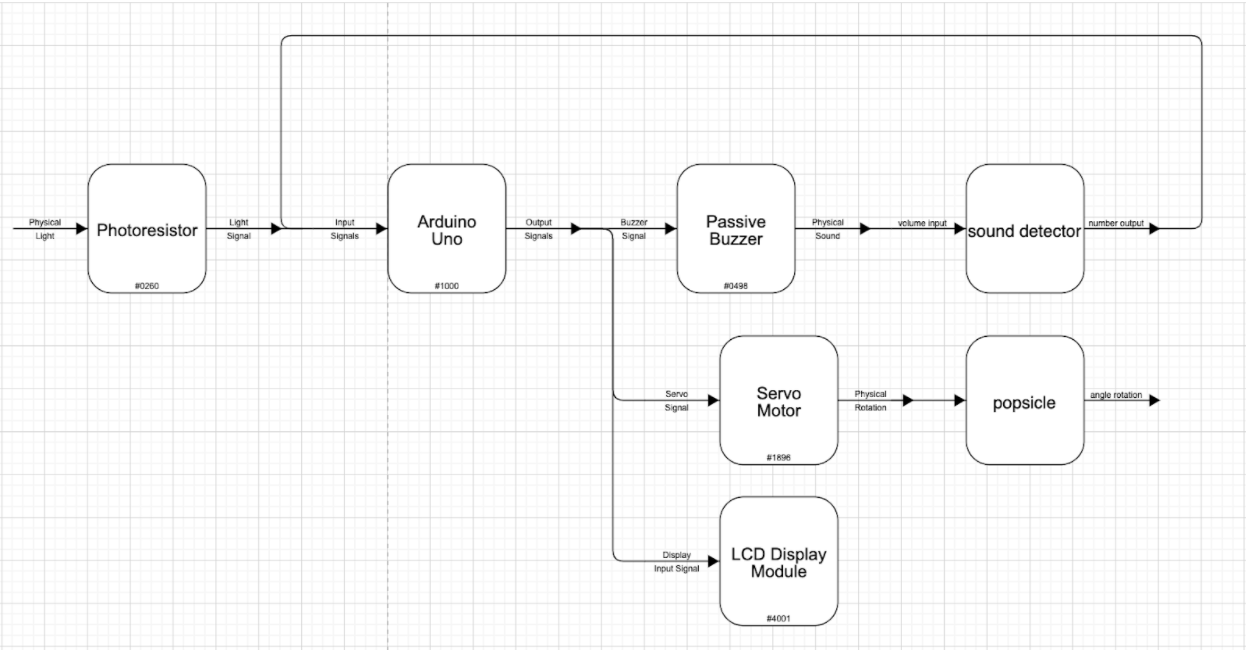
Block Diagram
Code
/* Double Transducer: Light --> Sound --> Movement
 *
* Catherine Liu and Noni Shelton
*
* This code takes in the rate of a blinking LED through a photoresistor and outputs a change in volume through a passive buzzer, which is then detected by a
* sparkfun sound detector and used as an input to drive a servo motor that rotates a popsicle stick to a certain angle
*
* Pin Mapping:
* pin | mode   | description
* ----|--------|-------------
* A3 . input .   photoresistor
* 3 .  output .  servo motor
* A0 . input .   sound detector
*
* Code Used:
* Robert Zacharias: Displaying data on an I²C LCD screen (https://courses.ideate.cmu.edu/60-223/s2022/tutorials/I2C-lcd)
* Referenced ToneAC library and Sparkfun Sound Dectector page for how to use buzzer and sound detector
*/


#include <LiquidCrystal_I2C.h> //LCD Display Module library
#include <toneAC.h> //buzzer library

LiquidCrystal_I2C screen(0x27, 16, 2); //initiate screen

//pins
const int PHOTOPIN = A3;
const int GAUGEMOTORPIN = 3;
#define SOUNDPIN A0

int photoVal; //light detected by photoresistor
int lightCount; //number of blinks per second
unsigned long lastTimeDisplay = 0; //tracks time for displaying on LCD
int volume; //volume outputted by buzzer
int soundDetect; //volume detected by sound detector
int rateArray[100]; //array for light readings
int arrayCount = 0; //counts number of values in array
int delayRange; //delay time for motor to get to certain angle
#define updateTime 20 //delay for servo motor

void setup() {
  pinMode(PHOTOPIN, INPUT);
  pinMode(GAUGEMOTORPIN, OUTPUT);
  Serial.begin(9600);

  LCDScreenSetup();
}

void loop() {
  LCDScreenDisplay();

  lightCount = 0;//reset lightcount after every loop

  for ( int i = 0; i < 100; i = i + 1) { //taking in reading
    photoVal = analogRead(PHOTOPIN);
    rateArray[i] = photoVal;
    delay(10);
  }
  for (int i = 1; i < 100; i = i + 1) { //counting number of blinks in array
    if (((rateArray[i]) - (rateArray[i - 1])) >= 100) {
      lightCount = lightCount + 1;
    }
  }
  for (int i = 0; i < 100; i = i + 1) { //resetting array
    rateArray[i] = 0;
  }

  //check blinking rate and map to buzzer volume
  volume = map(lightCount, 0, 20, 0 , 10);
  toneAC(400, volume);
  delay(1);

  // Check the envelope input and map to motor
  soundDetect = analogRead(SOUNDPIN);
  delayRange = map(value, 7, 45, 544, 2400);

  //call motor function
  motorAngle();

}

void motorAngle() { //delays the servo a certain amount of time for it to get to a specific angle
  digitalWrite(GAUGEMOTORPIN, HIGH);
  delayMicroseconds(delayRange);
  digitalWrite(GAUGEMOTORPIN, LOW);
  delay(updateTime);
}

void LCDScreenSetup() {
  // initialize the screen (only need to do this once)
  screen.init();

  // turn on the backlight to start
  screen.backlight();

  // set cursor to home position, i.e. the upper left corner
  screen.home();
}

void LCDScreenDisplay() {
  if (millis() - lastTimeDisplay >= 250) { //checks for when 250 milliseconds has passed
    screen.clear();

    // screen display photoresistor input
    screen.setCursor(0, 1);
    screen.home();
    screen.print("i:");
    int screenLight = map(lightCount, 0, 20, 0, 99);
    screen.setCursor(2, 0);
    screen.print(screenLight);

    //screen display volume output from buzzer
    screen.setCursor(5, 0);
    screen.print("m:");
    int screenVolume = map(volume, 0, 10, 0, 99);
    screen.setCursor(7, 0);
    screen.print(screenVolume);

    //screen display volume detected by sound detector
    int screenDetected = map(soundDetect, 7, 45, 0, 99);
    screen.setCursor(7, 1);
    screen.print(screenDetected);

    //screen display motor angle
    screen.setCursor(11, 1);
    screen.print("o:");
    int screenMotor = map(delayRange, 544, 2400, 0, 99);
    screen.setCursor(13, 1);
    screen.print(screenMotor);

    lastTimeDisplay = millis(); //updates the checking time
  }
}