Final Project

Updates for final exhibition:

For the final exhibition, I was mainly thinking about how to bring everything into an interactive experience for the exhibition visitors. My exhibition station had a few components:

Large monitor: shows a variety of media to set the tone–a manifesto of ideas driving the project, an animation/introduction to the project, and a visual of pixels being remapped from one person to another.

Center screen: videos/audios of non-human kin at magnified scales

Left screen: stereo pairs of focus-stacked moss; the screen was shown with a stereo viewer to facilitate the 3D visual effect.

Right screen: red-blue anaglyphs of focus-stacked moss; red-blue glasses were provided nearby so visitors could enjoy the effect

Handheld microscope: provided so visitors can see even more of the installation at scales they wouldn’t otherwise experience.

The screens were surrounded by grass and leaves from my yard (I tried to chose something that would create minimal disruption to the natural surroundings) and some dried plants a friend gifted me in the past. This was done so the media on the screens seemed to merge into the grass/leaves. As visitors leaned in to engage with the material (e.g. the stereo viewer), they would also find themselves getting closer to and smelling the grassy/vegetal scents.

I used my phone as one of the screens, so I both forgot to take an image earlier on during the exhibition (when everything was assembled more nicely) and wasn’t able to take a photo of the full setup, but here’s an image of the overall experience.

Project summary from before:

On the last episode of alice’s ExCap projects… I was playing around with stereo images while reflecting on the history of photography, the spectacle, stereoscopy and voyeurism, and “invisible” non-human labor and non-human physical/temporal scales and worlds. I was getting lost in ideas, so for this current iteration, I wanted to just focus on building the stereo macro capture pipeline I’ve been envisioning earlier (initially because I wanted to explore ways to bring us closer to non-human worlds* and then think about ways to subvert the way that we are gazing and capturing/extracting with our eyes… but I need more time to think about how to actually get that concept across :’)).

*e.g. these stereo videos made at a recent residency I was at (these are “fake stereo”) really spurred the exploration into stereo

Anyway… so in short, my goal for this draft was to achieve a setup for 360, stereoscopic, focus-stacked macro images using my test object, moss. At this point, I may have lost track a bit of the exact reasons for “why,” but I’ve been thinking so much about the ideas in previous projects that I wanted to just see if I can do this tech setup I’ve been thinking about for once and see where it takes me/what ideas it generates… At the very least, now I know I more or less have this tool at my disposal. I do have ideas about turning these images into collage landscapes (e.g. “trees” made of moss, “soil” made of skin) accompanied by soundscapes, playing around with glitches in focus-stacking, and “drawing” through Helicon’s focus stacking algorithm visualization (highlighting the hidden labor of algorithms in a way)… but anyway… here’s documentation of a working-ish pipeline for now.

Feedback request:

I would love to hear any thoughts on what images/what aspects of images in this set appeal to you!

STEP 1: Macro focus-stacking

Panning through focal lengths via pro video mode in Samsung Galaxy S22 Ultra default camera app using macro lens attachment

Stacked from 176 images. Method=C (S=4)

Focus stacked via HeliconFocus

Actually, I love seeing Helicon’s visualizations:

And when things “glitch” a little:

Stacked from 37 images. Method=A (R=8,S=4)

I took freehand photos of my dog’s eye at different focal lengths (despite being a very active dog, she mainly only moved her eyebrow and pupil here).

2. Stereo macro focus-stacked

Stereoscopic pair of focus-stacked images. I recommend viewing this by crossing your eyes. Change the zoom level so the images are smaller if you’re having trouble.

Red-Cyan Anaglyph of the focus-stacked image. This should be viewed via red-blue glasses.

3. 360 Stereo, macro, focus-stacked

I would say this is an example of focus stacking working really well, because I positioned the object/camera relative to each other in a way that allowed me to capture useful information throughout the entire span of focal lengths allowed on my phone. This is more difficult when capturing 360 from a fixed viewpoint.

Setup:

  1. Take stereo pairs of videos panning through different focal lengths, generating the stereo pair by scooting the camera left/right on the rail
  2. Rotate turntable holding object and repeat. To reduce vibrations from manipulating the camera app on my phone, I controlled my phone via Vysor on my laptop.
  3. Convert videos (74 total, 37 pairs) into folders of images (HeliconFocus cannot batch process videos)
  4. Batch process focus stacking in HeliconFocus
  5. Take all “focused” images and programmatically arrange into left/right focused stereo pairs
  6. Likewise, programmatically or manually arrange into left/right focused anaglyphs

Overall, given that the cameral rail isn’t essential (mostly just used it to help with stereo pairs; the light isn’t really necessarily either given the right time of day), and functional phone macro lenses are fairly cheap, this was a pretty low-cost setup. I also want to eventually develop a more portable setup (which is why I wanted to work with my phone) to avoid having to extract things from nature. However, I might need to eventually transition away from a phone in order to capture a simultaneous stereo pair at macro scales (lenses need to be closer together than phones allow).

The problem of simultaneous stereo capture also remains.

Focus-stacked stereo pairs stitched together. I recommend viewing this by crossing your eyes.

Focus-stacked red-blue anaglyphs stitched together. This needs to be viewed via the red-blue glasses.

The Next Steps:

I’m still interested in my original ideas around highlighting invisible non-human labor, so I’ll think about the possibilities of intersecting that with the work here. I think I’ll try to package this/add some conceptual layers on top of what’s here in order to create an approximately (hopefully?) 2-minute or so interactive experience for exhibition attendees.

Some sample explorations of close-up body capture

The Belly of the Beast: Excap Final

For my final I decided to build upon my typology from the beginning of the semester, where I captured the bottoms of bridges using photogrammetry. 

I wanted to focus on the presentation vehicle for my final, inspired by Claire Hentschker’s capture and release philosophy. I really liked the surreal and imposing quality that could be achieved by using augmented reality, which allows you to see these huge and imposing structures in your bedroom or backyard. 

So, I decided to create an app in Unity that could do this and give you a library of browsable bridges to look at, and I mostly succeeded!
There’s a lot of features I would still like to implement in the future, but for a first outing with Unity and app development in general, I’m really satisfied with the results. 

Here’s some videos of the app in action!

And finally, every bridge layered on top of each other outside, in true ExCap fashion.

Did I make this harder on myself by building a new app when there’s plenty that already exist? Oh for sure 10000 percent, but at least I can say I made an app now!

Also this class was great! One of the most fun classes I’ve taken at CMU, even if it was frustrating sometimes learning how to do things I’d never done before. I just discovered (when sitting down to do them) that FCE’s closed yesterday so this is my message to admin: More classes like this!!! I learned so much by just being given free reign to do basically whatever I wanted.

Final Project, Smalling, Documentation

Smallness — the form of being small, the action of having to contort oneself, and how that works when it has to happen consciously, with no immediate threat or reward. This idea came out of considering more formal elements of small bodies along with “smallness” as a symbolic item (as it’s used in movies and other media,) and smallness as a relatable concept.

Started as this:

Started testing which looked like this:

 Looked at some images closer to this:

Changed my setup to something more “official” (magic arm, real camera, fed all to laptop)

Struggled with output, the actual program (I took one coding class and my brain is bad at absorbing those things so just about all of it came out of AI and other people,) and defining the rules of the “game.” Lots of just odd looking problems like this:

Things started kind of working, here are some of the first tests:

After the first critique I wanted to keep working on the problems I had (random artifacts, measuring people in a way which prioritized small frames, etc…)

Here’s a test reel from the first few moments that the program was working semi-correctly:

Kept working and ended up with a cleaner smalling game. People stand against a green screen, everything green is chroma-keyed out, and the surface area of anything not green is measured against the previous size (a person standing at full size when the program starts is 100% of their own surface area, if they bend over, they might be at 65%, etc.). Time is variable and depends on beating one’s own high score—if 10 seconds have elapsed where the participant hasn’t become smaller, the game ends. Set it up for the showcase with the giant touchscreen monitor and a bunch of connections that I barely understood (thank you Golan)

Did the showcase. Here are some favorites:

here’s a larger grid:


here’s some photos my mom took:

here’s nica:

here’s golan:

Final Delivery | Walk on the earth

Concept

I seek to pixelate a flat, two-dimensional image in TouchDesigner and imbue it with three-dimensional depth. My inquiry begins with a simple question: how can I breathe spatial life into a static photograph?

The answer lies in crafting a depth map—a blueprint of the image’s spatial structure. By assigning each pixel a Z-axis offset proportional to its distance from the viewer, I can orchestrate a visual symphony where pixels farther from the camera drift deeper into the frame, creating a dynamic and evocative illusion of dimensionality.

Outcome

Capture System

To align with my concept, I decided to capture a bird’s-eye view. This top-down perspective aligns with my vision, as it allows pixel movement to be restricted downward based on their distance from the camera. To achieve this, I used a 360° camera mounted on a selfie stick. On a sunny afternoon, I walked around my campus, holding the camera aloft. While the process drew some attention, it yielded the ideal footage for my project.

Challenges

Generating depth maps from 360° panoramic images proved to be a significant challenge. My initial plan was to use a stereo camera to capture left and right channel images, then apply OpenCV’s matrix algorithms to extract depth information from the stereo pair. However, when I fed the 360° panoramic images into OpenCV, the heavy distortion at the edges caused the computation to break down.

Moreover, using OpenCV to extract depth maps posed another inherent issue: the generated depth maps did not align perfectly with either the left or right channel color images, potentially causing inaccuracies in subsequent color-depth mapping in TouchDesigner.

Fortunately, I discovered a pre-trained AI model online Image Depth Map that could directly convert photos into depth maps and provided a JavaScript API. Since my source material was a video file, I developed the following workflow:

  1. Extract frames from the video at 24 frames per second (fps).
  2. Batch processes 3000 images through the Depth AI model to generate corresponding depth maps.
  3. Reassemble the depth map sequence into a depth video at 24 fps.

This workflow enabled me to produce a depth video precisely aligned with the original color video.

Design

The next step was to integrate the depth video with the color video in TouchDesigner and enhance the sense of spatial motion along the Z-axis. I scaled both the original video and depth video to a resolution of 300×300. Using the depth map, I extracted the color channel values of each pixel, which represented the distance of each point from the camera. These values were mapped to the corresponding pixels in the color video, enabling them to move along the Z-axis. Pixels closer to the camera moved less, while those farther away moved more.

The interaction between particles and music is controlled in Real-Time

Observing how the 360° camera captured the Earth’s curvature, I had an idea: Could I make it so viewers could “touch” the Earth depicted in the video? To realize this, I integrated MediaPipe’s hand-tracking feature. In the final TouchDesigner setup, the inputs—audio stream, video stream, depth map stream, and real-time hand capture. The final result is an interactive “Earth” that moves to the rhythm of music. The interaction between particles and music is controlled in real time by the user’s beats.

Critical Thinking

  1. Depth map generation was a key step in the entire project, thanks to the trained AI model that overcame the limitations of traditional computer vision methods.
  2. I feel like the videos shot with the 360° camera are interesting in themselves, especially the selfie stick that formed a support that was always close to the lens in the frame, which was very realistic and accurately reflected in the depth map.
  3. Although I considered using a drone to shoot a bird’s-eye view, the 360° camera allowed me to realize the interactive ideas in my design. Overall, the combination of tools and creativity provided inspiration for further artistic exploration.

Project Proposal (Final) Synth Play

Pipeline/s

Overall (Edited) Pipeline: 

Mic – computer – little bits (arduino + cv) – audio amplifier – arp

Inside the Computer: Teachable machine to p5.js to max msp out to the analog pipeline

Themes:


Dealing with Loss – Audio Degeneration

My concept is focusing on the idea of losing someone close to you for whatever reason and I want to make a performance out of this using the arp 2600. The digital (capture ) component of this is focusing on removing various phonemes from my voice in real time to either single out or remove completely the specified sounds.

First step – get the system working to use cv to send out different qualities of the signal as a cv to control the arp. This is working 

https://drive.google.com/file/d/1XrmtC7oAI06D0D4_hy1Dk09lZ60820F4/view?usp=drive_link

Training using teachable machine – finding it’s quirks – consistency in volume I think vocal dynamics isn’t such a great way to train this model – prediction is that it becomes confused


  • Current headache – Max has odd syntax quirks that aren’t currently compatible with the arduino syntax <numbers>, however they definitely want to talk to each other.There is some conversion edit I have to make. When I send information i get an error which ends the process of sending the numbers, but I get a blink confirming that my setup is almost correct. – just found out / solved it !!!

Next steps – combining the teachable machine that is in p5.js(thanks golan), into max, then getting an output – transforming that output and hence sending it out to the arp. Performance (yay)

Motion Capture Final Project

Objective

I aimed to explore capturing dance movements through a Motion Capture (Mocap) system, focusing on understanding its setup and workflow while creating an animation from the captured data.

Process

System Testing:

I used the Mocap Lab in the Hunt Library Basement. There are 10 motion capture cameras mounted to capture movement in the space.

  • Challenges and Adjustments:
  • Calibration was essential for accurate capture, involving a wand with sensors to determine the cameras’ locations.
  • Initial calibration was poor due to system neglect.
    • Solution: Adjusted camera positions to improve calibration.
    • Result: Calibration accuracy improved but hardware issues persisted, making complex motion capture difficult.


  • https://drive.google.com/file/d/1kRd9X2ERyBjxDxj7PbBXGGeyQ92Uary9/view?usp=sharing


Recording:

I invited a friend, a costume design student from the School of Drama, to perform a short ballet routine for capture.

  • Challenges:
    • Hardware instability led to unreliable data capture.
    • Export of the ballet data was unsuccessful due to system restrictions.
    • Recorded video of the session was preserved for reference.


Rigging:

First Attempt:

https://drive.google.com/file/d/117iZ76MnFCeKrLIg_D61js7rksitm501/view?usp=drive_link

Second Attempt:

      • Model: Downloaded a pre-rigged character from Mixamo.
      • Data: Used test data due to the ballet motion file’s export failure.
      • Outcome: Successfully animated the pre-rigged model using test data.

Next Steps
  1. Locate the original ballet motion data and reattempt the export process.
  2. Redo rigging and animation with the captured dance motion.
  3. Explore finding a model that better aligns with the my conceptual design and hopefully build a small scene.


Special Thanks to Sukie Wang – Ballet Performer

Flatbed 3d Scanning

Creating 3d Scans using a Flatbed Scanner


This project uses the optical properties of a flatbed scanner to generate normal maps of flat objects, and (eventually) 3d models of them.

I leverage heavily from this paper:

Using the work of Skala, Vaclav & Pan, Rongjiang & Nedved, Ondrej. (2014). Making 3D Replicas Using a Flatbed Scanner and a 3D Printer. 10.1007/978-3-319-09153-2_6.

Background:

tldr : this sucked, but opened up an opportunity

This project is a result of a hurdle from my Penny Space project for the typology assignment for this class. In scanning 1000 pennies, I encountered the problem where the same penny, if scanned from different orientations, results in a different image. This resulted in having to manually align all 1089 pennies, but this project explores why this behavior occurs and how it can be harnessed


Why does this behavior occur?

flatbed scanners provide a linear source of light. This is sufficient for photographic flat objects, but when scanning objects with contours, contours perpendicular to the direction of the light will appear dimmer, whereas parallel ones will appear brightness due to reflection. This means we can use brightness data to approximate the angle the surface is oriented, and use that to reconstruct a 3d surface.

Pipeline:

4x 2d scans

-> scans are aligned

->  extract brightness values at each pixel of 4 orientations

->  compute normal vector at each pixel

-> surface reconstruction from normal vector

More Detail:

Scanning:

Object is taped to a registration pattern and scanned at 90 degree increments, than aligned with one another via control points on the registration pattern

Brightness Extraction

Images are converted to grayscale to extract the brightness value at each pixel.

Normal Reconstruction

A bunch of math.

Surface Reconstruction

A bunch more math.


Initial Results


full pipeline:

get the obj

fabric obj

What’s Next?

resulting surface is at an angle, limiting resolution. This is (likely) an issue with my math…

Possible Refinements:

Add filtering of brightness and / or normal vectors

4x 2d scans

-> scans are aligned

->  extract brightness values at each pixel of 4 orientations

    ->  PROCESS SIGNAL

->  compute normal vector at each pixel

    ->  PROCESS SIGNAL

-> surface reconstruction from normal vector

Final ~Thing~ I want to make : web app to allow anyone to create 3d scans in this way! Coming soon.


Final Project

Project Objective:

Make a convincing narrative MV to the song Truisms 4 Dummies by Headache using a moving depth video.

I’ve been wanting to make something out of this song for a while, and I wanted to use the noisy output of a depth camera to convey an abstract narrative of the lyrics.

Inspo:

Faith Kim (2017) —Pittonkatonk festival immersive 3D project  

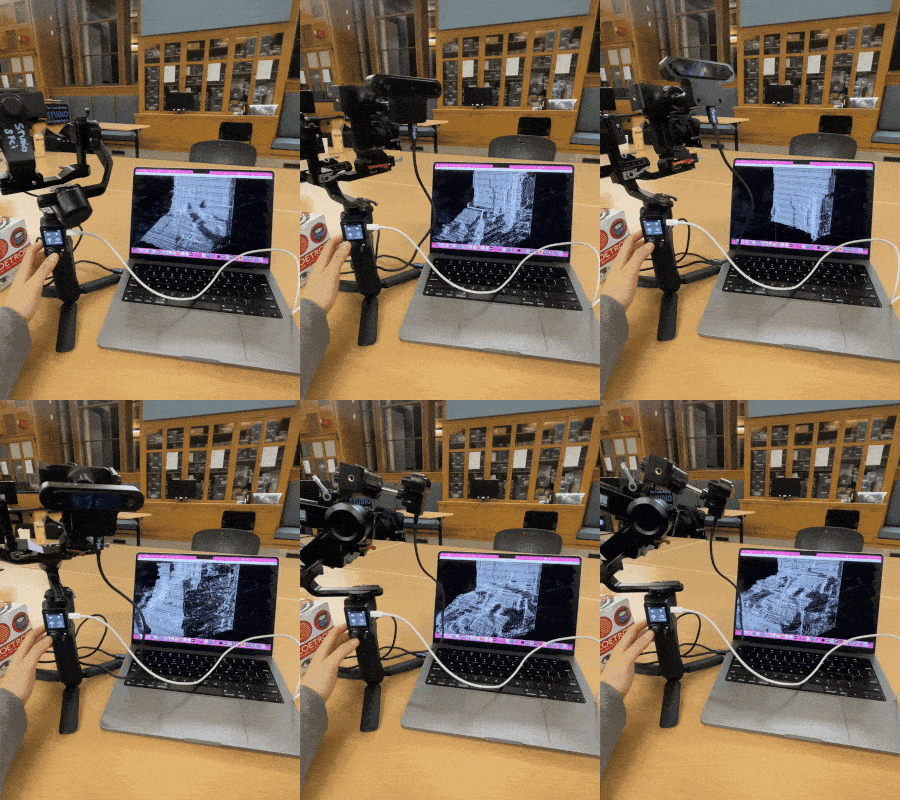
I used the OAK-D Camera since it was compatible with my Mac and a Ronin S3 Mini gimbal for the most minimal setup/rig for capturing moving depth footage. Much of the work process was to get the technology to work. There weren’t too many ‘beginner-friendly’ resources out there with the OAK-D to  TouchDesigner workflows but with help from A LOT of people (Nica, Alex, Kelly, Emmanuel,..) I got it to do the things. (Thank you)

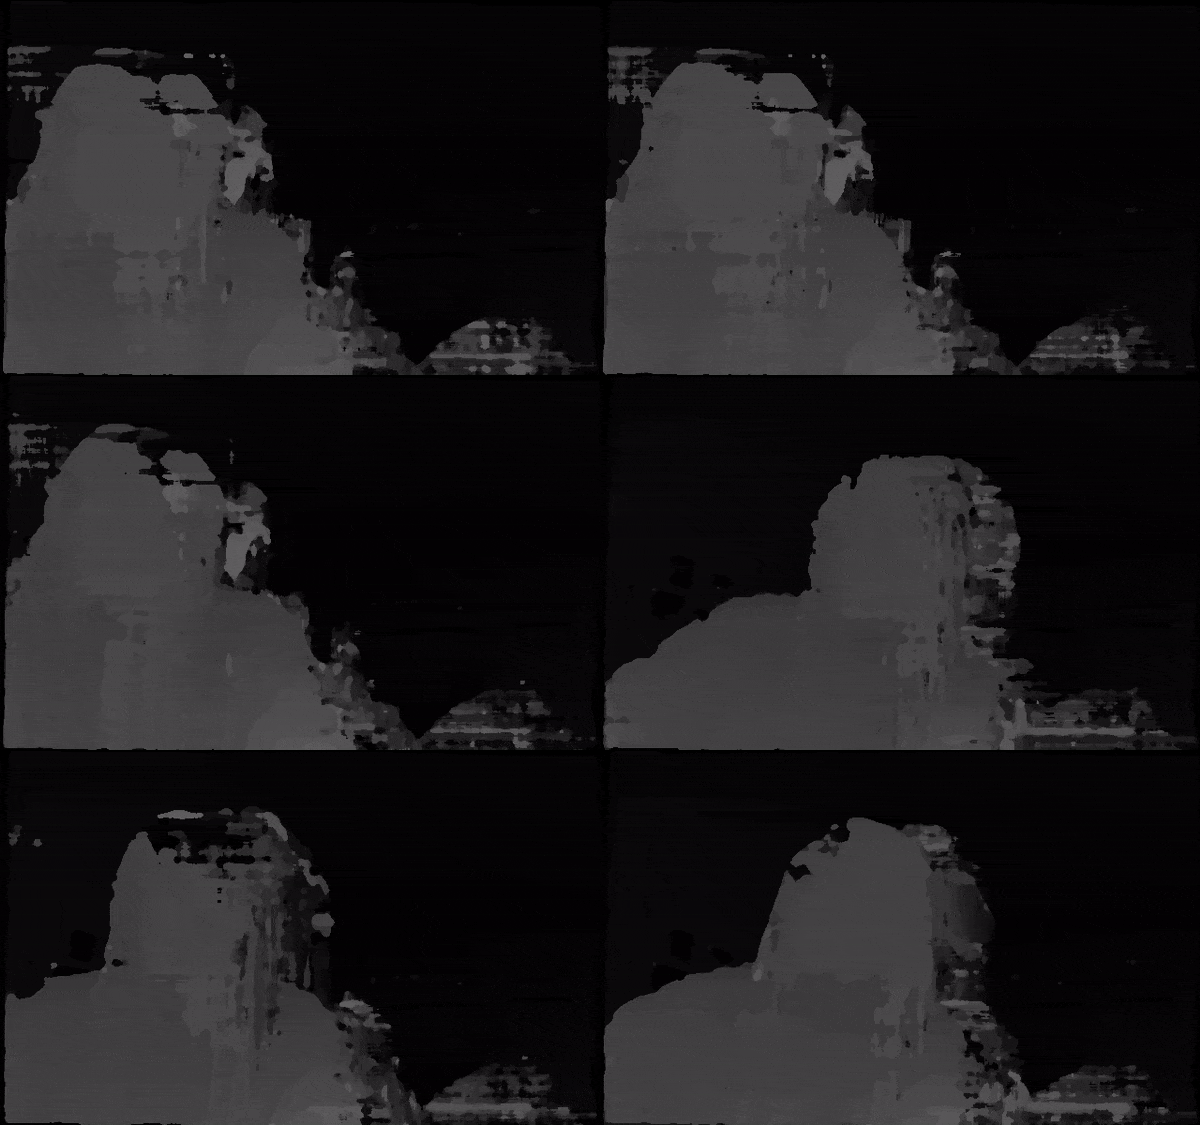
Direct Grayscale Depth Video Output

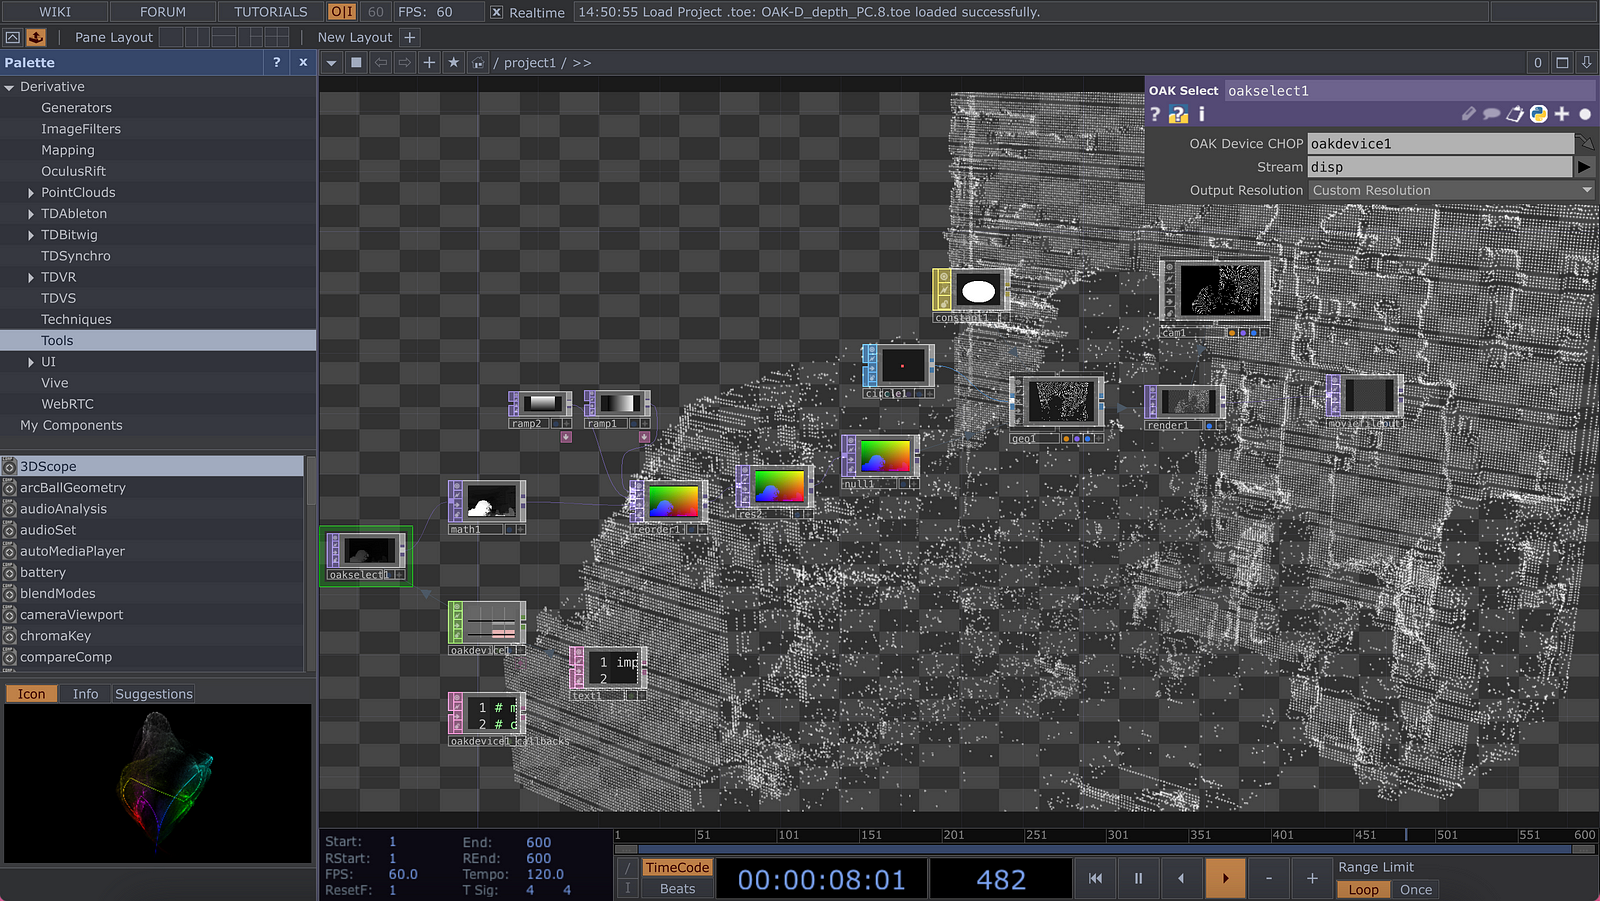
Touchdesignering…. 

TD takes data from the OAK camera (via a select operator) & Reorder TOP with vertical and horizontal ramps to map positions for instancing. This data flows to a Resolution TOP for formatting, then to a Null TOP, which passes it to a Geometry COMP (driven by a circle SOP and constant material) for instancing, and finally renders it to the screen.

How it looks with the gimbal setup.

Test vid of Lilian walking the walk

After getting the camera & rig to work successfully I went to shoot some clips for the song. Since the lyrics of the song are somewhat deep but also unserious, I thought matching those tones would be convincing.

Some test footage in different spaces:

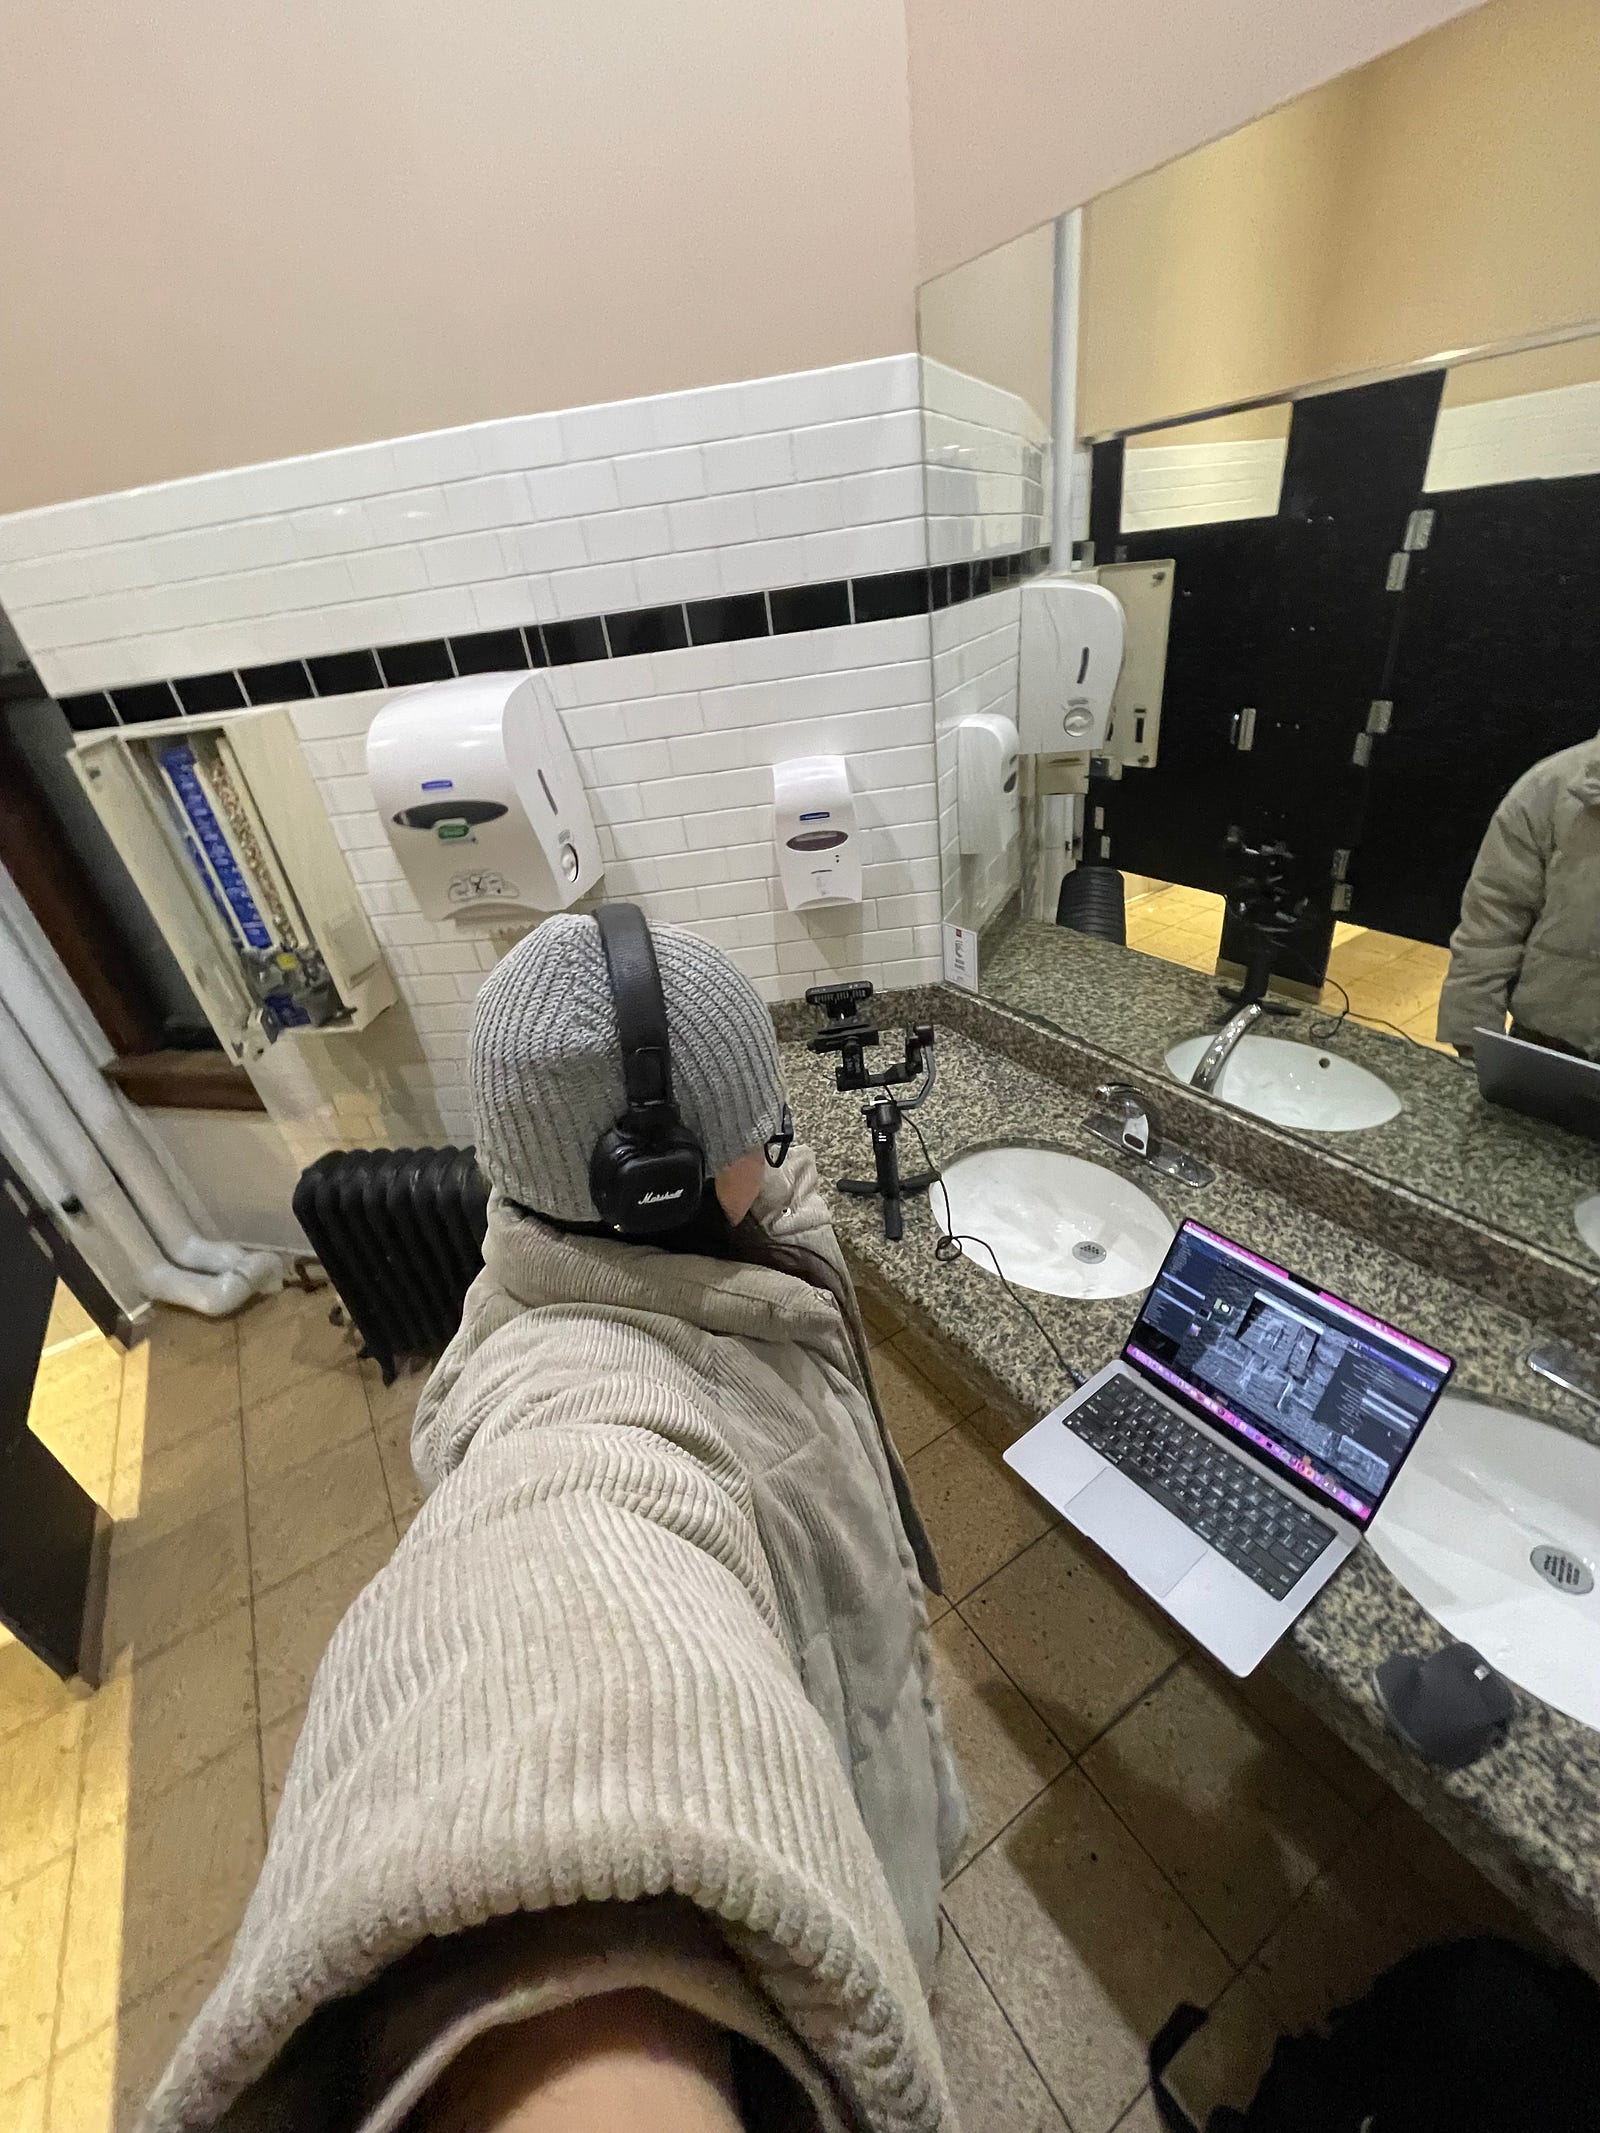
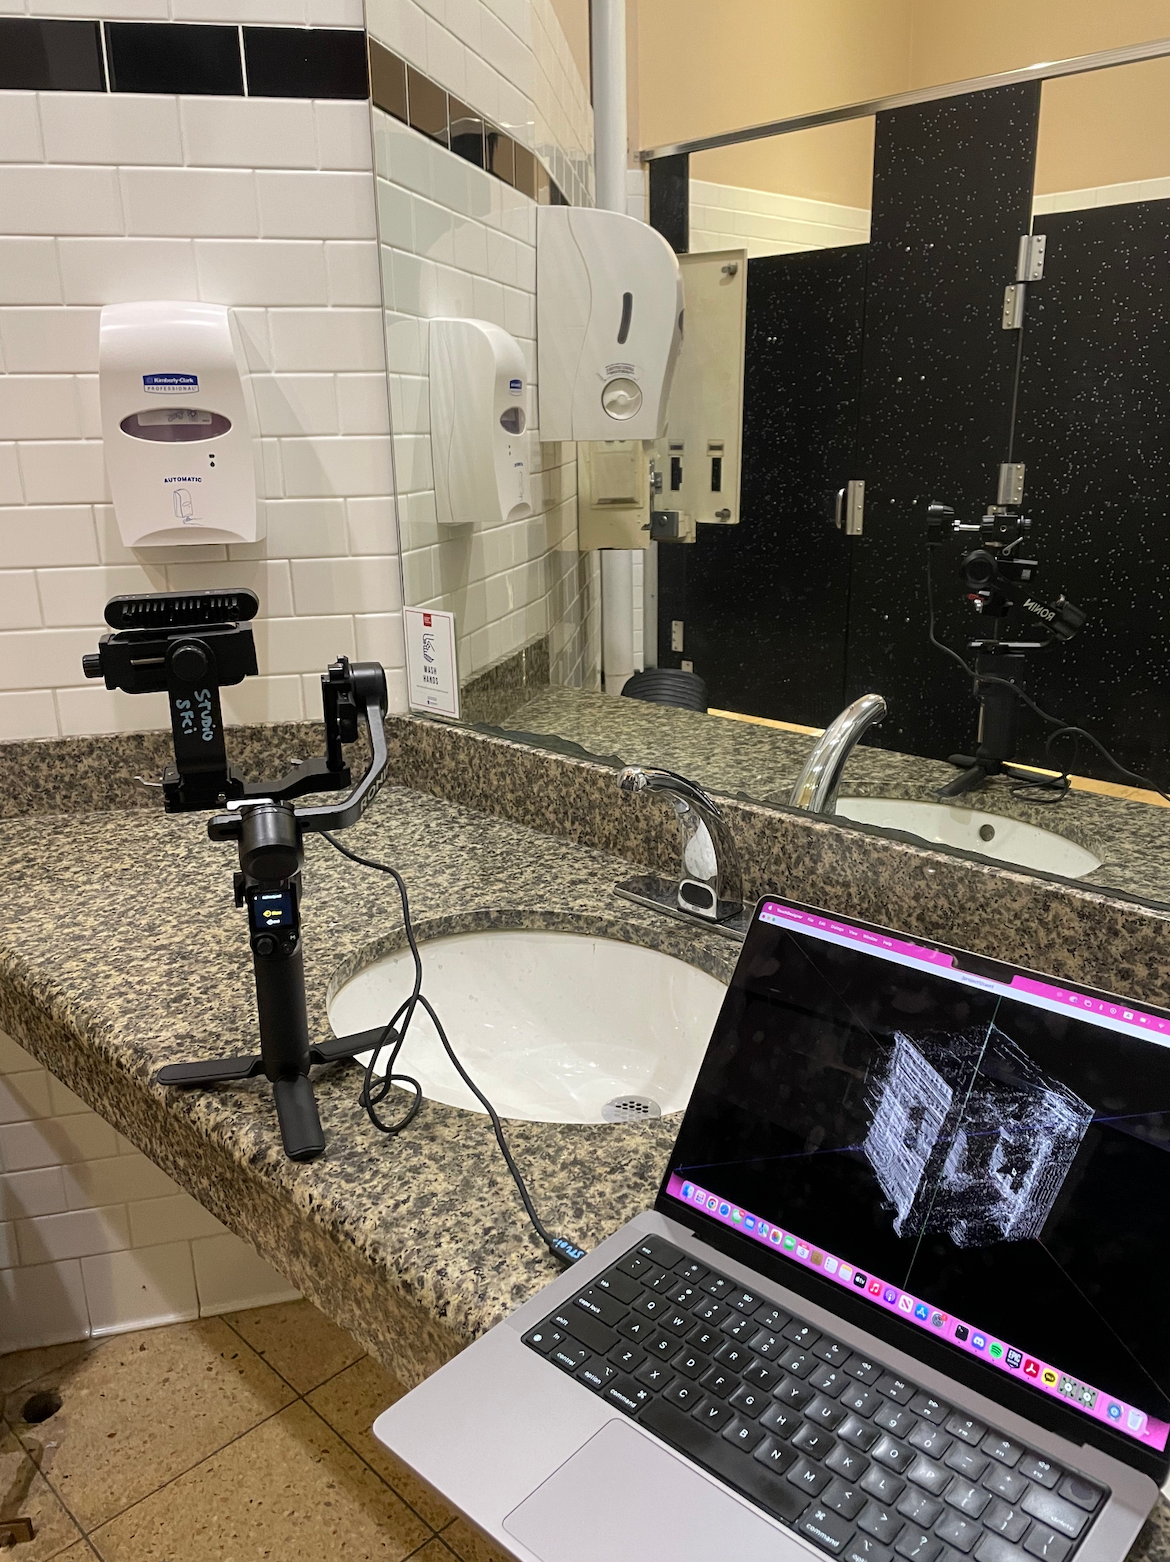
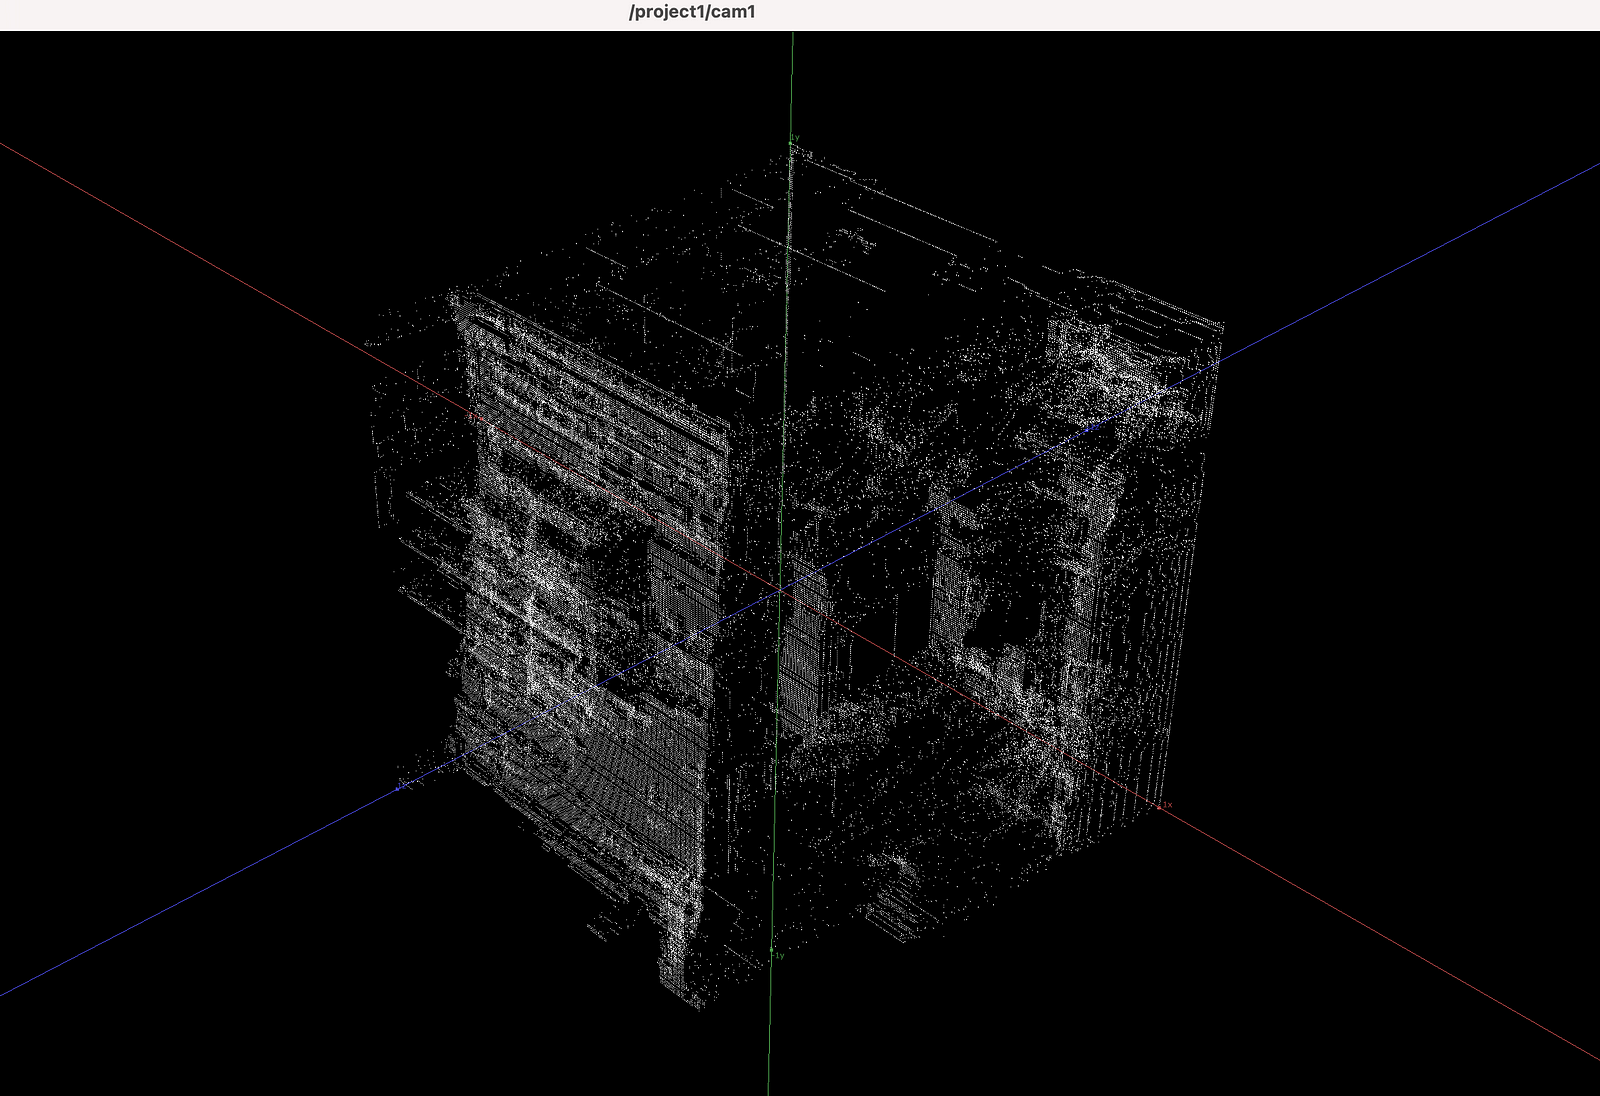
Bathroom Mirror Find — Cubic space through angles of mirror reflection..

Theory: The OAK-D camera I used utilizes stereo vision algorithms (calculates depth by determining the disparity between corresponding points in the left and right images) instead of an infrared (IR) structured light system or Time-of-Flight (ToF) which uses the calculation of how light bounces off in space. So when it is placed where the mirror and the wall meet, it is still able to recognize the reflections and outputs it as another wall. (Could this be used to make virtual 3d space of mirrored spaces? mirrored realities? underwater? water reflections?)

Final Video (Final Video Featuring my friend Lucas)