Roadkill Ritual

CW: Animal Death

incense emoji | AI Emoji Generatorincense emoji | AI Emoji Generatorincense emoji | AI Emoji Generatorincense emoji | AI Emoji Generatorincense emoji | AI Emoji Generatorincense emoji | AI Emoji Generatorincense emoji | AI Emoji Generatorincense emoji | AI Emoji Generator

I document through photo/geolocation and burn digital incense for roadkill–lives sacrificed for the current automotive-focused vision of human transit–encountered during routes driven in my car.

Inspiration:

Last summer to fall, I spent a lot of time driving long distances, and I was struck by the amount of roadkill I’d see. This strikes me every time I’m on the road because of several projects I’ve been working on these past two years around the consequences of the Anthropocene and the reconfigurations of our transit infrastructures for automobility. 

Workflow

Equipment:

  • Two GoPro cameras w/ recommended 64gb+, two GoPro mounts, two USB-C cables for charging
  • Tracking Website: a webpage to track which locations you’ve burned digital incense for dead animals. I made this webpage because I realized I needed a faster way to mark geolocation (GPS logging apps didn’t allow left/right differentiation, voice commands were too slow) and to indicate whether to look left or right in the GoPro footage. Webpage also meant I could easily pull it up on my phone without additional setup.
  • Blood, sweat, and tears?

Setup of the two roadside GoPro cameras mounted to the left and right sides of the car to film the road on both sides. The cameras are set to minimum 2.7K, 24fps; maximum 3K, 60fps.

 

My workflow is basically:

1) appropriately angling/starting both cameras before getting into the car

CONTENT WARNING FOR PHOTOS OF ANIMAL DEATH BELOW

Sample Images:

Test 1 (shot from inside of car, periodic photos–not frequent enough)
Memo: Especially after discussing with Nica, decided to move away from front-view shots since they’re so common/you don’t as good a capture.

Test 2 (shot from sides of car)
Memo: Honestly not bad and makes the cameras easier to access than putting them output, but I wanted to capture the road more directly/avoid reflection/stickers in the window, so I decided to put the cameras outside

Test 3: Outside
The final configuration I settled on. I did aim my camera down too low at one point and believe I missed some captures as a result. It was generally difficult to find a good combination of good angle + good breadth of capture. Some of these photos are quite gory, so click into the folder of some representative sample images below at your own caution.

Typology Machine Sample Images – Google Drive

2) using the incense burning webpage to document when/where I spotted/”burned incense” for roadkill

3) stopping the recording as soon as I end the route (and removing the cameras to place safely at home)

4) finding appropriate images by finding the corresponding time segment of the video. For now, I’ve also used Google My Maps to map out the routes and places along the routes where I’ve “burned digital incense” in this Roadkill Map. CW: Animal Death


Key principles:

A key principle driving this work is that I will only collect data for this project on trips that I already plan to make for other reasons; because by driving, I’m also contributing to roadkill (inevitably with, at minimum, insects–who were not included in this project due to time/scope). This both means that each route traveled is more personal and that I am led to drive in particular lanes and particular speeds/ways.

Design decisions:
My decision to add the element of “burning incense” for the roadkill I encountered arose out of three considerations:

1) acknowledging time limitations–algorithmic object detection simply takes too long on the quantity of data I have and I found the accuracy to be quite lacking

2) wanting a more personal relationship with the data; I always notice roadkill (also random dogs 🫰) when I drive and I wanted to preserve something of that encountering and the sense of mourning that drove this project through a manual/personal approach to sifting through the data. Further, when I was collecting data with the intention of sifting through algorithmically for roadkill, I found myself anxious to find roadkill–which completely started distorted how I wanted to view this project.

3) due to both the limitations of detection models and my own visual detection (also in some ways it’s not the safest for me to be vigilantly scanning for roadkill all the time), I inevitably cannot see all roadkill (especially with some being no longer legible as animals due to being flattened/decayed). This means I cannot really hope to accurately portray the real “roadkill cost”—at best, I can give a floor amount. However, through the digital incense burning, I can accurately portray how many roadkill animals I burned “digital incense” for.

Future Work

In many ways, what I built for the Typology Machine project is only the beginning of what I see as a much more extensive future of data collection. Over time, I’d be curious about patterns emerging, and as I collect more data, I would be interested in constructing a specific training data set for roadkill. Further, I’d like to think about how to capture insects as well as part of future iterations (they would probably require a different method of capture than GoPro). I also think that for the sake of my specific project, it would be nice to have a scrolling window filming method–such that things are filmed in e.g. 5 second chunks and when the Left/Right button is pressed, the last 5 seconds prior to the button press are captured/saved, allowing for higher resolution and FPS without taking up an exorbitant amount of space. It would also be interesting to look through this data for other kinds of typologies–some ideas I had were crosses/shrines at the sides of the road, interesting road cracks, and images of my own car caught in reflections. I would also like to build out the design of the incense burning website more and create my own map interface for displaying the route/geolocation/photo data–which I didn’t have much time to do this time around.

Typology Machine: The White T-shirt Architecture

A white T-shirt is often seen as the most classic basic garment. But how “basic” is your basic white T-shirt? In my project, I explored the construction of “basic white tees” from various brands, examining them from an inside perspective. By capturing the volumetric surface area of the insides, I hoped to bring out the subtle uniqueness of these shirts from the differences in linings and looming methods to the placement of tags and the varying hues of “white.”

Final Project

Approach

Similarly to the studies of the insides of things,

“Architecture in Music” 

Lockey Hill Cello Circa 1780

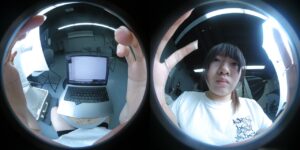
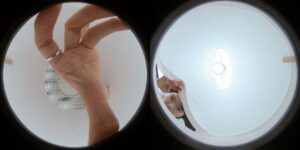
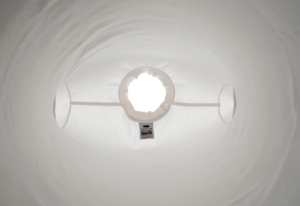
I used a 360-degree camera to get a fisheye perspective of the shirts and edited them to upload into a spherical viewer. This approach allowed an immersive navigable experience, giving you a feel of what it’s like to be inside these shirts and appreciate the details that set them apart.

Process

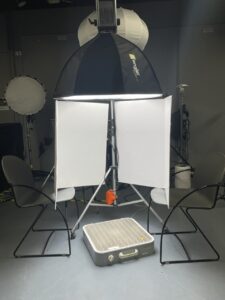
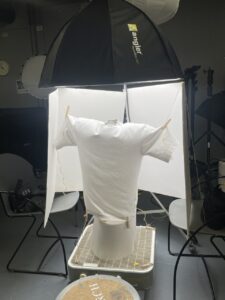
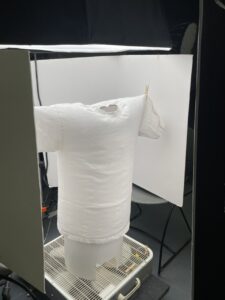
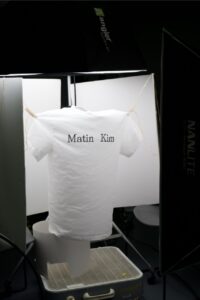
Setup: 1 Softbox, 1 Box Fan, 1 Chair dolly platform under the fan to allow airflow, 2 Foldable Panel Reflectors, 1 Rectangular Lightbox for more even light distribution, 2 chairs to set them up, some wooden clothespins, and string.  

Mi Shpere 360 Camera Test Shot

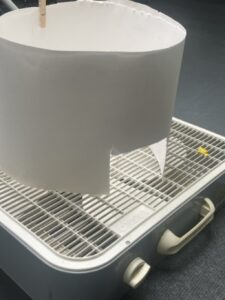
After a few adjustments, I made an expandable funnel with a cutout to direct airflow and allow access to manipulate the shirts.


360 Camera POV

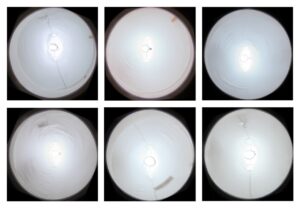
When the photos were taken I cropped and edited them in Photoshop.

Footages taken of UNIQLO, Levi’s, ProClub, Hurley, Matin Kim, and Mango.

I uploaded the edited images to a JavaScript-based tool that renders and allows interaction with 360° panoramic images. This enabled navigation through the insides of the shirts.

Finally, Leo helped me create an HTML website using GitHub Pages to host the images, allowing for simultaneous navigation of multiple shirts.

Draft using localhost portal

Browser website using GitHub Pages

Summary

By focusing on the inside of the garments, I highlighted the structural details that are often overlooked. The materials and construction techniques—whether from mass-produced or higher-end garments—show interesting contrasts. While expensive clothes may have finer finishes, the actual differences aren’t always as big as expected. It’s in the smaller details, like stitching and tag placement, where the craftsmanship, or lack of it, becomes most apparent.

Reflection

I enjoyed the literal process of “configuring the shirt inside out.” It was particularly interesting to examine the side seams and how some didn’t have them because it used a tubular looming method. It also expanded into narratives of the owners of the shirts (my friend in industrial design vs my friend in graphic design).

Something I would’ve done differently in my process is to use a DSLR with a fisheye lens because I noticed a lot of details were getting lost with the particular model of the 360 camera I used.

In the future, I think it would be cool to expand this project into a shopping website for white shirts or certain kinds of garments where the only visual information you will get is the inside of the shirts rather than the external appearance or branding. This concept challenges traditional consumer habits, pushing back against superficial buying trends and the impact of mass production. It encourages consumers to think more critically about the construction and quality of the items they purchase.

.


Hearing the things we can’t hear: Lightbulb Edition

I’m really interested in the phoneme around us that we can’t perceive as humans.  I was thinking a lot about how sound can create light, but the reverse isn’t possible. Ultrasonic frequencies are the bands of frequency that are beyond human hearing usually above 20-22khz. The frequencies captured in this project go between 0-196khz. I recorded various kinds of lightbulbs in many different places, with the ultrasonic microphone. Initially, I wanted to create a system that can capture and process the sounds of the lightbulb live, but due to technical limitations, I had to scale back the idea. I had to process each sample by hand; and focused instead on the automation of cataloguing the sounds using ffmpeg to create the spectrograms and final video of the images. If I had time, I would combine this with the audio samples to give a better display of the data, but it was too difficult as this was my first time working in bash.


Processing of audio – Filtering out audio beyond 20khz with a highpass filter and tuning down the audio by four octaves.

Google Folder of Files

.

Schenley Park Trail Typology

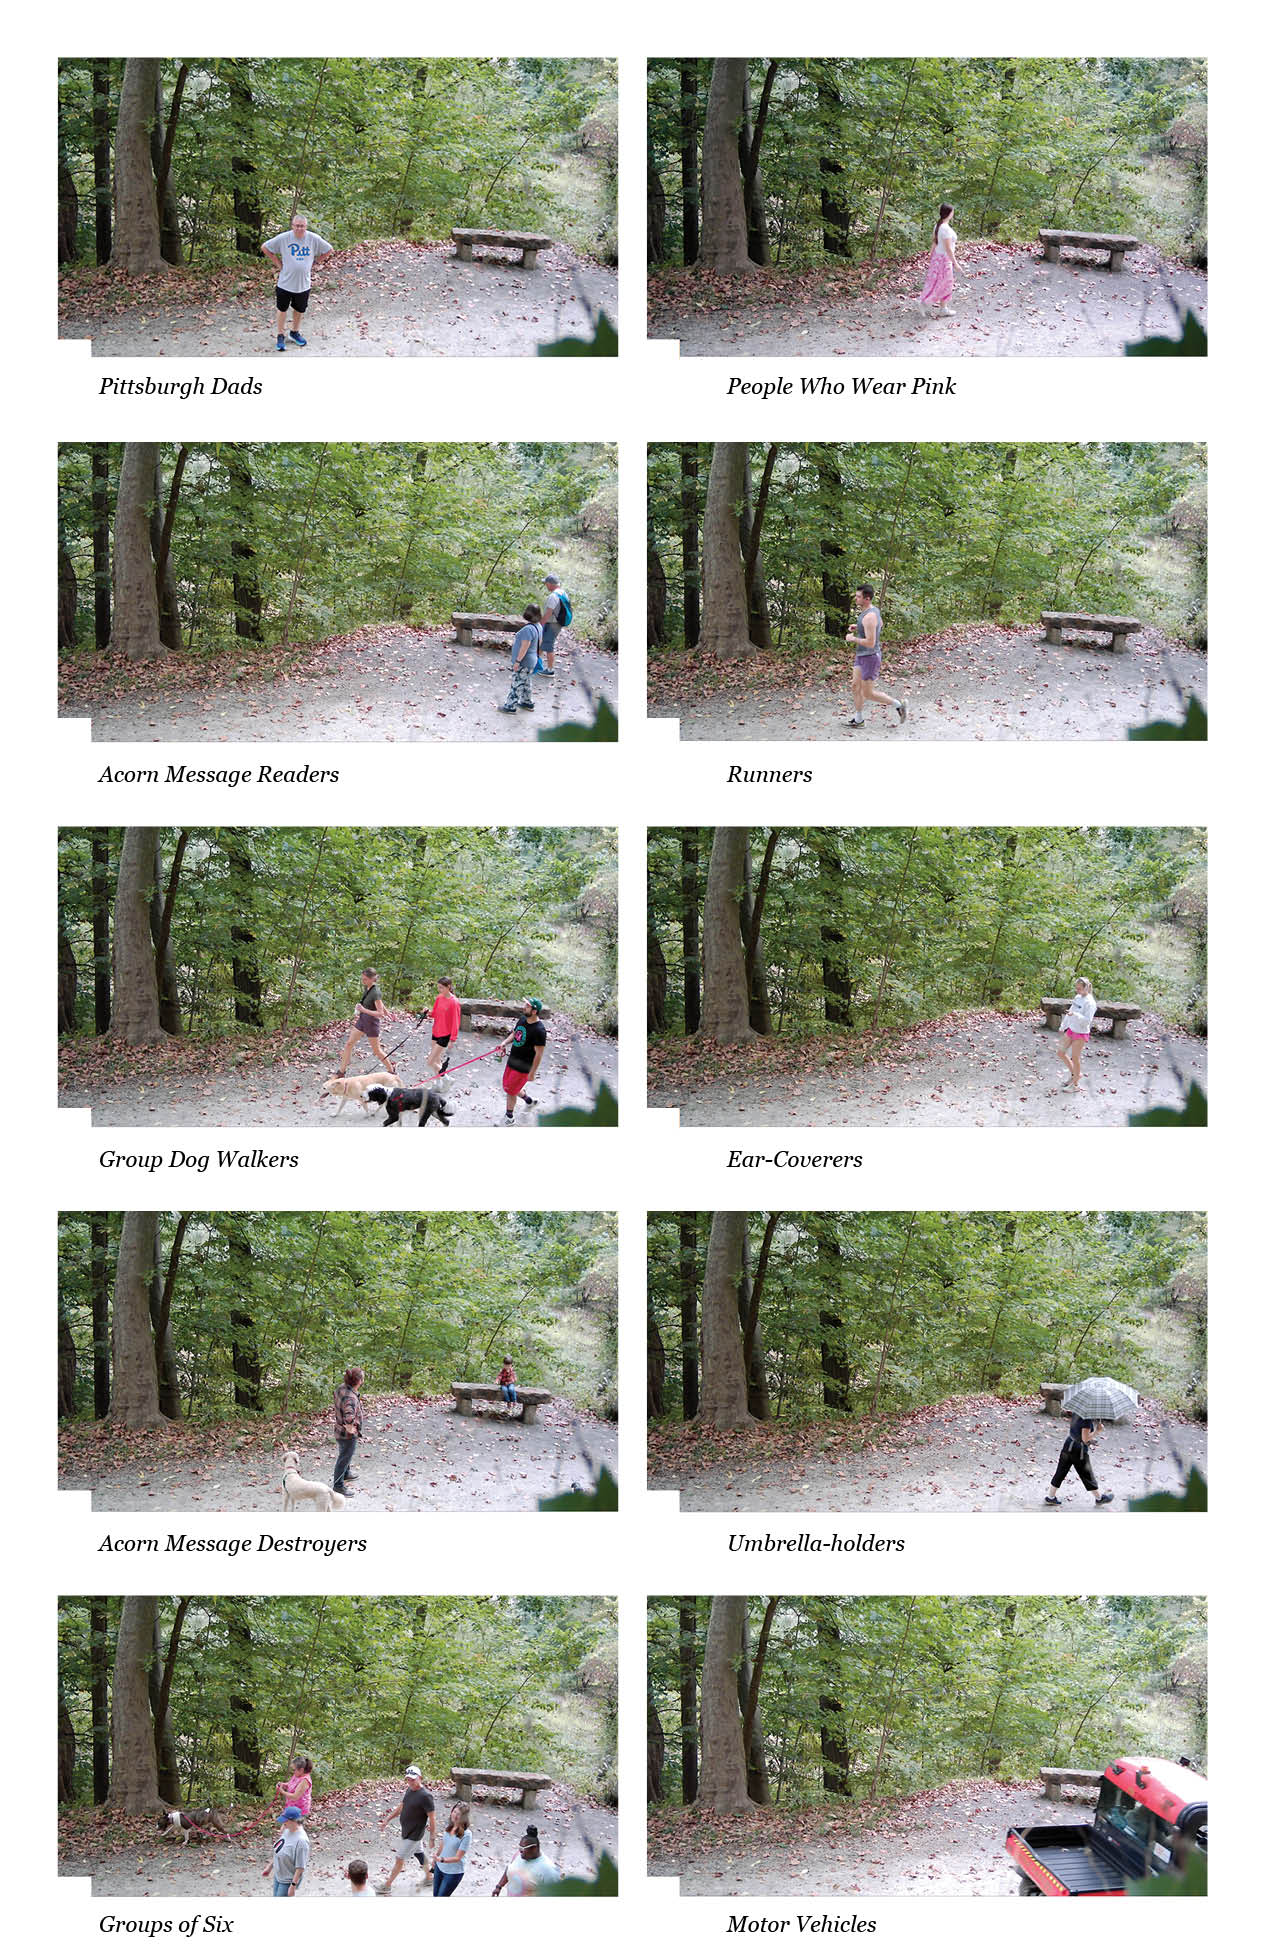
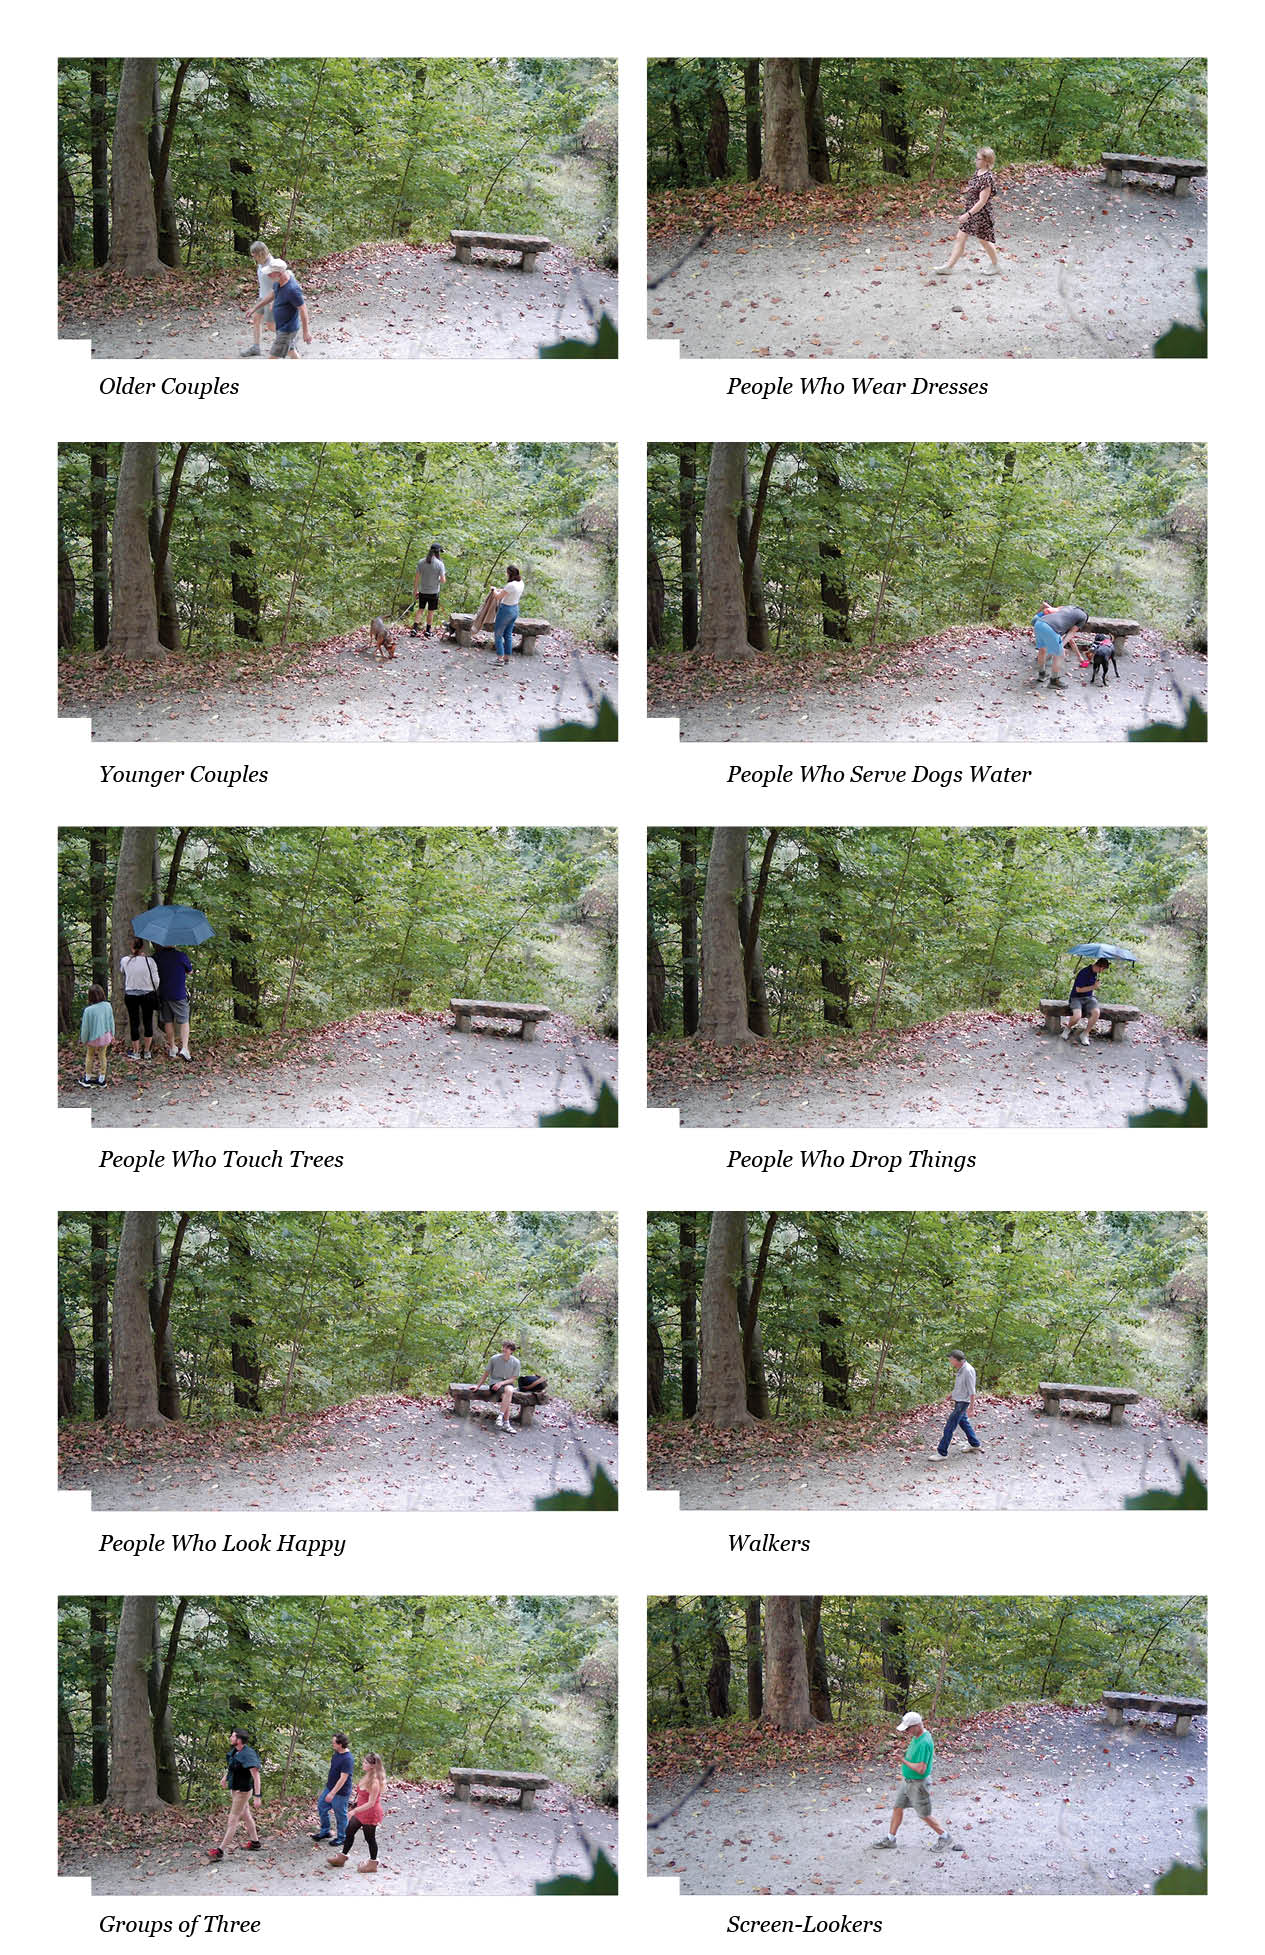
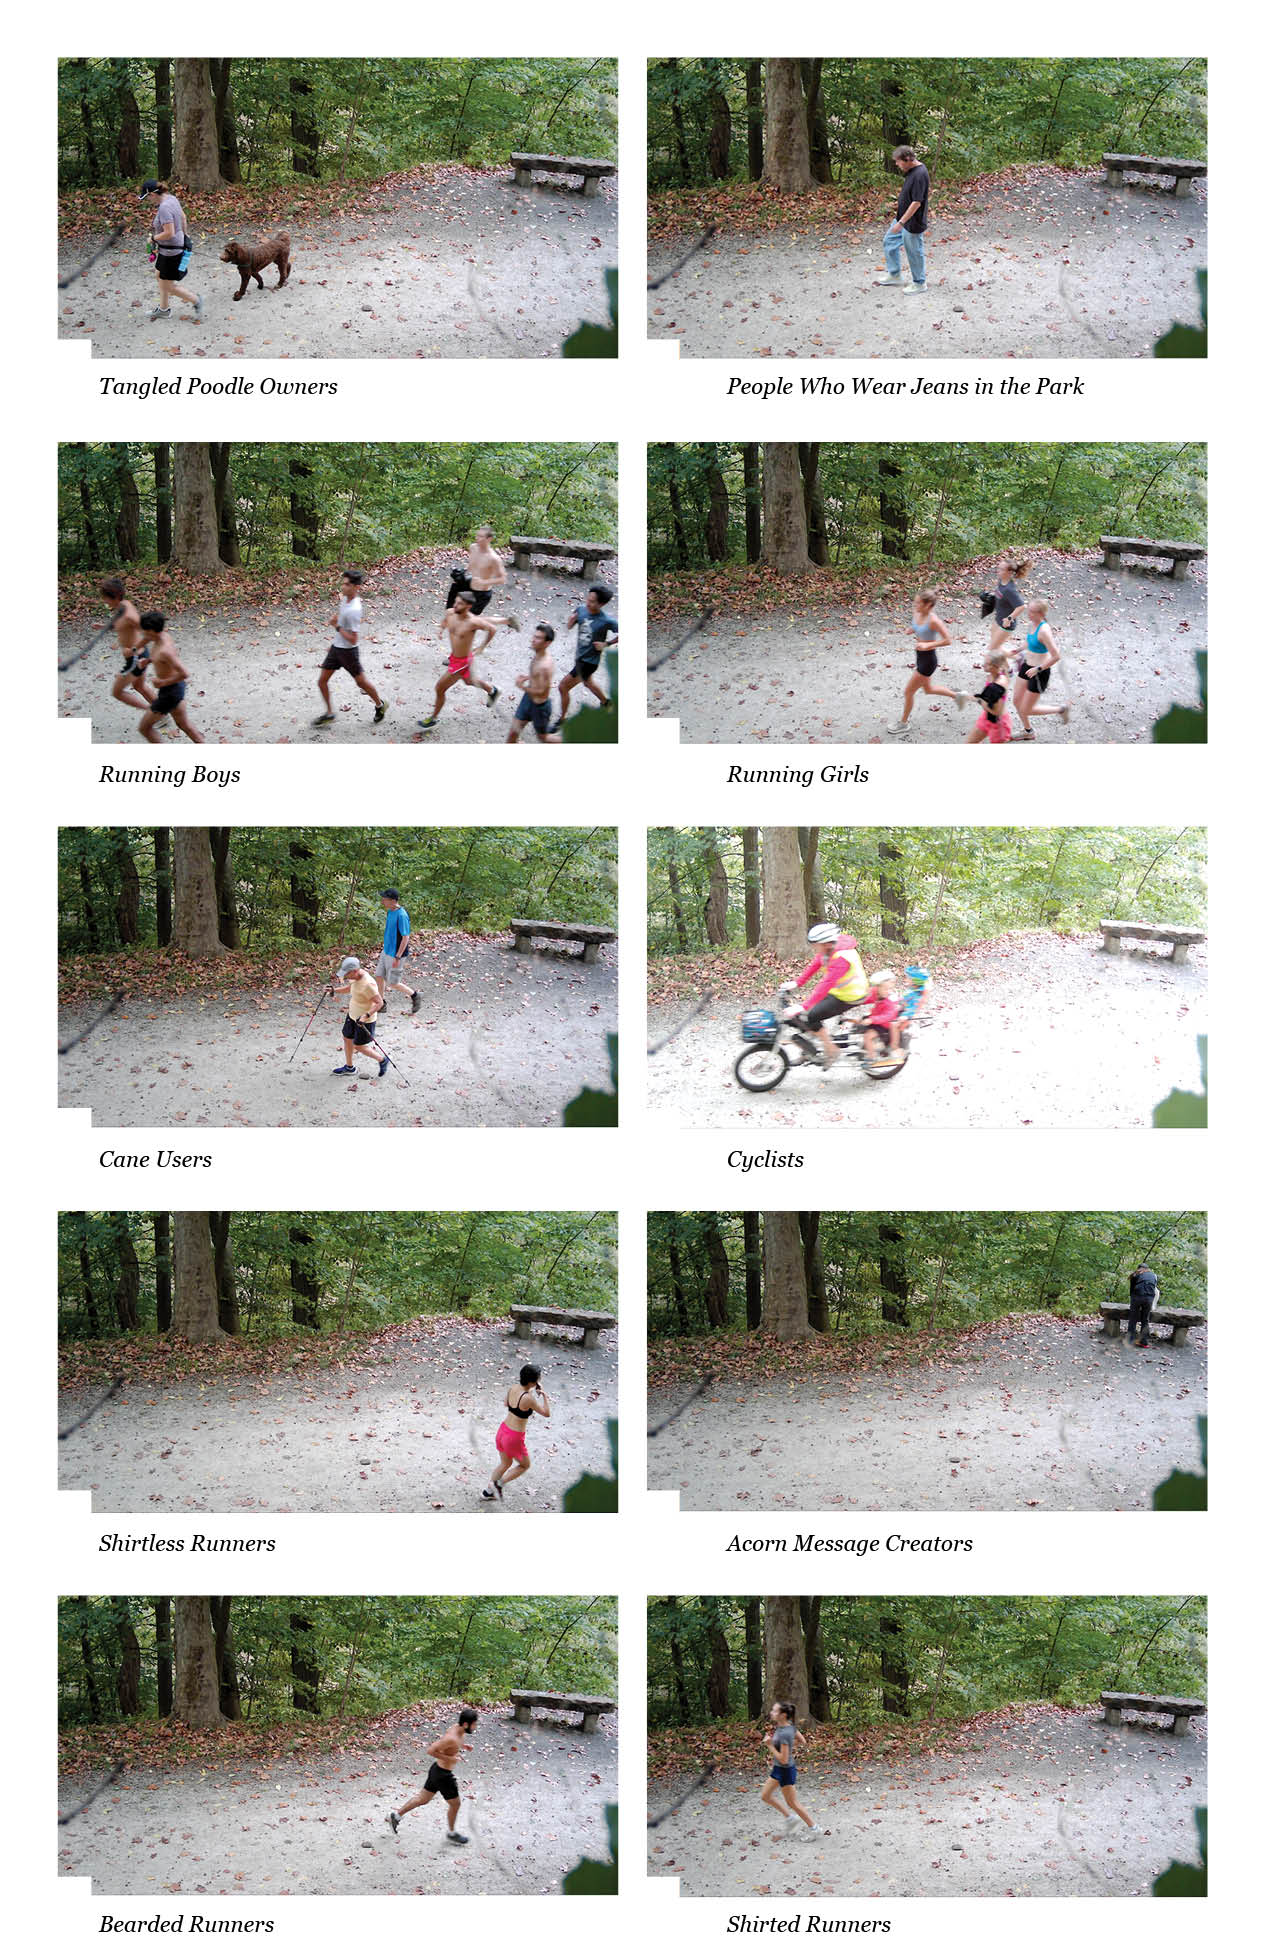
For our first ExCap project, I chose to make typology of actions that take place on a specific section of a trail in Schenley Park. I was interested in the various types of people, animals, and interactions that take place in this spot after once having noticed that someone left a laptop on the bench there and that there was a note on the bench the following day. Just for fun, I chose to present this in a parody nature documentary format. I had so much fun with this and wish to continue, improve and refine… this is as far as I could get for today.


Types of Schenley Trail Goers (video footage is not exhaustive)

In setting up this trail capture system, I had many highs and lows. Below is a log of my travails.

Friday, September 27th

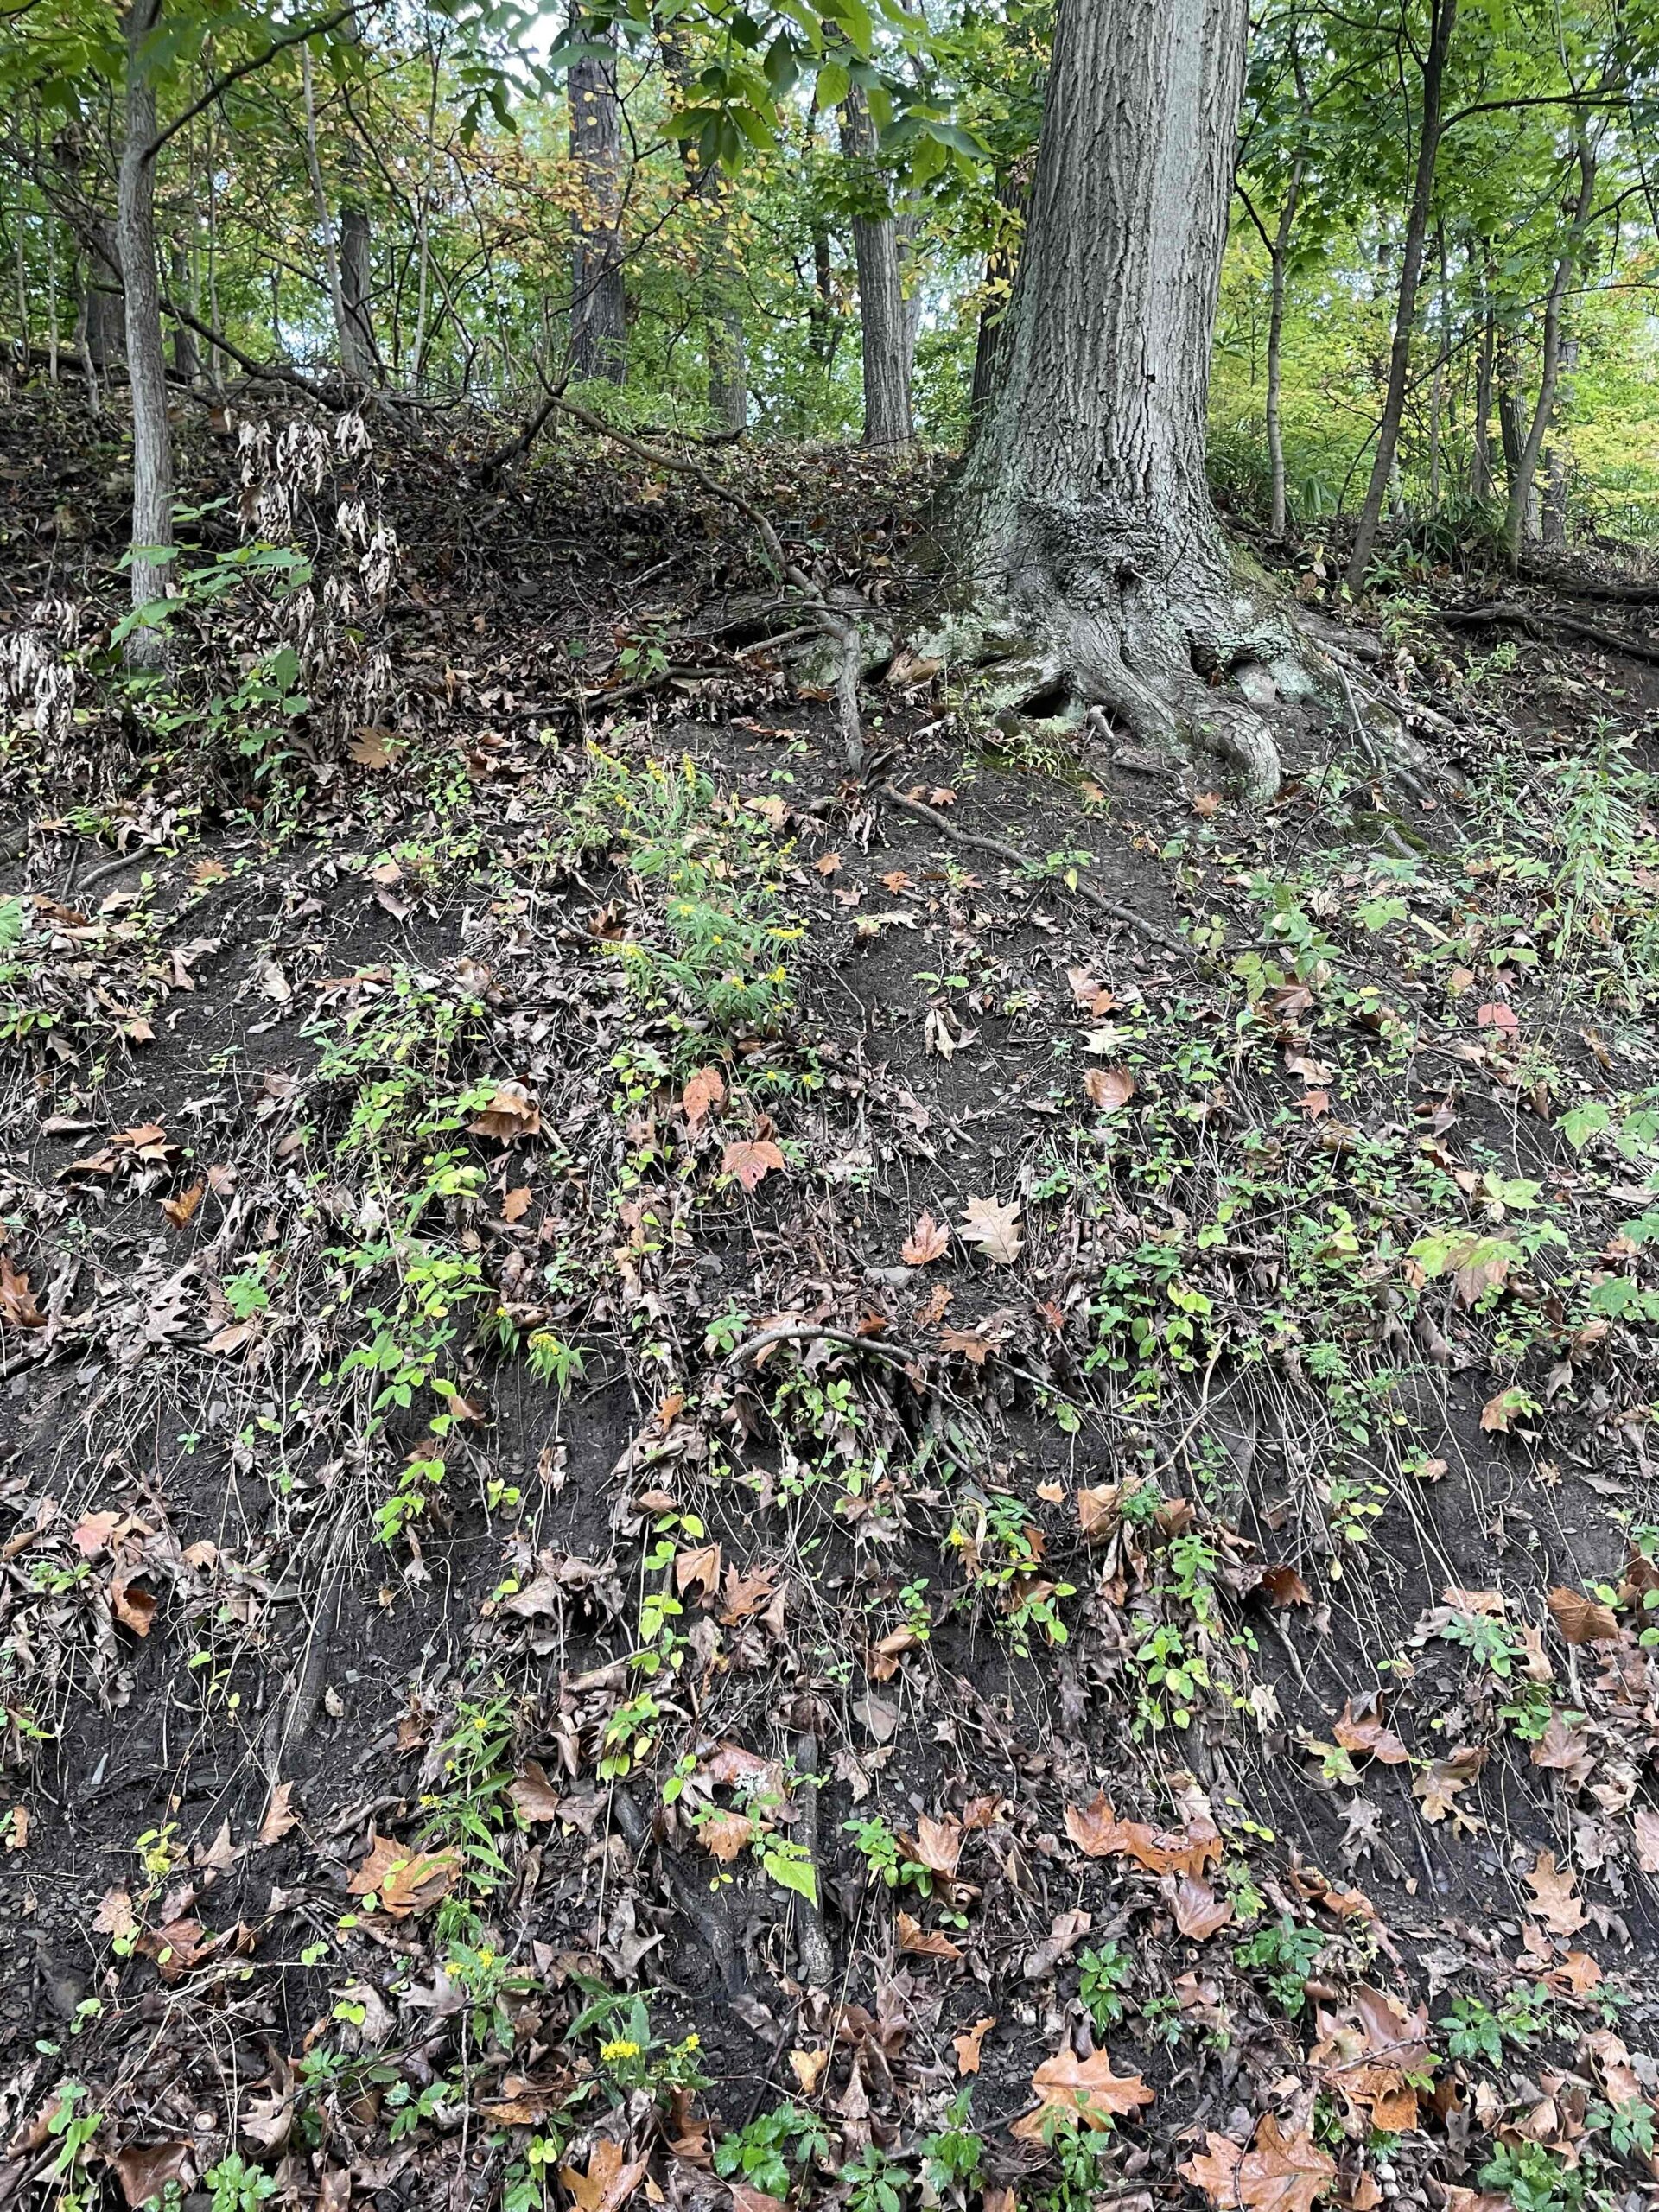
I spent 3 hours in Schenley Park, from 4:00pm to just after 7:00pm. The first hour was spent setting up the trail cam. (I wanted to find a sturdy and inconspicuous spot that I could easily access. It’s important for my project to maintain the same view, so I needed to find a spot that would allow me to remove and replace the camera in the same spot easily. I asked my friend Audrey to come to the park with me and asked if she could bring her ladder. She did, although the spot I selected didn’t require the use of the ladder. Thanks Audrey!) For the next 2 hours, I left the trail cam mounted by the tree. I was content and excited to see what it might capture.

A good friend and an unnecessary ladder.

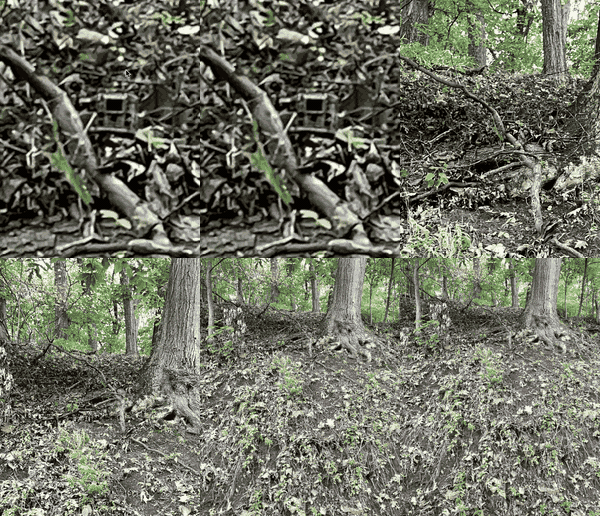
above, the trail cam set up from behind. below, the trail cam set up from the trail! It’s so camouflaged!


zoomed and highlighted, in case you couldn’t find it.

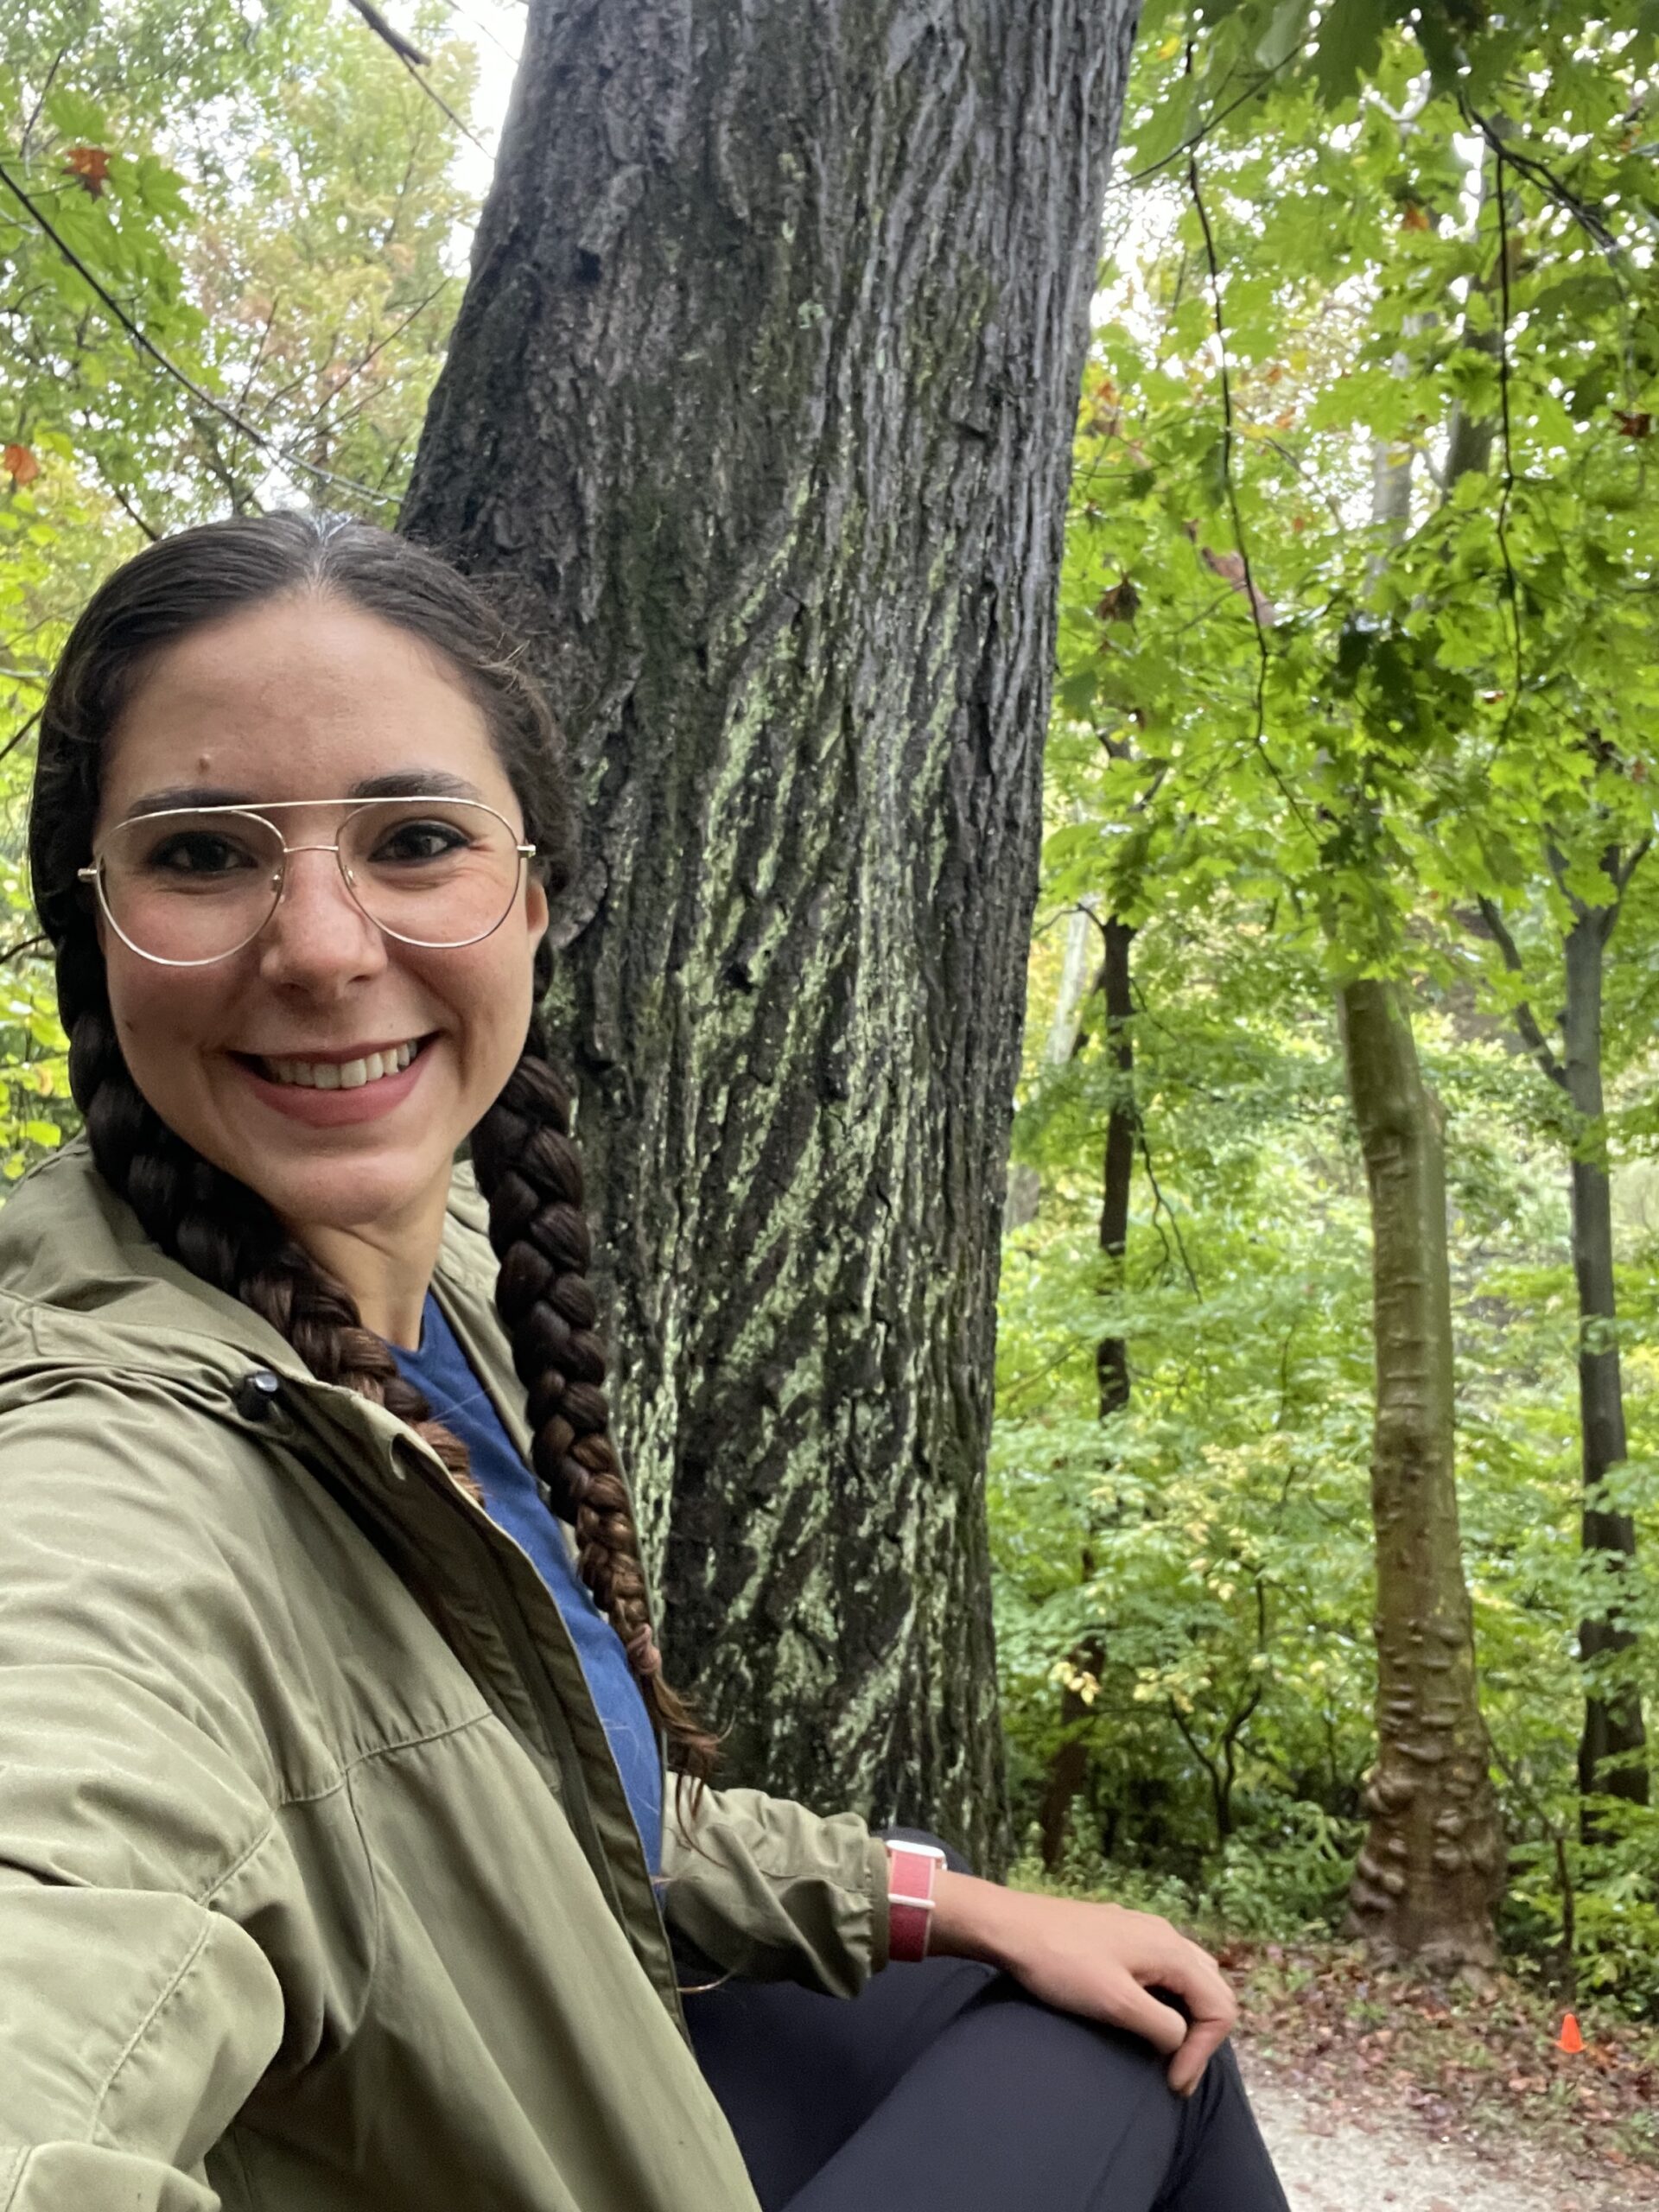
~A reflection on my setting up the trail cam.~ I got very dirty while setting up the trail cam because I climbed up and down the dirt hill to set it up. I startled some deer that were on the hill. They must have thought I was a freaky human, because I’m sure most humans they encounter don’t climb the steep hills, pressing their hands and knees into the dirt as I did. As I was setting it up, I was sitting next to a tree (for support). Seated beside the tree, toggling the trail cam settings, I saw many people pass through the trail below. Walkers, bikers, dogs, joggers. Not a single person or dog looked up at me. I was not hiding… had they looked up they would have seen me. But they did not look up.

Saturday, September 28th

Currently, I am sitting at a table in Schenley Park Café. It is Saturday, September 28th at 10:32AM. I arrived at the park a little after 8:30am to set the trail cam up. I’m worried because yesterday, I left the trail cam for 2 hours, thinking it was recording activity. I stayed nearby, reading while waiting for nightfall, with the camera in view. My plan was to collect the camera as soon as it stated getting dark. (Around 7:15pm). I picked up the camera, super excited, because I had seen various passerby on the trail… but it turned out that that the trail cam hadn’t filmed a thing!! I was confused!! Frustrated!! Because I had tested the set up before in studio, and on the trail, and the video recording based on motion detection worked as I expected.

I decided it would try again the next morning. Early. This takes us to the present moment. While I sat upon the hill by the tree setting up the trail cam, not a single passerby noticed me. More groups of joggers, walkers, etc. I even filmed some of them with my phone. I continue to be shocked at the fact that so far no one saw me. I wonder how they would react if they did see me! My guess it’s they would be startled and think I am a weirdo. 

I’m sitting here, writing these notes, feeling very worried that the trail cam may not be recording. I think it is, because I spent time setting up and confirmed that it was recording before I left it. The interface is not helpful in confirming what the camera is doing. This makes me wish there was a way for me to access the live footage, to receive confirmation that the camera is indeed recording, and that I am not wasting my time. Although I actually enjoyed the time I spent waiting for nightfall in the park yesterday, of course I felt like my efforts had been a waste. Because of this, I have submit request to borrow a GoPro Hero 5 from IDeATe. I hope I can pick it up today. I’ll pick a second spot for the GoPro and will remain nearby as it films! I have downloaded a bluetooth remote control app for the GoPro, so I hope that can allow me to control it from afar. At least this way, I will KNOW that the recording is happening while it happens instead of having to wait and see. This lack of immediate feedback from the recording device makes me think of photography when you didn’t know what you were capturing, or if the camera was working well, until you developed it. In this case, I don’t get to see what the camera is capturing until I remove it from its spot. This is inconvenient!

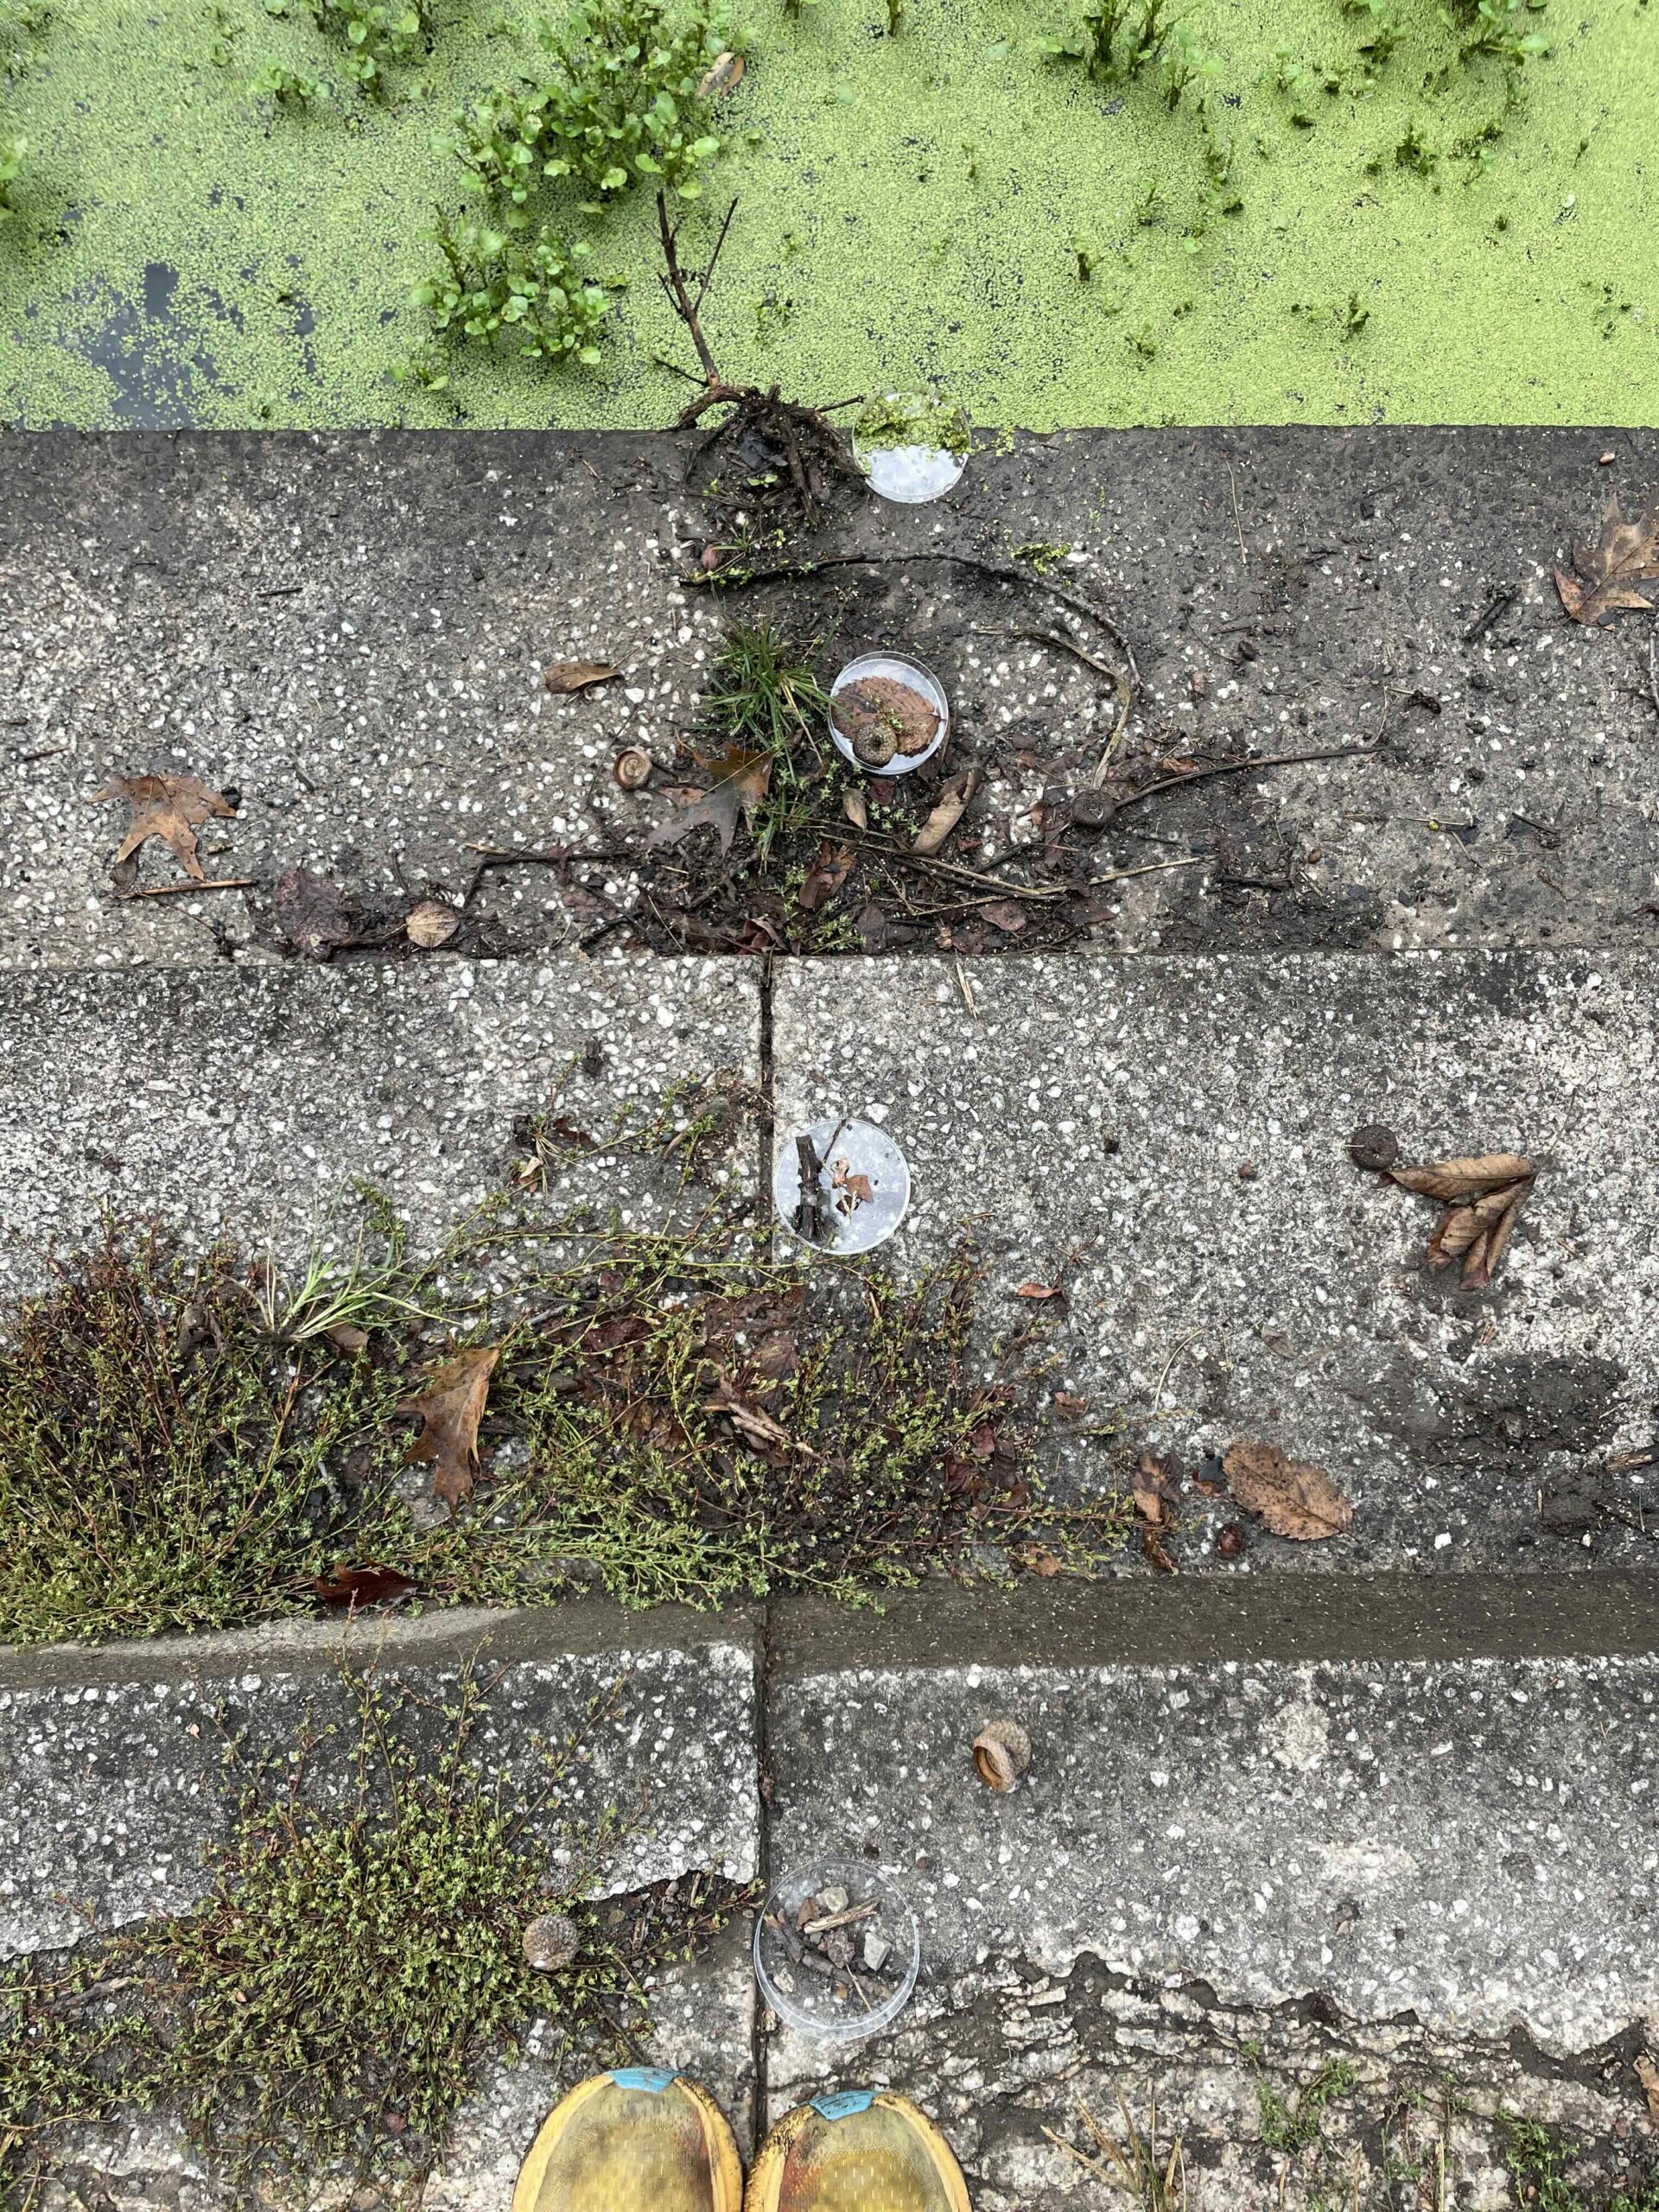
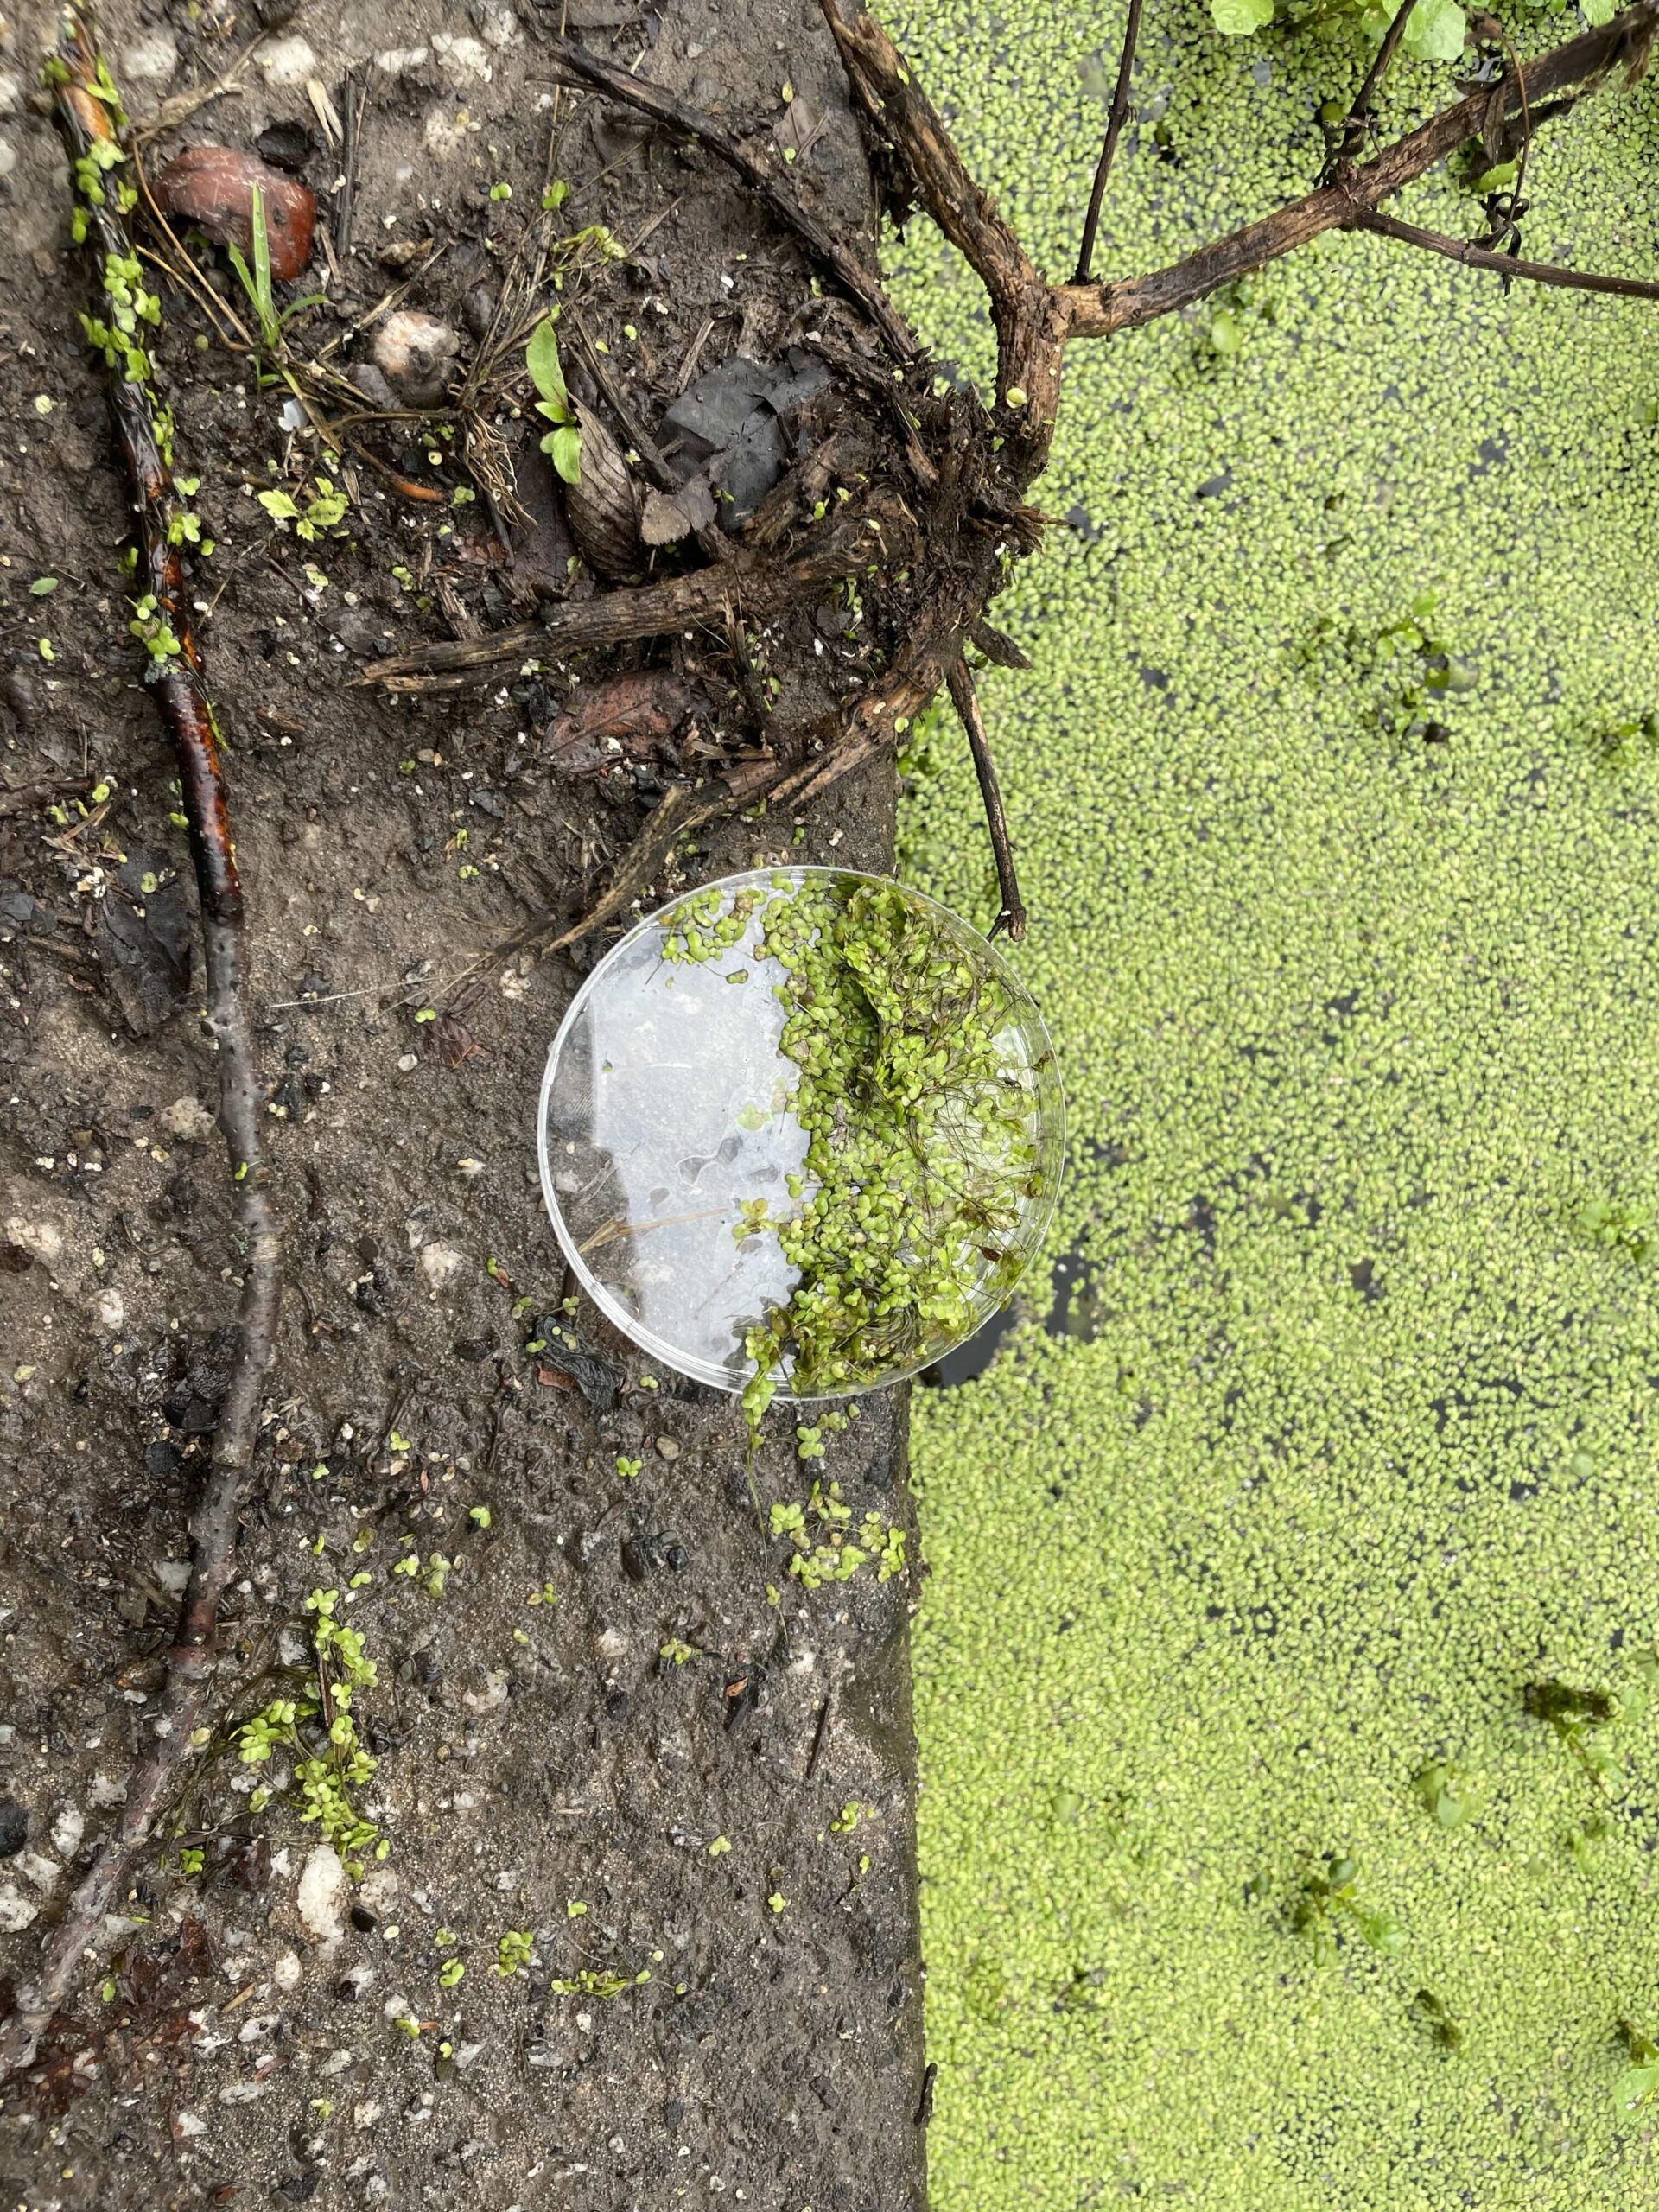
Speaking of spending time in the park – well… I’ve actually never spent so much time ~still~ in the park. When I’ve spent a lot of time in Schenley, I’m usually in motion, either walking or running. Through my stillness, I’ve noticed and become interested in some new features in the park that I hadn’t thought about before. The first is the variety of textures on the park surfaces. I’ve collected some sort of transect samples in petri dishes (I used petri dishes only as a means of standardizing the amount of material samples collected). I really want to put these dishes under the STUDIO microscope. I was amazed by what I saw under the microscope when we did the spectroscopy workshop a couple weeks ago because though it I was able to see the movements microscopic bug on a leaf that was impossible to see with the naked eye. This was shocking! Amazing! I almost couldn’t believe what I was seeing. It was like a portal into another dimension, where the familiar looked so different, it became unfamiliar. And I questioned what is really there. We see something like a leaf and we think we know what is it. But do we? 

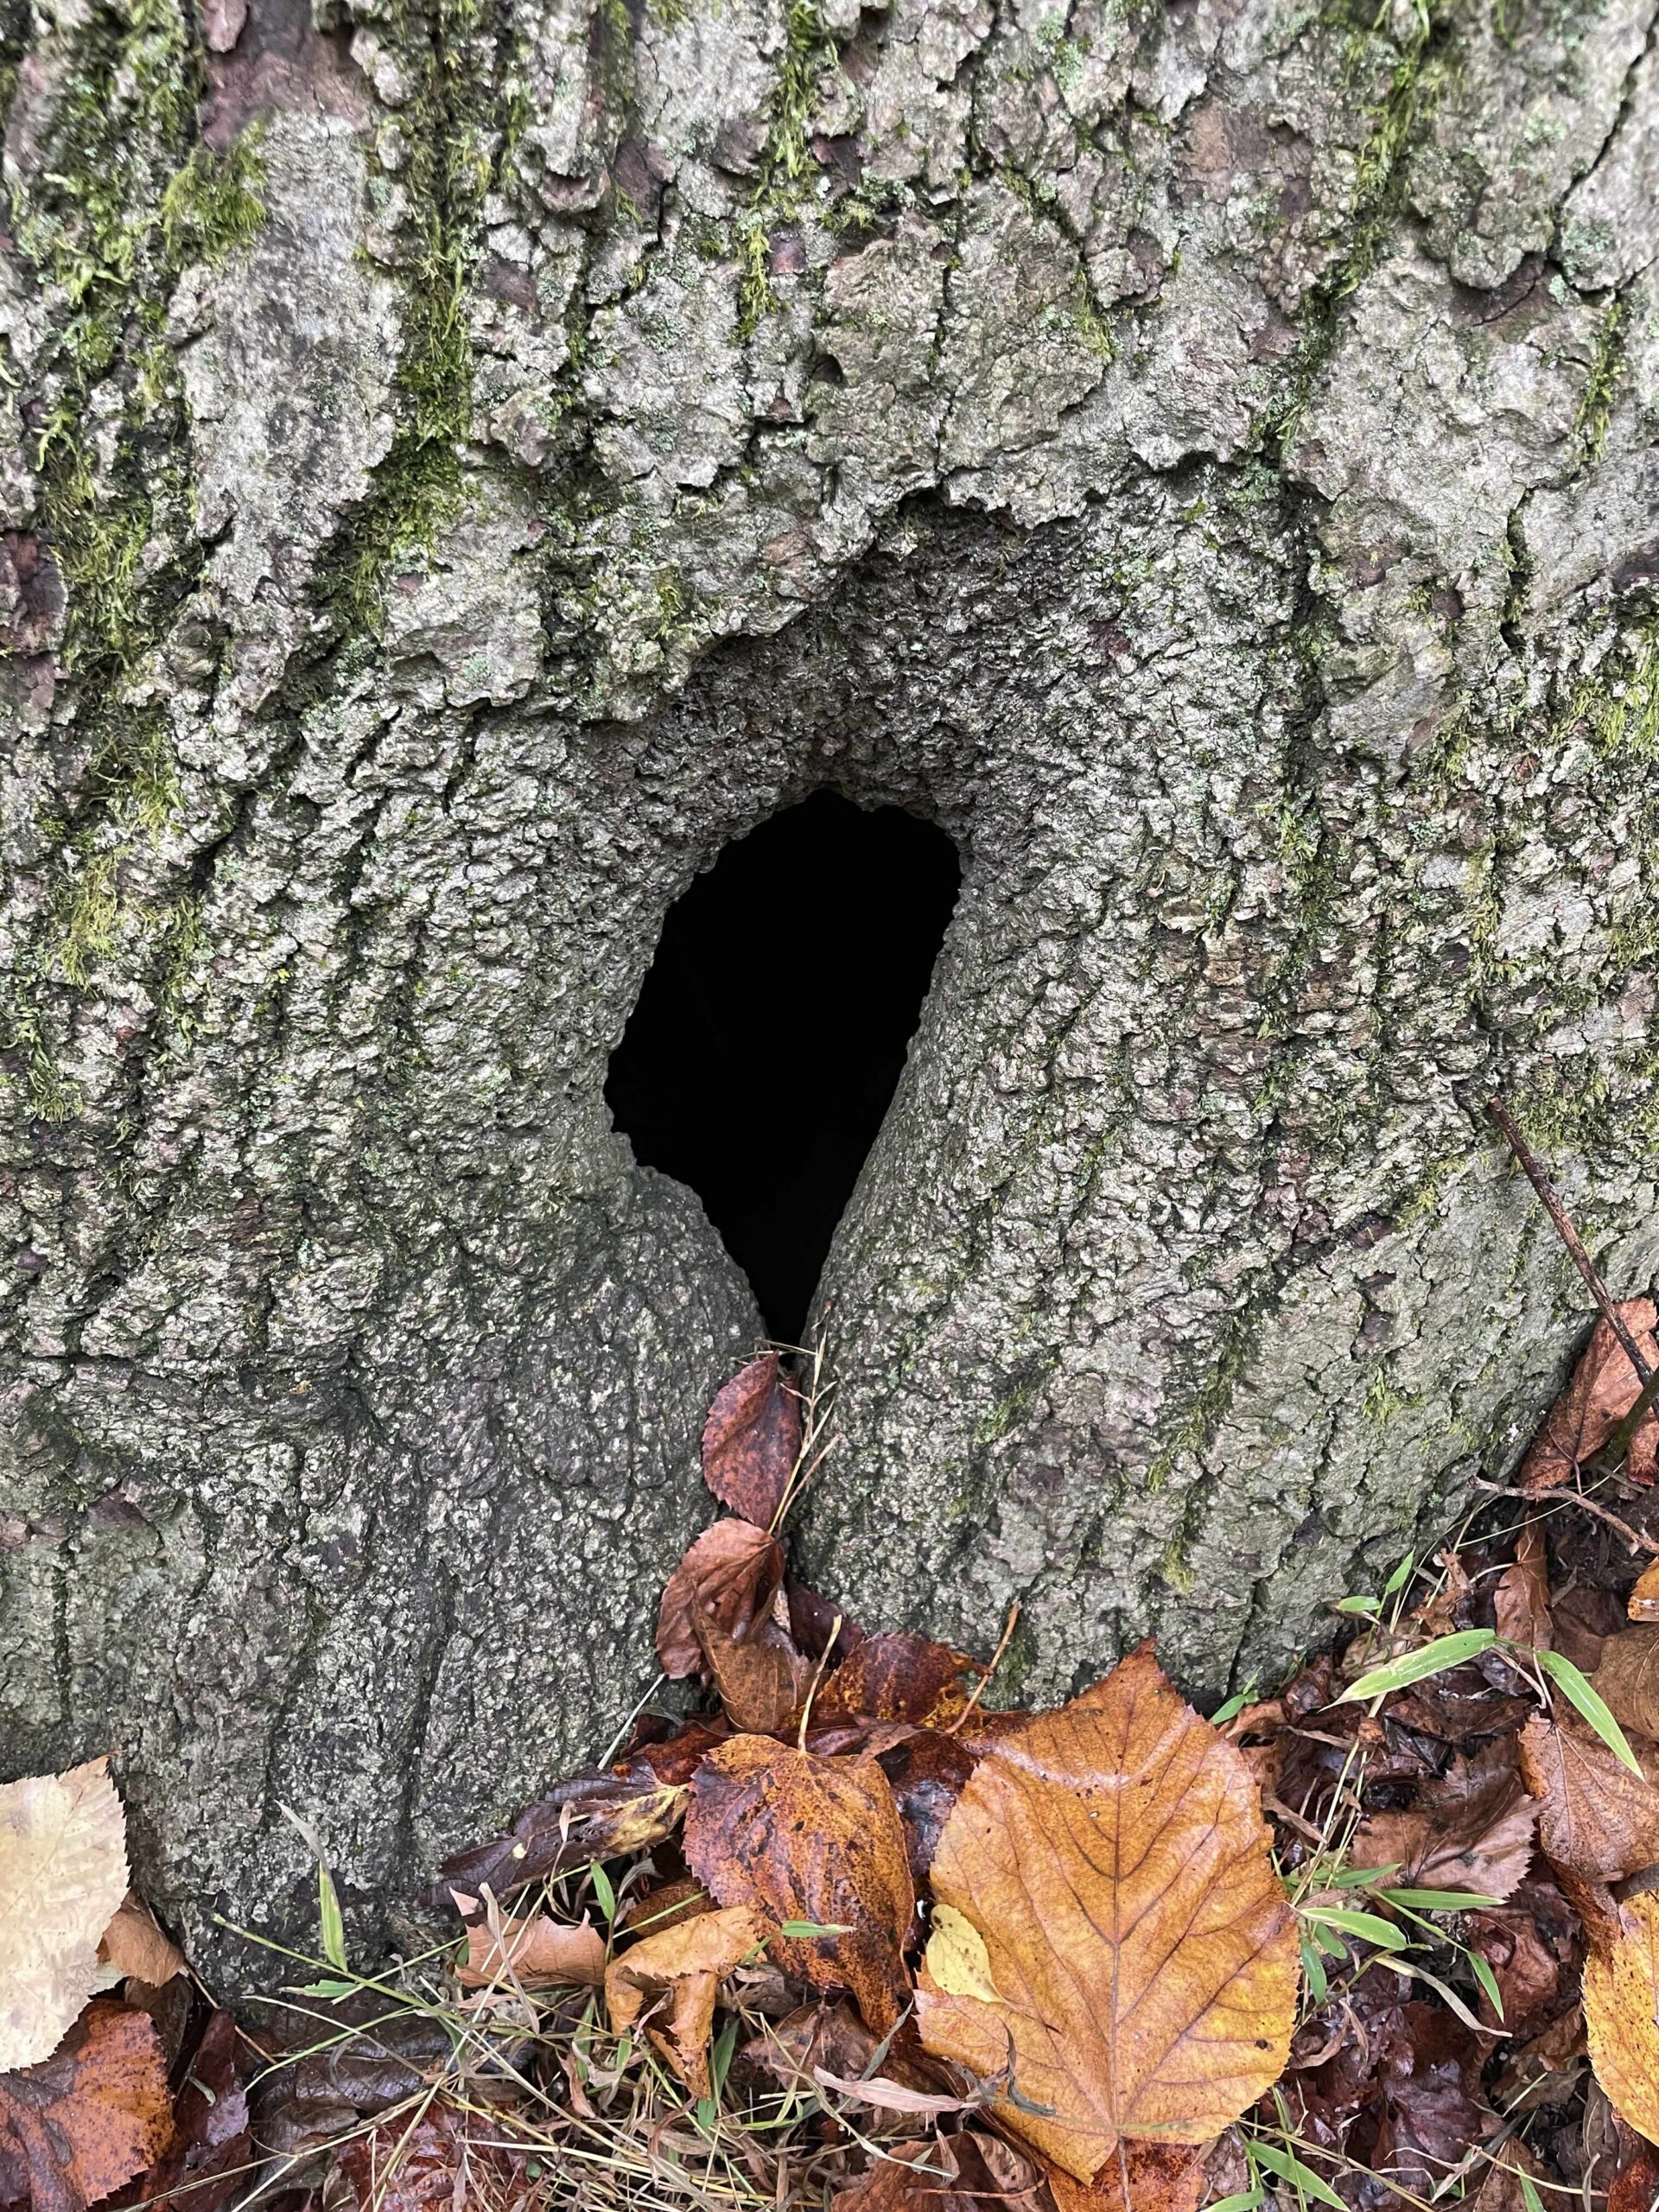
The other new interest is in tree hollows! They are everywhere and they are so mysterious to me! What goes on inside them? As humans don’t see what’s inside of them usually because our bodies are too big. Also they are dark. I would love to use a probe to scan or capture the forms they have on the inside and the activities they allow for plants, animals, fungi, & bacteria. How best to capture tree hollows? What devices could I use to capture the secrets of the tree hollows?

Doesn’t this look like a black hole?

So it is now 11:22am. At noon I will go to the trail cam and confirm that it has been recording videos. WISH ME LUCK! After I check on it I’m going to go to IDeATe to try to borrow a GoPro…

UPDATE I last checked trail cam footage around 12:00pm and it was recording! I’m sooo excited. Set it up again, I think it’s working.. I hope it’s working… I borrowed a go pro from ideate…. It’s 3:09PM

Tuesday, October 1st

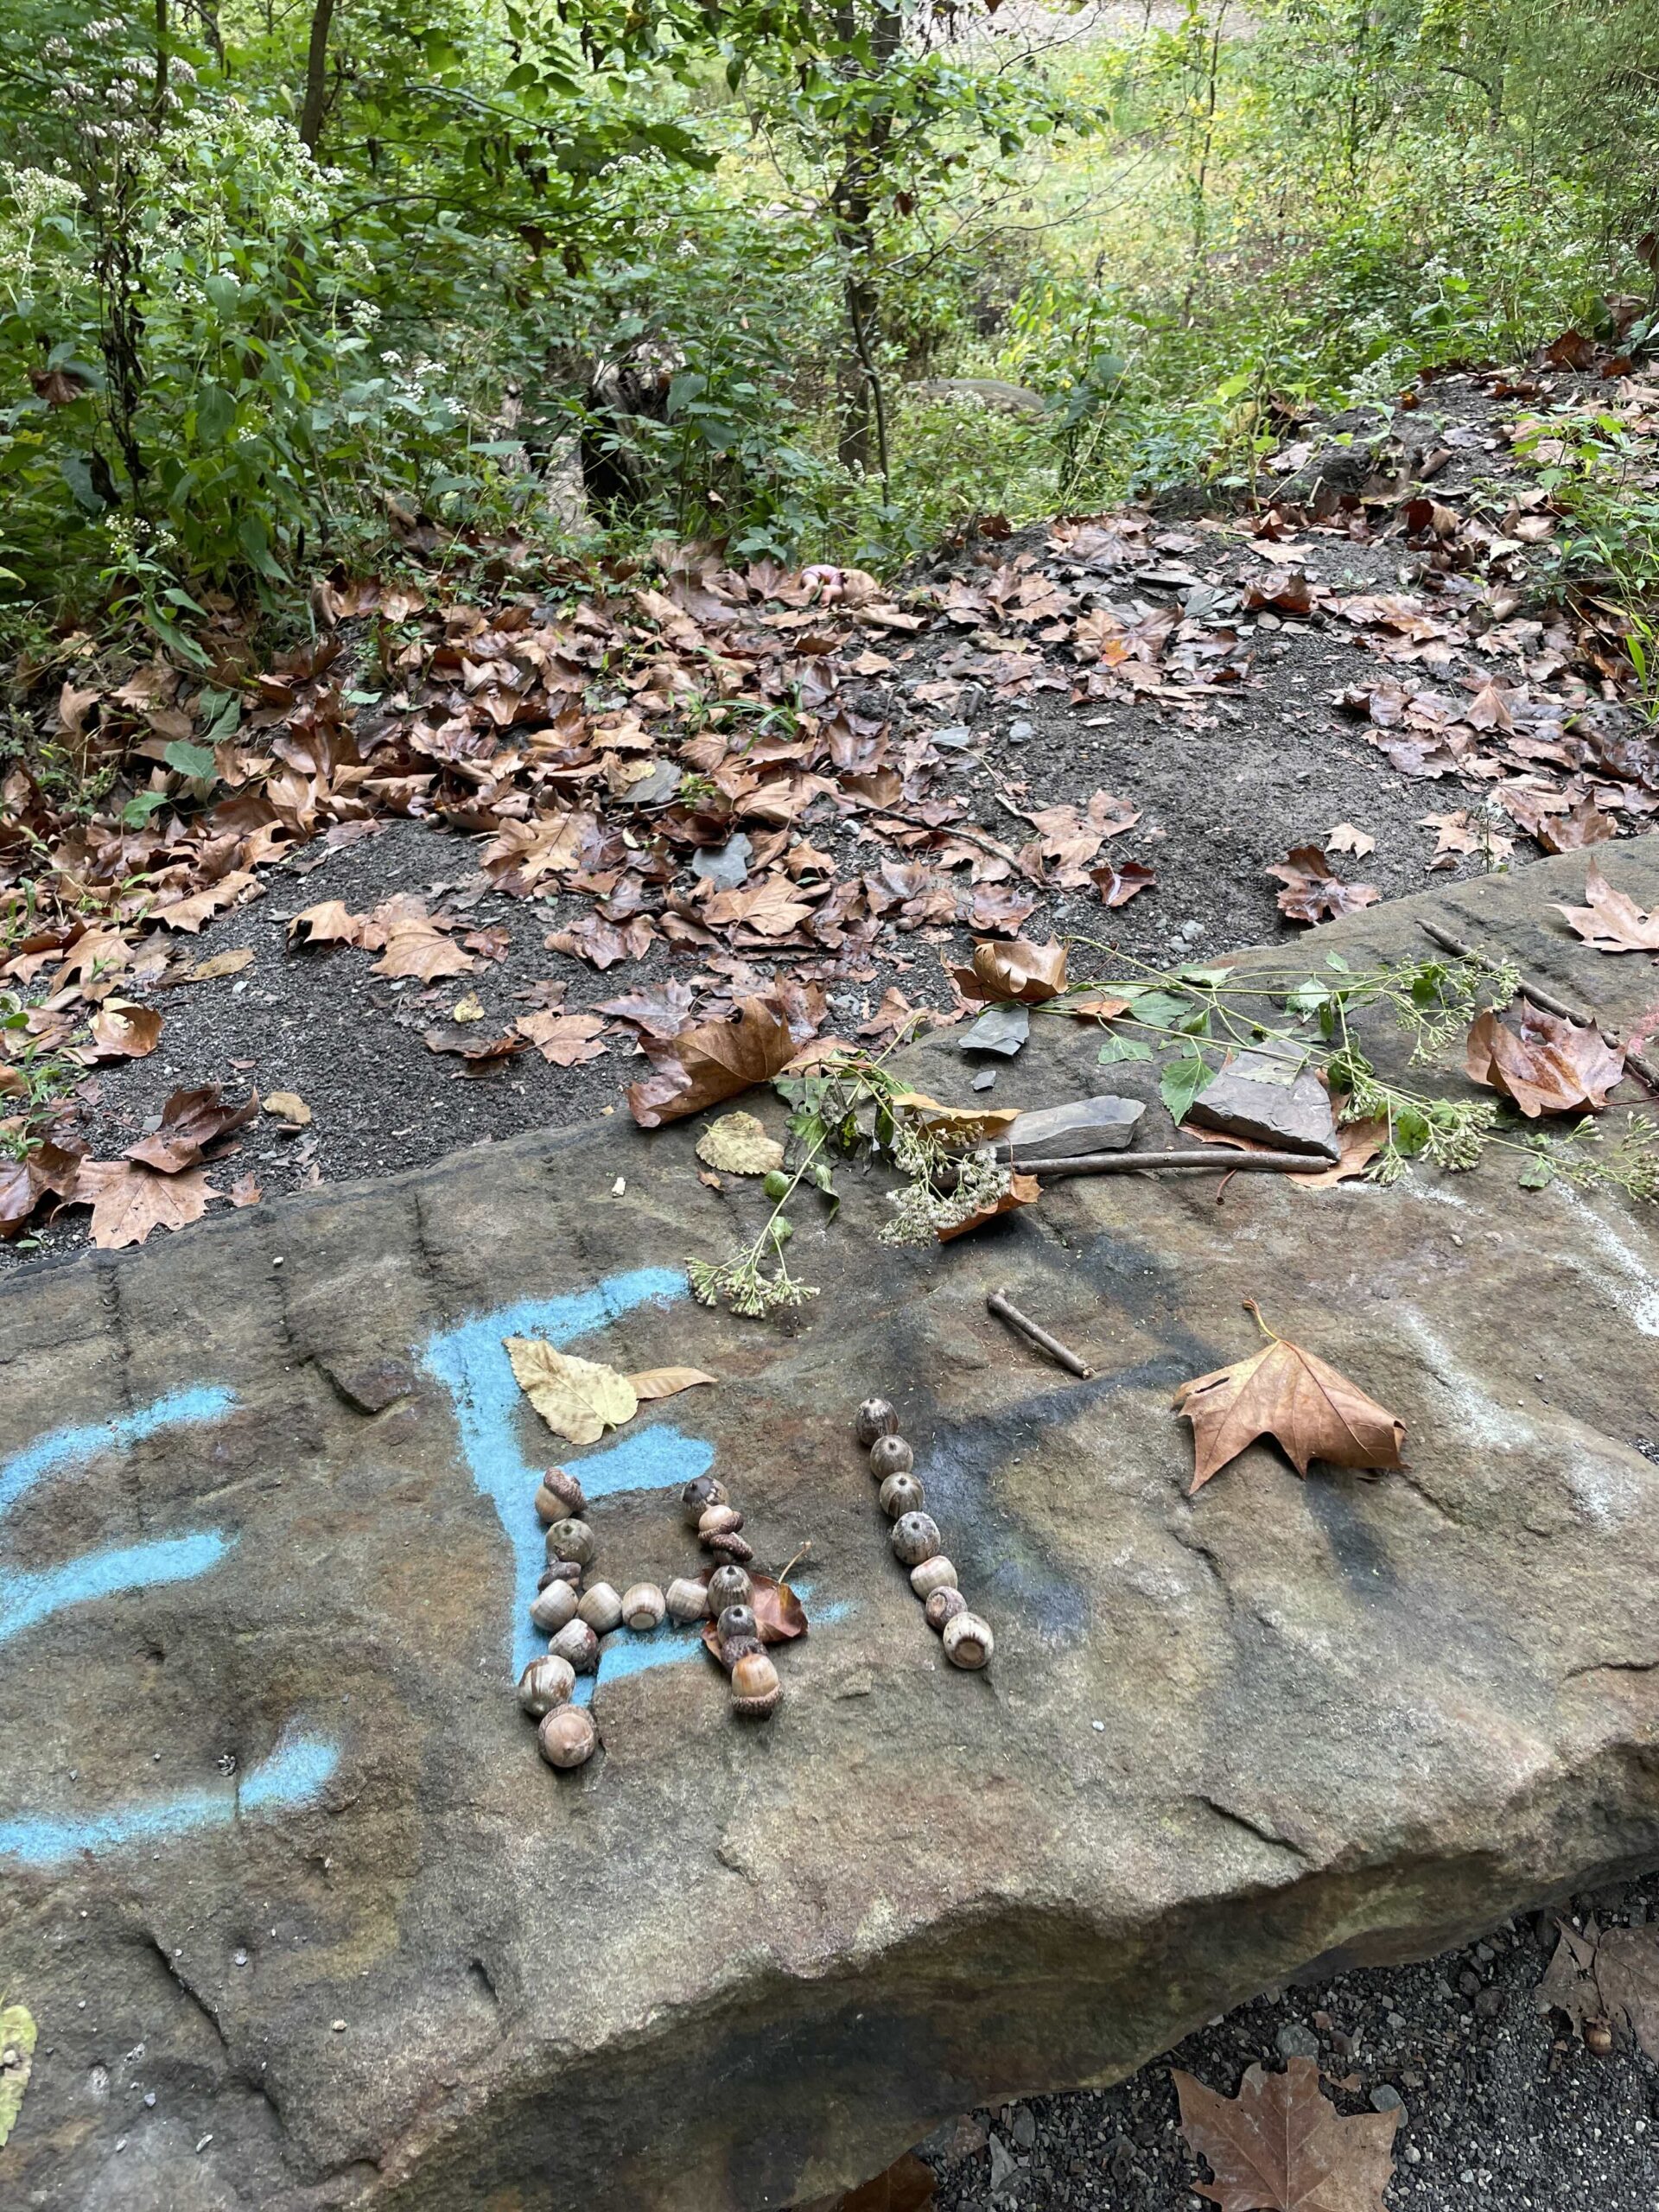
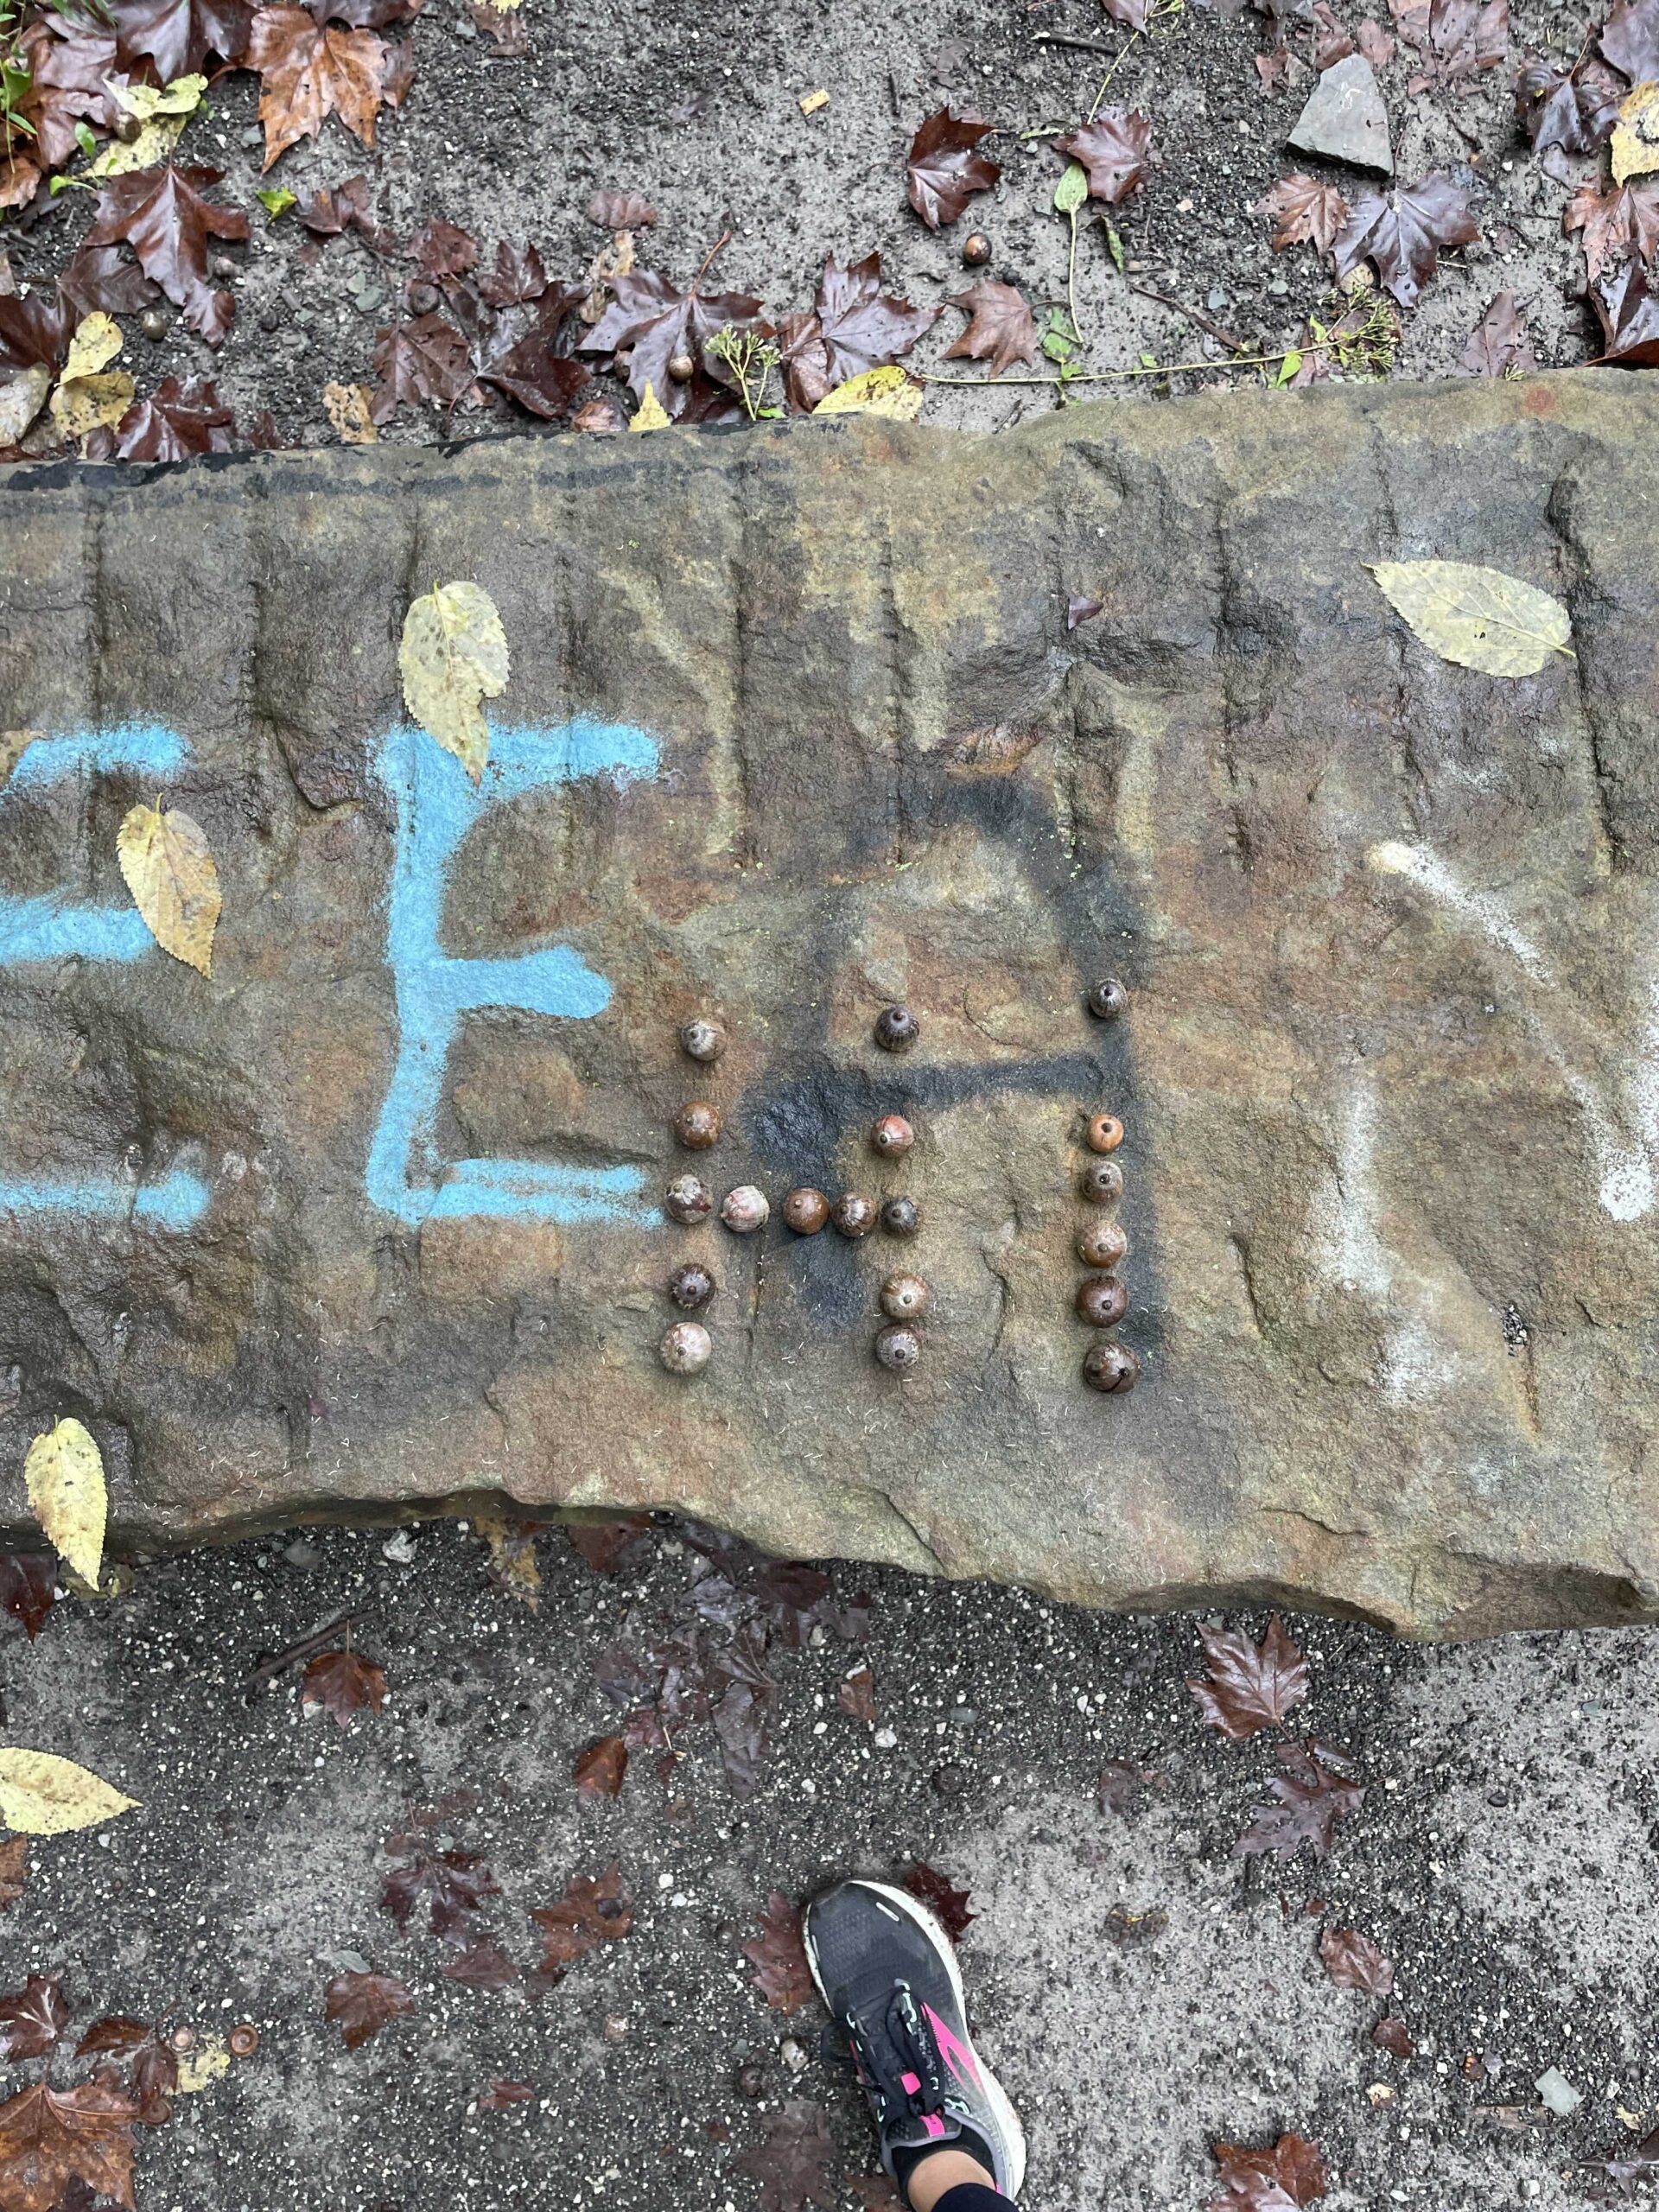
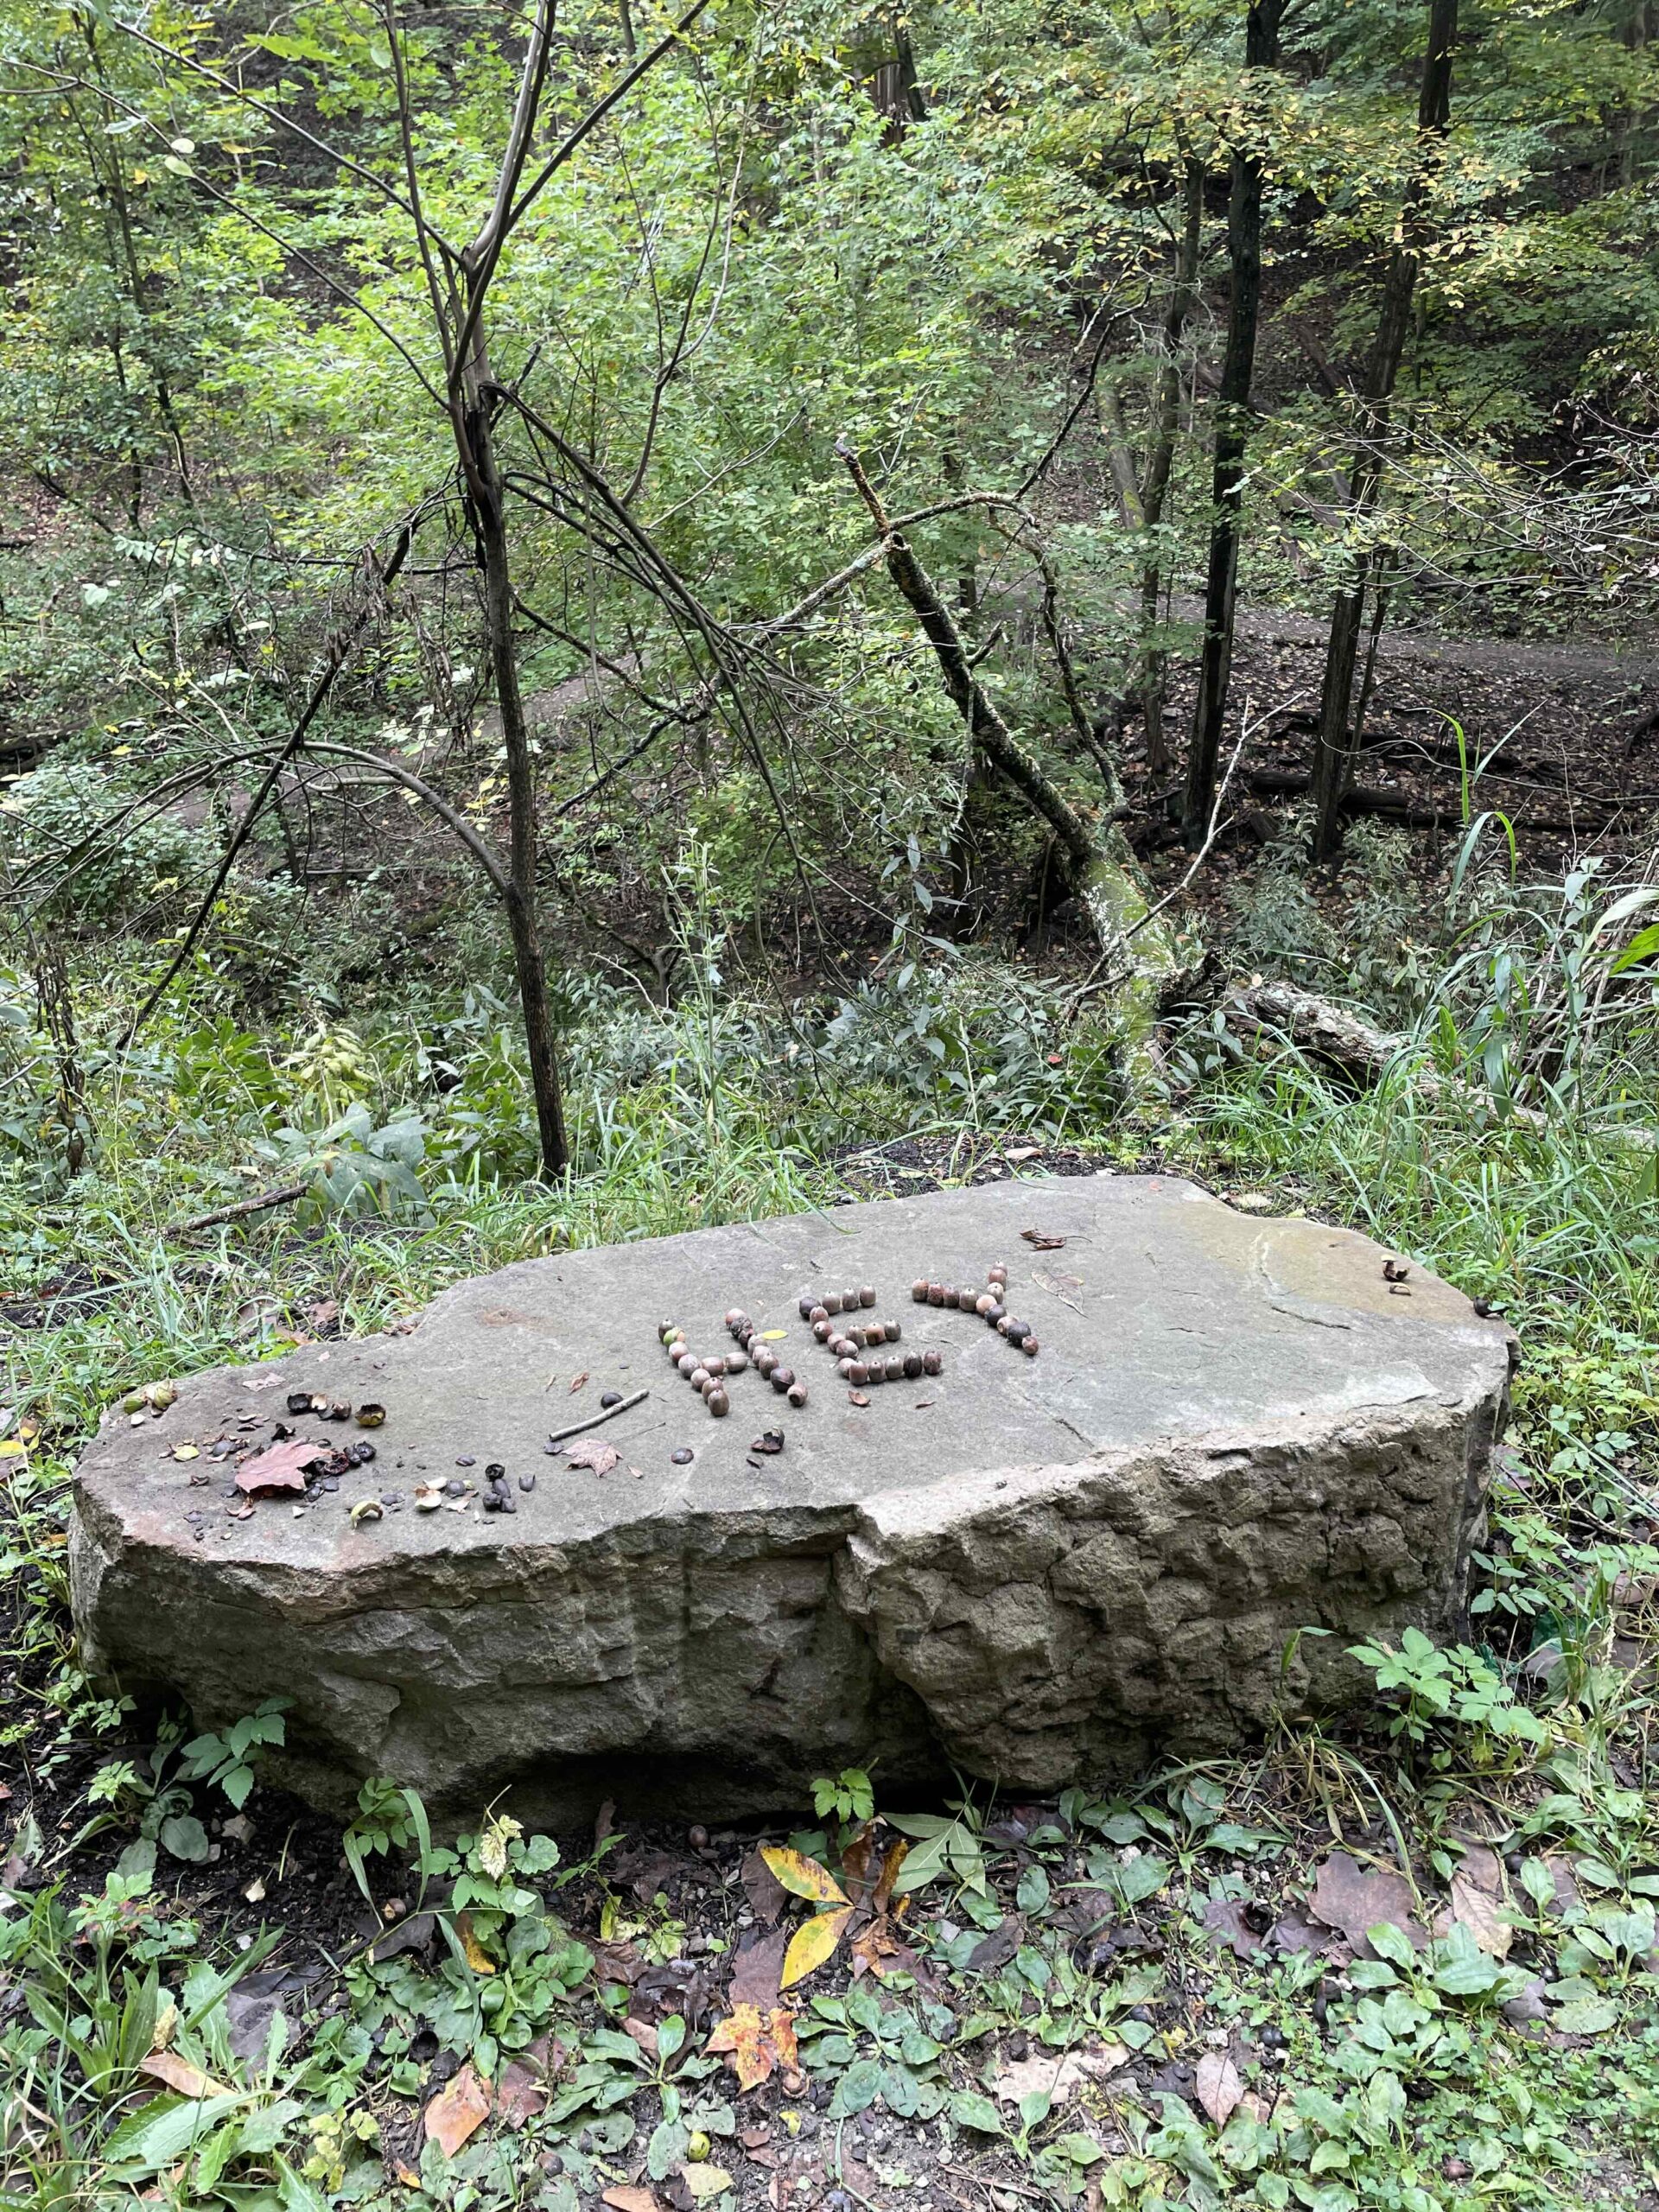
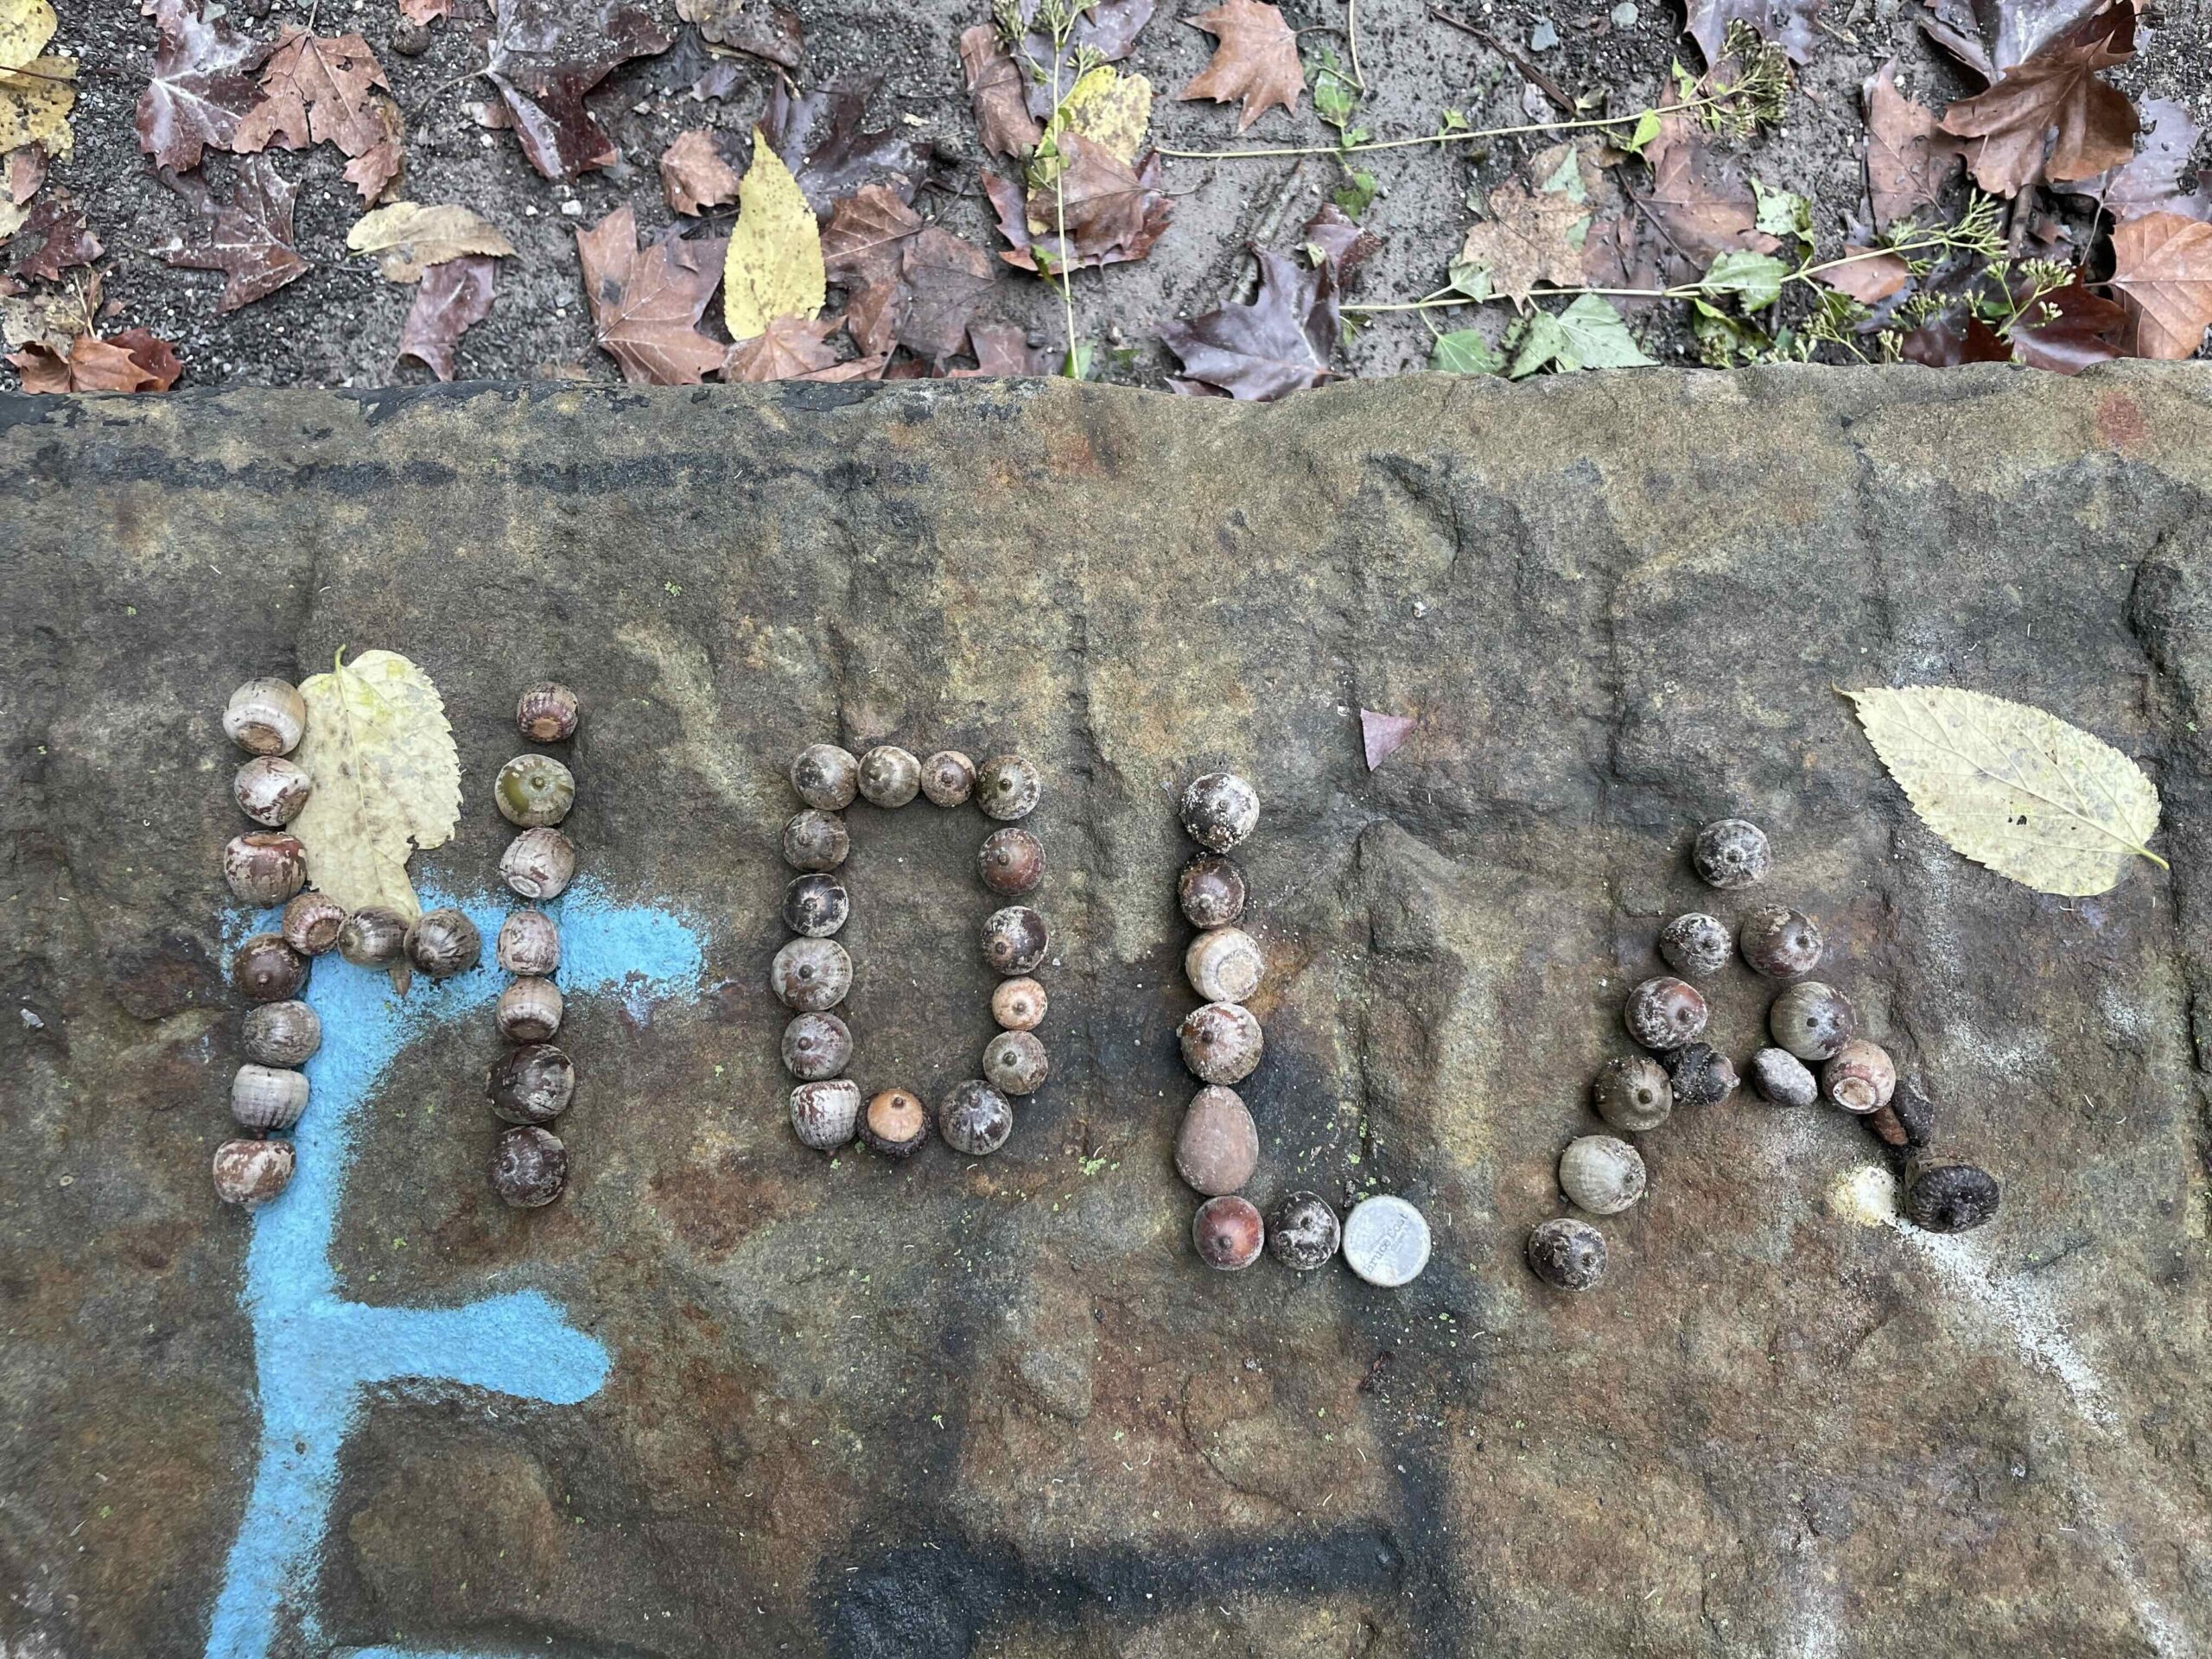
9:00am. Update on Schenley Trail Cam – This morning I witnessed something truly amazing.The acorns I left on the bench on Sunday were scattered across it. As I returned to my perch on the hill to set up the trail cam this morning, a passerby stopped by the bench. He spent a few minutes rearranging the acorns on the bench. Since I was so close to him, I tried my hardest to remain completely still. Once he left, I saw the message he wrote. It says “Hi” — this is so amazing to me. Why is it so amazing? Perhaps because that was the message I left, and because he had the exact same idea. It felt like mystical telepathy.

The acorn message that I left on the bench on Sunday.

Below is a link to the video of the guy placing the acorn message below.

IMG_8475

The acorn message that someone place on the bench on Tuesday morning.
IMG_8475

Finally, I just want to express that I’ve enjoyed this project so much and am inspired to do more! I’m eager to investigate human behavior and non-human mysteries in the park. I’m eager to leave more messages for people; I want to capture more footage from my spot; and I want to make new and better videos from my collected footage! What if I could keep this going as the leaves changed colors? Today I also saw deer in front of this spot, unfortunately the trail cam did not capture them.

I’m excited about the acorn messages and have tried some alternative versions. I have also placed some on another bench a few minutes walk away.

-Kim

Typology: Pittsburgh Bridges

When is the last time you looked up while driving or walking underneath a bridge?

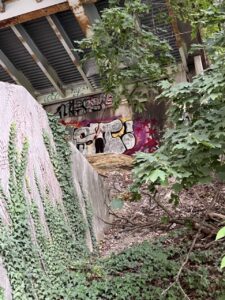
Through this project, I set out to document bridge damage in a way that is difficult to experience with the naked eye, or that we are likely to overlook or take for granted in our day to day life.

Inspiration and Background

At the beginning of this process, I was really inspired by the TRIP Report on Pennsylvania bridges, a comprehensive report that listed PA’s most at risk bridges and ranked them by order of priority. I was interested in drawing attention to the “underbelly,”  an area that’s often difficult to access, as a way to reveal an aspect of our daily life that tends to be unnoticed.

Initially, I was planning to use a thermal camera to identify damage that’s not visible to the naked eye. After meeting with two engineers from PennDOT, I learned that this method would not be effective in the way I intended, as it only works when taken from the surface of the bridge. It would have been unsafe for me to capture the surface, so I decided to recalibrate my project from capturing invisible damage, to emphasizing visible damage that would otherwise be unnoticed or hard to detect. Here are some examples of my attempts at thermal imaging on the bottom of the bridge. I was looking for heat anomalies, but as you can see the bridges I scanned were completely uniform, regardless of the bridge material or time of day.

Process and Methodology

After thermal imaging, I moved to LiDAR (depth) based 3D modeling. My research revealed this is the favored method for bridge inspectors, but the iPhone camera I was using had a pretty substantial depth limitation that prevented me from getting useful scans. Here are a few examples of my first round.

A LiDAR scan of Murray Avenue Bridge
Murray Avenue Bridge
Polish hill, Railroad Bridge over Liberty Avenue
376 over Swinburne Bridge

These scans were not great at documenting cracks and rust, which are the focus of my project. At Golan’s recommendation I made the switch to photogrammetry. For my workflow, I took 200-300 images of each bridge at all angles, which were then processed through Polycam After that, I uploaded each one to Sketchfab, due to the limitations of Polycam’s UI.

I chose photogrammetry because it allows the viewer to experience our bridges in a way that is not possible with the naked eye or even static photography. Through these 3D captures, it’s possible to see cracks and rust that are 20+ feet away in great detail.

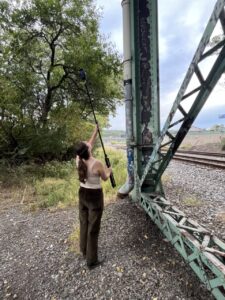
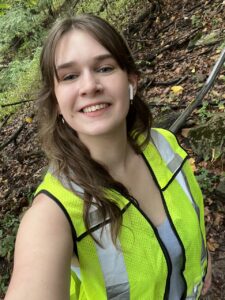
Here’s some pictures of me out capturing. A construction worker saw me near the road and came and gave me a high vis vest for my safety, which was so nice I want to give him a shoutout here!

Results

This project is designed to be interactive. If you’d like to explore on your own device, please go here if you’re viewing on a computer, and here for augmented reality (phone only). I’ve provided a static image of each scan in this post, as well as 5 augmented reality fly throughs, out of the 9 models I captured.

Railroad Bridge over Liberty Ave
Race St Bridge
Penn Ave Bridge
Panther Hollow Bridge
Greenfield Railroad Bridge
Swinburne Bridge
Frazier St Viaduct (376)
Allegheny River Bridge

I am quite pleased with the end result compared to where I started, but there’s still a lot of room for improvement in the quality of the scans. After so many iterations I was restricted by time, but in the future I would prefer to use more advanced modeling software. I would also like to explore hosting them on my own website.

Special thanks to PennDOT bridge engineers Shane Szalankiewicz and Keith Cornelius for their extraordinary assistance in the development of this project. 

TypologyMachineWIP

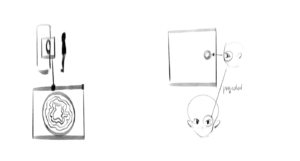
I have two concepts in mind that I’m still developing. The first is about a tree hollow where audiences can whisper secrets. These whispers would be quiet so a special microphone designed to capture the sound waves is needed. These captured waves would then be visualized as ring like patterns, similar to tree rings and projected inside the tree hollow. The final deliverable would include individual visualized sound waves, as well as a combined projection of all the whispers inside the tree hollow, which is an overall display of sound collected.

The second idea explores eye contact. Inspired by the apple vision pro’s features, which aim to project a video of your eyes and your face to make communication more natural while wearing the headset, I want to look into the sensation of communicating with someone who’s there but not fully present, which can create an uncanny effect. In this piece, I envision an audience peering through a peephole into a space. As they look through, their eyes are captured by a hidden camera and projected onto an average looking face? (haven’t really fleshed out this part) The projection would create an experience where they appear to make eye contact with themselves, but something feels slightly off. I’d like to capture and analyze the subtle movements of their eyes as part of this experience.

FFMpeg Test – View Two Paintings

Step1 To concatenate the two videos together, and exports the resulting video, with a (resized) width of 240 pixels and moderately heavy compression:

ffmpeg -i tile.MOV -i silver.MOV -filter_complex “[0:v]scale=240:-2[v0];[1:v]scale=240:-2[v1];[v0][0:a][v1][1:a]concat=n=2:v=1:a=1[v][a]” -map “[v]” -map “[a]” -c:v libx264 -crf 28 -preset medium test.MOV

Step2 To convert a .mov file to .mp4 because workpress only preview mp4:

ffmpeg -i test.mov -vcodec h264 -acodec aac test.mp4

Typology of: My Weight when I’m Happy

Typology Work in Progress:

I want to track my weight throughout the week with the things (objects, people, ideas) that make me happy. I will then use a calorie tracking app (prob myfitnesspal) to track my weight and the caloric equivalent of my “happiness” that day.

The how:

I plan to carry a scale around with me for around a week and weigh myself every time something makes me happy with the thing that makes me happy. Then I will use a calorie tracking app to log my weight and the object of my happiness with the caloric equivalent using the standard measurement of calorie to fat (3,500 calories to 1 pound of fat).

Idea Inspiration and the Why:

This idea came about with a realization I made when scrolling through Tiktok and coming across a video made by a fitness influencer who talked about how they used to track the calories in their toothpaste. I realized that people, through apps like myfitnesspal, make typologies every day by tracking their food, calories, and weight.

Weight is a heavy topic for a lot of people, and growing up in my no-filter Korean family, it is definitely a point of stress for me. In redownloading and analyzing my past MyFitnessPal entries, the daily typologies I made diligently throughout my hs and uni years revealed more than just what I ate that day. It revealed more personal and surprising things.

For example:

  • the state of my mental health
  • my financial status
  • my social life
  • the evolution of my cooking skills
  • my culture (& the exposure to new ones)

In making my weight and the “consumed” calories arbitrary, I hope to neutralize the negative connotations around the subject. Additionally, in tracking the more positive aspects of my life- I hope that my typology functions similarly to a gratitude journal.


From Class-

Taking pictures every time I measure my weight. Go pro at the level of the scale.

Typology Machine WIP

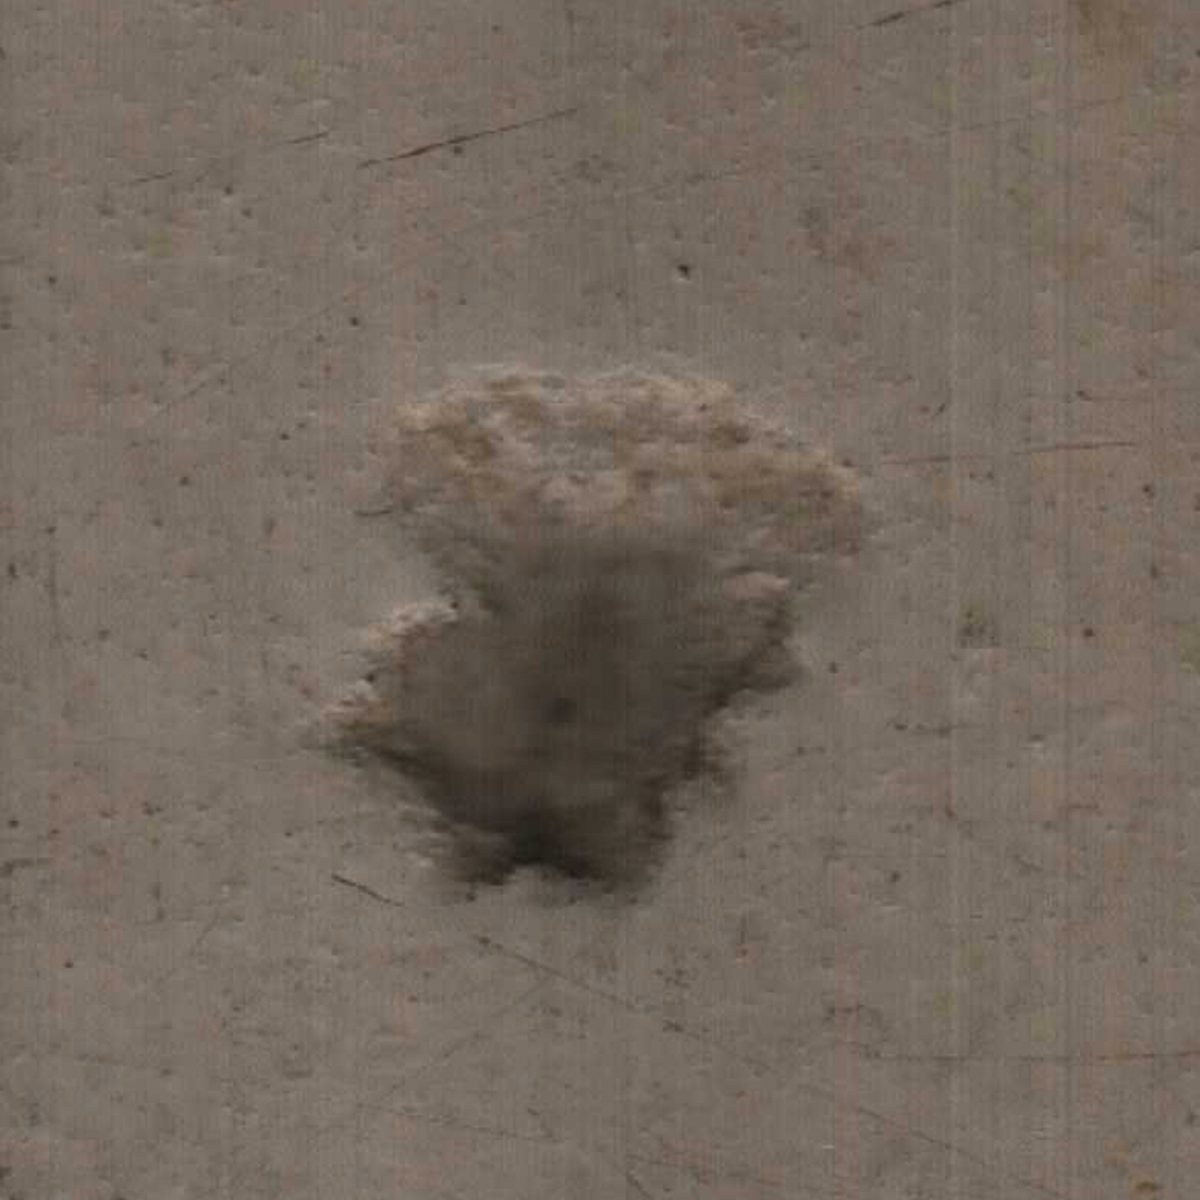
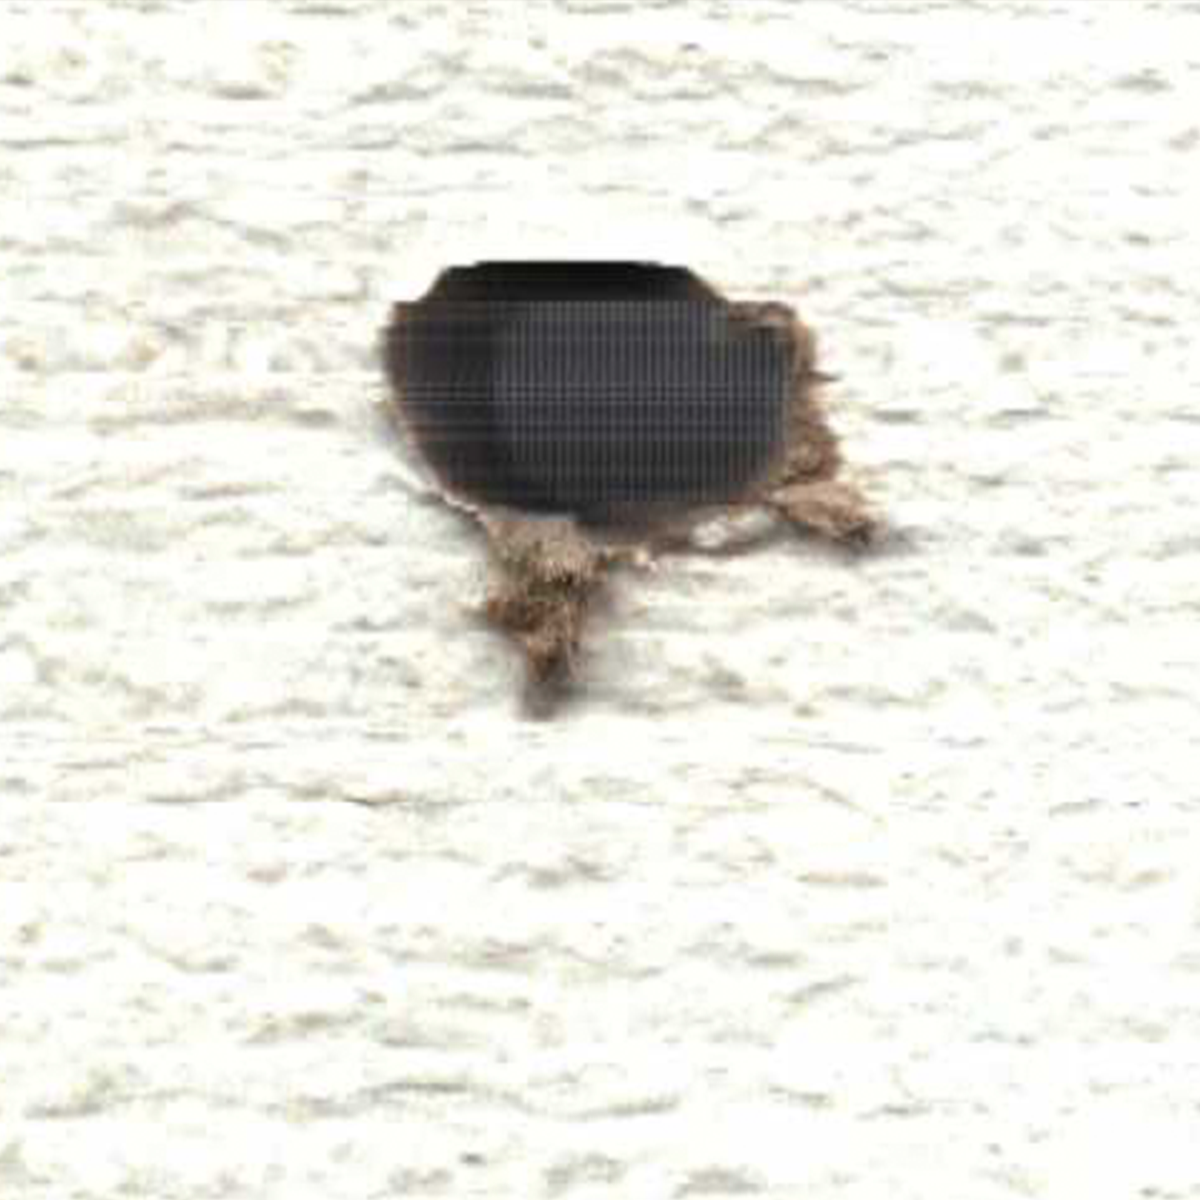
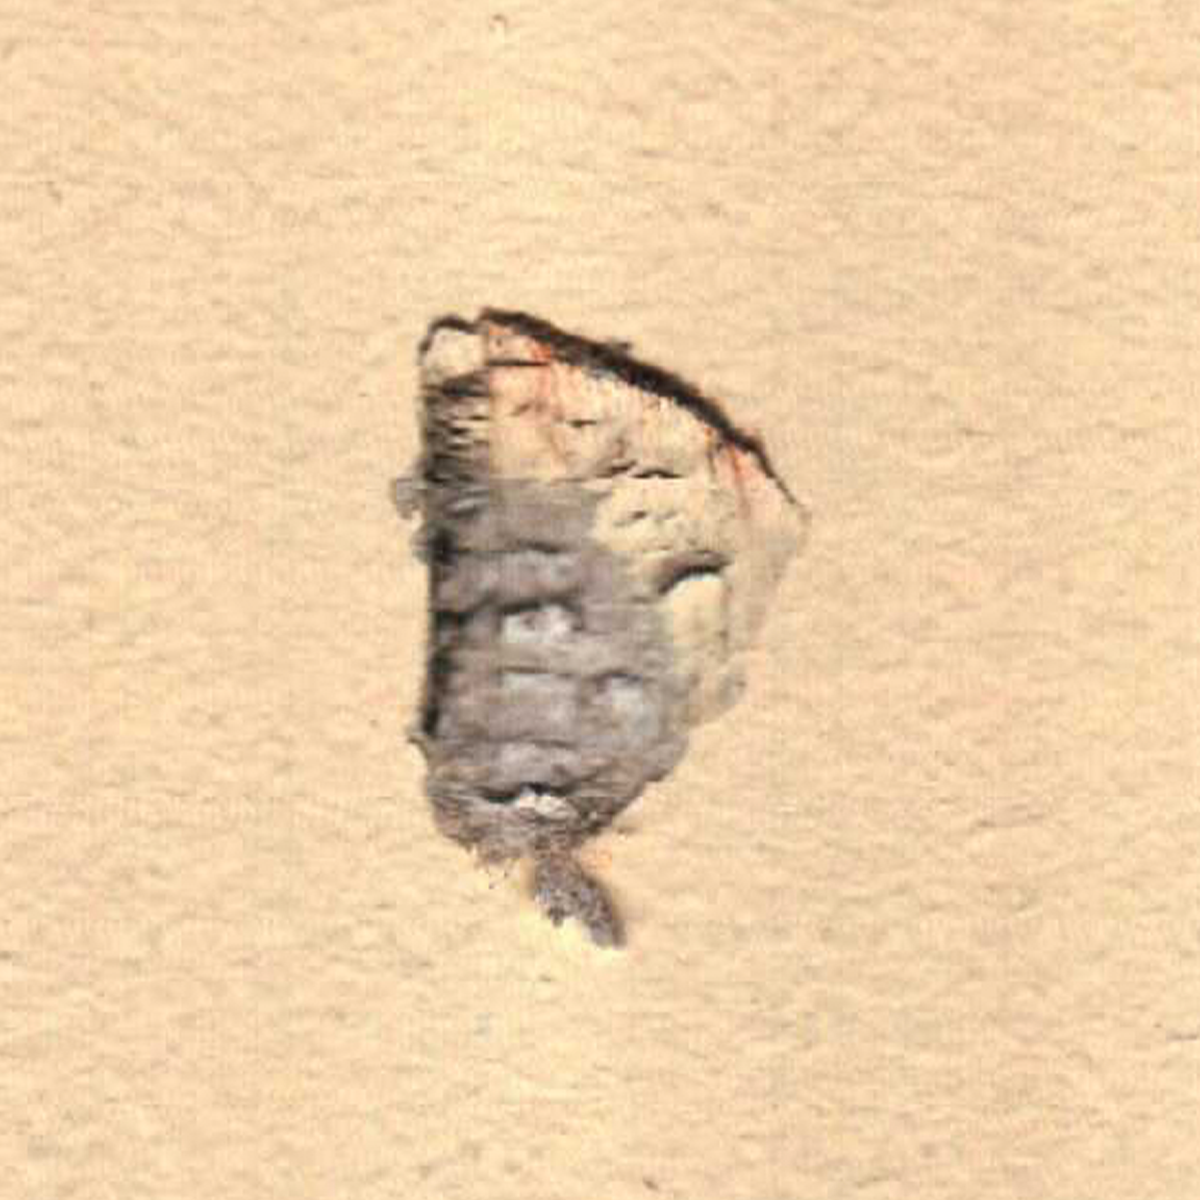
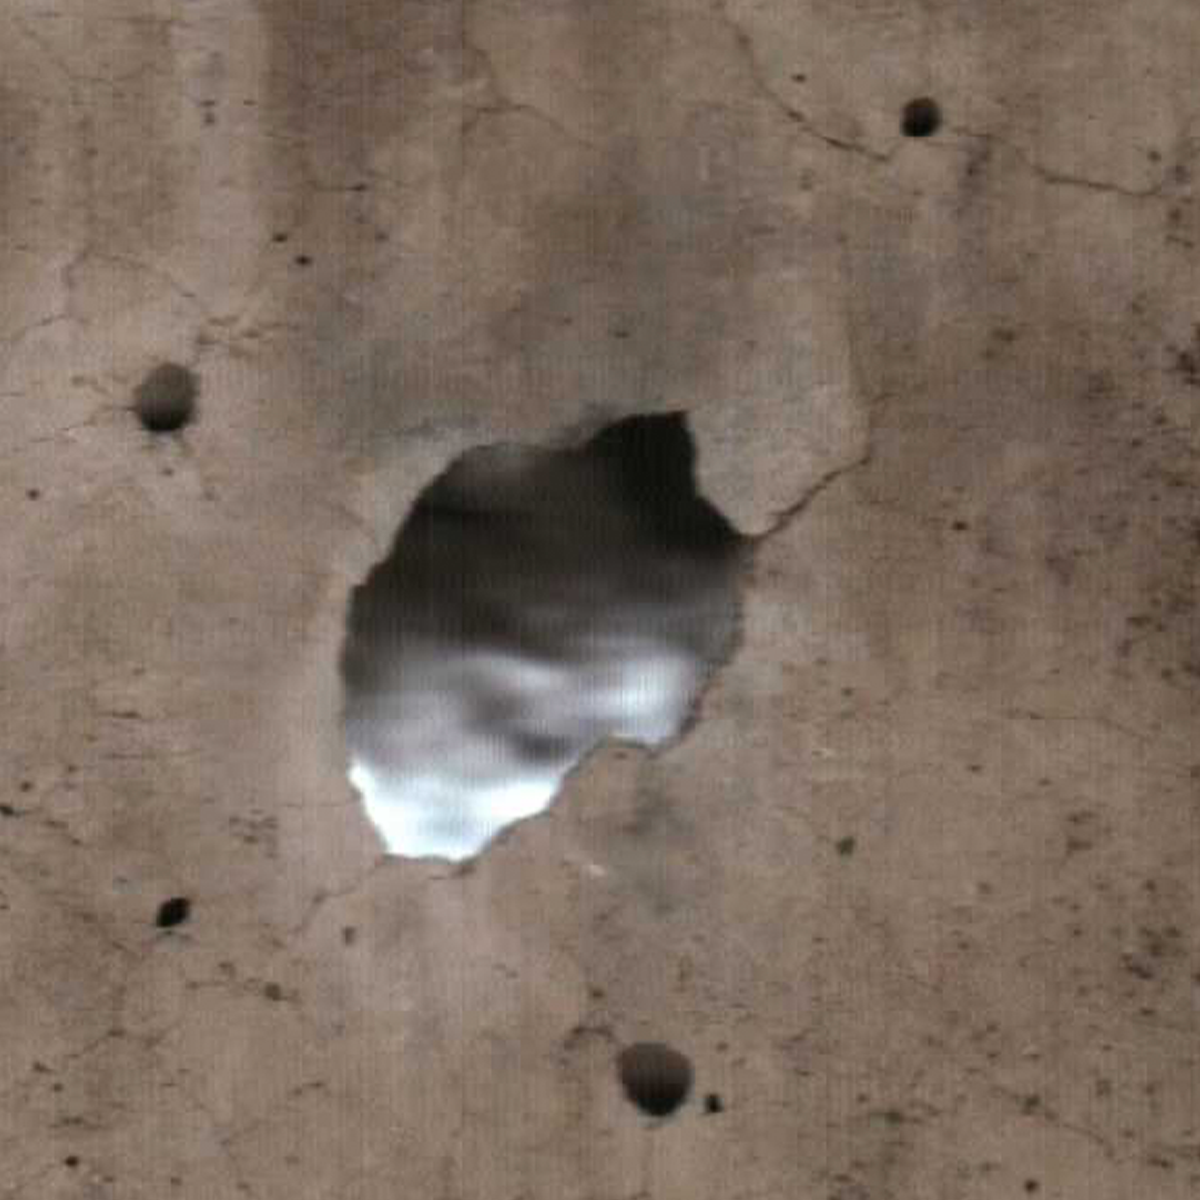
Post-feedback update: typology of life/death of a hole or something similair.

Will do some different camera tests with how holes will be captured. Tempted to focus more on campus so they’re accesible to students but feels more like a place I might be apprehended if I’m caught spackling and painting a hole in the depth of night.

Photographing and categorizing holes around campus/my neighborhood/home/etc. Aiming to have a quantity project. Filling holes with appropriate medium and “tagging” them. Tag may be related to cartesian coordinates as coordinate systems were brought up by every group. Something like x, y, z, [number of hole which this one is, 1-whatever] This is not graffiti and everything is fine and very lawful! Mayhaps I will use a crayon! Maybe somebody else who will never be discovered will secretly tag them for me! I certainly would not damage property intentionally.

Typology thinking:::::::

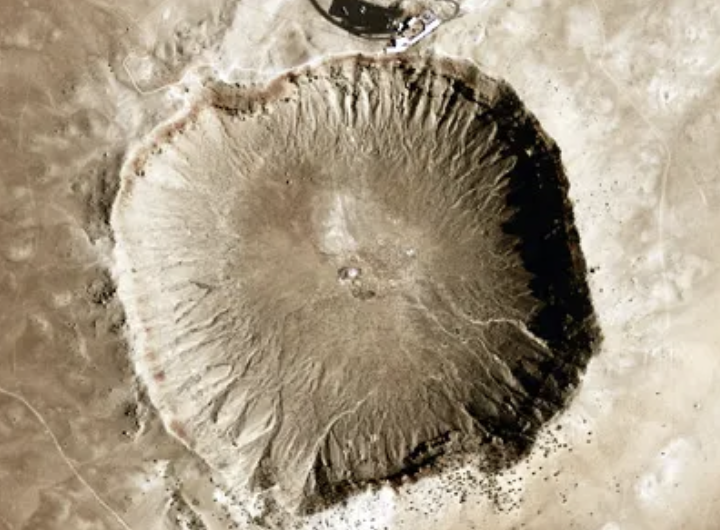
Craters: Finding myself close-encounters-levels (https://youtu.be/cdkS0TgEG30?si=ptrQVf2Vn8hg8In4) interested in impact sites — particularly on Earth (over swiss cheese moon novelty or satellite exploration ideas.) Interested in the large and small of what being on Earth is, something about impact sites feeling incredibly lonely. I think holes are easy to project on, and they’re sources of birth and death. I’m not really sure what the “data collection machine” of this all is because right now it’s just me walking around and looking for holes.

Interested in the loss of scale that occurs with the portable scanner so scanning small things around campus.

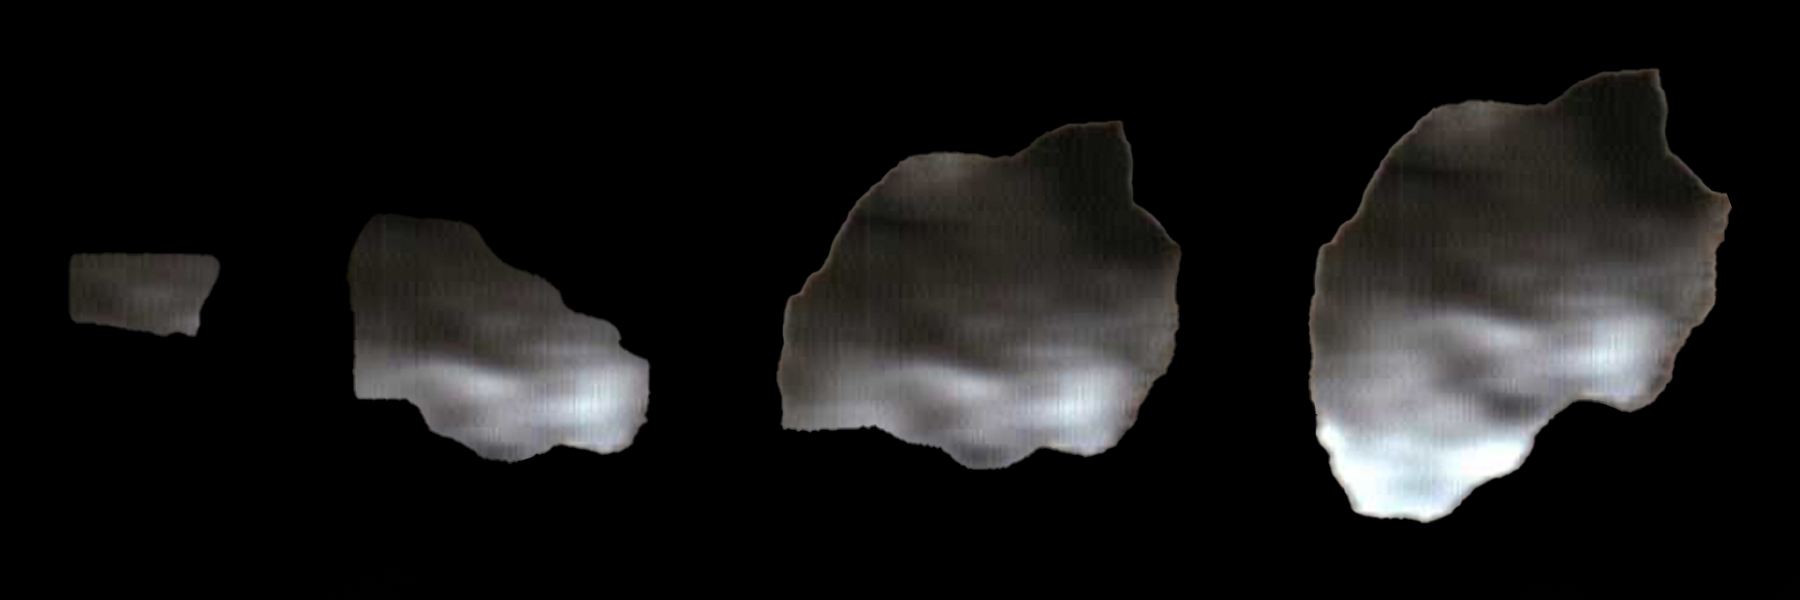
Also interesting relationship between the “fake ultrasounds” shown below and the feeling of a fake body in the holes–maybe pointing to some sort of data collection along the lines of ways people make themselves small or are small outside of choice.

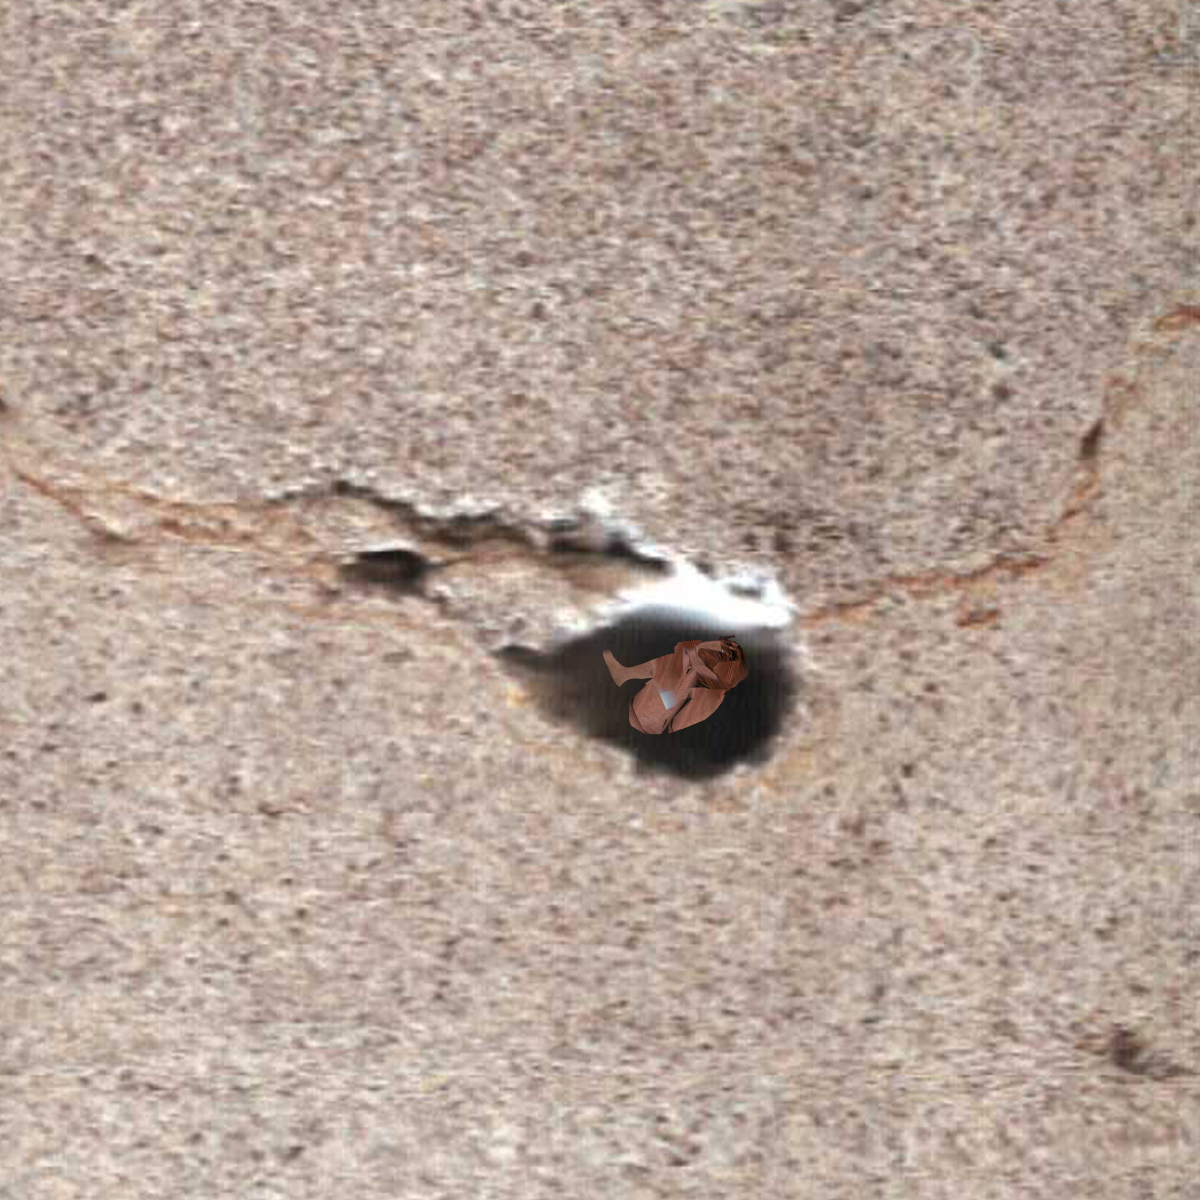
Extra: Me in crater (scanned skin stretched over a stock photo)

Extra extra: Peeled back (Ultrasound?) crater

Extra extra extra: Another peeled crater

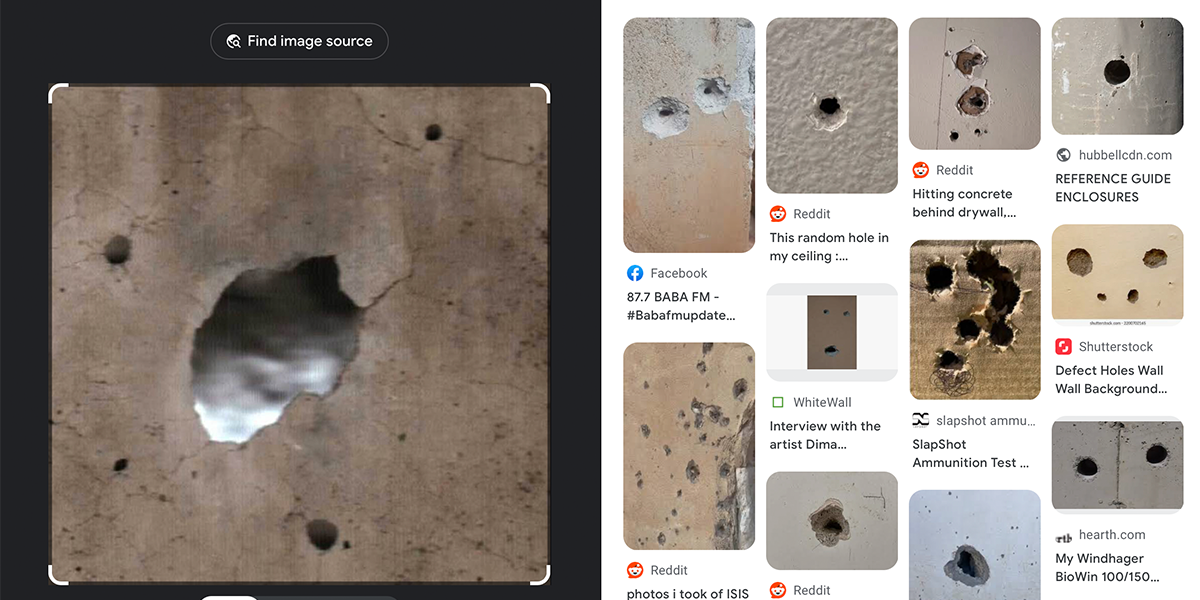
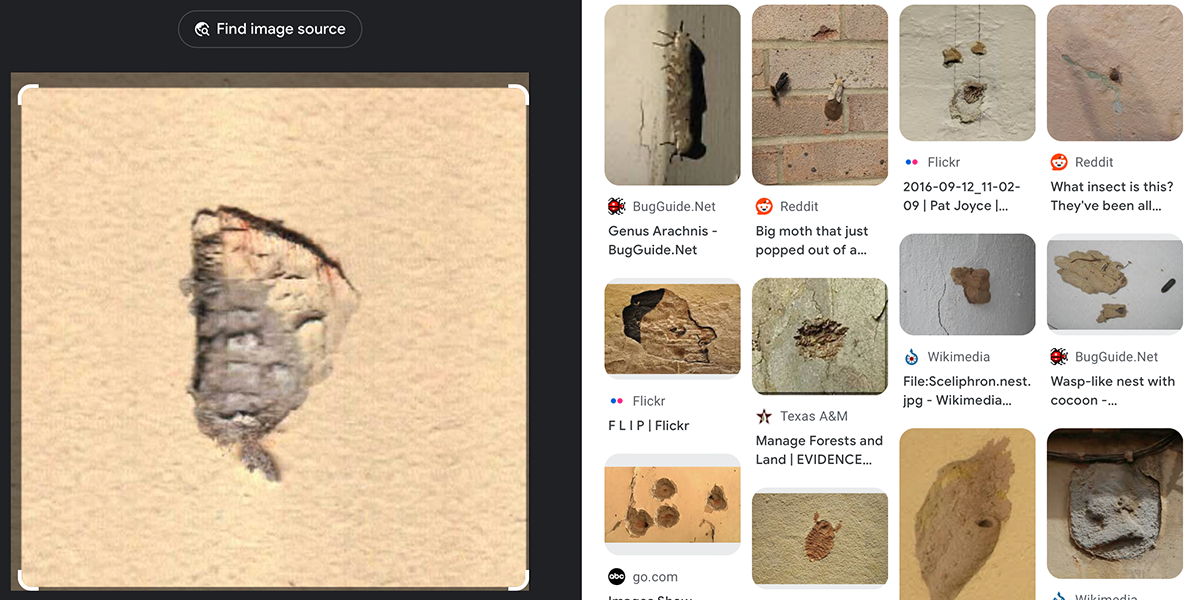
Extra extra extra extra: reverse image searched some of my scans

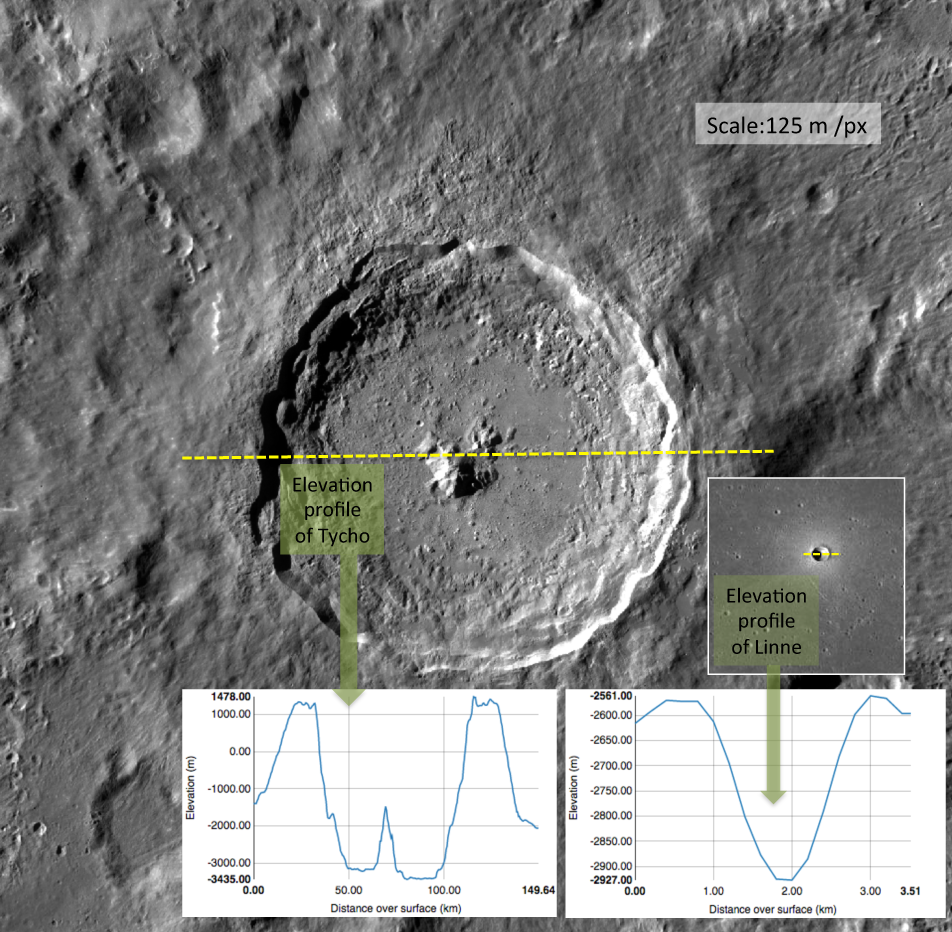
References I’m looking at (elevation profile and “real,” large scale crater, local biology of crater impact sites.) The elevation profiles are similair to the idea of measuring something non conventionally (this just being that I would be focused on loss of scale in measuring, would have to determine what the scaling system is (such as 1/2″ = 1 mile or something adjacent.)) However, unsure if removing the grounding in reality removes “the point,” of measuring something like this specifically.

https://www.researchgate.net/publication/11161300_The_biology_of_impact_craters-A_review

More:

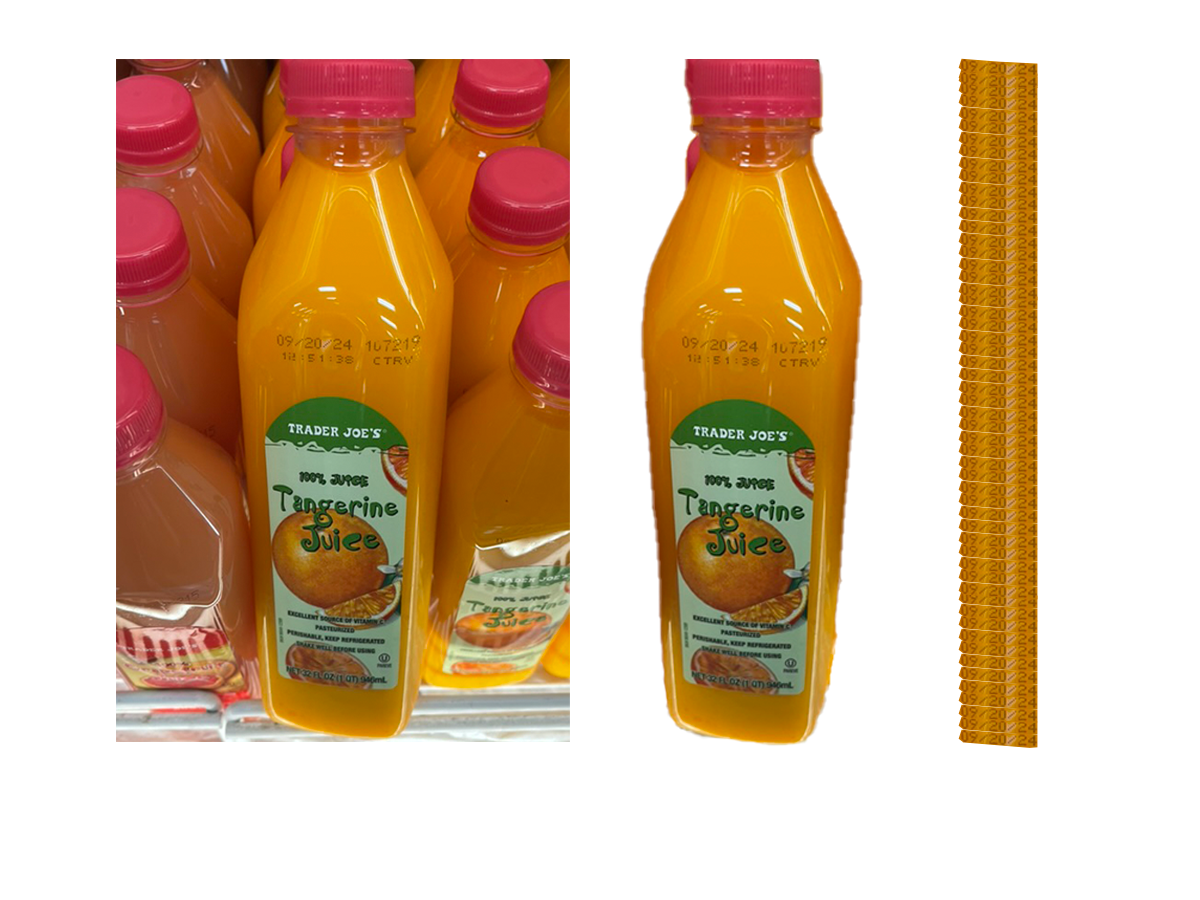
Interested in traditional photogrammatry still. Struggling to find a way to do this that isn’t just a callback to my AI cctv project. Thinking about just unnatural forms of measuring something? This orange juice is 55 expiration dates tall.

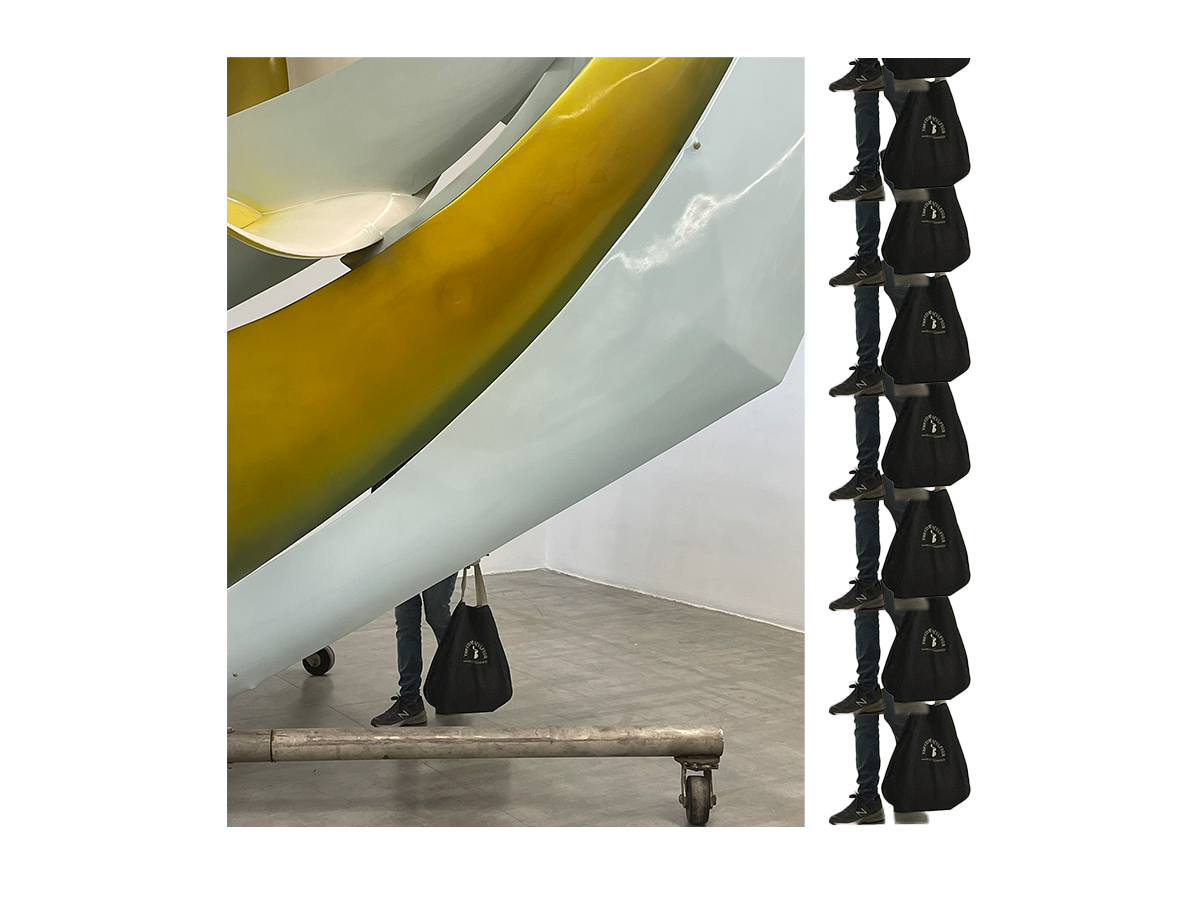
This sculpture, as it exists as a photo and within those bounds, is 7 feet to kneecaps and one foot tall.


Barcode scanner? Similair to unnatural forms of measurement. Would be kind of in the form of interfacing w the public potentially. Maybe finding things that can be scanned from a persons belongings (particularly handheld objects,) and photos of their hands.

Could also function as scanning barcodes in public/not attached to a human, just in the grocery store or somewhere with similair amounts of barcodes at the ready. Not really interested in this outside of a super tangential extra possibility.

Having a hard time detaching this idea from things that could be inherent to it such as surveillance or consumerism, which I’m not really interested in attacking in this project.


Somatic rituals:

Written rulesets only for capture. No specific subject in mind, more about the functionality of rules as rules.

CA Conrad: https://writing.upenn.edu/~taransky/somatic-exercises.pdf