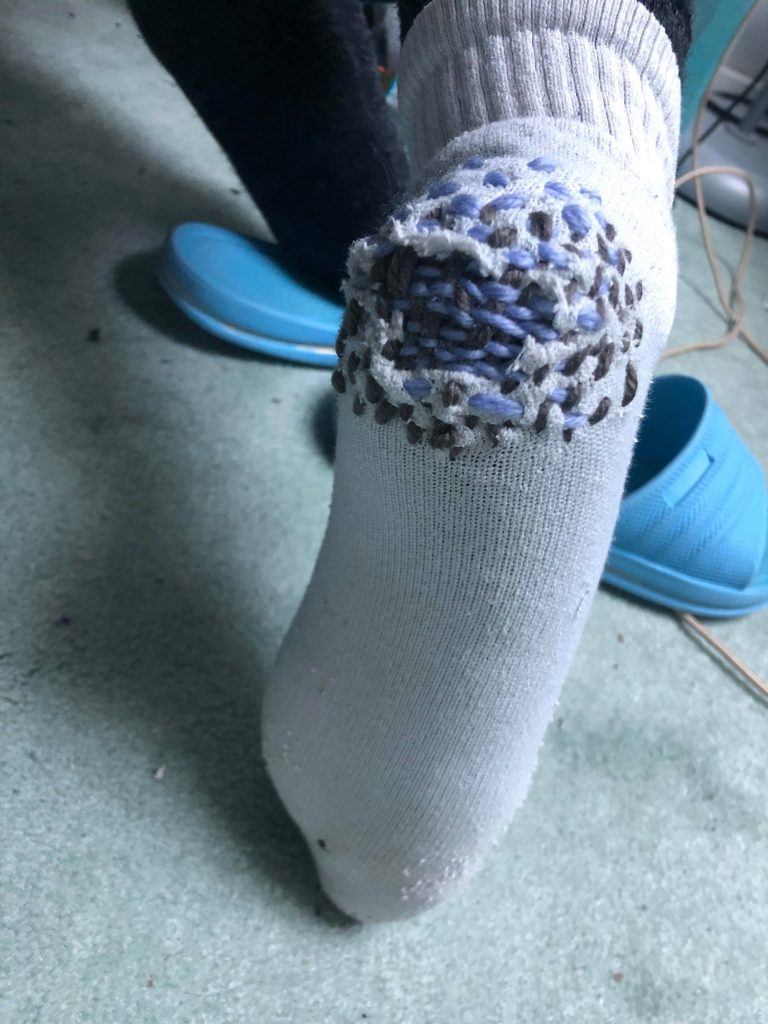
I started mending my sock, and I’ll probably go through and find more socks to mend using different techniques
62-150A: Introduction to Textile Media
Section A of Media Synthesis & Analysis – Fall 2020
I started mending my sock, and I’ll probably go through and find more socks to mend using different techniques
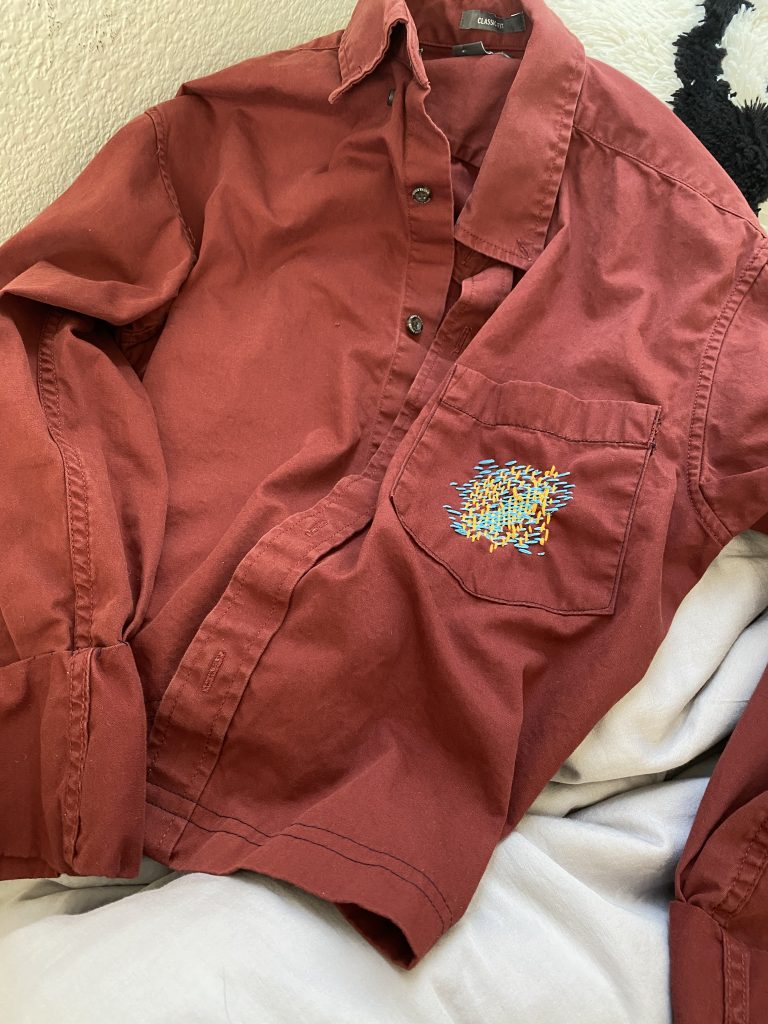
This is a piece of clothing I used to try out using a sewing machine during quarantine. On the pocket, I originally had a navy design that I attempted to make with the sewing machine, but I thought I was not satisfied with that design and thought it would be interesting to add some pops of color instead, continuing on with my introduction of altering clothes with this one jacket.
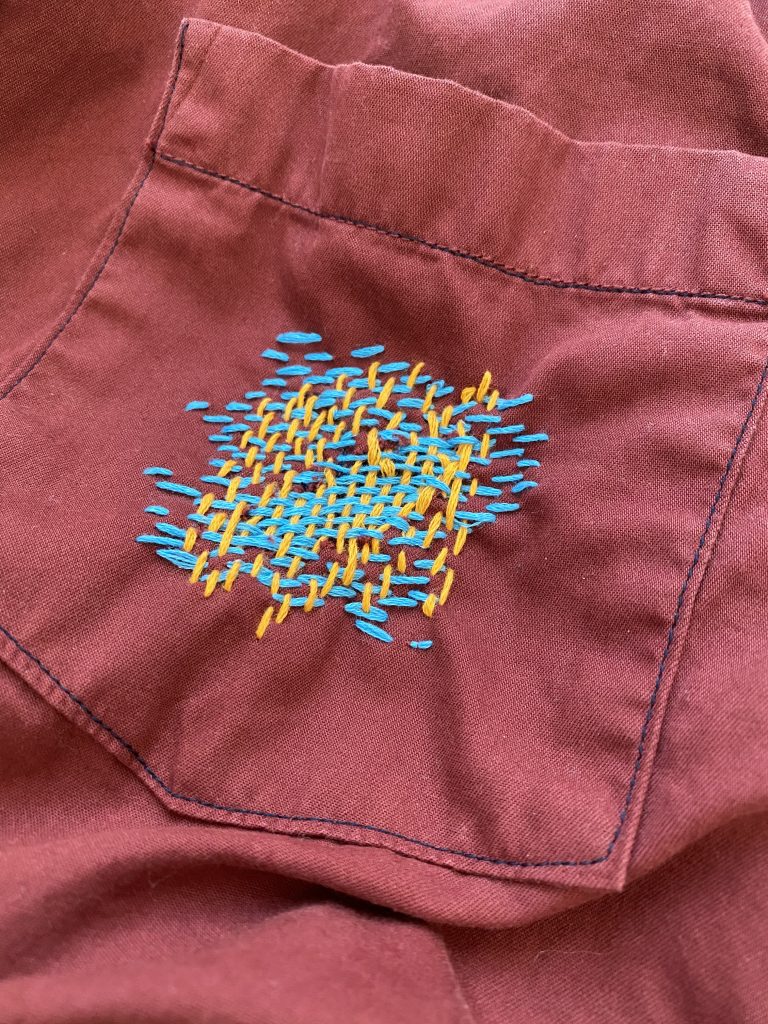
I decided to go for a primary palette to match with the burgundy cloth. I think I will continue experimenting by adding more threads along different areas of the clothing that are not as complete or satisfactory to me due to my lack of sewing experience and turn those little flaws into places of interest.
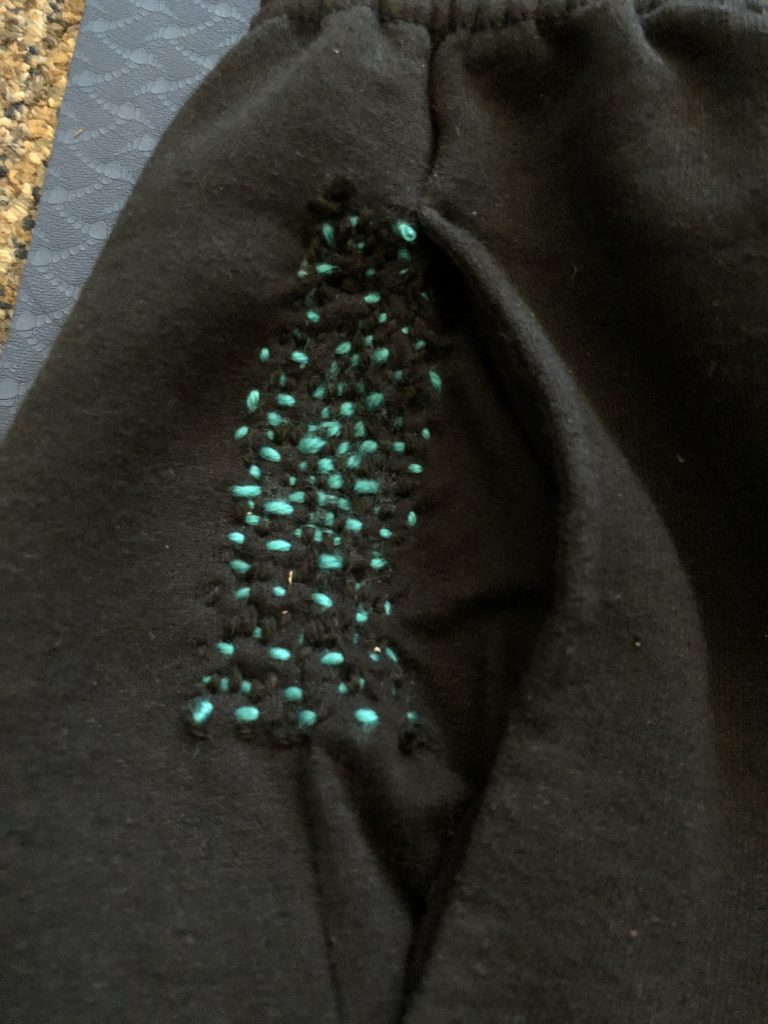
This was the first mending that I attempted with darning. I am using an old pair of sweatpants that I haven’t worn in a while because there were some preexisting holes in them. This hole was on the side right next to the pocket so it was a little bit hard to set up the darning with the pocket hanging over slightly. I used blue and black yarn to make the blue really pop while still looking somewhat cohesive with the fabric of the pants.
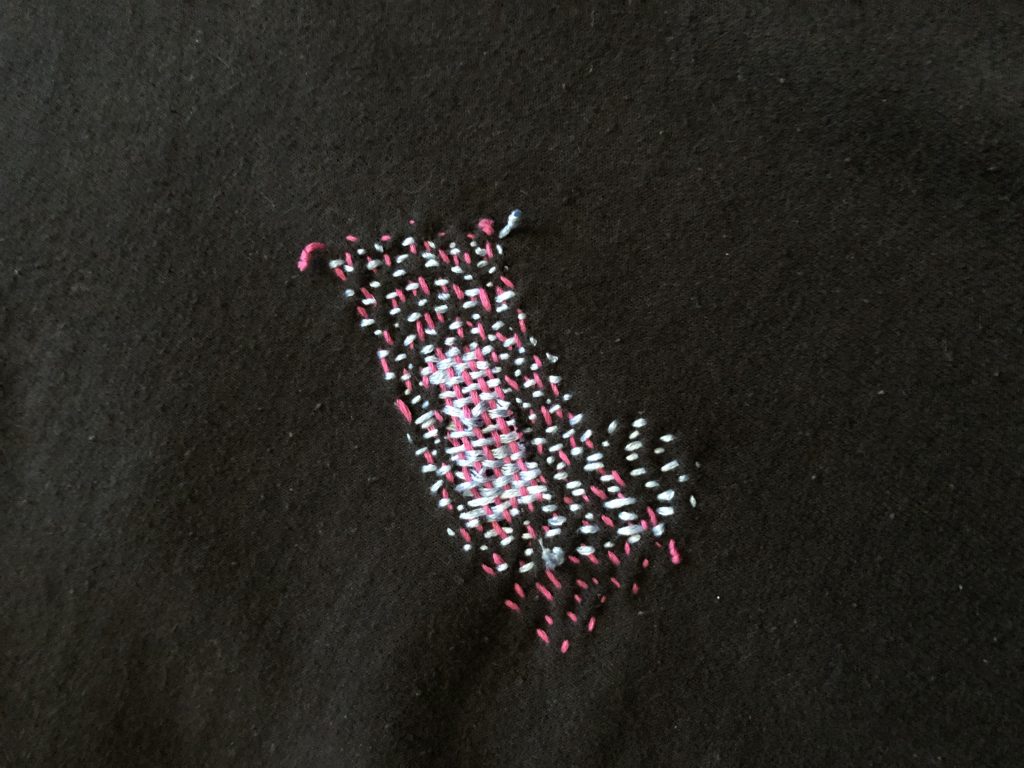
This was the second hole that I had on the pants. For this one, I used embroidery floss and meant to have a sort of abstract shape, but I’m not sure how I feel about it right now. I think that I may go back later and expand this shape with the blue. I liked using the embroidery floss more than the yarn because it is thinner and easier to pull through the thick fabric which made the darning as a whole look more delicate.
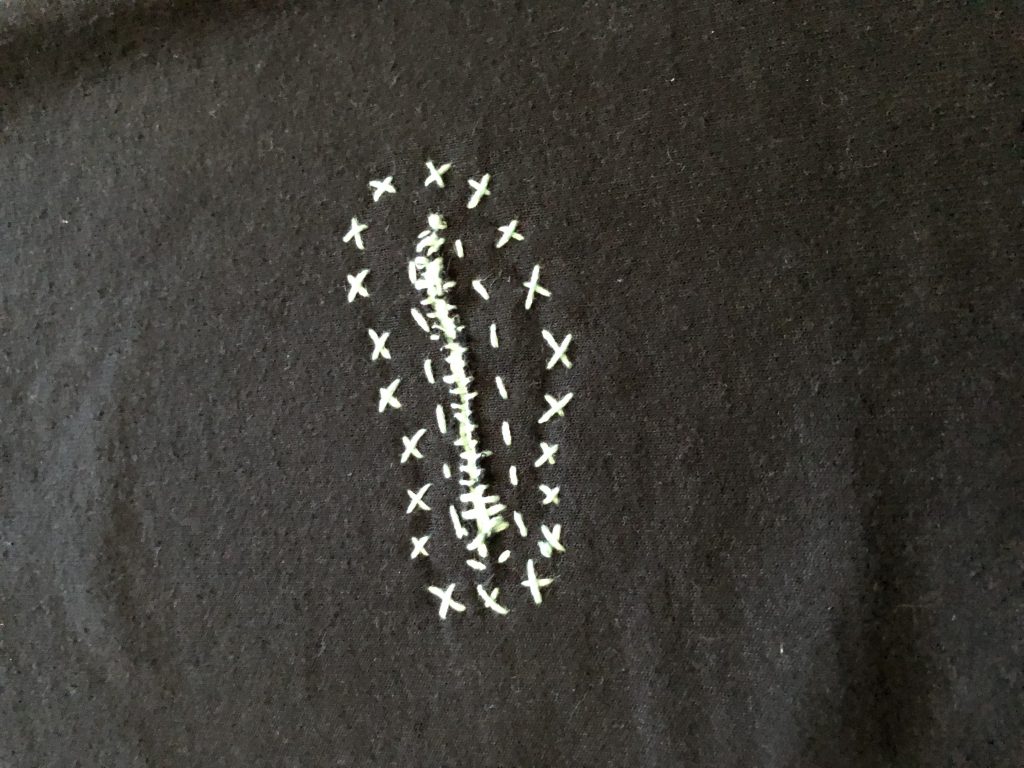
This was the third hole that I experimented with. For this one, I just cut a slit in the fabric so it wasn’t as large of a hole to cover. I tried to experiment with decorative embroidery using a single color and made X’s around the slit. Then I went in and did horizontal warping across the slit. It ended up looking kind of like a zipper, then once I went through in the opposite direction, it looked kind of like a spine which gave me spooky halloween vibes :)) To finish off the decoration I did a running stitch just outside the slit and inside the X’s.
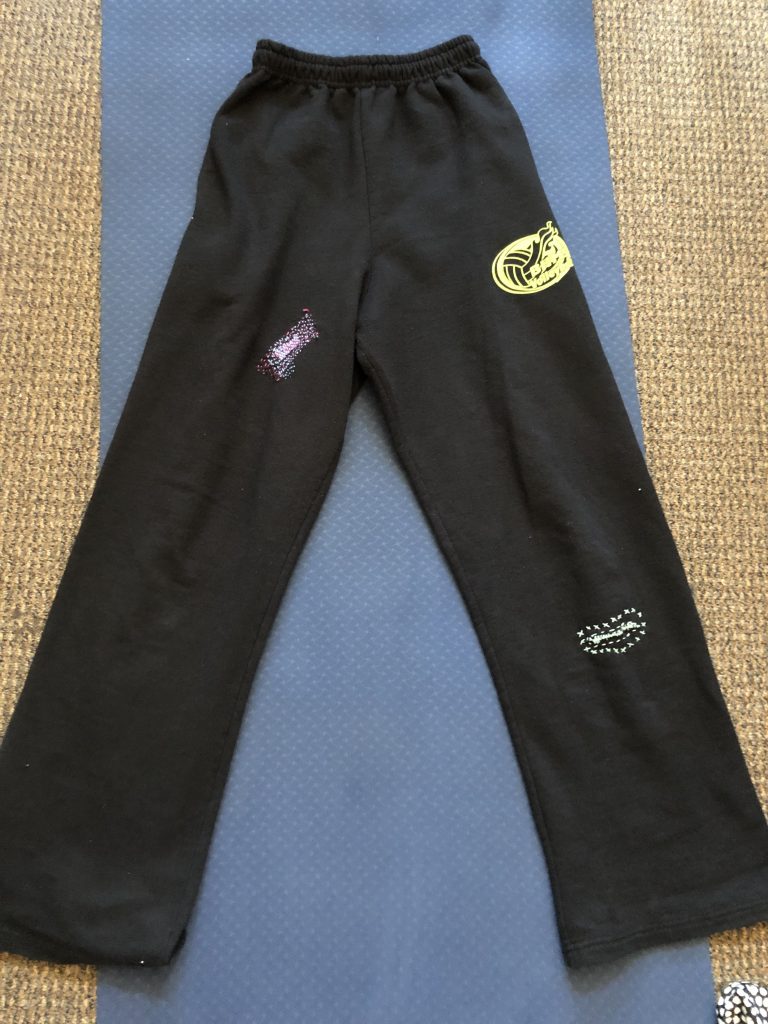
This is what the pants look like as a whole right now, the pocket mending is on the side so you can’t really see it in the image. Over the next few days, I think that I will try to make bigger darning patches for a nice visual effect and blend more bright colors in to give the pants more personality :))
My mending is of a couple holes I made in the mockup of a skirt I am making.
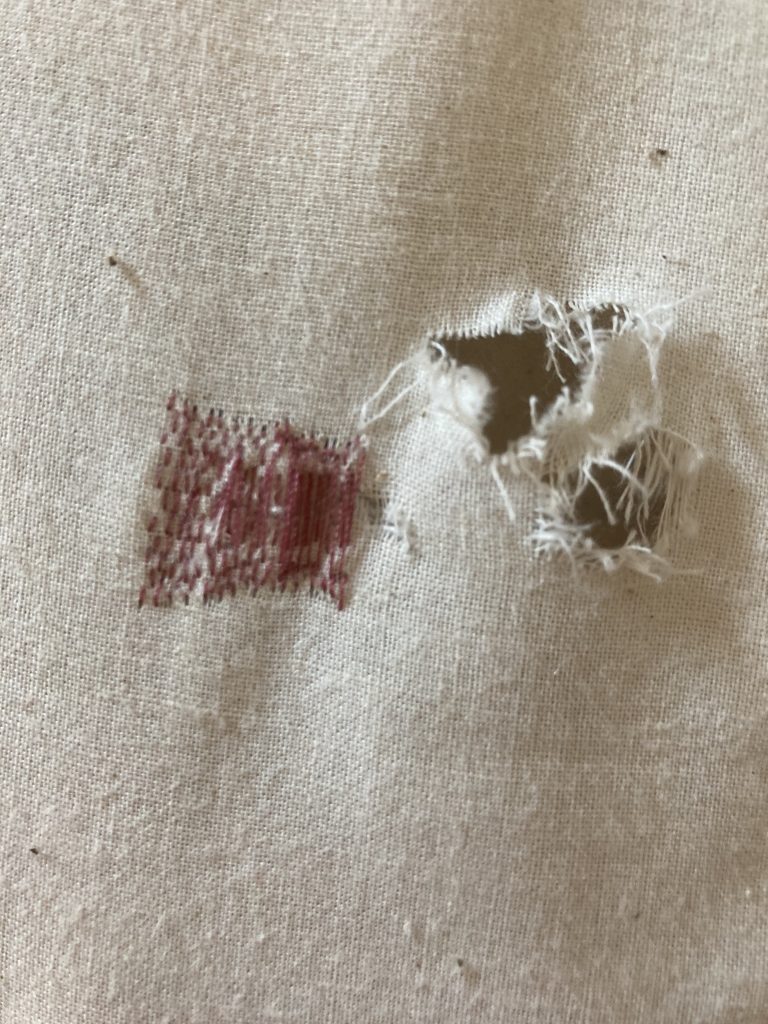
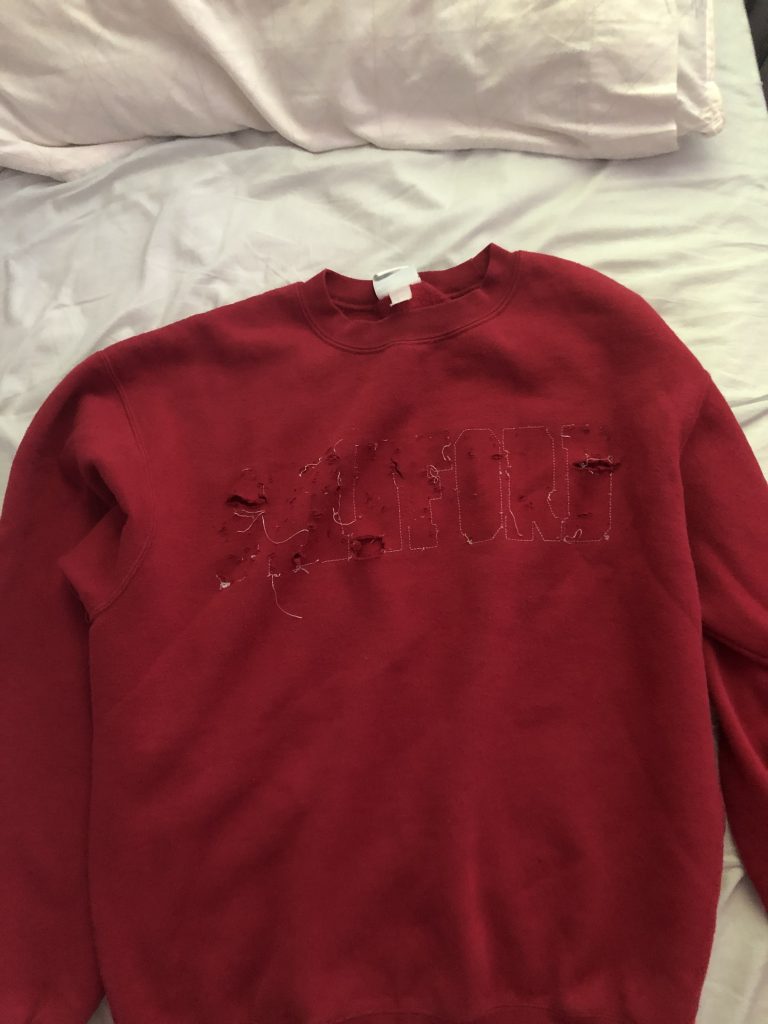
For this mending assignment, I chose to mend my boyfriend’s old Stanford sweater that he wore a lot in high school. When he came to CMU, he ended up roughly tearing off the letters with an x-acto knife, and left holes and a ghost remnant of what used to be. (He said it was because he liked the sweater but he did not want to represent Stanford while here.)
He hasn’t worn it in a while, so I thought maybe if I mend it and give it new meaning, it might be worthwhile. Instead of restoring the letters from before, what if I filled in some to spell out something else- I am leaning towards “SAD” right now, but maybe I could put in new letters.
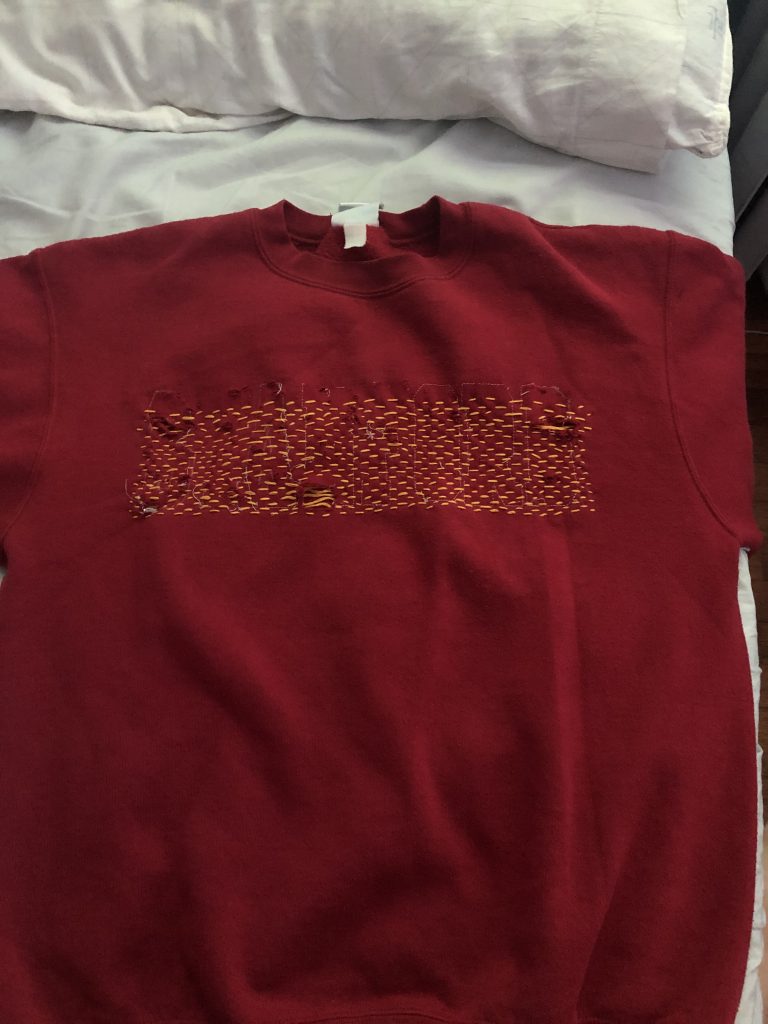
It took me a while to figure out what to do, but I decided to just take the pattern across the whole word horizontally, and only make vertical lines for the letters I want. I haven’t gotten there yet. It took around 4 hours just to lay the horizontal part across and I am still missing a little! (I ran out of that color of embroidery floss.) However, I am pretty happy with how it’s turning out, and how there now exists a lineage of alterations to this sweater with time and attitude.
I am inspired by Celia Pym’s sweater mending projects and how she transforms articles of clothing with darning. I went thrifting this past weekend for the most unassuming sweater I could find. I plan to cut various sized holes and embellish this brown/black knit sweater with bright and colorful woven patches.
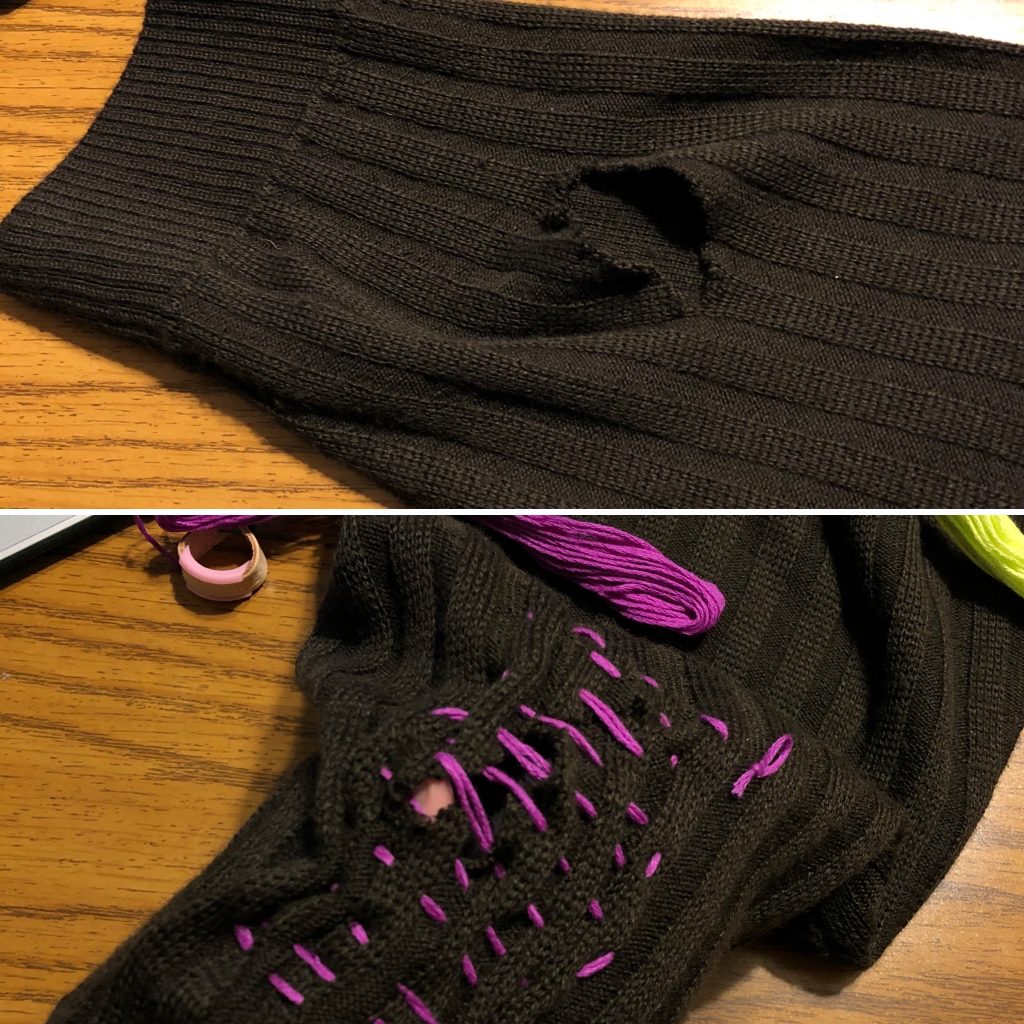
I cut a small hole on the sleeve to try darning out for the first time. The embroidery thread worked well with the sweater fabric. To avoid sewing the back of the sweater, I put a mason jar in the sleeve to hold the shape.
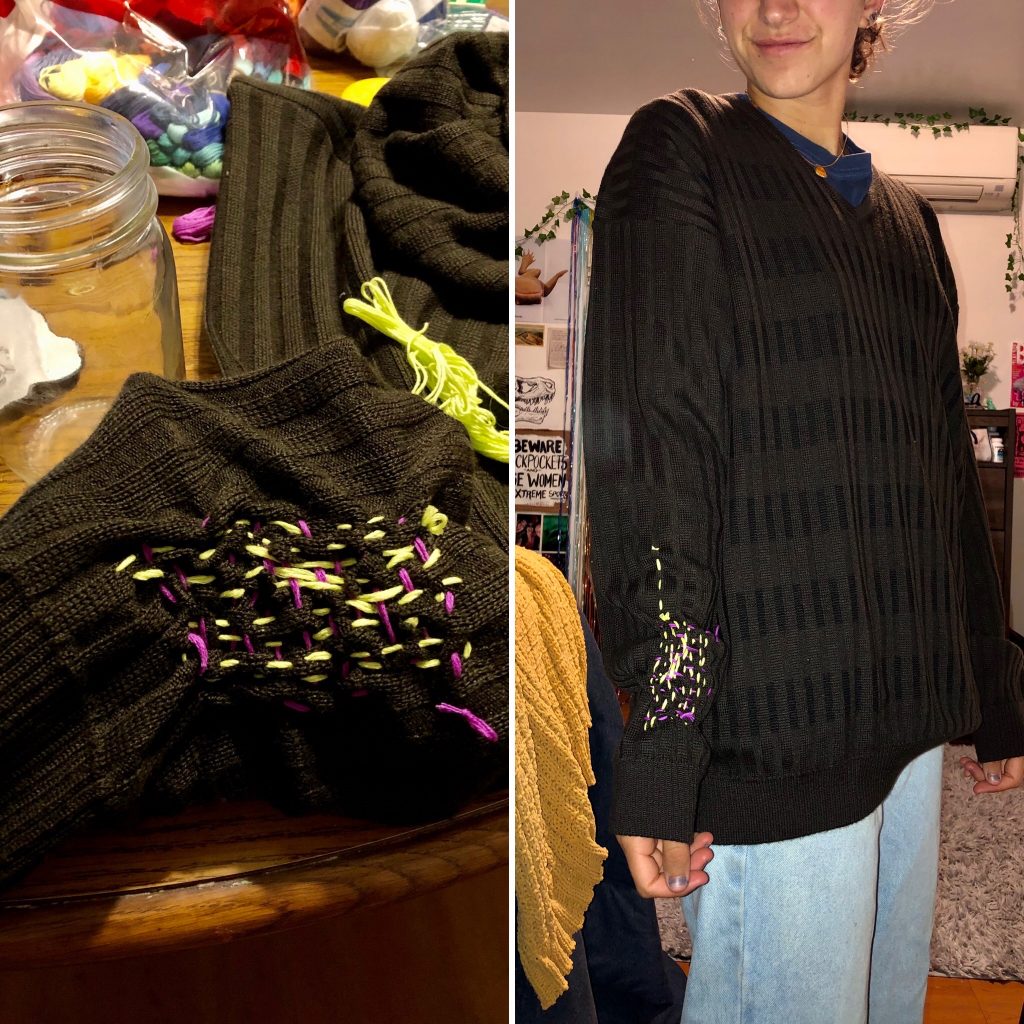
I definitely want to experiment with making the weaving section more visible for other patches, but I think that will be size dependent. I’m excited to see how I can continue to turn this sweater into a unique, expressive, and wearable piece.
I chose to spend time getting comfortable with embroidery on fabrics over the weekend, and experimented with many pieces of my clothing for embroidering techniques. For my larger embroidery/mending project, I chose to spice up my old pair of party jeans. These were my jeans that I would wear out a lot, and they have been to many concert/parties/gatherings with me. It’s been really hard to cope without the types of interactions I am used to, and it has been really damaging my mental health. Because of that, I decided to add some beauty to the pair of jeans that I miss wearing the most. I decided to add a sunflower because flowers and natural patterns remind me of the hope in life. Also, they remind me of my dogs at home, both of which have helped me get through every setback in life. This photo is an in-progress photo, but I like how the flower is turning out so far!

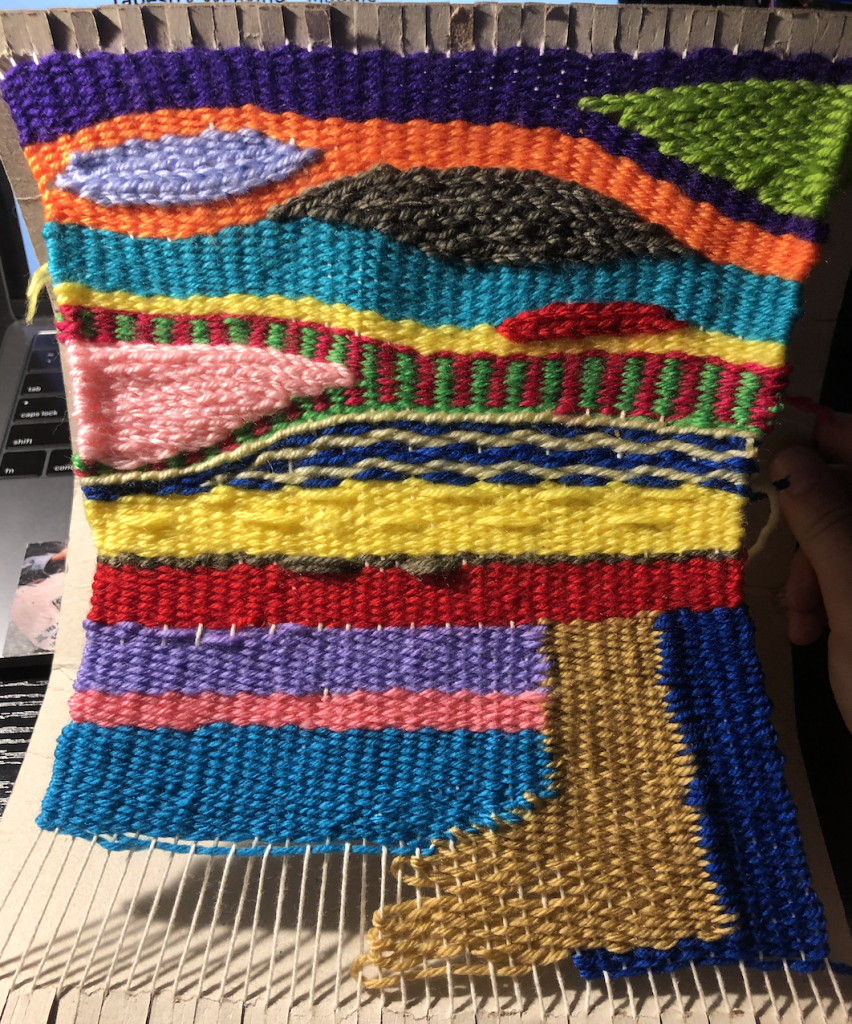
I also am finishing up my second tapestry, and I plan on embroidering brightly colored tree leaves over the flat piece I have right now. The flat part is pictured below:
I chose a pair of ripped jeans as my item to mend for this assignment. It was a somewhat ironic choice, as they were meant to be ripped in their original form anyway.

While the horizontal rip in the jeans were intentional, and were already there when I received them, the long gash on the left was unintentional and was created when I jammed my foot into the leg-hole. This caused a hanging corner on the knee of my jeans, unfolding and swinging around as I wore it. I decided to try and mend the rip using white and blue embroidery thread.

I sewed around the area of the gash to keep the loose threads in place, and then I created new weft threads with the white embroidery floss. I was able to weave these through the long hanging loose threads on the bottom of the gash, trying to blend the new thread with the old. I initially started with a plain vertical and horizontal weave, trying to just stabilize the fabric from ripping further.
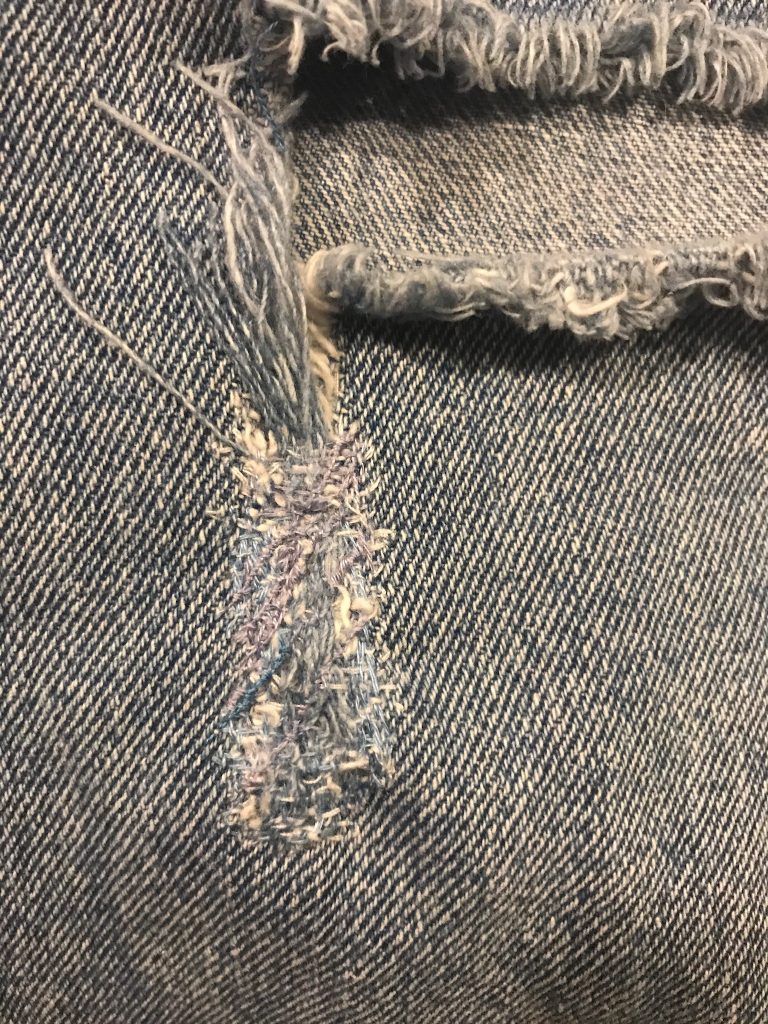
After the denim felt stable enough, I decided to try pattern matching the mended area into the rest of the jeans. However, this wasn’t too successful due to not being able to match the mechanical lines of the jeans’ original weave, and due to the color differences in the threads that I had. I tried to lessen this by mixing two different types of blue, however it is still not quite successful. I do think it’s interesting to see the handsewn patch against the rigid order of the rest of the fabric. It almost seems like a whimsical patch of sky, with the interwoven white and blue strands. What’s also interesting to think about is that even if I mended the entirety of the hole in these jeans with this same method, I think they would still be called “ripped jeans.”