Printing with HP Designjet T120
We have access to using the HP Designjet T120 for printing large patterns. Below are a few tips for using it.
Download the HP Designjet T120 printer driver to your computer and add the HP Designjet Printer to your printer list.
If it is low on ink or paper, please let Olivia know or email help@ideate.cmu.edu .
How to enlarge an image and print it on the paper roll using Adobe Acrobat:
- Open your image in Adobe Acrobat.
- Select ‘Print’ from the tool bar or by key command.
- On the print dialogue window do the following:
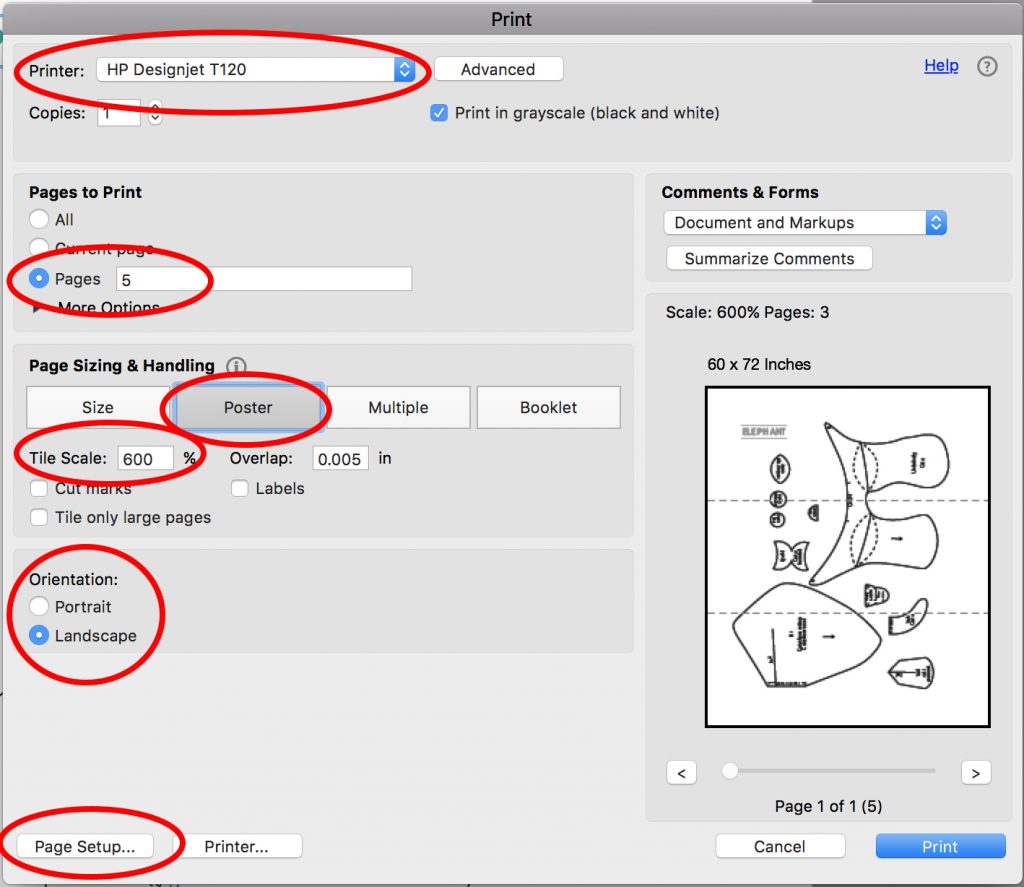
- For the Printer, select “HP Designjet T120”. If it is not there, make sure to add it as a printer and install the drivers for it.
- Select the Page or Pages you want to print.
- Select “Poster” under Page Sizing & Handling
- Select the “Tile Scale” for how large you want to print your image.
- Try out the different Orientations (“Portrait” and “Landscape”) to see which would print better.
- Click on “Page Setup…”
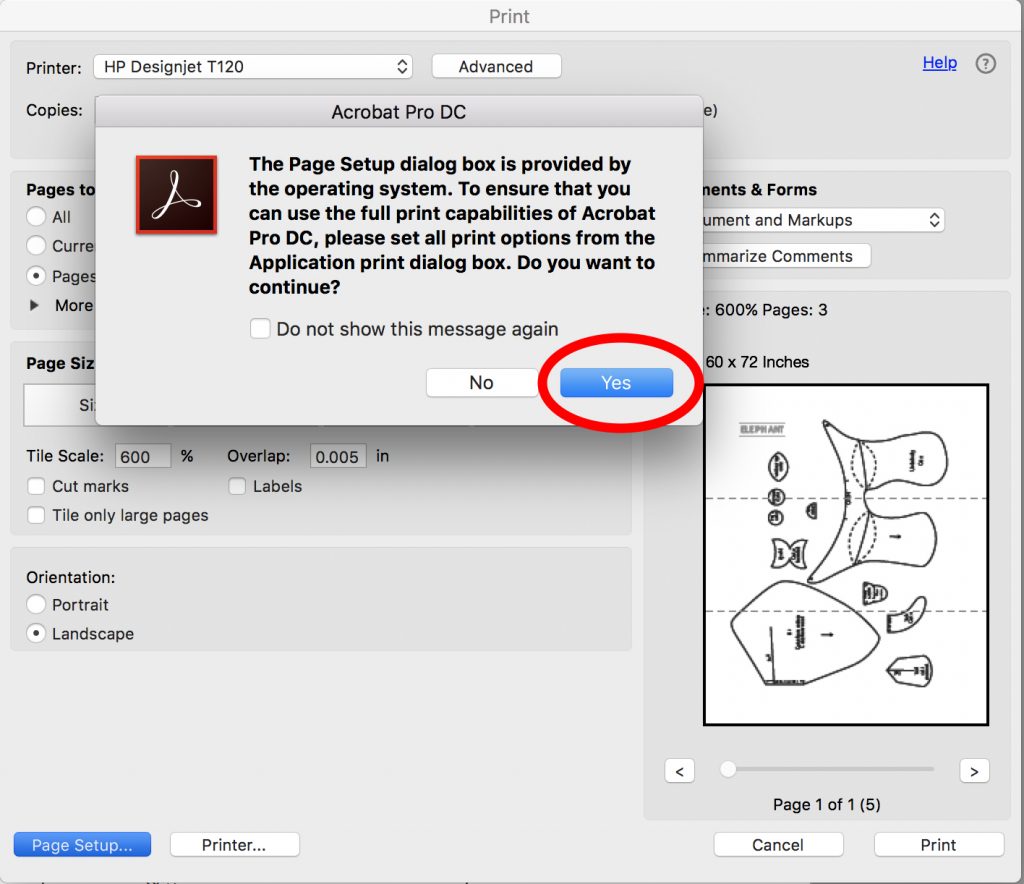
- If the above dialogue box appears, hit “yes”
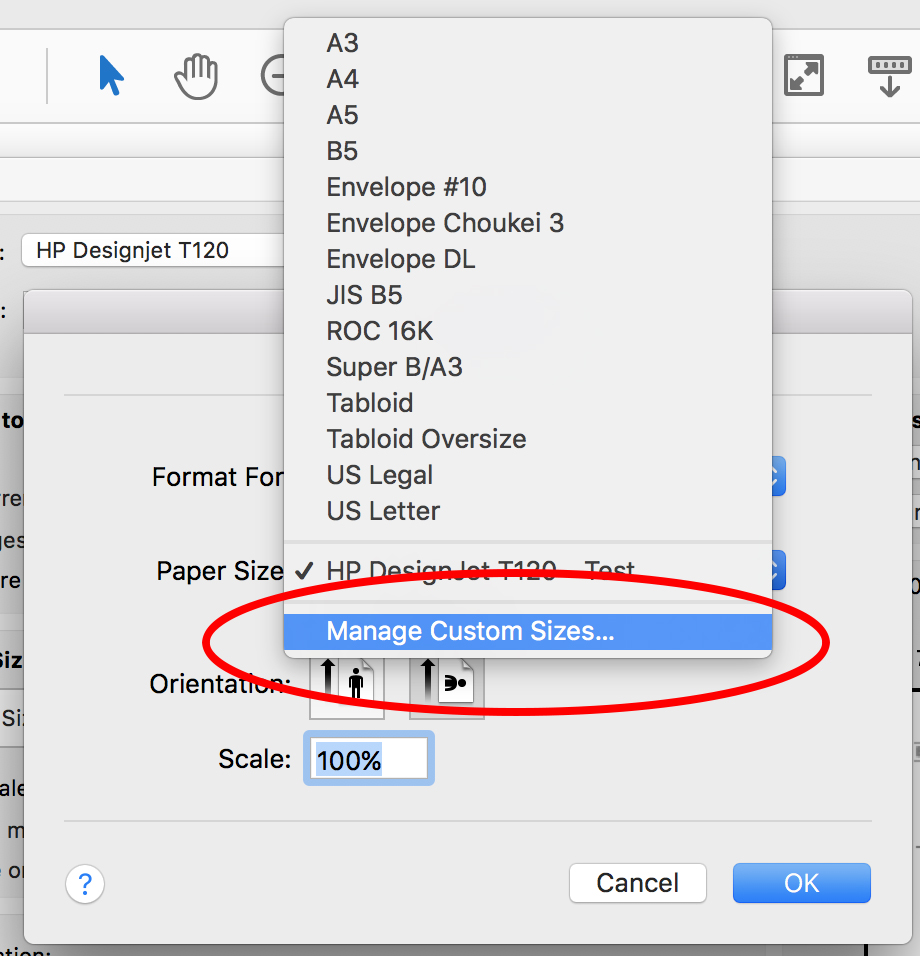
- On the Page Setup dialogue box select “Manage Custom Sizes…” on the Paper Size pull-down menu.
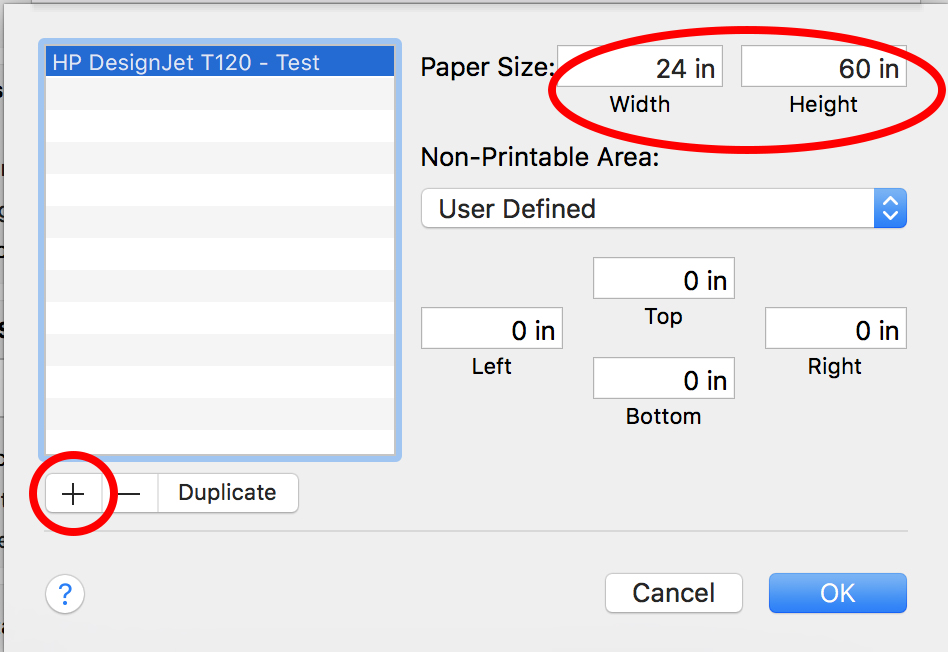
- Create a new preset if you haven’t already made one for this plotter. Do this by selecting the “+” sign.
- For this preset, make sure the Paper Size Width is “24 in”.
- The Paper Size Height will change depending on how long the paper needs to be for your print. How long does that paper need to be? Put in that number in the Height box and then hit OK to update this preset.
- Back at the original print dialogue box, go between the Orientation and the Page Setup (changing the Paper Size Height) until the preview of your print looks correct.