This project explores the relationship between color, size, shape, and volume through the making of three improvised inflatables. They are meant to be quirky and usual — Tracy Zhang
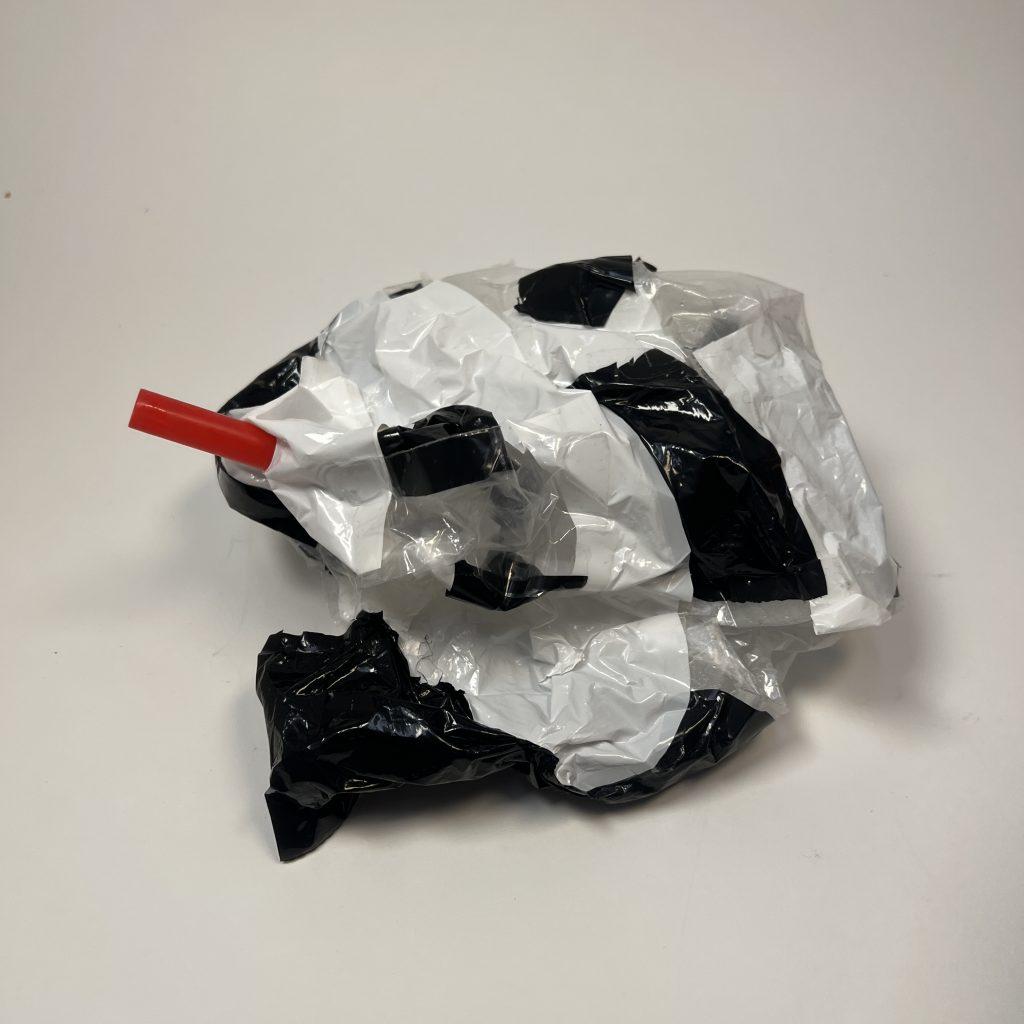
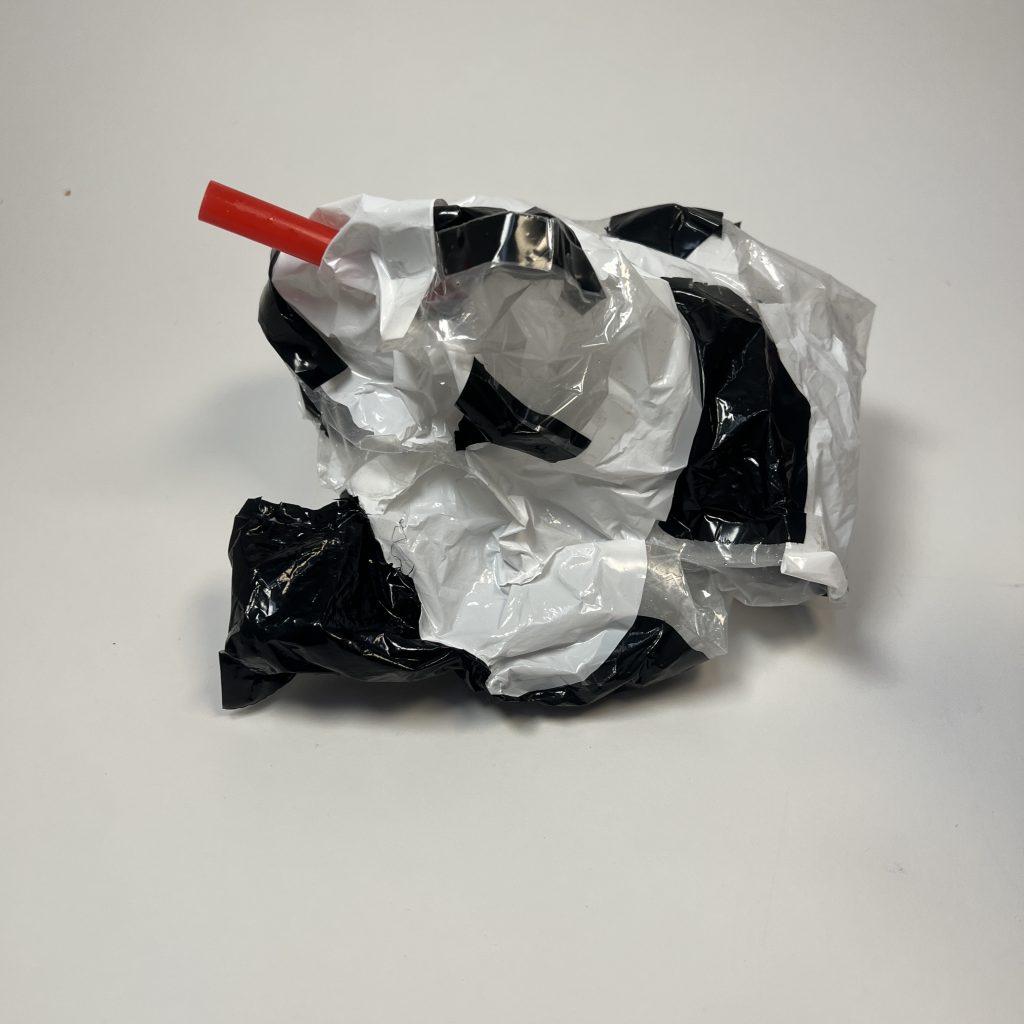
Inflatable #1:
The first was made from random shapes cut out of white, black, and clear plastic bags. To keep the clear quality of the material, I used clear double side tape, which introduced too many holes that failed to seal the air and inflate the form. The other difficulty of working with double-sided tape is that it often sticks onto other parts and eventually rips and stretches the form when trying to inflate again from its deflated form. Nevertheless, I persevered with the triangular character of the edge of the plastic bag when assembling the colored patches in an alternated fashion. Unfortunately, the air did not end up reaching into the little pockets of the irregular shapes.
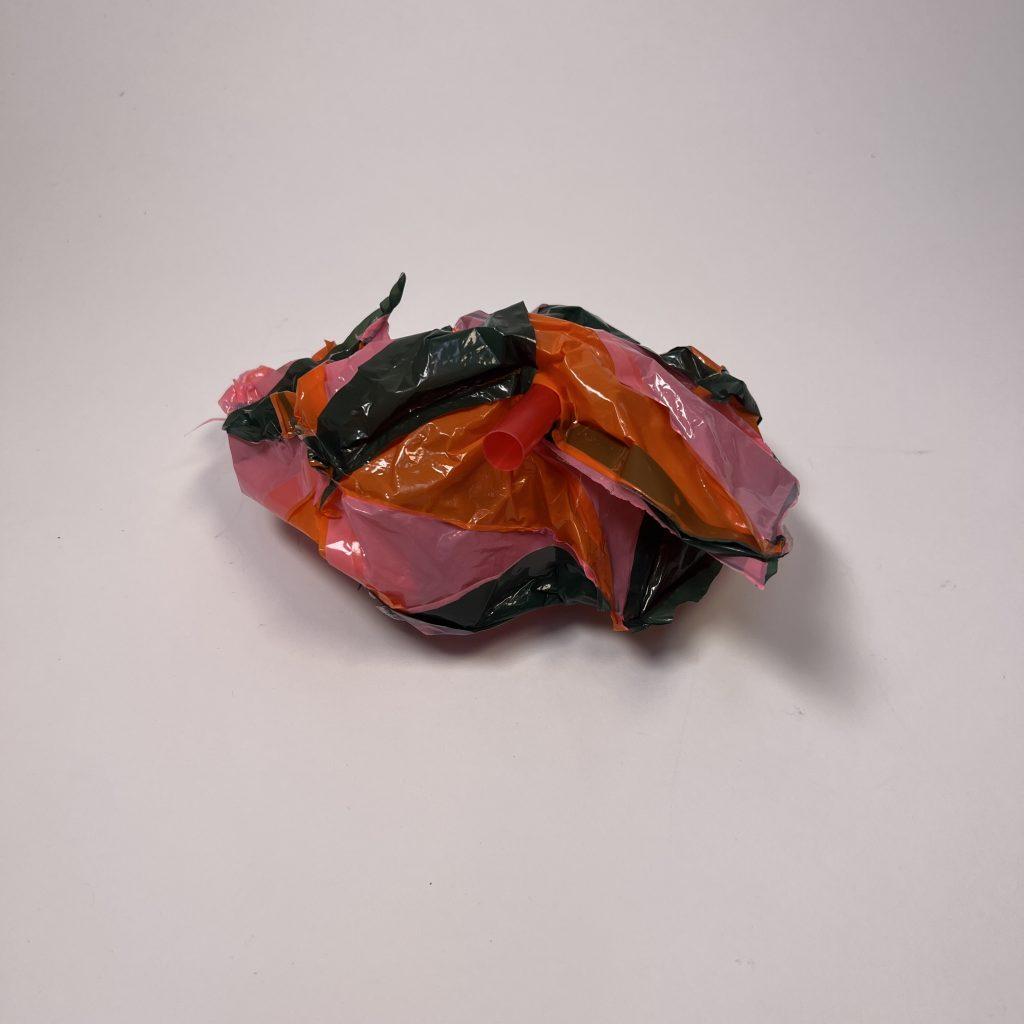
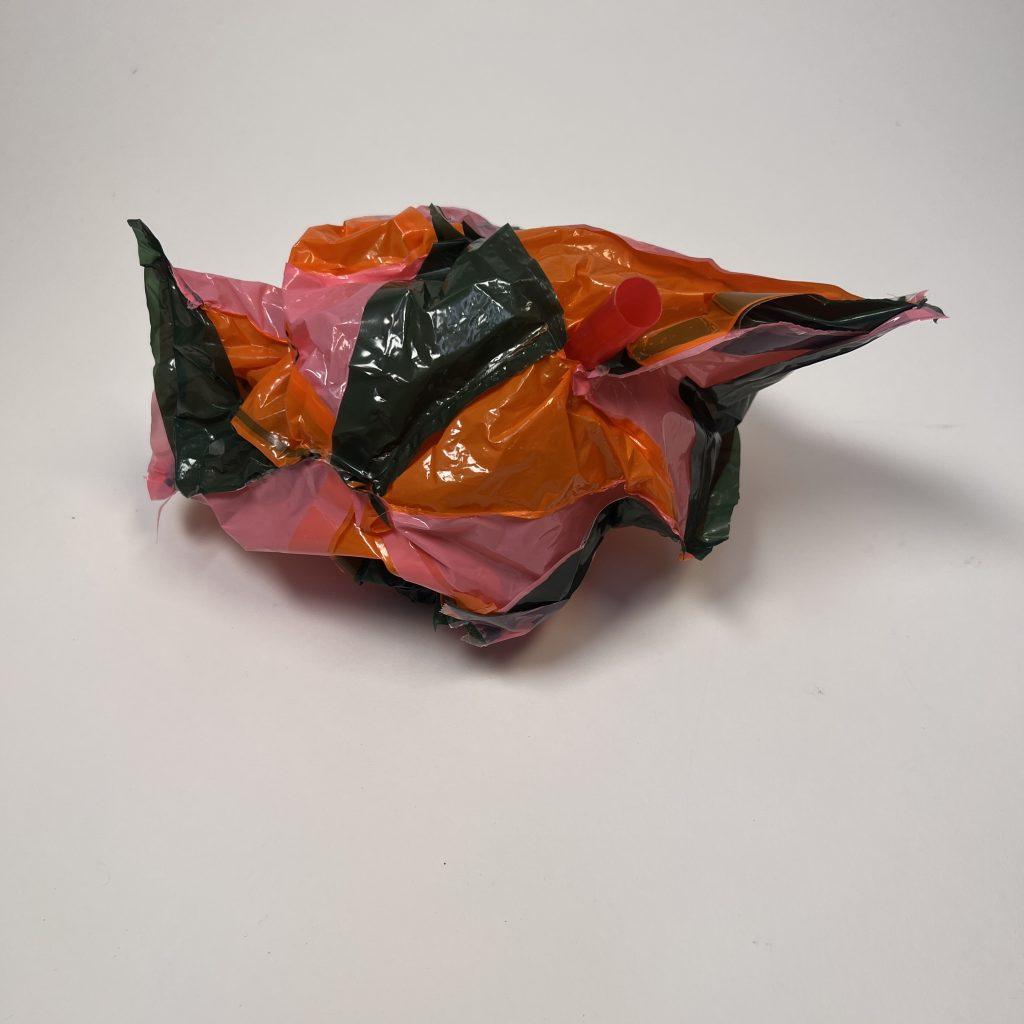
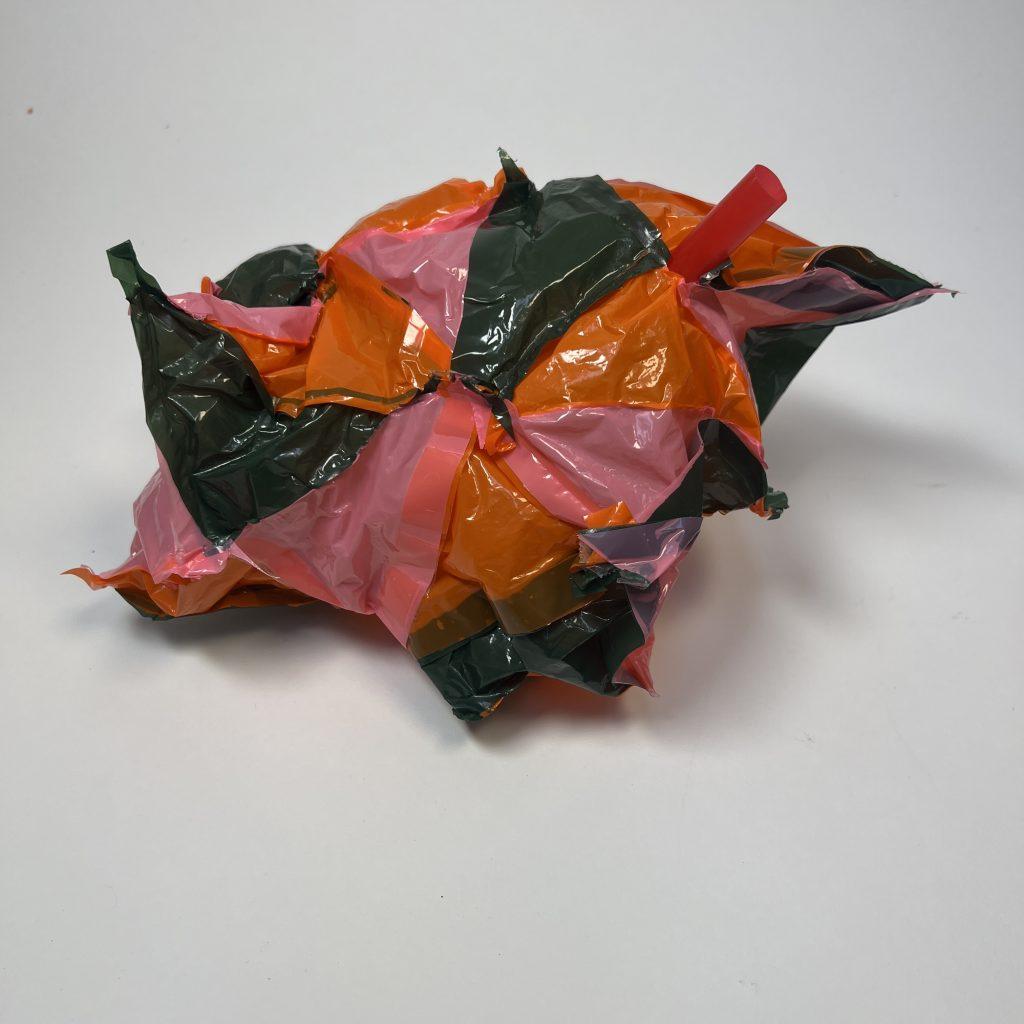
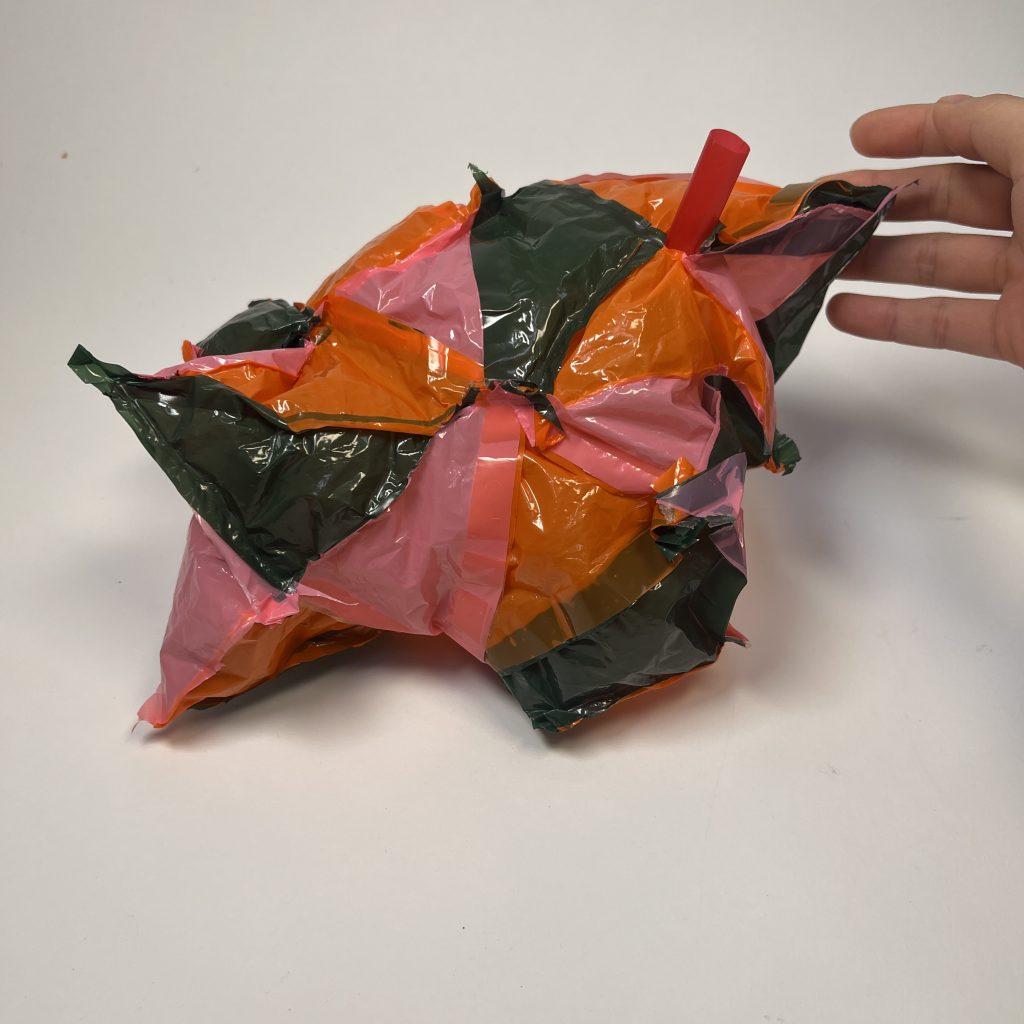
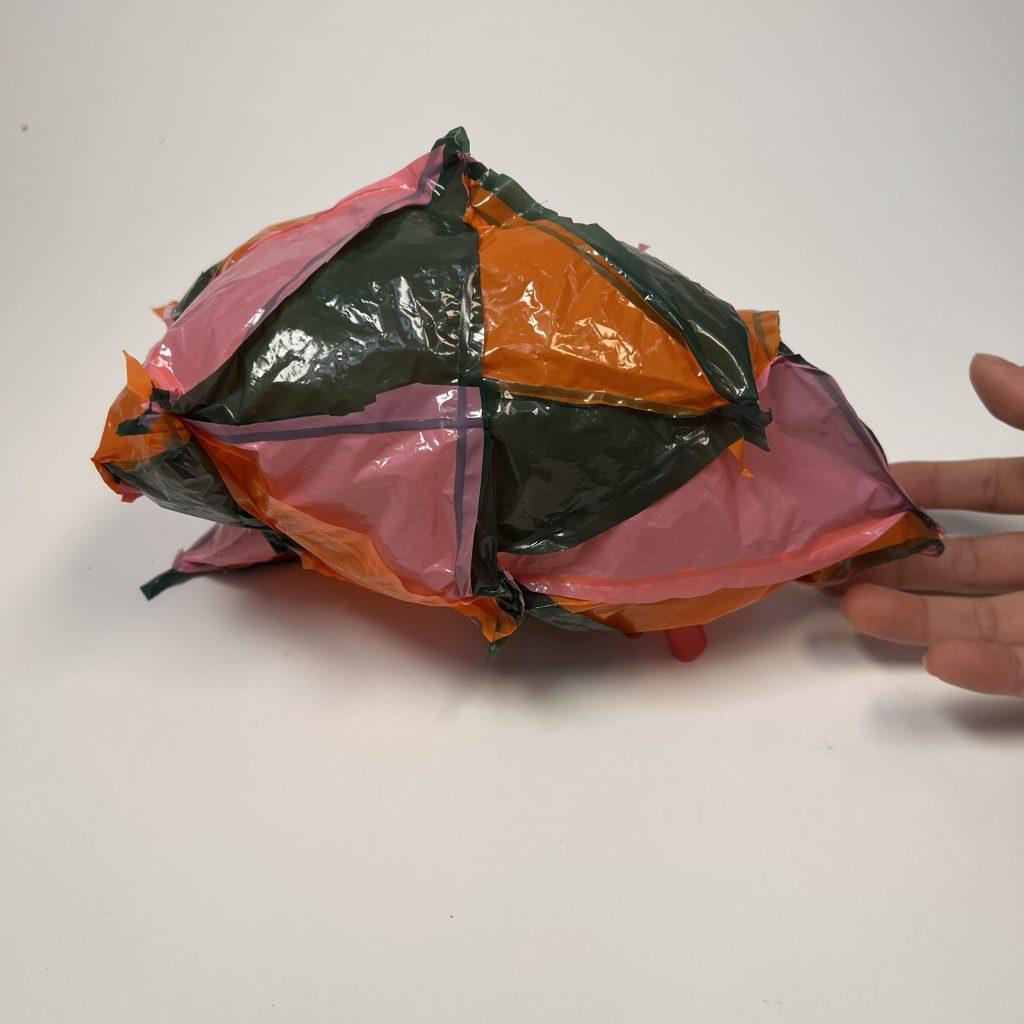
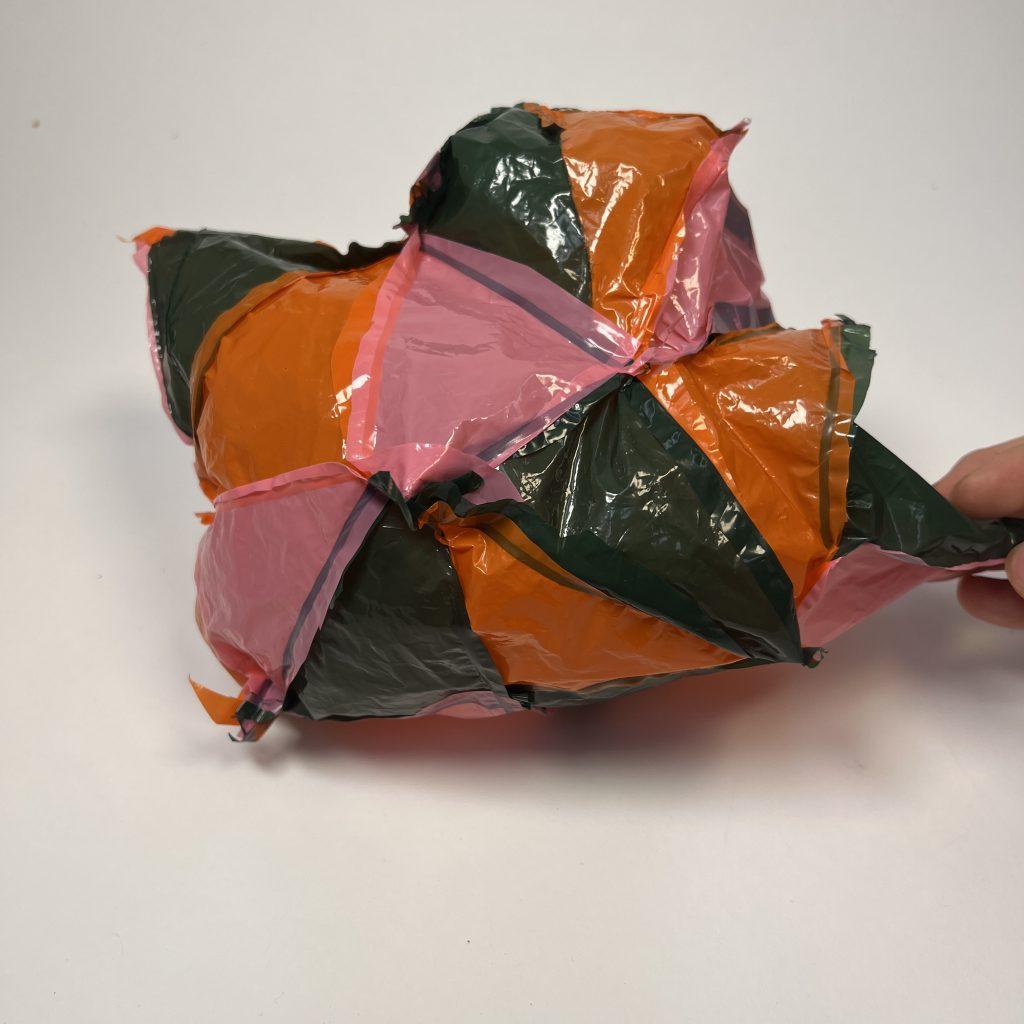
Inflatable #2:
Learning from the last failed attempt to create a seamless connection, an alternate tool, a heat seal, was used to ensure air capture. The concept of this one is to utilize the unique qualities of triangles to ‘mesh’ a 3D shape. I choose pink, orange, and green to create a contrasting palette. Making this one is the most methodical: first cut triangles that approximately fit to be later trimmed or extended when assembling. Like the last one, I tried to alternate the color so it would be more engaging to look at. This one ended up being my favorite one due to its roundness of the seemly sharp deflated form.
Inflatable #3:
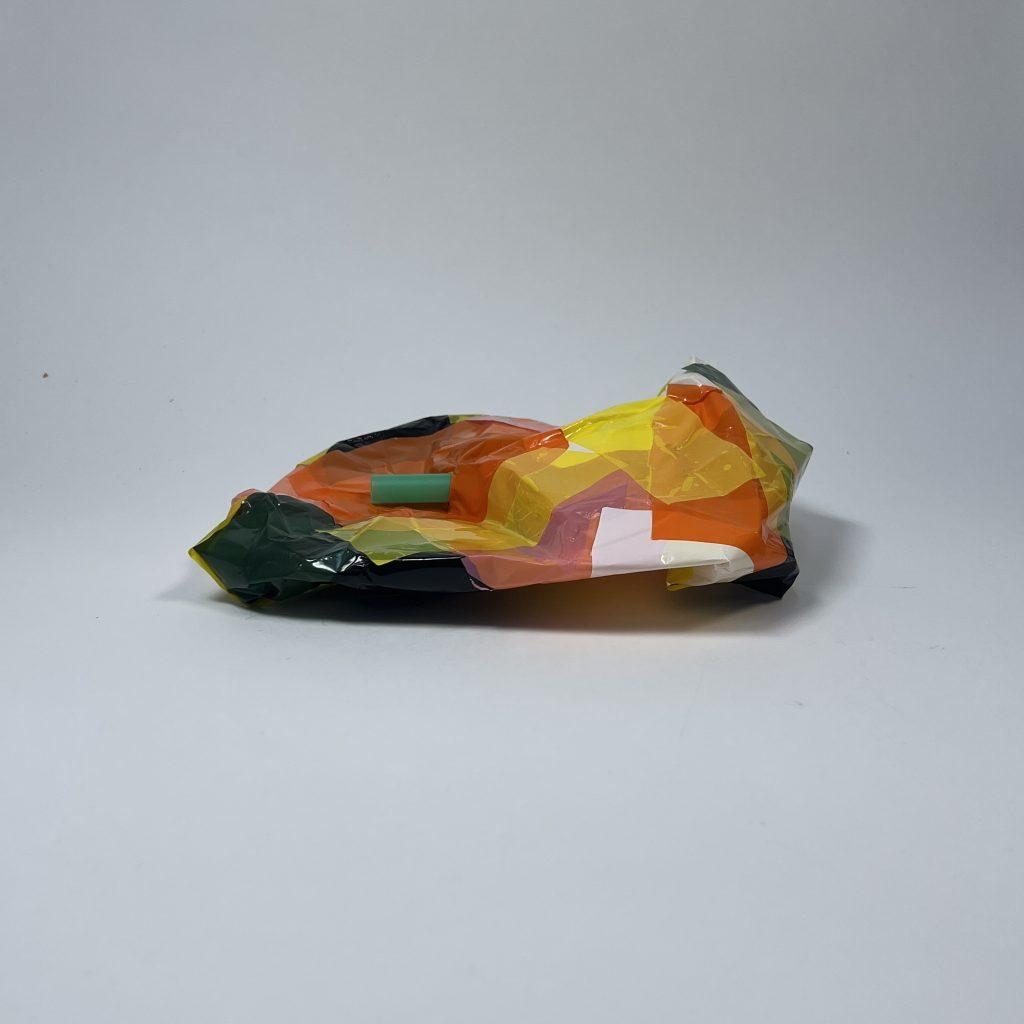
For the last one, I choose to use yellow tape visible on the outside to connect the pieces. This one was made from all the recycled scraps from the previous two. Thus you can sense a similar color palette. When the form is inflated, the yellow tape almost becomes another media other than just sealing but providing structure and the unexpected edge and ridges to the appearance. Such quality bounded the shape unexpectedly, turning this one into the most regular inflatable of three, although it was made of organic scraps.
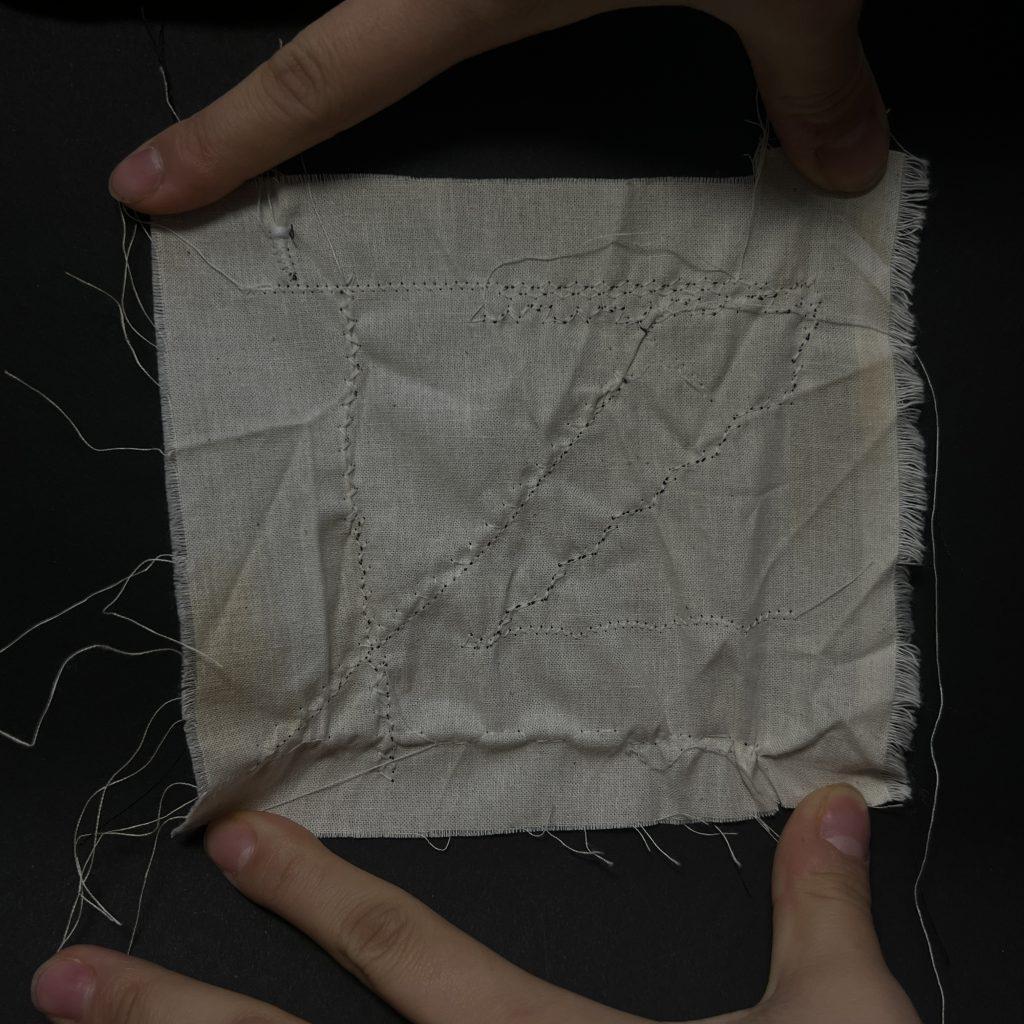
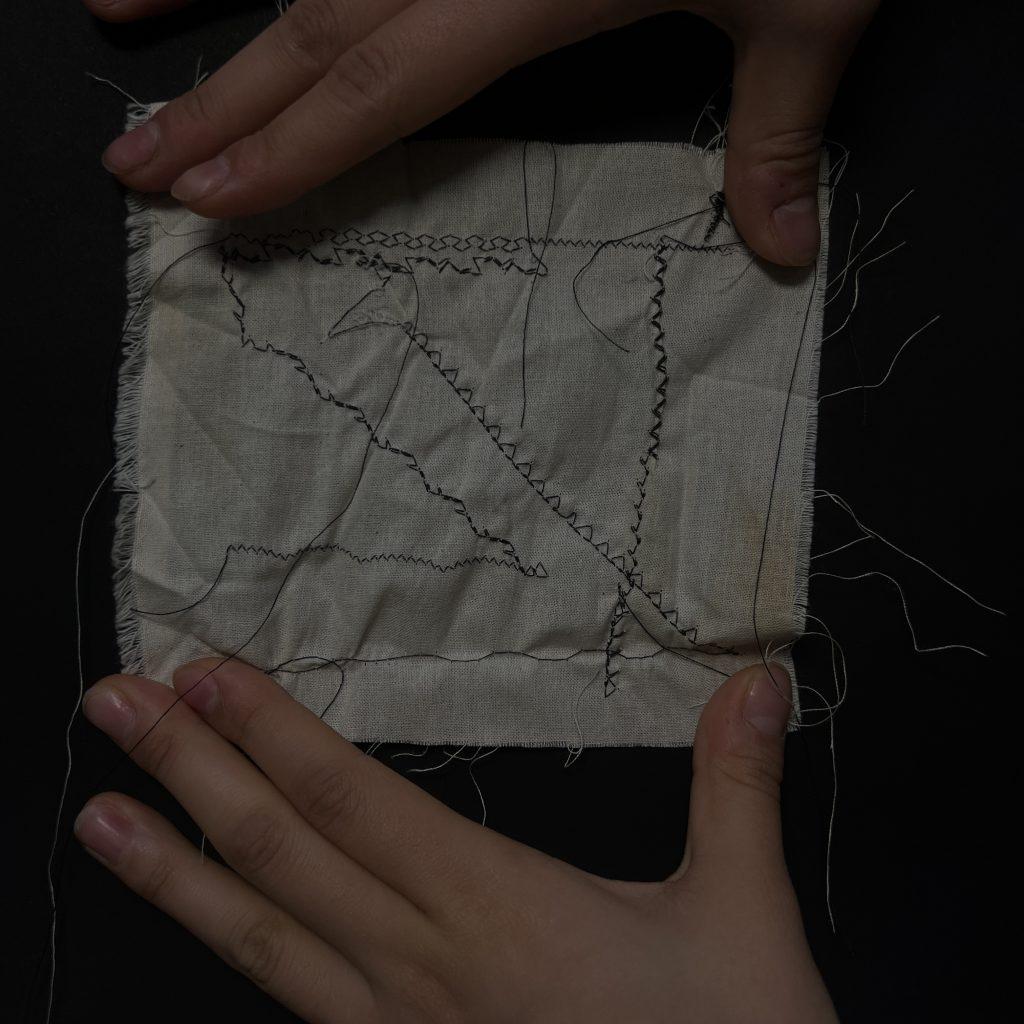
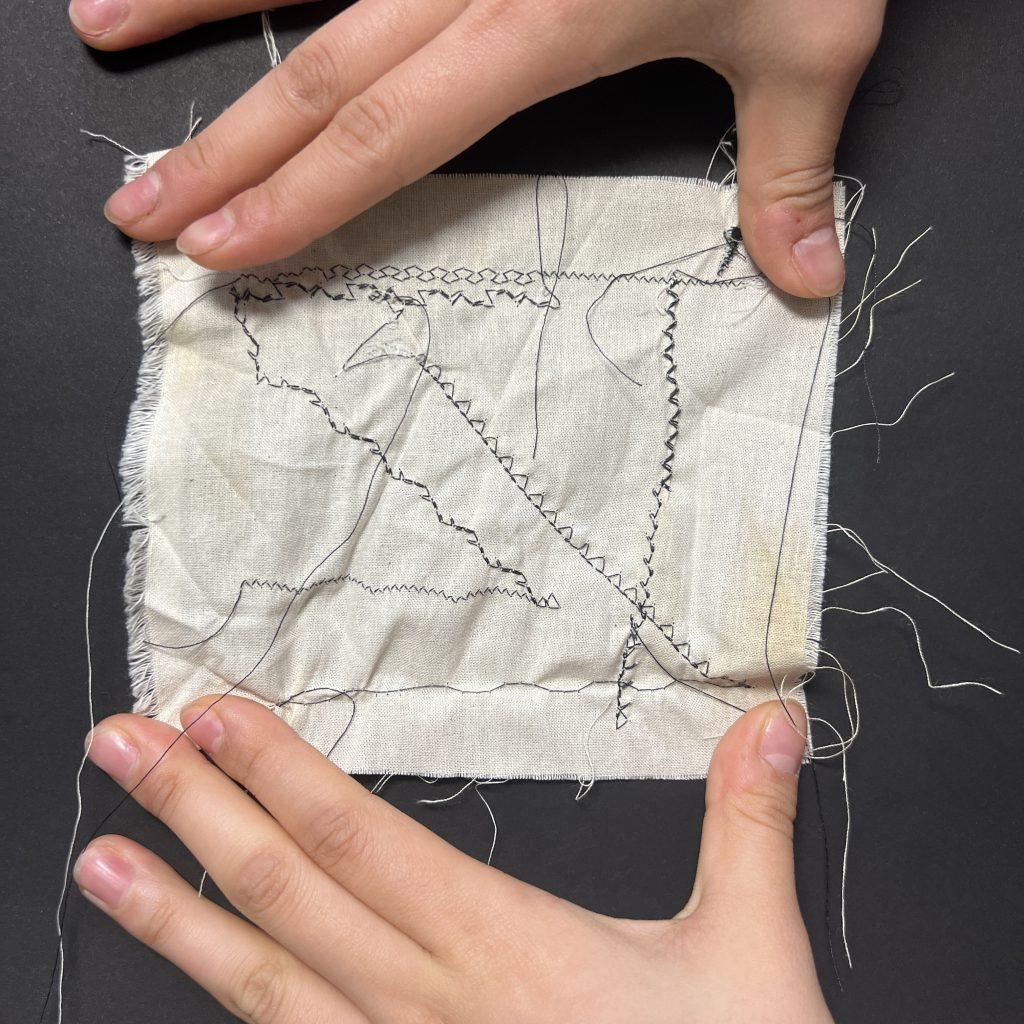
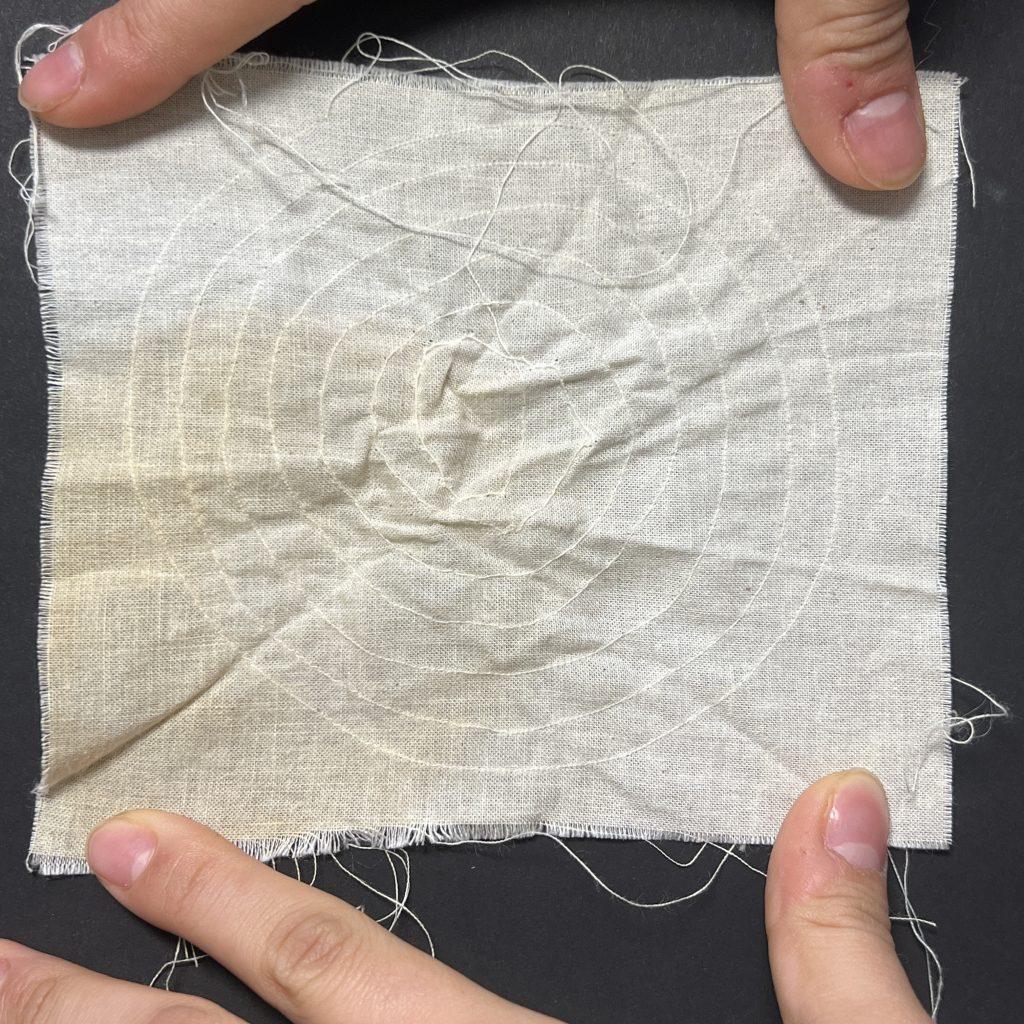
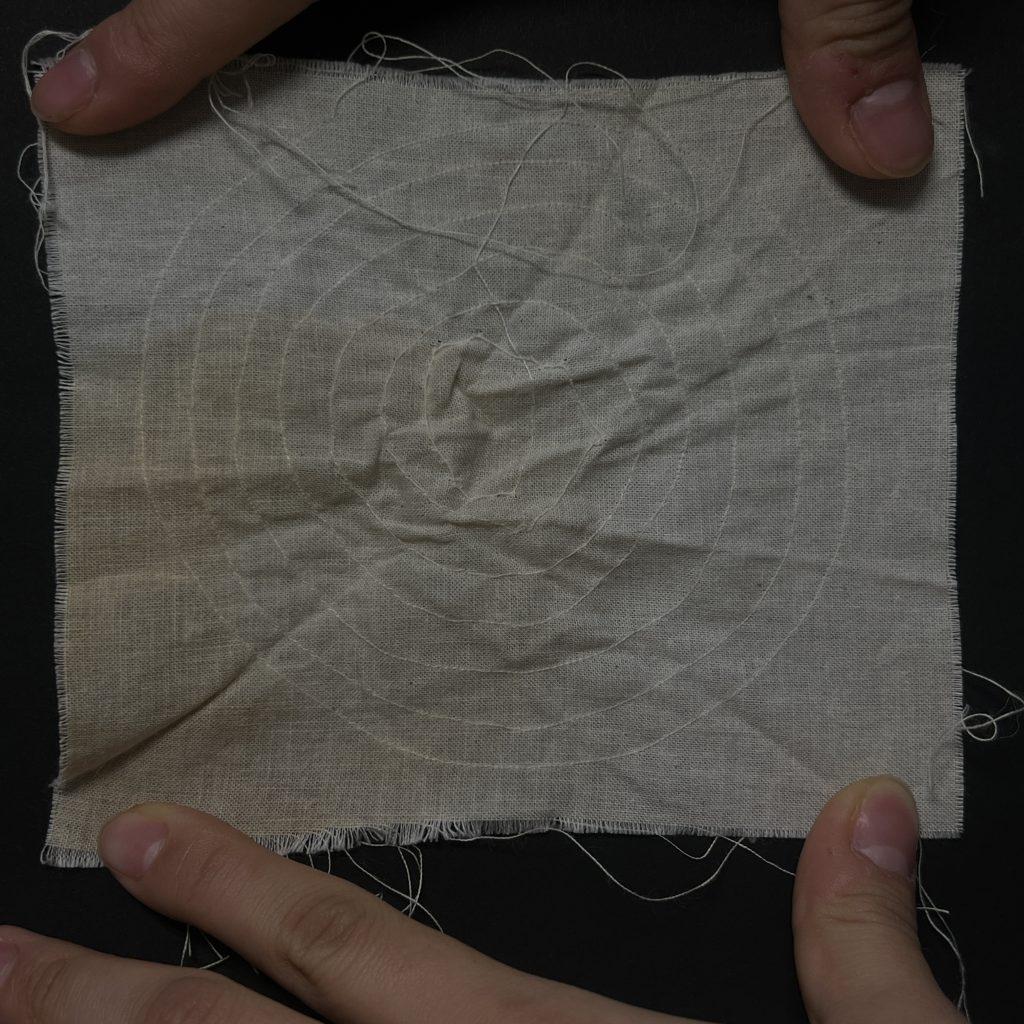
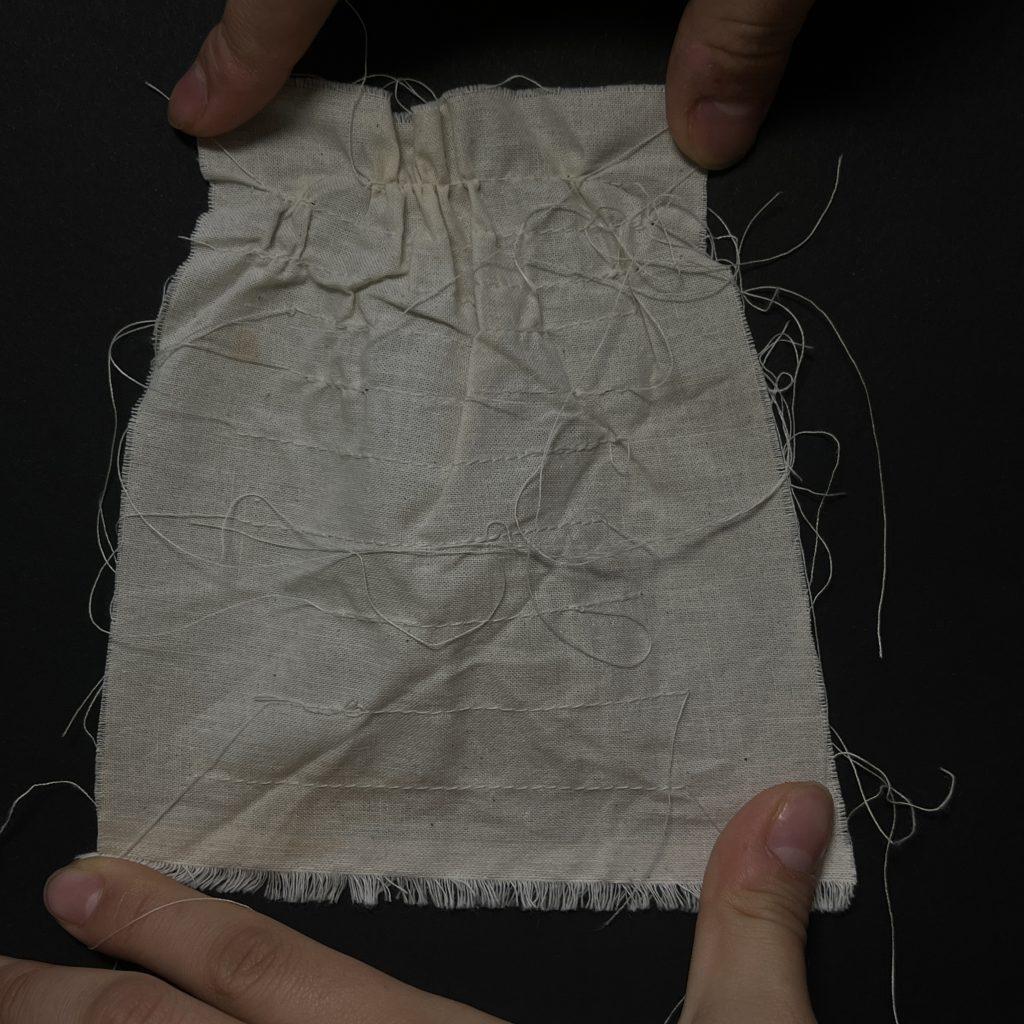
Sewing Sam
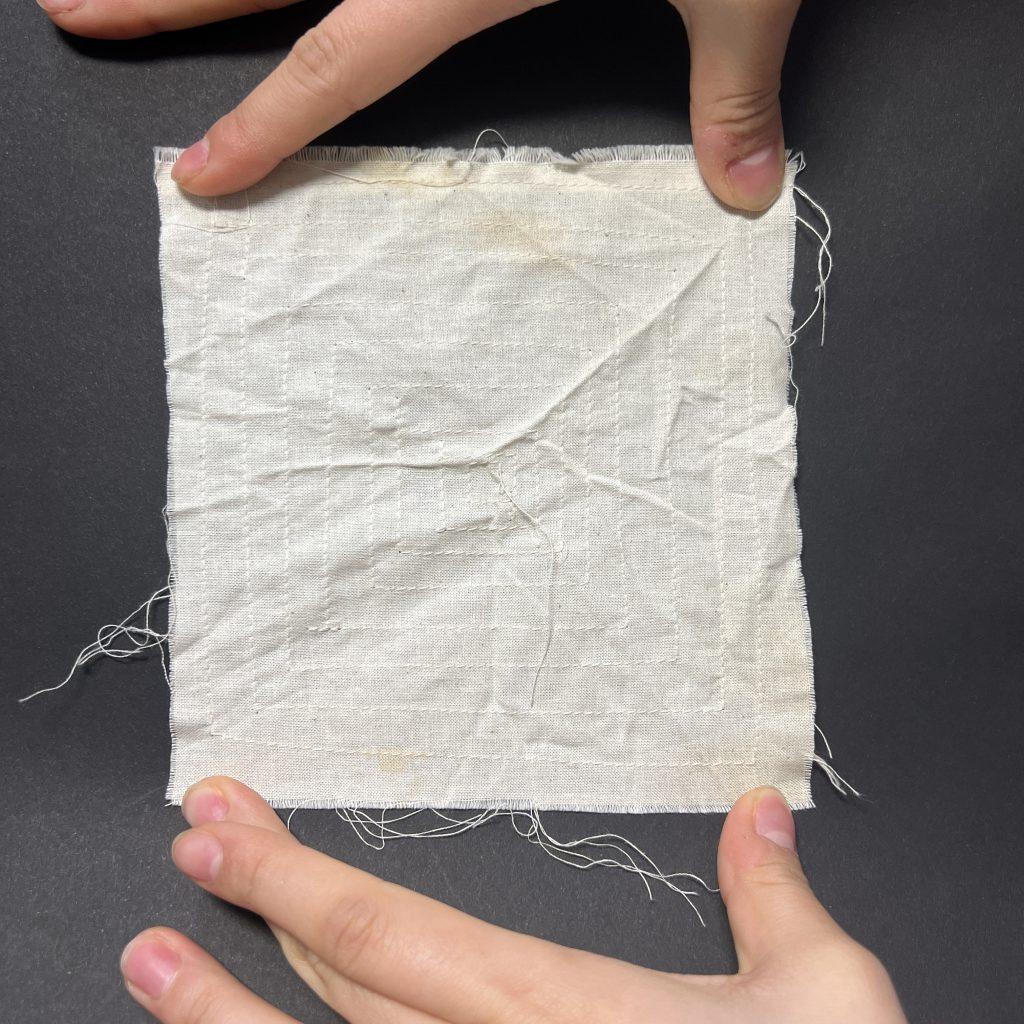
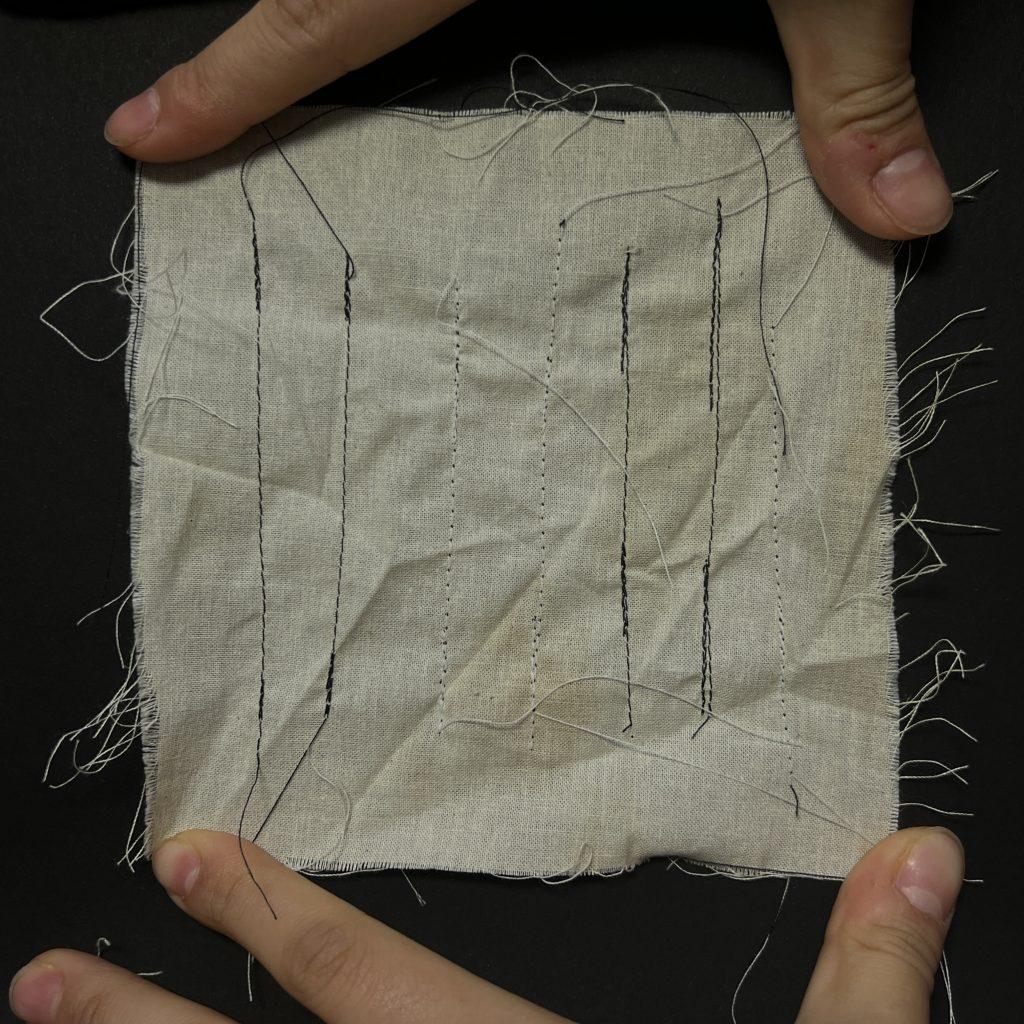
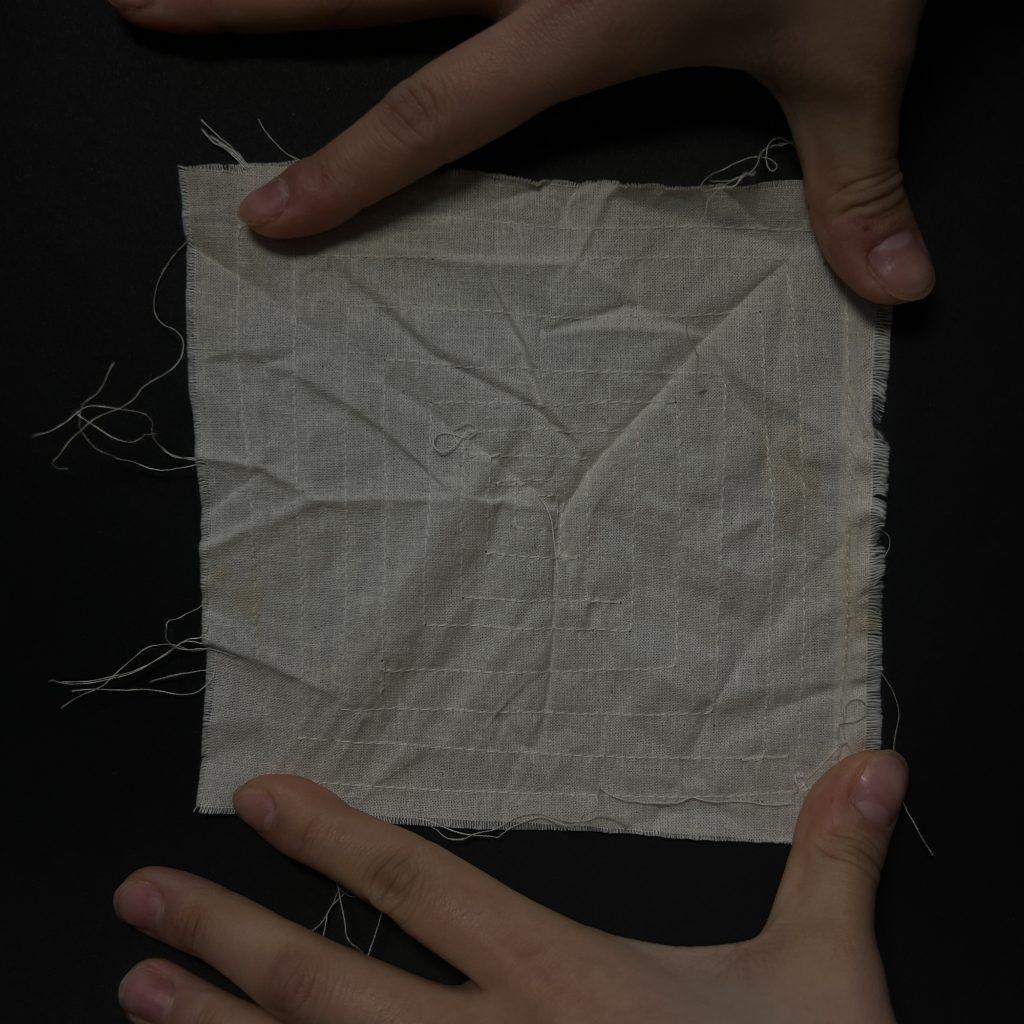
Sewing Samples:
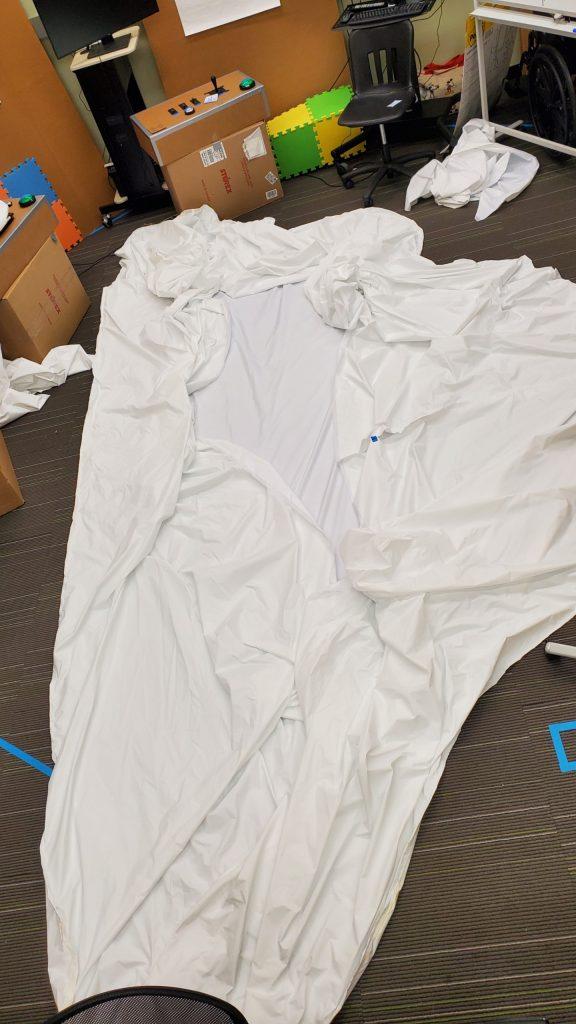
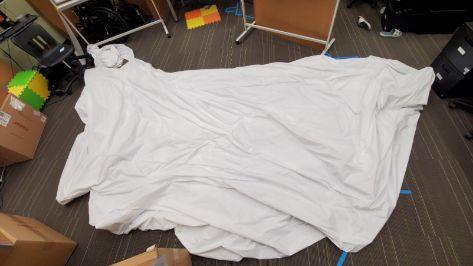
I tried to use light and dark to show the two sides and better showcase white on white.
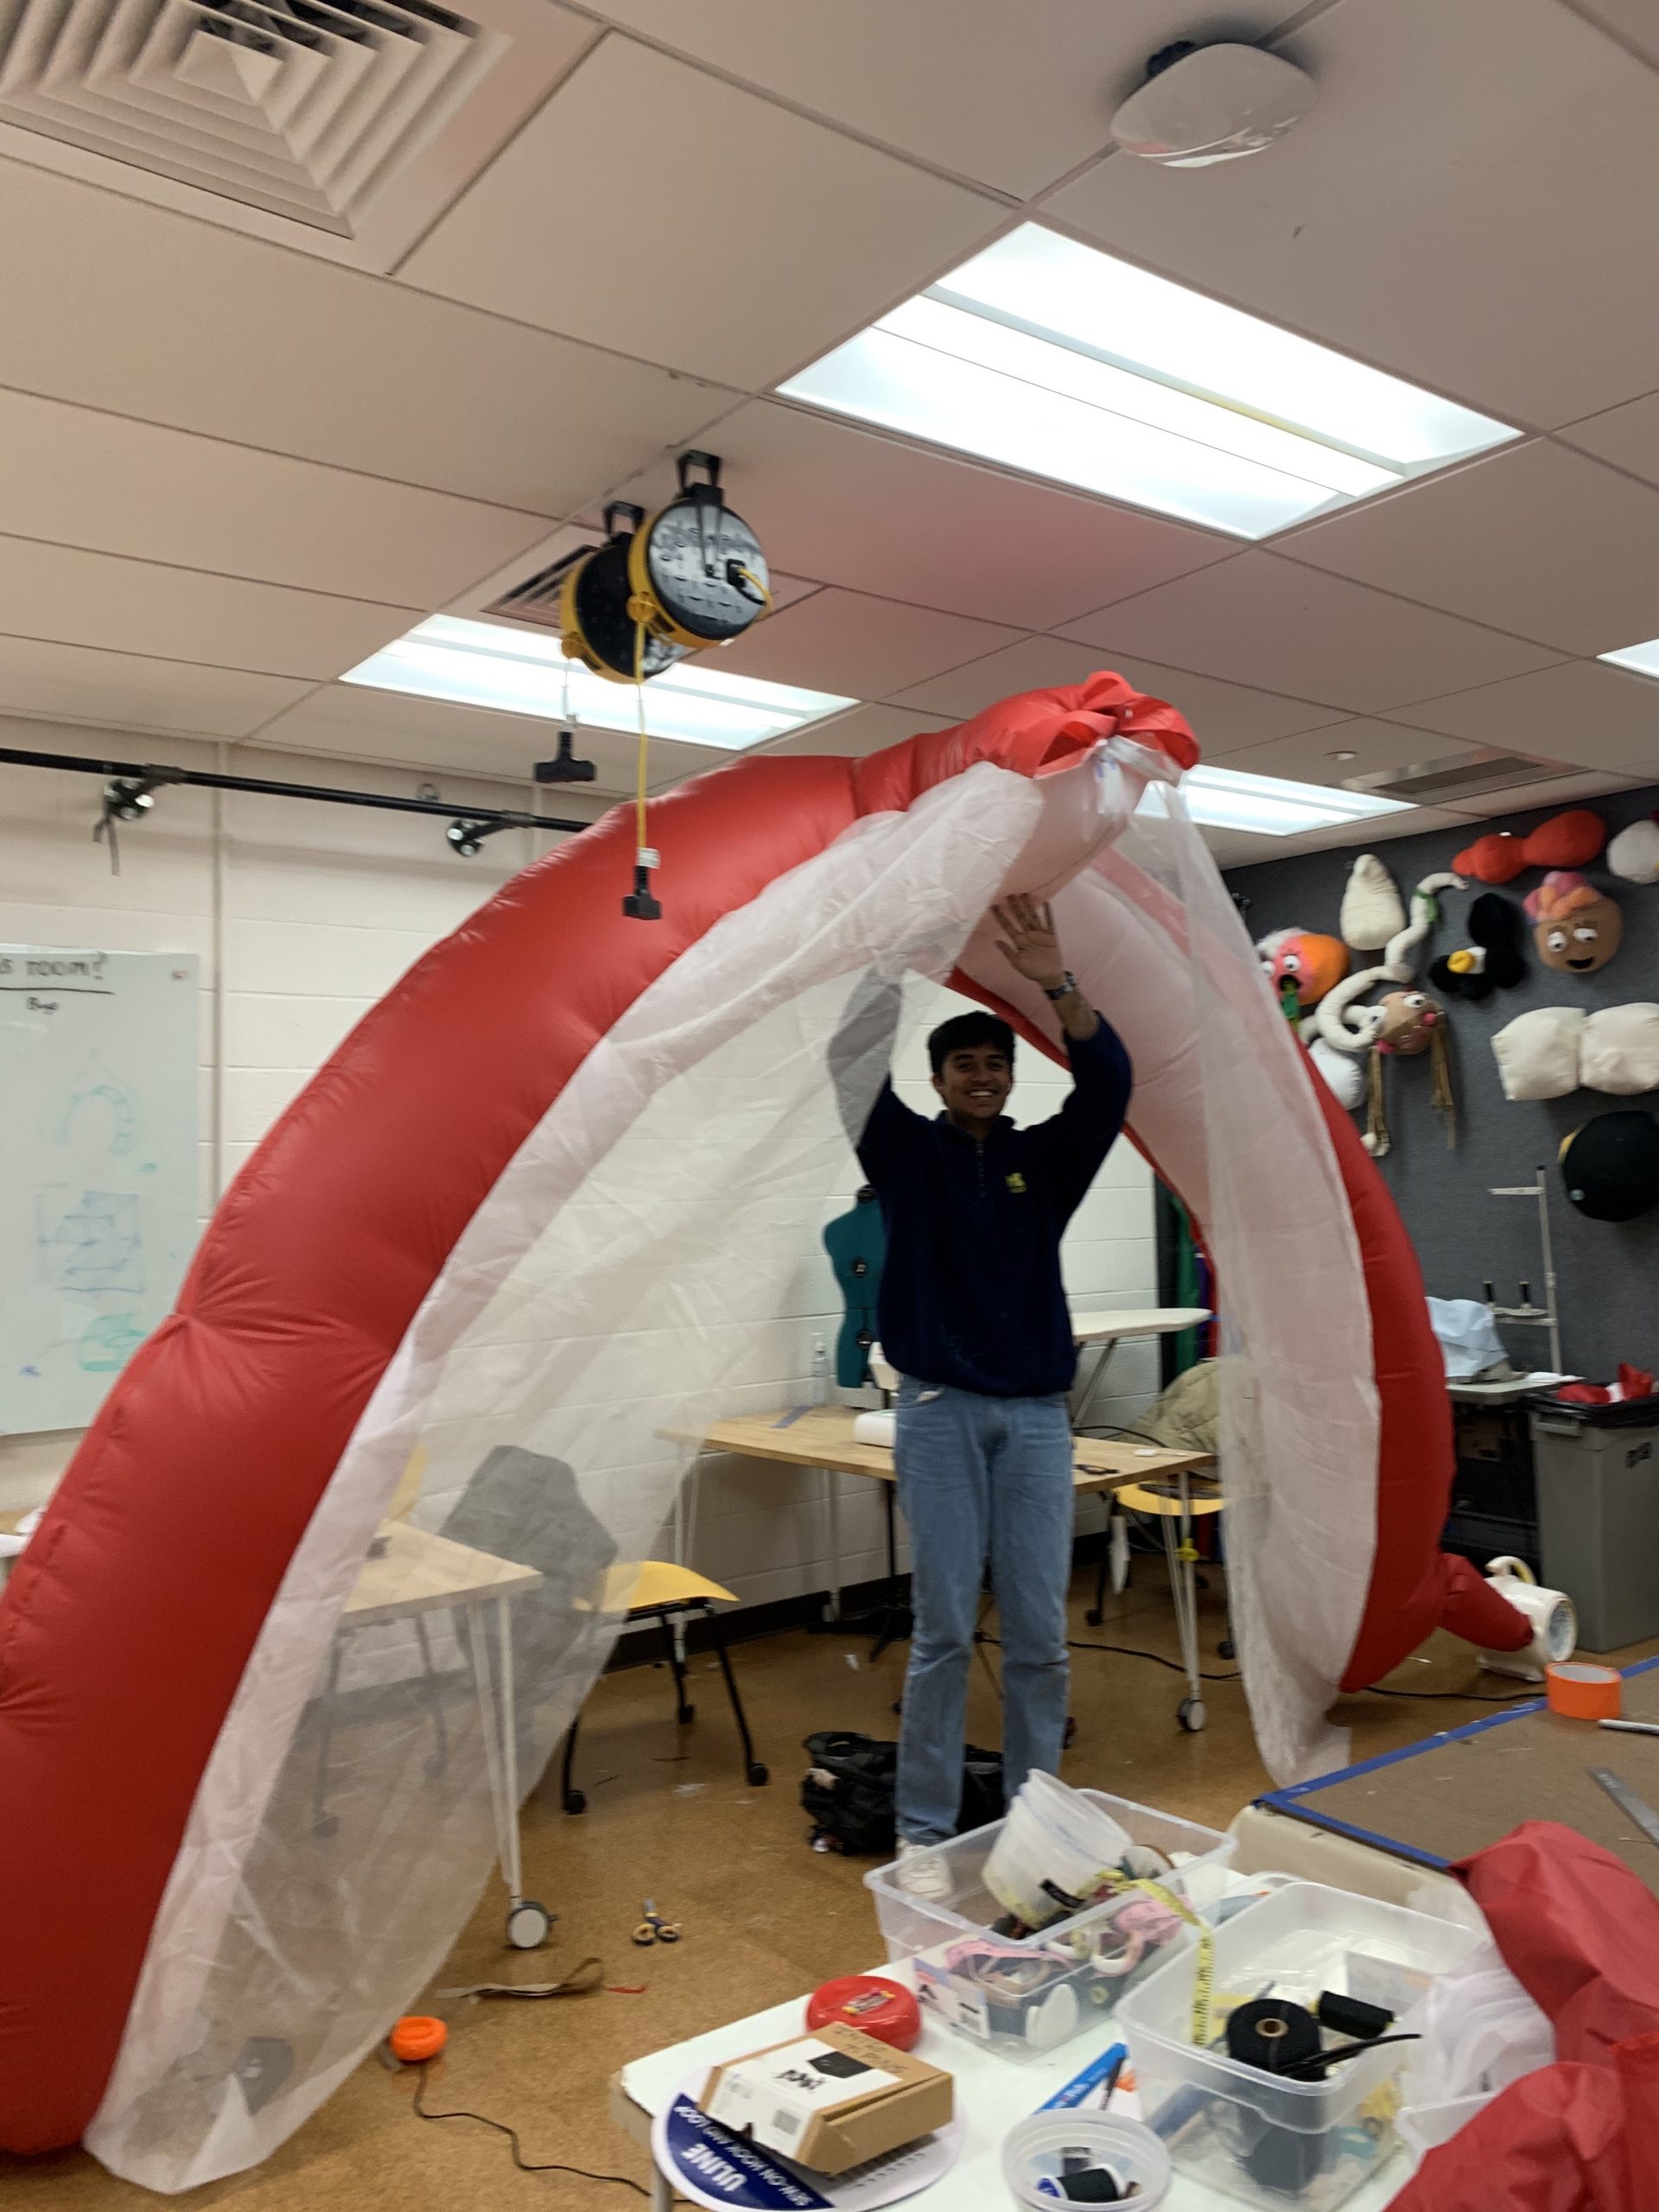
What aspects of your project or process were most successful? I think the fact that our inflatable even inflated is a huge success for us. The sheer size and complexity of our doors made it really nerve racking for us to wait and see if the structure would fully inflate the way we intended it to, especially since we modeled it on Rhino and not all CAD models turn out to be what one expects in real life (because of physics and stuff). The doors inspired by PneuHaus were super successful on their own because it was a bit of a last-minute addition to our inflatable. Thinking about how PneuHaus built it and then adapting it to fit our dome was a huge challenge, as we weren’t sure it would successfully keep our domes inflated. We couldn’t even get it right on our first try –we had to resew and cut off some parts– so the satisfaction of it not only working but also looking decently presentable was euphoric.
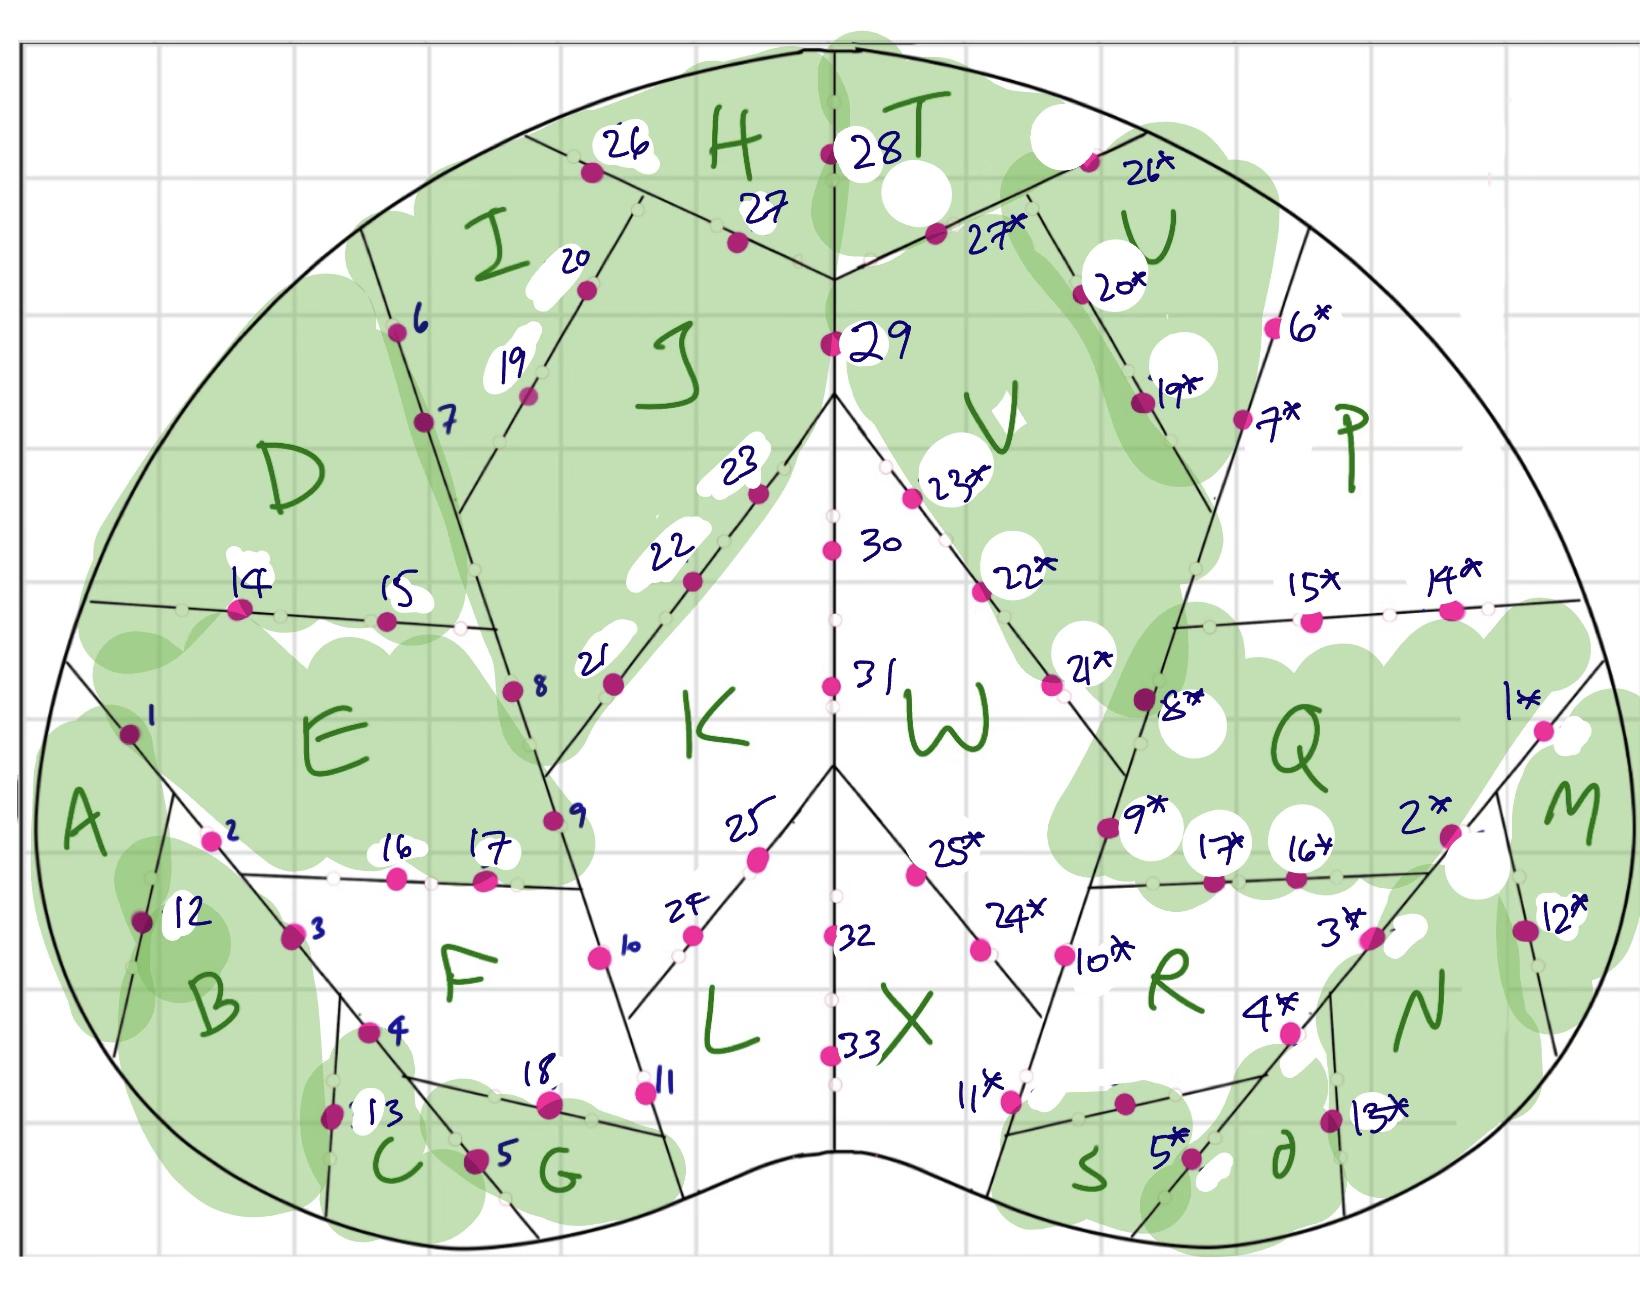
What were a few of the challenges you encountered and how did you overcome them? One of the earlier challenges I faced was preparing the Rhino model and file for the tracing and cutting of the pieces. I wasn’t super highly experienced in Rhino at the time, so I had to go over a bit of a learning curve for some of the Rhino functions and commands in order to build the model of our structure. Then, fixing the dome dimensions was another huge setback that delayed our group a bit on our track to building the inflatable, but because by then I was already so much more familiar with Rhino, I was able to relatively quickly make the corrections. I also felt like my spatial and visual awareness were being highly challenged, as we had to imagine how the structure looked like based on the cut out pieces we had; the pieces were huge and sometimes a bit of a struggle to assemble. Our system of numbering the edges of the pieces was very helpful, though, so having had the foresight of keeping track of them this way made it easier for us to tackle this challenge later on.
What are the three top things you learned from this experience that you will take with you into future project experiences?
1. Double, triple, fourple-check the dimensions of any models/drafts I make before taking any action to bringing the model to life.
2. Constructing a large structure that people can enter and walk in made me think more critically about space, our environments, and how we navigate them. It made me think in a way so differently from my usual STEM-y approach/mindset to viewing the world; I had to think more with a “psychology or human-centered lens” to think about how a visitor would feel and move in the dome we planned to build.
3. How to use walking feet for sewing materials like ripstop nylon. I definitely want to keep sewing and working on more textiles-based projects in the future, so knowing about this tool will be useful and expand the possibilities of what I could achieve in future works.
What have you observed in yourself regarding your collaboration with teammates who bring different skills and experiences to the creative process? I noticed that we naturally knew what our strengths and weaknesses were and harmoniously adjusted accordingly. For instance, I had the most experience using Rhino, so I took charge of making and preparing the model, while Sophia had more sewing experience so she took the lead of sewing and Sandy pinned and organized our materials together so that it would be easier for us to continue working on the project. We barely needed to talk about how to distribute work since we knew what had to be done and what we knew we could contribute to the most with our skillset.
What is your number one piece of advice you would give to future students in this course? Be prepared to spend long, long hours for this class pinning and sewing. You think you know you’re going to be spending a lot of time in this class, but it’s actually even MORE time than that.
Sandy
What aspects of your project or process were most successful? The overall dome structure was very successful. It was also the smoothest part of our process because the sewing was straightforward. Although the doors were hard to make, they were also successful in the end too. What were a few of the challenges you encountered and how did you overcome them? The greatest challenge was making the doors because they took us an extremely long time since we didn’t calculate the dimensions correctly. The curvature of the ceiling of the dome also made it difficult to match the rectangular door we create. In the end, we had to cut the tubes of our door off and re-sew them in a way that fit the shape of our ceiling. What are the three top things you learned from this experience that you will take with you into future project experiences? The top three things I learned from this experience are stress management, sewing skills, and flexibility to adapt to emergency situations. What have you observed in yourself regarding your collaboration with teammates who bring different skills and experiences to the creative process? I observed that I am usually the one that is rational and conservative in making decisions. I always tend to fact-check or reality-check before we make major decisions because I want to ensure feasibility on top of creativity. What is your number one piece of advice you would give to future students in this course? I would advise students to start early and DON’T GIVE UP!
Sophia
What aspects of your project or process were most successful? I am really proud about the overall end product. Althought I had many sewing experiences in the past, it was still really scary making something three dimensional, not to mention making it large and walkthroughable. I think having the final product come together and actually turn out to be a dome that is what we originally hope it would look like was a success. I also think the entrance door was successful. We were able to imagine what it would look like but there are many small sewing challenges to actually make the door. We were able to figure it out and successfully make a door that would hold up the structure.
What were a few of the challenges you encountered and how did you overcome them? I encountered many sewing challenges throughout the process. I had a lot of sewing experience in the past but they are usually for 2d items that are small. Sewing something at a large scale and making it inflatable is a big challenge for me. We overcame this by sewing small individual pieces together first to eventually make a bigger piece. Making the doors was also a challenge because I understood the idea but was unsure how exactly to sew them together to allow the air to flow between the tubes while being separated and still have a clean finish. We overcame this by drawing out how to make the individual pieces and planning what pieces would be required to make the final product. I also made a smaller version to test out if the idea would work.
What are the three top things you learned from this experience that you will take with you into future project experiences?
how to work efficiently and split up tasks according to everyone’s skillsets
how to use a walking foot on a sewing machine
how to sew a straight line without using pins and other sewing tricks that I did not know it the past
What have you observed in yourself regarding your collaboration with teammates who bring different skills and experiences to the creative process? I realized that I really enjoy working on group projects where everyone brings something different to the table and that I often focus on the thing I know I can do best. For example, Heeyun is really good at Rhino, I am good at sewing and Sandy is really good and efficient at tracing and pining. After knowing this, we split up tasks accordingly. I found that this an efficient approach.
What is your number one piece of advice you would give to future students in this course? Know what everyone is good at and delegate tasks accordingly.
Group
How did you generate the idea and starting point for the project? We were inspired by other inflatables we found online which were dreamy abstract concepts. We wanted our project to be an enclosed shape, so a dome was an ideal shape compared to a rectangular rigid box. It ended up being two domes because our concept is being confused in the first dome and then beginning to reflect in the second dome. Our ideal project was a double-walled dome shape, however, we realized that we didn’t have much time or fabric, so we had to alter our plans.
What was the path that you took from beginning to end to accomplish the project? Please upload 5-10 photos to illustrate your story. We started out accidentally ambitious, creating a Rhino file that was 4 times bigger than our planned project. It was a hassle to even begin the tracing process. We caught our mistake and were finally able to continue our tracing. We pinned and sewed the pieces starting from whichever pieces matched up first. Then we worked on the doors, which were basically two smaller inflatables that we had to make. Throughout this process, we had to redo many steps to fit our door because we measured the dimensions wrong. Overall, the structure was completed in time for the event and we are very proud of our dream dome.
(We only have pictures of the end result after everything is inflated, the pictures are at the bottom of this post)
What were the challenges you encountered and how do your team overcome them? Our greatest challenge was the lack of time for the project. We were all struggling to find the right time for all three of us to meet. We often missed our benchmarks and had to squeeze more time to meet. It almost always took twice the amount of time we planned to reach our goals. We overcame it by allocating the tasks according to our individual skill sets. The other challenges we encountered were mostly sewing issues and door design issues. It was difficult to imagine the structure being three-dimensional while having to sew in two-dimensional space. The structures also looked different after being inflated.
What were the “happy accidents” that you encountered along the way? A “happy accident” we encountered was seeing how the light shined through our windows and created various spotlights on the floor of our dome structure. We were also glad that the seams did not become too ugly and were not too distracting for the visitors. Lastly, the black ripstop nylon seemed to add to the effect of our dome.
Final Project: please upload 5-10 photos of your final project and 3 sentences that describe what your final project is (not what you intended, but what it is now that it is finished).
The Dream Dome is an immersive experience where people can feel the curiosity and exploration one would get from being in a dream. It is a relaxing and welcoming space that is a mini-getaway from the outside world.
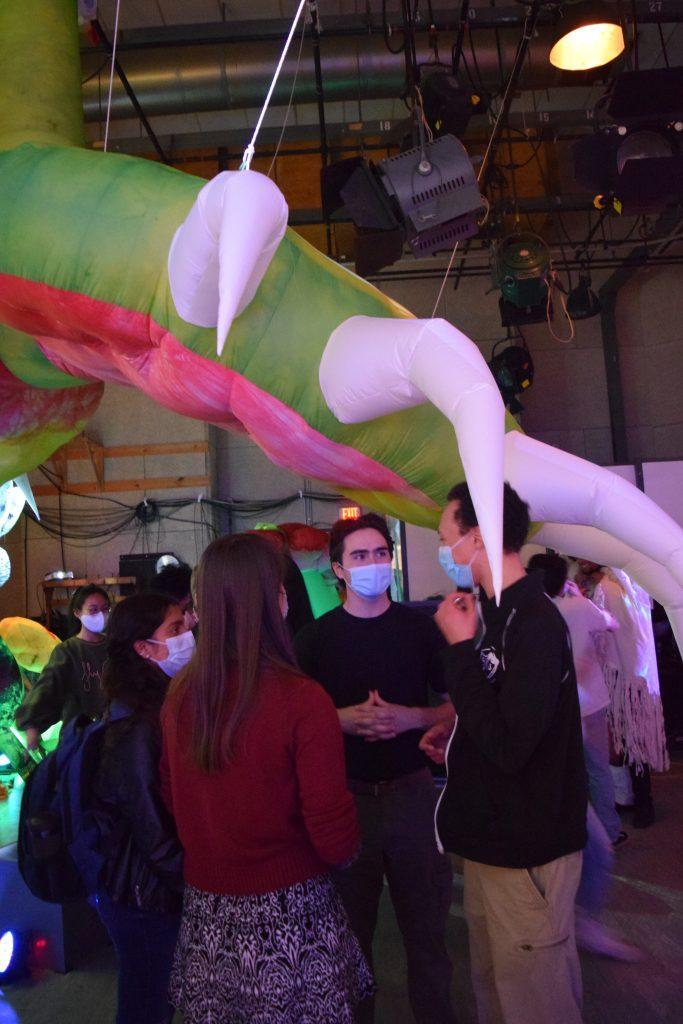
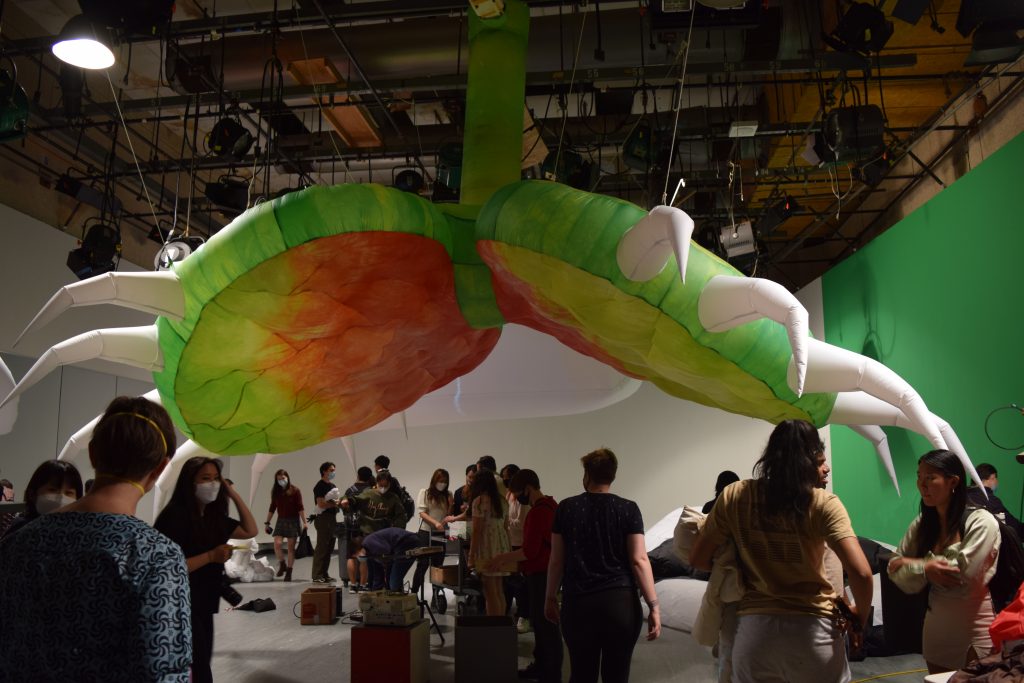
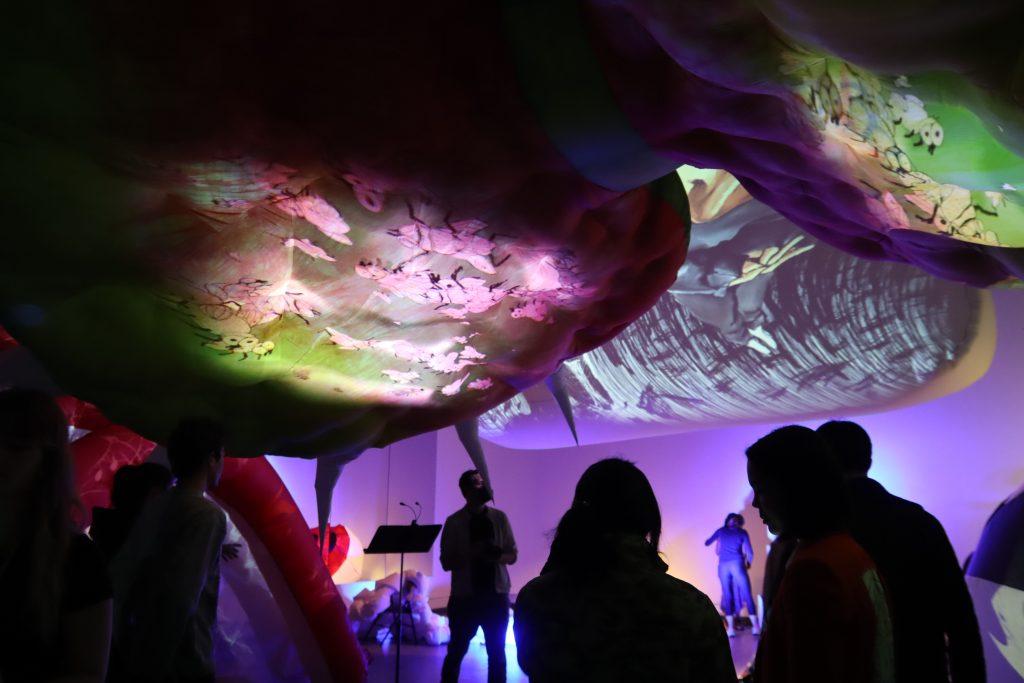
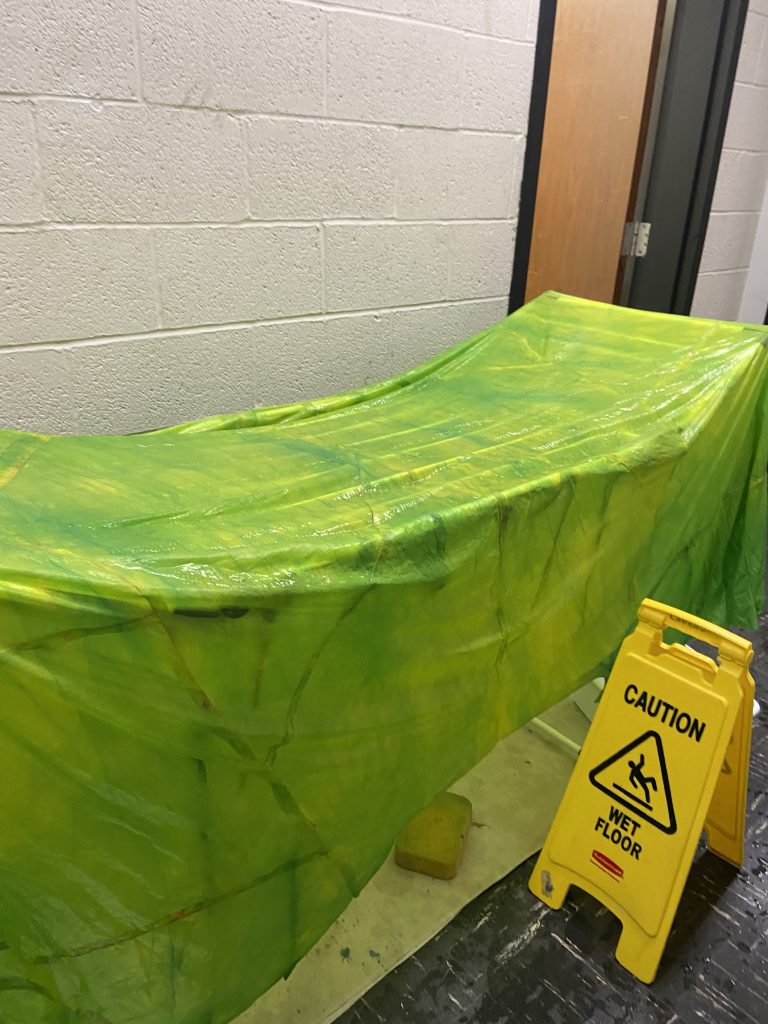
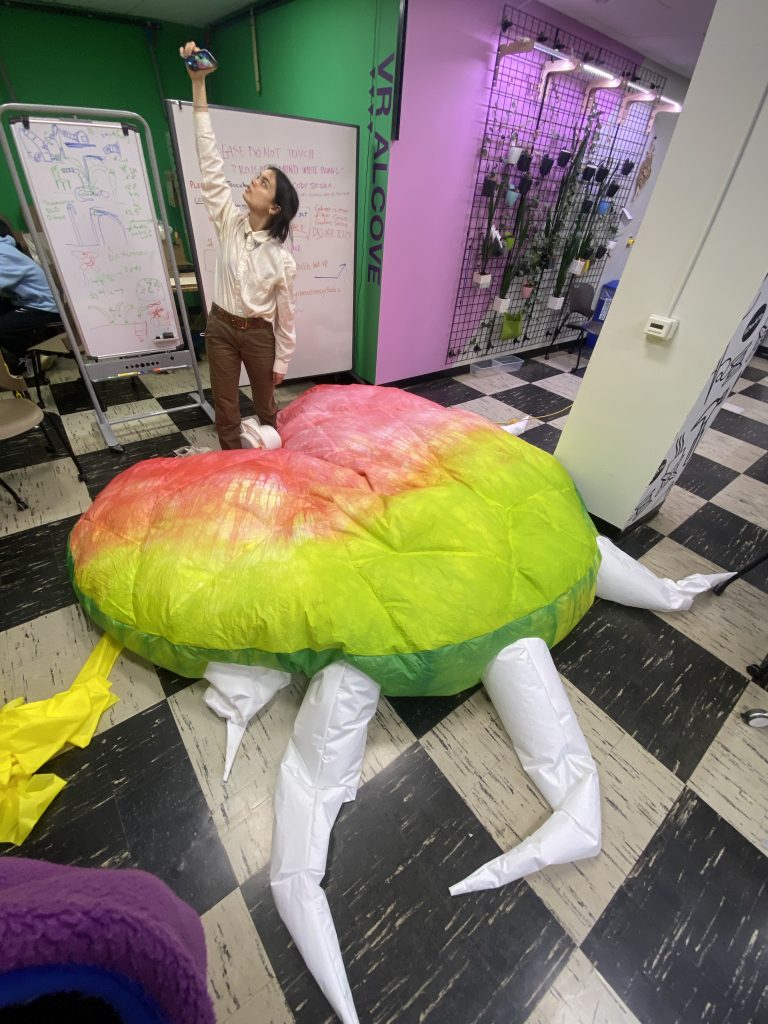
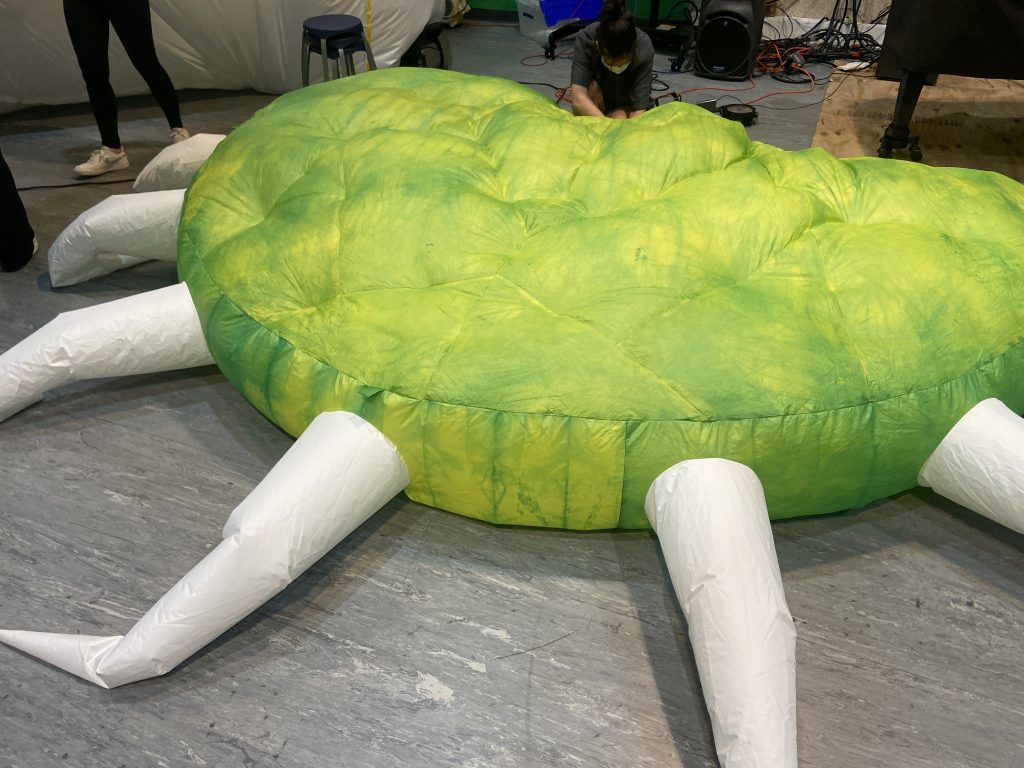
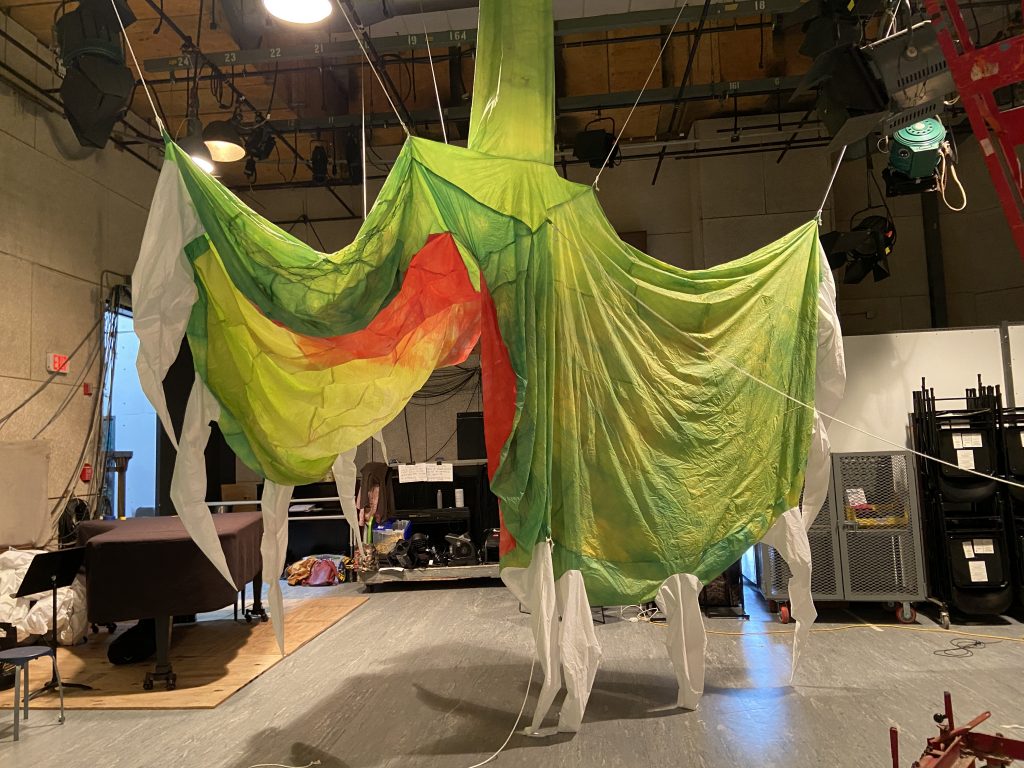
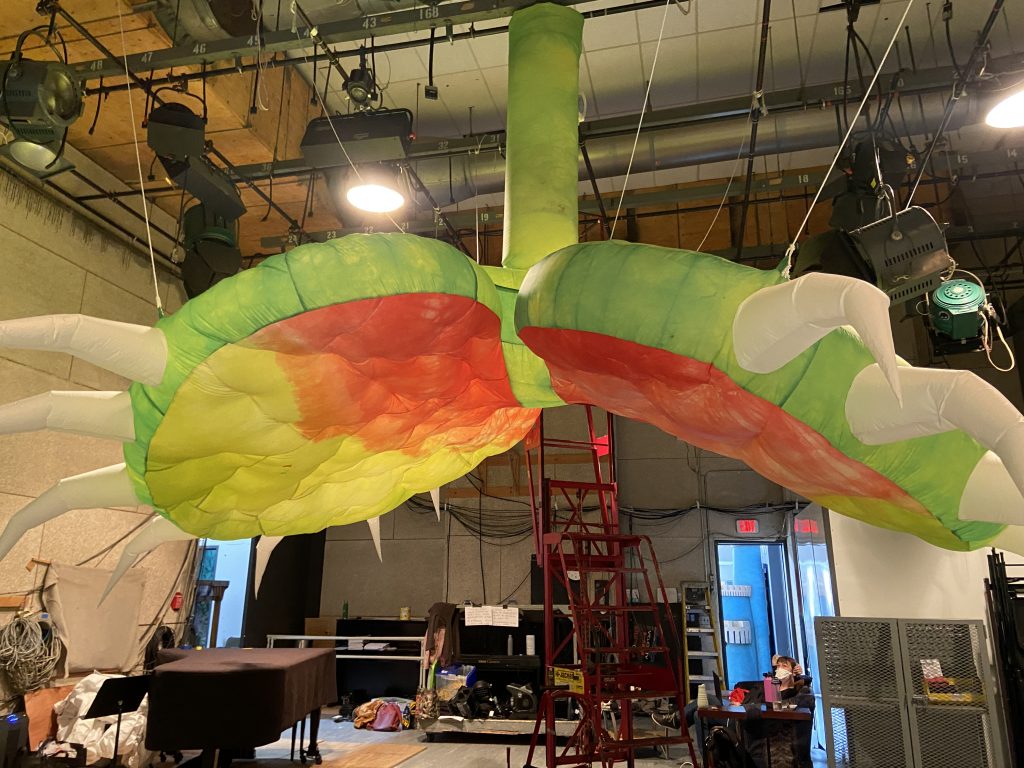
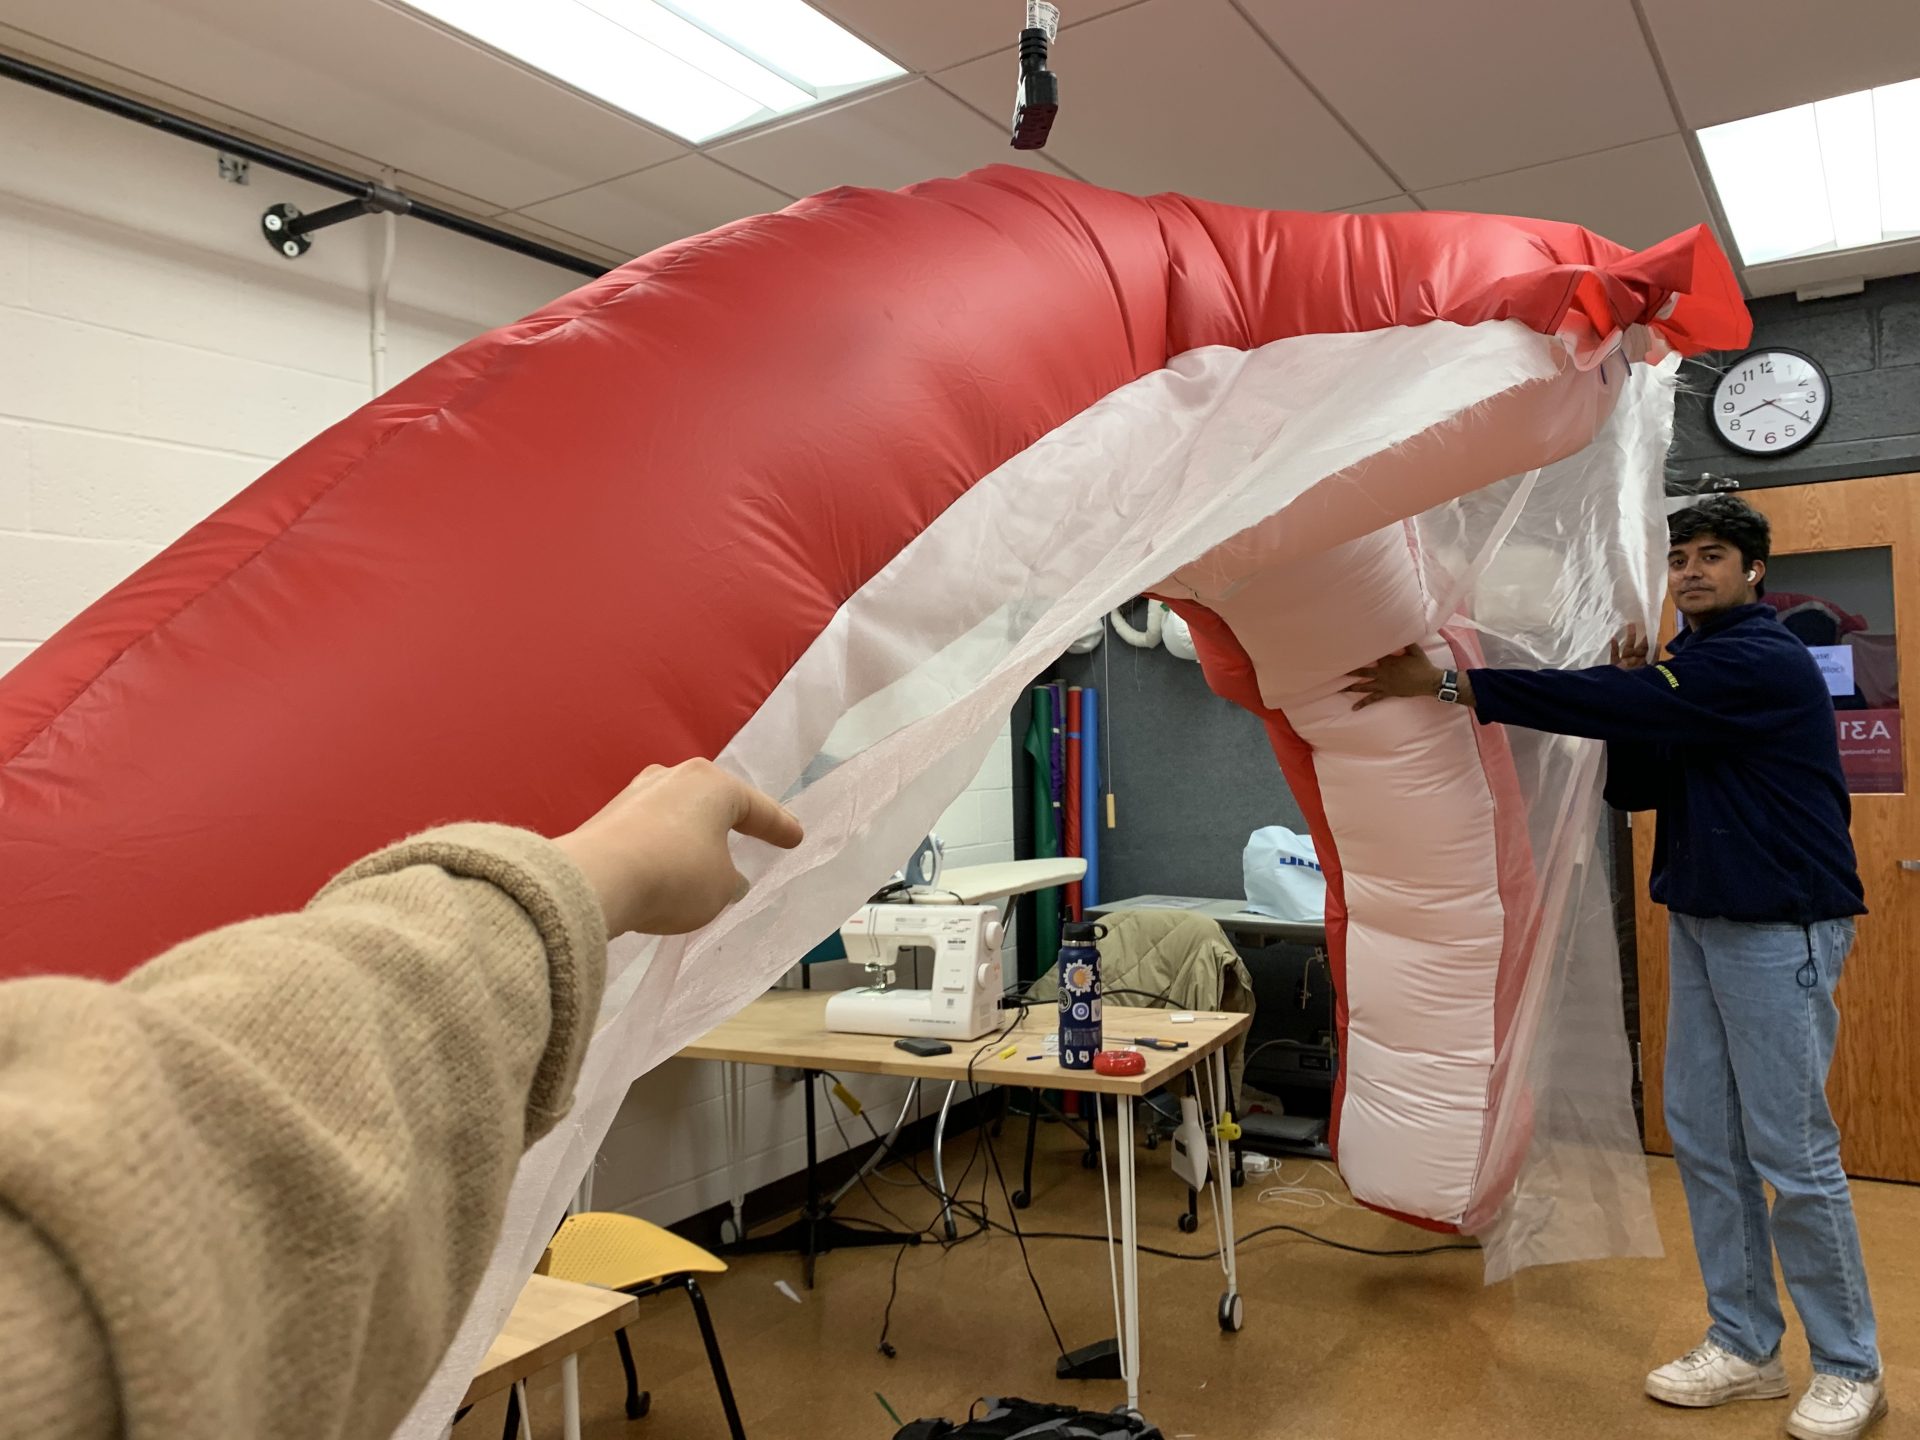
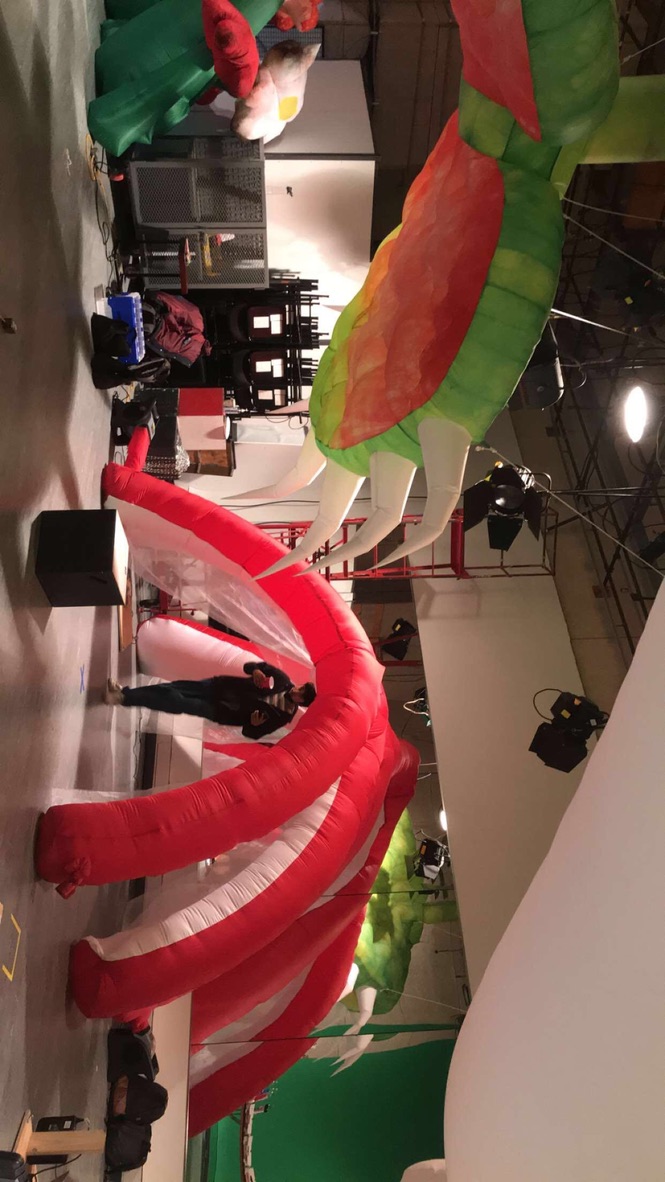
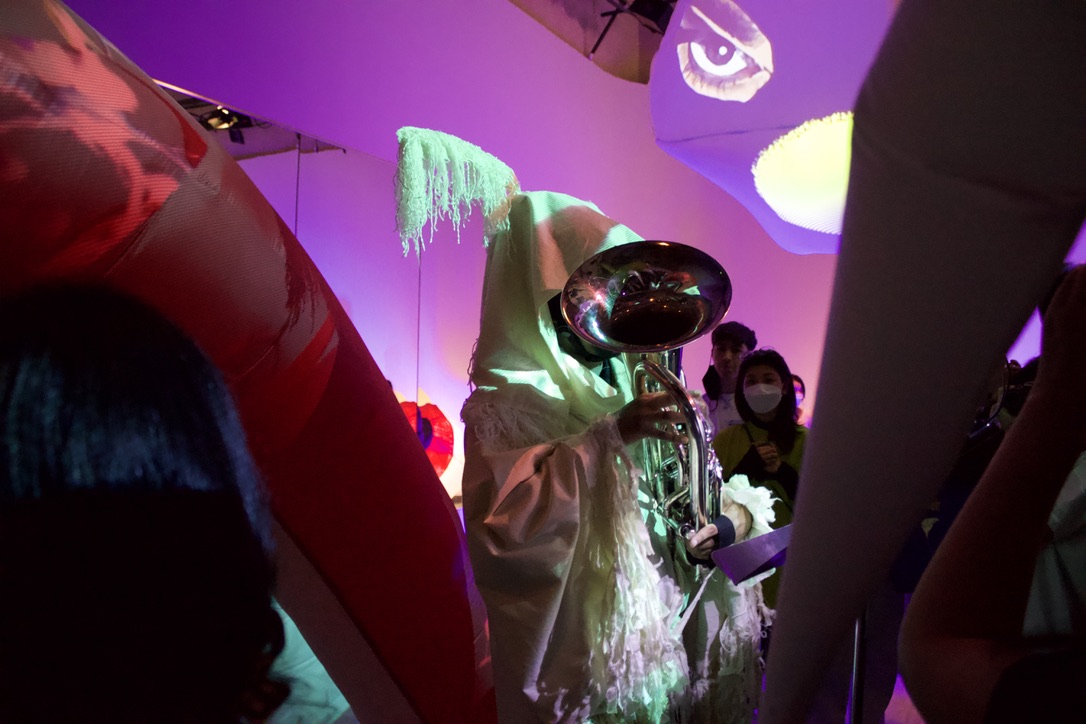
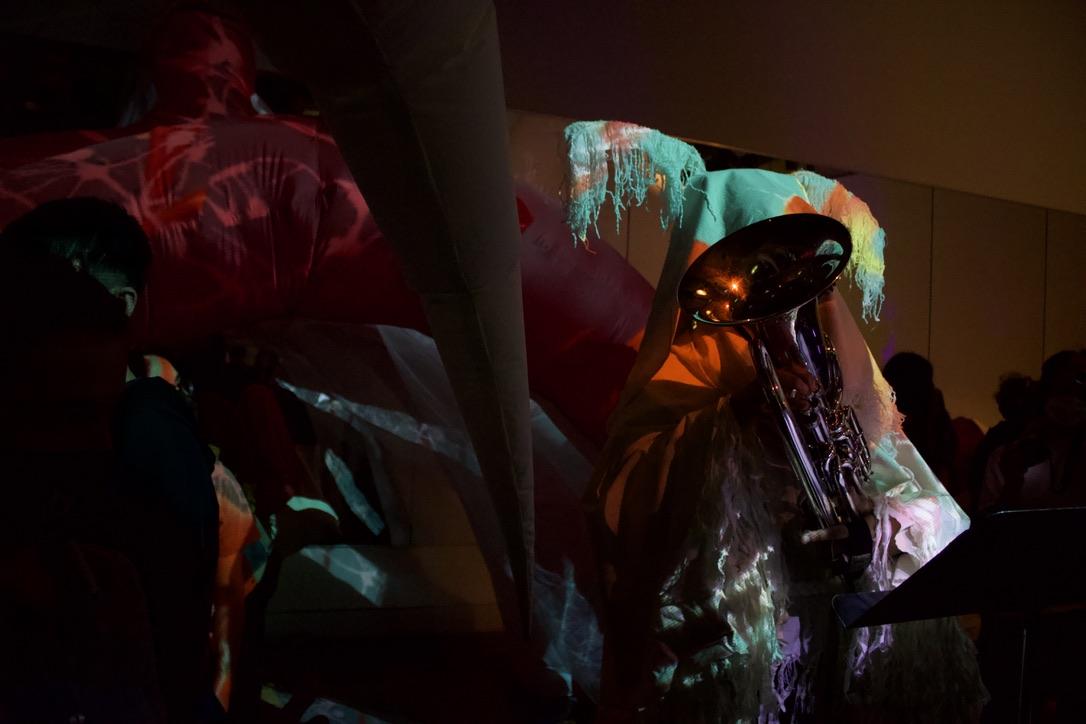
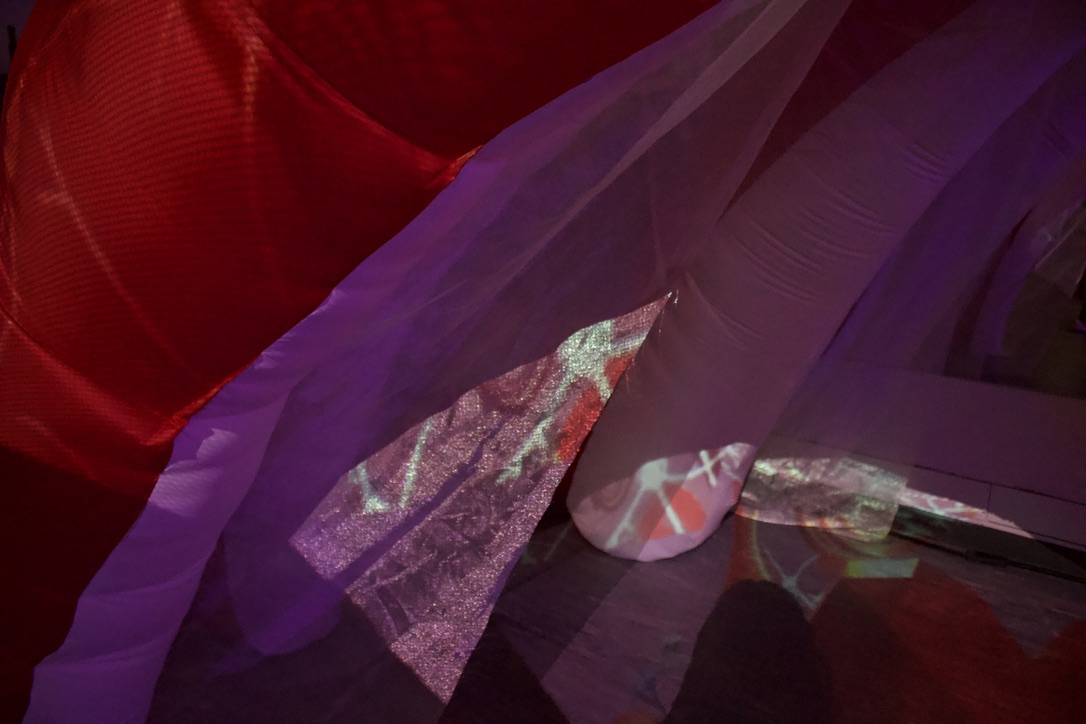
The Venus Fly Trap is a giant inflatable installation including projected animations of flies on the inside walls. It hangs from the ceiling, opening over the audience as if it were about to capture the people underneath. The Fly Trap is interactive, offering a space for communication, storytelling, and wonder.
Ideation
We all wanted to make a project that was interactive and hanging from the ceiling and came up with a lot of different ideas. Jennifer suggested we make a fly trap, and we went with it because it felt like the most tangible project.
Process
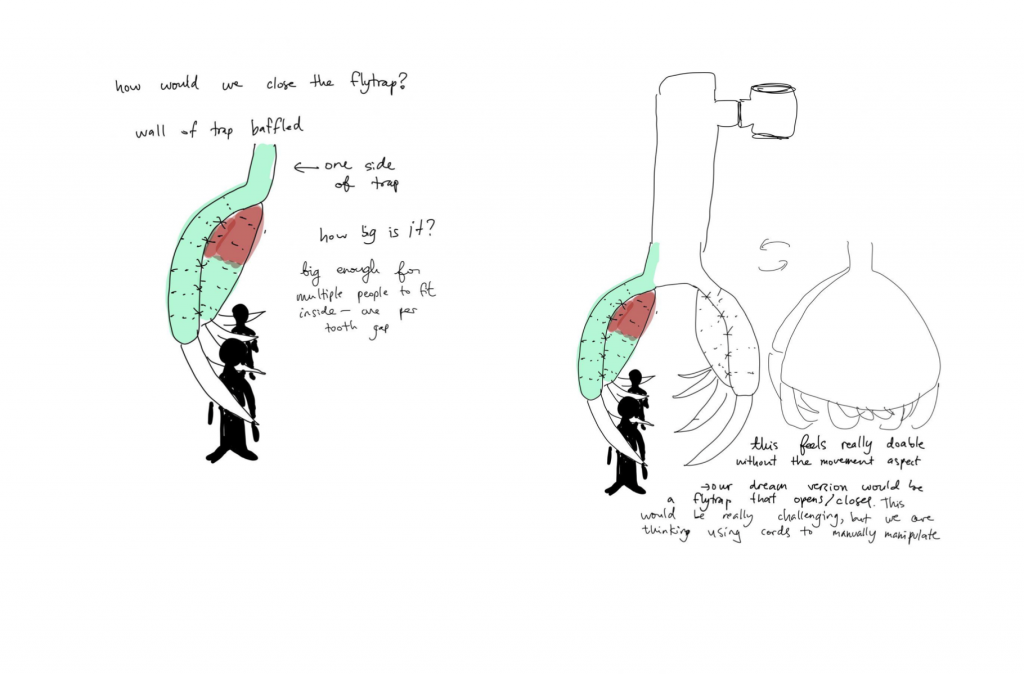
First, we made sketches of what we imagined it would look like. We imagined a fly trap that could open and close, that would hang over people and consume them as the teeth closed around their bodies.
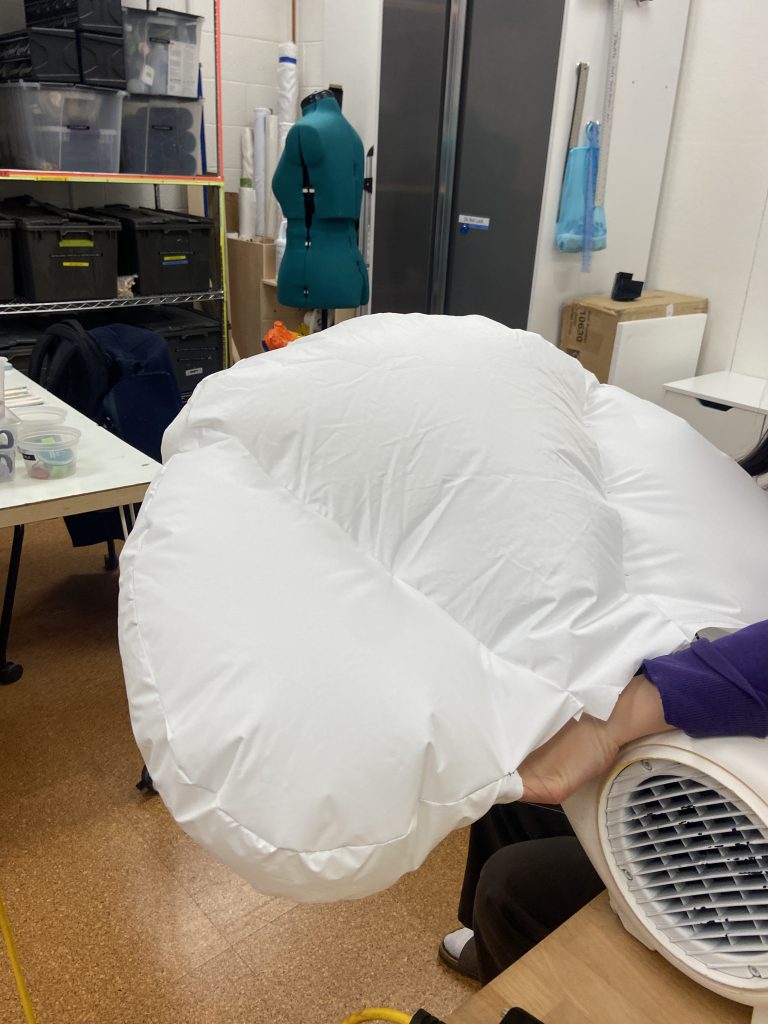
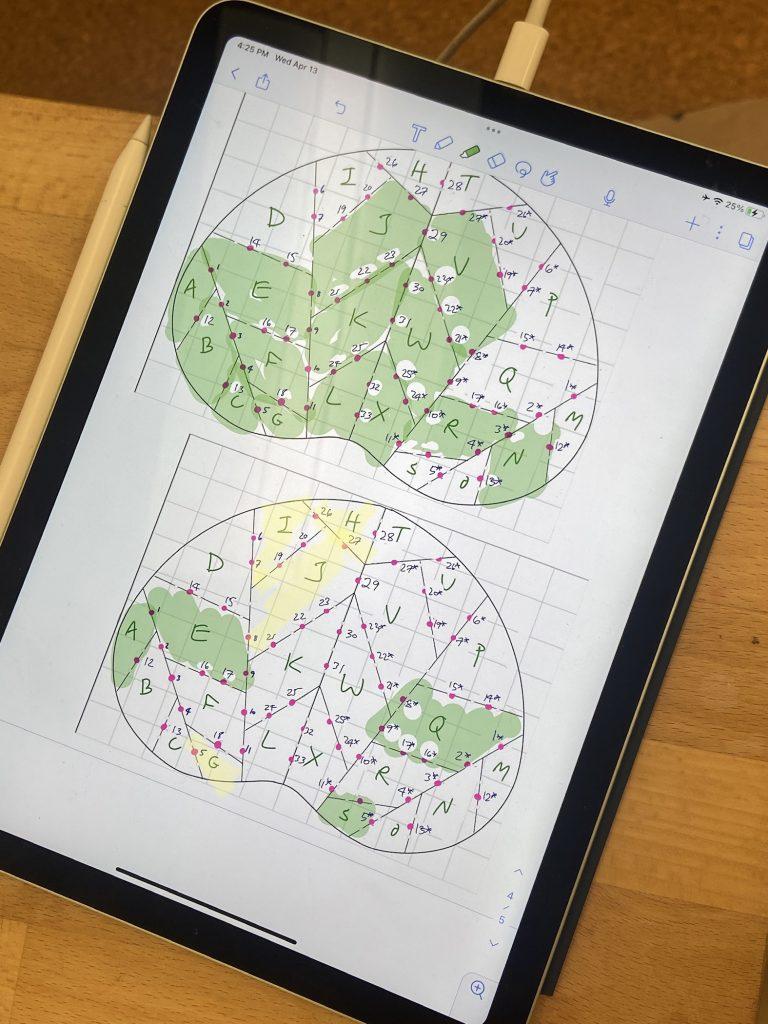
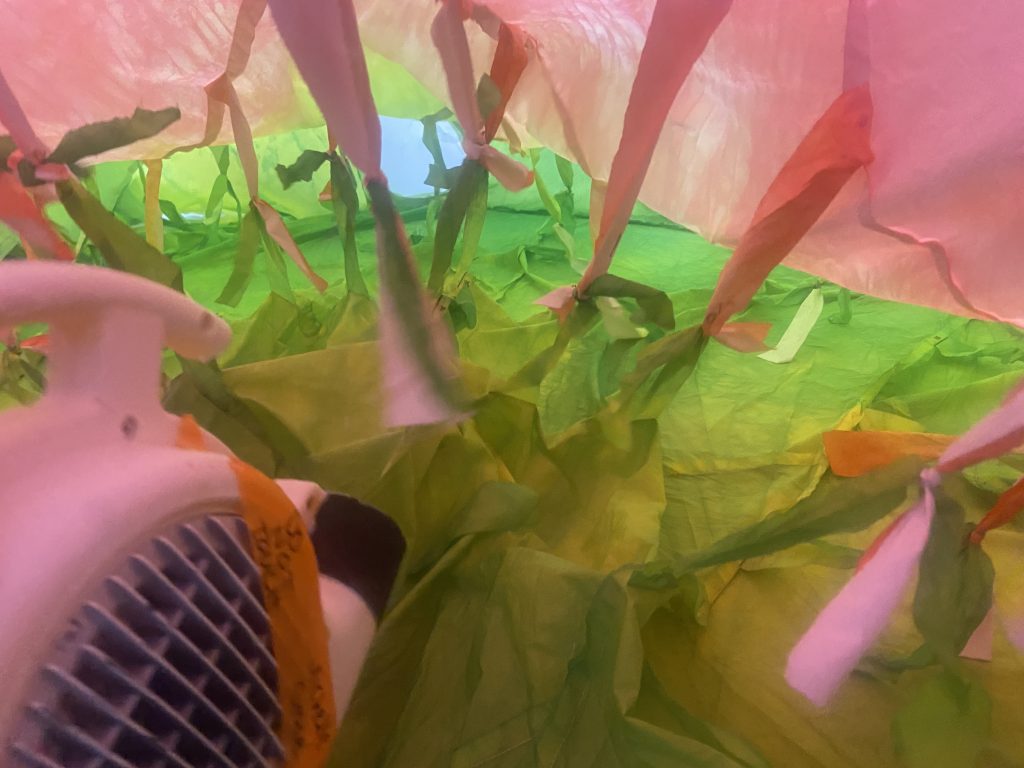
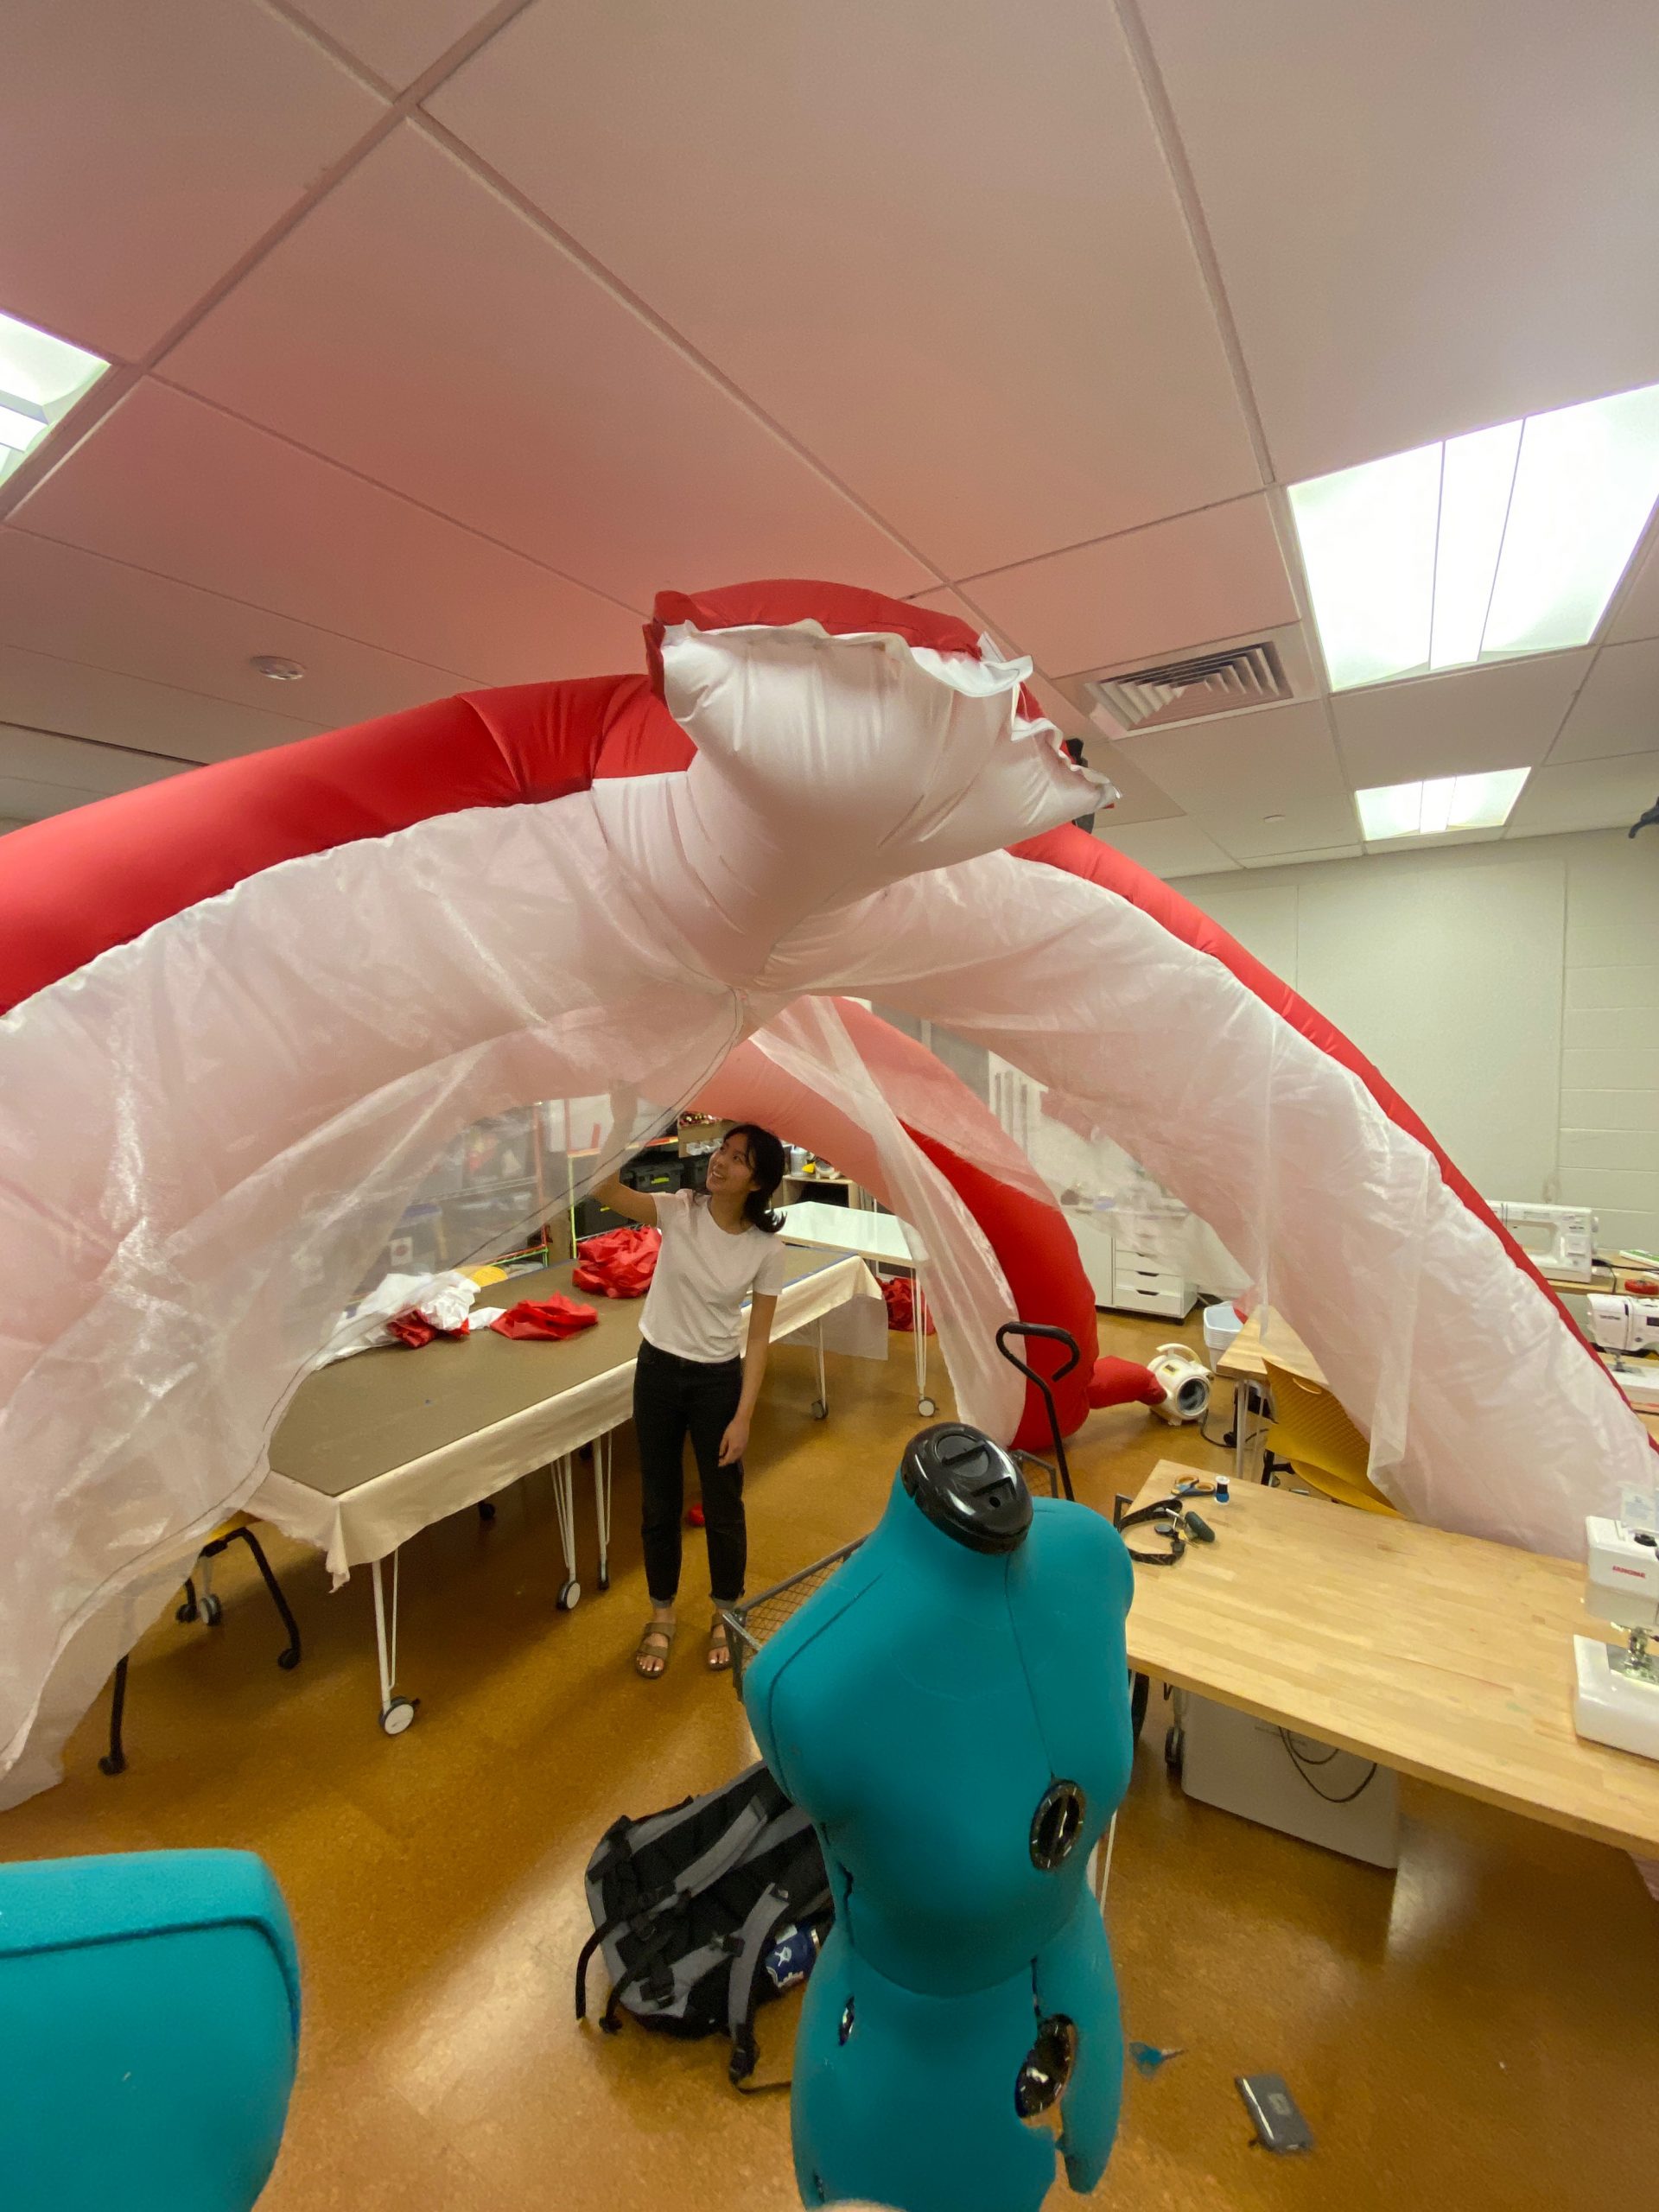
Then, we made a couple of mockups of the sides to test baffling, angle of connection, and teeth construction. None were really that successful, but we realized it was likely an issue with scale and took construction ideas from the mockup into account when designing the full piece. One aspect of the mockup that was particularly successful was baffling. We cut the leaf into pieces along lines that made it look like the leaf’s veins, sewed strips of fabric into those seams, then tied them together once both the inside and outside walls were connected. We expanded on this idea when making the pattern for the walls of the flytrap, making sure to consider symmetry for ease of construction.
We made 12 paper pattern pieces to make 96 total pieces for the four walls of the flytrap.
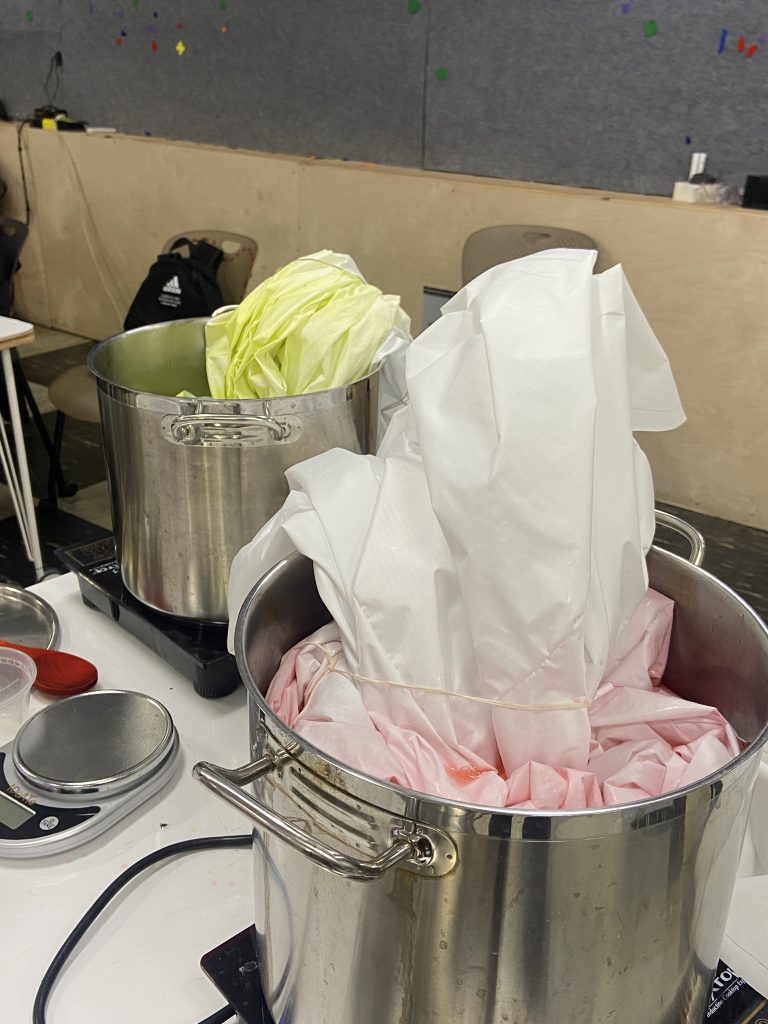
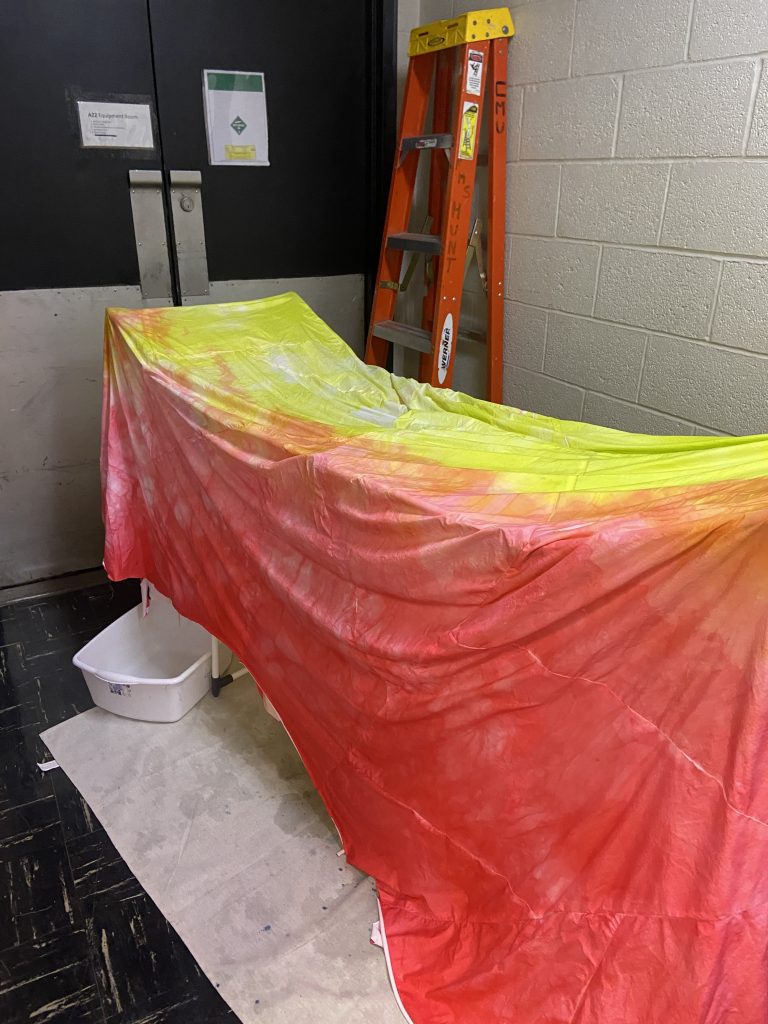
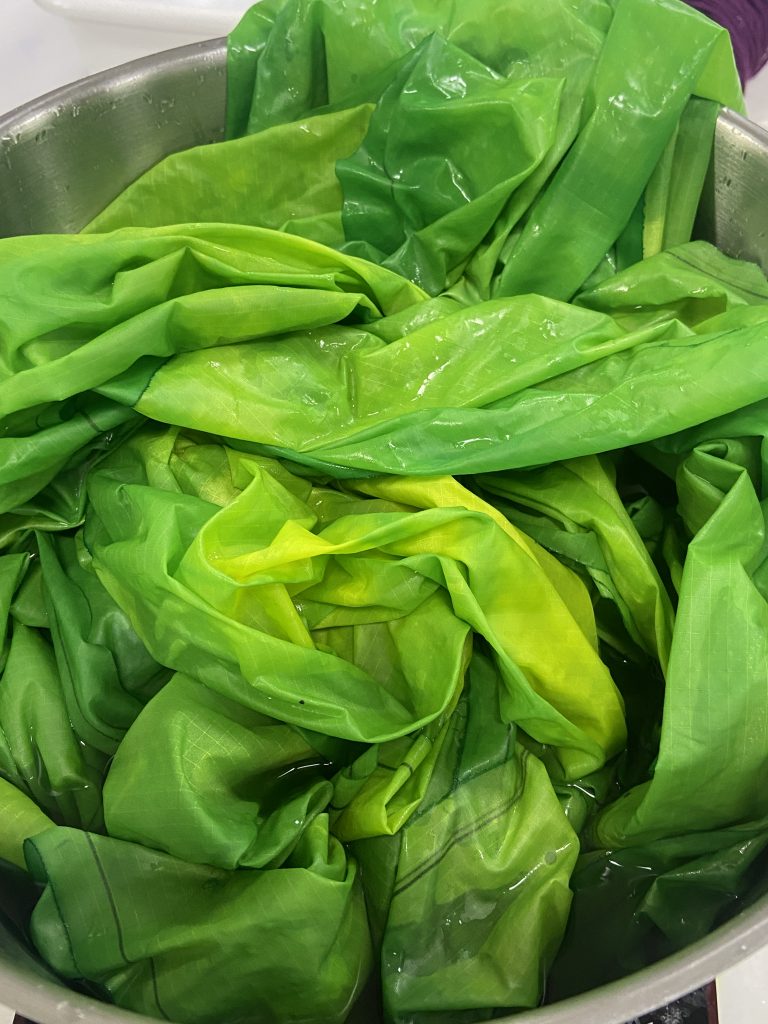
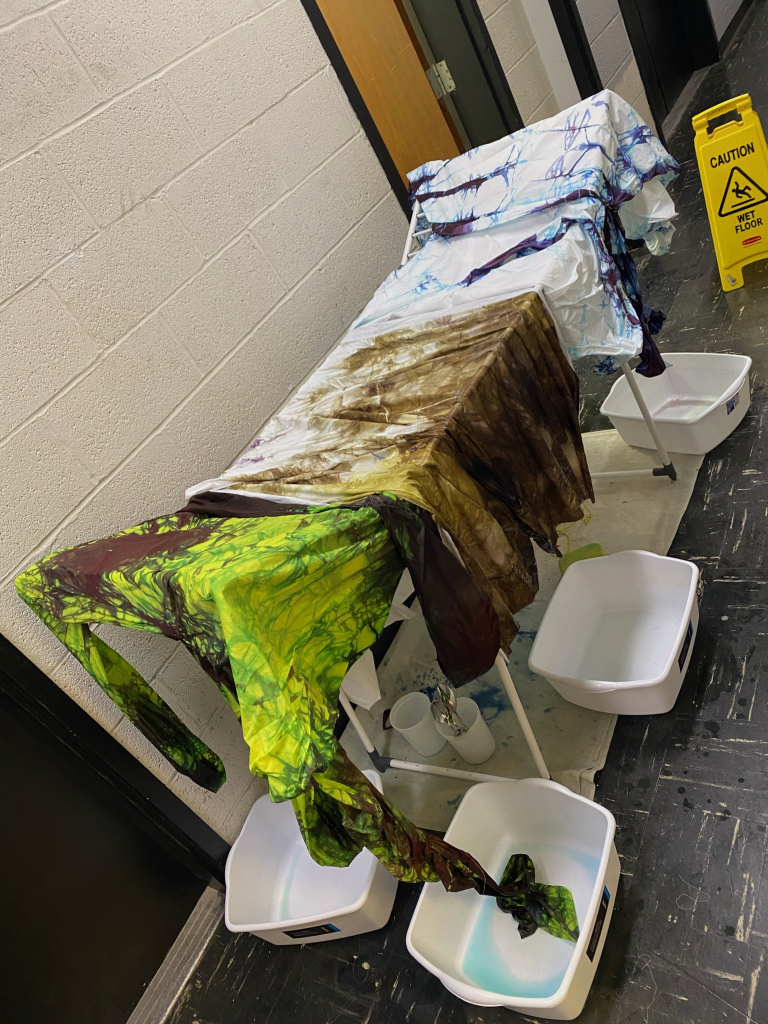
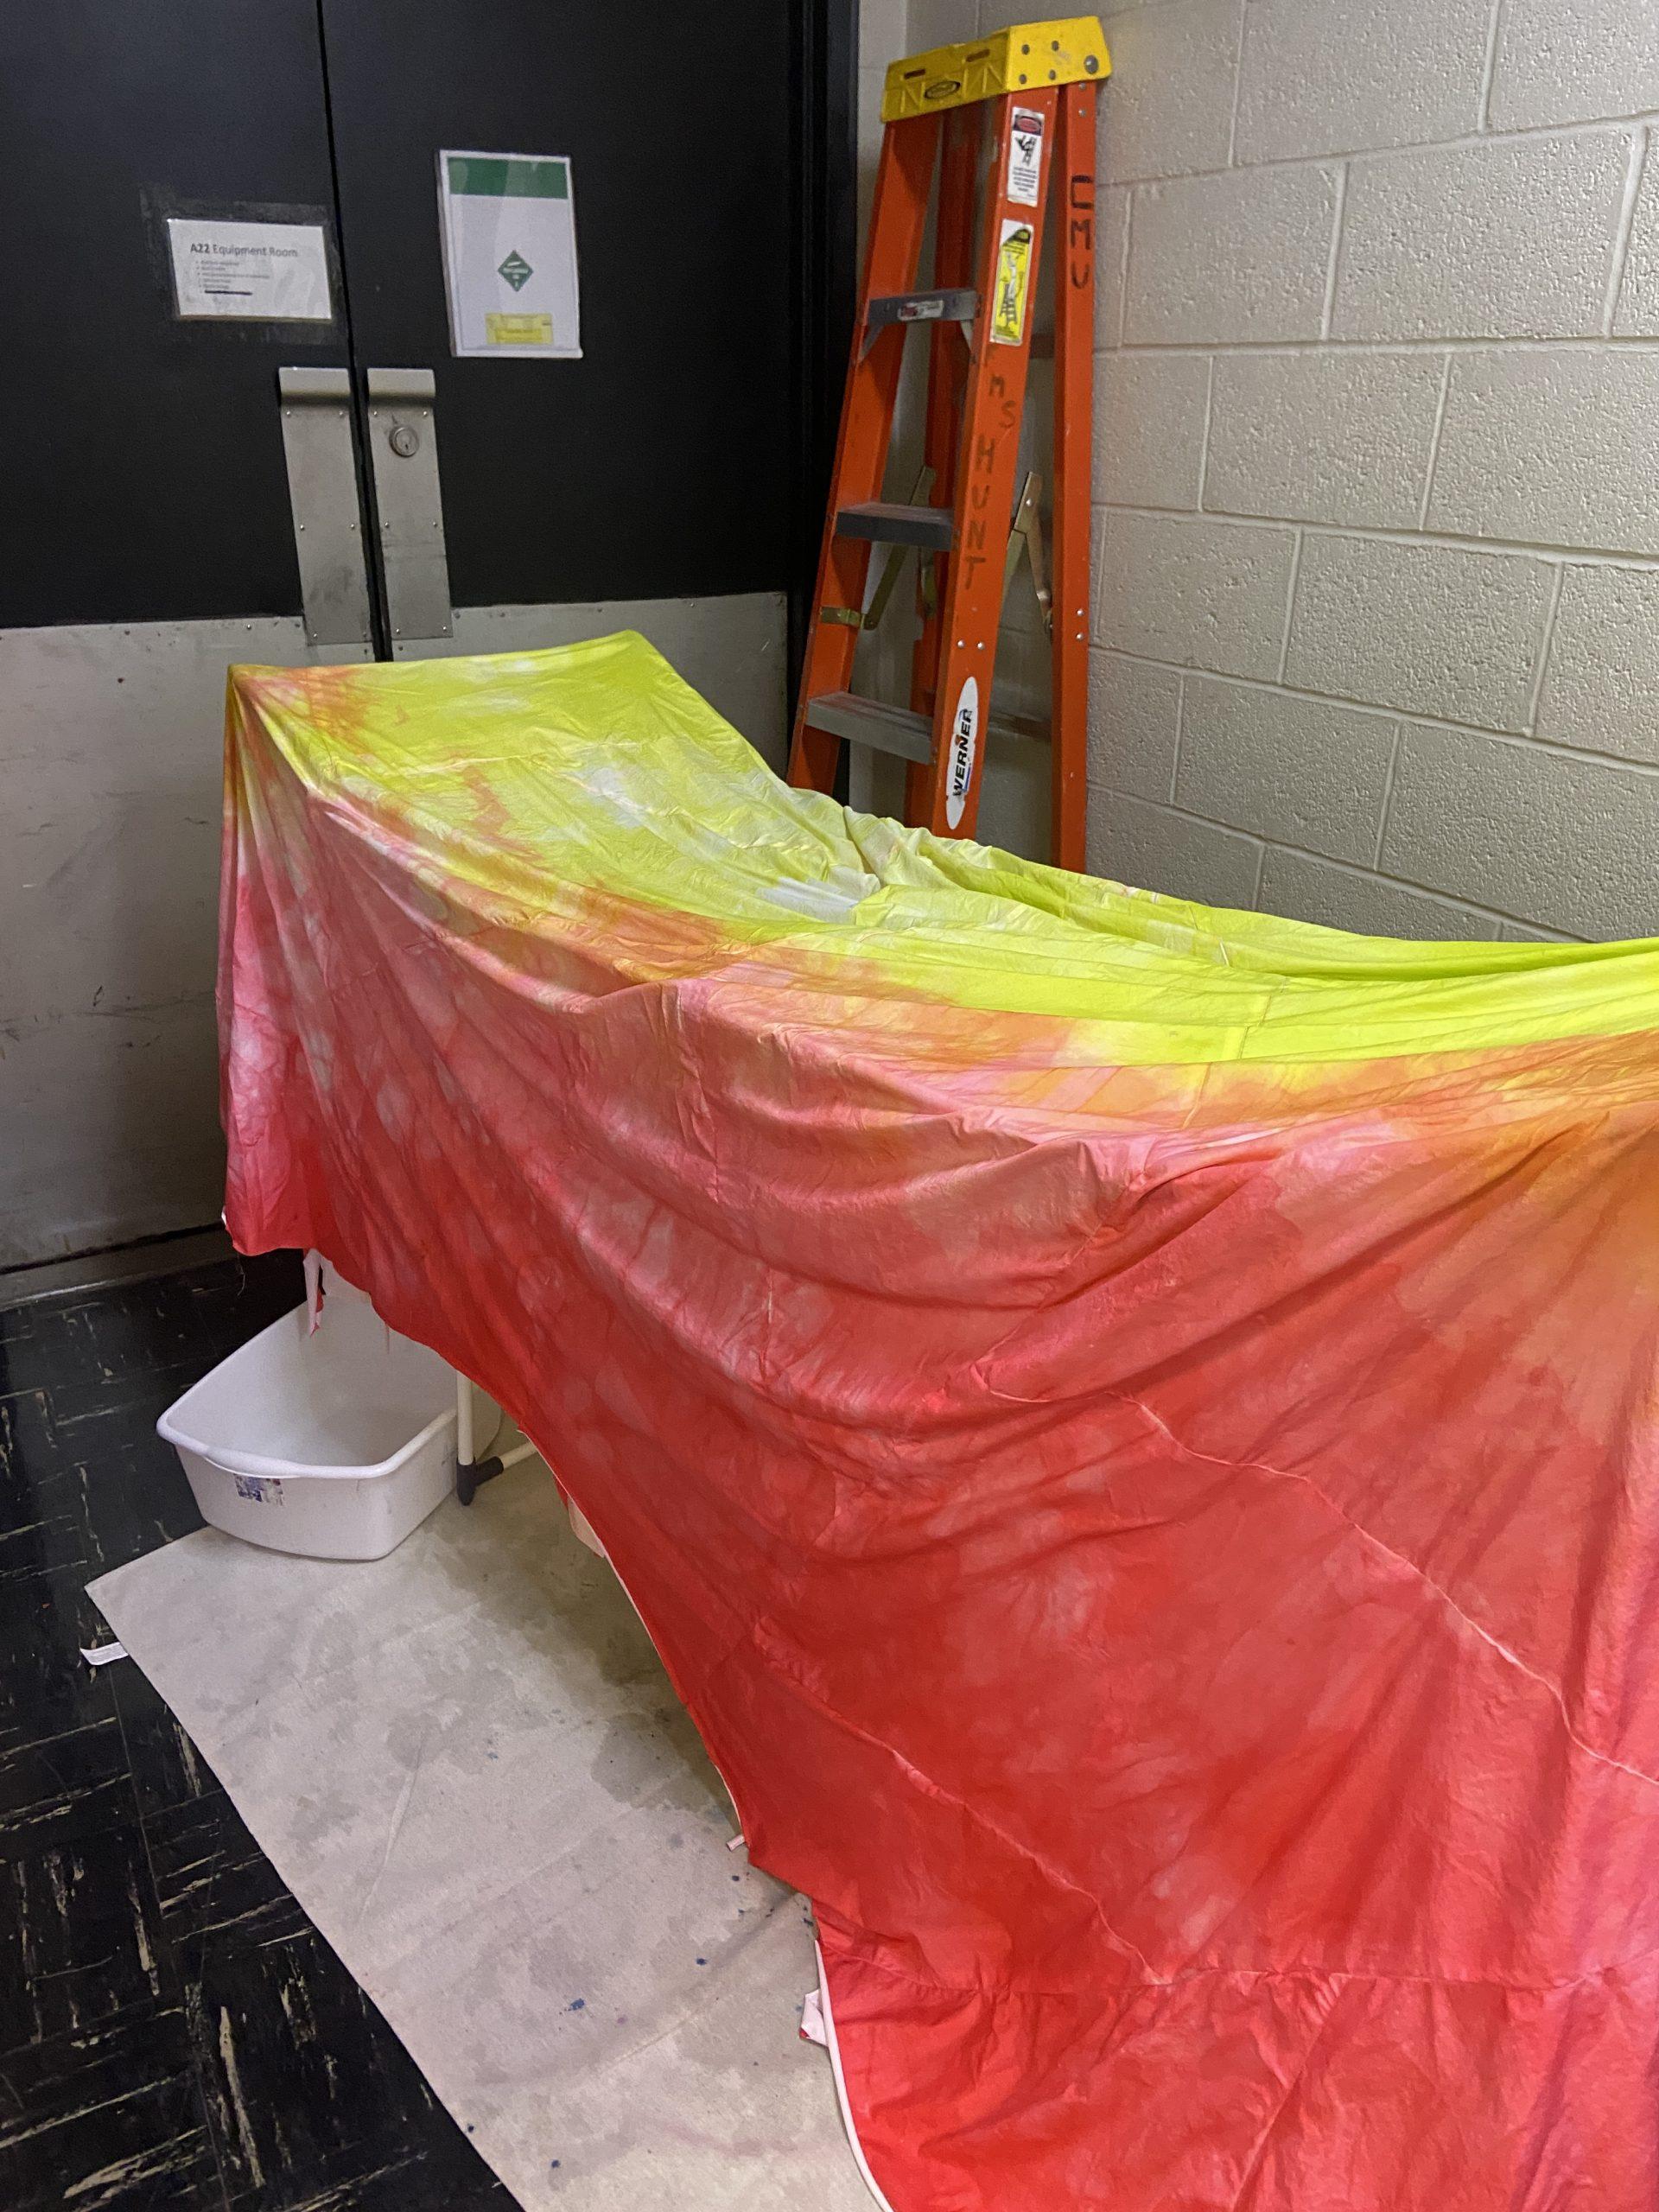
We sewed them together with the ties and dyed the inside walls with a gradient and the outside walls green.
When we dyed the outside walls, the dye bath got a little too hot and melted the protective coating on the fabric. It was all gloopy, but it actually looked pretty cool.
Next, we made the connecting walls with the teeth and attached them to the inside and outside walls we previously made. We tied all the ties together inside each wall, then connected the two walls with a central piece. Understanding how we would connect the two walls was very challenging.
We tried to plan for it but kept getting confused, and eventually just decided to improvise it. We were trying to make a complex connection between the walls of the flytrap and the stem but ended up going with the simplest solution possible and it ended up working. Finally, we made the stem and the tabs that the flytrap would hang from.
Once the fly trap was fully constructed, we did a test inflation at WQED.
Jennifer
I am really proud of the dye of the fabric. We tried several techniques and had fun, and the final result was true to the original plant. Also, I am happy with the shape and overall scale of the project. It was something that we did not know how it would turn out, so seeing it being so grand in the space was amazing.
At one point, I was extremely stressed out about the amount of work that I had to put in and worried about not finishing everything on time. Communicating with the team and sharing the frustrations to work together really helped. Figuring out how to create the overall shape was something I was worried about for the longest time. With our several initial mock-ups and creative improvisations with the team, we were able to successfully create the overall shape, slightly slanted leaves coming from the ceiling.
I learned how to collaborate creatively with others, especially those not coming from the same background. I am so used to working with other artists and being able to work together was such a valuable experience. I want to continue creating works on this giant scale. Finally, I learned so much about time management.
I learned how to listen and follow other people’s directions. I am used to being in control, especially since I do it alone when I am making my own artwork. So having other people, who have skills that I don’t have, and working together to come up with solutions was new to me but also so reassuring and comforting.
Everything you make will look so impressive and amazing, so don’t stress out.
Kavya
I think we were successful with our planning process starting with a small mockup, planning out our expanded design, and then cutting and sewing our final piece. This helped us create a shape that we were confident about looking good, and then scale it up instead of our initial thoughts of using rhino where we wouldn’t have known how the shape and baffles would hold. I also thought our dyeing was really successful as we were first unsure about how the green to red gradient would look and how the white teeth might look off, but the teeth actually really stood out with the white ripstop which I really liked.
A personal challenge I encountered was getting covid and not being able to be at hunt for over a week to help, but we did our best to work around that with me renting out a sewing machine and working on some of the sewing at home in quarantine to help out my group the best I can. We also had some problems with attaching the stem to the already sewed venus flytrap which required cutting and dyeing extra pieces and planning ahead on sewing better the second time.
The top three things I learned from this experience that I will take ahead into the future are patience when something isn’t working out or taking longer than expected, collaborating with teammates from different backgrounds with completely different skills, and how to work individually on a group project when we are not all working synchronously.
What I observed in myself regarding my collaboration with teammates is that we all had amazing but completely different ideas and with making a group project that was actually tangible versus coding/technical projects, we had to communicate a lot and make decisions before trying things out because we couldn’t just try all our ideas and see what works better as that would waste lots of time and material. It helped me learn to not always rely on trial and error and to discuss the pros and cons of all ideas beforehand.
The number one piece of advice I would give to future students in this course is not to be a perfectionist. Yes, planning ahead and being neat are two important skills to finishing an inflatable, but I struggled many times with stitching not being exactly on the line like I wanted or two pieces not being exactly the length we wanted to fit them together. Though it would be great if this always worked, I had to learn that at such a large scale, if I wanted everything to be perfect we would be working on one inflatable for months or years and we had to prioritize completion over perfection. In the end, with the giant inflatable you can’t even notice these tiny mishaps!
Charlotte
In making the flytrap, a crucial part of understanding how we would take on the project was making sketches and mockups. We had never made anything of that scale before, so making mockups was an approachable way to understand construction. I personally really appreciated our hands-on analog approach to project design; I’ve always had a tough time with CAD. I thought that our design approach allowed the form to be intuitively constructed without the distracting complications of CAD. Having to think that way also improved my own skills with imagining 3-D objects in space and the primary forms that they comprise of. Dyeing was also a crucial aspect of our project. I was afraid it would make our timeline for executing deliverables very challenging (it did), but it felt necessary for the kind of object we were creating. When I saw the final completed project, I felt like the dyed fabric was one of the most compelling elements that really brought the fly trap to life. Finally, I was very worried about our ambitions about having the fly trap hang at the beginning of the process, but being able to execute it was very satisfying. Having the fly trap hanging created a space underneath that seemed like an important aspect of our final project that I couldn’t imagine any other way. We would not have been able to hang the fly trap without the help of the team at WQED.
The biggest challenge in making the fly trap was having to dye every part of the inflatable. Due to poor planning and expectation of material needs, we ended up having to dye fabric a total of four times. We overcame this challenge mostly just by working a lot, but a better way to prevent such a problem would be to plan better, take more careful measurements, and handle construction more meticulously. Another challenge we faced was the presence and availability of all our group members. Sometimes, unexpected things come up and not all members of a group can be there even though we had expected to be all available. In one particular situation, the members that were able to be in person prepared materials for another person who had to be remote, and they worked on the project asynchronously. While it was challenging, it ended up all working out and showed us that working together on a project can take on many forms. In general, when we weren’t able to work on things together, we communicated as clearly as possible in order to make sure we were all on the same page.
The three top things I learned from this experience that I will take into future project experiences are trust, vision, and excitement. The most important of the three is trust. I had a lot of misgivings about the ambition of our project, the steps we would take to make it, details of construction, and more. I was really nervous about the project and I think feeling that way made the project challenging for me and my group members. Being anxious about the project did not serve anyone or even the project itself, and when I could trust that everything would be okay, work went the smoothest. Another thing I learned from this project is the importance of having a vision for what we want to create at the beginning of the project. Even if you don’t have all the details down in the beginning, it’s important to think about what kind of experience you want to create, what features you want to focus on, what it is you want to make, and so forth. Having such a clear vision at the beginning of the project is what helped us make concrete goals at the beginning and throughout the project. Finally, I learned during this project that excitement about what you are creating is an important feeling to have if you are going to work very hard and if you want to make something good. The more excited you are about a project, the more you want to feel responsible for it, and then the more you want to work on it a lot. This project had a lot of flexibility and creative control, but I hope in future projects where I may have less of that I can find little things I am excited to feel responsible for.
In terms of collaboration when different members have different skills, I’ve found that if there’s not enough time to share skills, it is actually most effective to divide work according to skillset. For example, it would be terrible if I was tasked with making CAD mockups not only because I would hate it but also because it would take forever and not be high quality etc. I got to learn a lot from my teammates especially because we all come from different academic backgrounds.
This is so cheesy but my number one piece of advice to future students is to have fun. I had so much fun in this class and it made all the work worth it. I loved being silly in group warm ups and exploring new ideas even if they didn’t turn out so awesome. It was great to meet all these insanely talented people in my class all from different backgrounds. Having fun and being excited will result in your best work and the best experience you could have in the class.
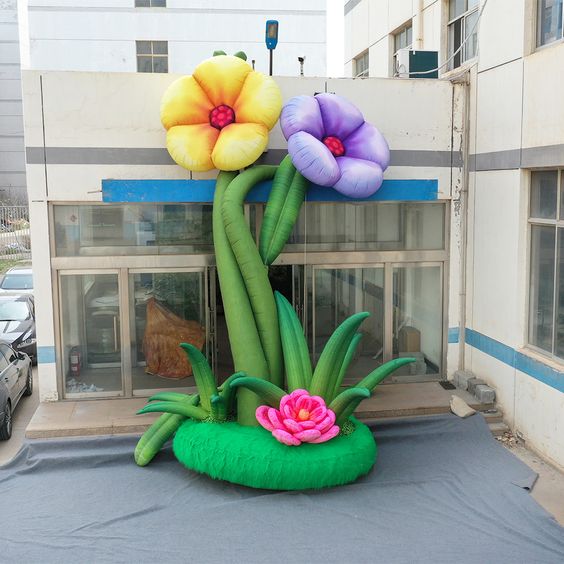
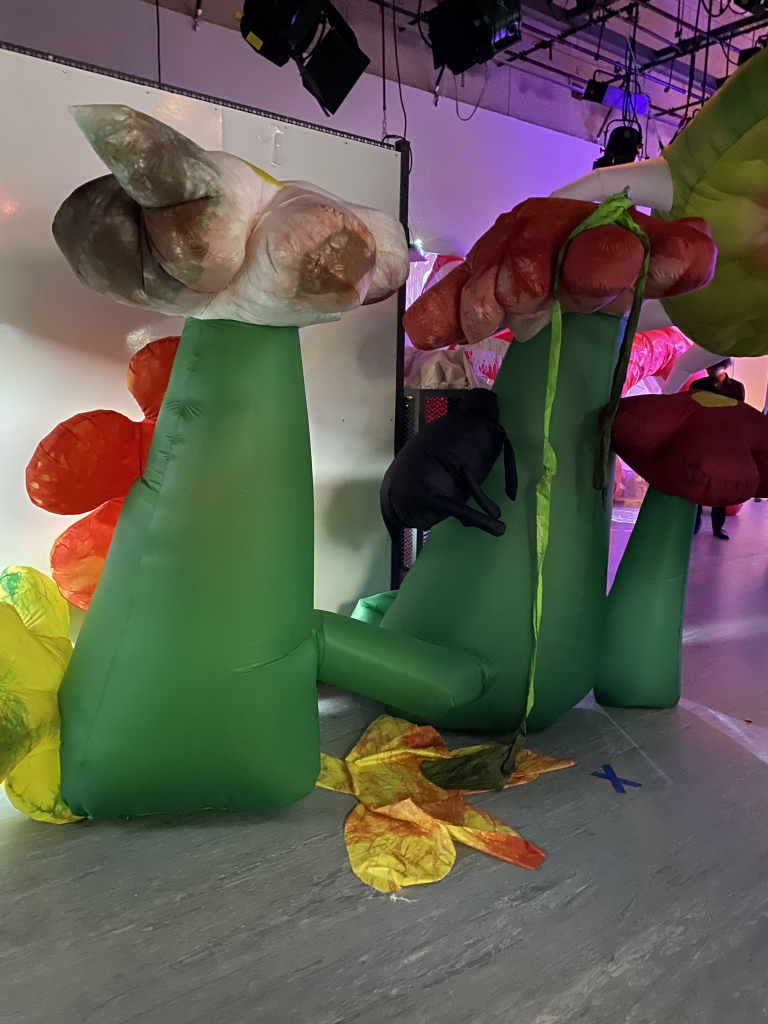
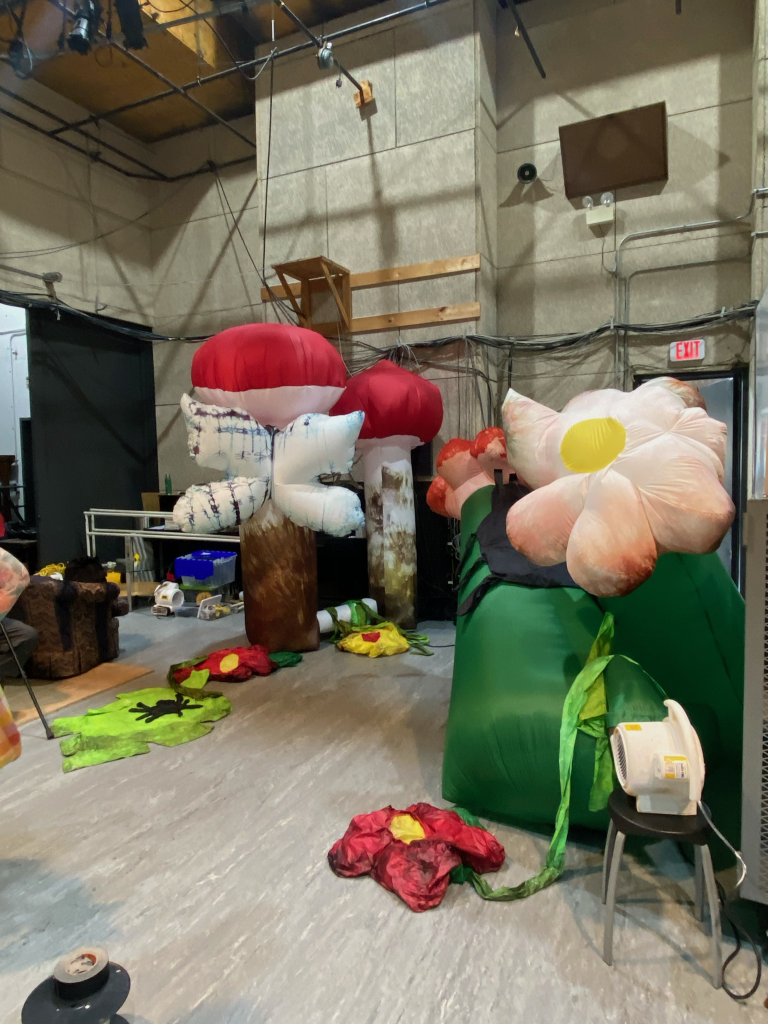
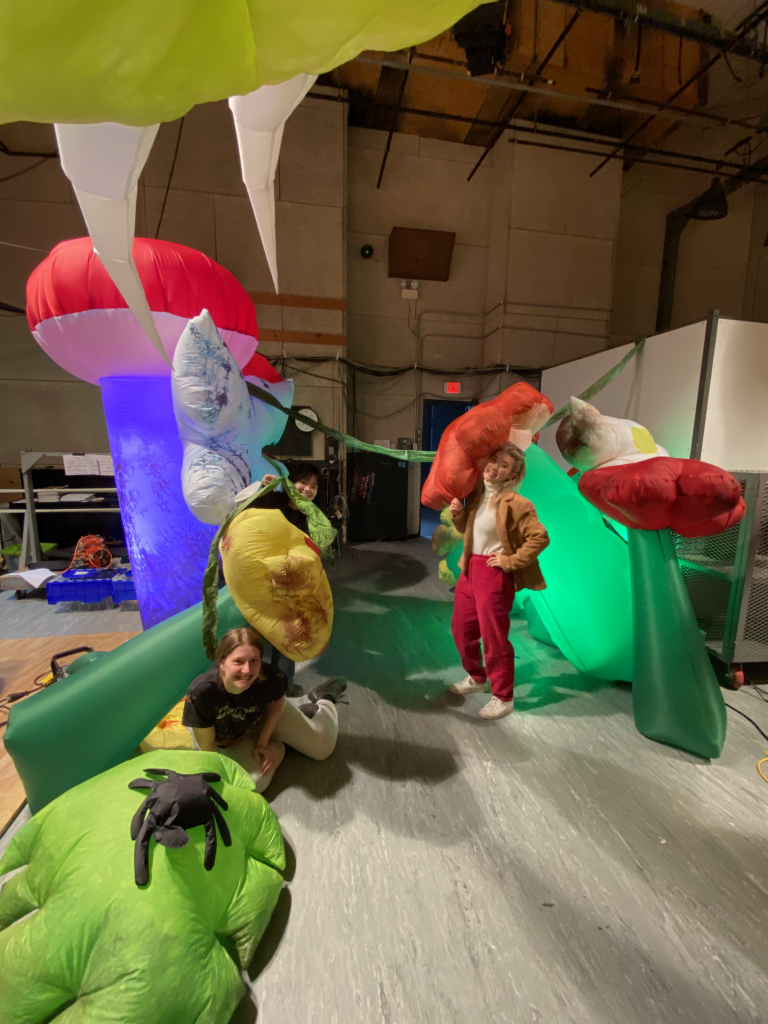
Through scouring lots of inflatable inspo pics, Heejin gravitated towards the inflatable flower shapes so we decided to build around that idea and thought of shapes that could complement the flowers and gardenscape.
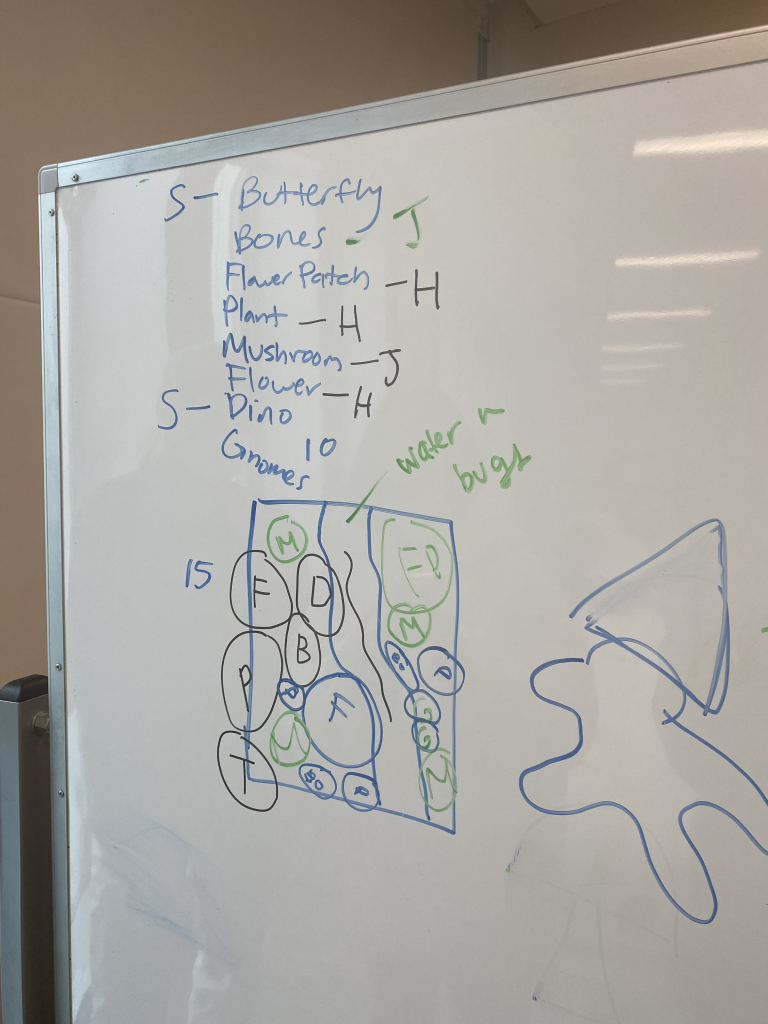
In the beginning, we found flower inspo pictures. We mapped out where we wanted our objects to go. Started building some pieces and did a test inflation to see how they work out. Spent a day dyeing the fabric. Created a new layout with our pieces and did another test inflation. At the end, we had finished sewing u all our pieces and put them all together for the show! (Then, we had to change the layout again for the animators xp)
Process photos of path from beginning to end.
One of the challenges we encountered was figuring out how to combine the pieces together in a way that was somewhat cohesive. To figure it out, we repeatedly did test inflations and moved around our placement a lot. This also helped understand where we needed to fill the gaps and make objects to fit into places. Since our project was very modular, we didn’t encounter too many challenges.
The “happy accidents” occurred throughout the piece. We all had kind of wonky looking shapes because we decided against prototyping the pieces in Rhino, but I think it made the environment feel more cohesive because all the shapes were a little out of proportion and whimsical.
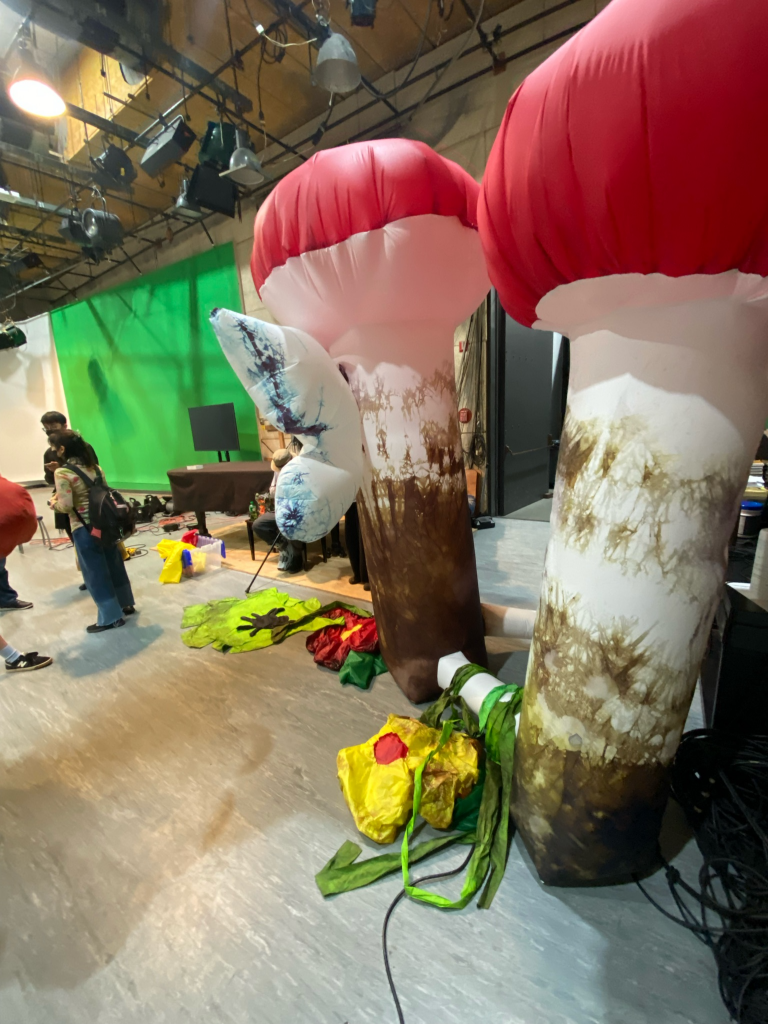
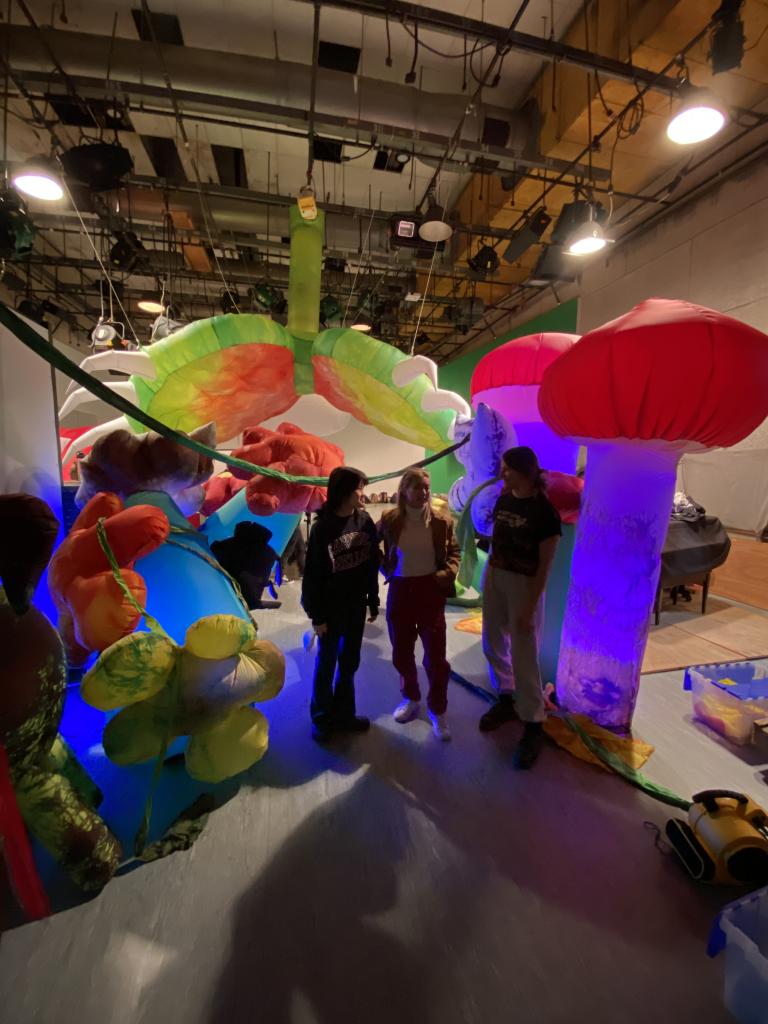
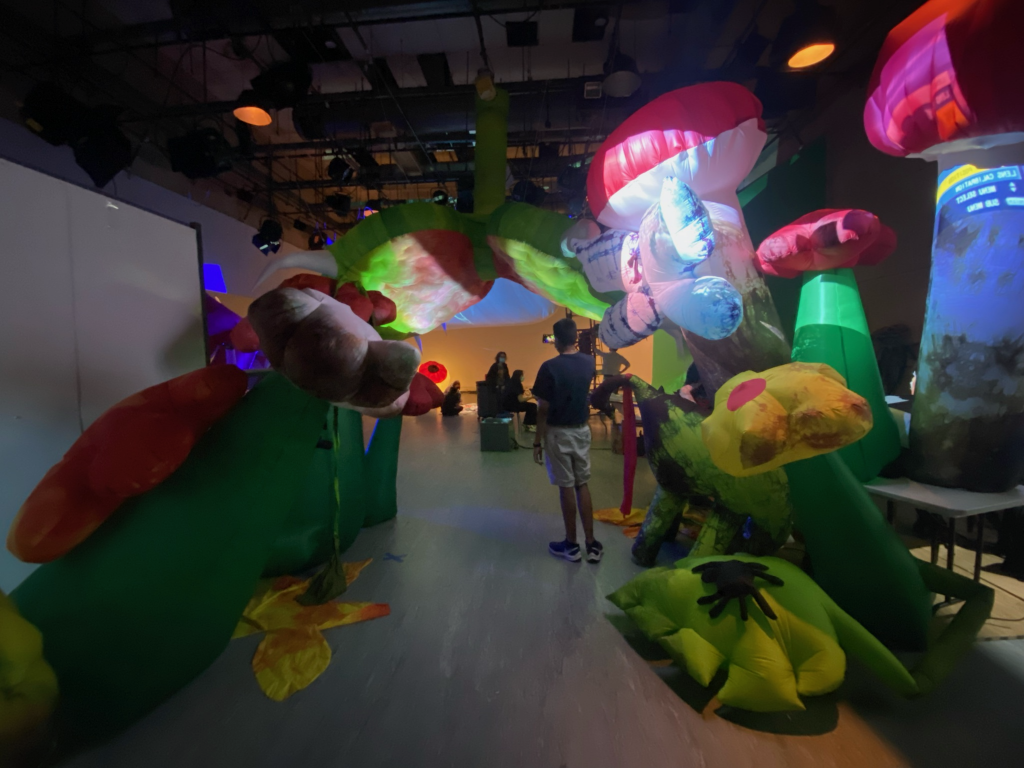
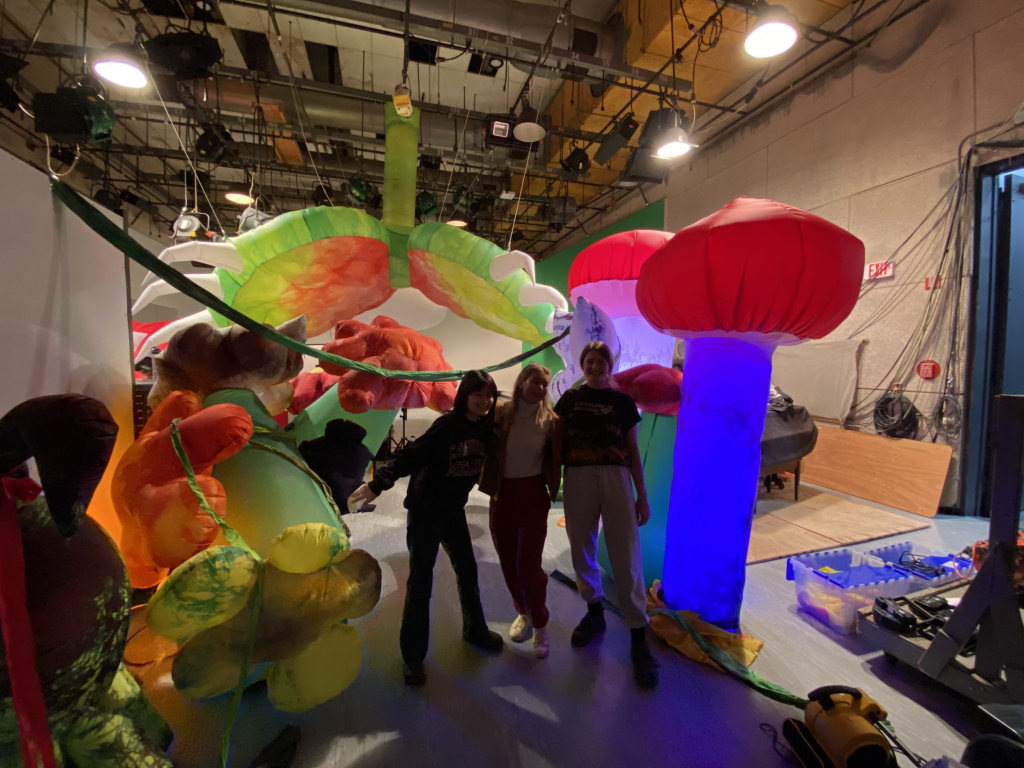
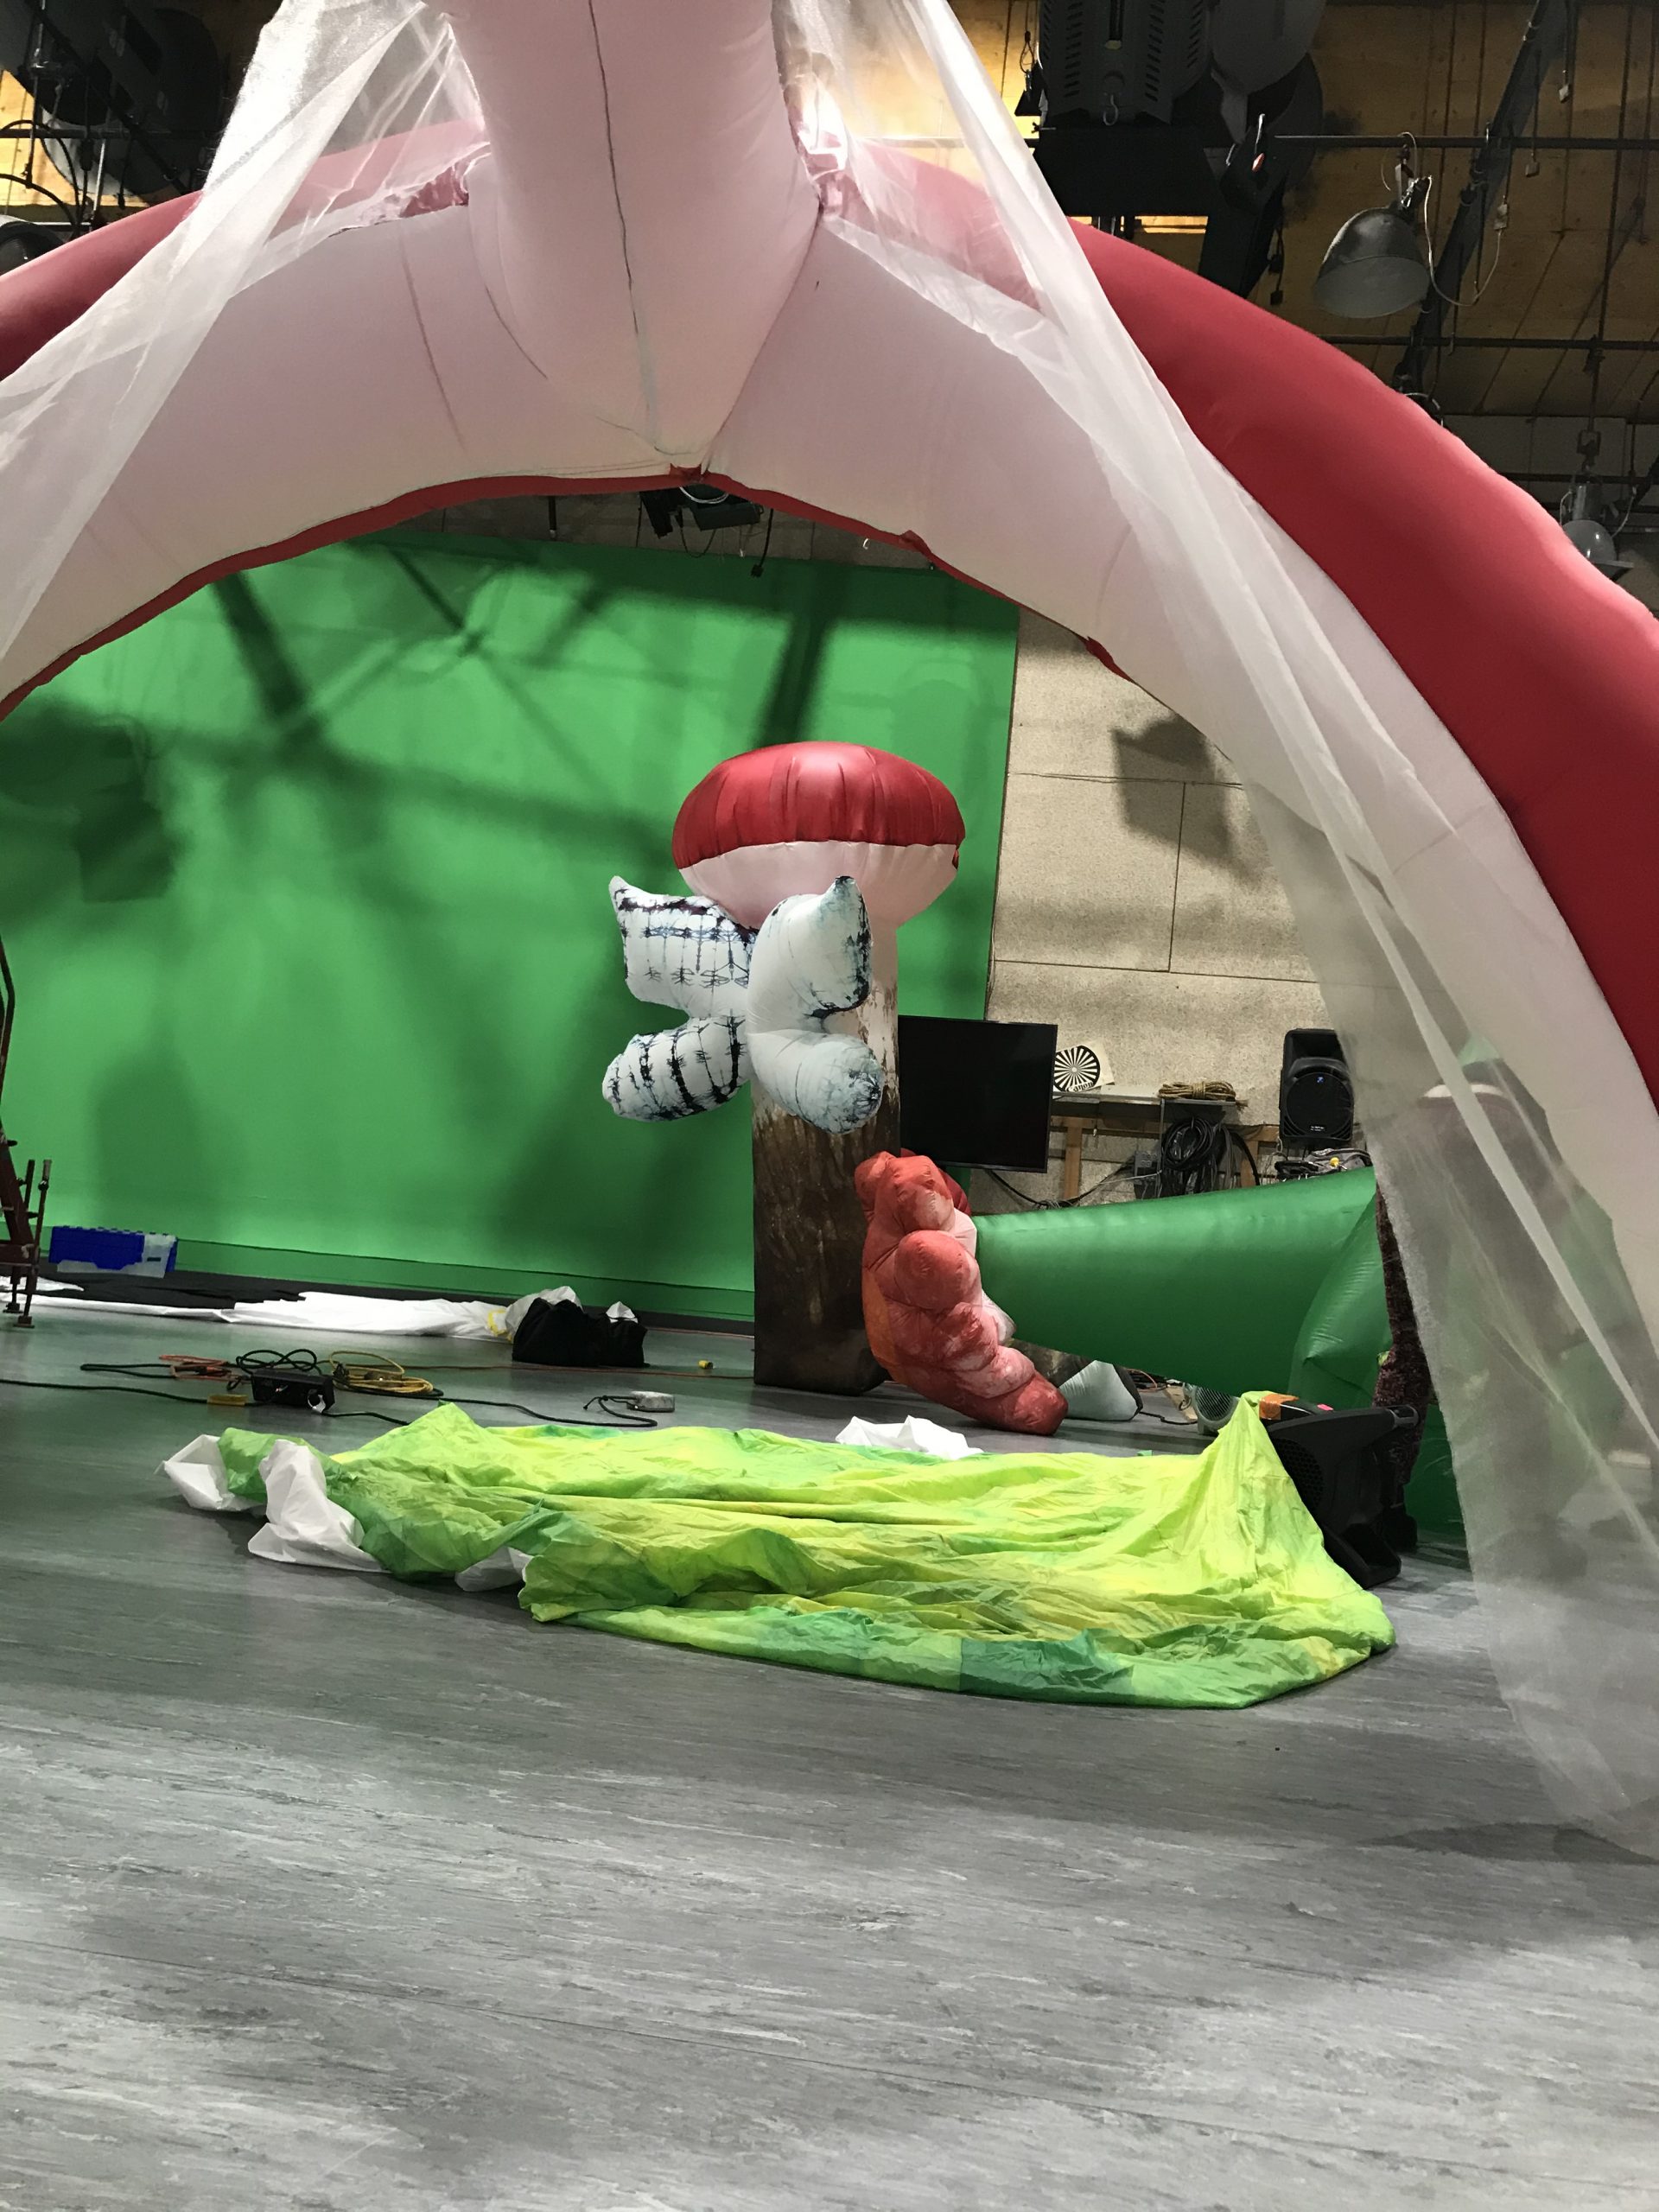
This project is an eclectic, psychedelic garden pathway with gargantuan flowers, mushrooms, and creatures. The projections are patterned light, bugs, and flowers that complement with the environment. The viewer feels very small in the space since the mushrooms and flowers span to 7 feet tall and give the viewer a wondrous experience.
Individual (Jules):
I thought our dye job came out more successfully than I thought it would. I wasn’t sure if bundling the fabric and dyeing it would look bad, but I think it added a really interesting element to the project that made it seem much more complex than if it was a solid color.
One of the challenges I encountered was making the mushroom cap more mushroom-like. In order to have the peak effect and the cap to form, I had to make a bunch of tiny pleats that was very exhausting and not fun. Before understanding the tiny pleats, I was making big pleats that did not look great
Top three things are knowing how to sew, use the laser cutter, and CAD. I think also in general, just time management and how to delegate parts of things in collaboration.
I think I observe that I can collaborate easily and I especially like to highlight other people’s skills in the creative process. I also observe that as long as someone is getting the work done, I don’t really care what small decisions or time management that someone is doing.
I would advise future students to start their projects as early as possible and frontload budgeting as much time as possible.
Individual (Skylar):
I think the most successful aspect of our project was the chaotic and busy feel that our process and dye jobs gave it. We did originally intend to have it be chaotic and creepy, but we didn’t really plan how to do that. I think having each of us own different parts of it and come up with new ideas before we put everything together was a fun way to achieve this – I felt really able to still ideate and create new things fairly late into the project, and it was different every time we set it up, which I don’t think the other groups got to do. I really appreciated that as in general I’m not someone who wants to stick with a meticulous plan. I love being able to just figure things out on the go. I think the dyeing was also a great addition and I’m really glad we did it.
We encountered group communication challenges often because we were all working on different parts and didn’t really understand how they would all fit together, especially because we kept coming up with new things. I think at the end we just decided to work with what we had and embrace the changes. We also struggled with connecting pieces since there were so many of them and it got so confusing to turn them all inside out. But we just made it work.
How to use sandbags
How to work with people who do not have my same amount of experience with group projects (I always had the same amount as people in my major, and did most projects with them, so it got to be really easy to collaborate by the end because we all knew each other)
How to use a walking foot and ripstop nylon (I want to make moreeee)
I think I can get frustrated when I feel like communication isn’t working but I like to think I feel comfortable letting people with different skills and experiences do what they are going to do without trying to micromanage.
I would tell people in the future to believe in themselves and not let mistakes get them too down.
How did you generate the idea and starting point for the project?
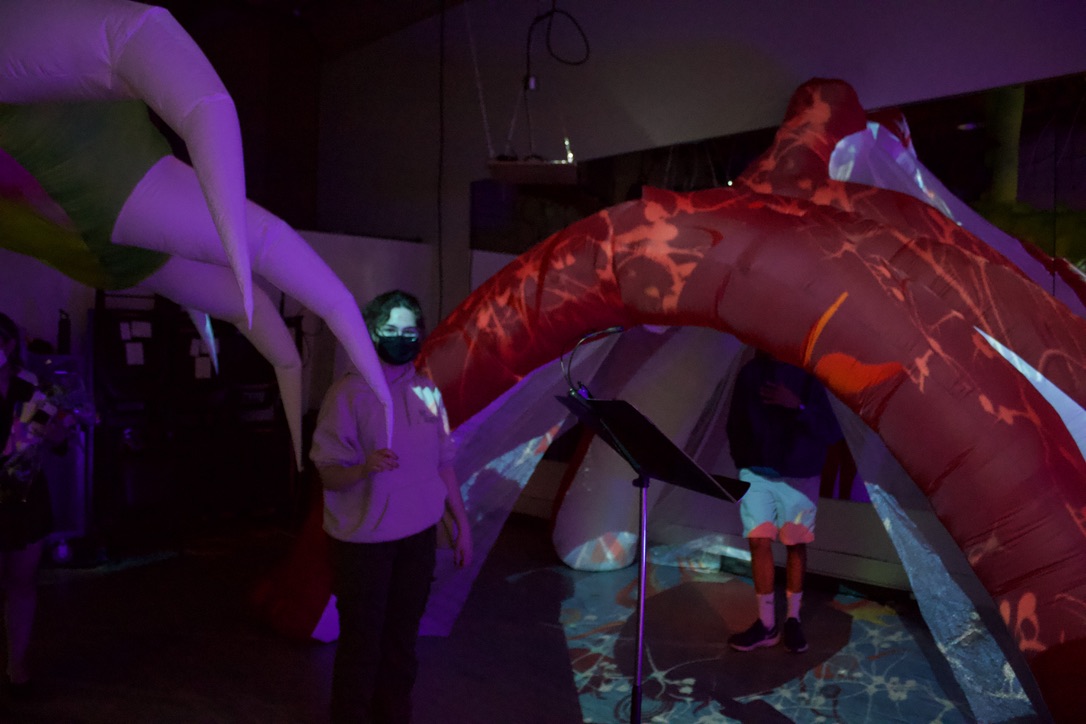
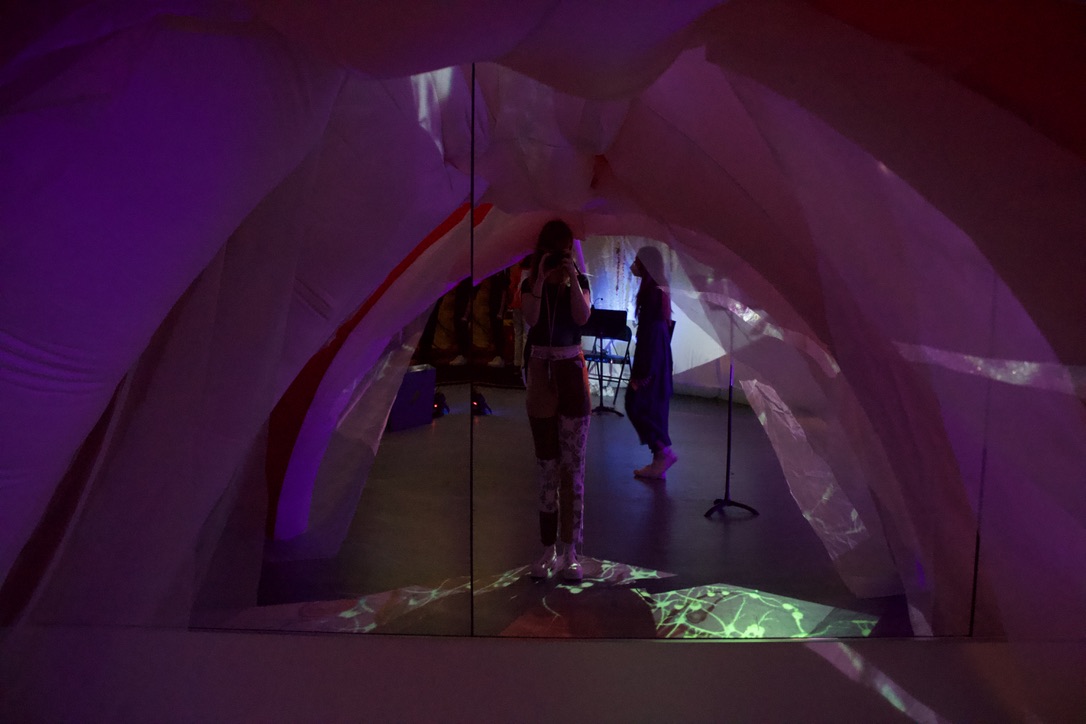
I think our idea started with hallucinations. When at WQED I had told Jiyeon and Asad that I thought it would be cool if we did something around that idea. I think once getting into the space, Jiyeon thought of having a dome or some sort of space to walk into, and we all enjoyed the idea of it. With hallucinations still in mind, the mirror really struck us as a prop that we could use to further that idea of a weird space, and along the way of drawing I kind of ended up turning it into anatomy, and a place that would just be super weird.
What was the path that you took from beginning to end to accomplish the project? Please upload 5-10 photos to illustrate your story.
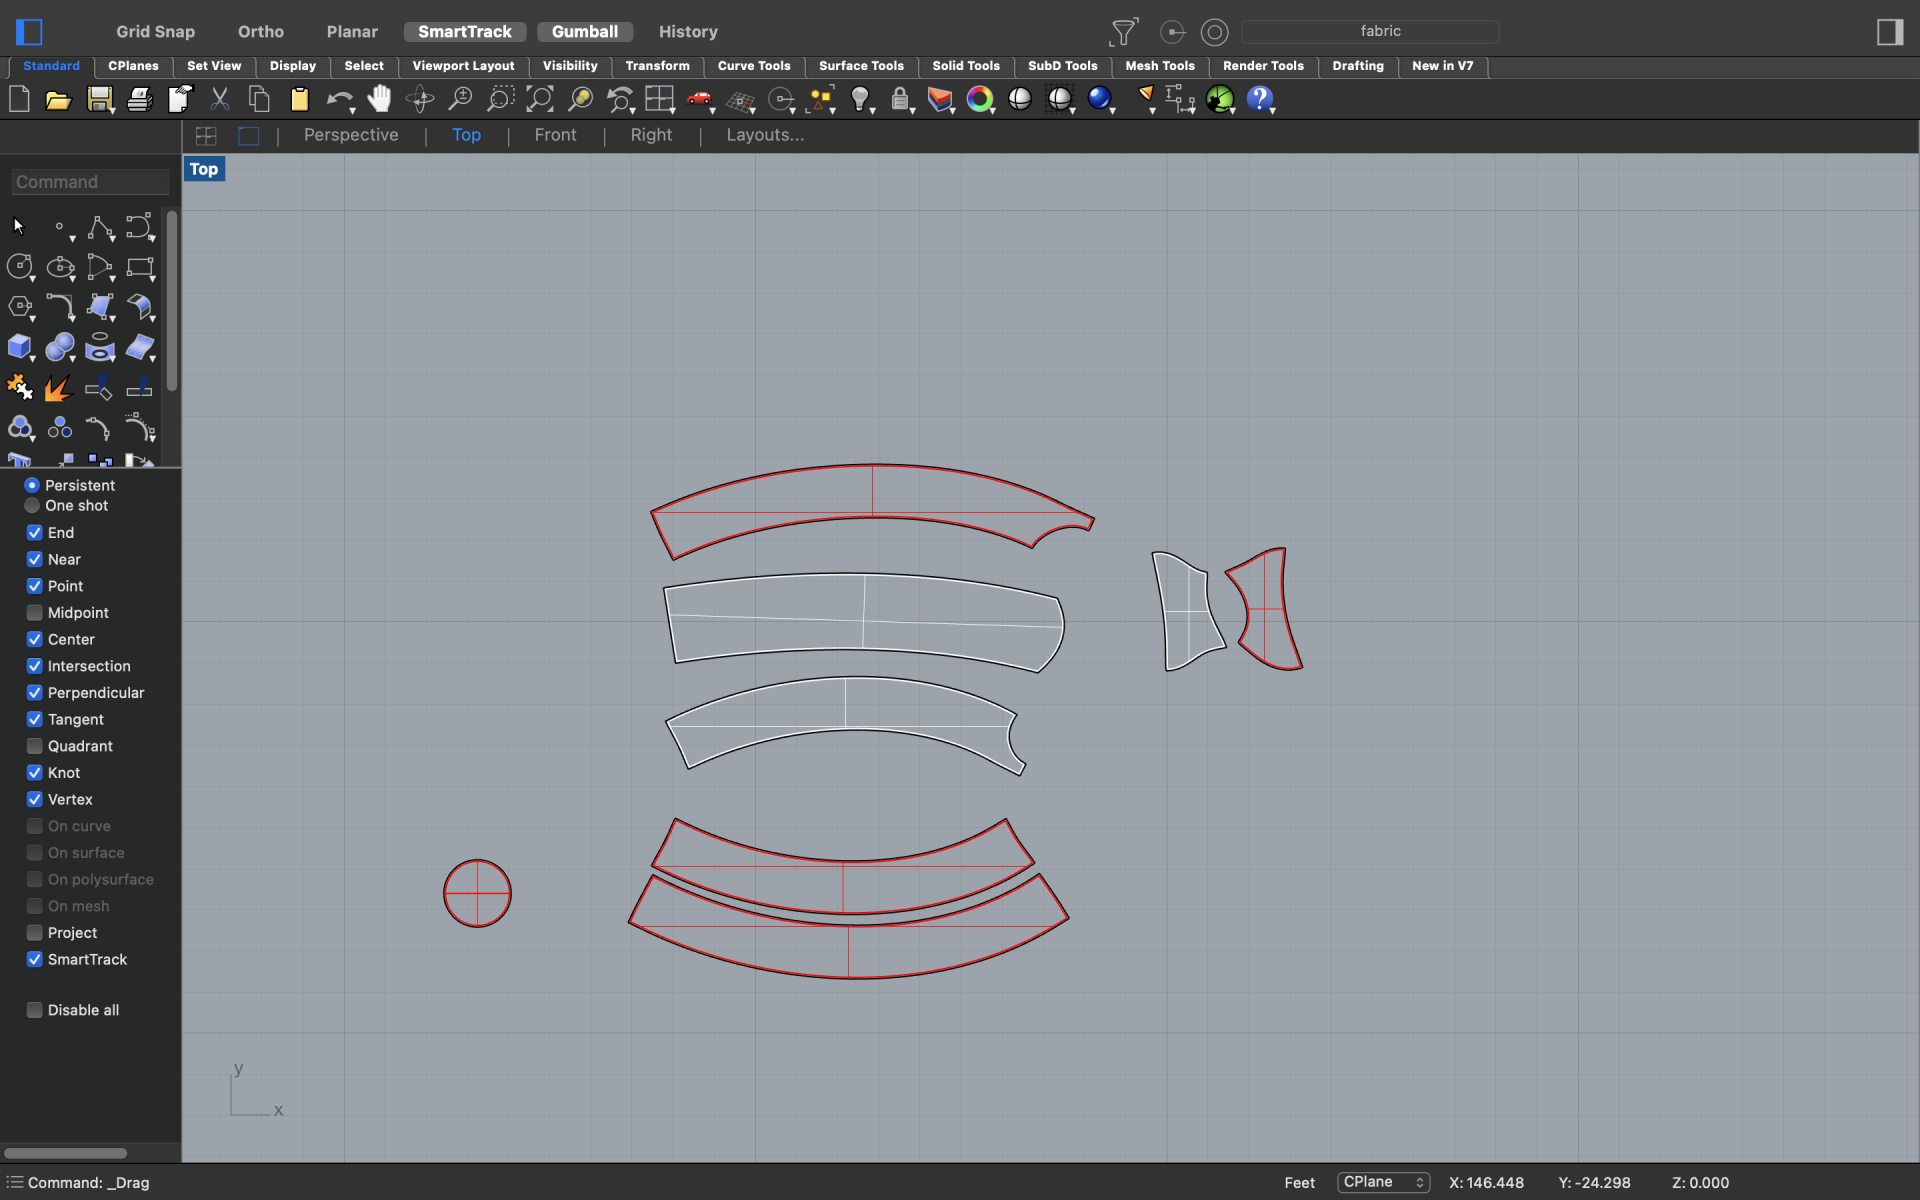
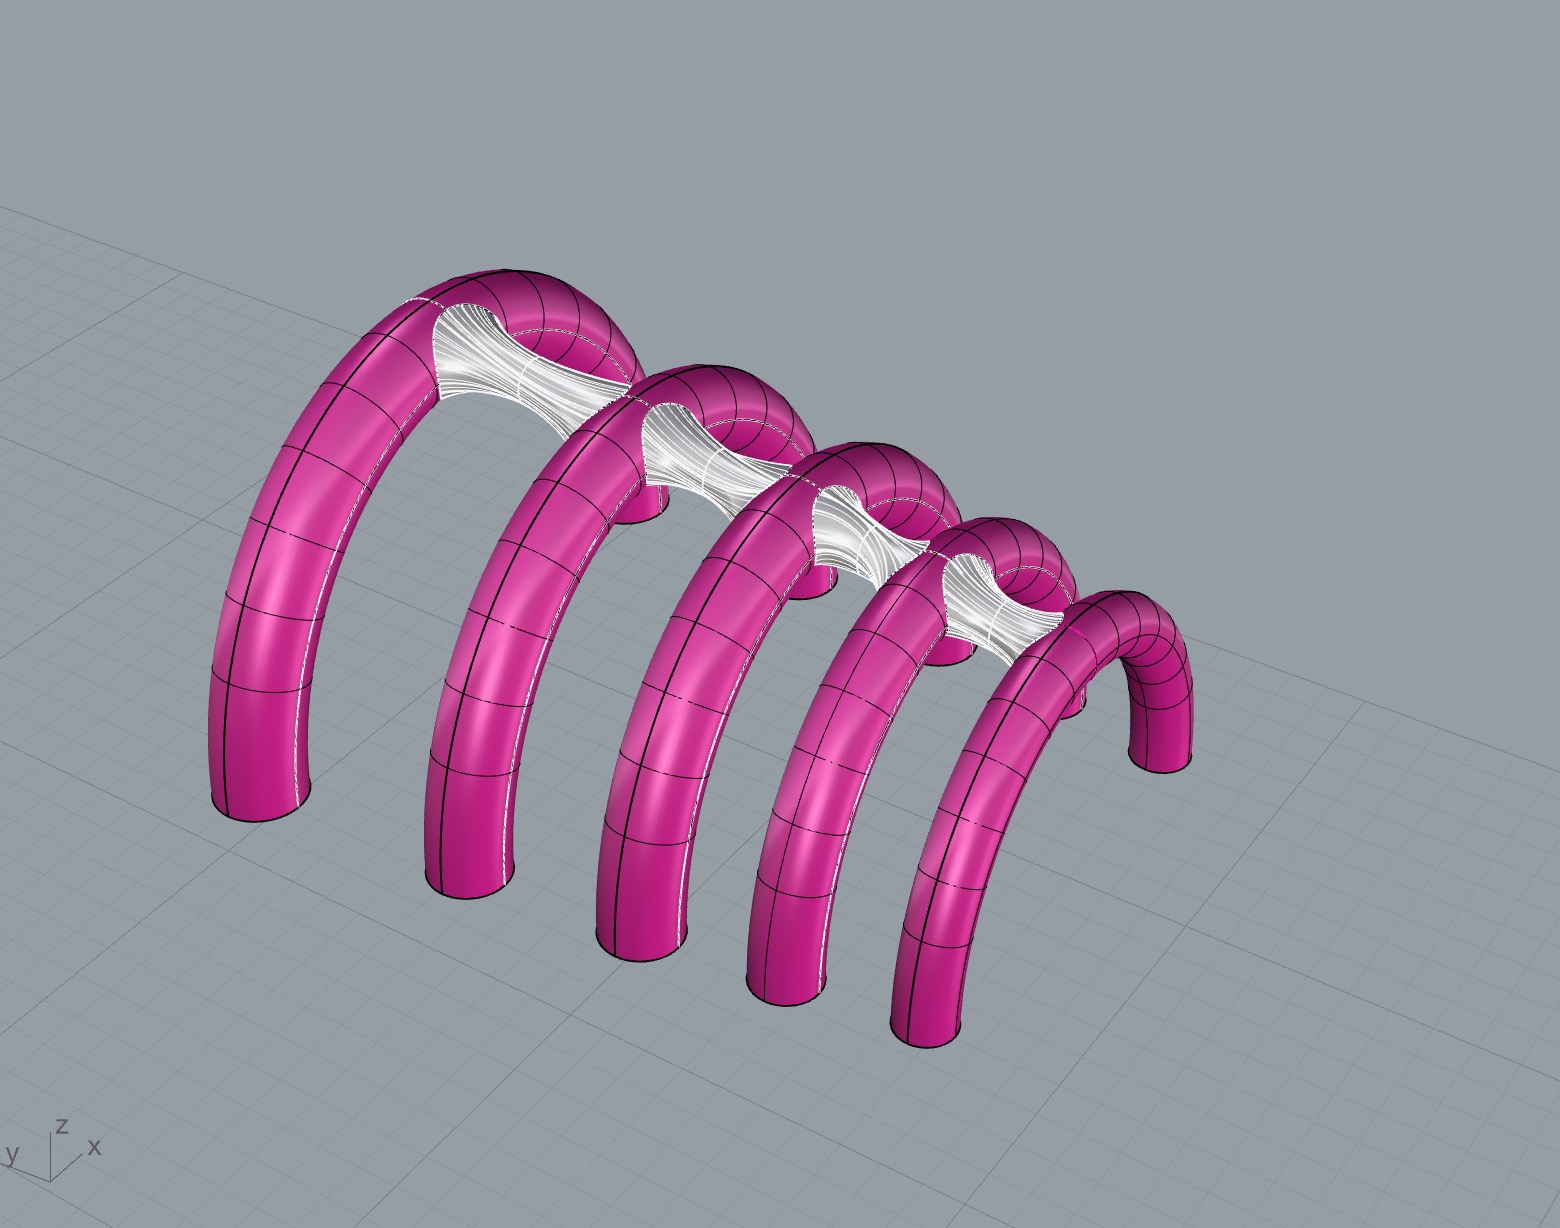
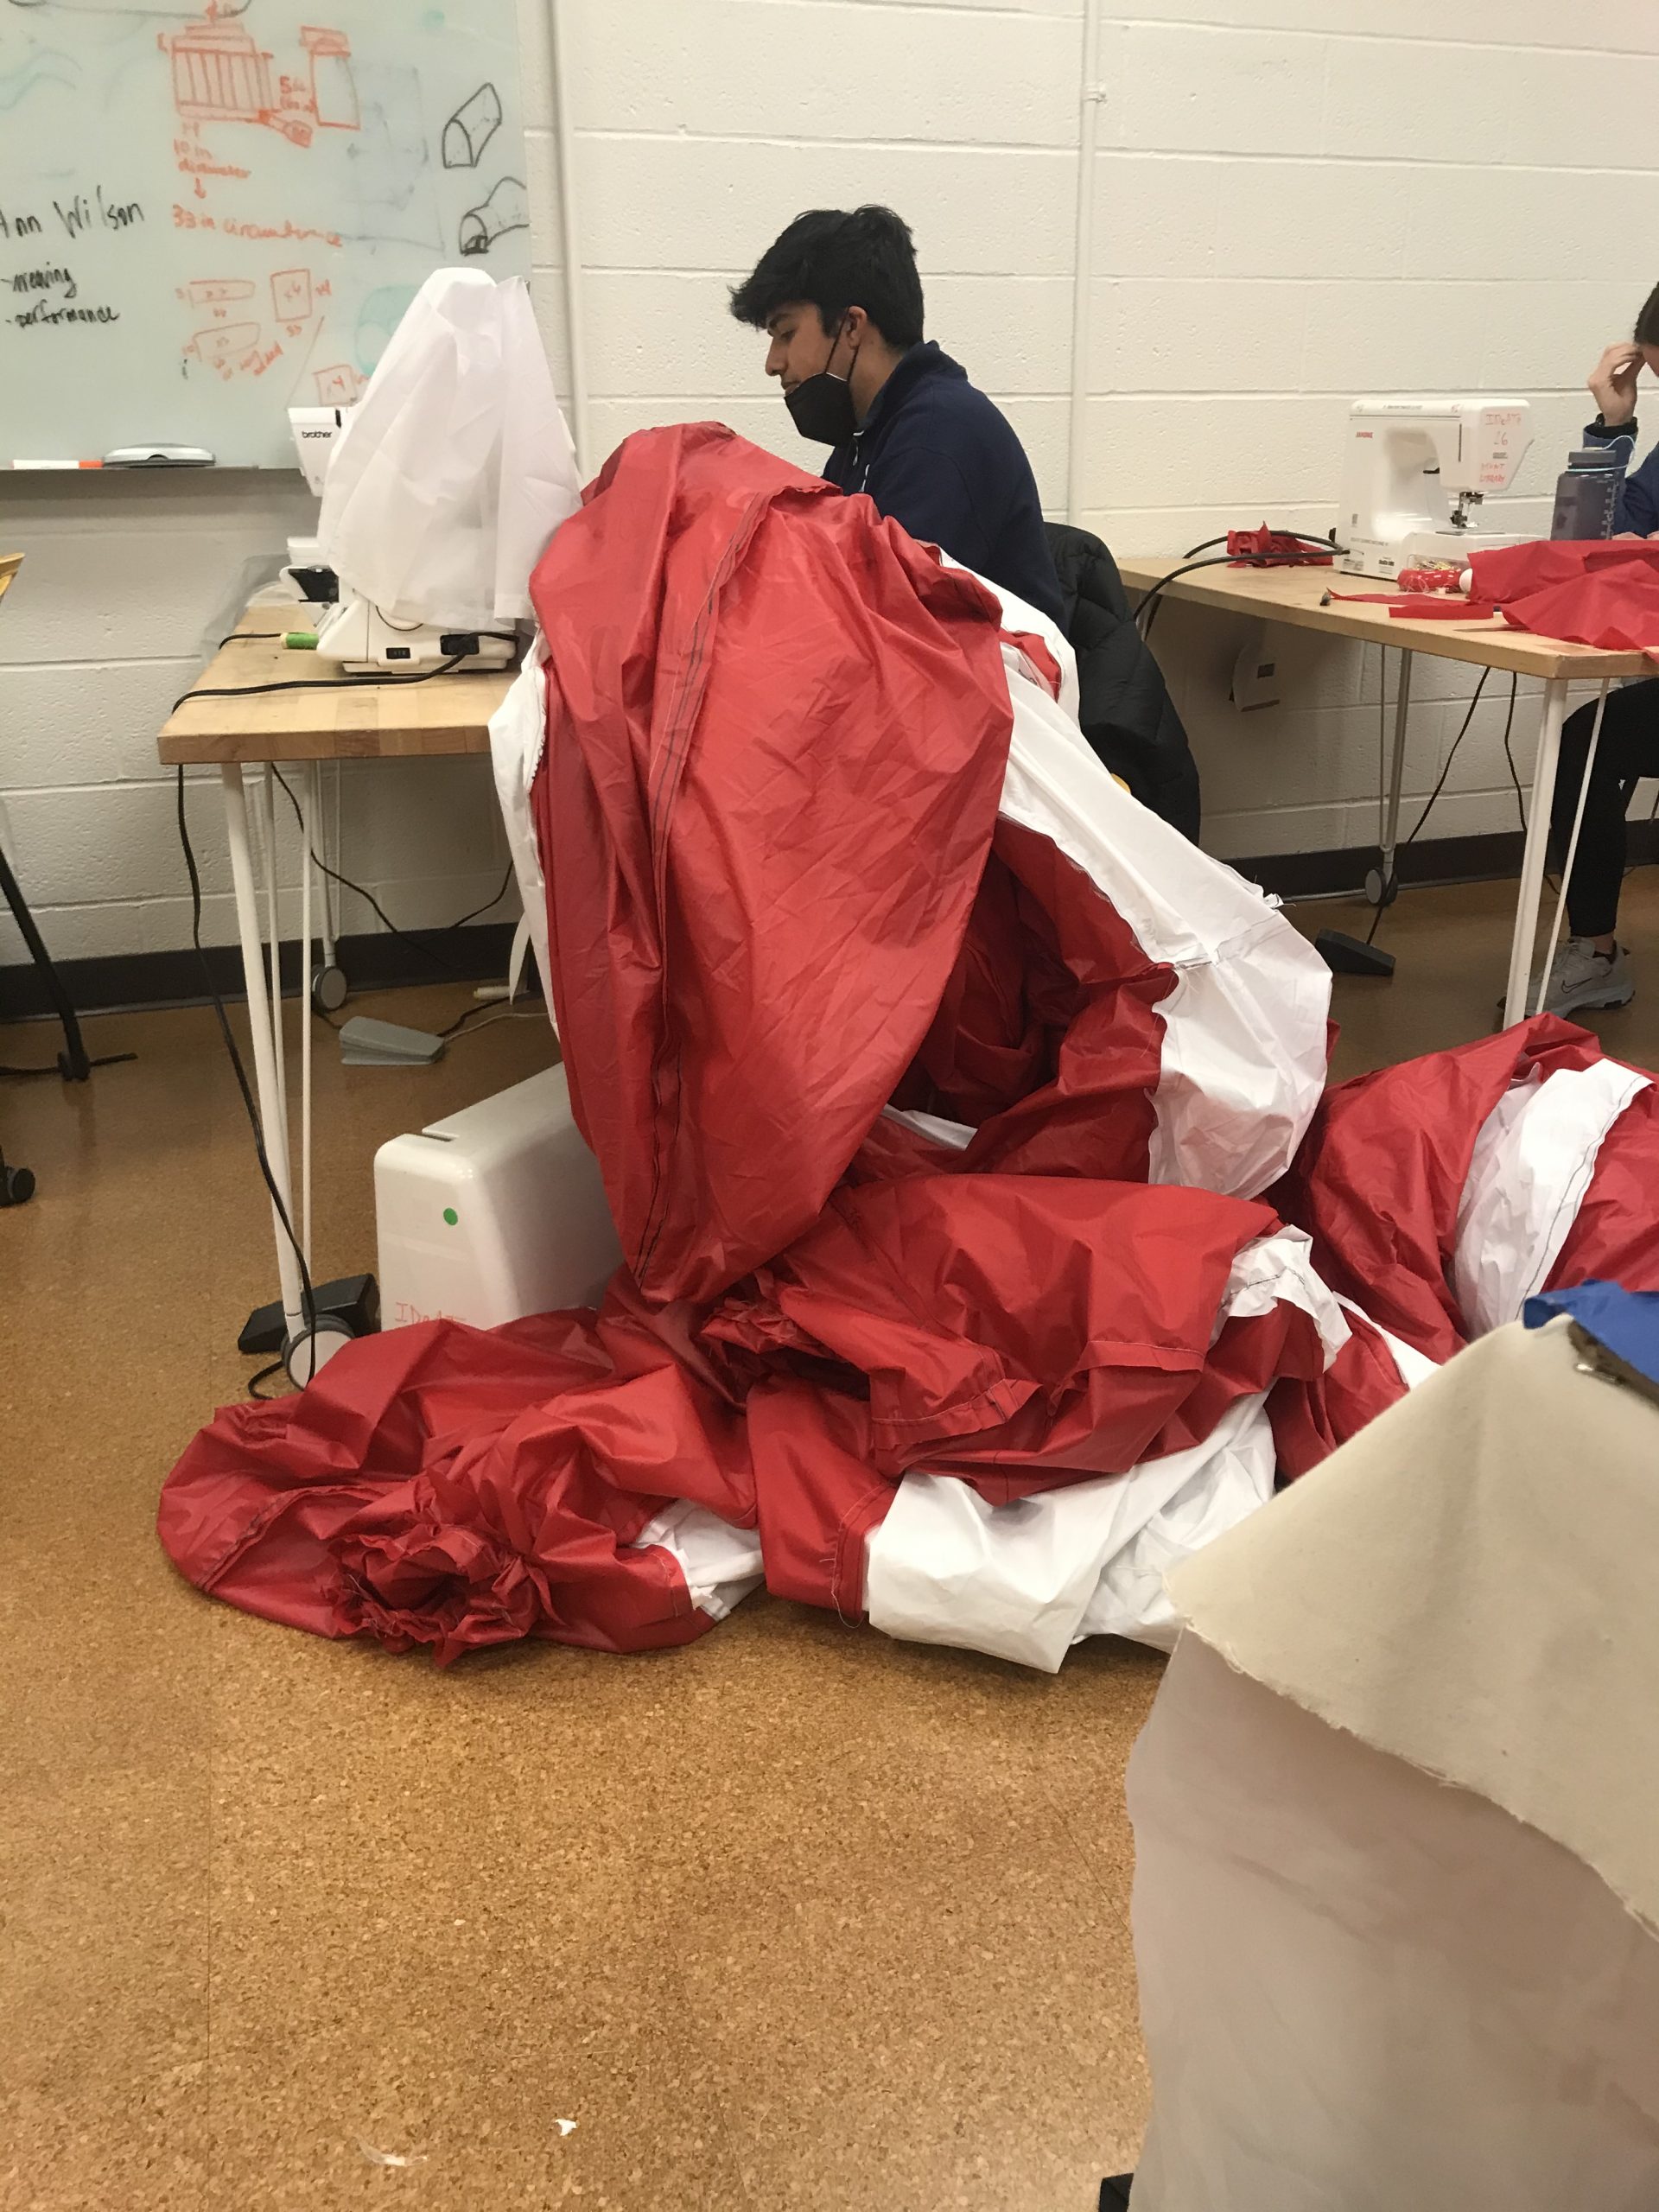
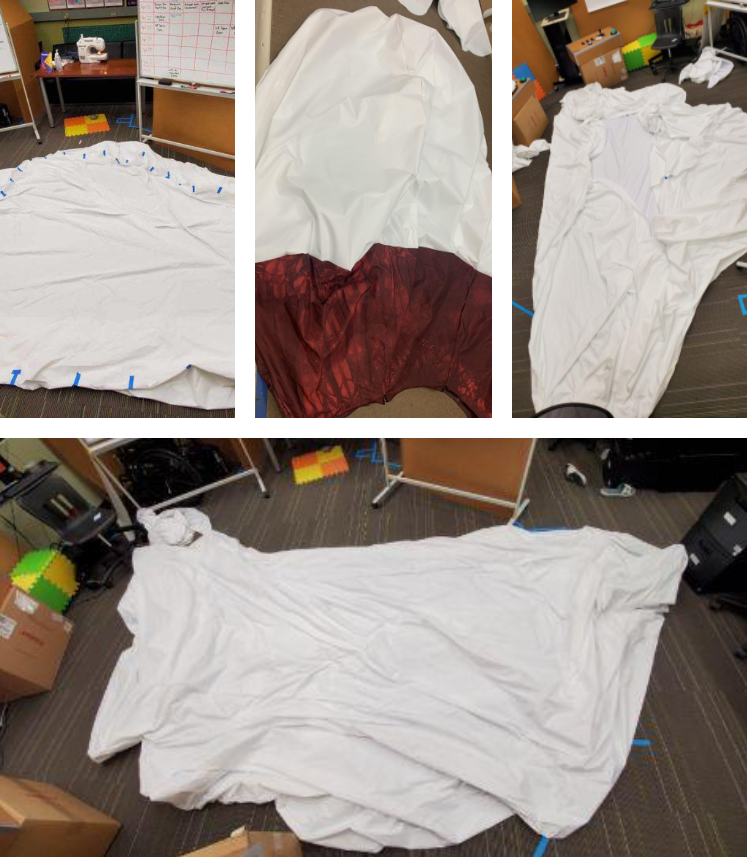
I mean first, we started with Rhino, which took us a while. Once we had most of the pieces squished we were able to start cutting pieces. We started to cut pieces using the projector and cut and sew pretty much until we finished.
What were the challenges you encountered and how do your team overcome them?
There were a couple of challenges we encountered along the way. There were issues with projectors – we first struggled with getting comfortable with the setup so that we could trace all of our pieces. There were also issues with lending as there were multiple times where we weren’t able to get access to the resources we needed. We overcame this by regularly communicating with Olivia to make sure we did have access to lending resources.
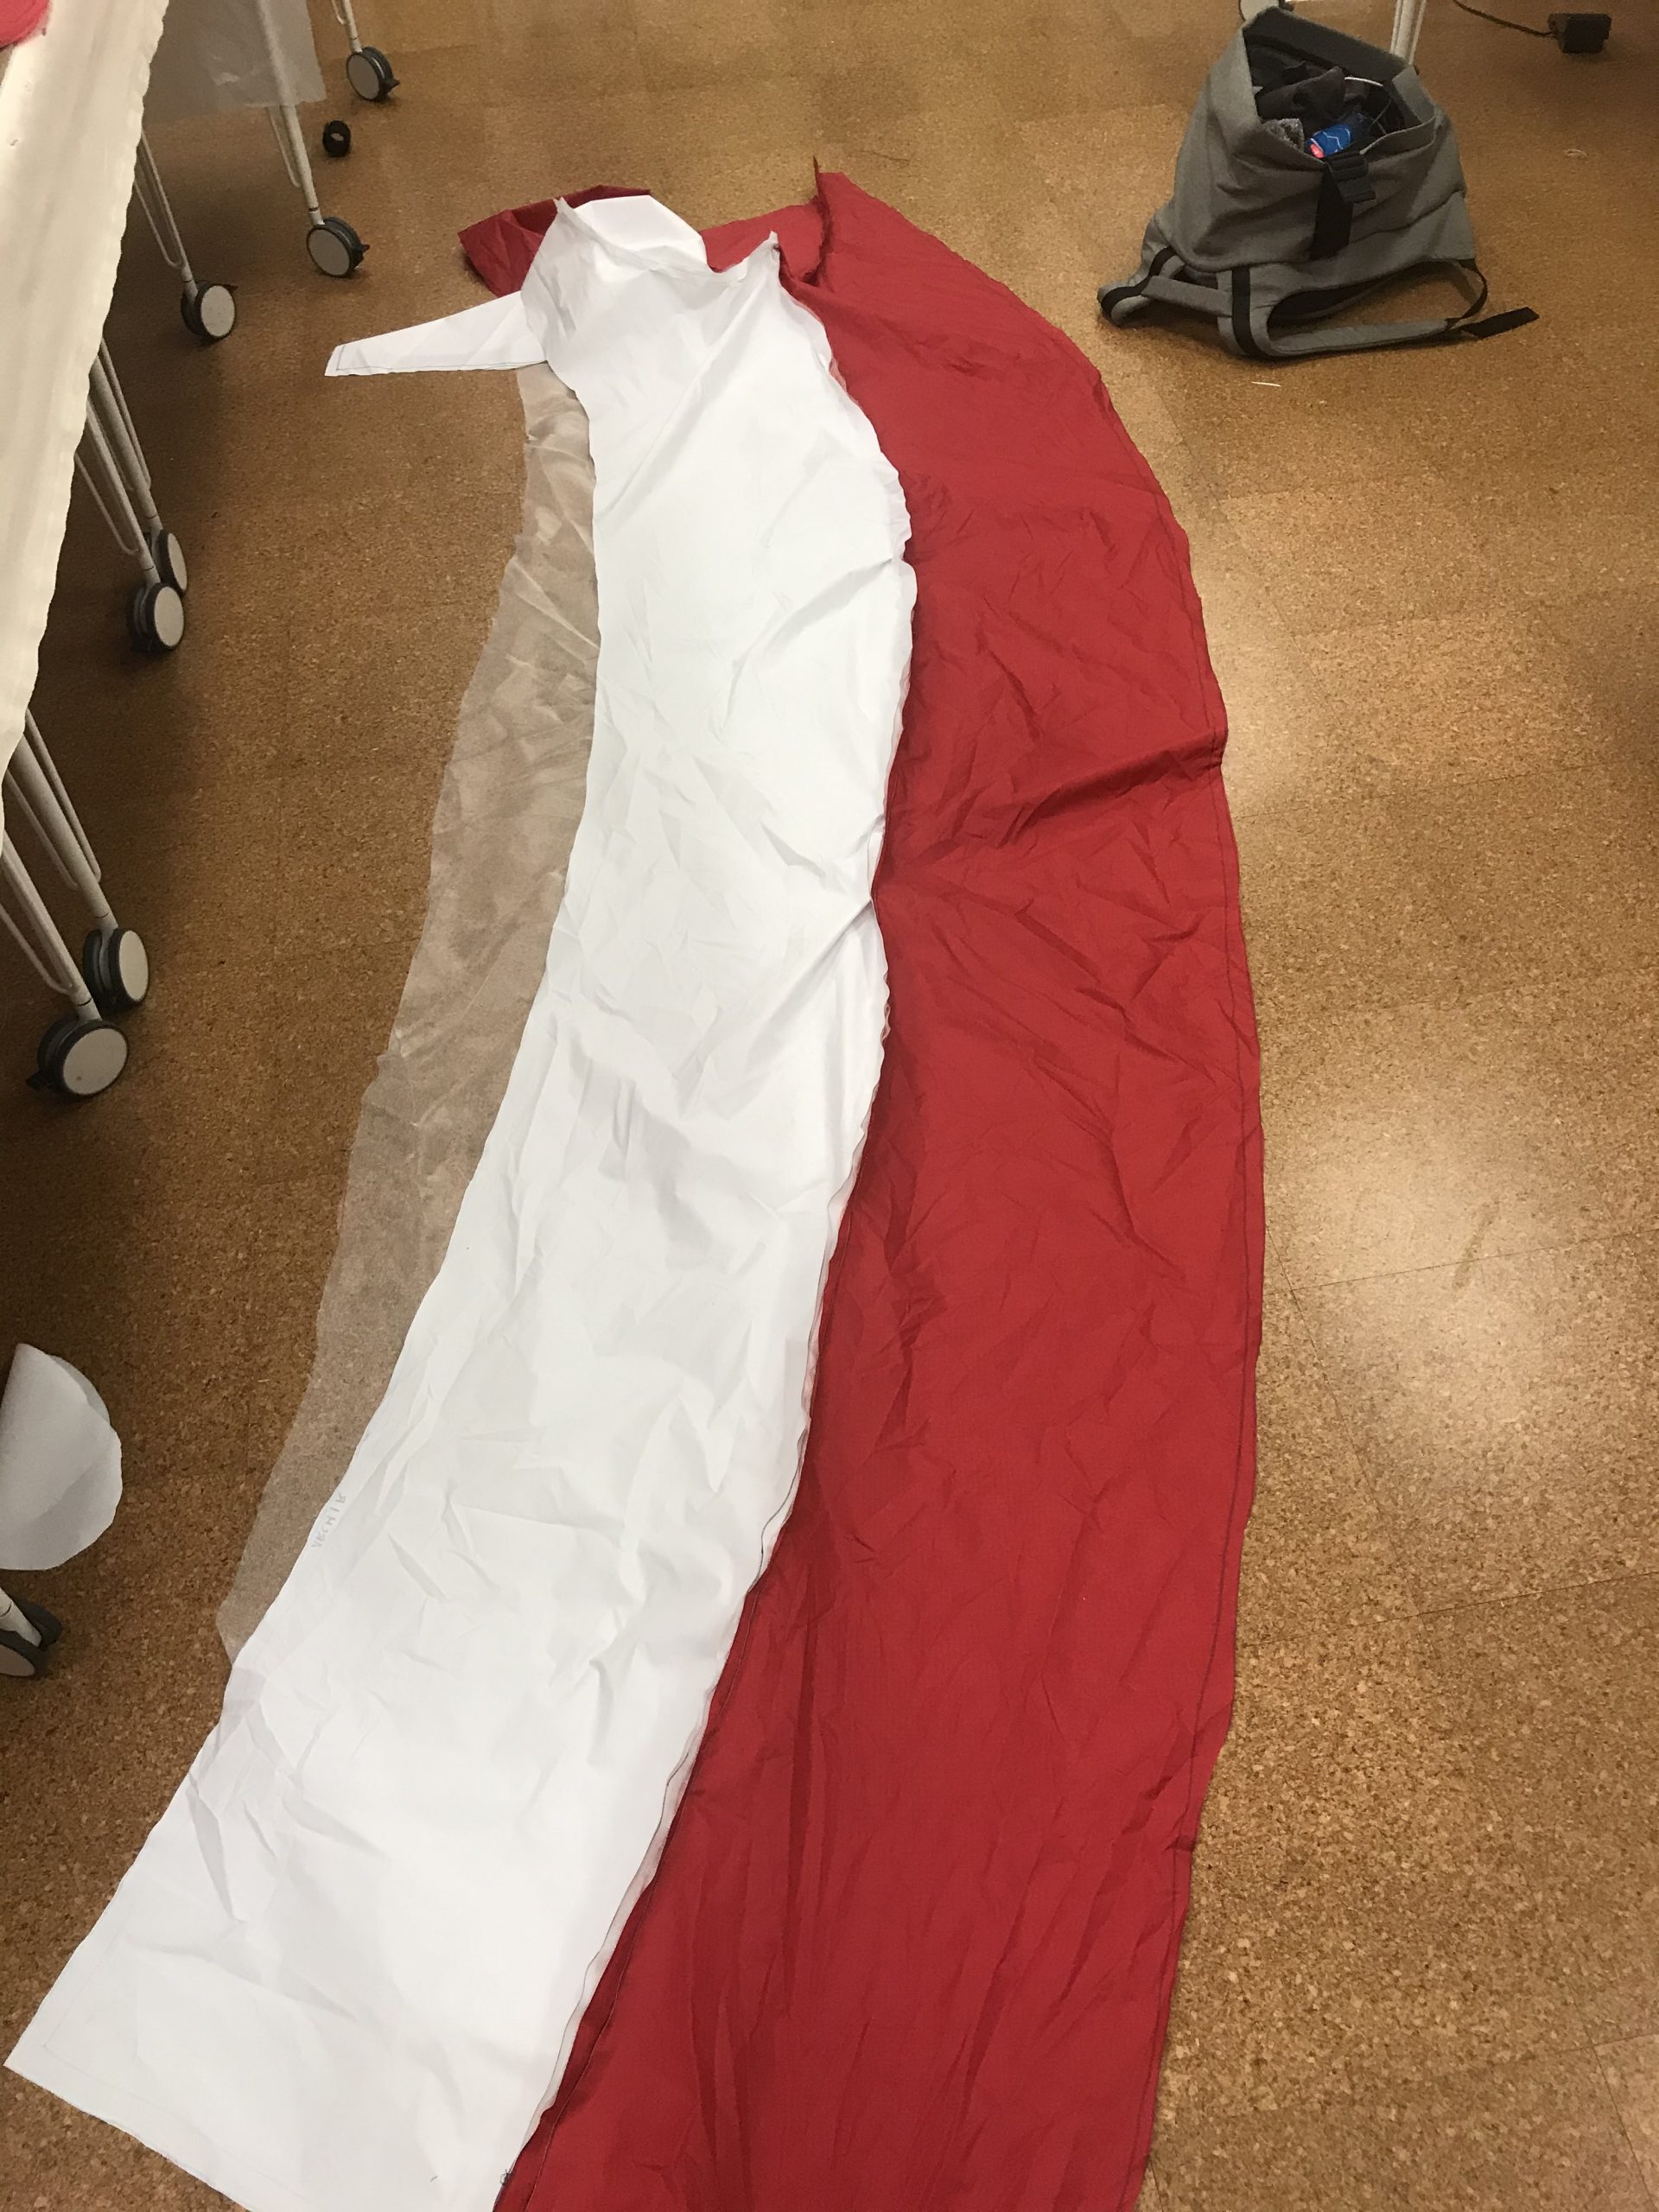
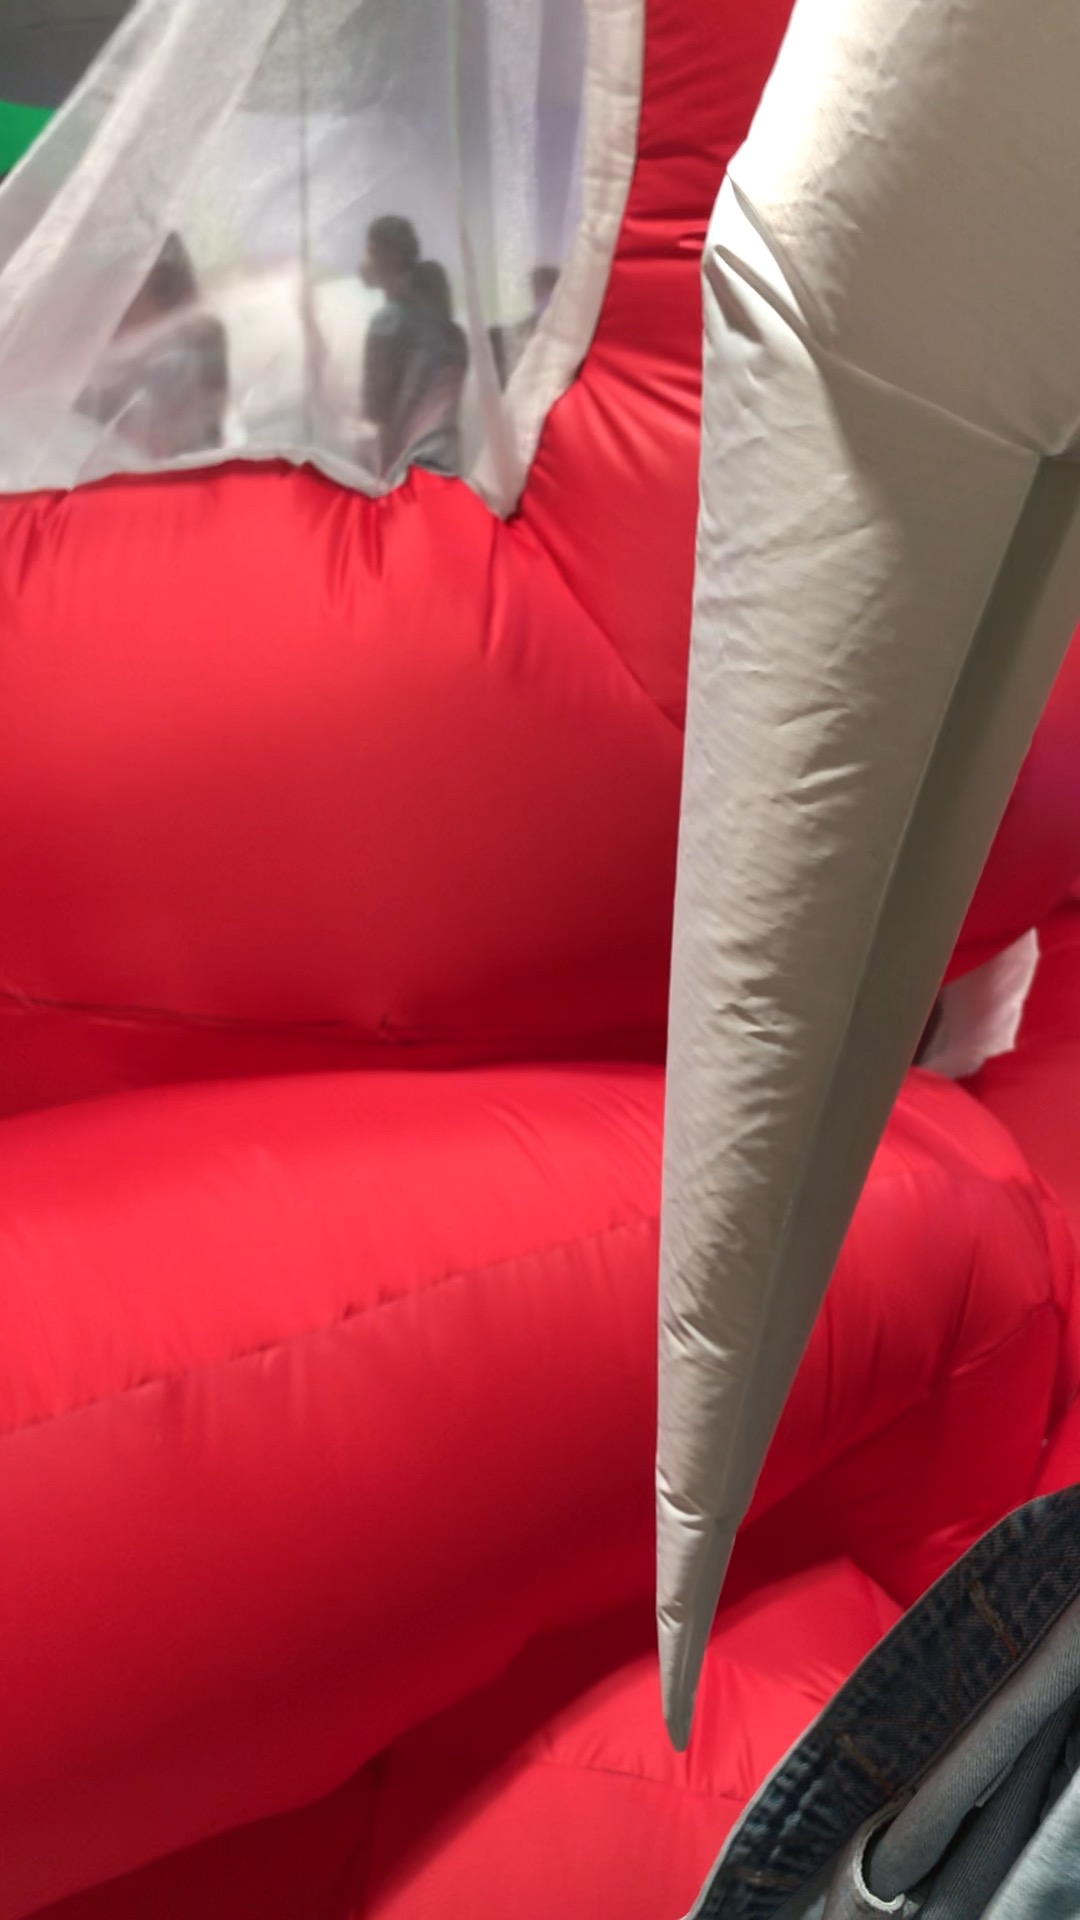
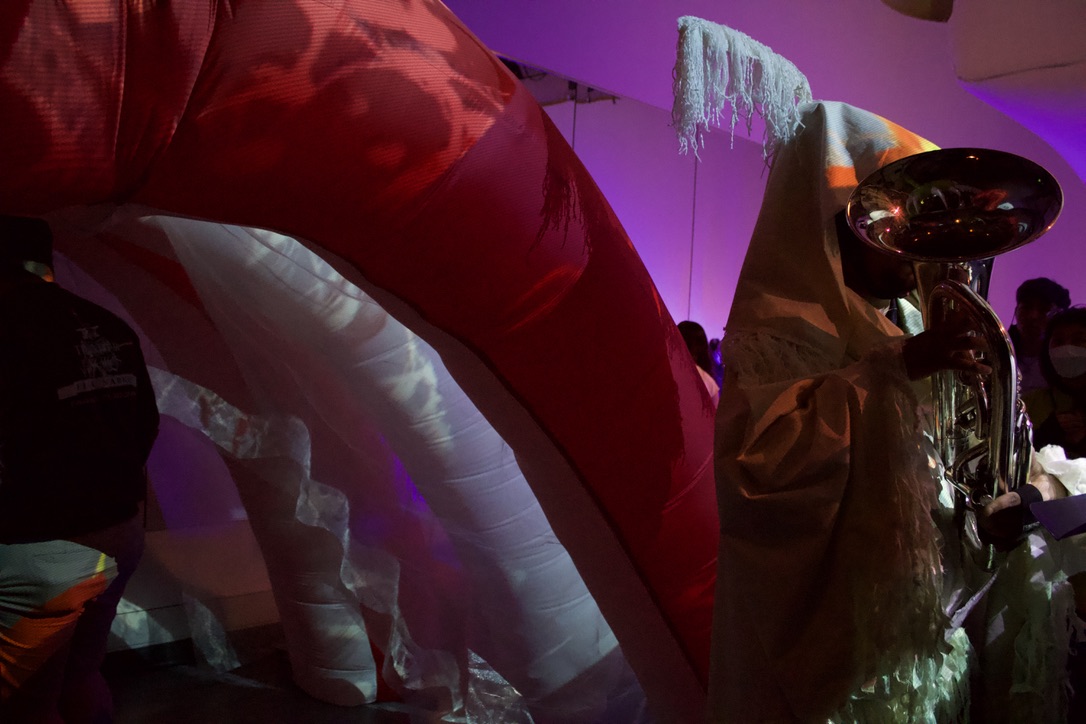
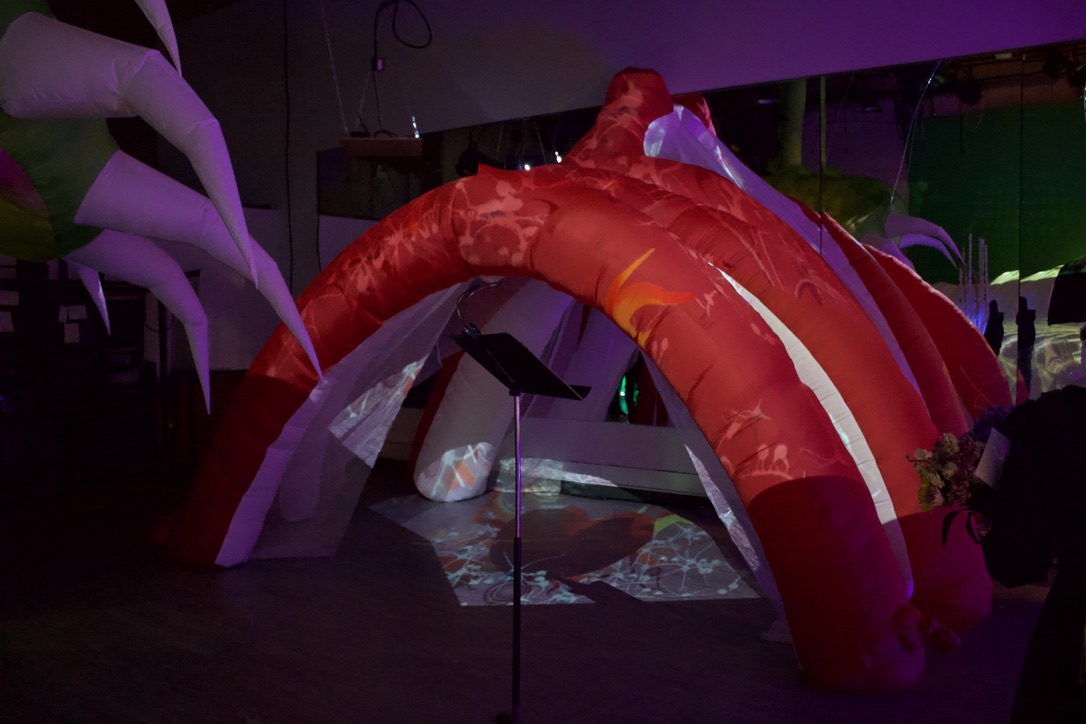
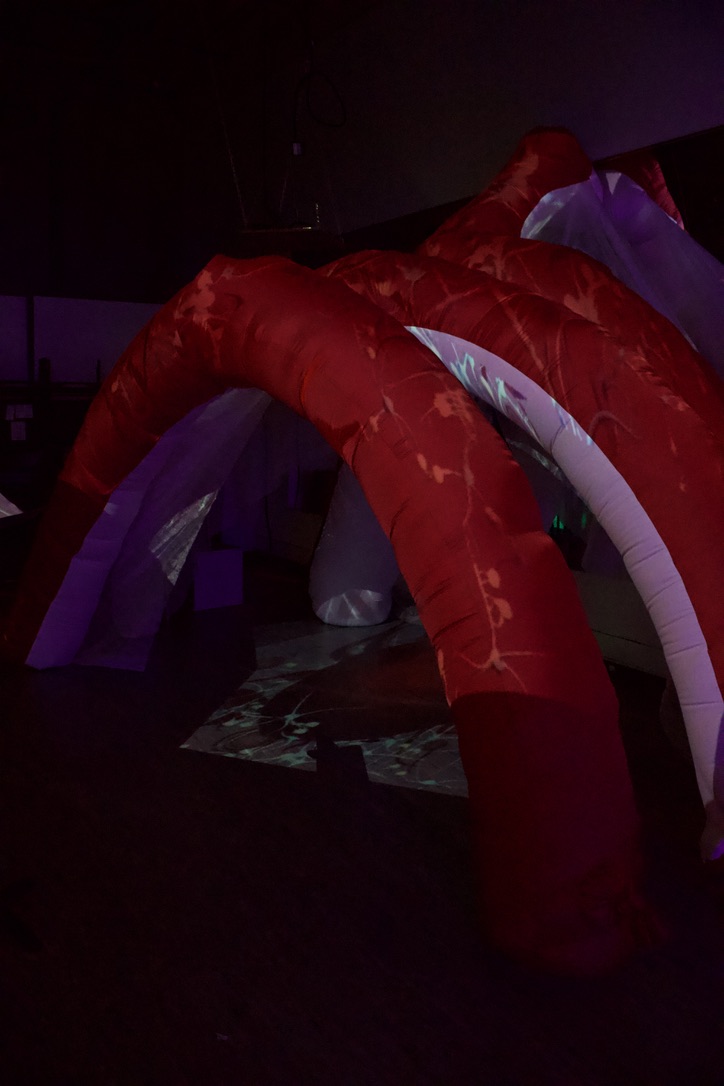
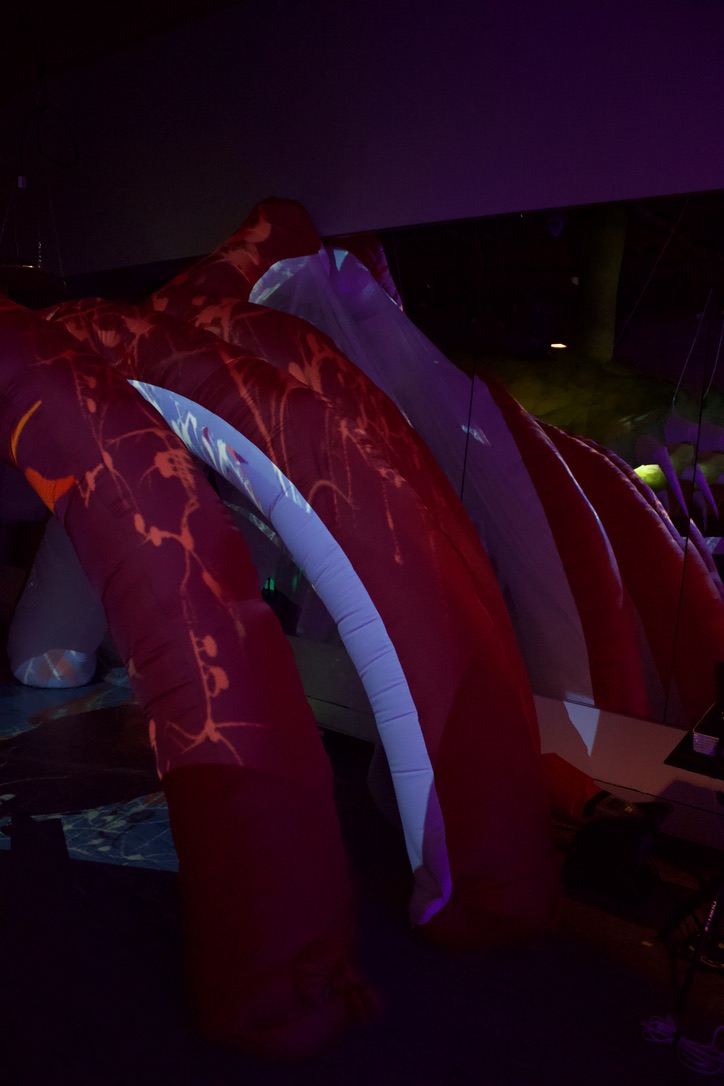
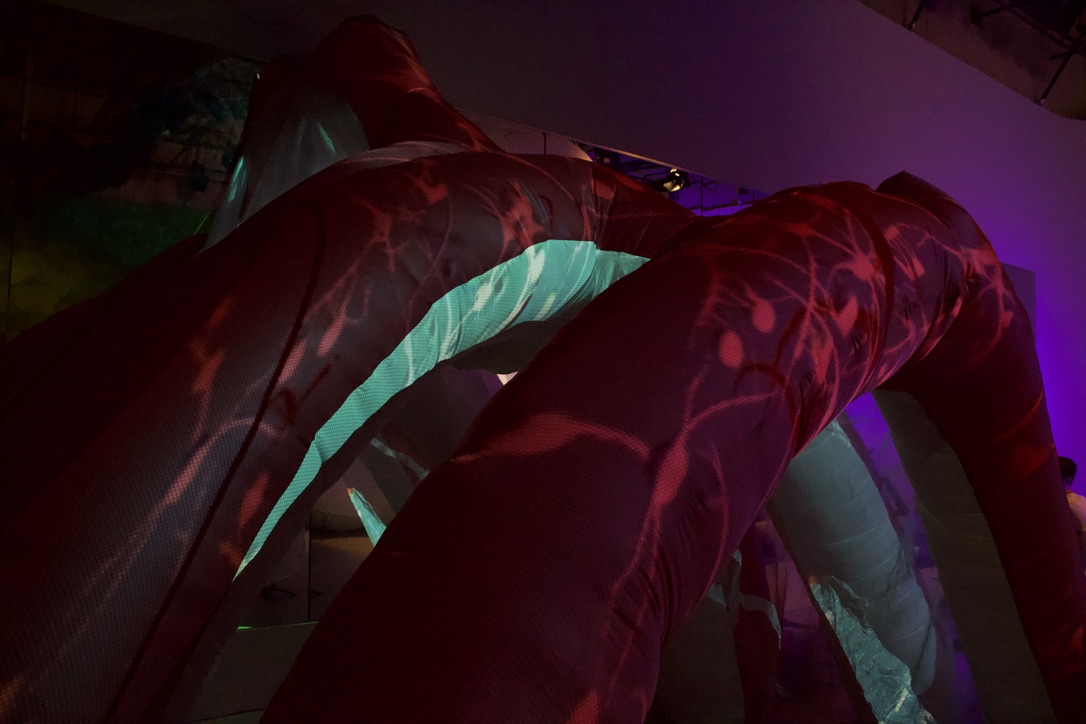
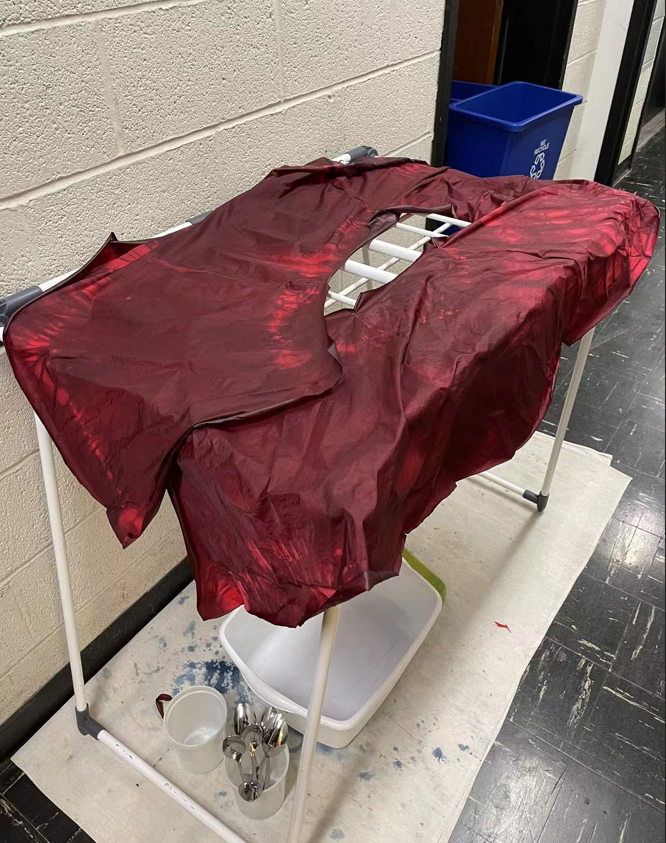
We also struggled with fabric availability. There wasn’t enough white ripstop for our project so we had to resort to using red on the outside of the ribcage and white on the inside so that we were still able to create that experience on the inside that we intended.
We had some issues with availability – we were constantly asking ourselves who was free all the time. We found that using a google sheet to write down our availability was super helpful in knowing when our schedules overlapped.
What were the “happy accidents” that you encountered along the way?
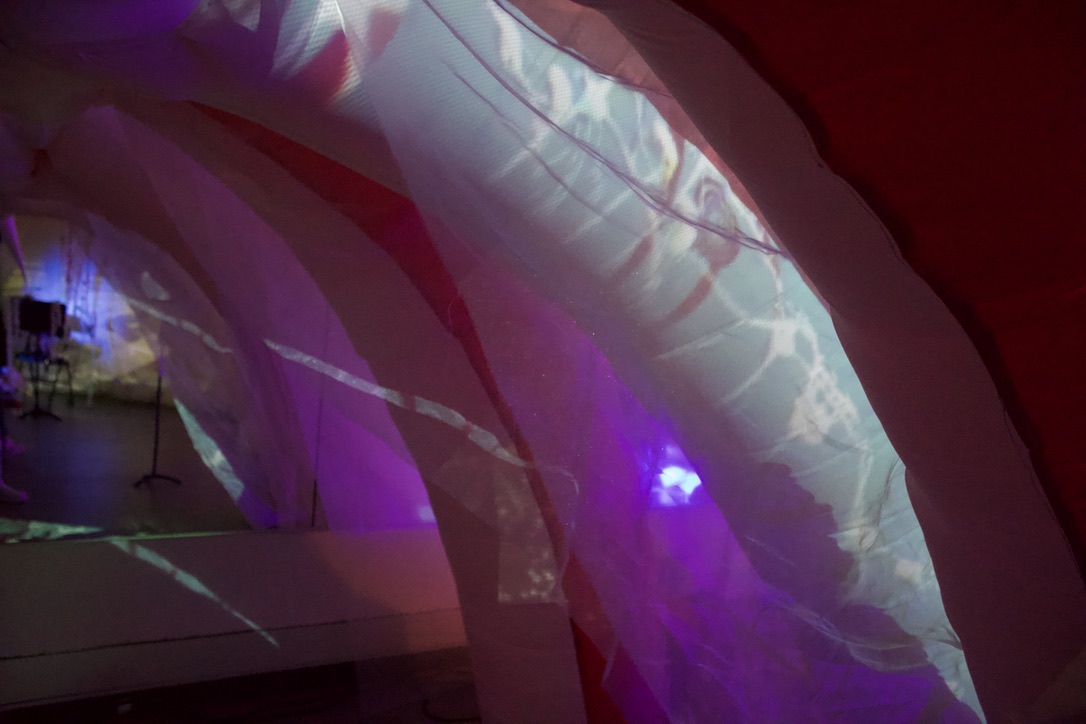
I think we had a few things work out. In one case I had accidentally had Asad sew some pieces the wrong way, but because of how our rhino file was made, we were able to use them for another part of the arch, which was awesome cause we did not have to seam rip. We also were unable to have our skrim be on both sides sewn in, it was just too hard to think through and be able to turn things inside out. I think this worked out because it added a breathing element to our piece, and when the show was packed it allowed for people to travel in around the pieces and not just from the arch whi9ch was cool. I think another happy accident was the animation team. I am not in love with the animation(@ georgia), but I think it being the heart instead of something hallucinogenic allowed people coming in to better read our piece as a ribcage, because their was a heart in it.
Final Project: please upload 5-10 photos of your final project and 3 sentences that describe what your final project is (not what you intended, but what it is now that it is finished).
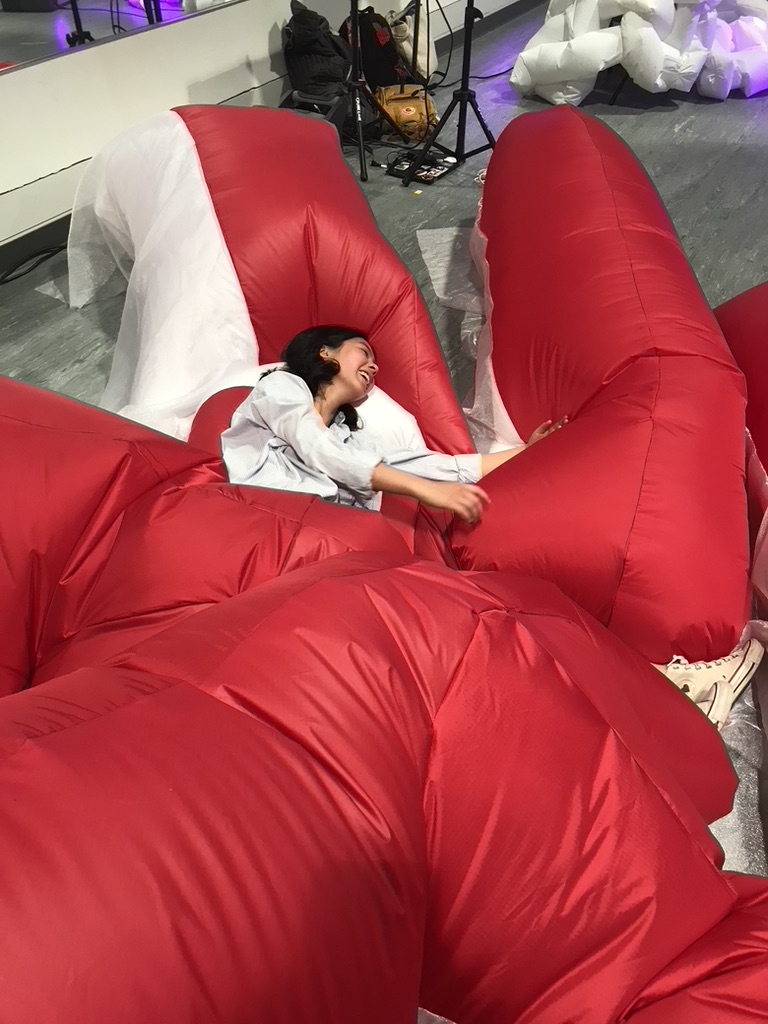
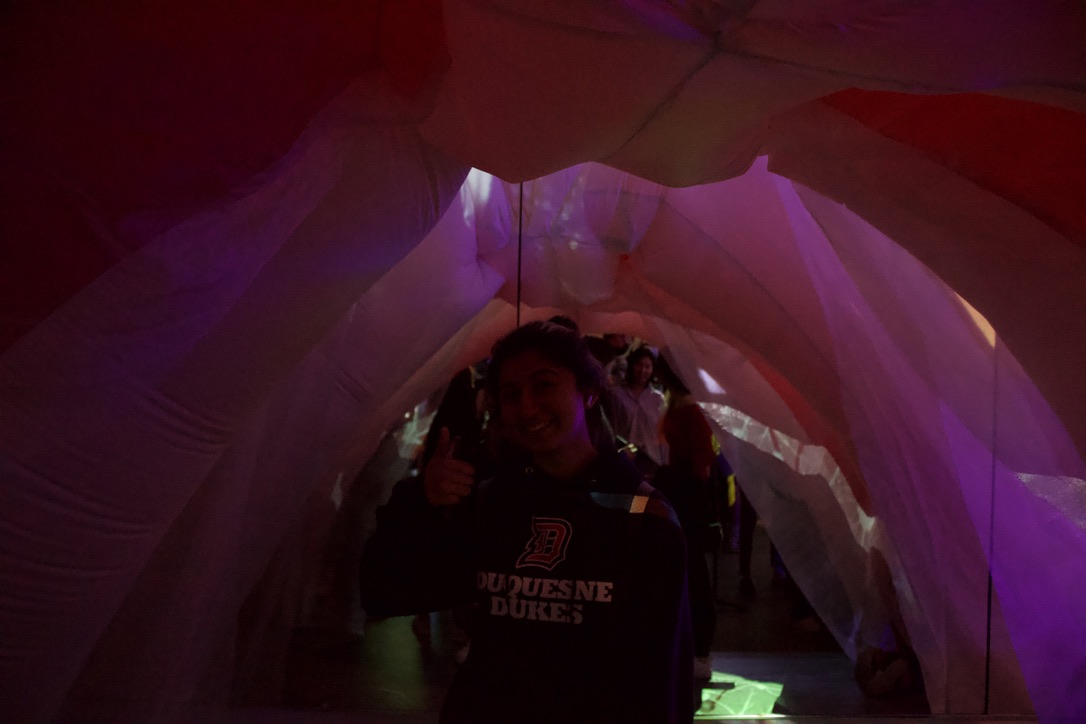
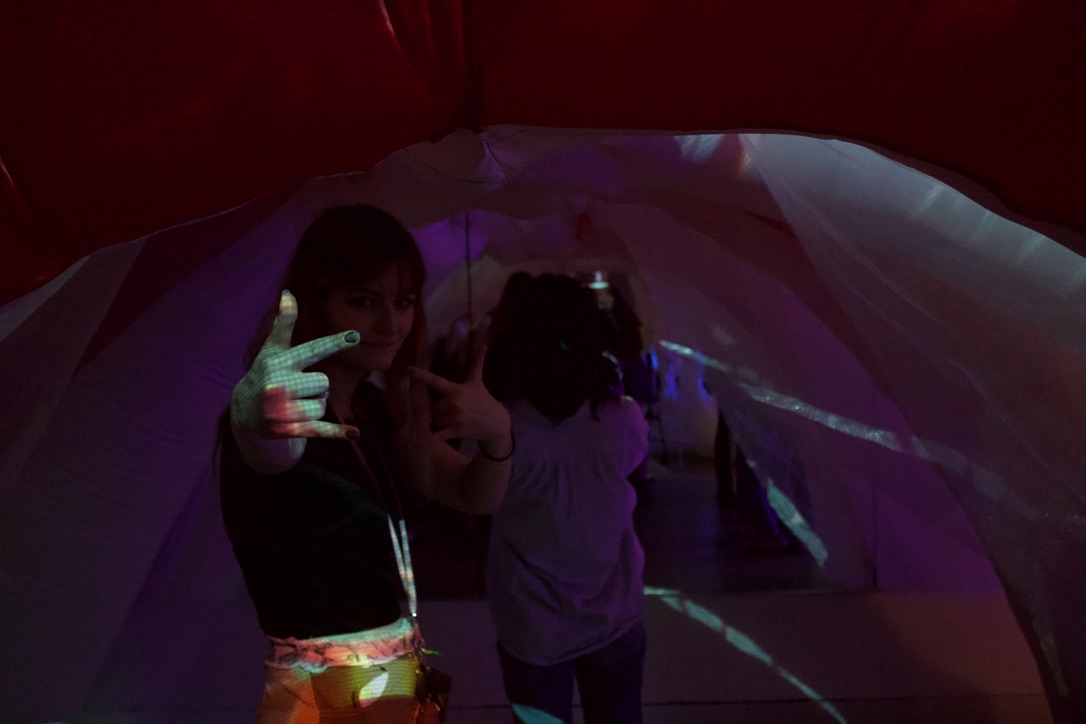
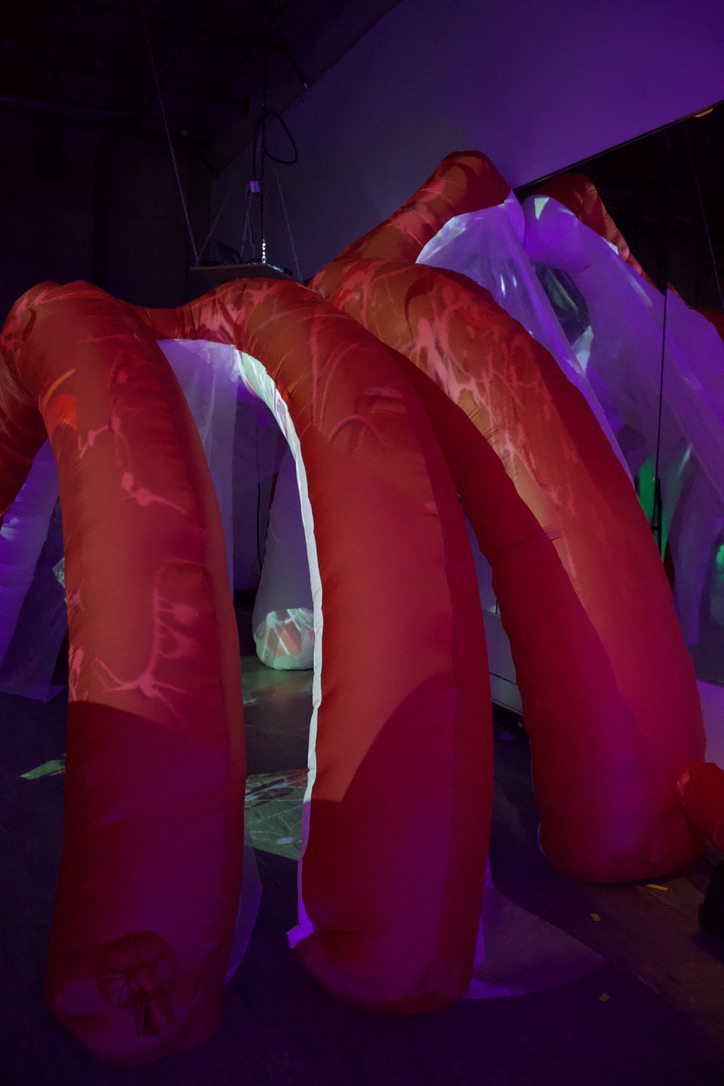
Our final project is about entering a space both outside and inside your body and anatomical structure and finding out what lies there. Our reflections elongate the journey through the ribs and allow you to pass through and see yourself… inside yourself. It is both an adventure of a few steps, but potentially a space to relax in your body and be either comforted or relaxed by feeling that you are in a ribcage.
ASAD:
What aspects of your project or process were most successful?
Being so meticulous about our planning in Rhino really helped us stay organized and assemble the arches smoothly. Getting help from Sean was also super crucial in making sure we squished the design in the best way possible so that we had to cut as few pieces as possible.
What were a few of the challenges you encountered and how did you overcome them?
One challenge we had was after we had sewn the first arch and were ready to attach the second one, we couldn’t figure out how to attach the scrim from the first arch to the second arch. We decided instead to then let the scrim stay open and create a sort of gill-like effect with the ribcage. We also had to deal with running out of white fabric, so we instead switched to red for the top of the ribcage and kept the white on the inside.
What are the three top things you learned from this experience that you will take with you into future project experiences?
3-dimensional thinking: understanding how to model in 3D and think about assembling a 3D shape from 2D pieces
Organization of a large scale project: Making sure we keep pieces organized, how do we communicate what progress we made if we were not working synchronously, version control of rhino files
Confidence in creativity: Being able to stick up for your creative vision and making sure that you aren’t compromising to the point where you are losing the intention of your creation.
What have you observed in yourself regarding your collaboration with teammates who bring different skills and experiences to the creative process?
We did a really good job of delegating specific tasks between team members based on their strengths. I did a lot of the actual sewing work, while Georgia helped organize and pin pieces together, and Jiyeon did a lot of the preliminary work in Rhino.
What is your number one piece of advice you would give to future students in this course?
Don’t think too practically – it’s ok if you have no clue how your archway will stand up or how you will even assemble pieces to make something. Make something you are excited about and the rest will all fall into place.
GEORGIA:
What aspects of your project or process were most successful?
I think our rhino file was really helpful in the end to cut pieces with the projector. We had some material issues however with running out of white ripstock and red which also ended up being why our arch ended up being 3 instead of 5. I think for the work flow what was really successful was being able to work with Asad to sew everything. I kind of ended up being the master of putting the thing to gether based on the rhino file, I was kindof the only one who knew how all the pieces fit together. So it worked really well when I met up with asad and I ended up pinning everything and feeding it to him on the sewing machine. We were able to work with a good rhythm this way.
What were a few of the challenges you encountered and how did you overcome them?
We had quite a few challenges. I think what ended up being the worst was our problems with lending projectors and running out of fabric to use. I could list out an entire list of things that went wrong, it was a lot. We were able to work through them by compromising and making schedules so two people could always work together because working on this individually proved to be challenging. I think from the start we were a little behind because of mine and Asad’s involvement in the carnival. I think once we got the rhino file done we were excited to get started. We had some roadblocks on our first time tracing because the projector was too close to the wall, but we were able to fix that quickly and back up the projector. To finish the last arch we also had to sew together scrap pieces that Jiyeon found to be able to complete our long arch shapes, I think when doing this is when we realized doing the other arch was perhaps too much.
What are the three top things you learned from this experience that you will take with you into future project experiences?
I think what helped us was being able to work well in rhythm and having people have certain roles in the project. It made it so everyone knew what they were getting into when we were working. I think one thing I would change about how we worked together was time. I get really antsy and take deadlines really seriously, I got a bit mad when I was free to work, but I couldn’t because my partners were busy. I think although we had good rhythm when working together, I would have appreciated if everyone knew how to put the pieces together, so that I did not need to be there every time a person wanted to sew, or so if I had free time I could go in myself and vis versa, and get stuff done. I think another thing I learned in conjunction with this, is that I can really push people a lot with projects, but sometimes it’s not necessary if, in the end, we get it done. I think that’s something I can work on as a peer, to be more understanding of other people’s limitations, because they are not the same as mine.
What have you observed in yourself regarding your collaboration with teammates who bring different skills and experiences to the creative process?
I think it was really cool to work with different people, both for the Jellyfish and the Ribcage. I think in both scenarios we figured out how to collaborate with each other in different ways. I think when working with Heeyun I really liked to way we worked together, where we made the idea together, separated for a little bit, and got to work together in the end and go full circle. I think this worked really well for both of us because our free time at the start of the project did not match, but because of the extension, we were able to really work together and surprise each other. I think the fact that I knew both my partners out of class changed things for the last project, I knew their skill sets more and was able to see what area we all would be working in. It was different working on this project because for cutting and sewing we either needed two people or it was helpful to have someone else to work with, I think this was new for me, where I usually work separately and then collaborate in the end.
What is your number one piece of advice you would give to future students in this course?
When people ask me about this course I always like to tell them that it is really fun, and you get to make a lot of amazing things, but you do have to be aware that the class is a bit of a time commitment. Especially because A lot of my friends are people who always do studio courses, to us this is like another studio, and You have to be willing to put in that amount of time while doing other crafting projects.
What aspects of your project or process were most successful?
What were a few of the challenges you encountered and how did you overcome them?
What are the three top things you learned from this experience that you will take with you into future project experiences?
What have you observed in yourself regarding your collaboration with teammates who bring different skills and experiences to the creative process?
What is your number one piece of advice you would give to future students in this course?
Yiyang
Our process of making the entire project is quite successful. We kept our plan simple and it was straightforward. Our making process was ahead of class and was on track of our schedule.
Our installation process, however, was really challenging. We had to deflate it over the weekend and also took it down during the week. Thanks to Douglas, we had it up there again in the end.
Double check with the person who is in charge of the installation process. In general, double check with people who were responsible for the space. And just to be safe, check it with the second person who is in charge or in use of the space.
I created the Rhino file. Compared to making the object, I am much more confident and comfortable in making 3D models. Douglas and I also had much more time on campus and we traced all pieces for the project. In general I guess all of us are pretty flexible with our roles in the team.
Be prepared to spend tons of extra hours outside the class. And prepare the final project as early as possible so it would not have conflict with other finals. For those who come from non-project based classes (STEM), this class is highly project-based and thus requires careful time management. Make sure you either have some free time on campus or have some free space at home to work on the project.
Lori
I believe that the most successful part of our project was our time management. Our team was really on top of everything right from the beginning, and worked really efficiently. Our pipeline, from modeling and slicing in Rhino all the way through sewing our cut pieces of nylon worked really well.
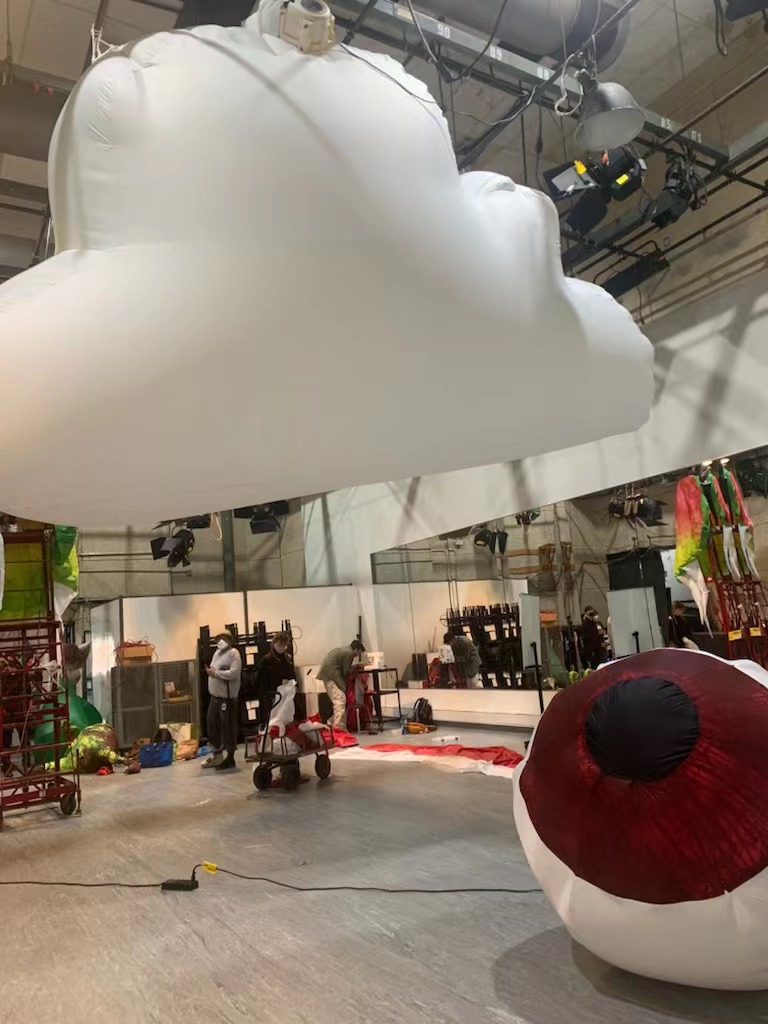
The biggest challenge was probably my lack of access to campus, in general. Because I spend most of my time away from CMU’s main campus at the ETC, it was sometimes difficult for us to coordinate as a team. We worked around this by having Douglas and Yiyang complete a lot of the patterning together, and then passing me the pieces to sew. Since I was able to check out a sewing machine and walking foot, I was able to sew up the entire cloud at the ETC rather than struggling to find time to go to Hunt. We also had to cut the optic nerve from our design, since we were using too much fabric. We got around this by instead changing the narrative of our piece by turning the eye to look at the nightmare cloud rather than being attached to it.
First, I learned a lot about sewing and soft fabrication. I really enjoyed the practice I got sewing and learning about what causes wrinkles, folds, and errors while doing it. Especially since I am hoping to go into location-based themed entertainment, understanding different materials and assembly is really important. Second, I learned a lot about time management for a large-scale fabrication project and the importance of leaving time for iteration and corrections before installation. Finally, I learned how amazing it is to have dedicated, reliable teammates. We were able to accomplish so much because I knew my teammates were reliable and responsive, so even though we weren’t able to spend much time together, I still felt like we were a team.
I really enjoyed listening to my teammates’ creative vision for this project. Both Douglas and Yiyang brought up narratives for our piece that I would not have considered, and their expertise in patterning was incredibly crucial to our team’s success. I am so appreciative of my teammates and of their different views, and I have found that it’s a lot easier to remain on schedule and remain accountable when you know you can rely on your teammates to do the same.
Definitely start earlier than you think you need to; patterning takes way more time than actually sewing, so account for that when you plan your project timeline.
Douglas
I believe we succeeded at making a large scale project that was challenging to create and install while still maintaining simplicity of design. This accomplished the original intention of working synergistically with the animation team to provide a large and awe-striking medium for projection.
The installation of the cloud required a couple hours of working on a lift 2 stories above the ground for attachment of the inflatable to the ceiling. This along with a the need to tie it up and reinstall it due to miscommunication (being told we were able to leave the cloud installed in advance when in reality this affected other classes or events) was a challenge.
I learned and will be applying in the future the knowledge and various tricks of sewing, how to use another form of computer aided design (Rhino), and the scale up process of how to take a small concept in my head and realize it on a large scale.
I have been very grateful for each team member’s contributions and talents in this project. I believe our team became good friends and were able to pick up where someone left off or could enhance the performance of each other really well in each part of the project. I learned trust and got comfortable with the idea of leaving large tasks into the hands of team members which can be very stressful.
The one piece of advice I would offer future students would be to design your final project focusing on simplicity of design. The project is complicated regardless just based on the sheer magnitude of the project, and one can always increase the complexity. But when supply or time shortages are a risk to completion, one will be very grateful that their project can be simplified to accommodate the new constraints.
Group Questions
How did you generate the idea and starting point for the project?
What was the path that you took from beginning to end to accomplish the project? Please upload 5-10 photos to illustrate your story.
What were the challenges you encountered and how do your team overcome them?
What were the “happy accidents” that you encountered along the way?
Final Project: please upload 5-10 photos of your final project and 3 sentences that describe what your final project is (not what you intended, but what it is now that it is finished).
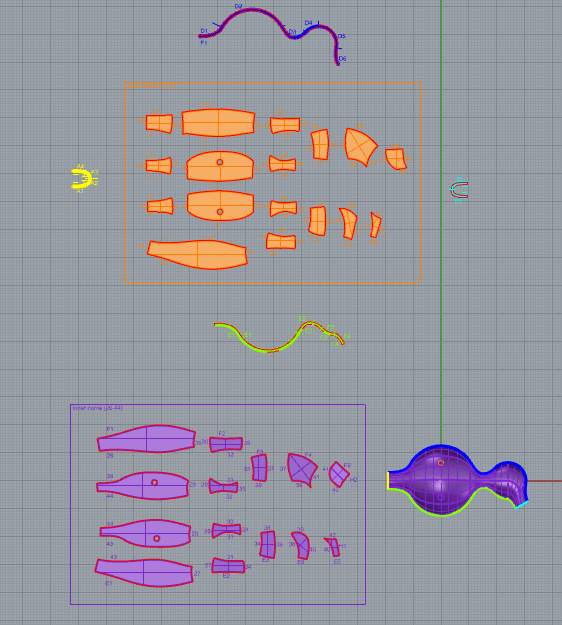
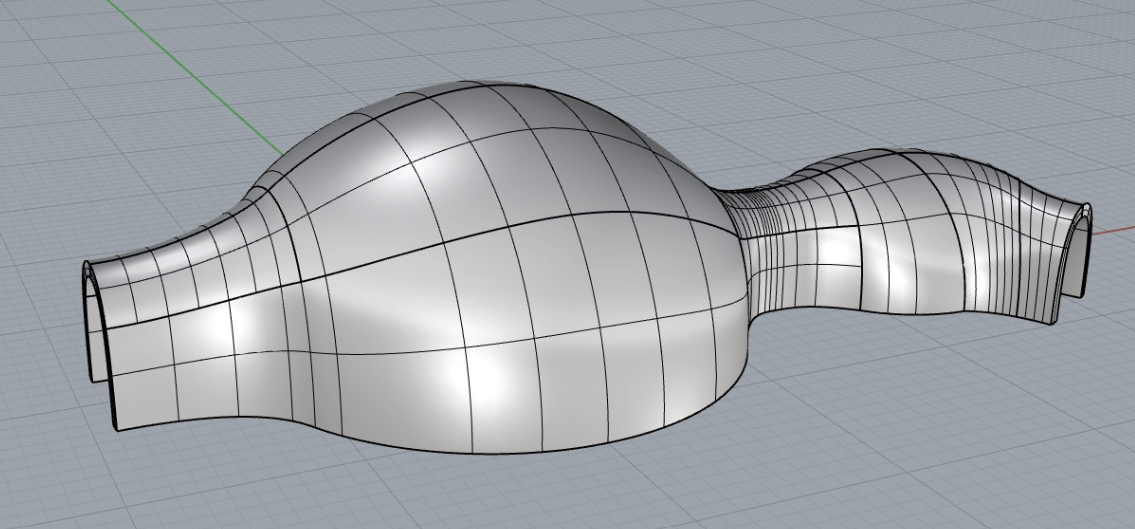
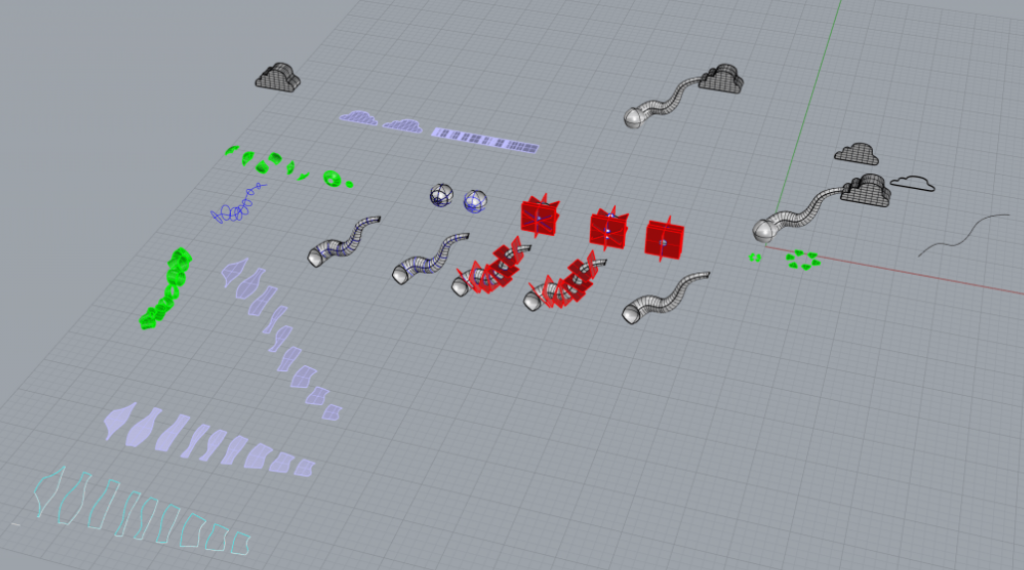
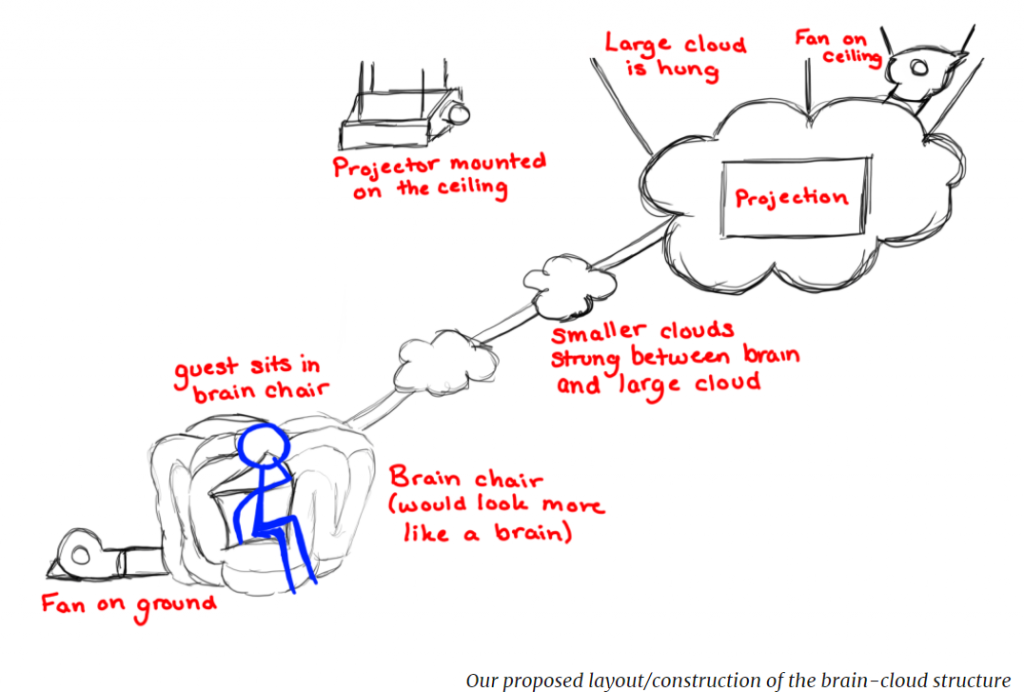
Yiyang wanted to do something creepy, and so we started brainstorming about what that could be. We had the idea of doing a dark thought bubble that someone could stand under, as if it were reflecting their thoughts. From there we expanded on the nightmare theme, eventually introducing a brain, and then an eye when a brain proved to be too difficult.
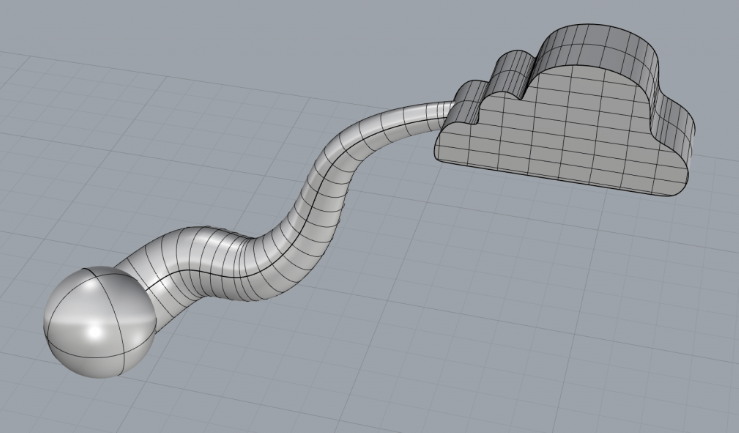
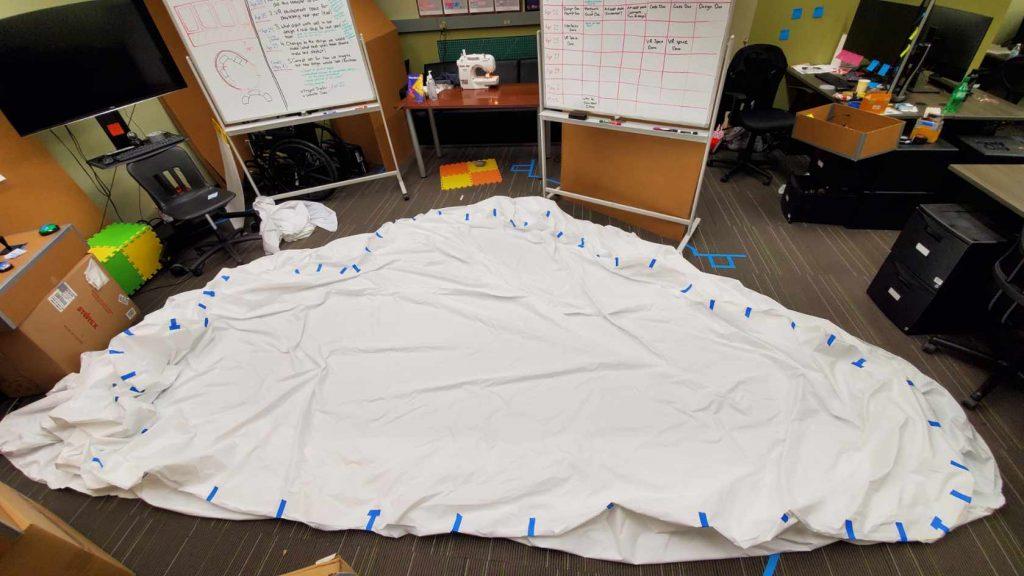
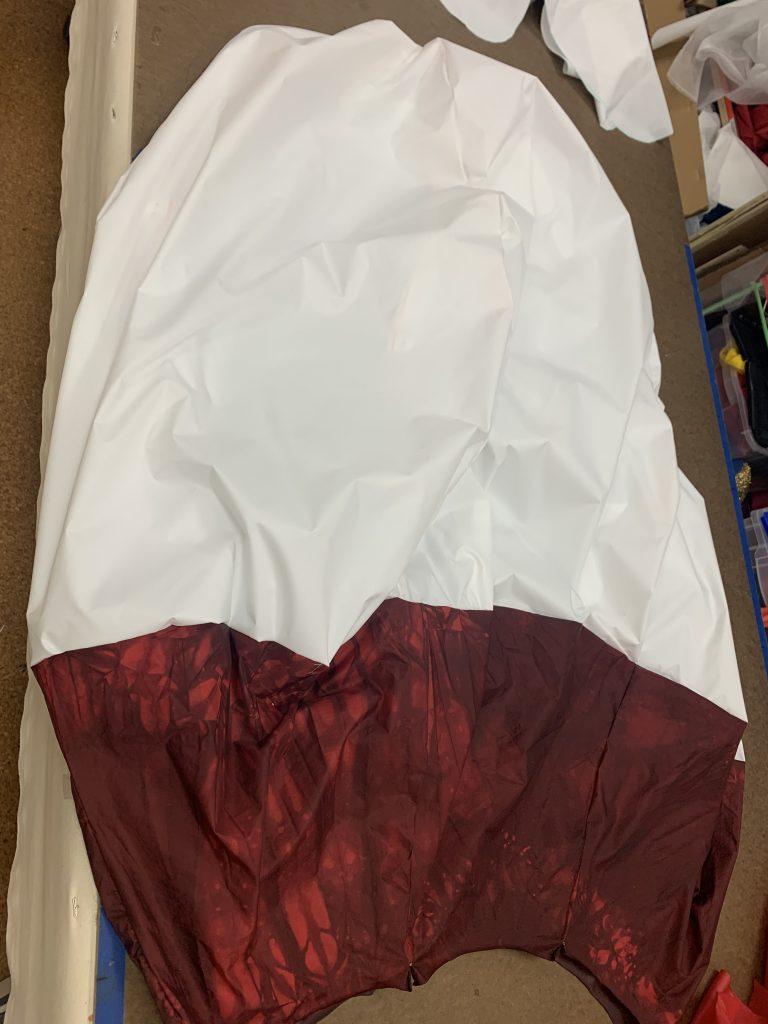
After establishing the nightmare implementation (eye to cloud), we modeled the whole thing in Rhino, then sliced the model into several pieces that we could pattern. Using the projection method, we traced brown paper versions of the different patterned pieces, then cut out nylon versions. To tackle the workload, we divided the project into the eye and the cloud. Douglas and Yiyang did a lot of the patterning work for both pieces, Lori and Yiyang dyed the nylon for the eye, Lori sewed the cloud, and Douglas and Yiyang sewed the eye.
Our team’s biggest challenge was the sheer size of our inflatable – especially the cloud. We also had to cut the optic nerve from our design because we would not have enough fabric to complete the whole piece. Additionally, because the cloud and eye are both simple forms, it was important to have clean, uniform seams, especially for the projections.
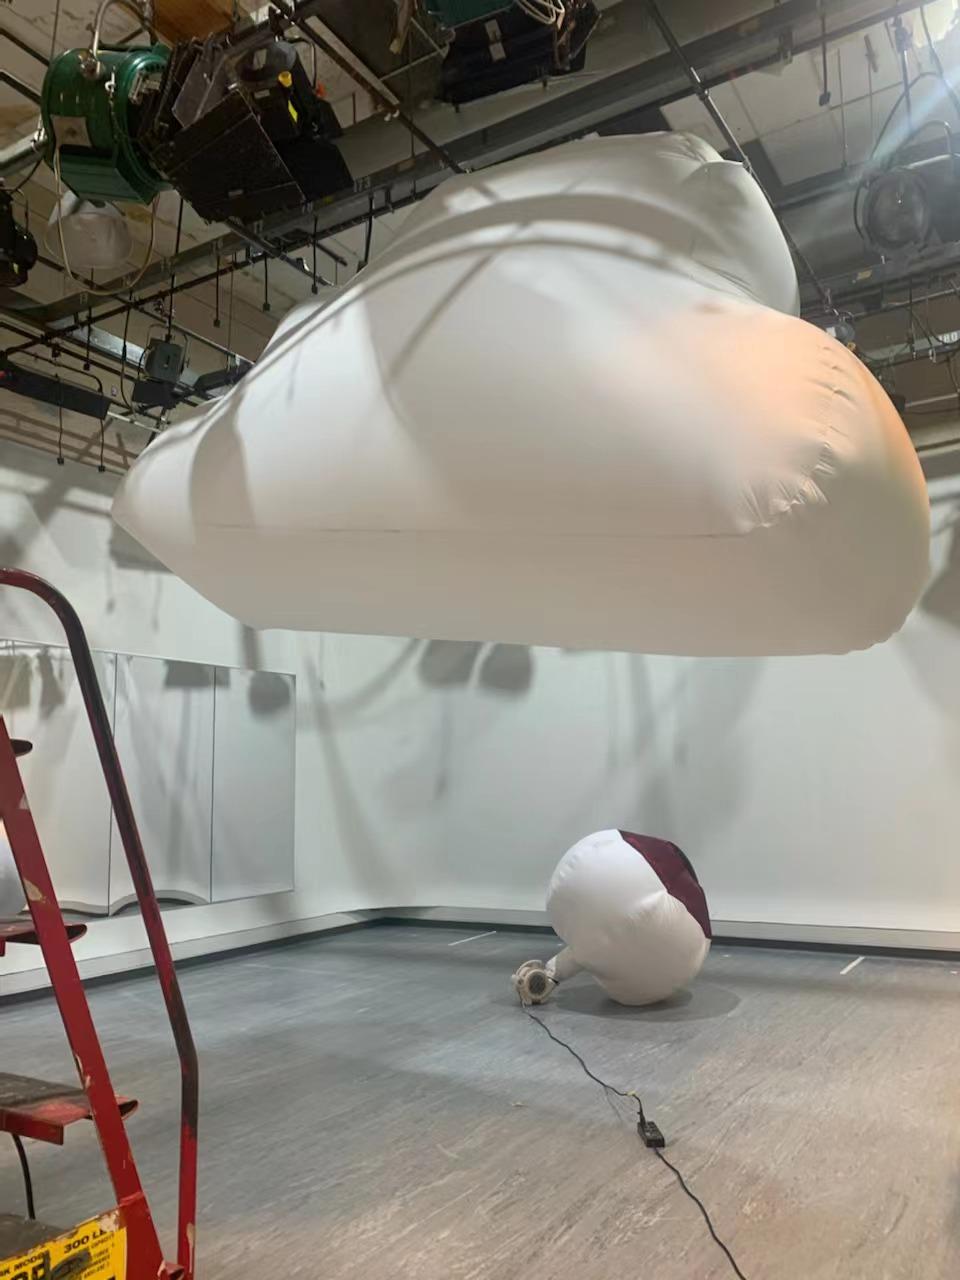
Originally, we planned to baffle the cloud using extra large acrylic buttons. However, after fully inflating the cloud for the first time, we decided that we actually liked the rounder, bloated shape rather than a flatter projection surface, and decided to nix the buttons.
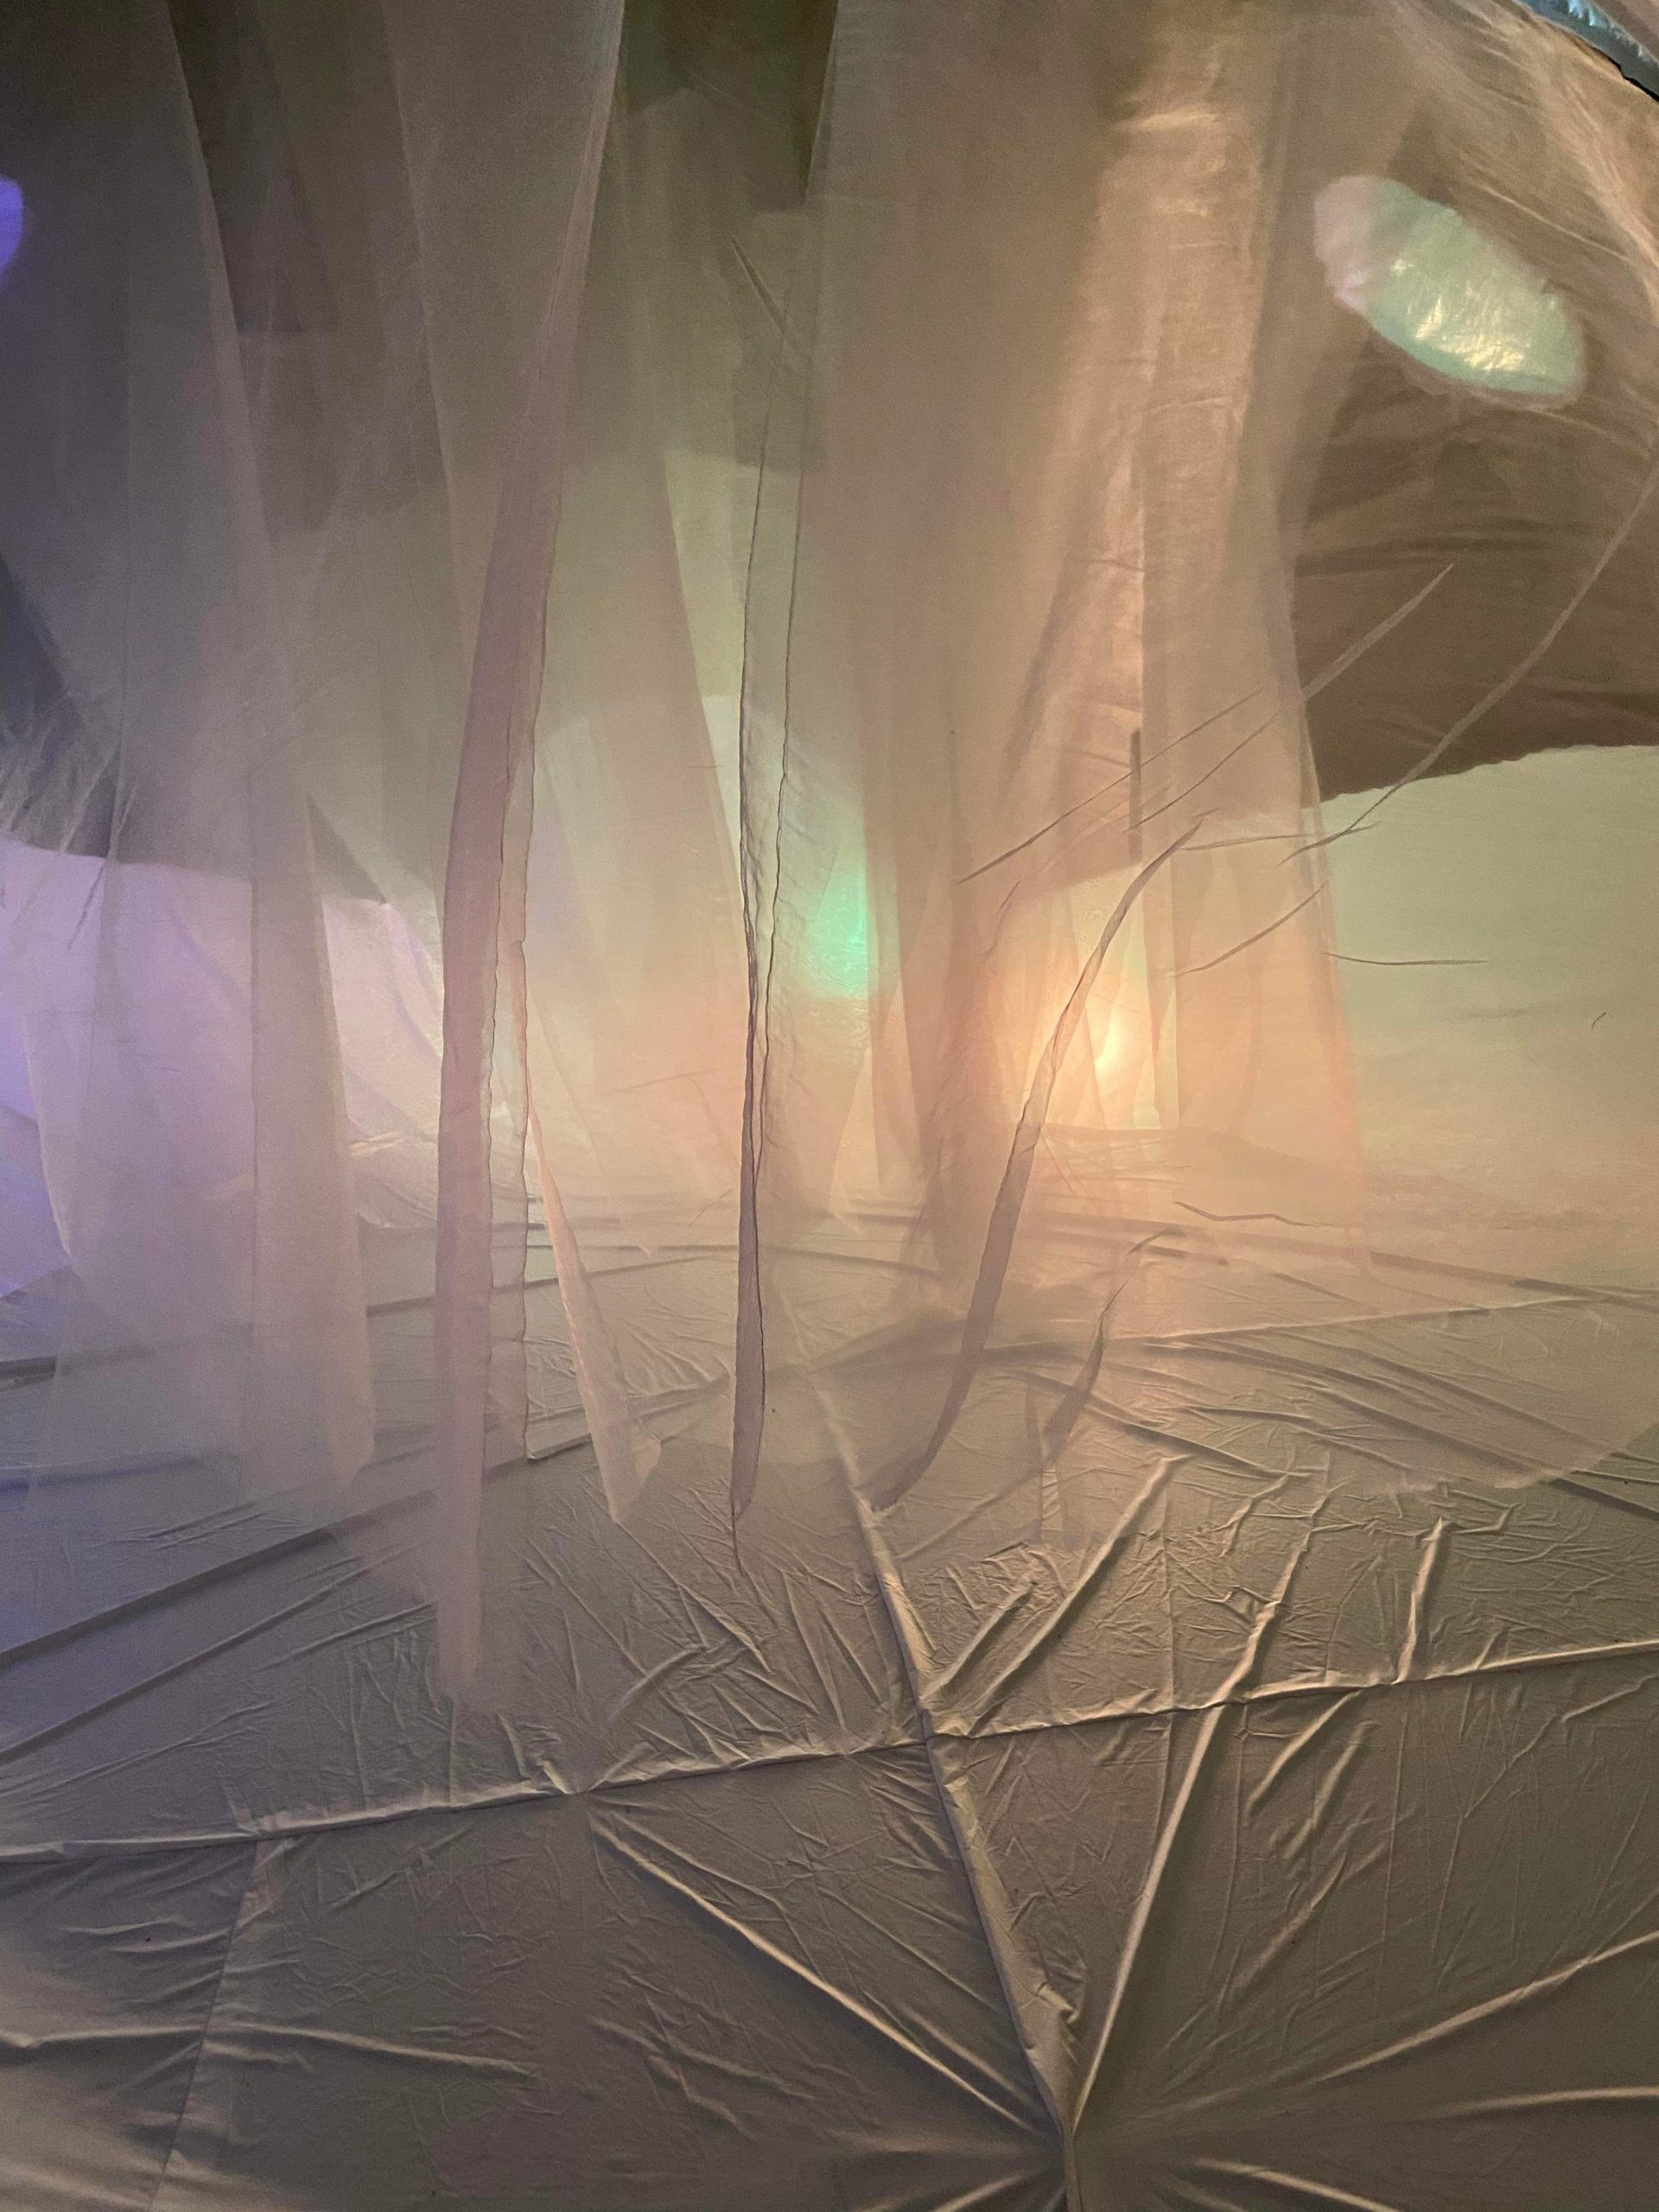
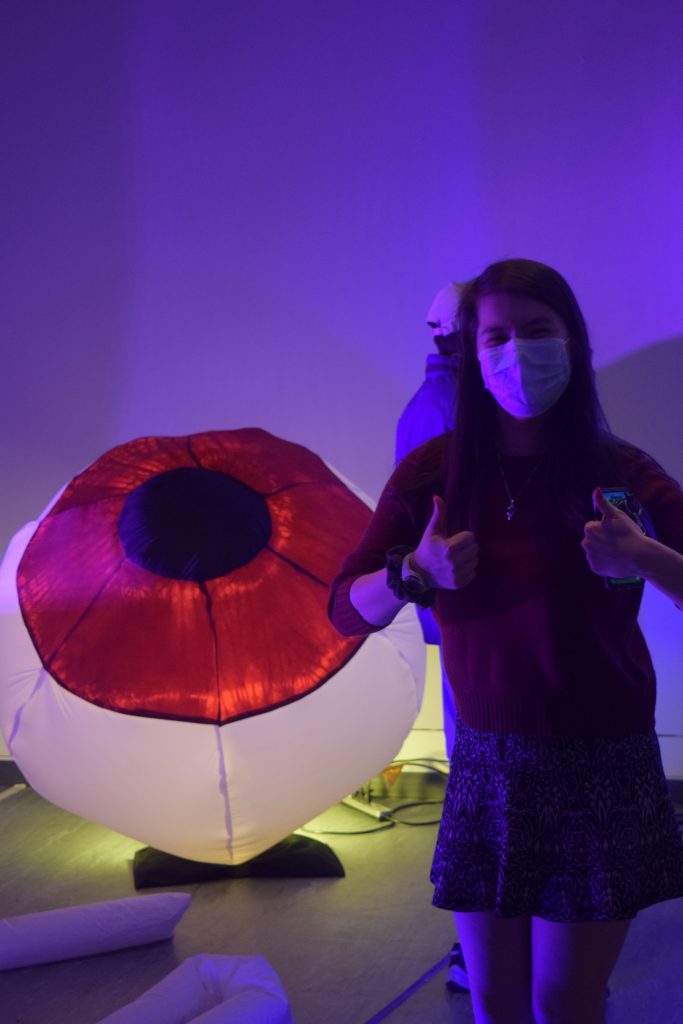
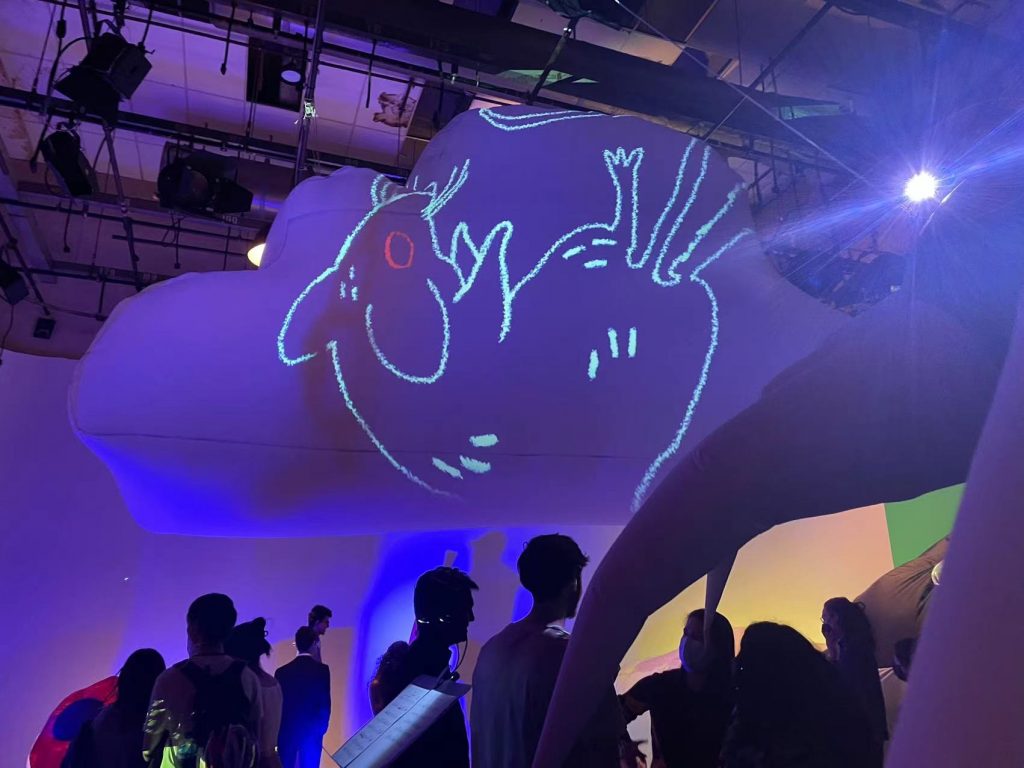
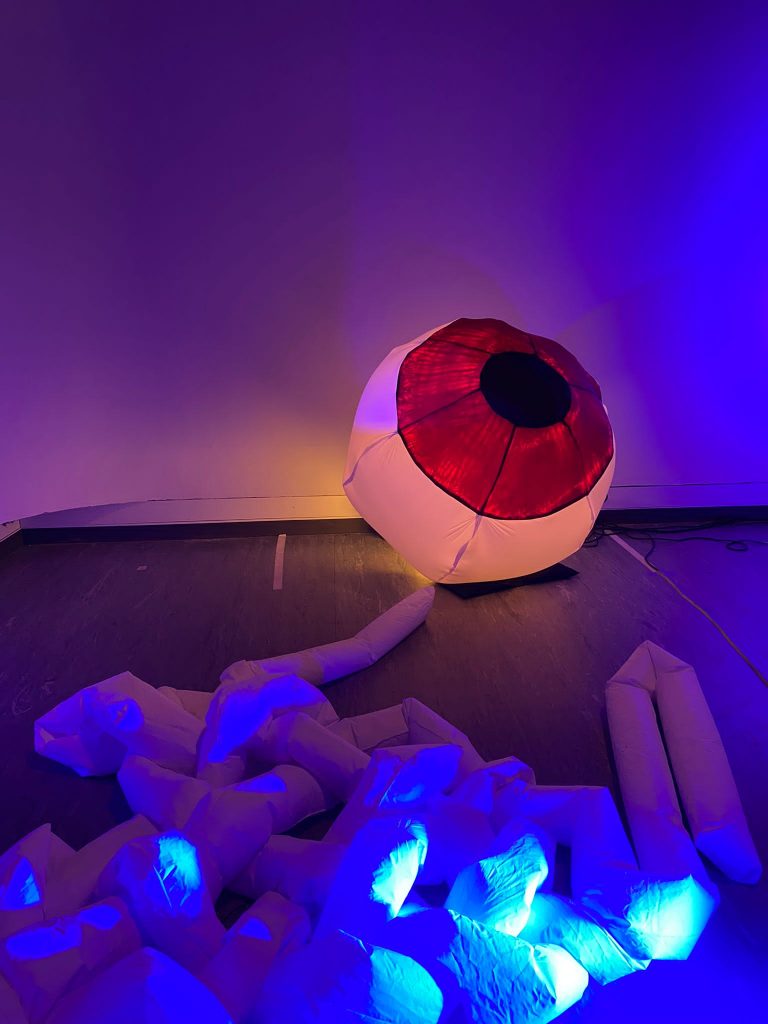
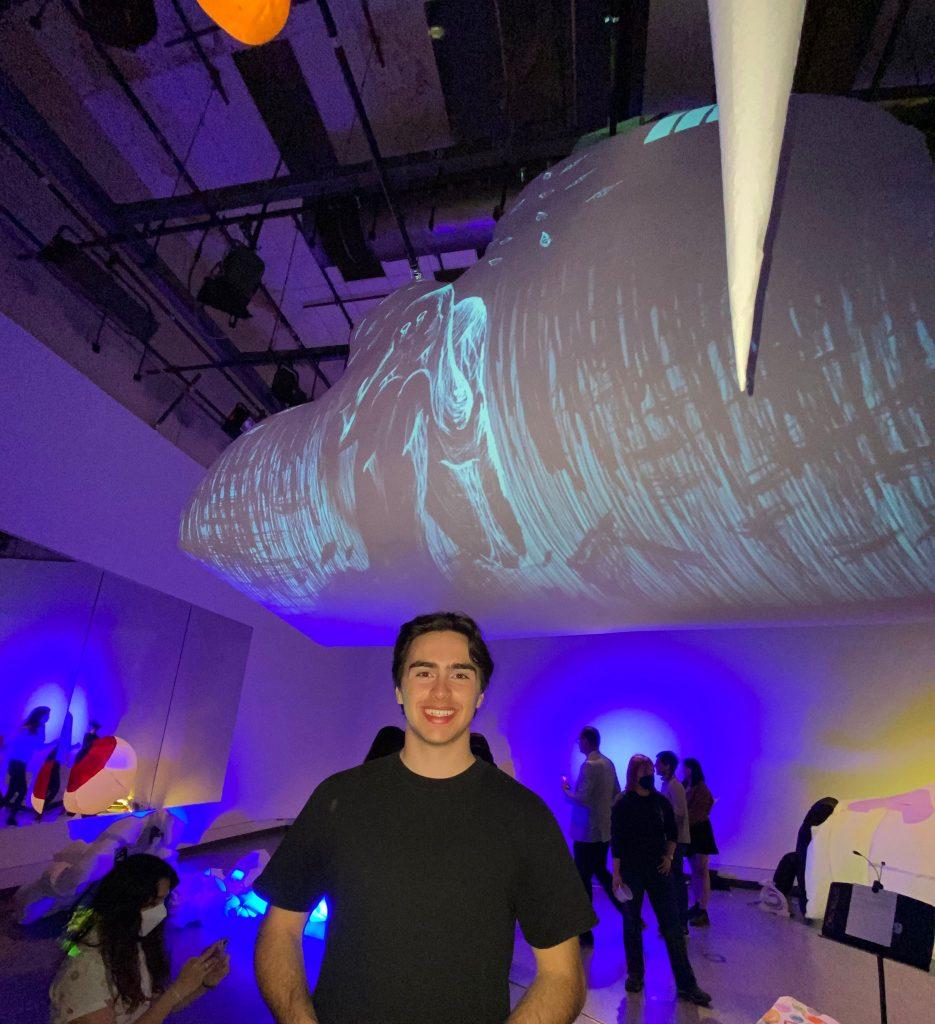
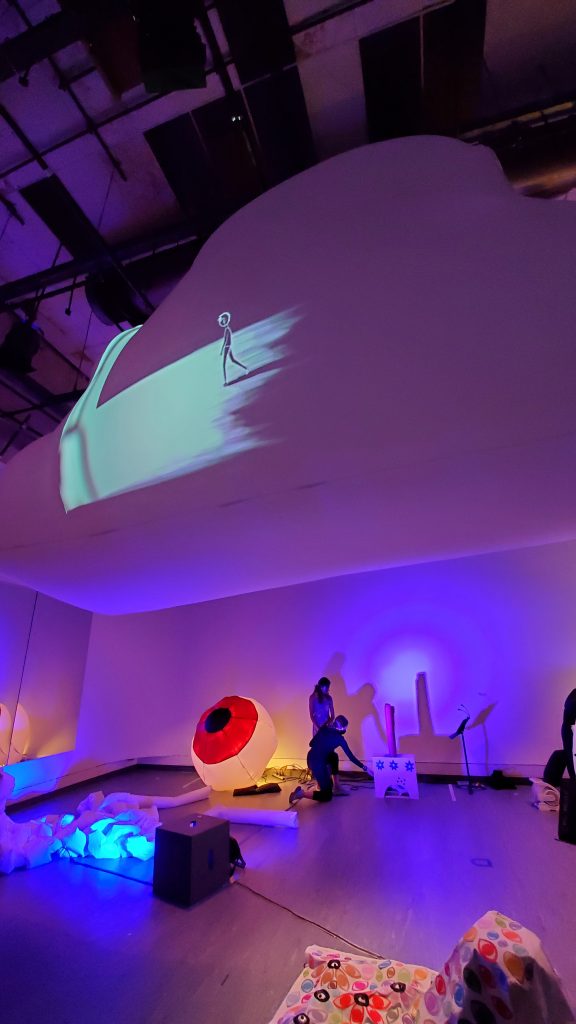
Our neyetmare cloud is a ominous entity that looms over the viewer inspiring awe alongside a glowing, curious, and piercing eye that joined the viewers on the mortal ground. The cloud offers a large projection area offering flexibility for animation project and increasing the “mass” of the cloud even further because of the way the animations are brought to life at such a scale. The eye ball sits in the corner lit up with an LED light that highlights the dyed iris and giving it vitality.
This week we refined our cloud shape by fixing some wrinkles. We also sewed our eyeball again. Because last time we traced its patterns, some pieces were not at the same size. The following pictures are from our rehearsal on Friday.
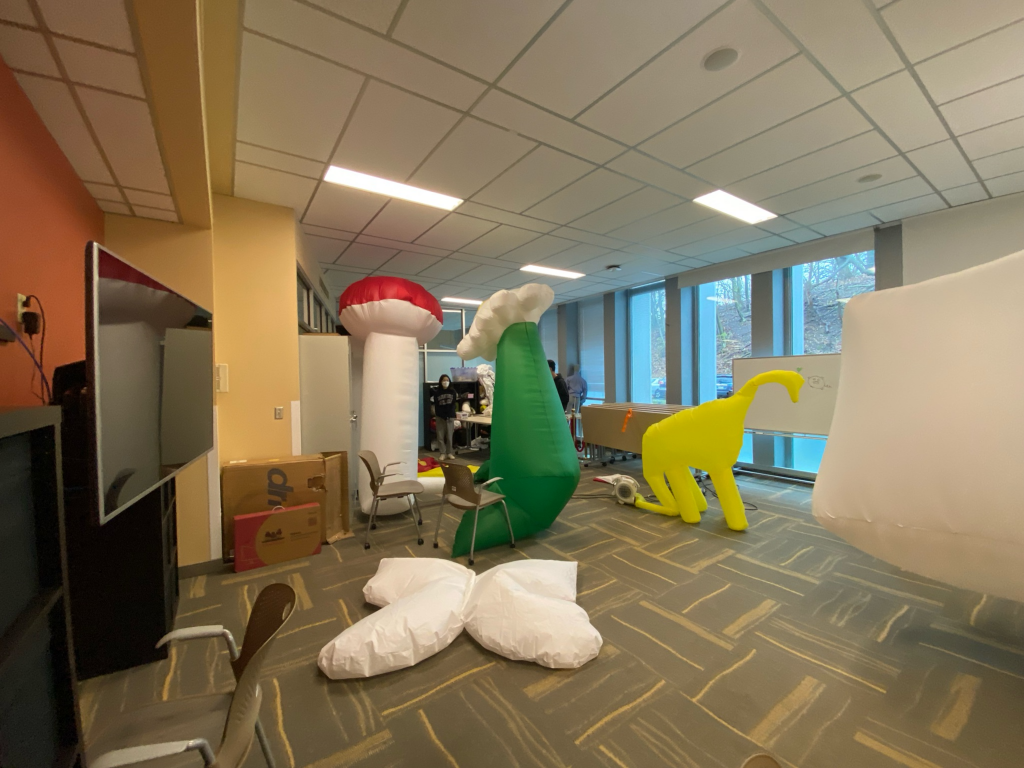
Yesterday + sunday we test inflated the big mushroom, big flower, dinosaur, and butterfly. we also have two mini flowers with stems, five flowers, a leaf, and a bug sewn, and the pieces for the second mushroom cut. we decided the final layout and amount of dyeing we need to do. next steps are:
Last week: completed dyeing and patterning, cut most nylon pieces
This week: completed sewing of the cloud sans buttons (we will decide post test inflation where they will be located as baffles) and attached air inlet though we have made the air inlet that will attach to it. We will add the hole retroactively. Sewed all but the pupil onto the eyeball, which we will also add the air inlet later.
Over the weekend, we finished cutting off our pattern for the leaves and assembling them. We also dyed two inner wall leaves with green and pink gradient. Our next step is to dye the outer layers green, make the teeth and the stems and assemble everything together.