Final Project Proposal – Adrienne W, Elin Z, Neha C, June L

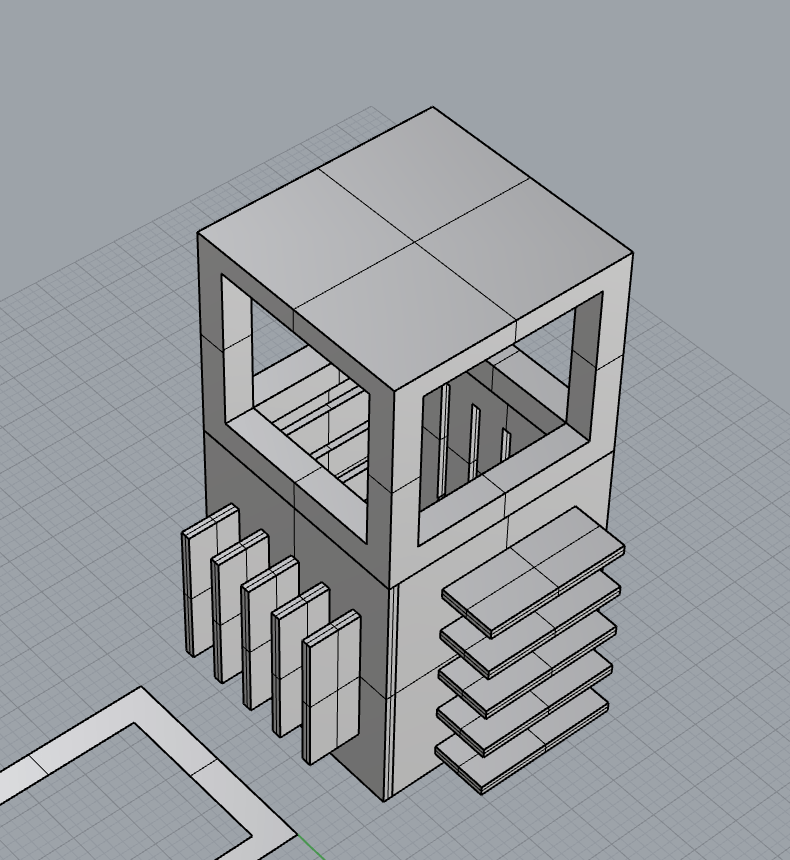
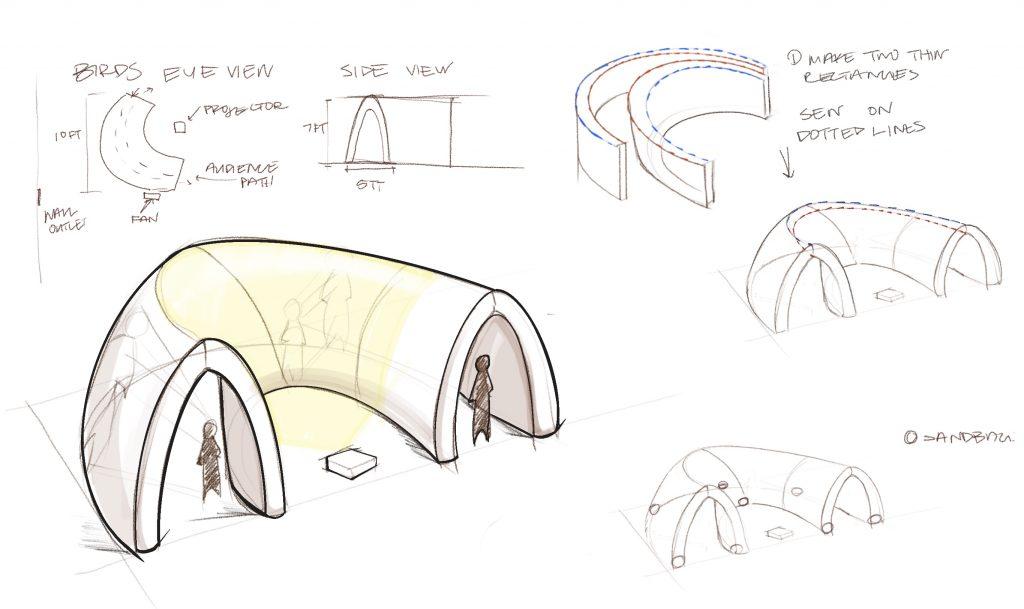
For the final project, our group’s idea is to have a rounded, tunnel structure that has an outside and inside layer. Ideally, the animation projection would be displayed on the inside layer of the tunnel so when people walk through the tunnel, their silhouettes can be seen on the outer layer. The inflatable would resemble a multi-faceted interactive landscape with different displays, allowing the audience to interact with it in different ways. We anticipate the inflatable to be approximately 7 feet tall and 5 feet wide. We expect to use a translucent fabric for the outside layer and most likely ripstop nylon for the inside layer. 

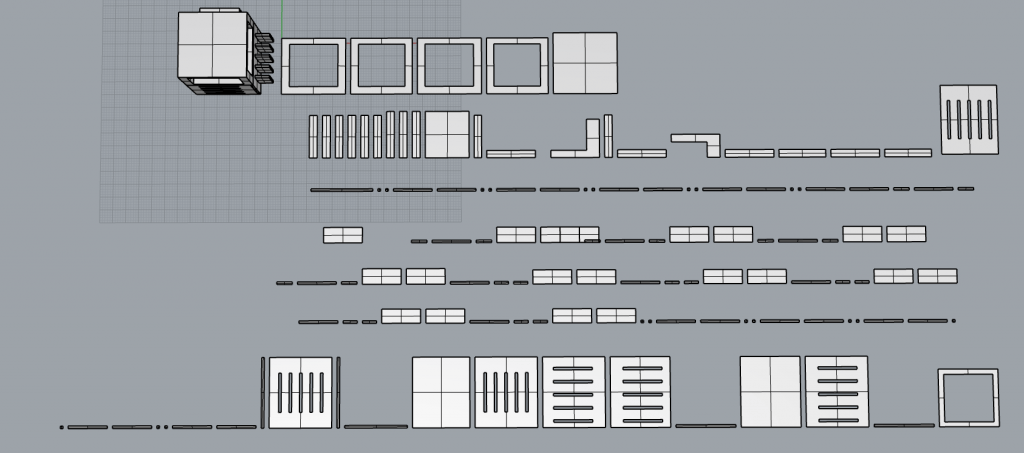
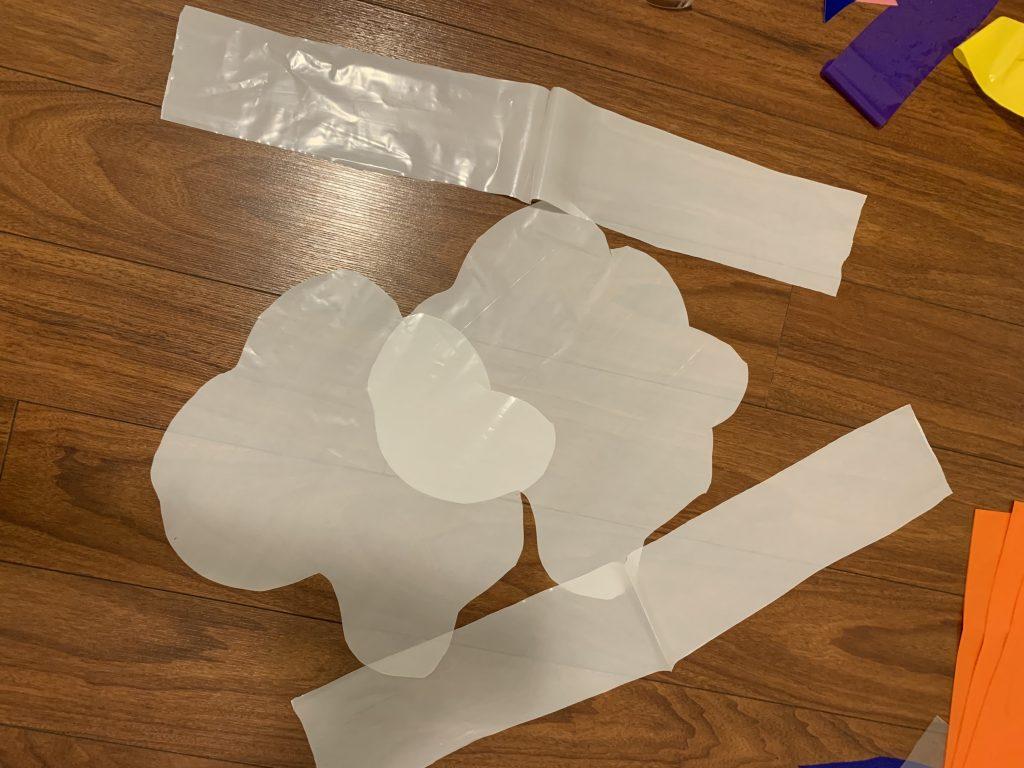
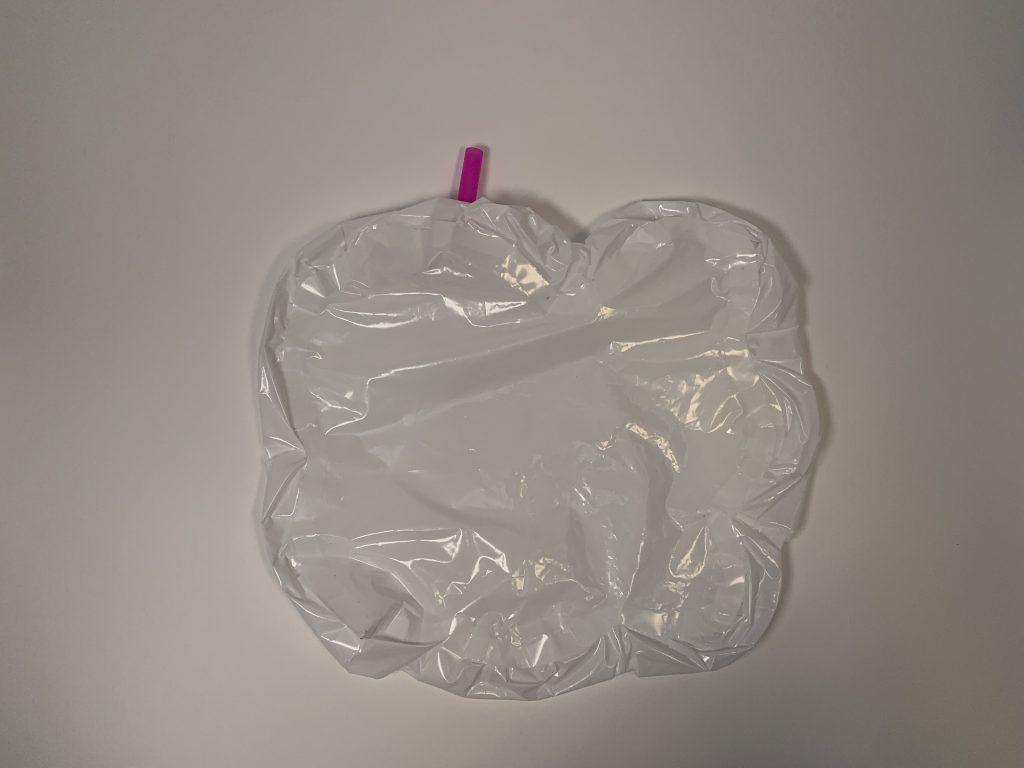
There may be several challenges throughout this project, including maintaining the curved structure of the inflatable as it is inflated and expanded with air. To ensure this inflatable has the intended structure, the pieces patterned will need to be in smaller sections and account for the expansion into a rounder shape when inflated. Another challenge will be making sure a person can fit under the structure both in height and width, especially after the two walls are connected and curved at the top of the structure. We will be modeling this structure with real dimensions before patterning to make sure it can be walked through. Finally, we need to test that sewing together two different types of fabric with different opacities can still be robust when inflated, and that the seams will look clean and intentional. 

Music Tower – Adrienne Wang

Rhino File in Google Drive

My music tower is inspired by one of my all-time favorite Disney songs called “When Will My Life Begin” from the movie “Tangled”. I was inspired by the realistic structure of the Rapunzel tower, but also the themes of isolation and boredom conveyed in the song, so I made my tower very tall and the focal point far from the ground.

Push/Pull Objects – Adrienne Wang

For this project, I created my 3 objects with different approaches: the first with the final figure in mind, the second with the goal of being interactive, and the third driven by an emotion and action verb.

Object #1 Red Panda:

For my first object, I created a red panda plushie by combining a sphere shape, a tail made of a darted cylinder so it would curve to the side, and decorative felt for the ears and facial features. The body and tail were created together and then inverted right before stuffing. One of the biggest challenges with this object was inverting the fabric of the tail and stuffing it since its diameter was so small.

Object #2 Invertible Sphere:

For my second object, I wanted to create something interactive and playful, so I created a more complex version of a stuffed sphere by making it invertible. I was intrigued by the two colors of dark blue and white for the inside and outside of the sphere. I also liked the ambiguity of which color is the inside or outside, since both create the same shape.

Object #3 Spikes:

My third object was inspired by my emotions at the time, since I was feeling irritated in a calm and controlled way. I also wanted to portray the action verb of “to poke” and represented this through spikes that were made of small cones and later inverted before stuffing. Instead of making a sphere using a pattern, I leaned on the concept that inflated objects tend to form the shape of sphere, so I just tied a large piece of fabric at the base to close the object. I found it satisfying that the spikes can poke both outwards and inwards.

Improvisation Inflatables – Adrienne Wang

For this project, I wanted to experiment with how different shapes could come together with straight or curved edges. For my three inflatables, I constructed them using different kinds of seams and different colors of plastic. Throughout construction, I took risks in not knowing what the final structure would look like, but also focused on making sure it could inflate with air in the end.

Inflatable #1:

For my first inflatable, I cut two layers of a white plastic bag into an abstract shape with smooth round edges. Instead of connecting these two pieces directly together, I used an equal-width strip to connect them and add more volume. I found it challenging to use the double-sided tape to connect curved edges, since I could only use a very small strip of tape at a time to maintain the curved shape.

Inflatable #2:

For my second inflatable, I experimented with connecting many smaller pieces of plastic to create a larger structure. I began with cutting small circles and then folded each circle into equilateral triangles. I used tape to connect the straight edges of the triangles together while leaving the round edge of the circle exposed outside of the seam. I discovered that triangles are a very versatile shape in making 3D structures, since not only were they easier to put together, but also inflated easily into this final structure.

Inflatable #3:

I approached my third inflatable by challenging myself with using one continuous piece of plastic cut in an abnormal shape to create a structure. I cut pink plastic in a continuous spiral and reconnected the spiral on an angle to create a 3D structure. I was surprised by how much this structure expands when inflated with air because of the layers of the spiral. This structure also reminded me of candy after construction, so I decided to use a longer straw to complete its resemblance to a lollipop.