Day 8: (Mon Sep 27, Week 5) Electrical Theory
Notes for 2021-09-27.
New Assignments
The next assignment will involve adding a photoreflective sensor to either your existing actuated marble device or a new one.
Administrative
Some requests from IDeATe staff regarding the laser cutters:
Please do the hot-work certification check and fill out the log. There is a clipboard on each laser cutter and they should be filling this out on whichever machine they use every time they use it. This is the one that environmental health and safety actually collects from me and they take it very seriously. There was recently a small fire in TechSpark, so EH&S is on the prowl. As a reminder, ALL users of the laser must:
Check the path to the emergency exit in A5 proper and make sure it is clear all the way to the last machine (other users not counting). If it is not, they must clear it.
Inspect the zip tie on their laser’s fire extinguisher. If it’s broken, the extinguisher was used and they have to tell us.
Make sure there is nothing flammable in or around the laser. This doesn’t count wood, but would be things like gasoline, etc. Granted this should never be in there, but you never know.
Clear the floor of any debris that could be a slipping hazard in case of an evacuation.
Everything above and signing the log should take about 1 minute, so this is not a burden.
Bring a buddy with you if they plan to cut. We do not yet have enough staff for them to provide this.
All Stratsys units are back up and running and so is the part wash. Since there is a keycard reader on the laser room door, it is possible that a student does not have access to the laser room, but needs to get a print. For this reason, we are periodically collecting prints and putting them out on a table near the emergency exit. Students should get the full experience of peeling their part off of the sheet, and processing it in the wash. They should be wearing safety gear to do this.
If you think some training would help them with this, Cody would be happy to do this.
We’re still working on weekend staffing for laser monitors, please stay tuned.
Agenda
In-class demos of 3D-printed marble devices.
Discussion of basic electronics theory.
Demos of lab equipment: DMM, oscilloscope. (DMM DC voltage but not yet oscilloscope.)
Hand out a few more parts from the F21 Course Kit (1395, 788, 237, but not yet 1931, 6049, 482).
Try out Exercise: Continuity Tests. (Skipped this.)
Demo of reading a switch with a Pico. (Didn’t get to this.)
Supplementary Video
Electrical Theory Introduction: https://youtu.be/d5HxmQHCO48
Kirchhoff’s Laws, Ohm’s Law: https://youtu.be/hnbD_D4ljOE
Resistors and Voltage Dividers: https://youtu.be/j8rvBSPiiUI
Switch and LED Circuits: https://youtu.be/lY3ckgUBEbg
Reflective Photointerruptor: https://youtu.be/atuFgbVYVsA
Resistive Circuits in Tinkercad: https://www.youtube.com/watch?v=mX5L67WcWec
Essential Theory
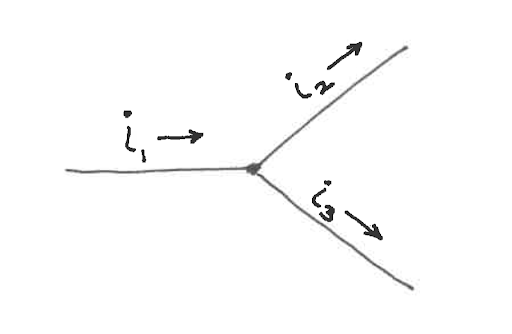
Kirchhoff’s current law (KCL).
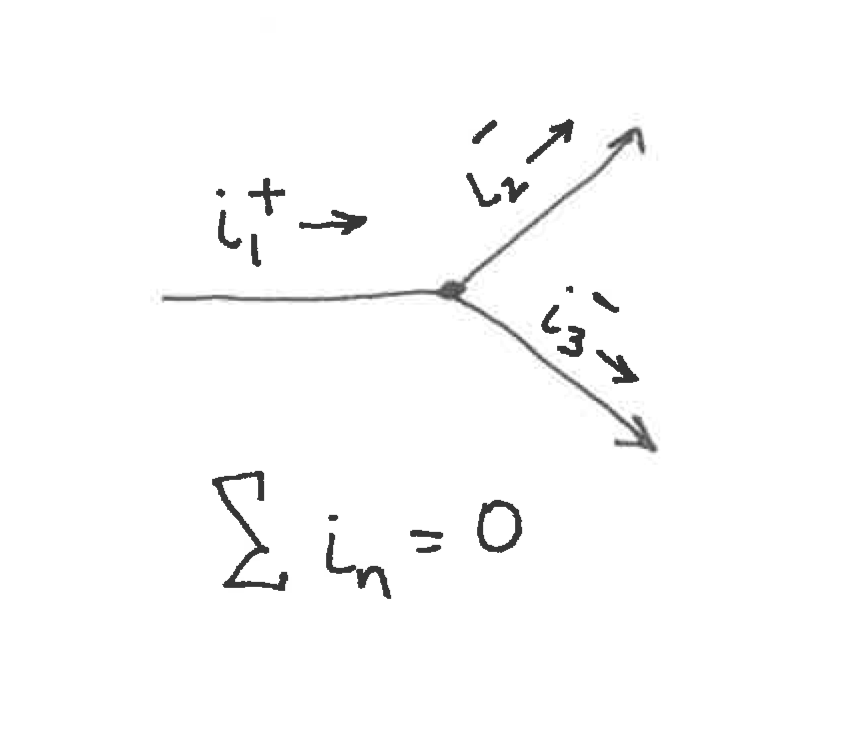
Kirchhoff’s current law (KCL).
Kirchhoff’s voltage law (KVL).
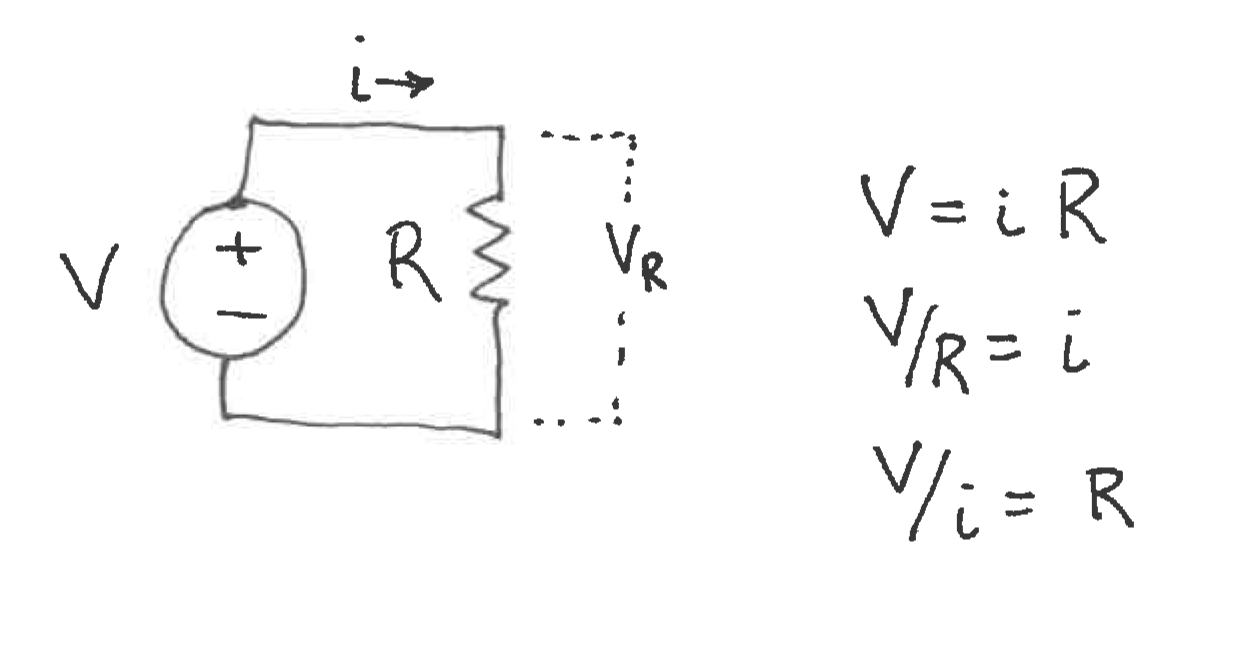
Ohm’s Law.
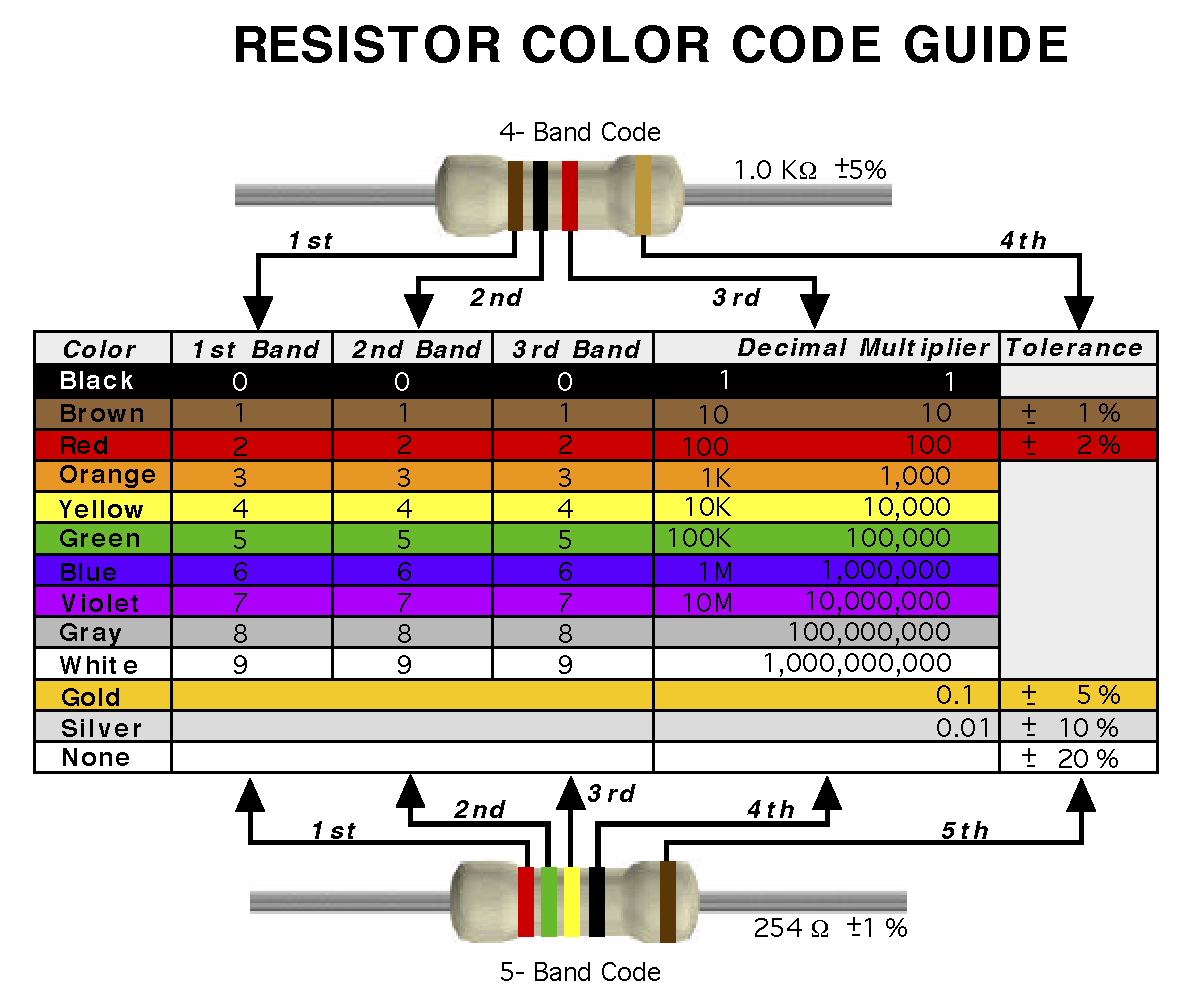
We use 1/4-Watt resistors with axial leads. The part value is indicated by the colored bands.
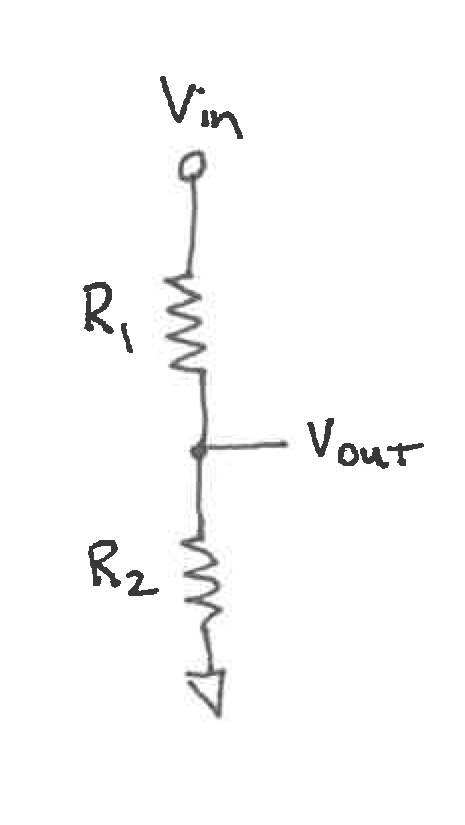
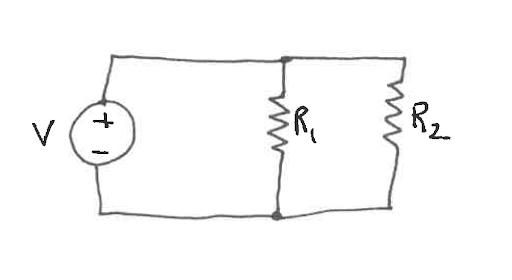
A voltage divider, the essential topology for most of our circuits. For more detail, please see Voltage Dividers.
Essential Circuits
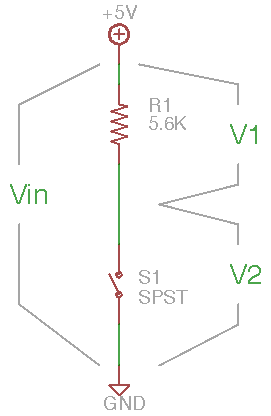
A switch with a pullup resistor, analyzable as a voltage divider.

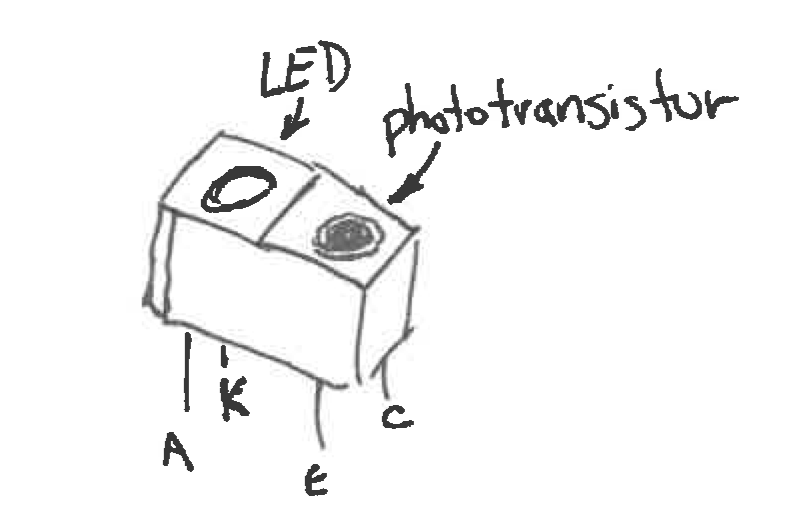
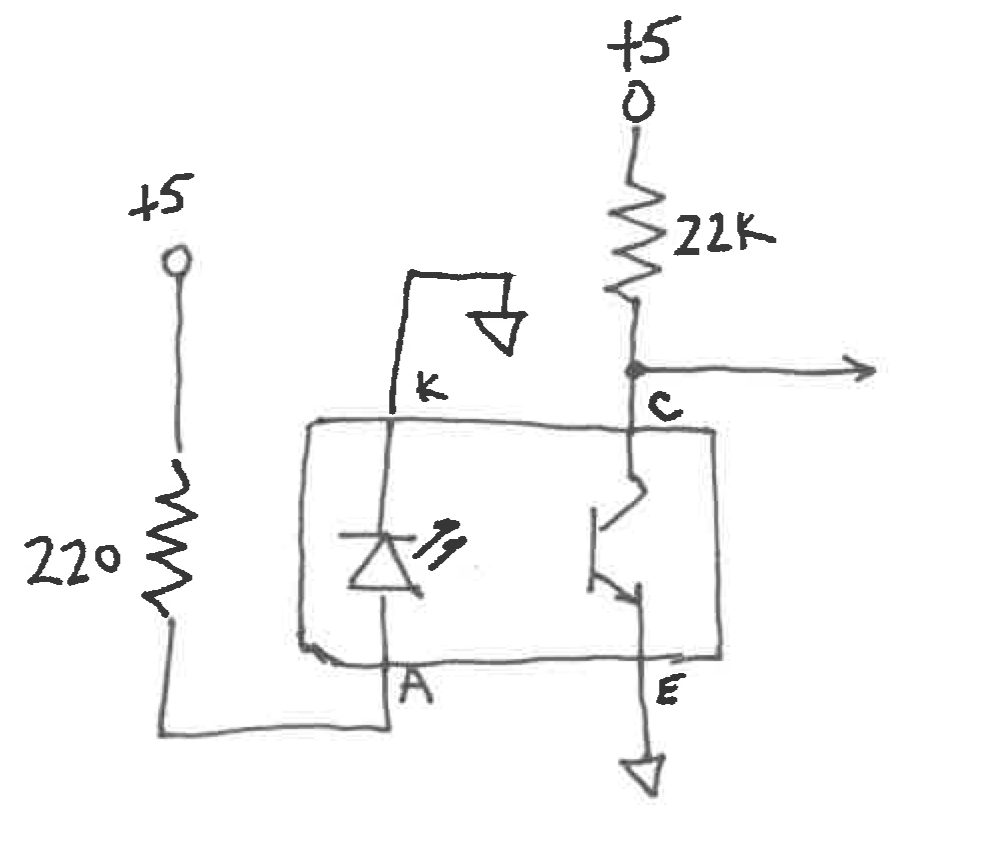
A photointerrupter circuit includes a current-limiting resistor for the LED and a bias resistor for the phototransistor.

A single-channel unidirectional power driver using a MOSFET. For more detail, please see Exercise: Unipolar Drivers. For the Pico, we now use the 3.3V-compatible IRLB8721PbF.
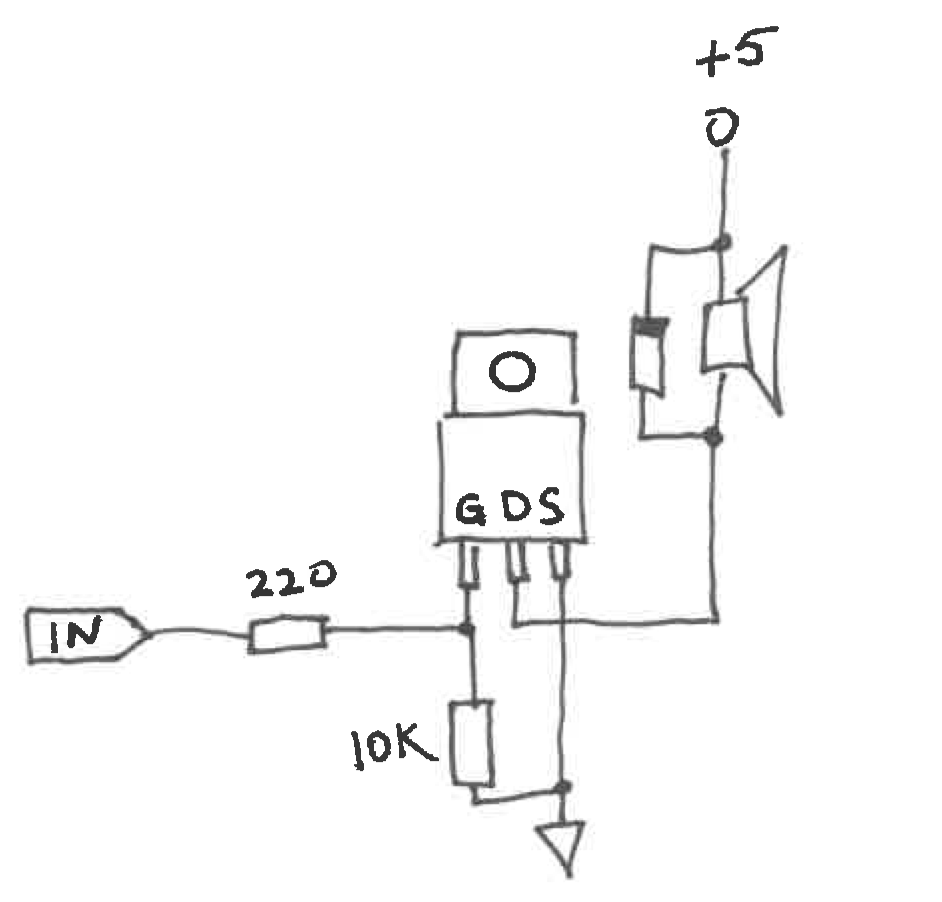
A more graphical representation of the MOSFET circuit.
Essential Lab Equipment
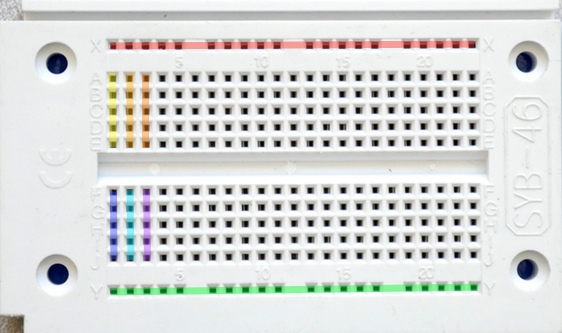
Solderless breadboards are our workhorse for electronics prototyping. Each short row of five holes connects together by an internal metal clip and forms a single circuit node. Each long bus row is a node. Please disregard the +/- bus labels on your breadboards.
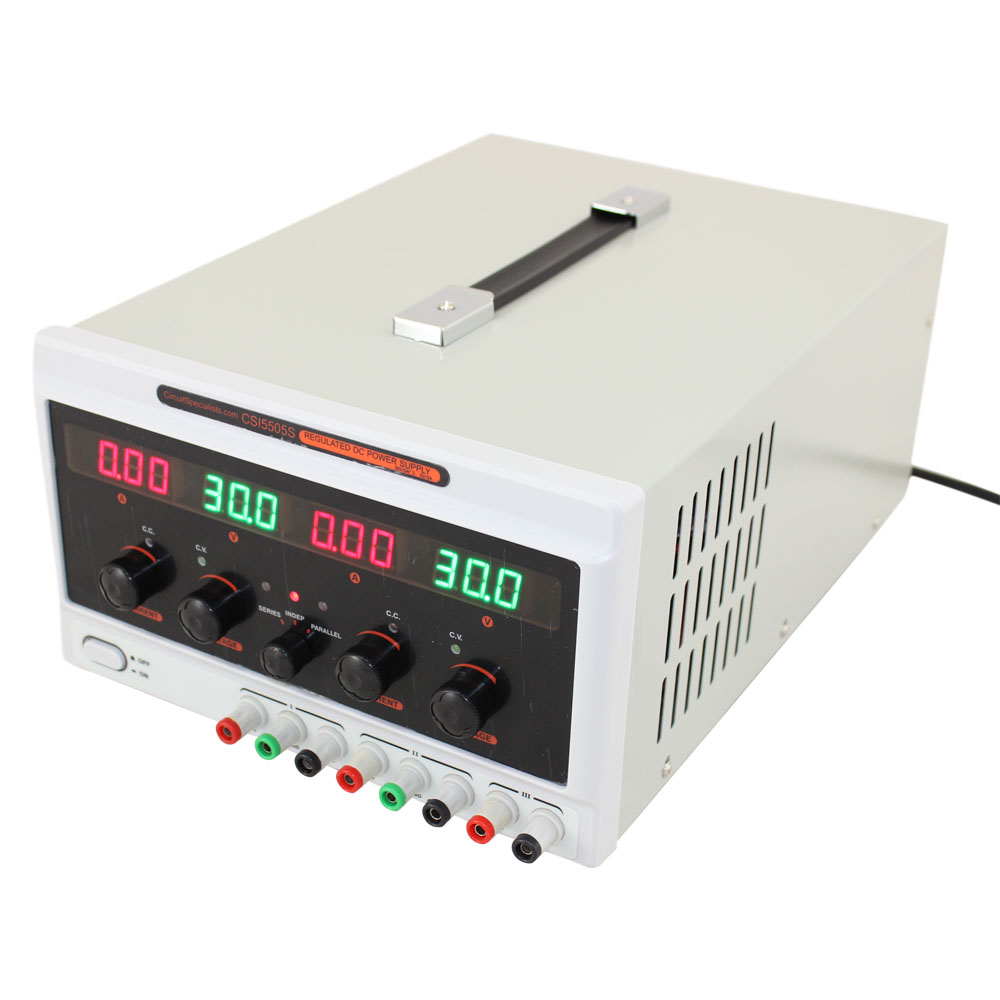
Three-channel lab power supplies.
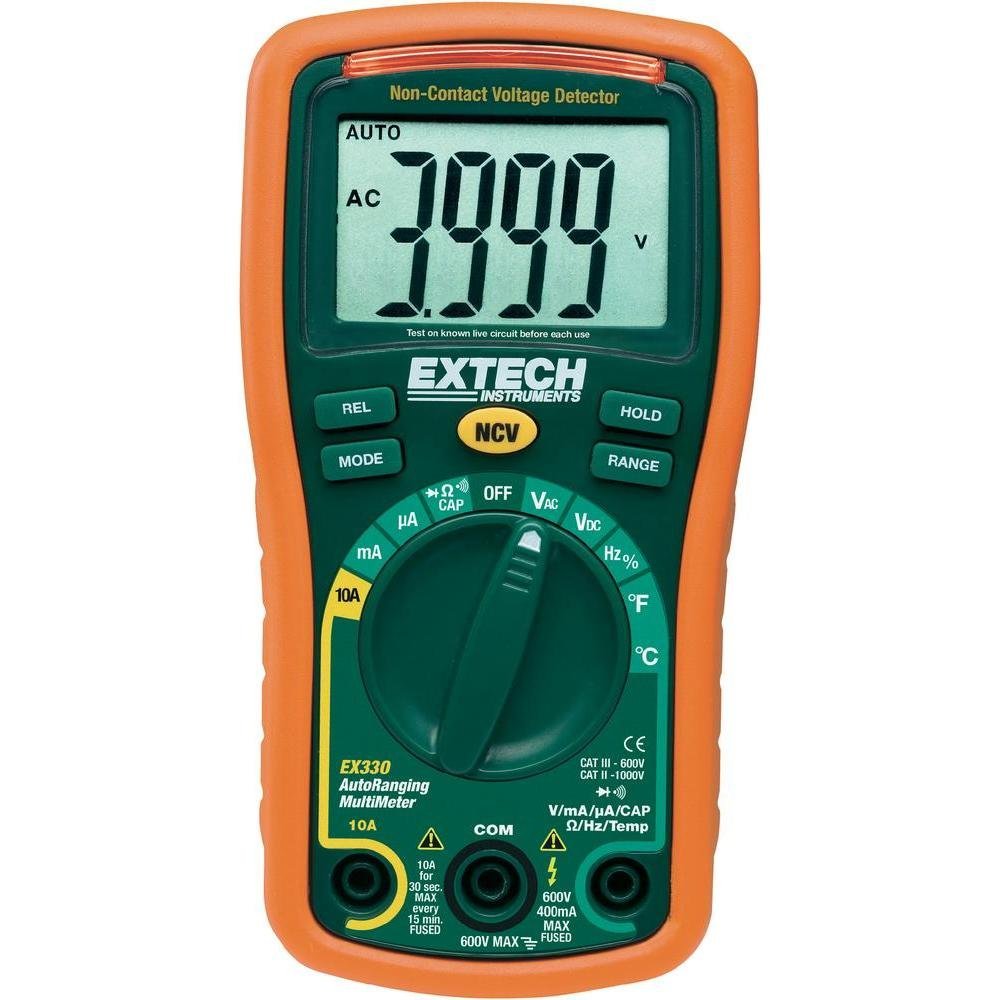
Digital multi-meter (DMM).
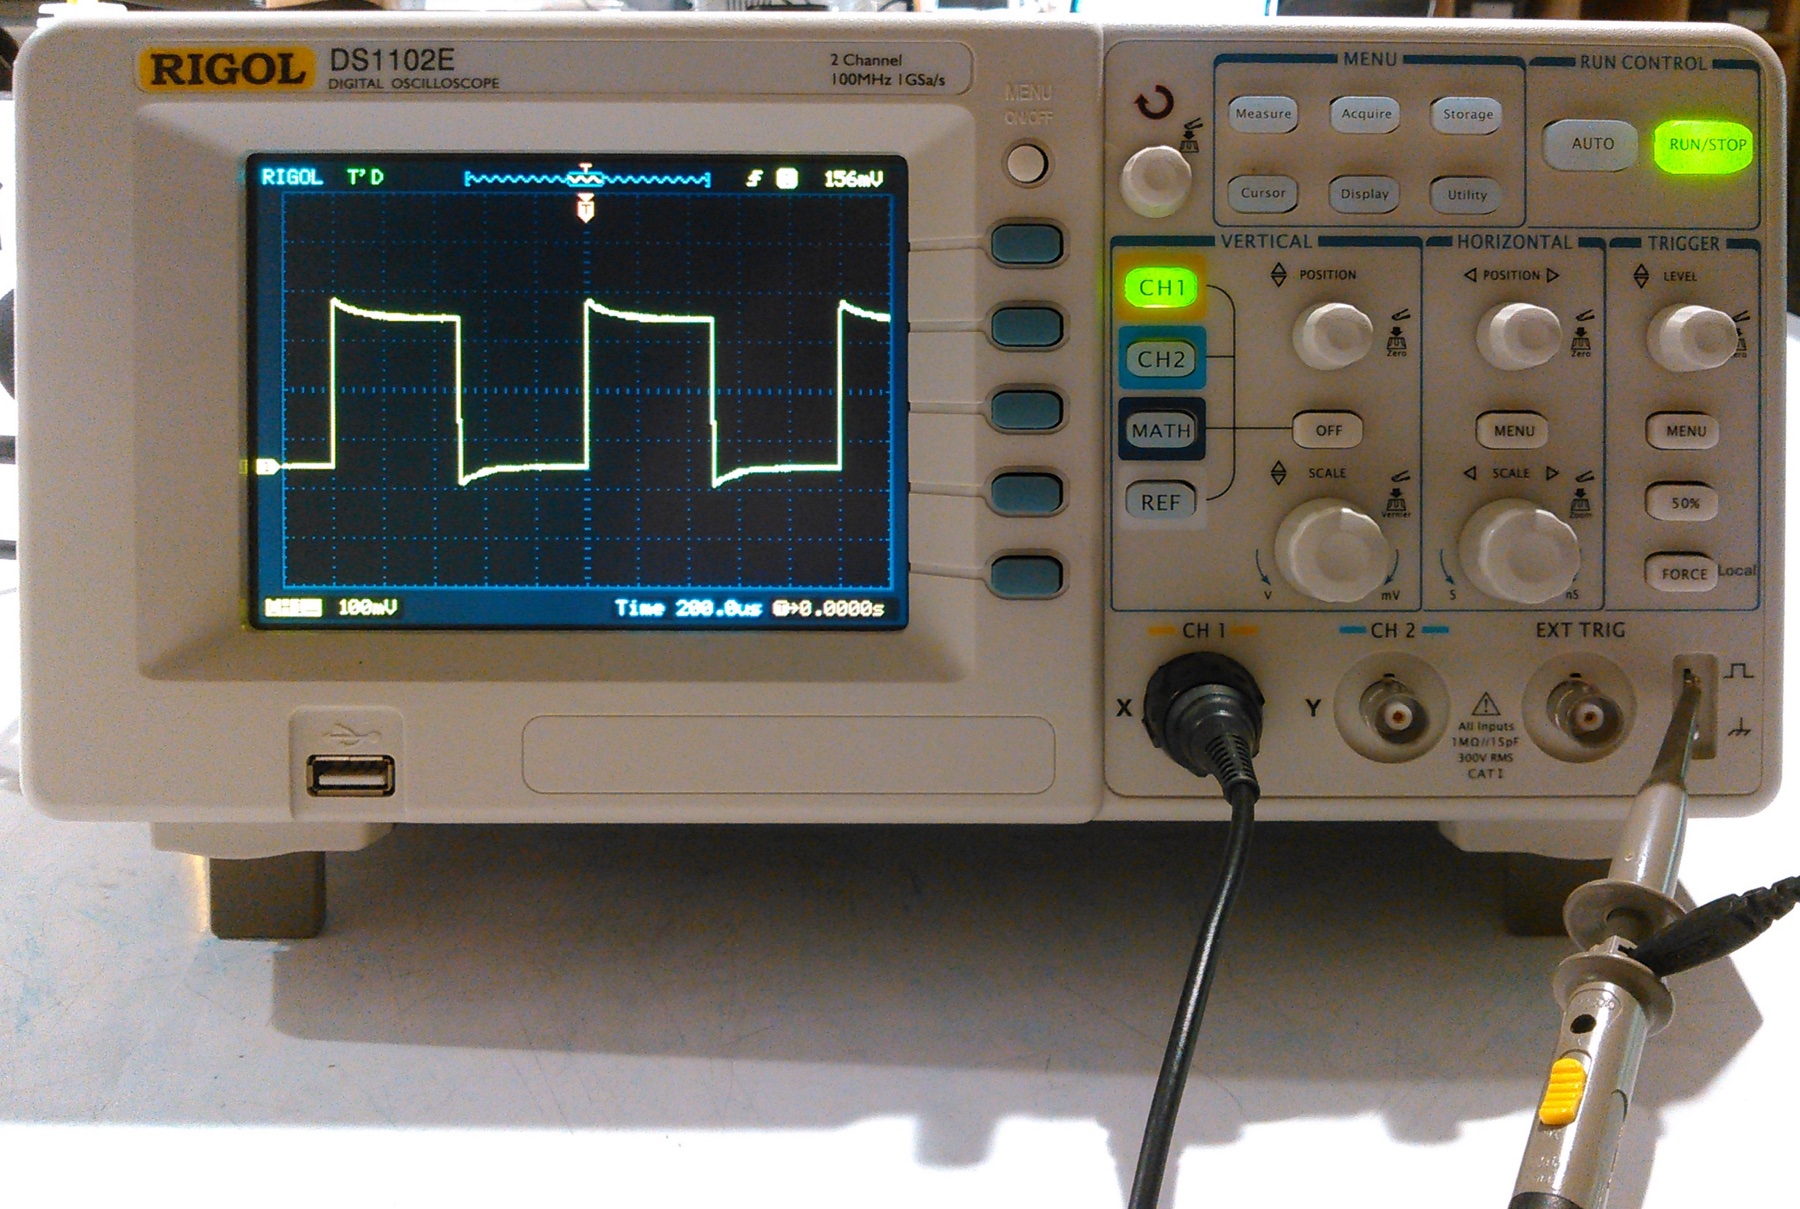
Digital oscilloscope. For more details, please see Oscilloscope Guide.