
Abstract Our overall goal for this project was to create an interactive system that provided a variety of types of play for children. We hoped our design would engage a child’s senses and encourage them to play and share with others. As an extension, we wanted to conceal parts of our system so that marbles would “disappear” into holes and “reappear” in other places. We feel these goals were met through our project design and sparked interesting outcomes.
Objectives Our goal for this project was to create an interactive system that provided a variety of types of play for children. One type of play we wanted to explore was sensory experiences integrated into the overall system. To do this we included a tactile inflatable that could be pressed on and bounced, reactive, colorful lights surrounding the turntable, and a bit of airflow beneath the geometric ramp. Another aspect of play we looked at was concealing the marble’s routes so that a marble would disappear as it fell into a hole and reappear when it re-emerged out of a separate part of the system. We wanted the “hidden” parts of our design to excite the children and engage them in figuring out how the system worked on a low level. To achieve this, we created a double ramp system that sent marbles from the turntable to the top of the ramp or a ball launcher, depending on what hole the ball fell into.
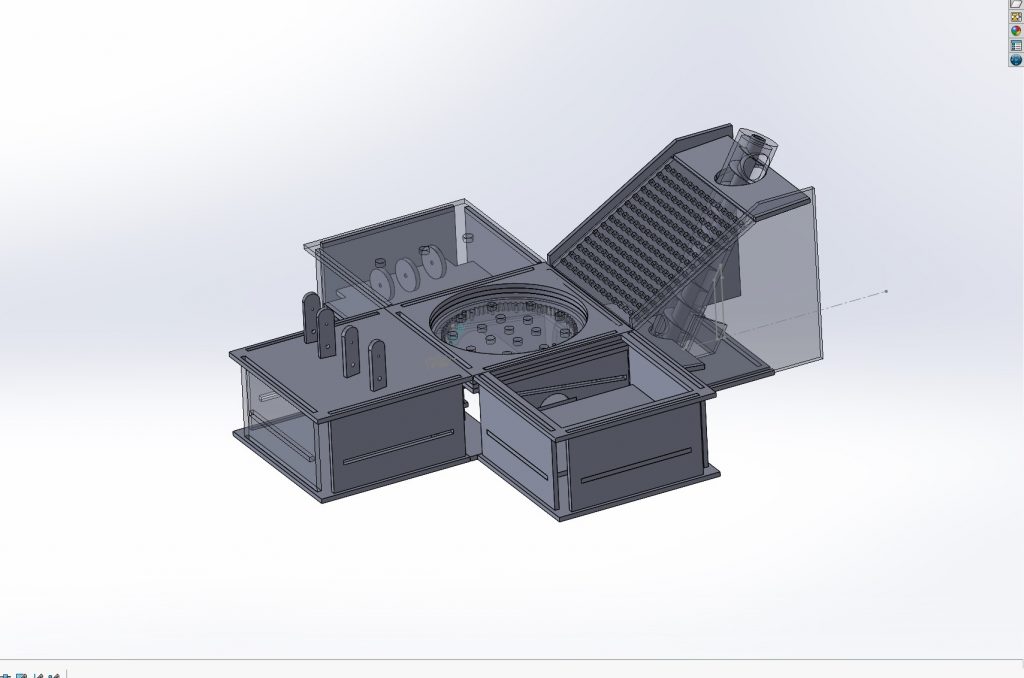
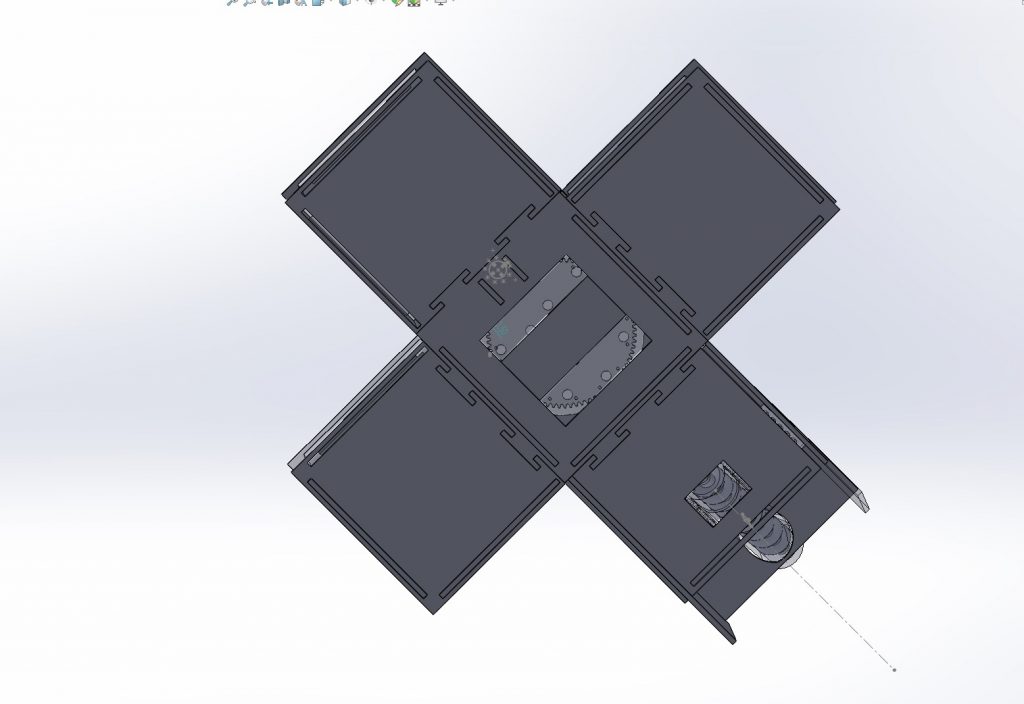
Implementation To implement our design, we had four “play” pieces interlocked with a center turntable who’s holes lead to either an Archimedes’ screw and a ramp back to the turntable, or a ball launcher pointed at the turntable. Two separate internal ramps led to each outcome, depending on the hole of entrance, and we saw that the children were initially surprised to see marbles pop out of one location or another. Both the Archimedes’ screw and ball launcher systems were included to provide a self contained system that would keep the marbles moving even in the absence of a child playing with them.
We created an interlocking system between the turntable and its surrounding sections in order to make our system more resilient to play. Our prototype test showed us that our system wasn’t resilient enough to withstand play. If the ramps and other play pieces were simply placed next to the turntable, as they were in the first iteration of our design, they very quickly ended up in new places that hindered continuous use for the kids. As a result, the bottom portion of each piece connected to the center turntable using a puzzle piece-like connection that held up very well during our final test.
A brief summary the construction/purpose of each piece within our design:
- Turntable – The turntable was the focal point of our design. All our subsequent pieces were created to be easily integrated and interacted with the turntable. Below the tuntable were two ramps that lead to the archimedes’ screw or ball launcher. The biggest ramp led to the screw and had a hole in the center to provide access to the second ramp below it. This hole used a straw and funnel to connect the center hole and passed marbles to a separate, smaller ramp that included an infrared sensor to detect when a marble got onto the ramp and led to the ball launcher. If the infrared sensor detected a marble on the smaller ramp, that would trigger the LED strip on the walls of the turntable to display a sequence of colors before the marble was shot back into the system.
- Ball launcher – A 12V motor rotated a wooden disc next to a curved ramp in order to fling marbles back towards the turntable and inflatable bouncy cube. Marbles would be directed to the ball launcher once they fell through the center hole of the turntable and came into contact with the spinning disc.
- Ramp – On our first visit to the children’s school, we saw kids of all age groups really enjoyed dropping balls or rolling toys down ramps. As a result, we dedicated an entire section of our project to a ramp that also served as a backboard to the catapults across from it. An unintended outcome we noticed from our original ramp prototype was that a couple kids found they could “draw” on the ramp by gently placing marbles on the holes of the ramp. We really enjoyed seeing that happen and decided to keep this aspect of the ramp as a feature for our final design.
- Inflatable bouncy cube – Across from the ball launcher, a tactile inflatable cube would rebound marbles shot in its direction. Kids could also roll or bounce marbles themselves to try to get marbles into the holes of the turntable or simply experience the way marbles would move if they came into contact with the inflatable. To keep the inflatable in a square shape, we connected pieces of fabric from the top to the bottom of the inflatable. This design also created very slight divots in the inflatable, which channeled the marbles and allowed the kids to play with it more easily.
- Catapults – Two catapults used rubber bands and a thin plastic stopping rod to project marbles at the ramp and turntable.
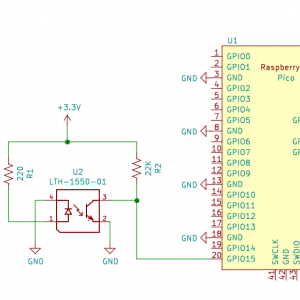
For all the systems described above, our project used 3 continuously running motors, an infrared sensor, and a NeoPixel LED light strip. Below is the code and wiring diagrams used for the 2 Pico boards used.
NeoPixel Code Fragment
# Below is a section of code used to control the LED light strip

#---------------------------------------------------------
# The NeoPixel strand uses one GPIO output.  Note that in general it will need
# separate 5V power, only the smallest arrays can use USB power.
pixels = digitalio.DigitalInOut(board.GP13)
pixels.direction = digitalio.Direction.OUTPUT

# The number of NeoPixels must be specified, as they cannot be detected.
num_pixels = 12

# Create a buffer for storing a complete linear image.  The color order and
# depth depends upon the specific devices, but are typically 3 bytes (24 bits)
# per pixel in BGR order.  The first pixel data will apply to the first device
# in the chain, the second to the next, etc.  Excess data will have no effect.
# If less than a full frame is sent, the last pixels will not change.
frame_buffer = bytearray(3*num_pixels)

#---------------------------------------------------------
# Run the main loop to generate a sequence of frames as fast as possible if a marble is detected.

print("Starting main script.")
while True:
    # Read the sensor once per cycle.
    sensor_level = sensor.value

    # send color sequence iff the sensor detects a marble
    if (sensor_level> 4):
        for i in range(20):
            # generate the next frame based on the real-time clock value
            now = time.monotonic_ns() / 1000

            # generate a temporal color sequence with each component out of phase
            red = int((now//11000) % 256)
            grn = int((now//33000) % 256)
            blu = int((now//55000) % 256)

            # update the entire frame buffer including an additional position-dependent term
            # to create spatial variation
            for p in range(num_pixels):
                frame_buffer[3*p]   = (grn + 12*p) % 256
                frame_buffer[3*p+1] = (red + 12*p) % 256
                frame_buffer[3*p+2] = (blu + 12*p) % 256

            # transfer the new frame to the NeoPixel LED strand
            neopixel_write.neopixel_write(pixels, frame_buffer)

    # generate white
    red = int(256)
    grn = int(256)
    blu = int(256)

    # clear the entire frame buffer when a marble isn't detected
    for p in range(num_pixels):
        frame_buffer[3*p]   = (grn + 12*p) % 256
        frame_buffer[3*p+1] = (red + 12*p) % 256
        frame_buffer[3*p+2] = (blu + 12*p) % 256

    # send the "blank" frame to the NeoPixel LED strand
    neopixel_write.neopixel_write(pixels, frame_buffer)
Motor Code Fragment
# Below is a section of code used to control the motors

#---------------------------------------------------------
# The main processing loop is set to continously drive both motors.

print("Starting main script.")
while True:
    # run both motors at full speed
    driver.write(0, 1.0)
    driver.write(1, 1.0)

    time.sleep(2.0)
NeoPixel Wiring Diagrams
Motor Wiring Diagrams

Outcomes The children played with our project in similar capacities as our first iteration, with a bit more focus on getting marbles to go through the center hole of the turntable to make the LEDs light up and see the cat (ball launcher) “spit out” the marble.
Marbles disappearing into holes and reappearing in other places created curiosity and exploration for some of the children. There were a handful of kids who attempted to test every hole on the turntable to see where the marbles would reappear depending on their input.
With the addition of a ball launcher that projected balls in the direction of the inflatable, we noticed a couple children try to “aim” with the launcher and express “success” when the marbles would bounce on the inflatable and go into the center turntable. While the launcher wasn’t really controlled by the users, that didn’t stop kids from repeatedly putting marbles into the center hole to see how it would be launched (it seemed marbles would be launched at different angles depending on how the rolling marble came into contact with the launcher).
We noticed that children were excited to play with the catapults and played with the increased number of catapults (from 1 to 2) with their peers or by themselves. If a child saw something interesting happen with a catapult, they could immediately try it for themselves without any interruption or waiting for the other child to finish playing. We also saw kids try to use both catapults simultaneously and experiment with their fine motor skills.
Future Work If we were to make another iteration of this project, we would focus on fine tuning the range the marbles could be launched and put more focus on the finished look of the project rather than just its functionality. We believe that a cleaner look would make play more straightforward so the kids exclusively focus on the features we intend to be played with.
Contribution To divide project work, Waleed was much more familiar with using SolidWorks to design physical systems, so he designed many of the interacting laser cut pieces and archimedes’ screw. Sandra had more electrical circuit and sewing experience so she was responsible for those aspects of the project alongside a couple laser cut pieces (specifically the catapult design and second center ramp) to distribute the work more evenly.
Leave a Reply
You must be logged in to post a comment.