Description
In teams of four students will create a high-fidelity, digital reconstruction of a found object (or fragment of an object). Object choice should be based upon observation of a compelling texture, geometry, or surface quality of the object. These observations should directly extend from the students’ previous observation and practice with hand-tools from Exercise One. Each team will then digitally transform (e.g. morph, tile, aggregate) their reconstructed object and rely on digital simulation of hand-tool paths and CNC produced patterns/templates to assist in producing a new physical artifact by hand.
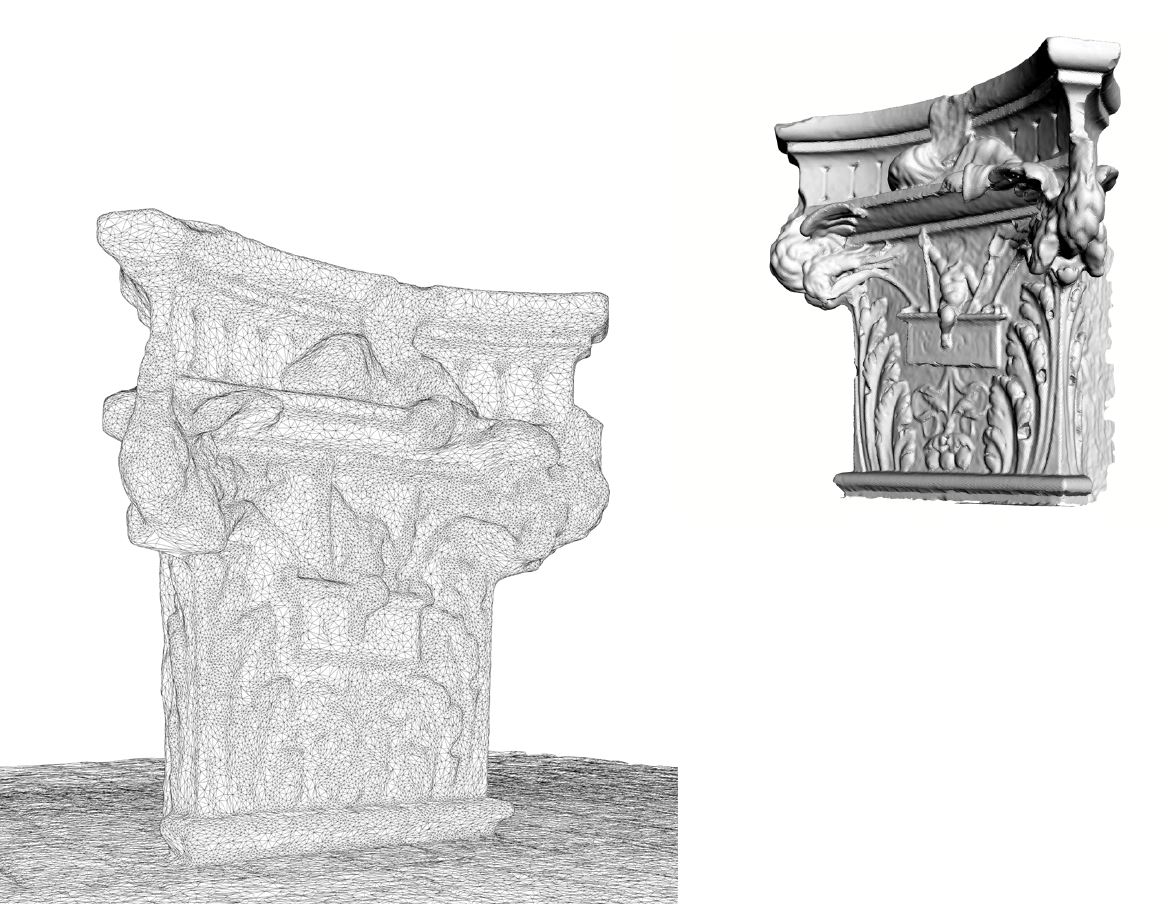
Example 3D Scan of ornamental carved stone.
Objectives
In this exercise students will:
- Negotiate basic translations between physical and digital constructs.
- Experiment with 3D scanning and photogrammetry reconstructions.
- Understand important paradigms in digital, solid and surface modeling in Rhino.
- Practice physically outputting a digital model through 3D printing.
- Use CNC outputs to assist in intricate hand-work.
Process
- Thursday 01.29.15
- Release Exercise Three and discuss objectives and workflow (In Class).
- Form working teams (In Class).
- Teams should locate a found object with an interesting texture, global geometry, or surface quality. Discuss how these characteristics relate to the students’ extendable observations about tool and material behavior from Exercise One. Anticipate how the chosen object implicates certain tool and material strategies (For Homework).
- Tuesday 02.03.15
- Introduce 123D catch and basic Rhino modeling strategies (In Class).
- Make a digital reconstruction of the object using reverse engineering techniques – e.g. photography, 123D Catch, 3D scanning, Rhino Modeling (Begin in Class).
- Thursday 02.05.15
- Introduce 3D printing workflow in Hunt lab (In Class).
- 3D print the reverse engineered copy of your object – at a smaller scale if necessary (Begin in Class).
- Make a generalized model (in Rhino) of your reconstruction that can be morphed, tiled, or augmented to construct a new artifact. Careful translation between polygon mesh and NURBS geometries may be required (Begin in Class).
- Tuesday 02.10.15
- Simulate anticipated tool paths and workflow in rhino to inform digital shape refinement and physical production (In Class).
- Laser cut templates and patterns to aid in hand-tooling of new artifact (In Class).
- Physically produce a new artifact that expresses the intent of your digital investigation (Begin in Class).
- Thursday 02.12.15
- Discuss artifacts and drawings from Exercise Three in group review (In Class).
Deliverables
For the in-class review, please be prepared to discuss your findings, including sample artifacts and documentation of the key translations in your team’s workflow.
Artifacts:
- 3D printed model of your reverse-engineered object.
- Hand-tooled object extended through digital processes.
- Templates used to produce final object.
Documentation (can include drawings, images, videos):
- Documentation of the physical digital translations of the exercise.
- Documentation of the digital simulation of physical tooling processes.
Prior to the next class, please submit a short text write up with accompanying drawing images and a video link to the XSEAD site as discussed on the Submissions page. Please be sure to add your project to the appropriate ‘pool’ as linked.
Resources
123D Catch: A free app from Autodesk to create 3D scans using a camera.
Rhino Tools: A collection of resources related to reverse engineering in Rhino.
Rhino Reverse: A plugin for Rhino designed to aid Mesh to NURBS translation and handle high polygon count meshes.
Intro video 123D Catch, Autodesk