Due: start of class Mon Jan 27
The objective of the assignment is to prepare tooling for an in-class casting mold workshop on Jan 27 and Jan 29. We will group the class into pairs. Each pair will be responsible for fabricating a mold pattern to use in class. On Monday we will prepare the pattern in a mold box and create a rubber mold. On Wednesday we will cast plaster into the rubber molds.
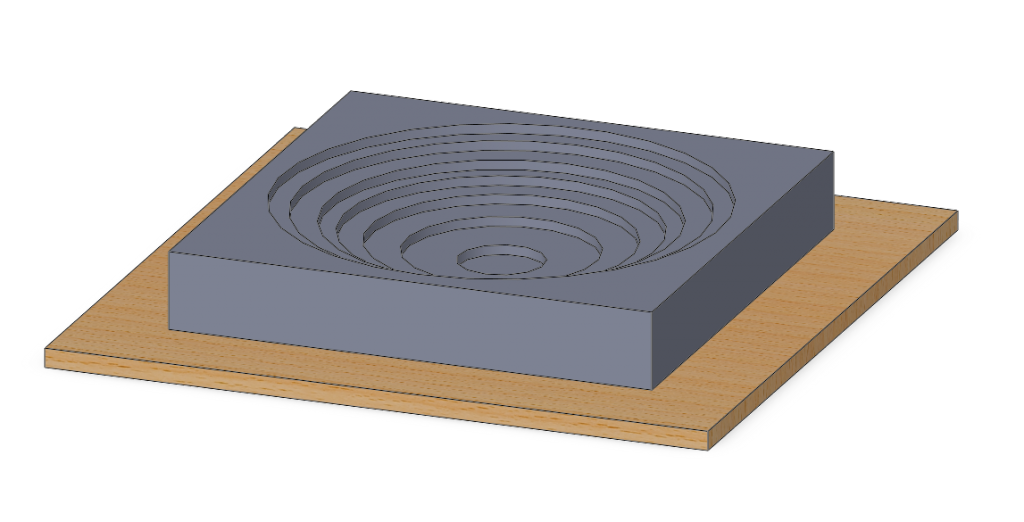
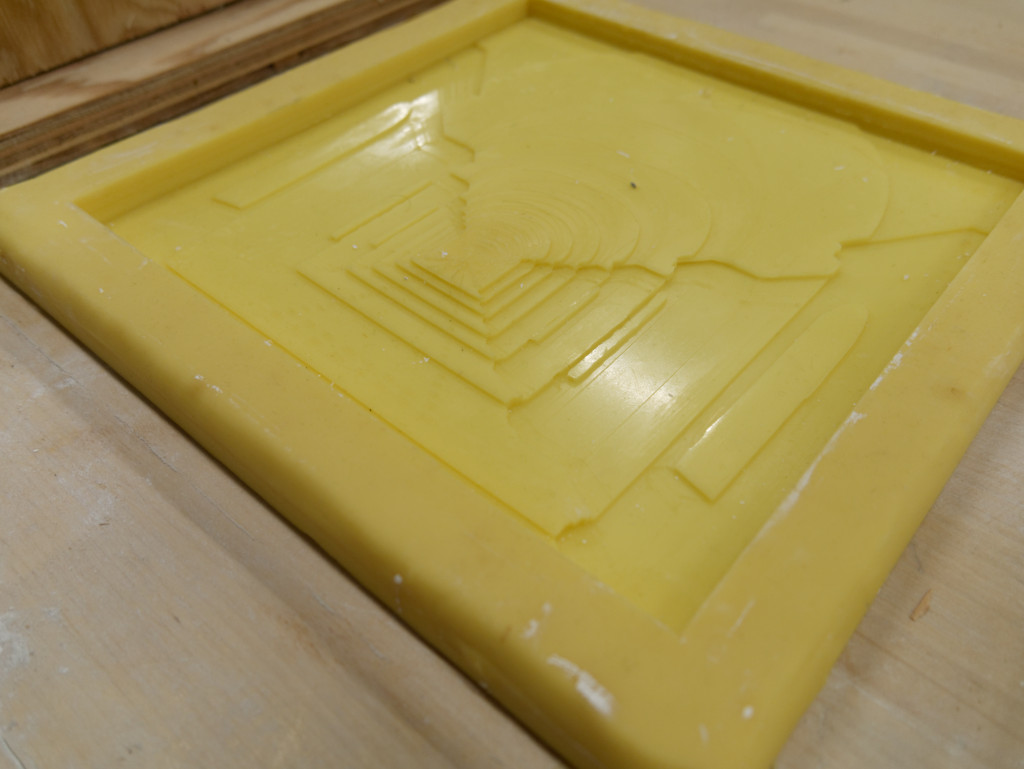
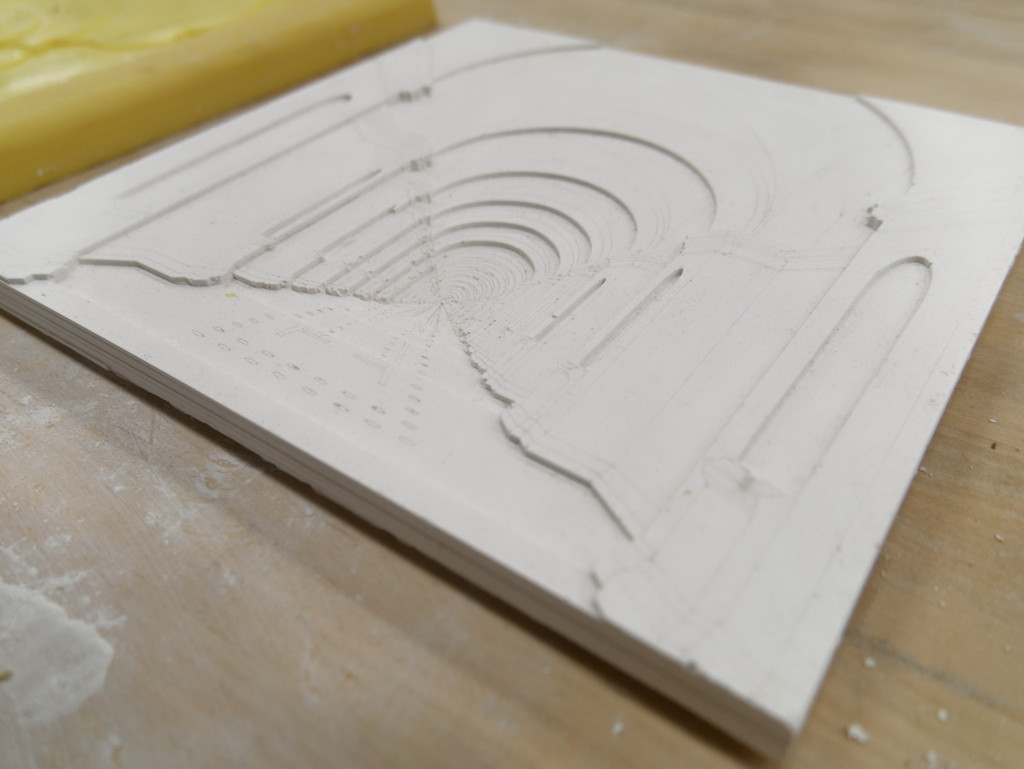
The pattern you create is a positive form in low relief. The resulting single-sided rubber mold will have the negative shape and include side walls to contain poured plaster. The plaster part will be upside-down in the rubber mold; the exposed back surface (on top during pouring) will be left open and be approximately flat.
Pattern Dimensions
Below you will find both sample CAD files and photos of the demonstration pattern and mold. Your pattern object should occupy a volume of no more than 150x150x24 mm (6x6x1 inch) and be mounted on a backing plate large enough to mount the mold box walls with clearance for the side walls of the rubber mold. A reasonable rubber side wall thickness is 9mm (3/8 in), and the mold box walls are 19mm (3/4 in) plywood, so the backing plate is typically at least 28mm (1 1/8 in) larger than the pattern on each side. The backing plate can be lightweight; we recommend 6 mm plywood.
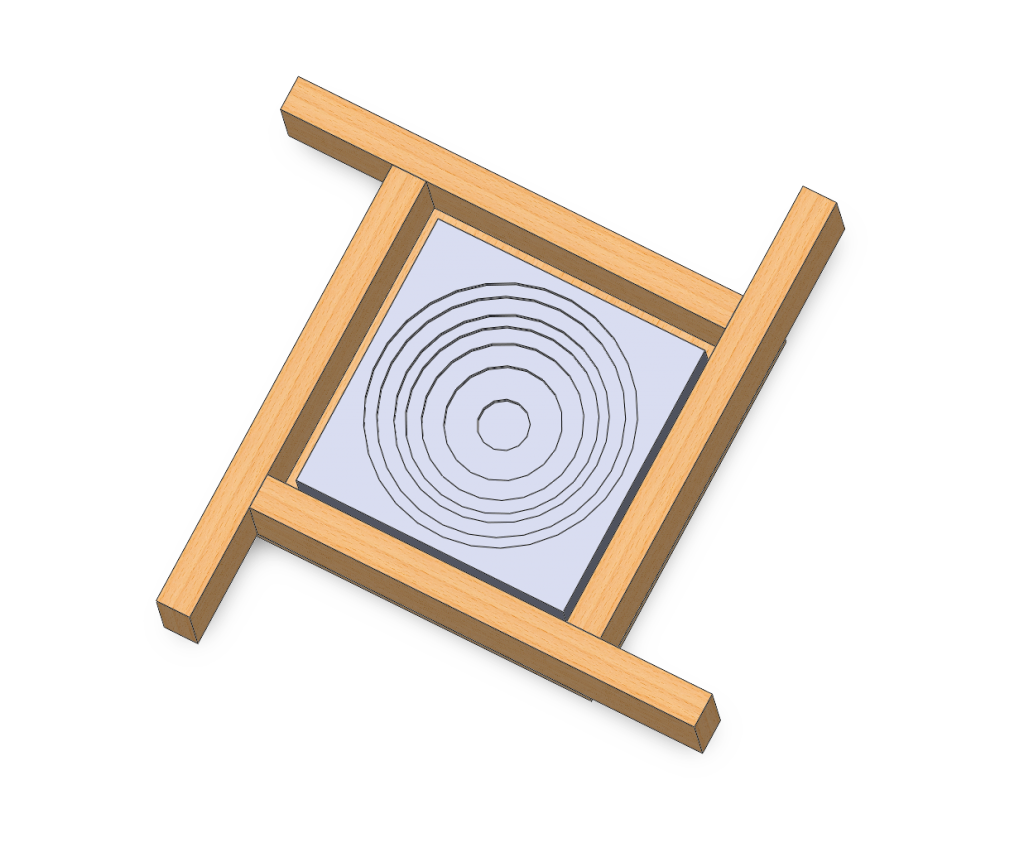
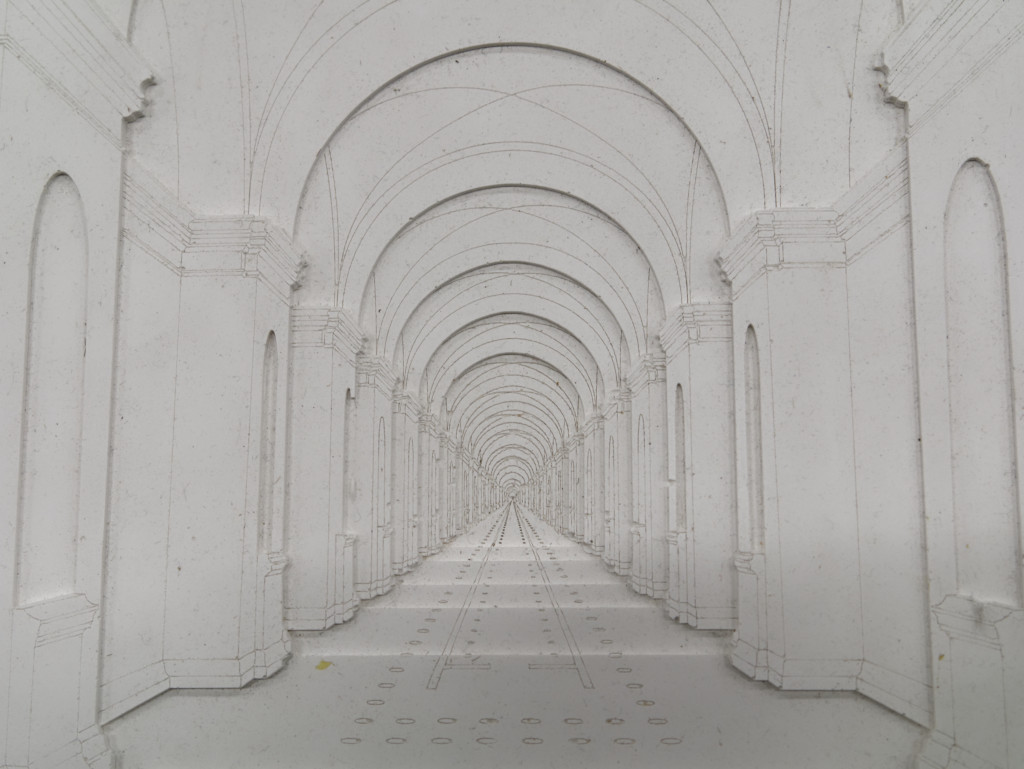
The demonstration pattern below was created using eight layers of laser-cut 3mm acrylic bonded together, although you may choose to make a shallower profile. The pattern includes geometric low relief as well as etched linework. The rubber and plaster can both carry fine detail. The rubber is flexible enough to pull off corners and out of pockets, but please avoid undercuts, and recognize that deep vertical surfaces or narrow holes may make demolding a challenge. Please remember that the final part will be in plaster, so an overly thin pattern may be very fragile.
You may also use other materials in the pattern, e.g. hand-worked clay, wax, or small found objects. The example is image-based, but any sort of literal or abstract geometry or image composition which fits within the bounds is acceptable.
If assembling a pattern from parts, please be sure to bond any layers together firmly; if gluing acrylic, clamp firmly. The rubber has low viscosity and will seep into tiny openings or textures.
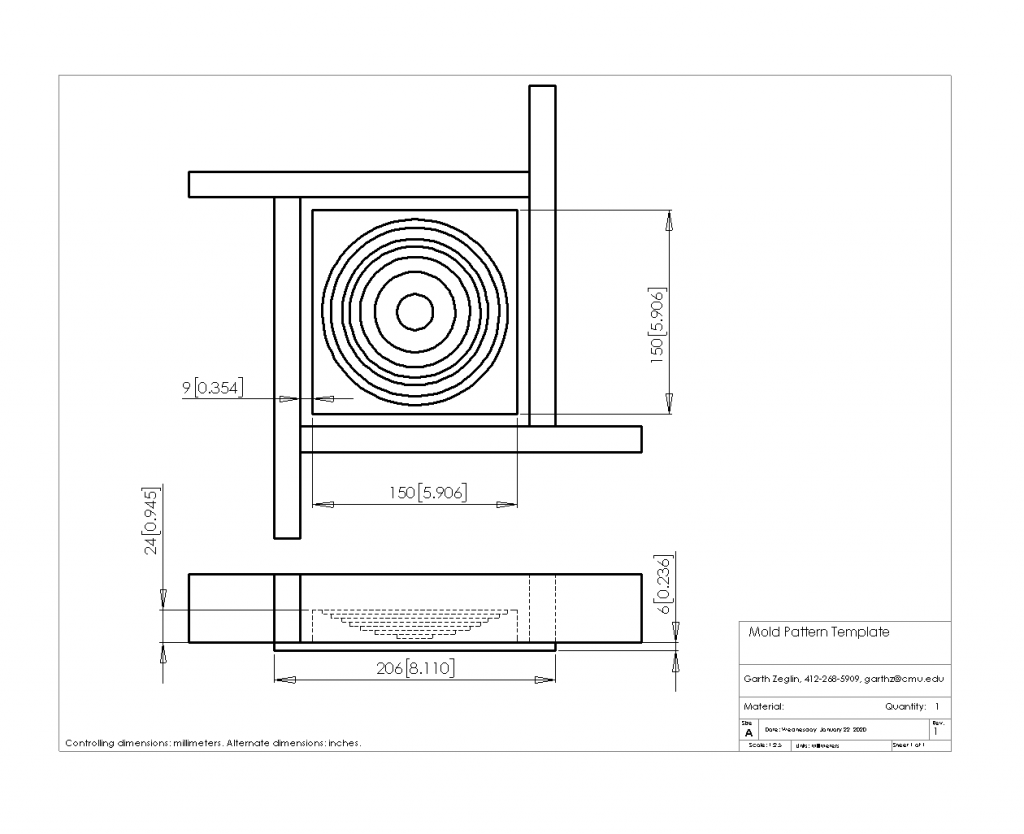
Sample Files
The zip includes a SolidWorks template for the pattern and mold. The PDF is the drawing showing critical dimensions.
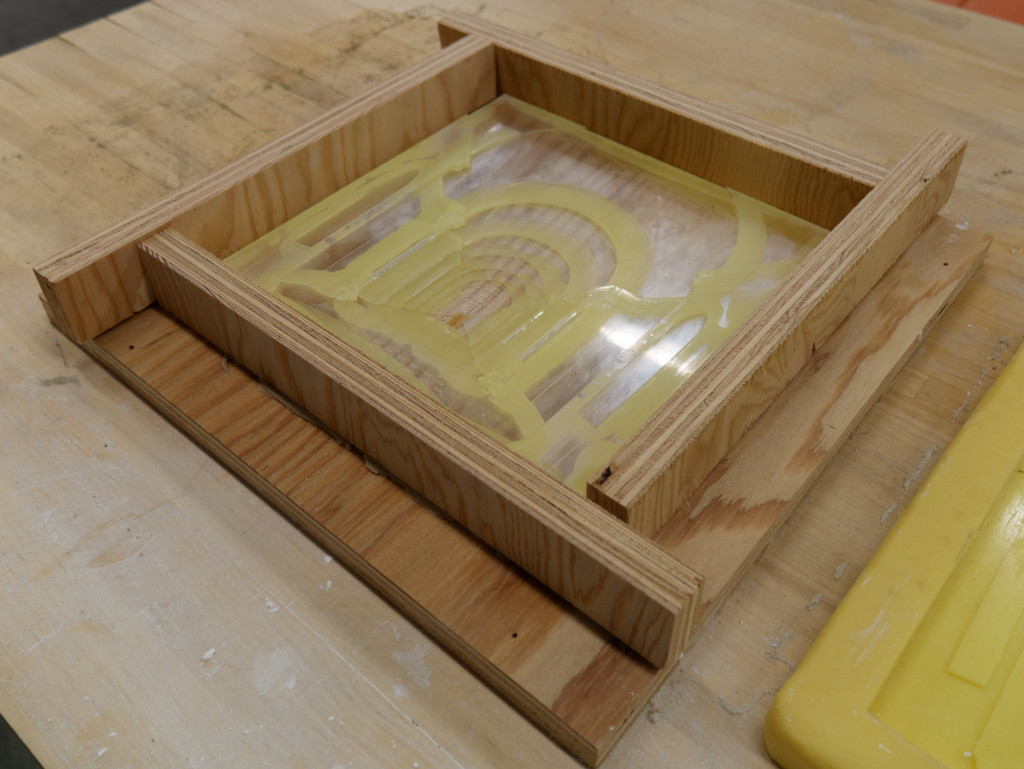
Demonstration Mold
Materials
We will be using Poly 74-20 Liquid Rubber, a two-part liquid polyurethane.
Please bring a hot glue gun on Monday (if you have one) to use in assembling the mold box.
We will use Plasticine clay to seal openings in the mold box.
We will cast using USG Moulding Plaster, same as for the running mold.
Estimated Volumes and Mass
The bounding box for the pattern has a volume of 540 cc, so the maximum plaster mass is about 800 grams (1.8 lbs), but could be substantially less, depending on the specific contours.
The rubber is typically poured about 6 to 8 mm higher than the highest pattern feature. With 9 mm wall thickness, the absolute maximum block volume is about 850 cc, but of course some of that is displaced by the pattern. The absolute minimum would be about 300 cc (850-540, e.g. a solid pattern. The rubber has a specific gravity near 1.0, so a typical 450 cc mold weighs about 450 grams (1 lb). For reference, the rubber is about $8.50/lb.
Mix Ratios
The PolyTex 74-20 rubber specifies a mix ratio of 1A:2B by mass. In other terms, the Part A component is 33.3% of the total mass, and the Part B component is 66.6%. E.g. 450 grams of rubber requires 150 grams of Part A and 300 grams of Part B. Part B should be stirred before use. The pour time is 20 minutes, so we’ll need to work quickly after the parts are combined. The demold time is 16 hours.
The USG data sheet suggests a range of mix ratios, between 63 to 70 lbs of water per 100 lbs of plaster. In other terms, the water constitutes between 38.7% and 41.2% of the total mass of the mixed plaster. E.g. assuming a mid-range 40% water rate, 1 kg of plaster (2.2 lbs) would use 400 grams water and 600 grams dry plaster.