Sunjana
After last week’s failure with the locking mechanism, this week, I attempted to try two locking mechanisms, one with .5mm thick channels, 3 horizontal, 3 vertical, and one with .5mm thick channels, 3 horizontal, 2 vertical.
With the first mechanism, I tried bonding using Elmer’s glue, which worked poorly. With the second one, I tried using the Ecoflex 00-45, which worked much better. With the second mechanism, I also was able to see the locking work, however fluid started leaking from the sides, and the paper I used for the grid wasn’t transparent, so I had to keep flipping the silicone piece back and forth to see the lock and the liquid traveling through the channel.
Some major issues I encountered
- I want to be able to test this on actual silicone, since Yupo paper isn’t transparent, but there’s a lot of manufacturing-related issues with that
- bonding is tough with the yupo paper in the middle, as there always seems to be leaks, not sure if it’ll get easier with just silicone
https://drive.google.com/drive/folders/1GkbPZlNeZZRonAAJdQHutpS7KHkTIaK8?usp=sharing
Jina
This week I was able to text and better understand the tesla Valve. Due to the small scale, it was not as efficient when observing the different directions and impact of the water movement. So, I moved forward and also started to look into the locking mechanism. I made models that are printing and hope to be built on Monday to test!
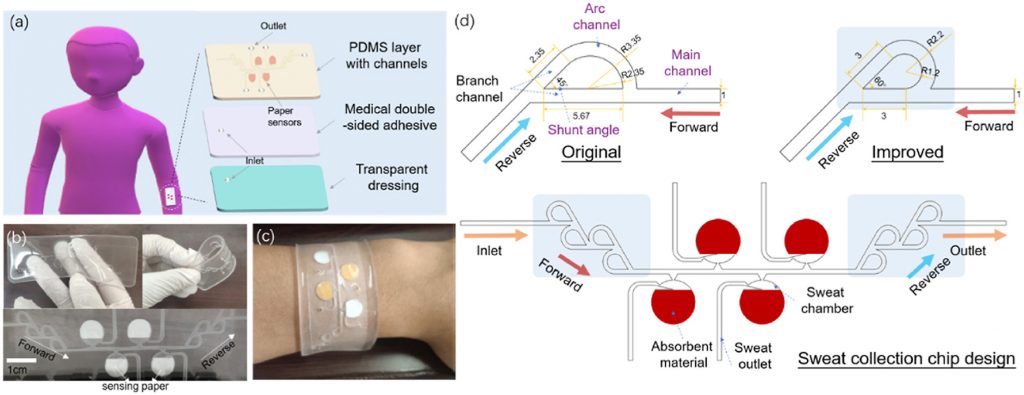
I found this paper that uses the tesla valve into a wearable. This is the model I am trying to print and re-create. How they are using is different but can be of help as they are using the inward and outward direction of the tesla valve. Compared to the model shown in the paper, I changed it slightly to better suit our purpose. The second image is the quick sketch I used to plan out my mold design.
https://www.sciencedirect.com/science/article/abs/pii/S0039914022000042

