
Our project is a basketball shooting game that allows the player to interact with a spring-loaded catapult that shoots balls with the objective to get the ball into the hoop. The catapult is a part of a photo-realistic human body than can be moved to different parts of the court via a peg and holes. The primary components to this toy are a basketball court, basketball hoop, and the shooter.
How these components were made:
Basketball Court: 2′ x 1′ acrylic base with multiple sockets to adjust the position of the shooter that was laser cut using a Rabbit laser cutter. The words “NEVER LOST” are laser engraved onto the court.
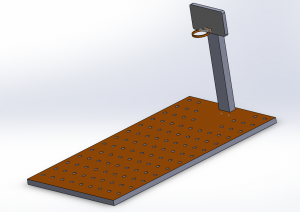
Feet were glued onto the bottom of the court to allow the peg on the shooter to extended further into the holes.
Shooter: A CAD design of a person with a shooting arm was 3D printed using the NVBOTS.
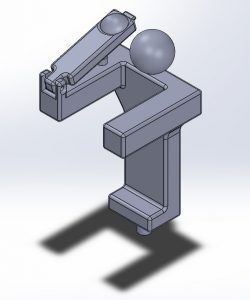
After it was printed, support material was removed by hand, with pliers, and with a belt sander to allow all of the pieces to fit together. The head, rotating arm, and body are all separate pieces (separating the head from the body made for a cleaner print). The neck was simply pushed into a hole in the body after support material was removed. The holes for the rotating arm were drilled out to allow a steel dowel to be inserted. The hole on the rotating arm was drilled out to be slightly larger than the holes on the body so that it would rotate around the dowel with low friction while the dowel stayed fixed in the body. Finally, a spring was added to the the nub on the arm of the body simply by wrapping it around.
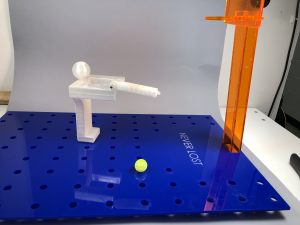
Basketball Hoop: Each component of the hoop assembly (the base, the backboard, and the rim itself) was laser cut using the Rabbit laser cutter. The Solidworks models were designed such that the Hoop is fully laser-cuttable. These laser cut parts were then fixed to each other using acrylic cement. Additionally, to increase sturdiness, the rim and backboard are twice as thick as the other components. This was achieved by laser cutting two copies of the component and then layering them on top of each other using acrylic cement.