This is a project to promote productivity by creating a “punishment” if I look at my phone, and a “reward” if I go long enough without looking at it.
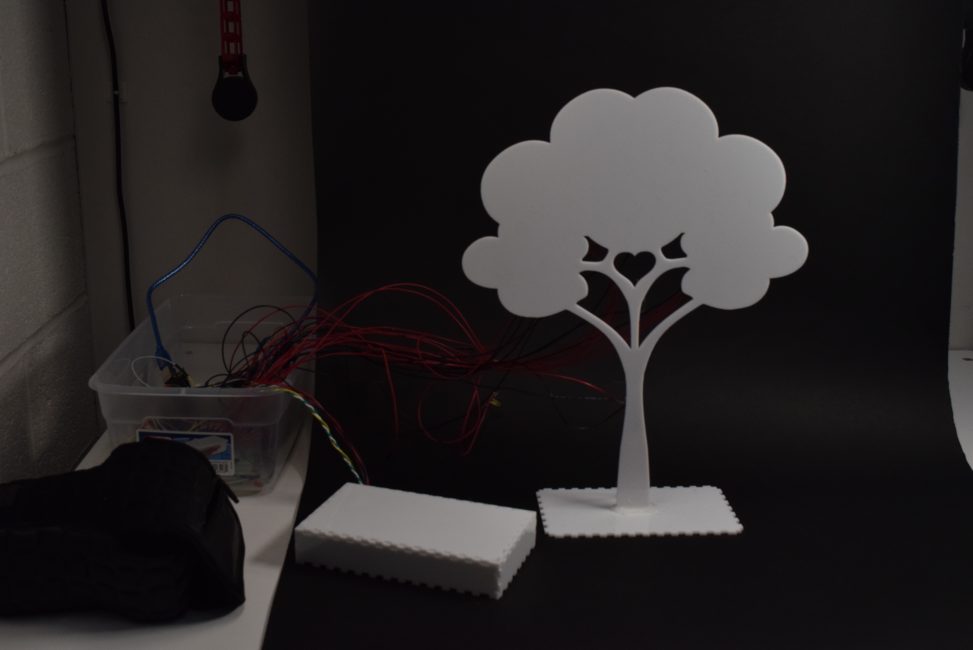
This is an overall photo of my project; this includes the tree and the phone cover as well as the wiring that makes all of it work.
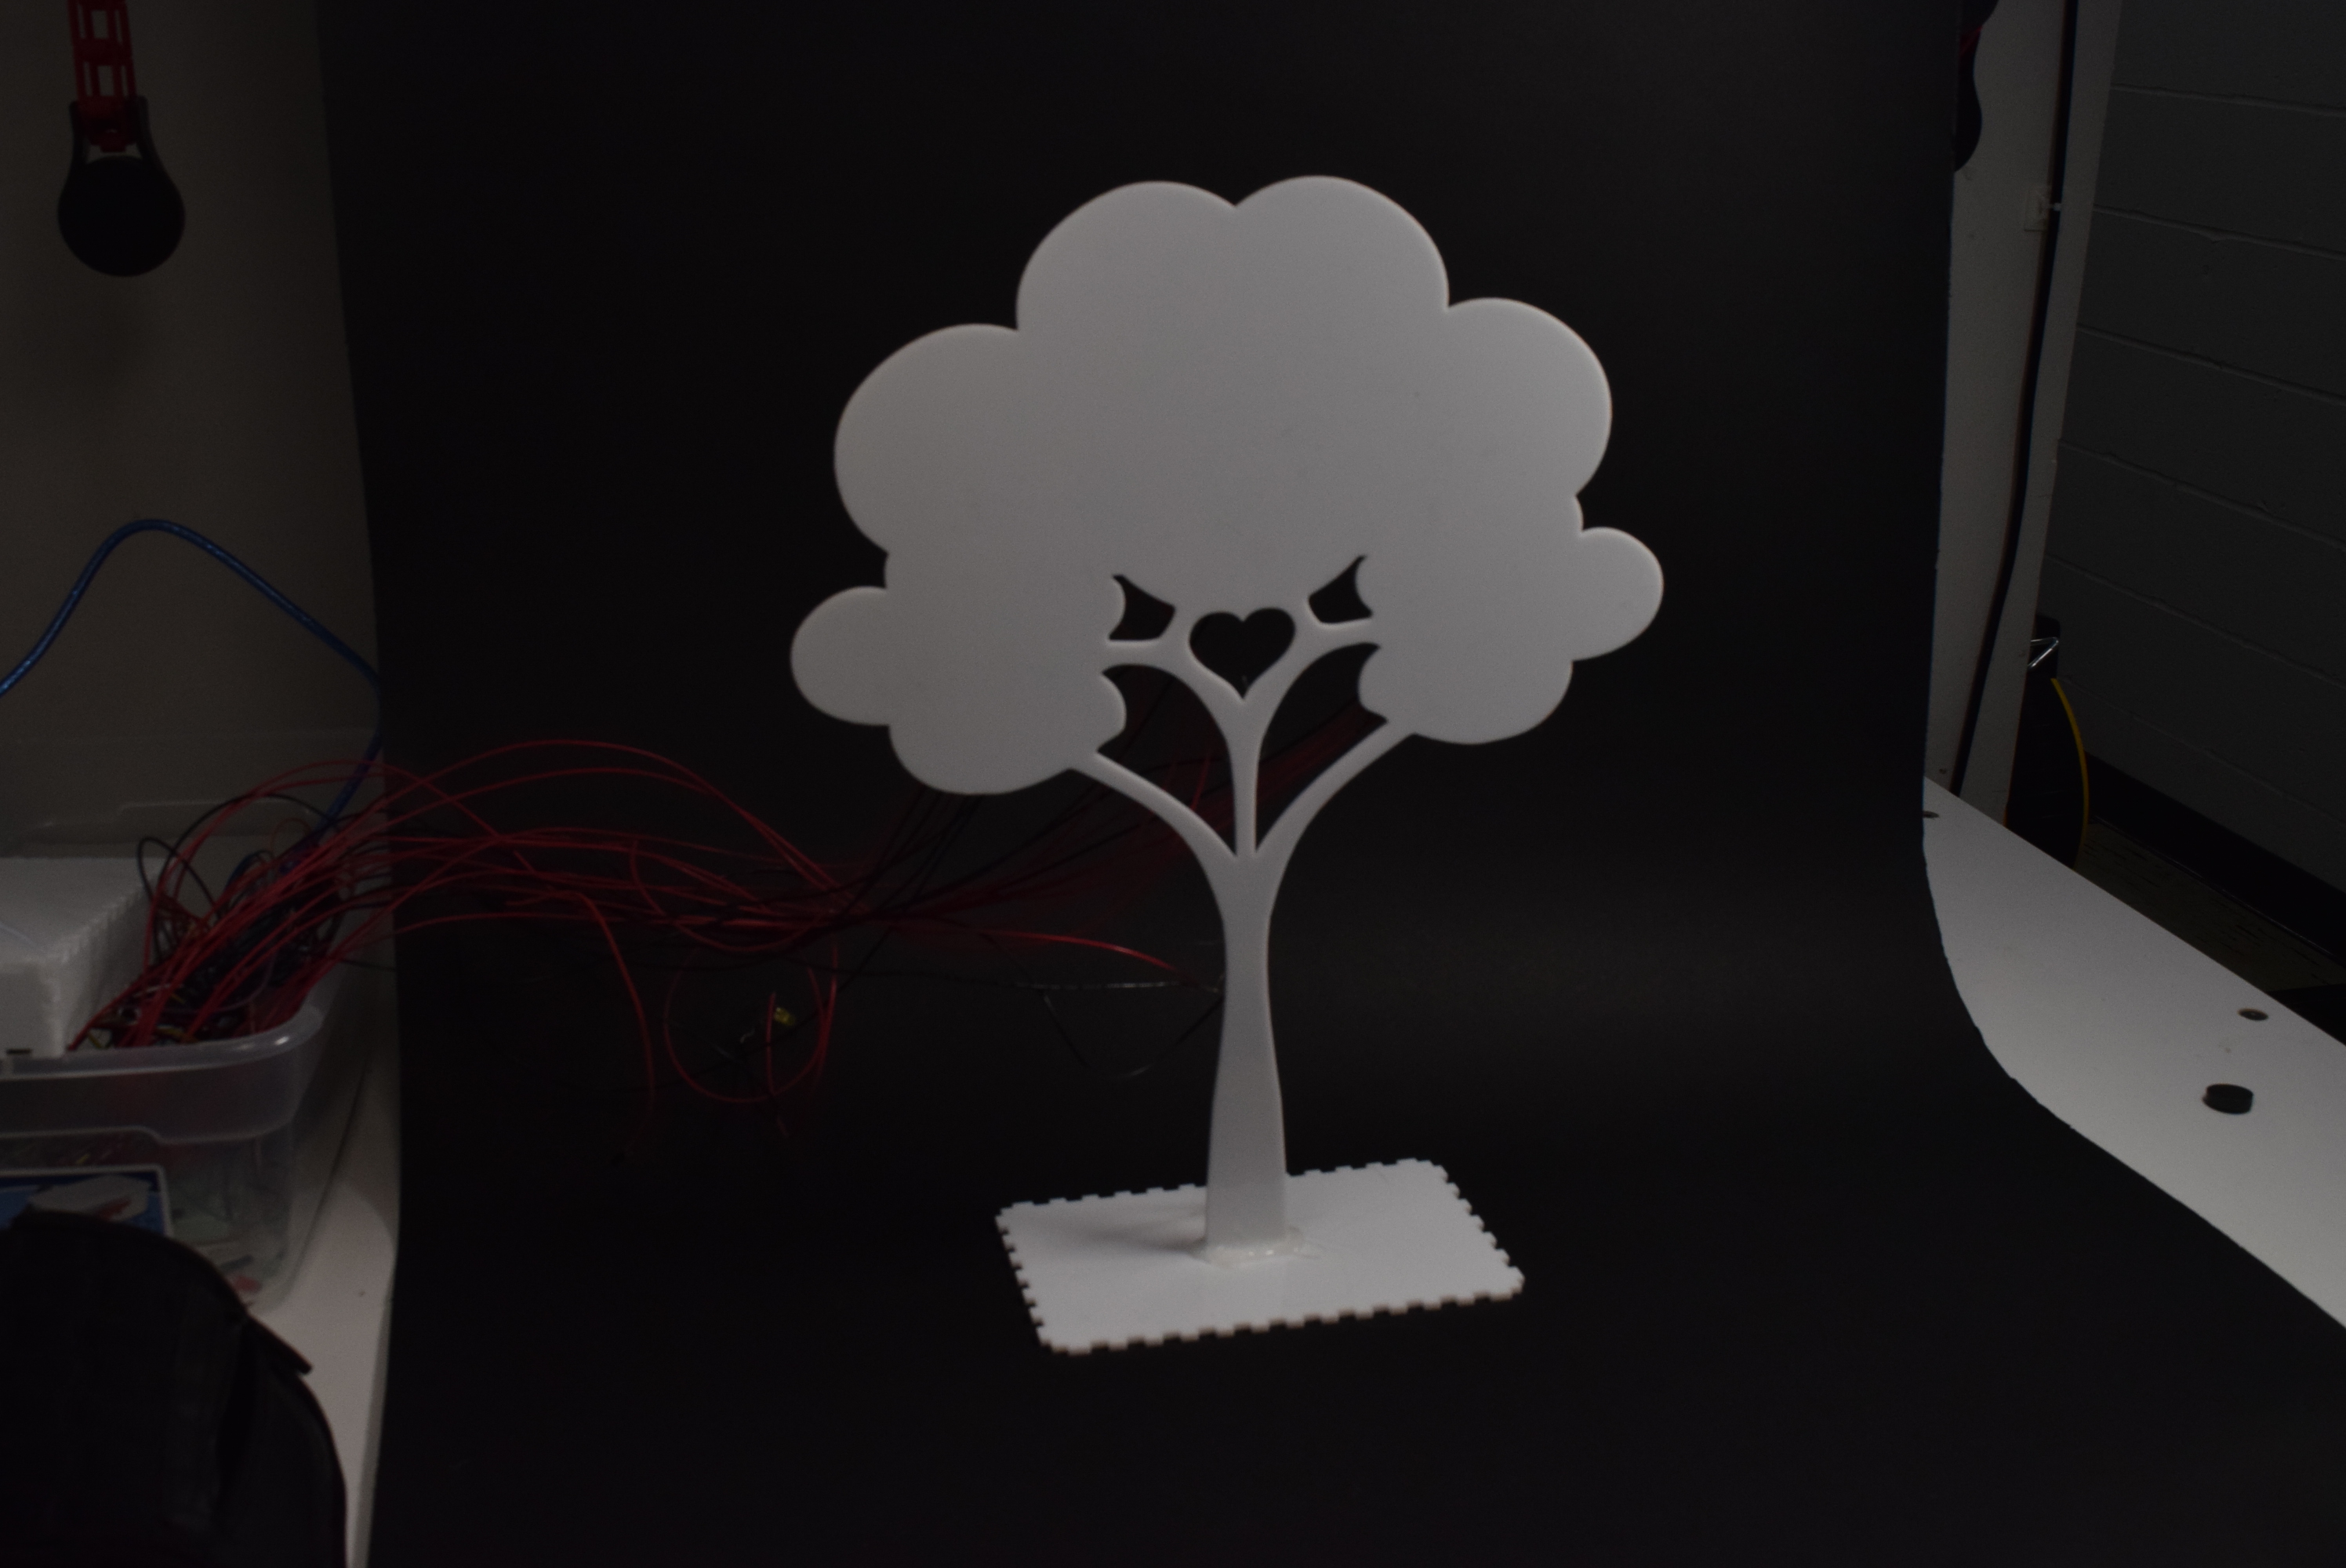
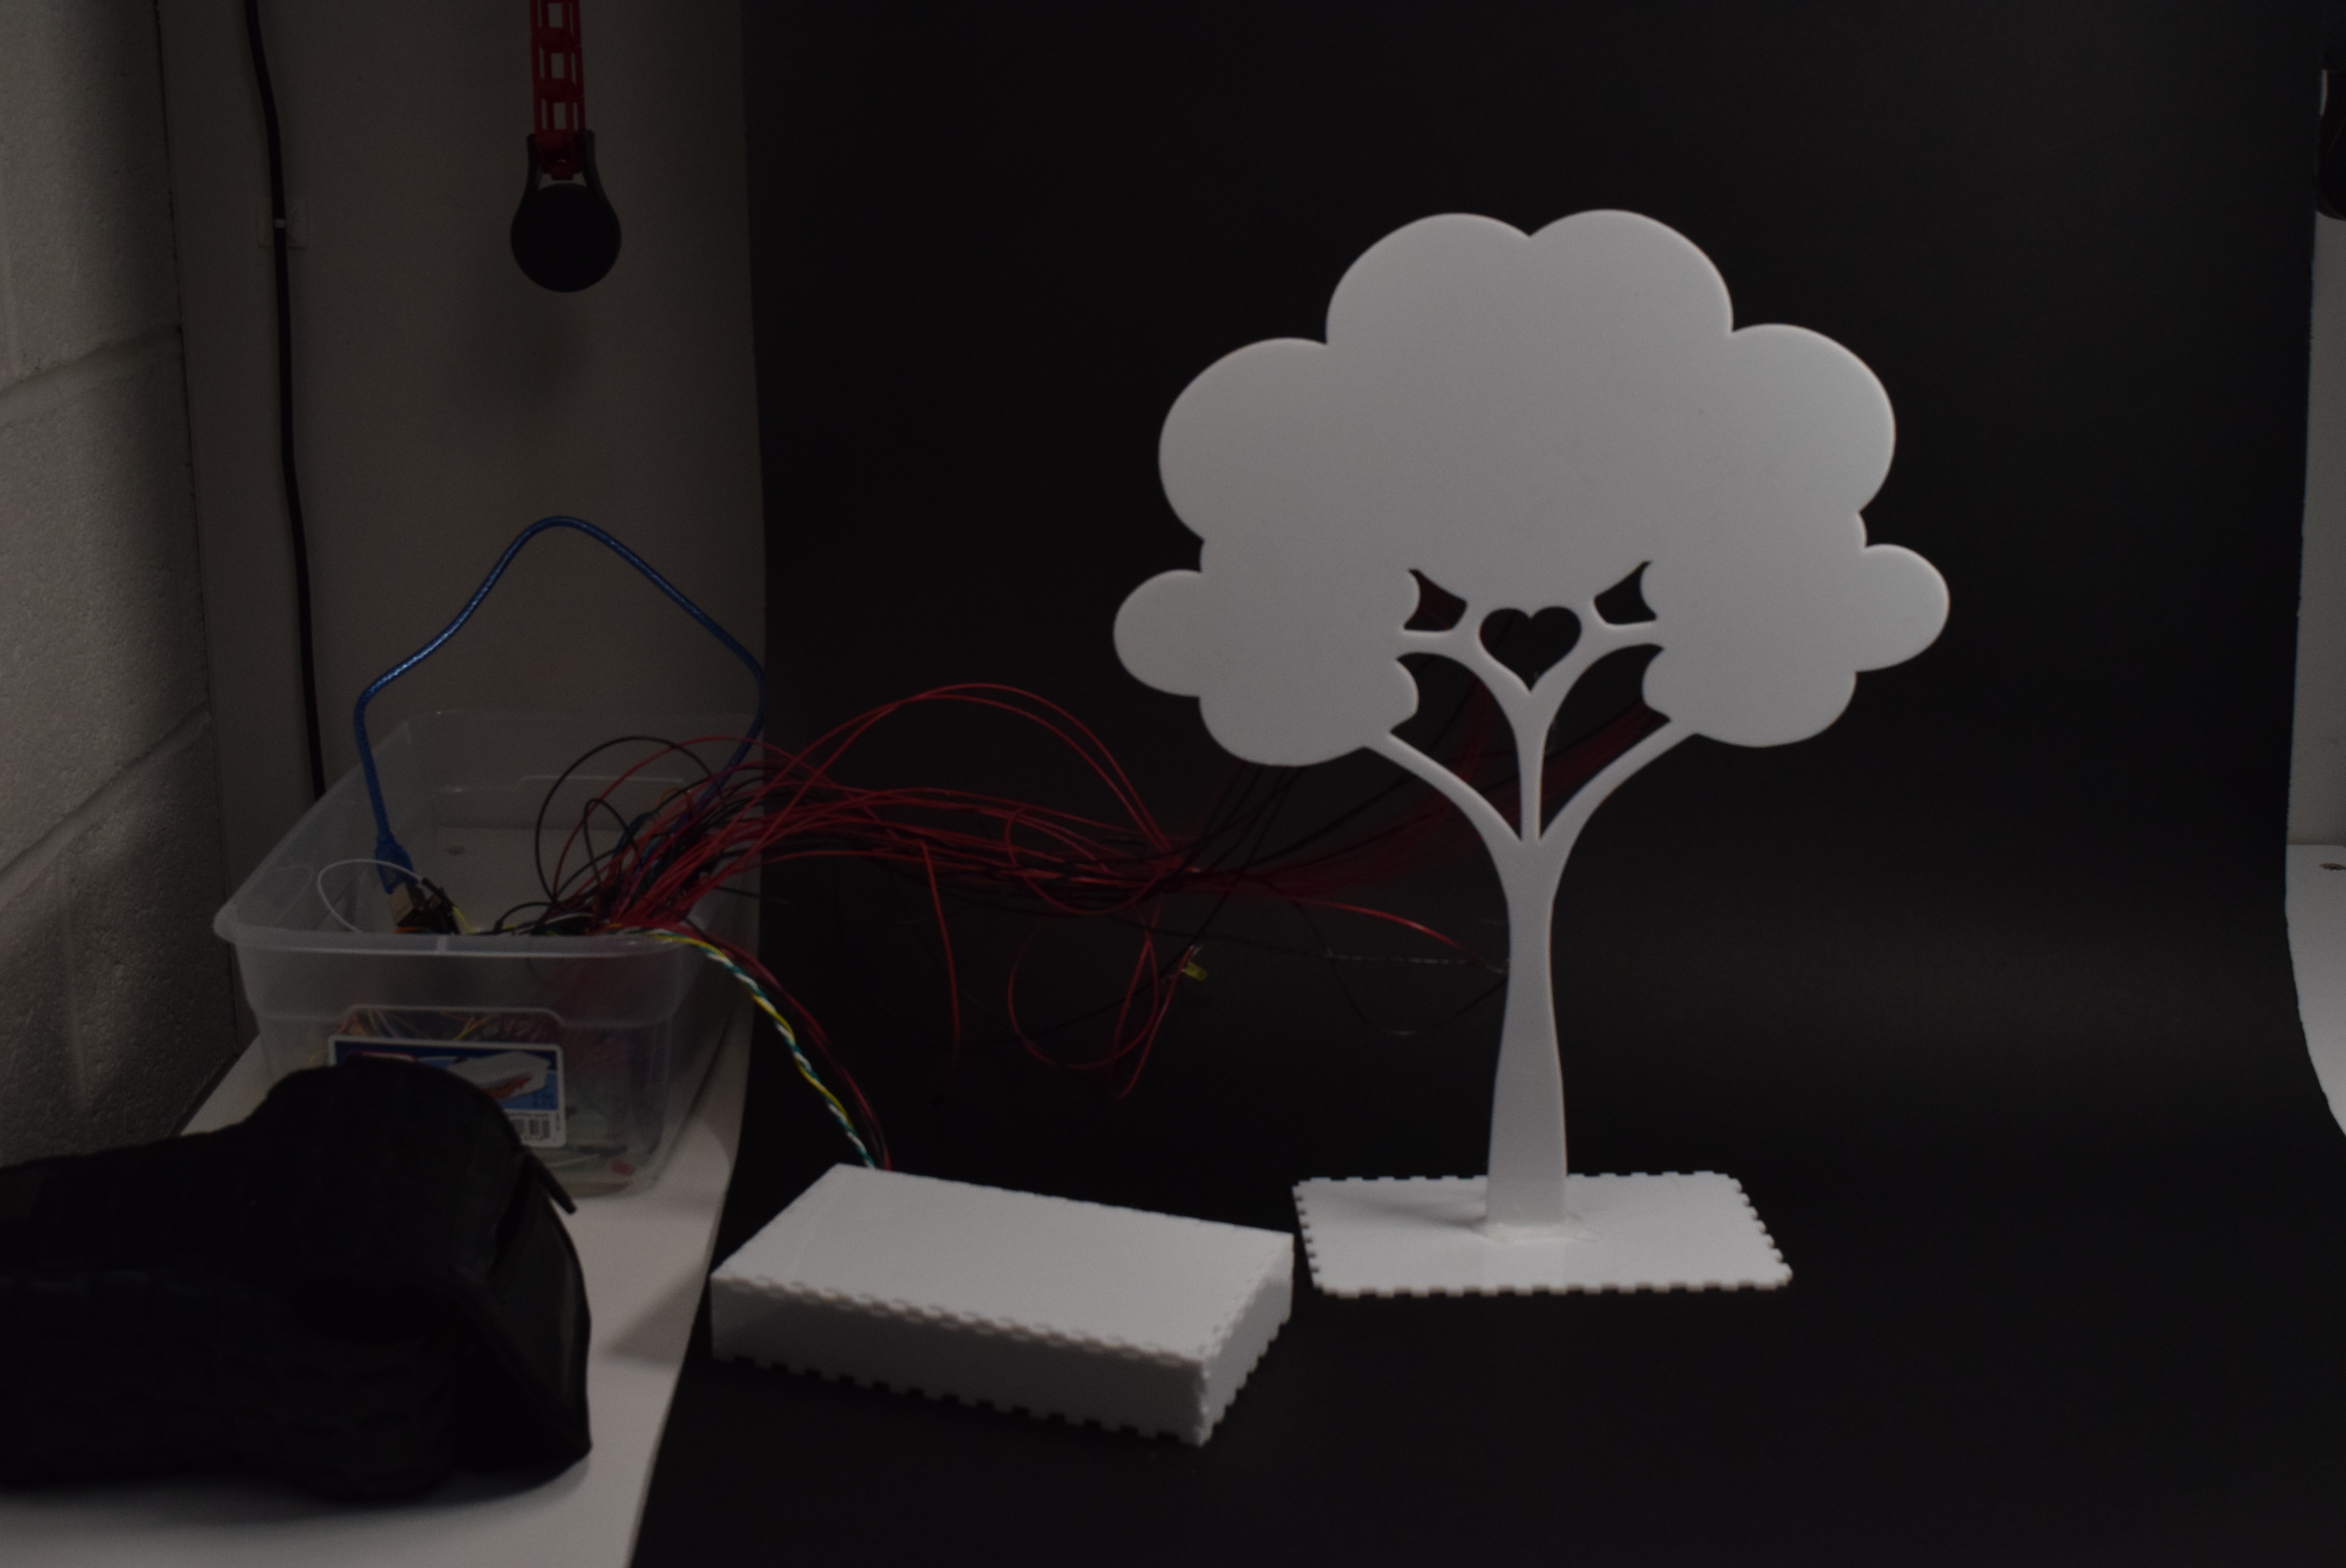
This is a picture of the main tree alone; this was laser cut using white acrylic, and is the focal point of the project.
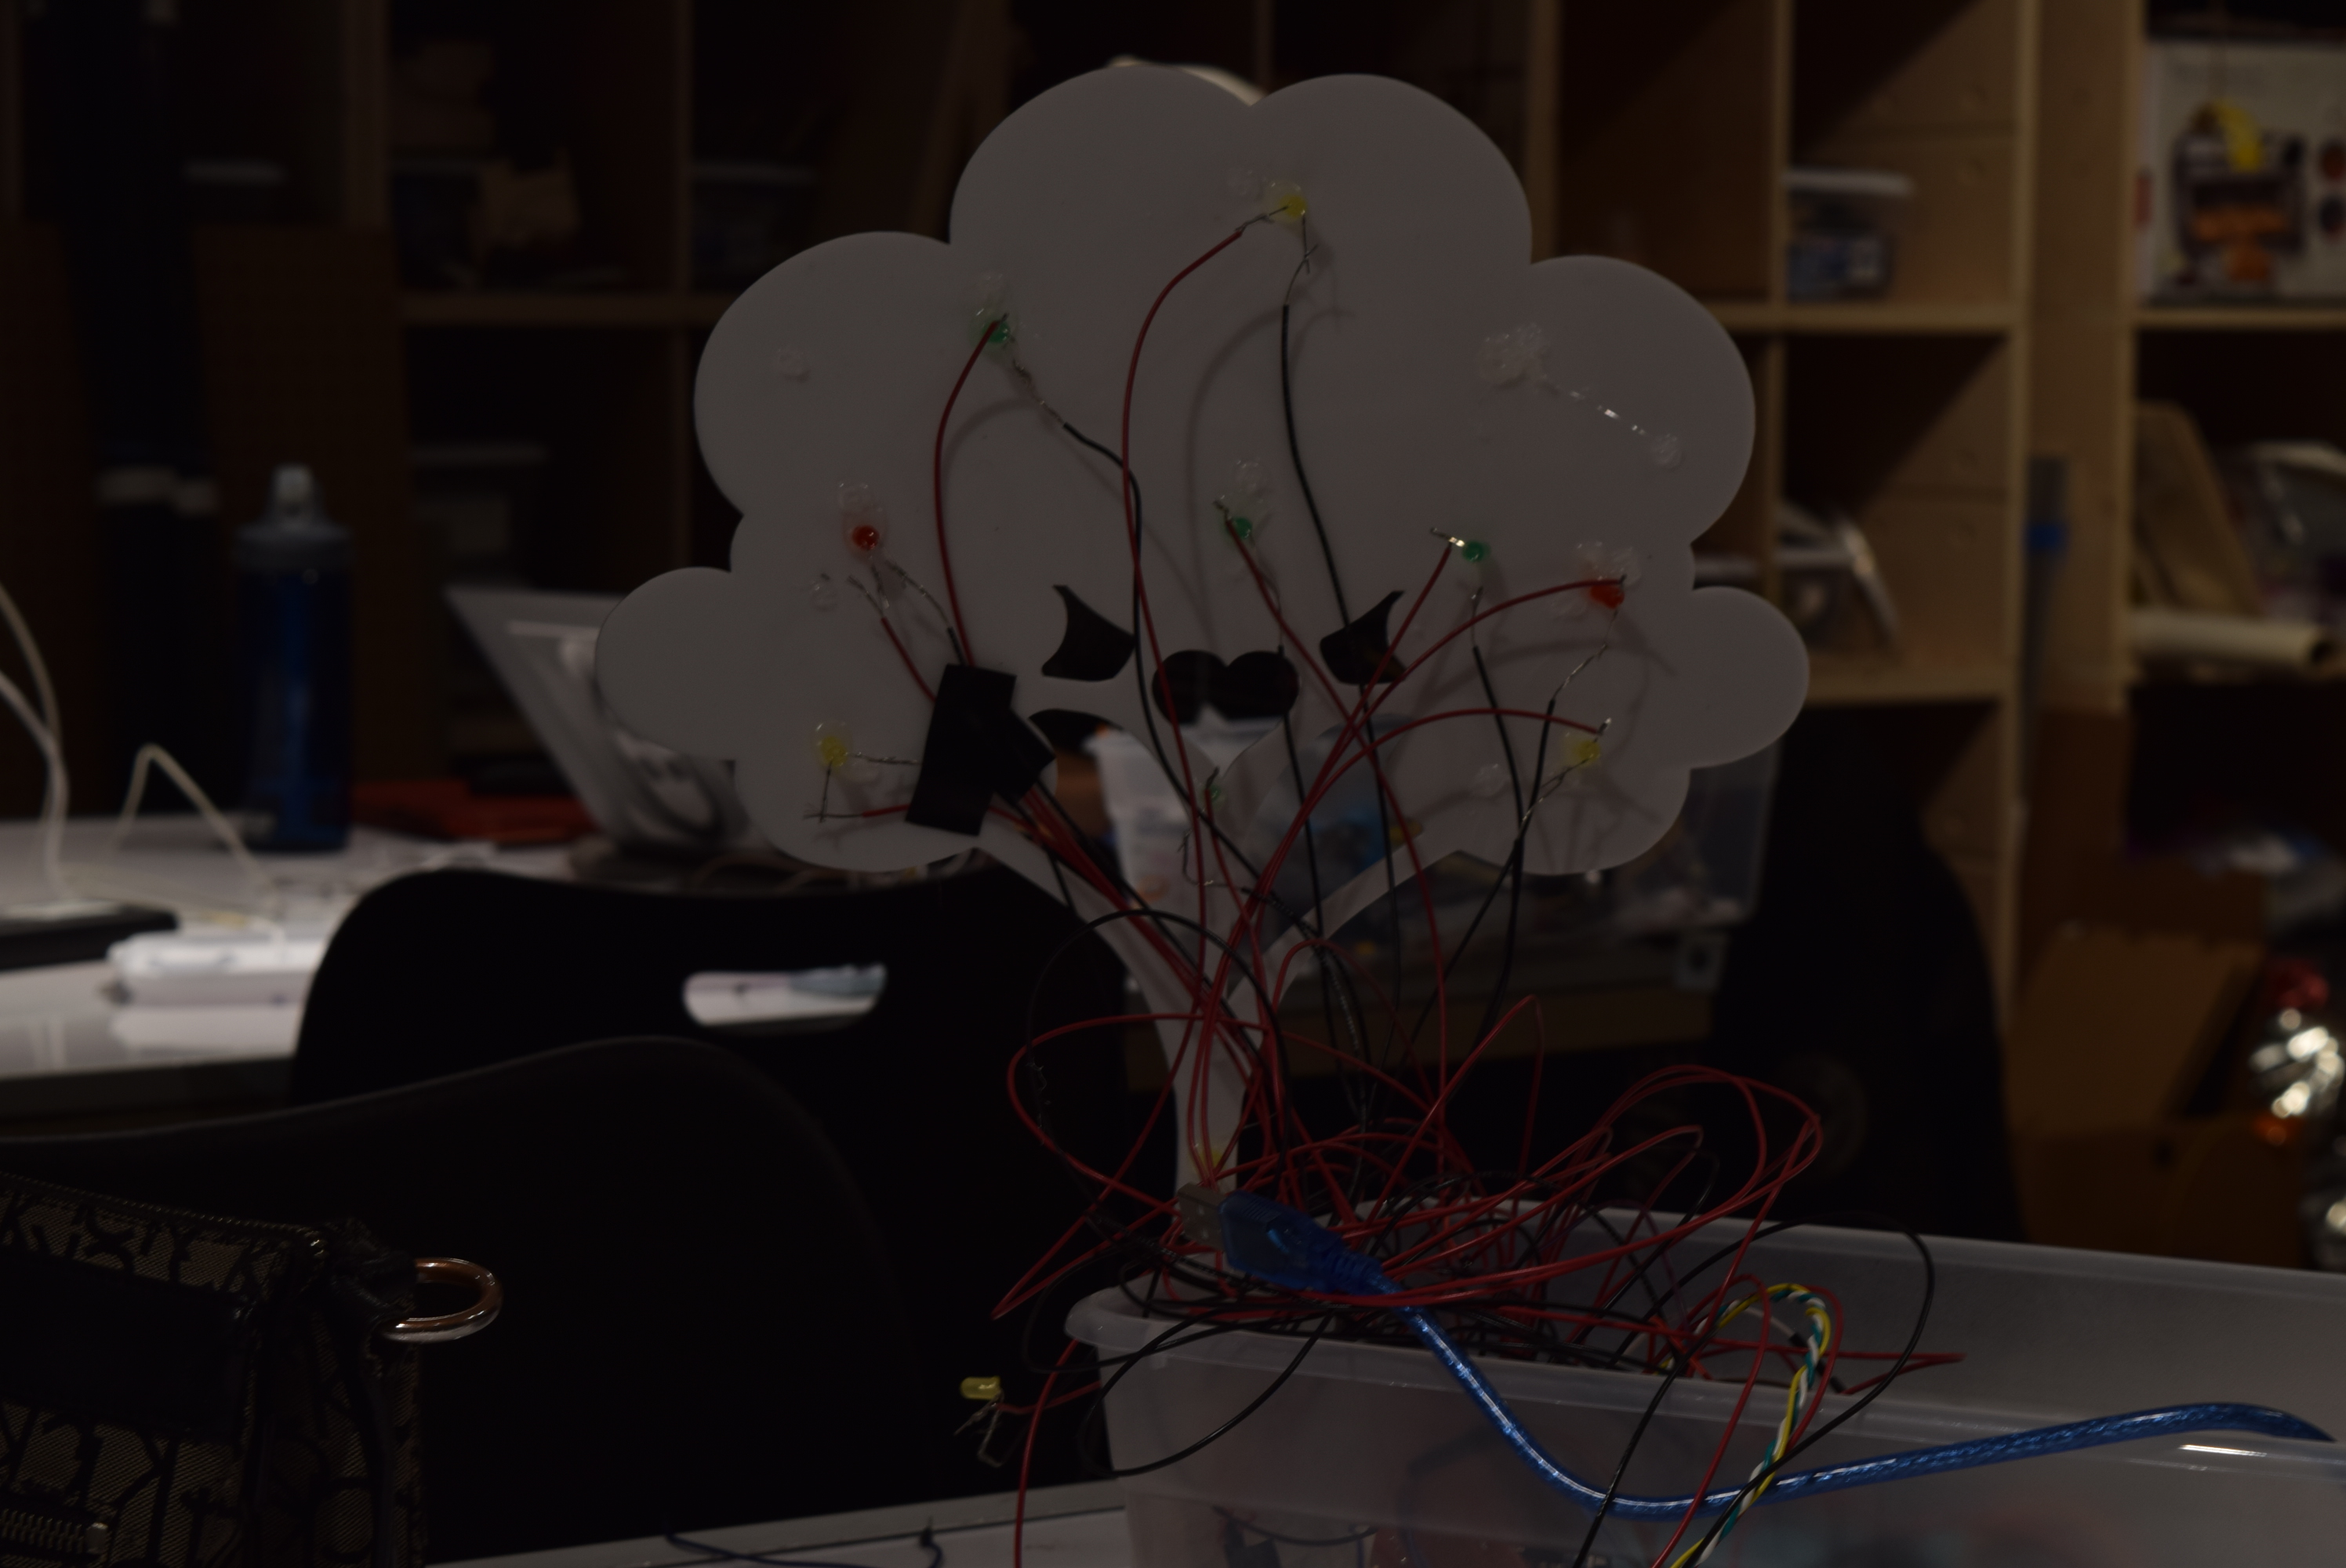
This is what the back of the tree looks like; there are LEDs hot glued to the back that will light up eventually.
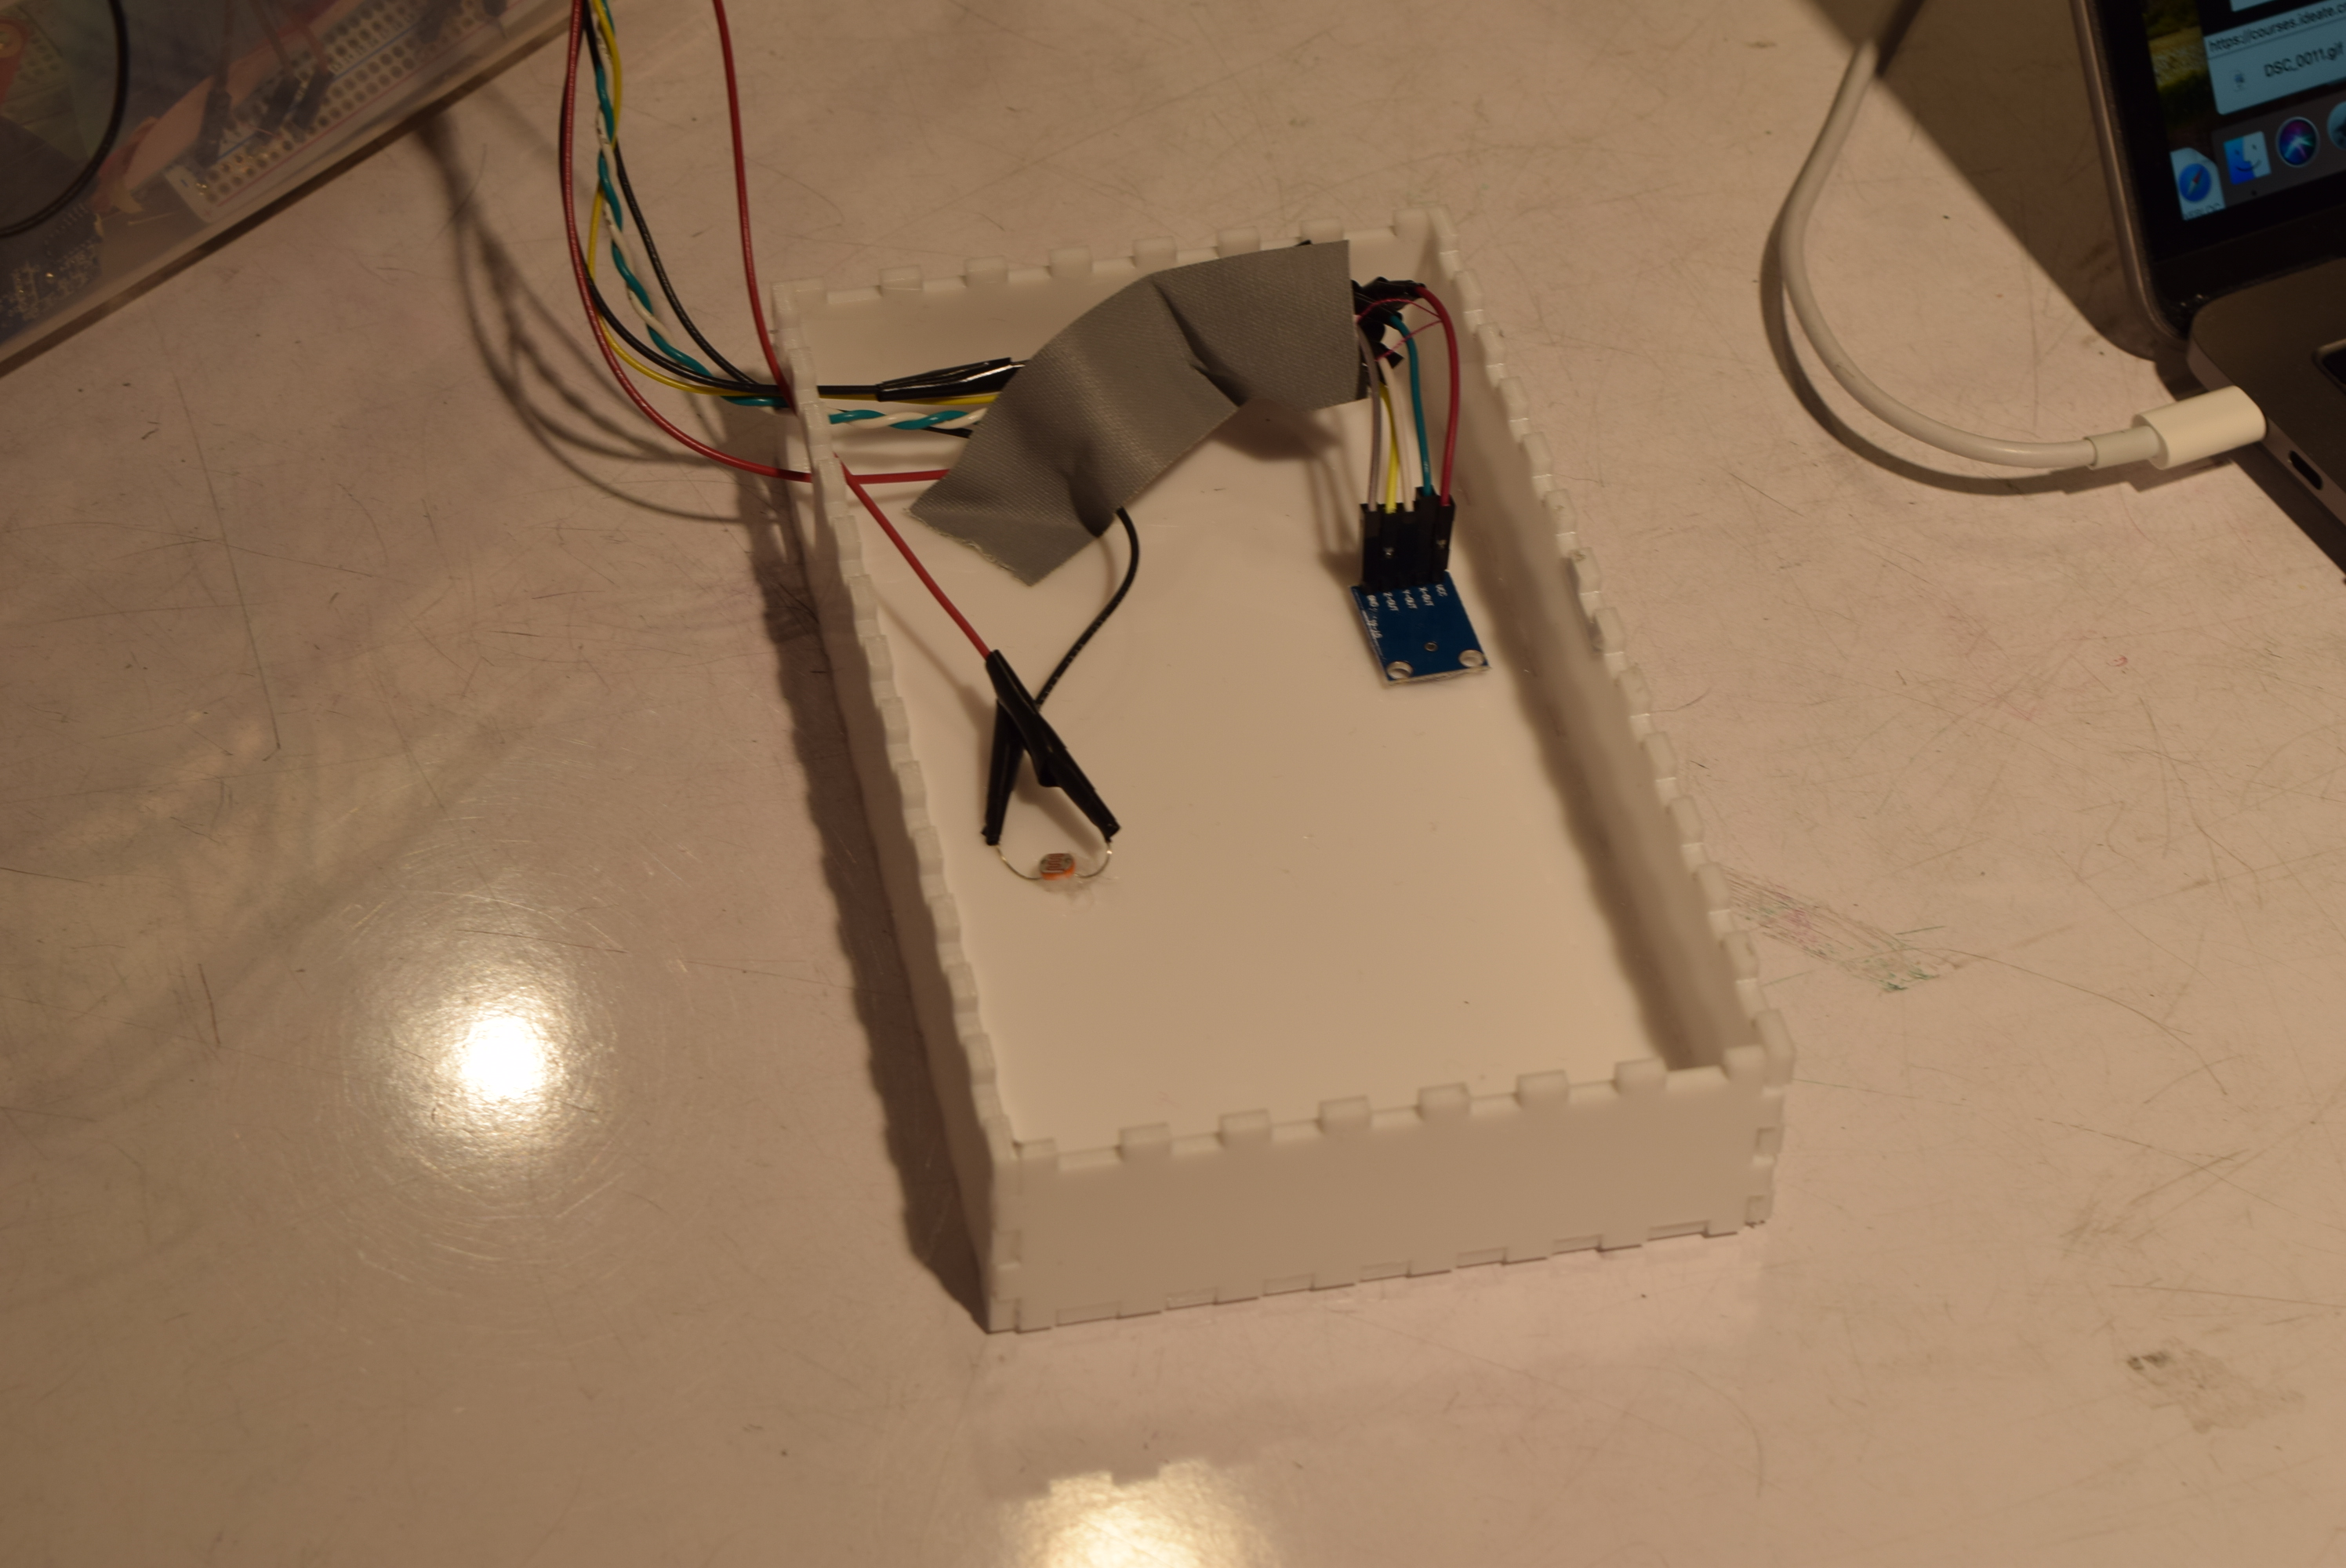
This is the inside of the phone cover; there is a light sensor (that will probably not be used) and an accelerometer that checks to see if you move the cover to access your phone.
Here is a gif displaying the “success” reaction (when the person manages to wait the full time length without distraction)- followed by a wait, then the “failure” reaction (what happens when/if the person gets distracted and tries looking at their phone).

Process
Initially I had the (ambitious) idea of creating about 5 trees that could be raised at a controlled rate, and all would “grow” and eventually all create a “forest.” The major roadblock I had with that idea was finding out that making things go up and down (especially at a controlled rate) is not trivial- it requires a pulley system to make things go up and down, and it requires a stepper motor to make things move at a controlled rate. Unfortunately, a stepper motor is quite heavy and somewhat large- which convinced me that it was probably impractical to have 5 different stepper motors all moving these trees. I also didn’t think it would really be doable- or visually attractive- to have the stepper motor hovering above where the tree would be lifted, so I thought of creating a pole for a string for the pulley to go over, so the motor could be hidden within a box on ground level.
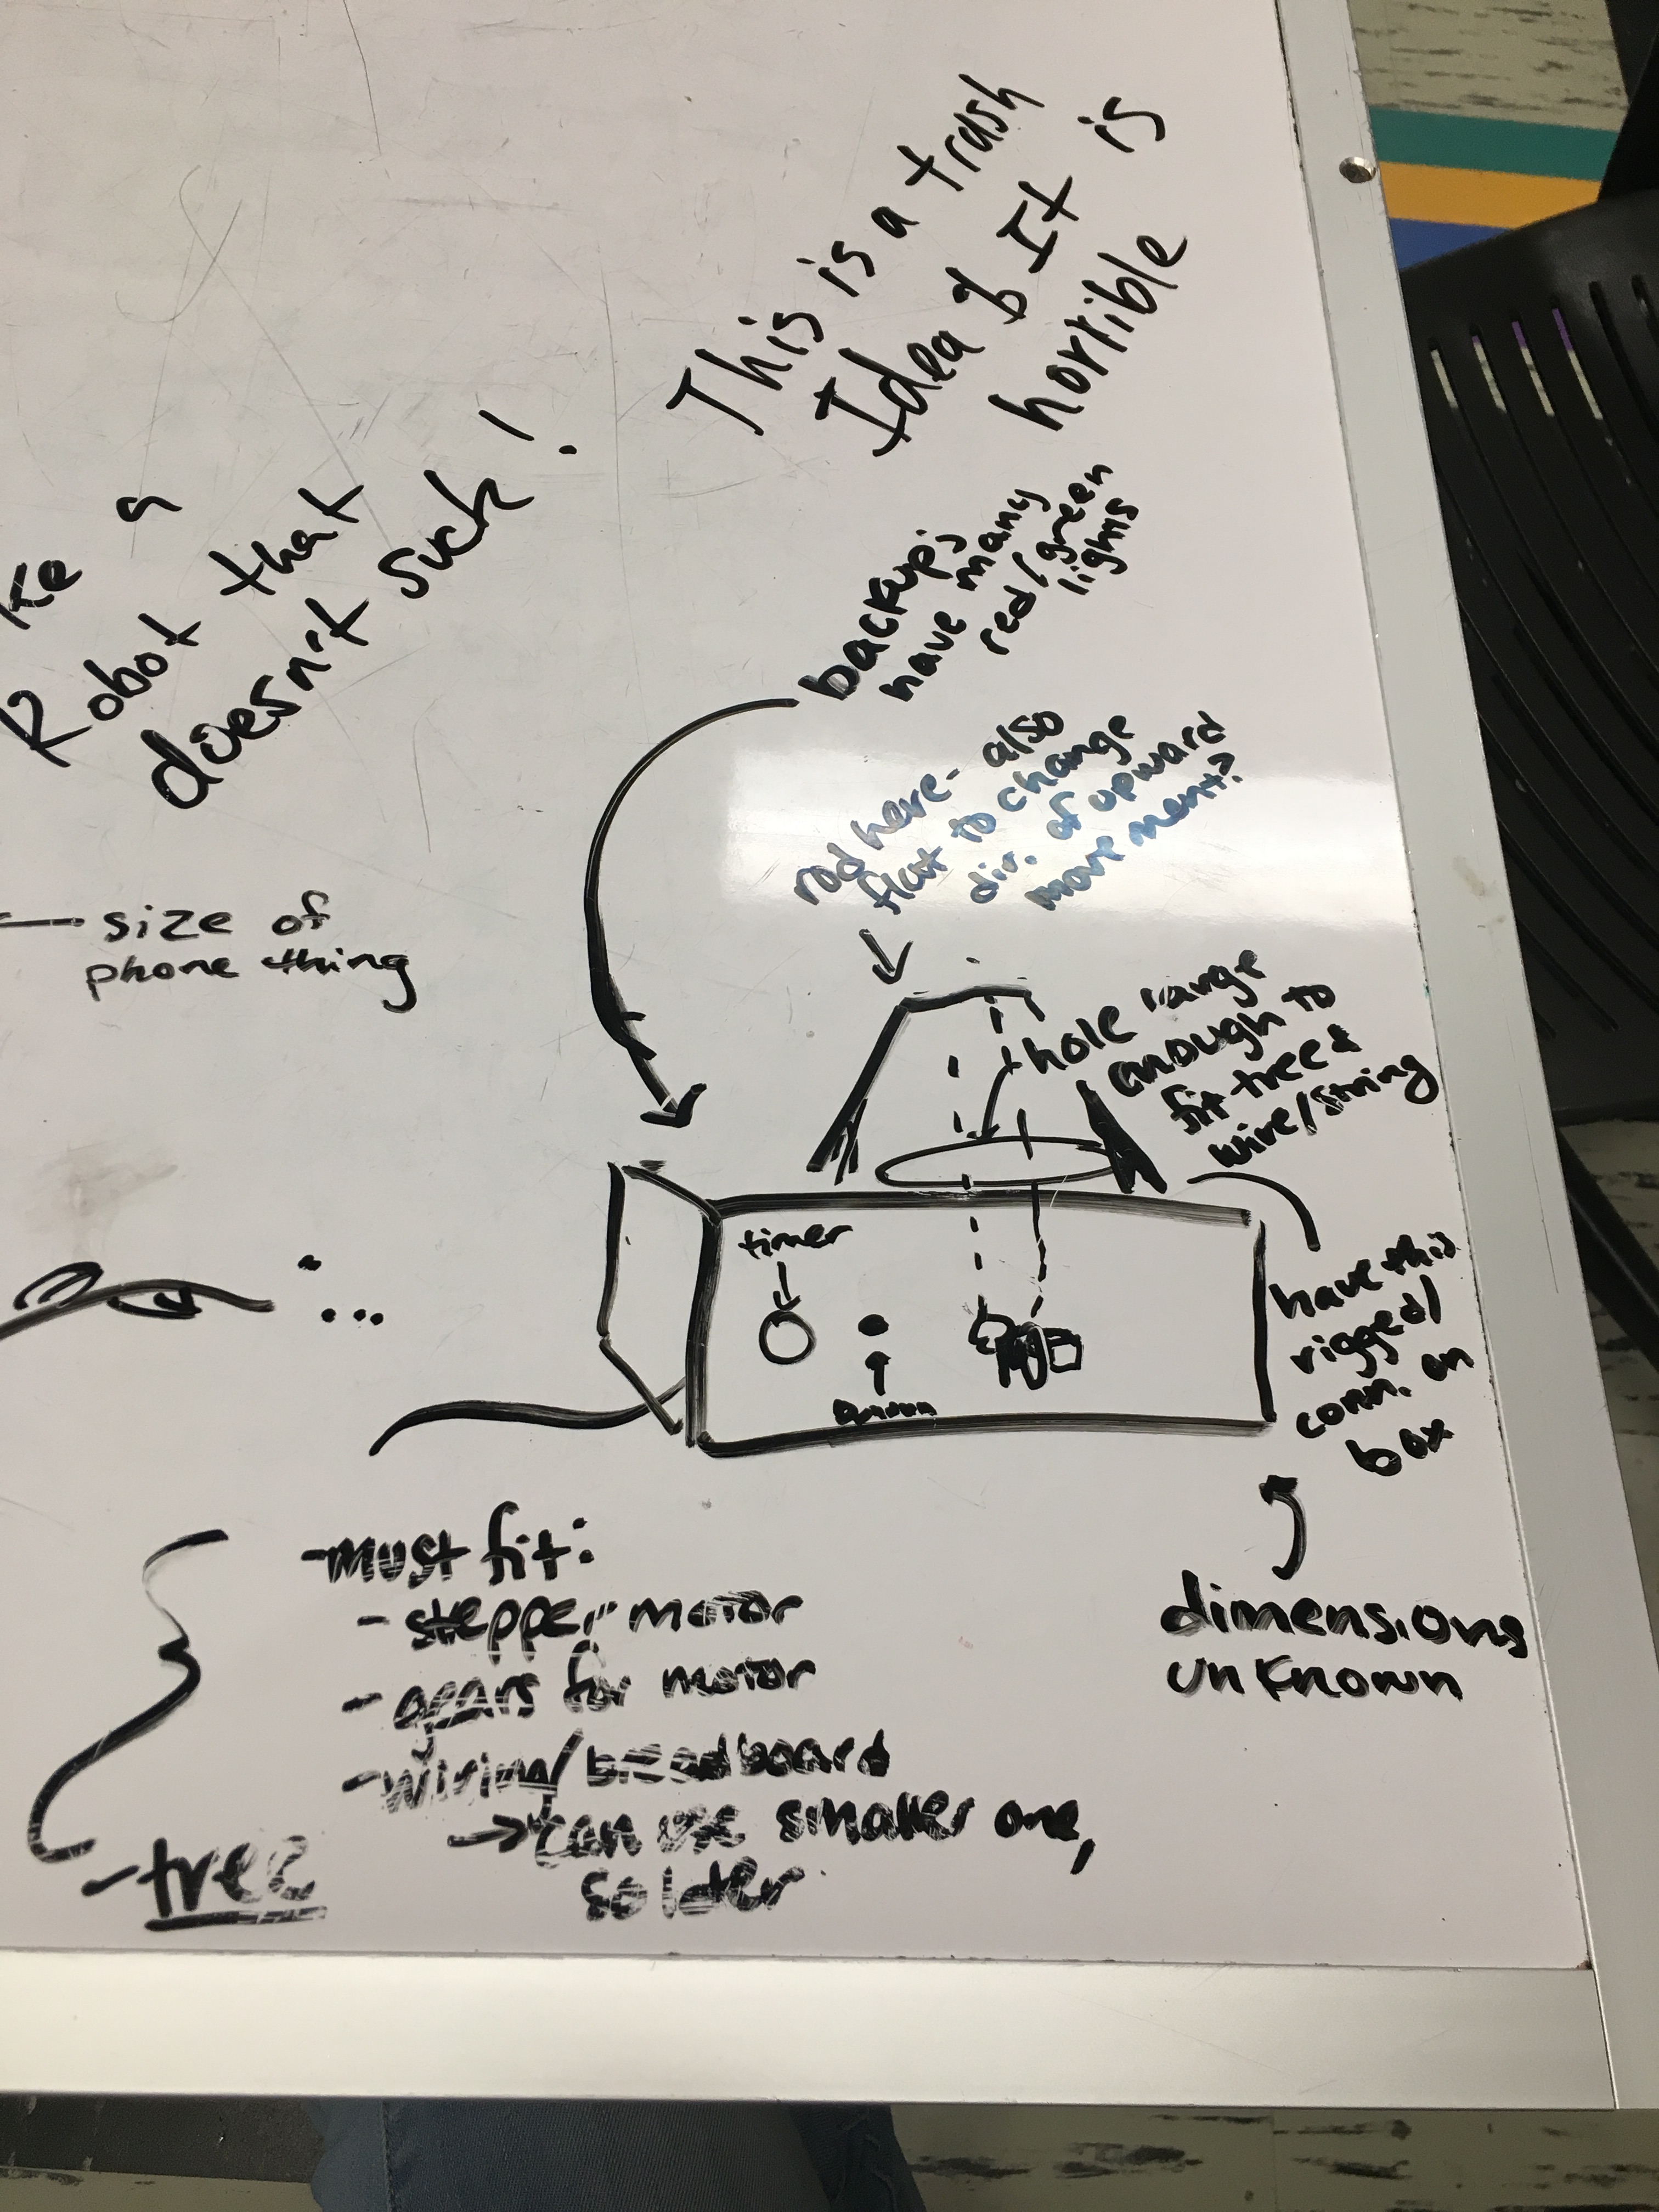
This is a schematic of my original idea; you can see how the tree was supposed to emerge from a hole, and how the stepper motor was supposed to be hidden.
My work came to another halt as I tried to understand how to laser cut everything I needed to- I don’t have permission to laser cut on my own, so I would need to try and make the one hour a day that the laser cutter open hours were available to laser cut- as well as try to learn the software needed to create my designs. By the end, I managed to learn more; but the day before, I still had not created the gears needed to be put around the stepper motor, or the box that everything would hide underneath. I decided that I was making this too large an undertaking and rethought my idea; I had all the code working, so I could keep the concept and just change the execution.
I changed ideas- instead of having a physical tree “grow,” there would be a large tree already standing that would symbolically “grow”- with lights going up the tree as time passed to show that time is passing. If I looked at my phone and “failed” it would flash red lights, and if I managed to not procrastinate I would “succeed.”
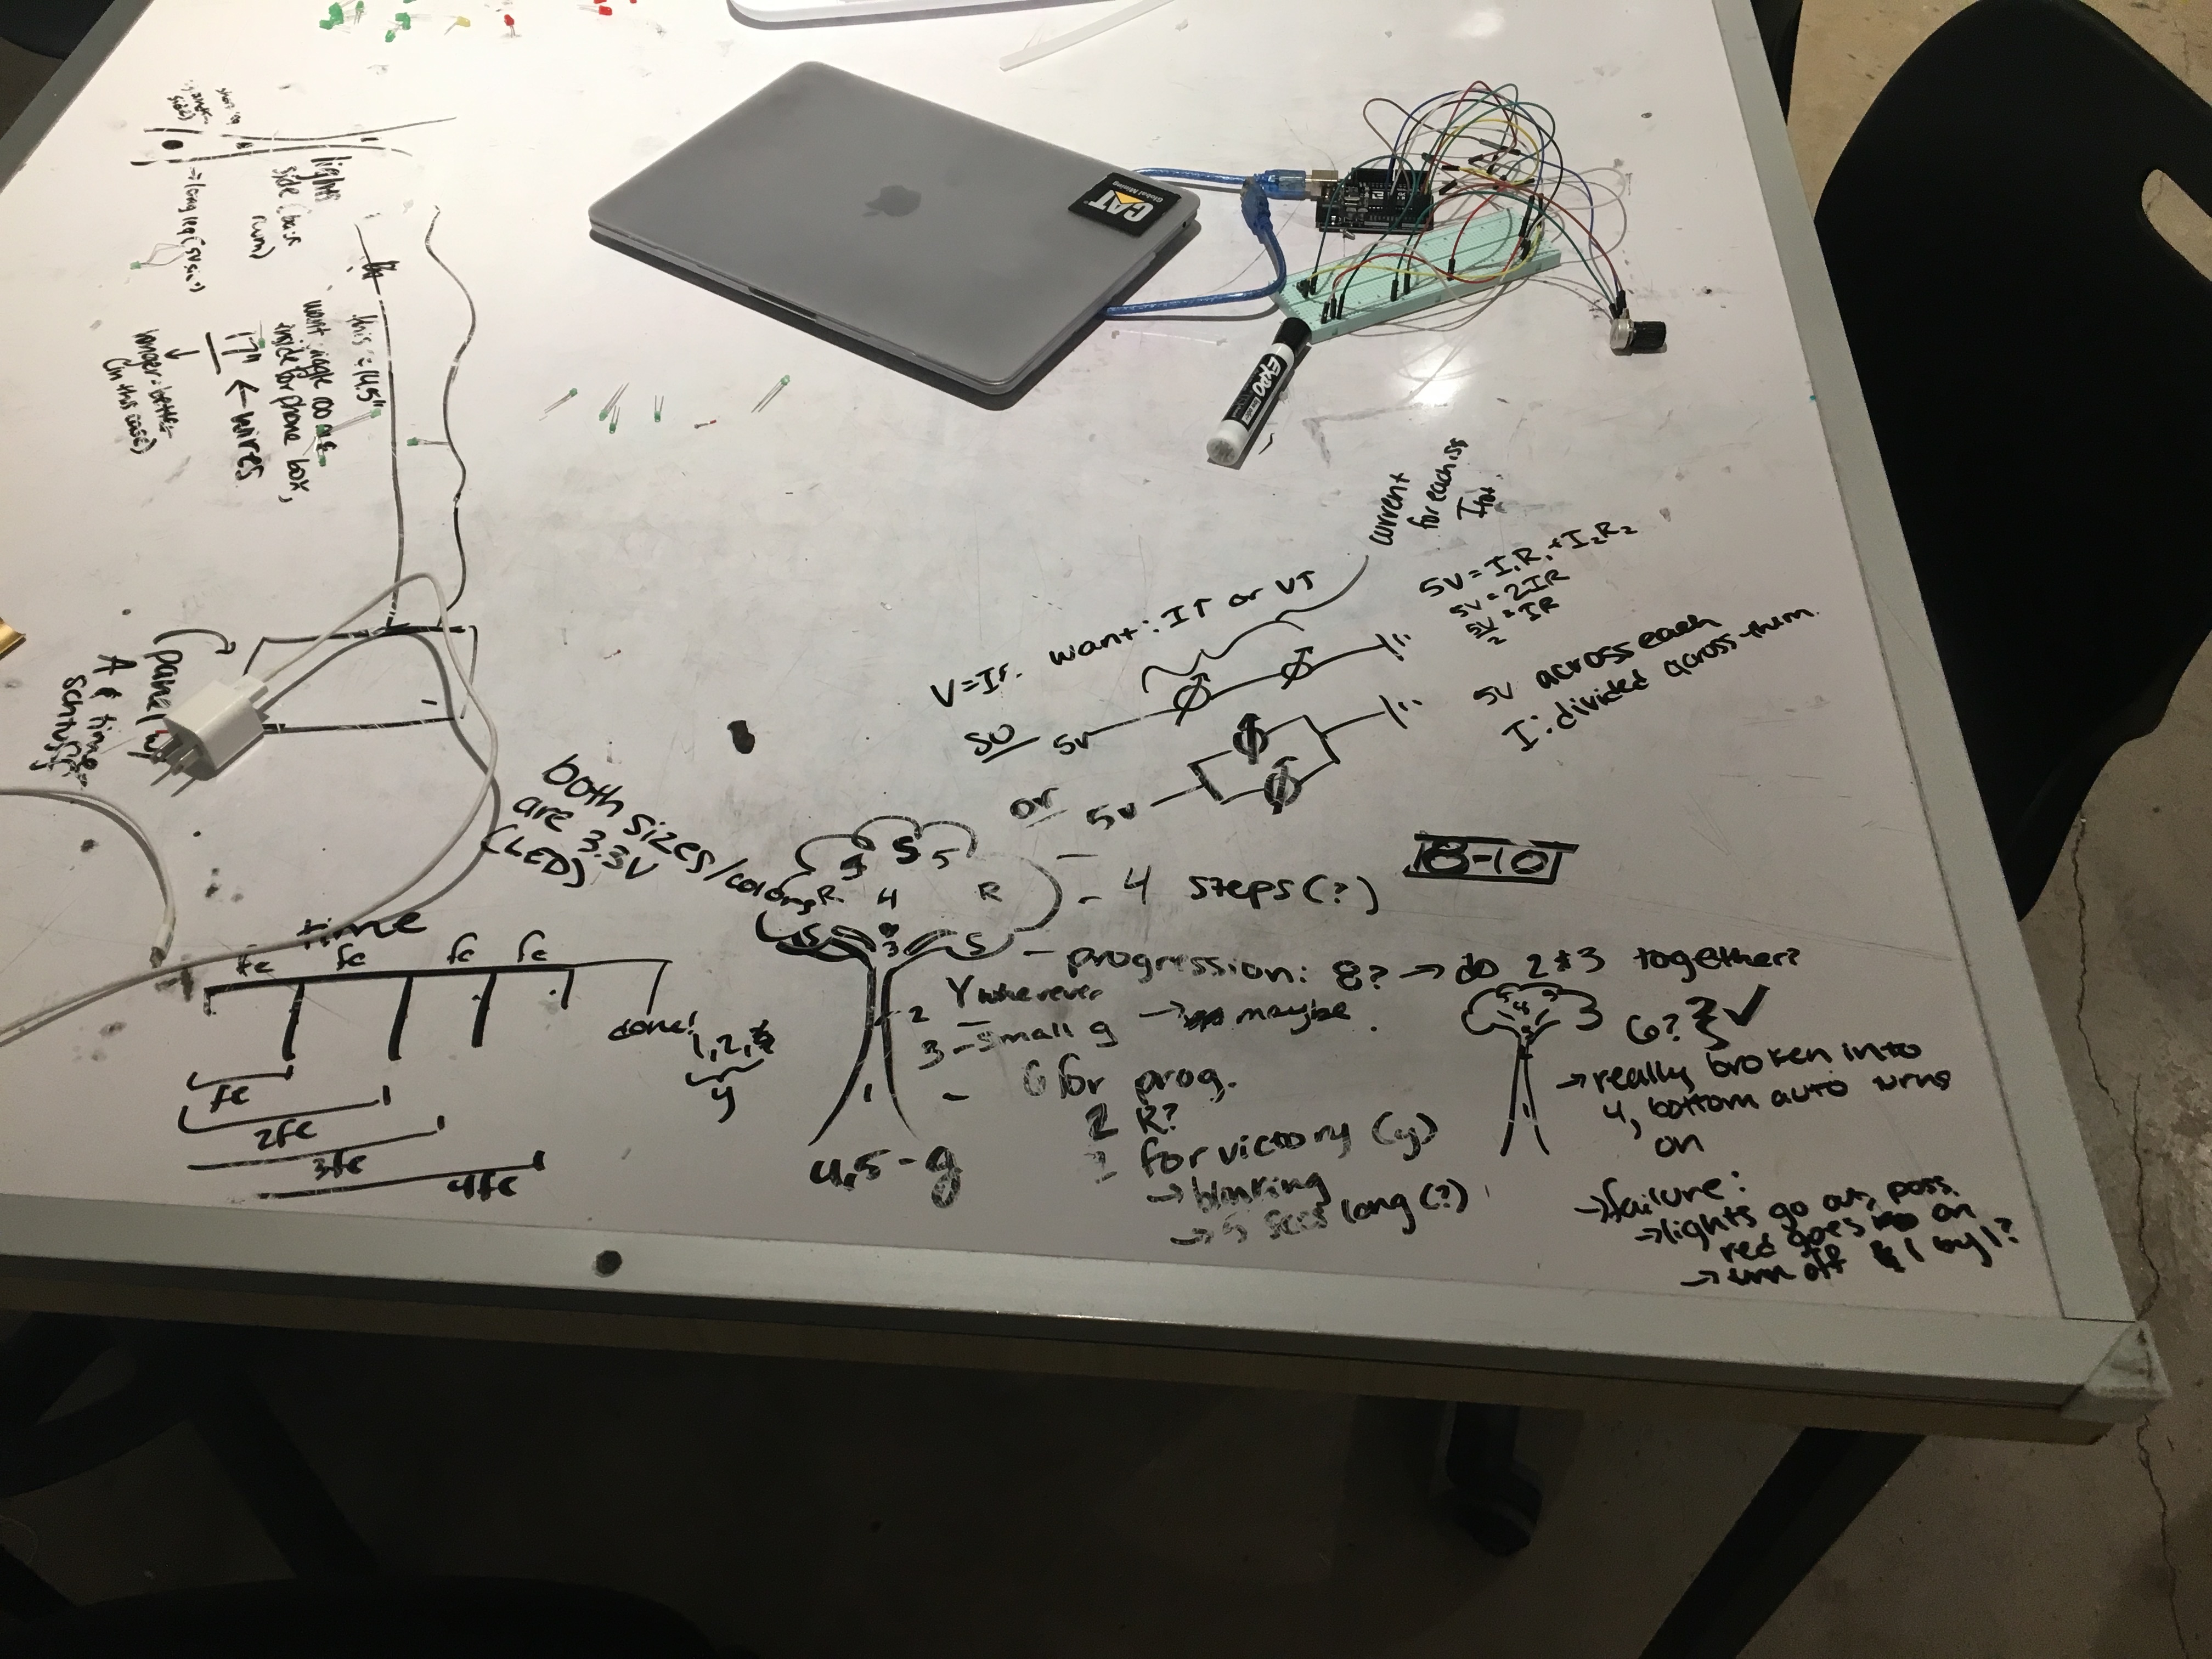
Here is a crude diagram of my final idea- in this sketch, I feature about 11 lights on the tree, and show where I chose to put them, and how long I want each one to take before lighting up.
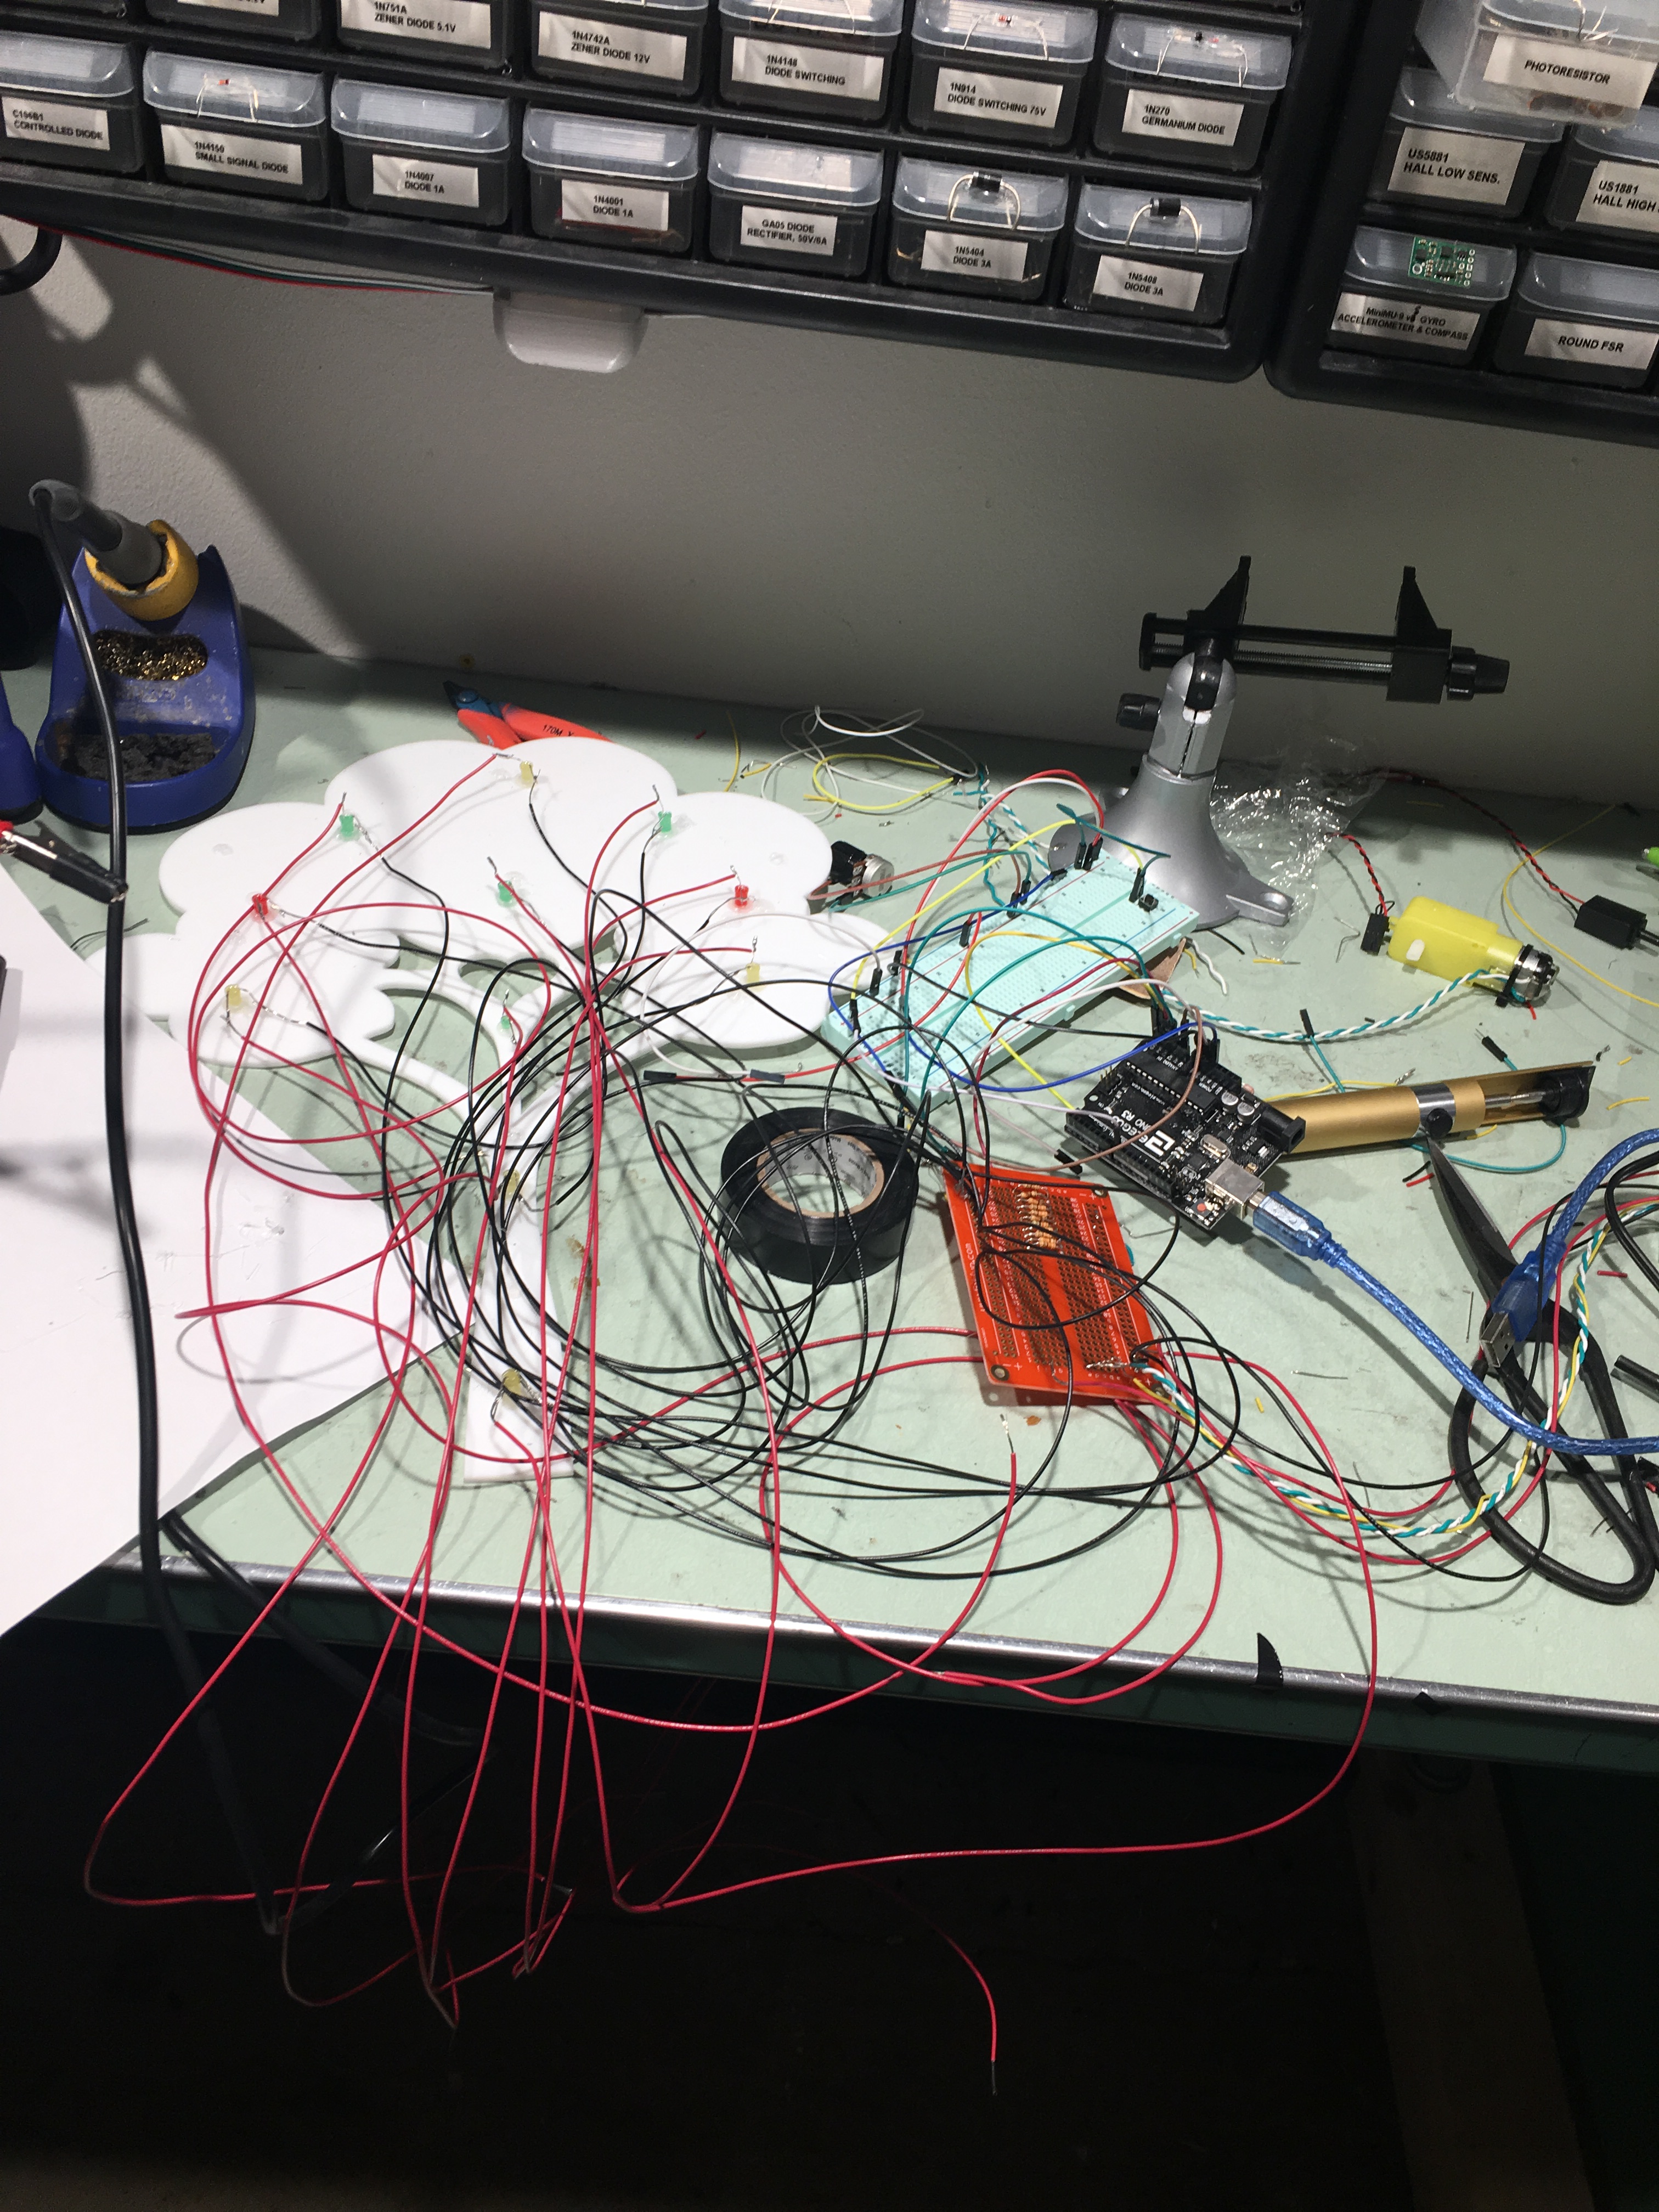
An unexpected difficulty that I did not anticipate was the wiring and the length of time it would take to solder- each LED needs an input and an output- so 22 wires for that- and each LED also needs a resistor (of 330 ohms), so that was 11 more resistors that I also needed to solder onto my breadboard. This photo is a picture of the mess of wires that took place about halfway through the soldering process.
Discussion
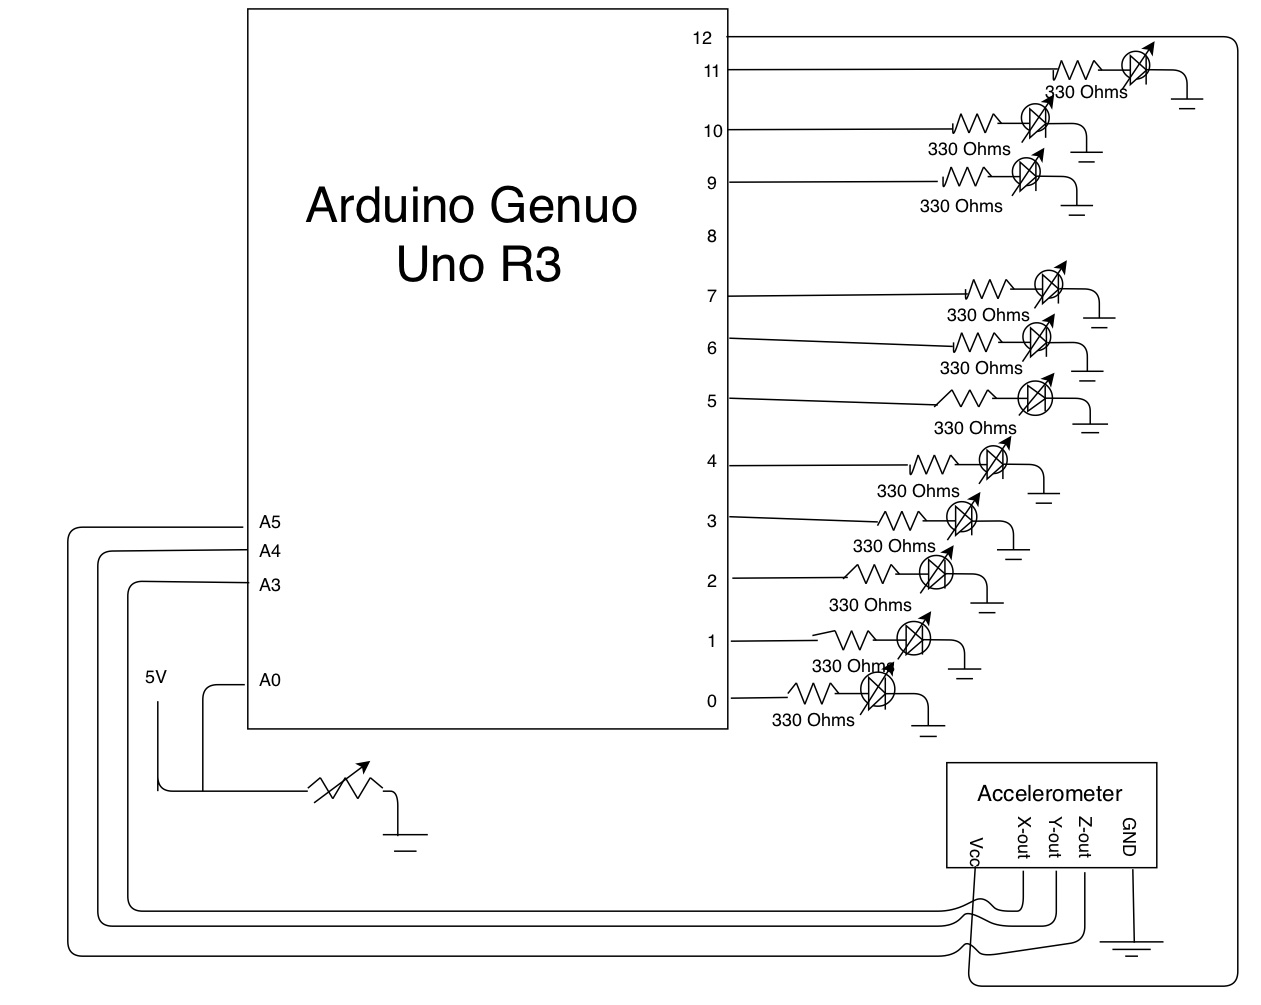
In the crit, I got a few responses, such as: “I don’t fully understand the purpose of the light sensor”. This made me evaluate the purpose of including a light sensor as well; initially, I thought that if the person was to click on their phone or move it that the program would “fail”, however with a cover it is impossible for someone to click their phone without moving the cover. I think that trying to incorporate a light sensor overcomplicated the project and didn’t match my purpose; so I would get rid of the code that involved lighting and remove the light sensor- in the circuit diagram I didn’t include it because it lost its purpose as is.
I also got a response saying “I really liked the concept, but maybe you could make another tree for the back to hide the wiring and lights”. I really liked this comment, because I never thought of adding a back to this project- I only envisioned it being 2D with a front and not a back that would be used. I also imagined hiding the majority of the wiring with another box, that would also hide the breadboard and the Arduino. After creating the extra box with the material I have, I will see if I have enough to create a back for what I have now- I think it would make my project cleaner and more attractive in other locations.
Frankly, I am not totally satisfied with how my project came out. I really like how my tree and phone cover came out, but the extra wiring is very off-putting. In addition, during the crit my code didn’t fully work because I forgot to add the wiring of the accelerometer. I consider this project unfinished because I want to work at it until it both looks attractive and functions well consistently.
That being said, I learned a ton in this process. One of the things I learned is that moving things are more difficult than I anticipated. I also learned how to create my own laser cutting file- something that I think may come in handy in the future for my own projects. Due to all the soldering I did, I got a lot of practice and got to work on proper soldering techniques. This project was frankly frustrating at many points, and I am the type who hates having to downscale (like when I changed directions from having 5 moving trees to 1 large stationary tree), but I’m very grateful for learning the different difficulties that comes with creating a project. Next project I think I will focus on all the hardware first, especially all the sizing/laser cutting things- and get more help earlier when I run into something I am more unfamiliar with.
I still plan to work more on this project- I want to create a box, or some kind of container, that can hold the wiring, breadboard, and Arduino in a way that is attractive. I want to make sure all the lights on the tree are bright as well- and maybe add an LED strip to make there be more lights and a more dramatic effect. I also want to learn how to connect my project to a battery pack so I may use it to study when I’m not near my computer. Also as of right now the timer and the button are in inconvenient spots; I would integrate them into the box that I will be creating.
//Megan Roche
//Productivity Tree
//This is the code to create a "tree" that has lights that help you stay productive. A list of the inputs/outputs and what they do are below.


//what is needed (input): mute button, potentiometer (timer), set time button, maybe second timer?
//what is needed (input sensors): photosensor (dramatic change), accelerometer (dramatic change)
//what is needed (output): various lights? all on string, motors that move gradually
//different effects:
//  if set button pressed, start timer for whatever potentiometer is at
//    use internal clock and compare, have timer be unsigned long
//  if dramatic change happens with either sensor, then immediately "quit"
//    if "quit", then have motors (trees) go all the way down
//    if not "quit", then have motors continue moving gradually

#include <AccelStepper.h>

unsigned long timer;
const int LIGHTONE = 0;
const int LIGHTTWO = 1;
const int LIGHTTHREE = 2;
const int LIGHTFOUR = 6;
const int LIGHTFIVE1 = 5;
const int LIGHTFIVE2 = 9;
const int SLIGHT1 = 3;
const int SLIGHT2 = 7;
const int SLIGHT3 = 11;
const int fLight1 = 4;
const int fLight2 = 10;
//lights 0-7,9-11


int secLight = 0;
int thirdLight = 0;
int fourthLight = 0;
int fifthLight = 0;

const int POTTIMER = A0;
const int SETBUTTON = 8;
const int X = A5;
const int Y = A4;
const int Z = A3;
int moveThresh = 1000;
int currpos = 0;

//const int PHOTOSENS = A2;
const int ACCEL = 12;
//two things are looking at the accelerometer

//const int MOT1 = 10;

const int numRots = 3;

unsigned long duration = 0;
int lightThresh = 1000;
bool timerGoing = false;
bool failure = false;
unsigned long timeStart = 0;

bool lightsON = false;
int timeForEach = 0;

//4 steps/revolution rn
//const int steps_needed = 50;
//const int STEP_PIN = 11;
//const int DIR_PIN = 10;

//const int fLight = 2;
//const int sLight = 3;

//this creates an object myMotor
//AccelStepper myMotor(1, STEP_PIN, DIR_PIN);

void setup() {
  // put your setup code here, to run once:
  Serial.begin(9600);
  pinMode(LIGHTONE,OUTPUT);
  pinMode(LIGHTTWO,OUTPUT);
  pinMode(LIGHTTHREE,OUTPUT);
  pinMode(LIGHTFOUR,OUTPUT);
  pinMode(LIGHTFIVE1,OUTPUT);
  pinMode(LIGHTFIVE2,OUTPUT);
  pinMode(SLIGHT1,OUTPUT);
  pinMode(SLIGHT2,OUTPUT);
  pinMode(SLIGHT3,OUTPUT);
  pinMode(fLight1,OUTPUT);
  pinMode(fLight2,OUTPUT);

  pinMode(POTTIMER,INPUT);
  pinMode(SETBUTTON,INPUT_PULLUP);
  pinMode(PHOTOSENS,INPUT_PULLUP);
  pinMode(ACCEL,INPUT);

  //digitalWrite(LIGHTFOUR,HIGH);
  //digitalWrite(SLIGHT1,HIGH);
  //digitalWrite(SLIGHT3,HIGH);
  //pinMode(MOT1,OUTPUT);

  //pinMode(fLight,OUTPUT);
  //pinMode(sLight,OUTPUT);

  //myMotor.setAcceleration(500);
}

int failed() {
  Serial.println(analogRead(PHOTOSENS));
  Serial.println(analogRead(ACCEL));
  Serial.println("FAILED");
  timerGoing = false;

  digitalWrite(fLight1,HIGH);
  digitalWrite(fLight2,HIGH);
  delay(500);
  digitalWrite(LIGHTFIVE1,LOW);
  digitalWrite(LIGHTFIVE2,LOW);
  delay(500);
  digitalWrite(LIGHTFOUR,LOW);
  delay(500);
  digitalWrite(LIGHTTHREE,LOW);
  delay(500);
  digitalWrite(LIGHTTWO,LOW);
  delay(500);
  digitalWrite(LIGHTONE,LOW);
  delay(500);
  digitalWrite(fLight1,LOW);
  digitalWrite(fLight2,LOW);
}

int success() {
  Serial.println("SUCCEEDED");
  timerGoing = false;
  for(int a = 0; a < 5; a++) {
    if(lightsON == false) {
      digitalWrite(SLIGHT1,HIGH);
      digitalWrite(SLIGHT2,HIGH);
      digitalWrite(SLIGHT3,HIGH);
      digitalWrite(LIGHTONE,HIGH);
      digitalWrite(LIGHTTWO,HIGH);
      digitalWrite(LIGHTTHREE,HIGH);
      digitalWrite(LIGHTFOUR,HIGH);
      digitalWrite(LIGHTFIVE1,HIGH);
      digitalWrite(LIGHTFIVE2,HIGH);

      lightsON = true;
    }
    else {
      digitalWrite(SLIGHT1,LOW);
      digitalWrite(SLIGHT2,LOW);
      digitalWrite(SLIGHT3,LOW);
      lightsON = false;
    }
    delay(1000);
  }
  if(lightsON == true) {
    digitalWrite(SLIGHT1,LOW);
    digitalWrite(SLIGHT2,LOW);
    digitalWrite(SLIGHT3,LOW);
  }
  //delay(3000);
  //failed();
}

//0-1023
void loop() {
  // put your main code here, to run repeatedly:

  //Serial.println(digitalRead(SLIGHT2));

  if(digitalRead(SETBUTTON) == LOW && timerGoing == false) {
    timeStart = millis();
    //changing duration for testing purposes; turn back to 3 * analogRead after this
    duration = ((analogRead(POTTIMER))/3.0)*1000;
    //myMotor.moveTo(steps_needed);
    int xpos = analogRead(X);
    int ypos = analogRead(Y);
    int zpos = analogRead(Z);
    currpos = (xpos+ypos+zpos)/3;
    moveThresh = currpos + 10;
    Serial.print("potentiometer reading: ");
    Serial.println(analogRead(POTTIMER));
    Serial.print("duration (in seconds) is ");
    Serial.println(duration/1000);
    Serial.print("X position: ");
    Serial.println(analogRead(X));
    Serial.print("Y position: ");
    Serial.println(analogRead(Y));
    Serial.print("Z position: ");
    Serial.println(analogRead(Z));
    Serial.print("average position: ");
    Serial.println((xpos+ypos+zpos)/3);
    timeForEach = (duration)/5;
    //myMotor.setSpeed((4*numRots)/(duration/1000));
    digitalWrite(LIGHTONE,HIGH);
    secLight = timeForEach;
    thirdLight = timeForEach * 2;
    fourthLight = timeForEach * 3;
    fifthLight = timeForEach * 4;

    Serial.print("light sensor: ");
    Serial.println(analogRead(PHOTOSENS));
    timerGoing = true;
    //find the range for potentiometer, then change output into range 0-1hour

  }


  if(timerGoing == true && (analogRead(PHOTOSENS) < lightThresh) && millis() < (timeStart+duration)) {
    Serial.print("photo ");
    Serial.println(analogRead(PHOTOSENS));
    Serial.print("accel ");
    Serial.println(analogRead(ACCEL) - moveThresh);
    Serial.println(analogRead(PHOTOSENS) < lightThresh || analogRead(ACCEL) > moveThresh);
    //failed();
    timerGoing = false;
  }
  if(timerGoing == true && millis() >= (timeStart+duration)) {
    success();
    timerGoing = false;
  }
    if(timerGoing == true && digitalRead(LIGHTTWO) == LOW && millis() >= (timeStart + secLight)) {
    digitalWrite(LIGHTTWO,HIGH);
  }
  if(timerGoing == true && digitalRead(LIGHTTHREE) == LOW && millis() >= (timeStart + thirdLight)) {
    digitalWrite(LIGHTTHREE,HIGH);
  }
  if(timerGoing == true && digitalRead(LIGHTFOUR) == LOW && millis() >= (timeStart + fourthLight)) {
    digitalWrite(LIGHTFOUR,HIGH);
  }
  if(timerGoing == true && (digitalRead(LIGHTFIVE1) == LOW || digitalRead(LIGHTFIVE2) == LOW) && millis() >= (timeStart + fifthLight)) {
    digitalWrite(LIGHTFIVE1,HIGH);
    digitalWrite(LIGHTFIVE2,HIGH);
  }

}
Leave a Reply
You must be logged in to post a comment.