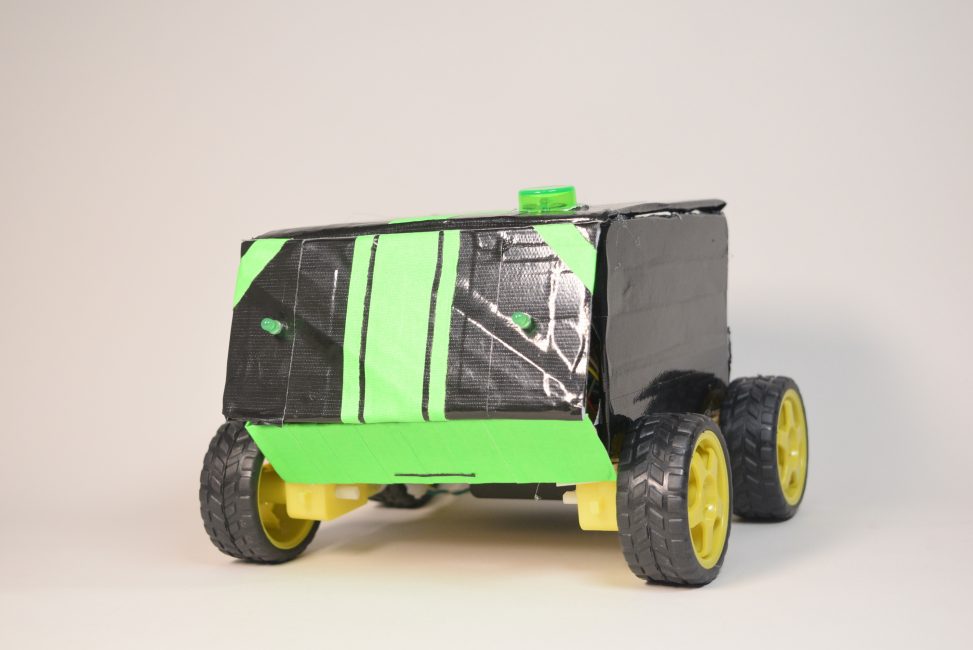

This photo captures the front view of the car, which shows the green button on top, the LED “headlights”, and the front flap (the black rectangle containing green details and the LEDs) which lifts to allow access to the battery and the Arduino.
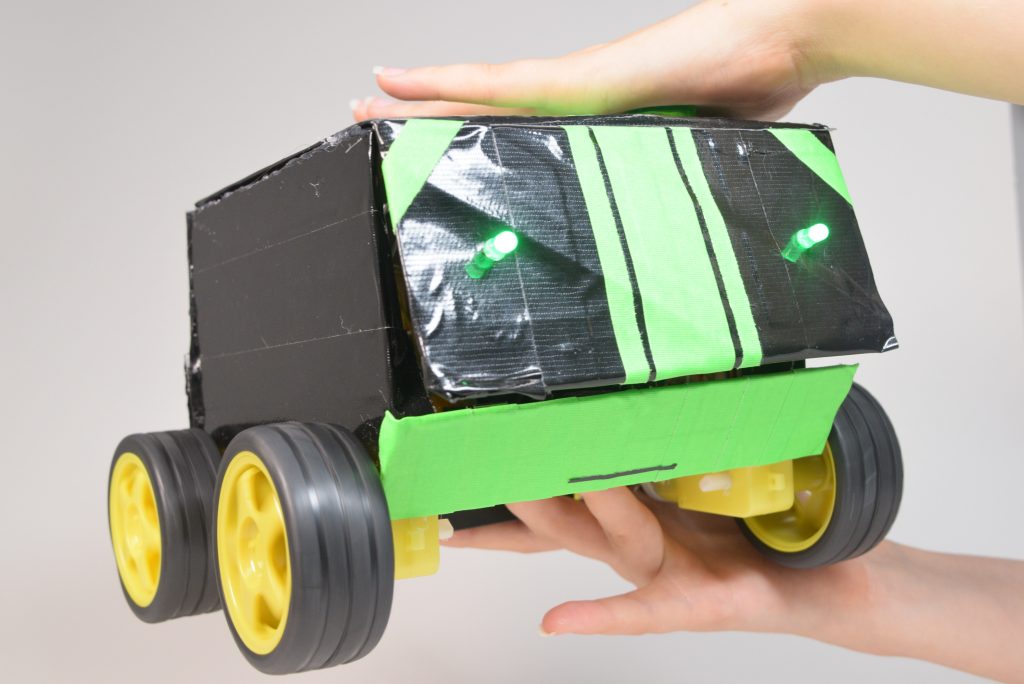
This photo shows the activated car, with its headlights on. This activation is caused by the hand over the photosensor inside the button, which has detected a lower level of light.
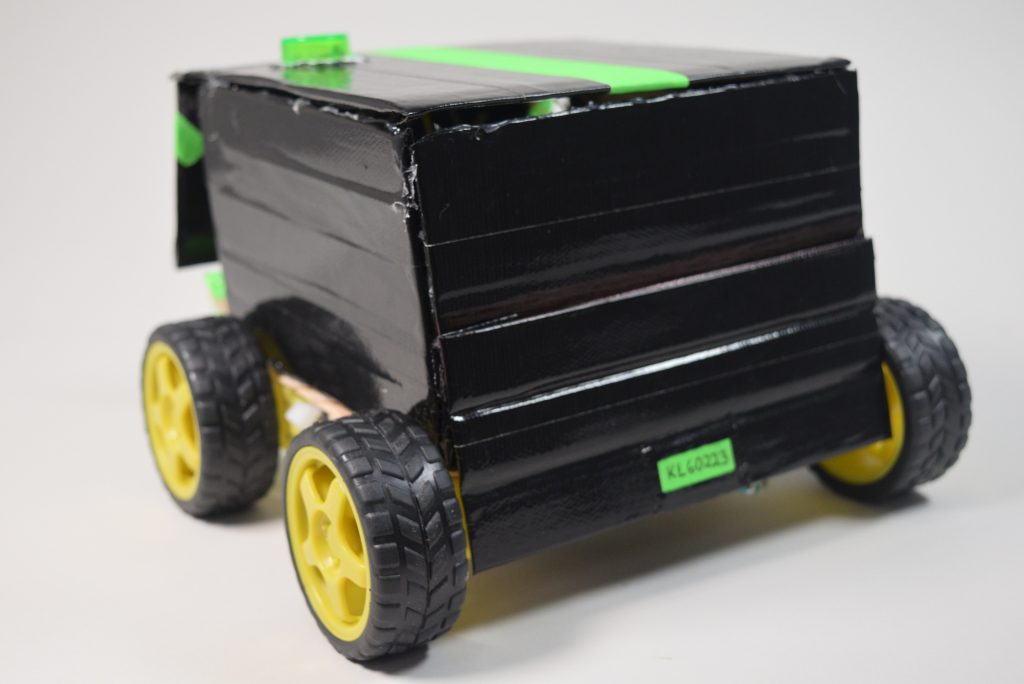
This photo captures the back view of the car, where another angle of the button can be seen.
The car has a green button on top of it. When someone goes to press the button, a sensor in the button detects a change in the amount of light, and the car “runs” away. This is similar to our inspiration of a cat running away from a human that wants to pet it.
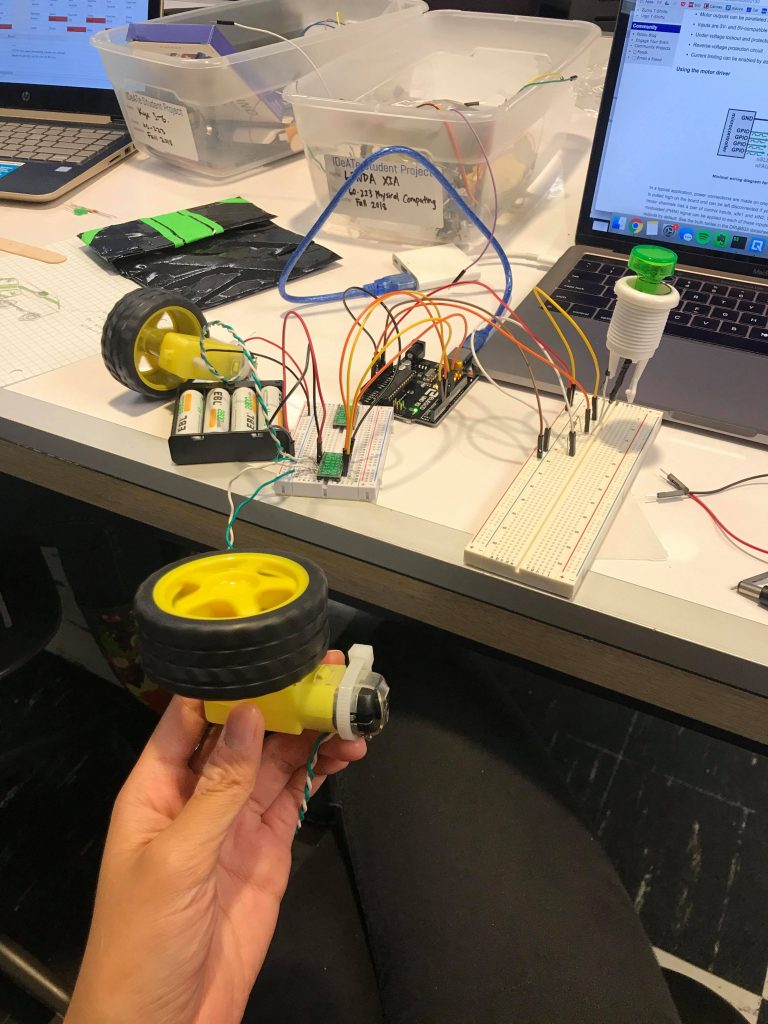
At this point, the wheels were being wired into the breadboard, along with their drivers. The front flap of the car and the wired button are also visible in this picture. This was during the early stages of configuring the electrical parts.
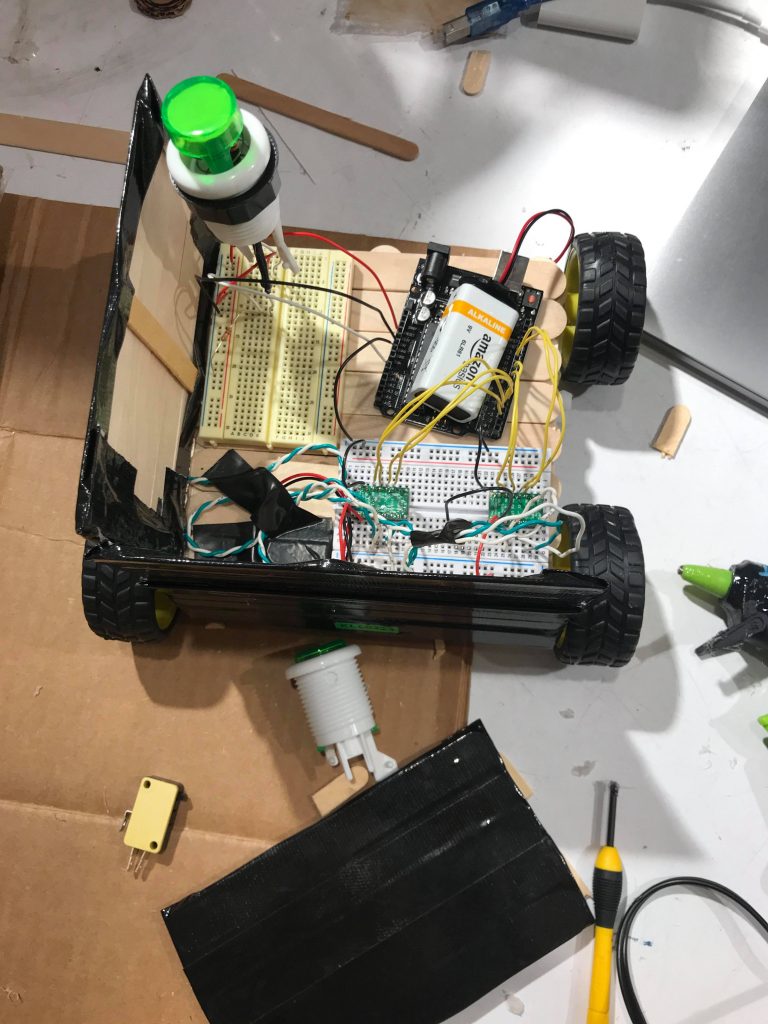
Here, the car was starting to be constructed. All of the wheels were attached to the base, and the walls were being put up, allowing the electrical parts to sit inside the vehicle. The top was made around the button, out of cardboard, in order to ensure it would sit correctly and allow the photosensor to be activated.

At this point, construction was nearly complete, with the exception of the front of the car. We made the design choice to have the front go out and become a flap the battery and Arduino visible in the front left part of the car could be accessible, in case we needed to change the code.
/**
*
* Linda Xia
* Kye Stapleton-Gray
*
* Project 1: Surprise!
*
* This Arduino "surprise" comes in the form of a toy-sized car, artfully made from popsicle sticks
* hot glued together. It contains a green "Push Me!" button, which is aimed to entice the user to
* tap it to turn it on. Little do they know that the device is already on, and the photoresistor
* hidden within the button alerts the little toy car to awaken and swiftly scamper away.
*
*/
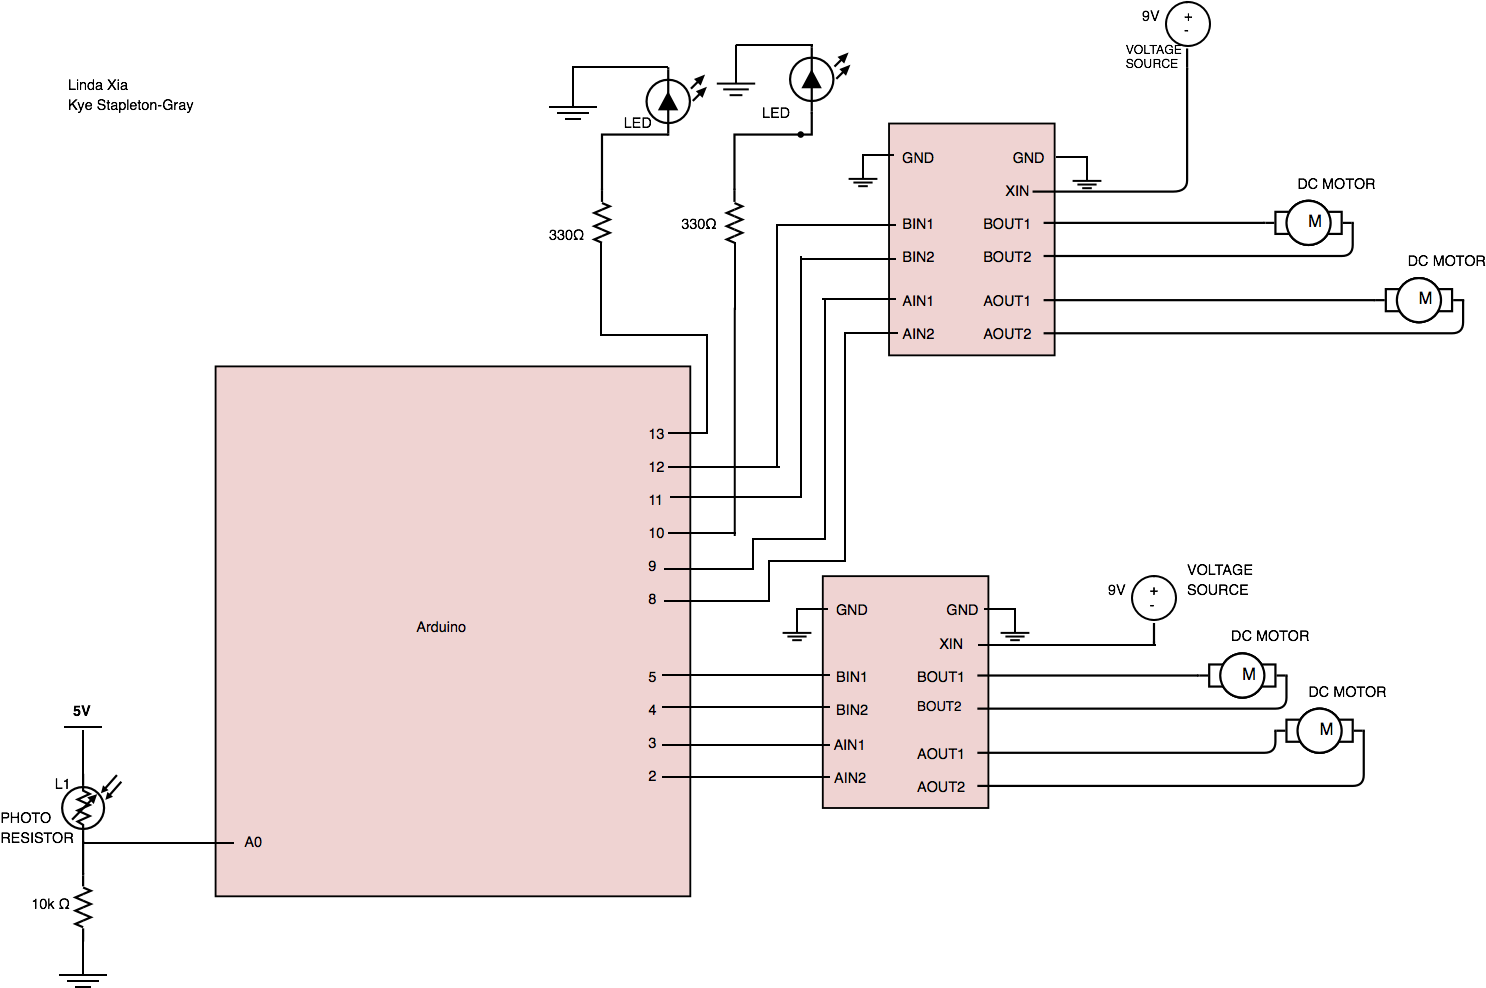
const int back_in_1 = 8;
const int back_in_2 = 9;
const int back_in_3 = 4;
const int back_in_4 = 5;
const int front_in_1 = 11;
const int front_in_2 = 12;
const int front_in_3 = 2;
const int front_in_4 = 3;
const int led_1 = 13;
const int led_2 = 10;
const int sensitivity = 550;
void setup() {
Serial.begin(9600);
// Controls the back wheels DC motor output
pinMode(back_in_1, OUTPUT);
pinMode(back_in_2, OUTPUT);
pinMode(back_in_3, OUTPUT);
pinMode(back_in_4, OUTPUT);
// Controls the front wheels DC motor output
pinMode(front_in_1, OUTPUT);
pinMode(front_in_2, OUTPUT);
pinMode(front_in_3, OUTPUT);
pinMode(front_in_4, OUTPUT);
// The LED "eyes" of the little toy car
pinMode(led_1, OUTPUT);
pinMode(led_2, OUTPUT);
pinMode(A0, INPUT);
}
void loop() {
// Read the photoresistor value.
int photoValue = analogRead(A0);
/*
* If the photoresistor value dips below a certain sensitivity level, the little toy car
* is alerted that a human is near due to the change in light.
*/
if (photoValue < sensitivity) {
digitalWrite(back_in_1, HIGH);
digitalWrite(back_in_2, LOW);
digitalWrite(back_in_3, HIGH);
digitalWrite(back_in_4, LOW);
digitalWrite(front_in_1, HIGH);
digitalWrite(front_in_2, LOW);
digitalWrite(front_in_3, HIGH);
digitalWrite(front_in_4, LOW);
digitalWrite(led_1, HIGH);
digitalWrite(led_2, HIGH);
delay(1000);
}
// Otherwise, if there is no danger -- uh, human -- nearby, the car will be napping.
else {
digitalWrite(back_in_1, HIGH);
digitalWrite(back_in_2, HIGH);
digitalWrite(back_in_3, HIGH);
digitalWrite(back_in_4, HIGH);
digitalWrite(front_in_1, HIGH);
digitalWrite(front_in_2, HIGH);
digitalWrite(front_in_3, HIGH);
digitalWrite(front_in_4, HIGH);
digitalWrite(led_1, LOW);
digitalWrite(led_2, LOW);
}
}
For future improvements, it would be useful to make something like a knob on the device that could adjust the sensitivity of the photoresistor based on the brightness of the room, since variable lighting in the classroom caused issues in our demonstration. To make the device more “cat-like”, we could have allowed the car to be moving already, and speed up when a hand goes to press the button. It would have also been better to allow the button to actually be pressed, since we weren’t expecting for someone to actually try to press it hard and quickly enough that the sensor was set off.
Some challenges were that working with DC motors was a risky move, because neither of us had worked with them before, and extra hours were spent soldering threaded wire to the motors to create electrical connections, and soldering the drivers together. It was also difficult to find the right battery to power the motors, the drivers, and the Arduino. We ended up using 4 AA batteries and a 9V battery. It was confusing wiring those up because the wheels kept acting up or not moving at different points.
When constructing the car, we wanted to make the function as discreet as possible so no one would guess the surprise. This made us construct a closed box, with no way of peeking inside at the parts.
The electrical components we had already learned about in class were easy to connect, like the photoresistor and the LEDs. The scope of the project was right, since we were able to produce a polished project without spending crammed hours at the end. In the future, we would love to incorporate more complex and sensitive sensors, motors, and other electrical accessories to create a less direct replica of an already existing being (the cat). Some of the projects we saw from others in the class inspired us to be more creative, like the slowly moving package box, and the caring-actions-turned-violent plant watering project.
Leave a Reply
You must be logged in to post a comment.