Introduction:
After interviewing with Elaine, we were able to start the prototyping development to help us better understand our initial device concept. You can see our documentation about our interview process to learn more! We were able to truly connect and better understand a day in Elaine’s life to try to create a device that would be of convenience. Upon thinking and discussing as a team we were able to come to a final prototype concept with a direct problem statement.
Our client enjoys music which is evident through their theme songs consisting of Mountain Lions by Lonestar and many other classic songs! However, Elaine has difficulty with devices that require the use of grip force and strength, so there are musical instruments that are difficult to use. Elaine suffers with Larsen syndrome, Adams-Oliver syndrome, and Ehlers-Danlos syndrome. These disabilities causes here to not be able to extend her arms fully with her right arm (only 90 degrees). In addition she is missing muscles in both shoulders (deltoid) while having her joints be loose and unstable due to lack of collagen her body can properly make. Lastly, her left hand only has her first bone on the thumb and her right hand is missing most of the thumb muscles. She emphasized that there are times where she uses her mouth in place of her hands. We decided to work with Elaine to build a musical device that would cater to her needs by having flexible inputs while ergonomically focusing on her personalization.
This documentation is meant to help us summarize and reflect our prototype process and journey to find our next steps and any other problems we found on the way! Because we come from various ranges of backgrounds, we decided to split the explorations based on our strengths.
Prototypes:
The three paths we decided to take for this exploration were ergonomics, design, and software. The goal with looking into the ergonomics of the potential prototype was used to find solutions to make interactions more comfortable and increase productivity which would be applied later in the design. For the design, we used this experience to have a better understand of what are the best design possibilities. Lastly, with software, we wanted to double check that the electromechanics that we thought of in our design prototype would be possible.
- Ergonomic: What is the most comfortable range of motion to build for? How can our physical artifact be best tailored to meet Elaine’s specific needs?
- Design: Does a user understand how to use this without being given verbal instructions? Does our design help with the constraints in mind or make the experience more difficult?
- Software: How well does the MIDI interface work with the Arduino and does the sound it creates resemble a musical instrument enough?
E R G O N O M I C S
Simply put, form needs to follow function. We knew that the instrument should be tailored to Elaine’s unique abilities. The interactions which manipulate sound should not only be engaging, but also comfortable to use. If done right, there will be very little in the way between Elaine and the music. Elaine is able to extend her right arm to 90 degrees, while her left arm has a full range of extension. However, she only has a full hand on her left arm, while her right hand only has the first joint of the thumb. Explorations needed to be done to better define these needs. Which directions of motion are most natural? Are there positions which can be sustained longer than others? What touch points best satisfy comfortable movement while maintaining the magic in sound manipulation?
INITIAL PROTOTYPE DEVELOPMENT
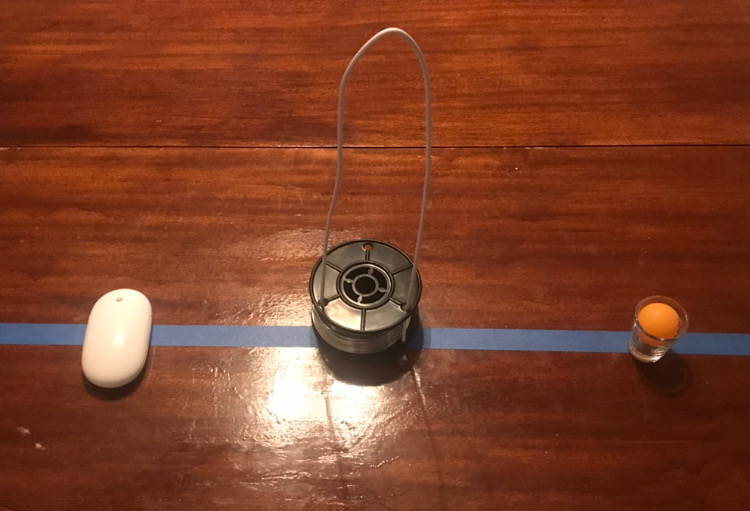
Initial arrangement of different interactions with household objects: magic mouse, coat hangar “theremin”, and shotglass roller ball
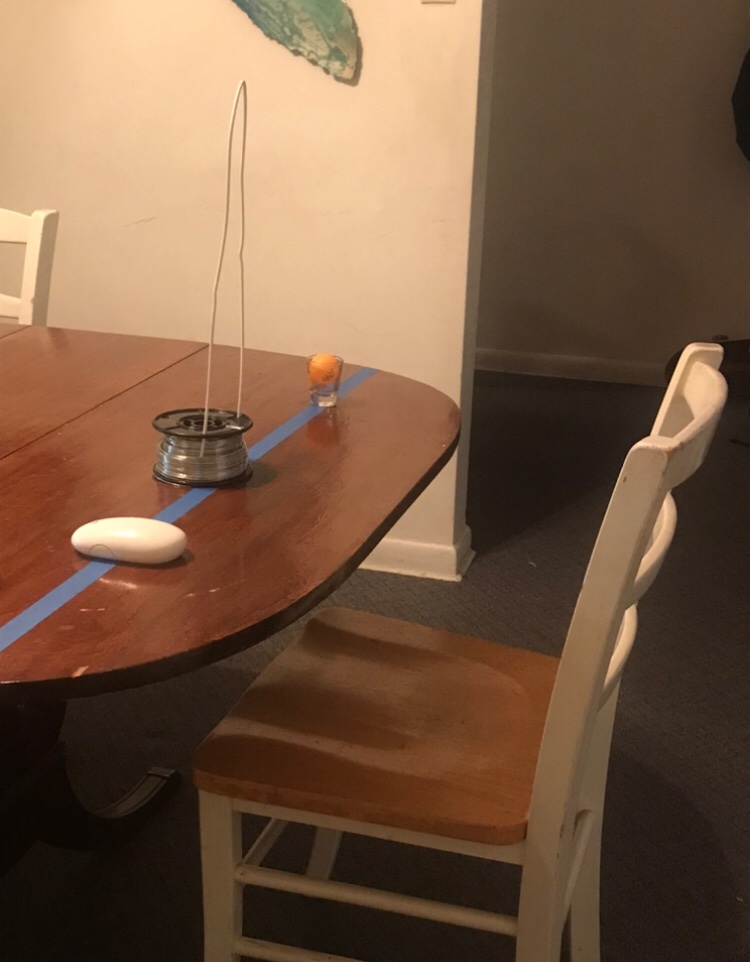
The choice of this table was intentional, because of its spacious overhang lending itself practical to wheelchair use.
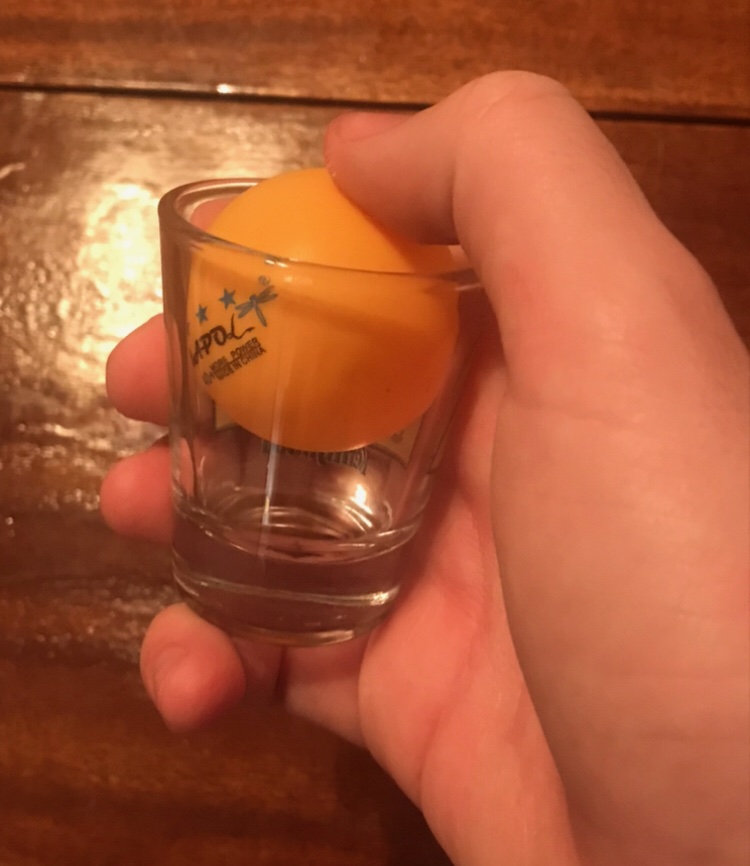
A very pleasant discovery was how a ping-pong balls snugly rolls in a shot glass, used in place of Elaine’s favored ball mouse.
IMAGES OF PROTOTYPE TESTING
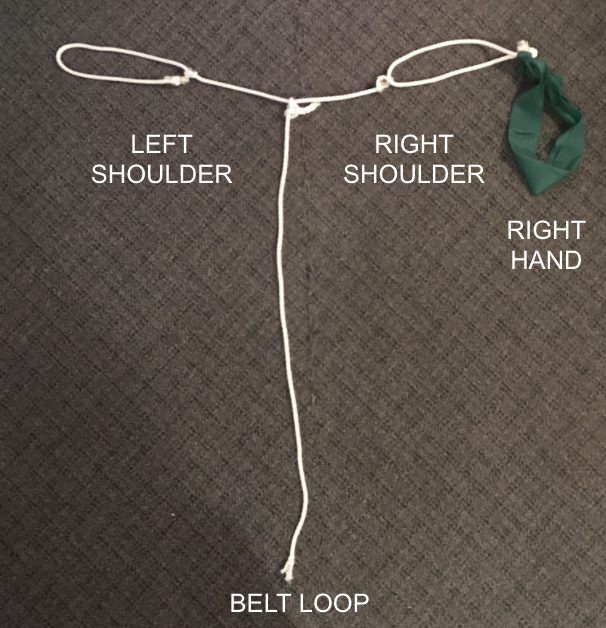
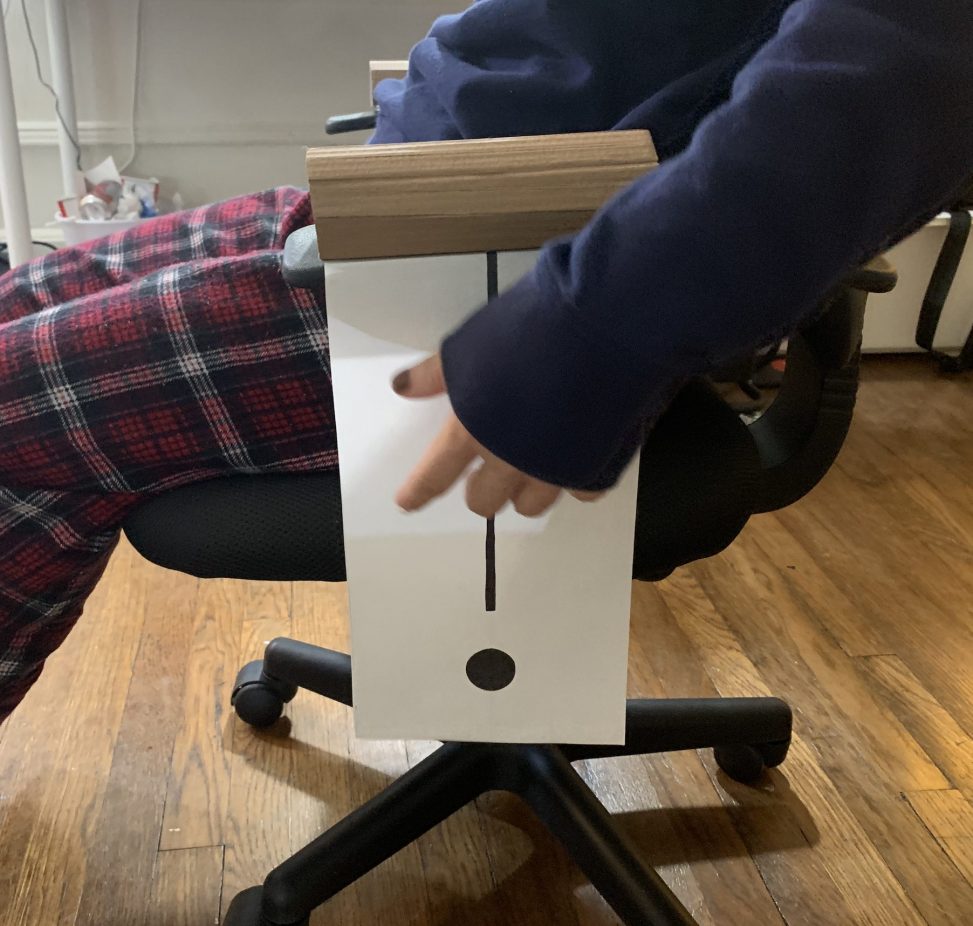
In a prototype shift, I zoomed back from the interactions to better understand Elaine’s conditions untethered from specific context. To do so, I made this wearable out of rope and an exercise band to restrict my movement.
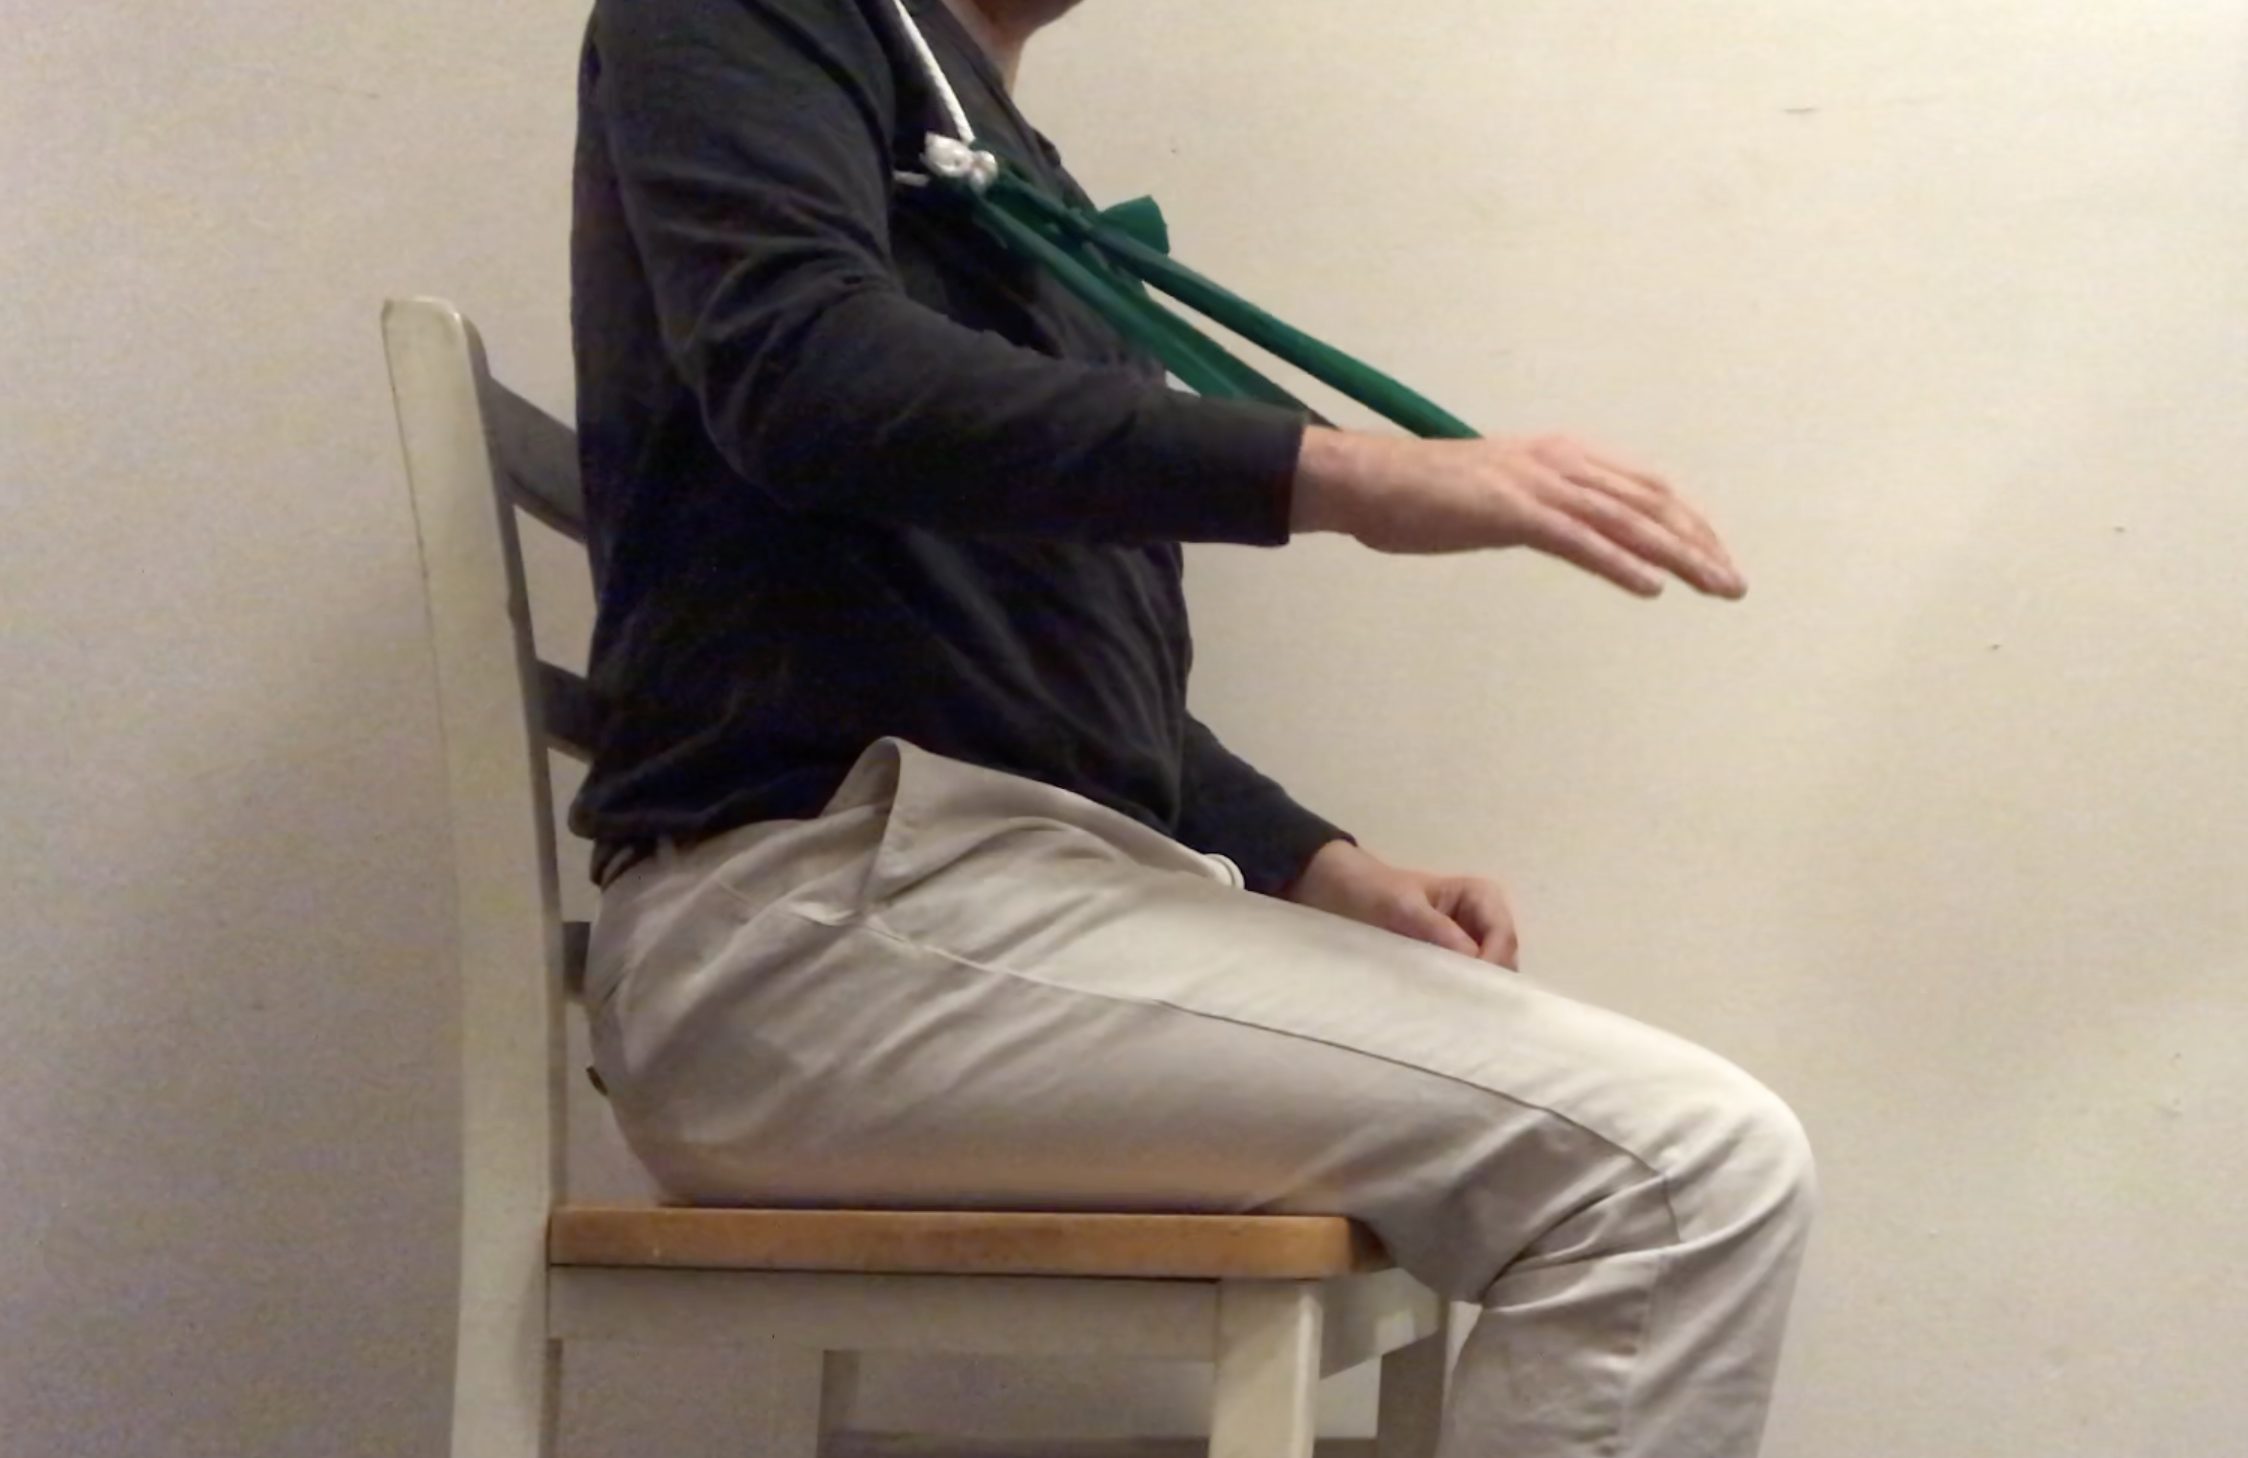
Profile of the band at its fullest extension with a resting arm
I found that the farthest extension which is not fought with resistance is about 70 degrees in, understandably short of the maximum.
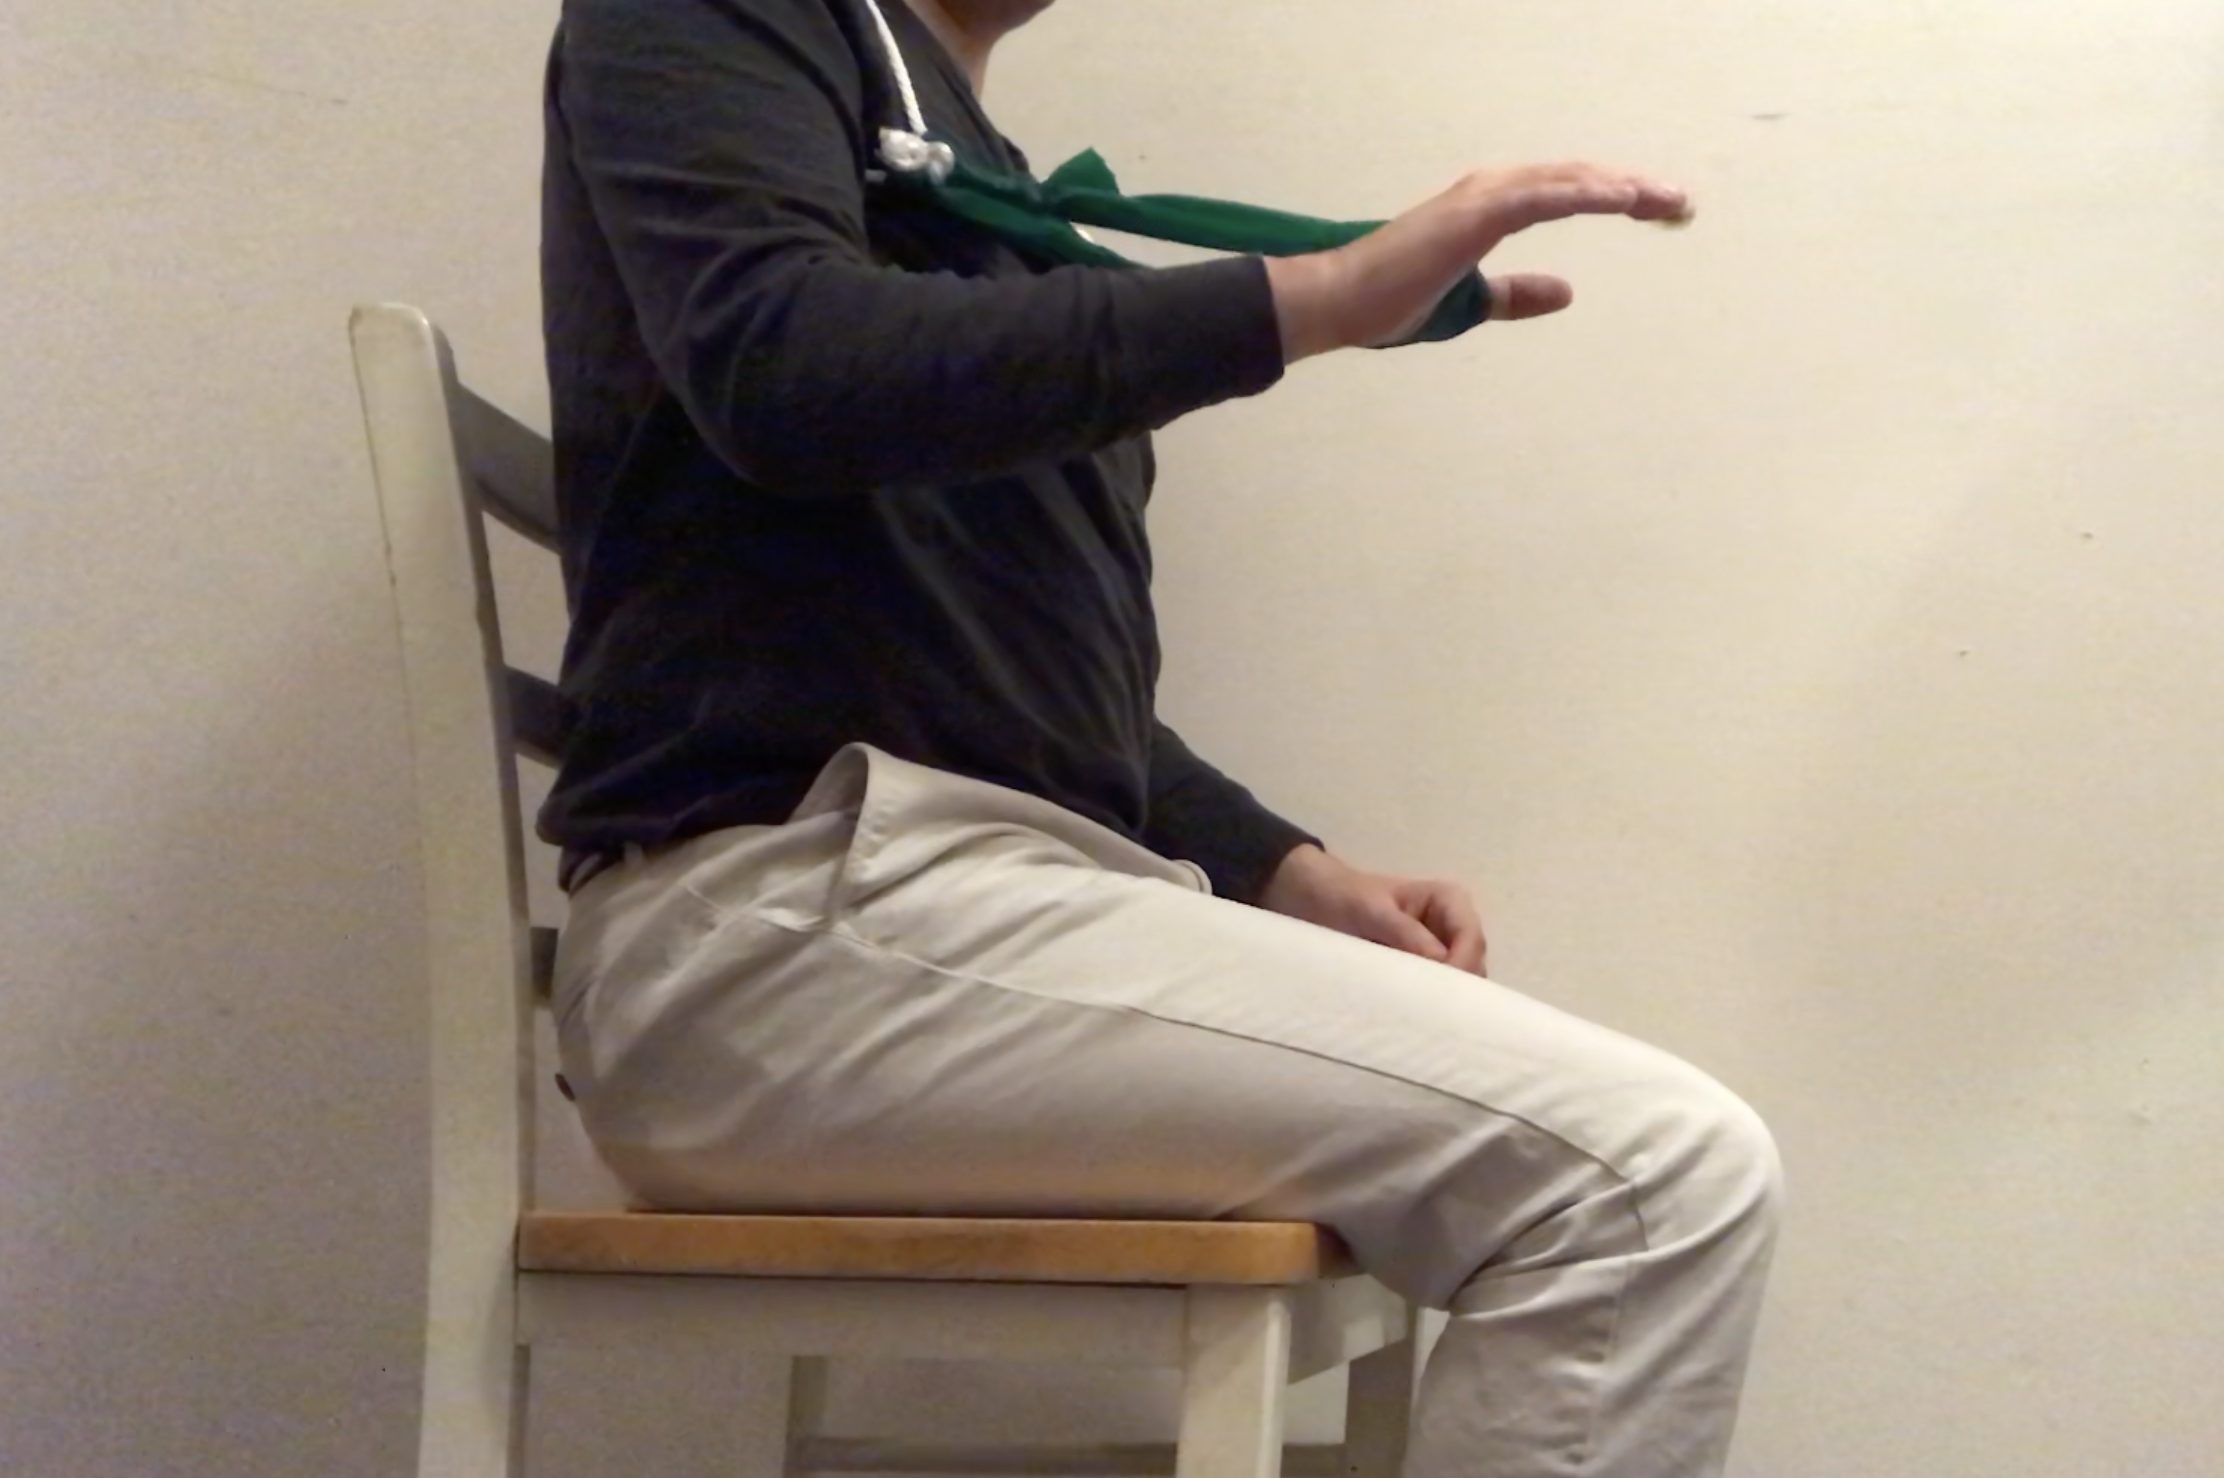
CLIP OF PROTOTYPE TESTING
Here is some general arm movement to play with the vertical and horizontal resistance in the device. Horizontal movement was the easiest.
CONCLUSION
The prototyping process was enlightening. Having started with specific touch points in mind, I enjoyed finding lo-fi ways to a diverse set of interactions. I believe that this initial presented some great moments for decision making, even down to where I was going to set up these interactions. Of the three touch points, the theremin predictably held up to being the least demanding interaction. However, I ultimately felt I was getting ahead of myself. These prototypes set the stage for questions, but the experiments were only really for someone with my own abilities. It defeats a lot of the purpose of the project.
Instead, I zoomed out. Building the simple harness to limit my range of motion brought me closer to Elaine’s lived experience. Just experimenting with the exercise band challenged a lot of my assumptions. Sure Elaine could move to a 90 degree extension in her right arm, but the band made it apparent that there is no need to max this out. The edge out any range of motion is usually not the most comfortable. Additionally, the horizontal range of motion became super apparent as something to leverage. In playing with the exercise band, my arm pivoted left to right with ease in contrast to the resistance in its vertical movement.
Elaine’s feedback built off of these insights. She noted that gravity is not on her side, given the extra weight it puts on her scarce tissues. Once her arm is on a certain plane, it is easiest to keep it there rather than dip up and down repeatedly as I did. Another blind spot in my experiments is still in the horizontal movement. Elaine notes that it is easier to move her right arm left to right, but noted there is some strain when reaching directly in front of her. Moving forward, these insights point to this instrument potentially being in two pieces to customize comfort and minimize hard to reach interaction.
D E S I G N
This prototype was designed to help figure out the design options to cater the most efficient and best experience for Elaine. The question in mind were Does a user understand how to use this without being given verbal instructions? Does our design help with the constraints in mind or make the experience more difficult? These questions were based off of our prototype concerns that we were unable to figure out when brainstorming through sketches.This was done by creating simple prototypes through cardboard and paper while using the Wizard of Oz method. Before starting all of that, I wanted to evaluate the main goals and concerns the prototypes are meant to deal with. I was able to do so by writing down everything and then decide on the next steps of the process. Personally, regardless if what I write down is helpful and accurate, I prefer to write and think out my thoughts and possibilities to see them all and then move onto the visual iterations.
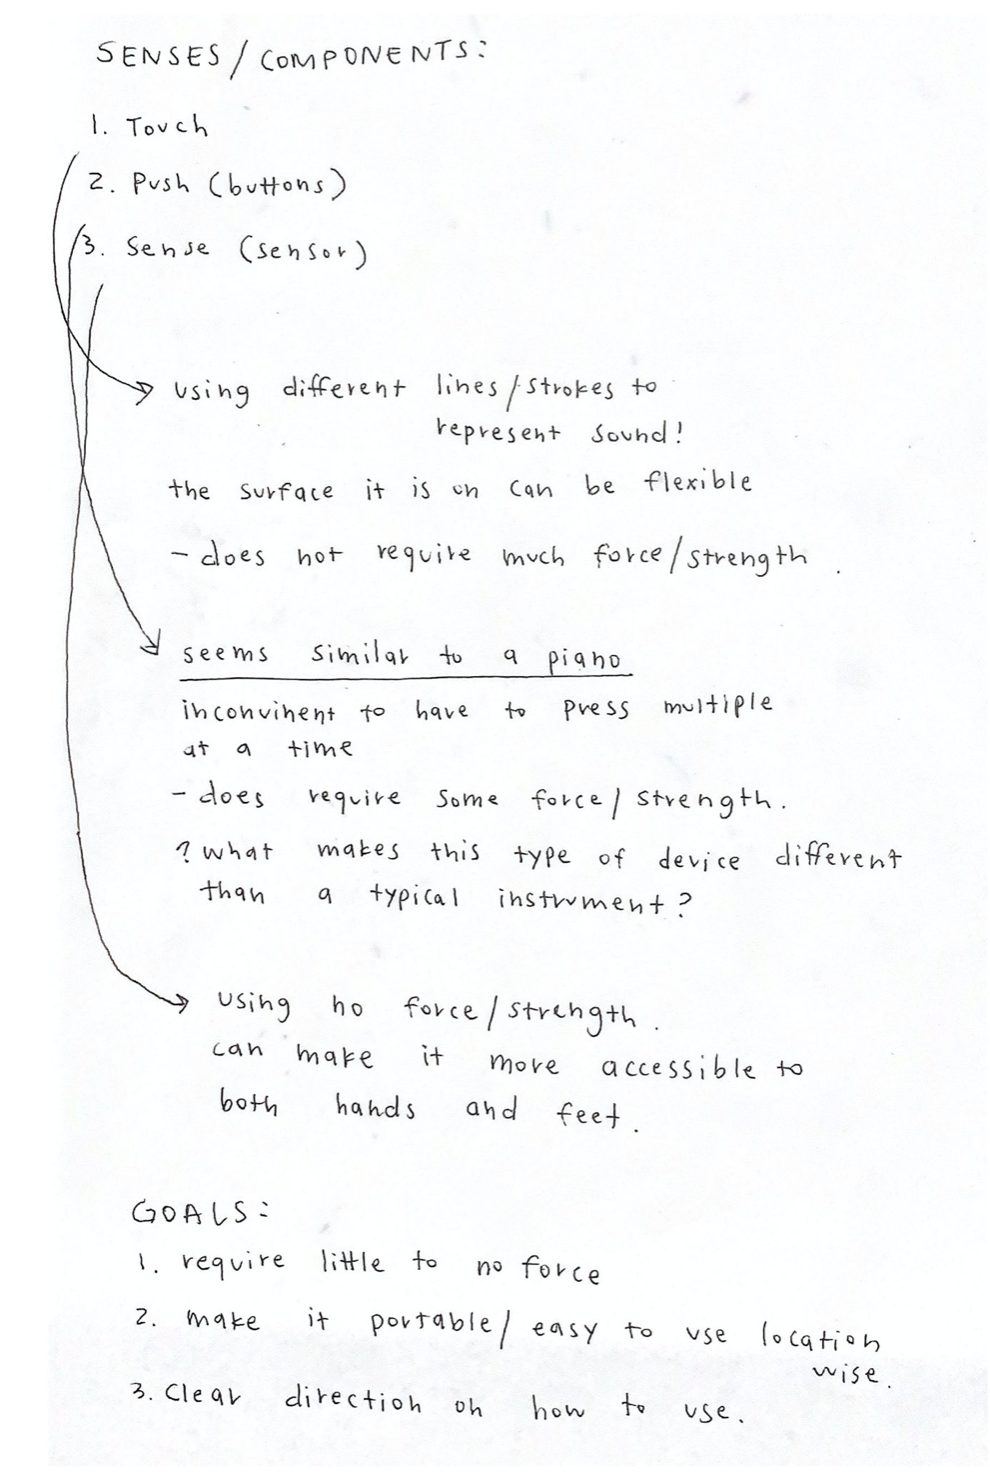
Here are the notes that I took in order to start the design iterations.
INITIAL PROTOTYPE SKETCHES
The particular prototypes focused on the interactions that Elaine would have through using touch and sensing as inputs. While considering her settings, we explored ways to make the potential device be flexible. For both iterations, they have two inputs: the volume and tone.
With the first iteration concept, I explored the idea of using electrical tape or electrical paint to be used as the input touch navigation. While trying to make the pattern of the shapes intuitive while allowing users to know that there are changes as you move through them was a thought that I still continue to think about and iterate. The purpose of exploring this touch method was because of Elaine’s emphasis that she prefers to have this device use non-force touch or sensors. We discussed buttons, but she mentioned that it is more difficult to do.
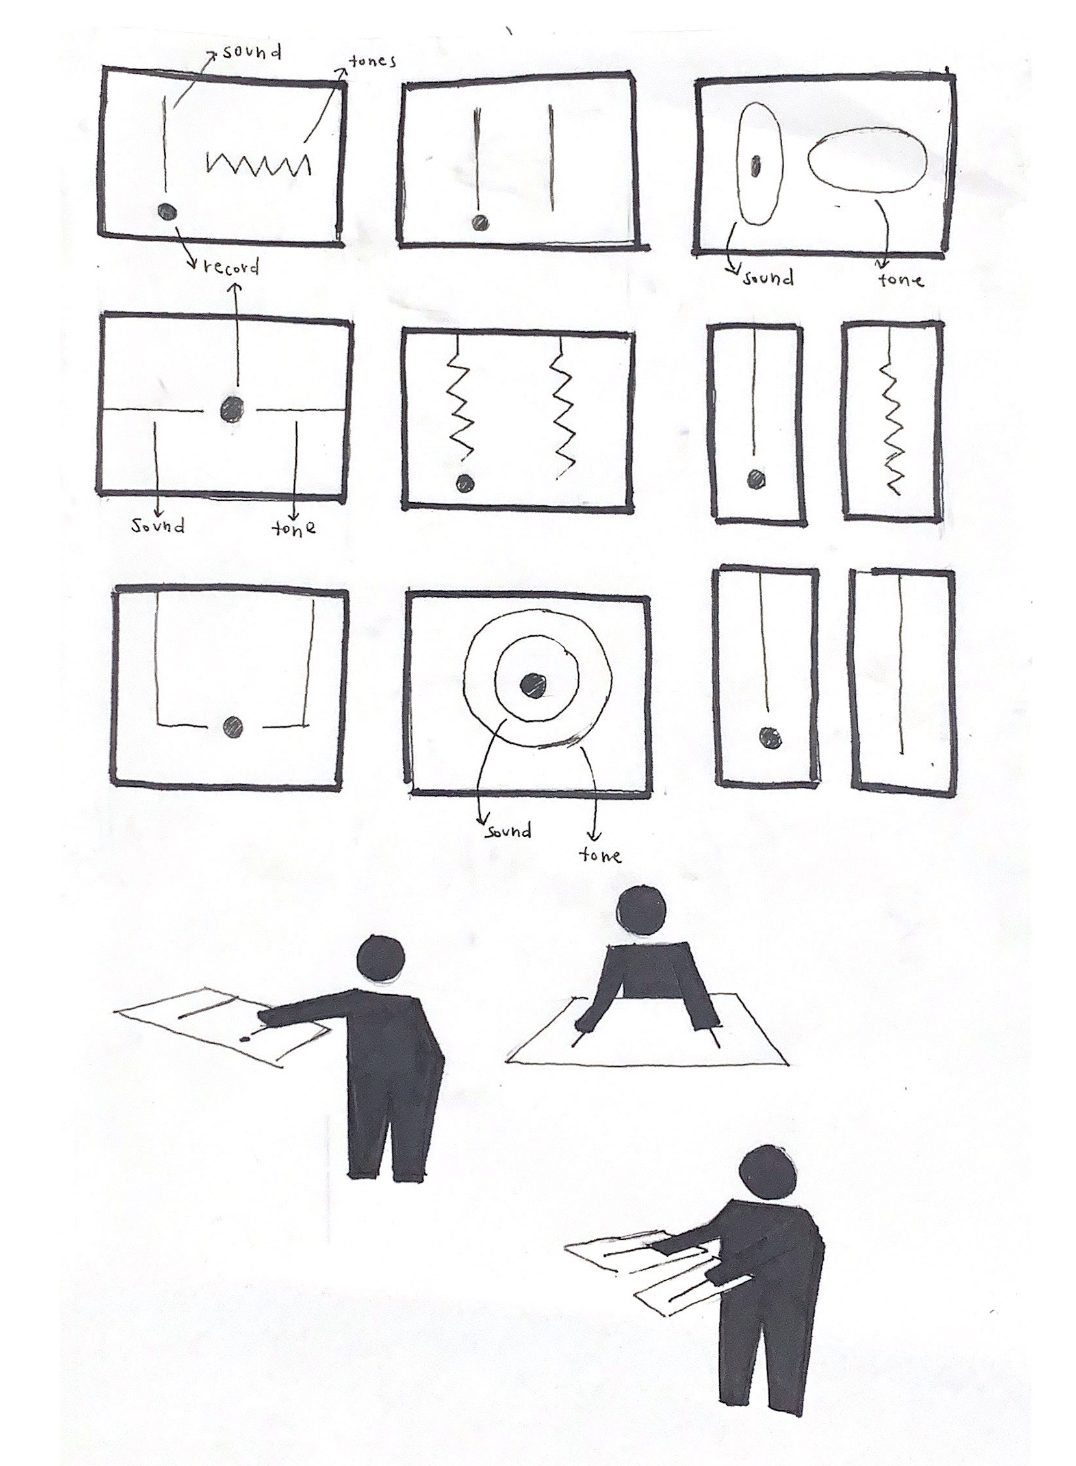
I tried creating various patterns to iterate on the touch base prototype iteration.
This is the second type of device iteration that focuses on using sensors as the input for sound and tone. The left side is mainly used to manipulate the volume while the right side is using the tone of the instrument. While iterating, it was initially focused on only being used by hands, but knowing that Elaine’s feet are useable, I tried looking into how to integrate both parts for this device through proportions. In addition, understanding if we want this device to stand or lay on the platform.
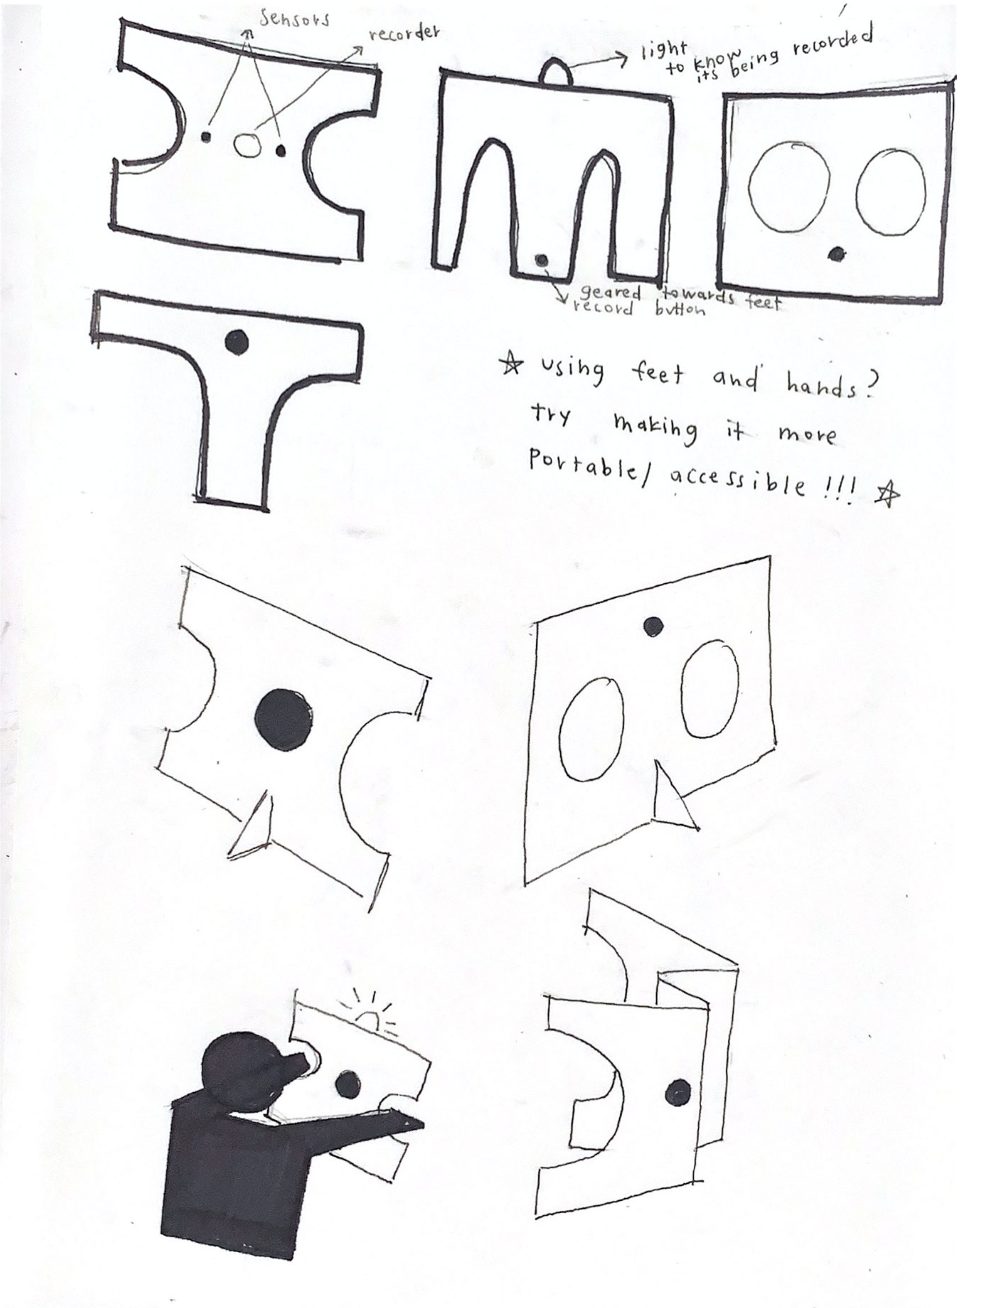
Here are the second concept prototype iteration sketches.
INITIAL PROTOTYPE DEVELOPMENT
From the sketches, I was able to prototype the final iterations with cardboard, paper, and a black marker. The first iteration is focused on the use of touch to manipulate the inputs. The cardboard is the speaker element and the black lines and shape is used for the touch buttons.
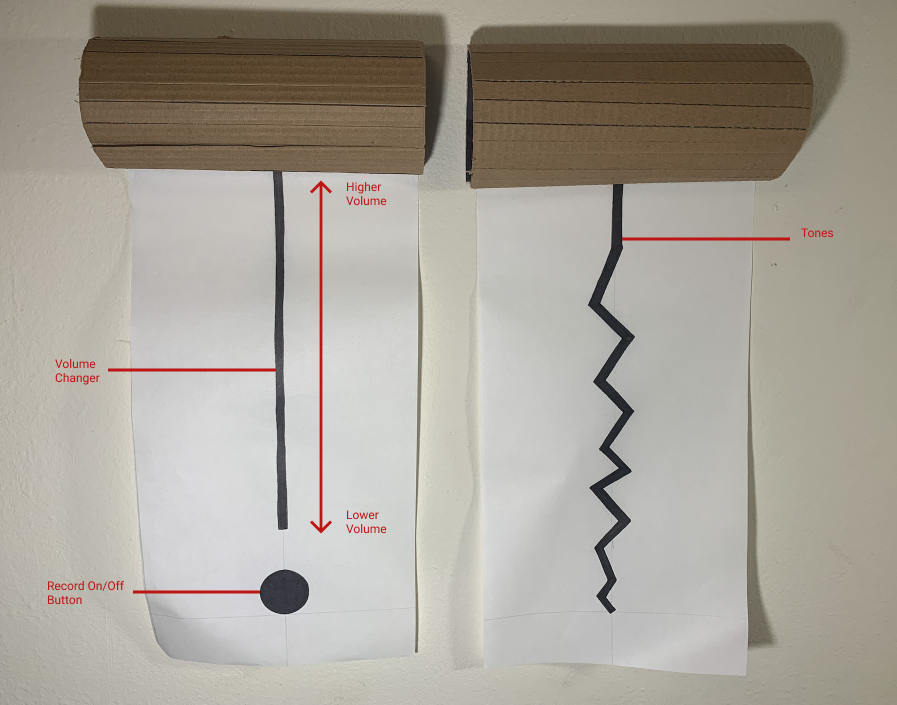
This is the mapping of the components of the first iteration prototype.
This gif shows the record on and off button.
Here is the user interacting with the volume.
This gif shows the interaction of the tone input of the prototype.
The second iteration is focused on the sensor. It is foldable so that Elaine is able to flexibly carry and use the device. One of her wants was to have this device have multiple inputs to allow her to use it anywhere with most devices. The left cut out is used to manipulate the volume of the input while the right cut out is used to change the tones of the instrumental sounds.
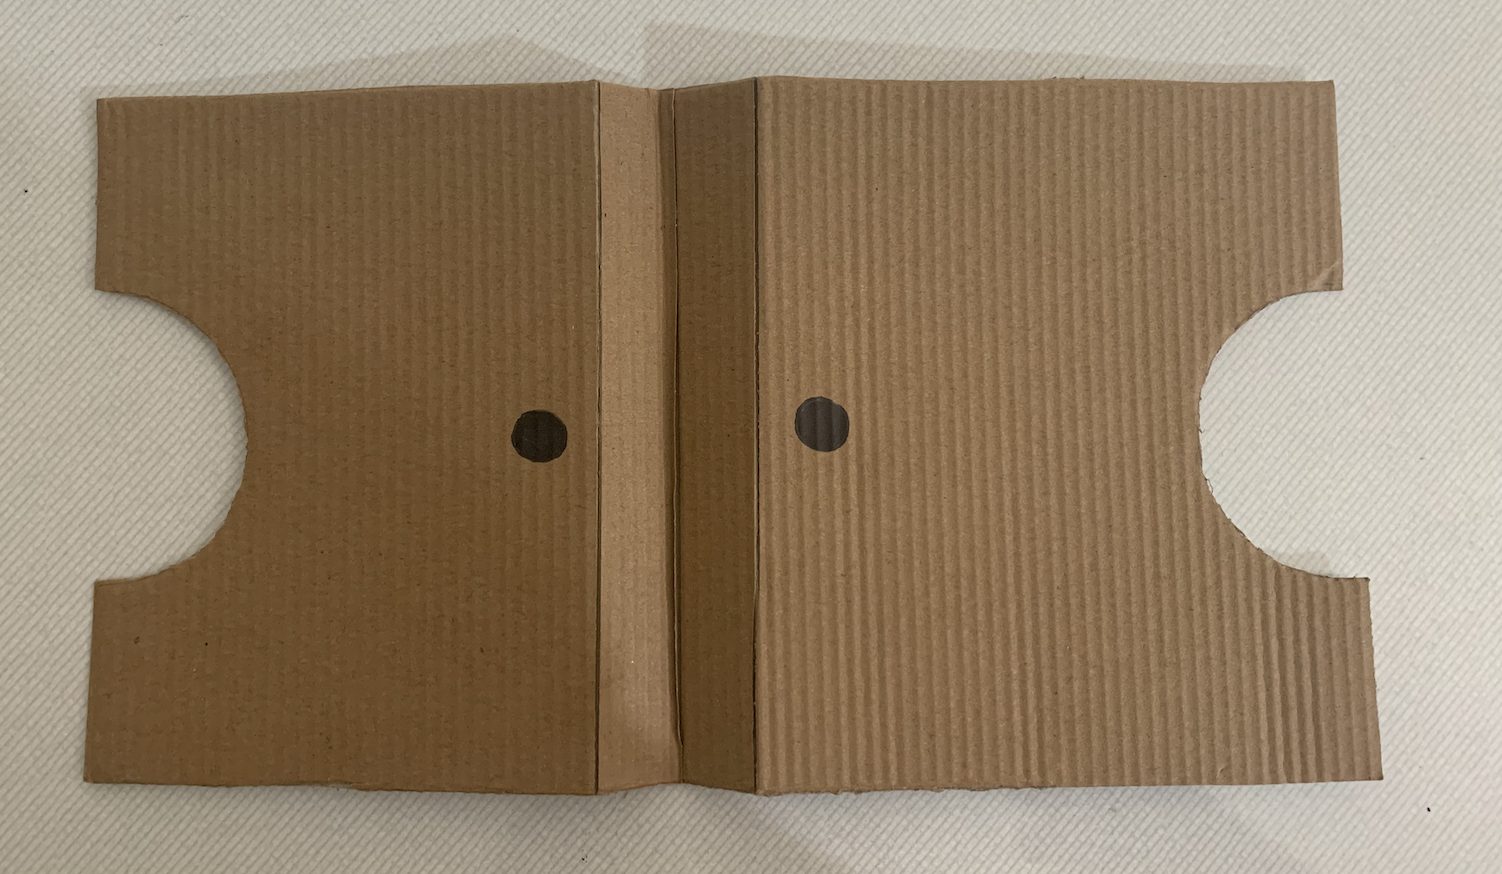
Here is the design flat down. The creases are used to allow the device to be foldable flat so that Elaine can comfortably more around.
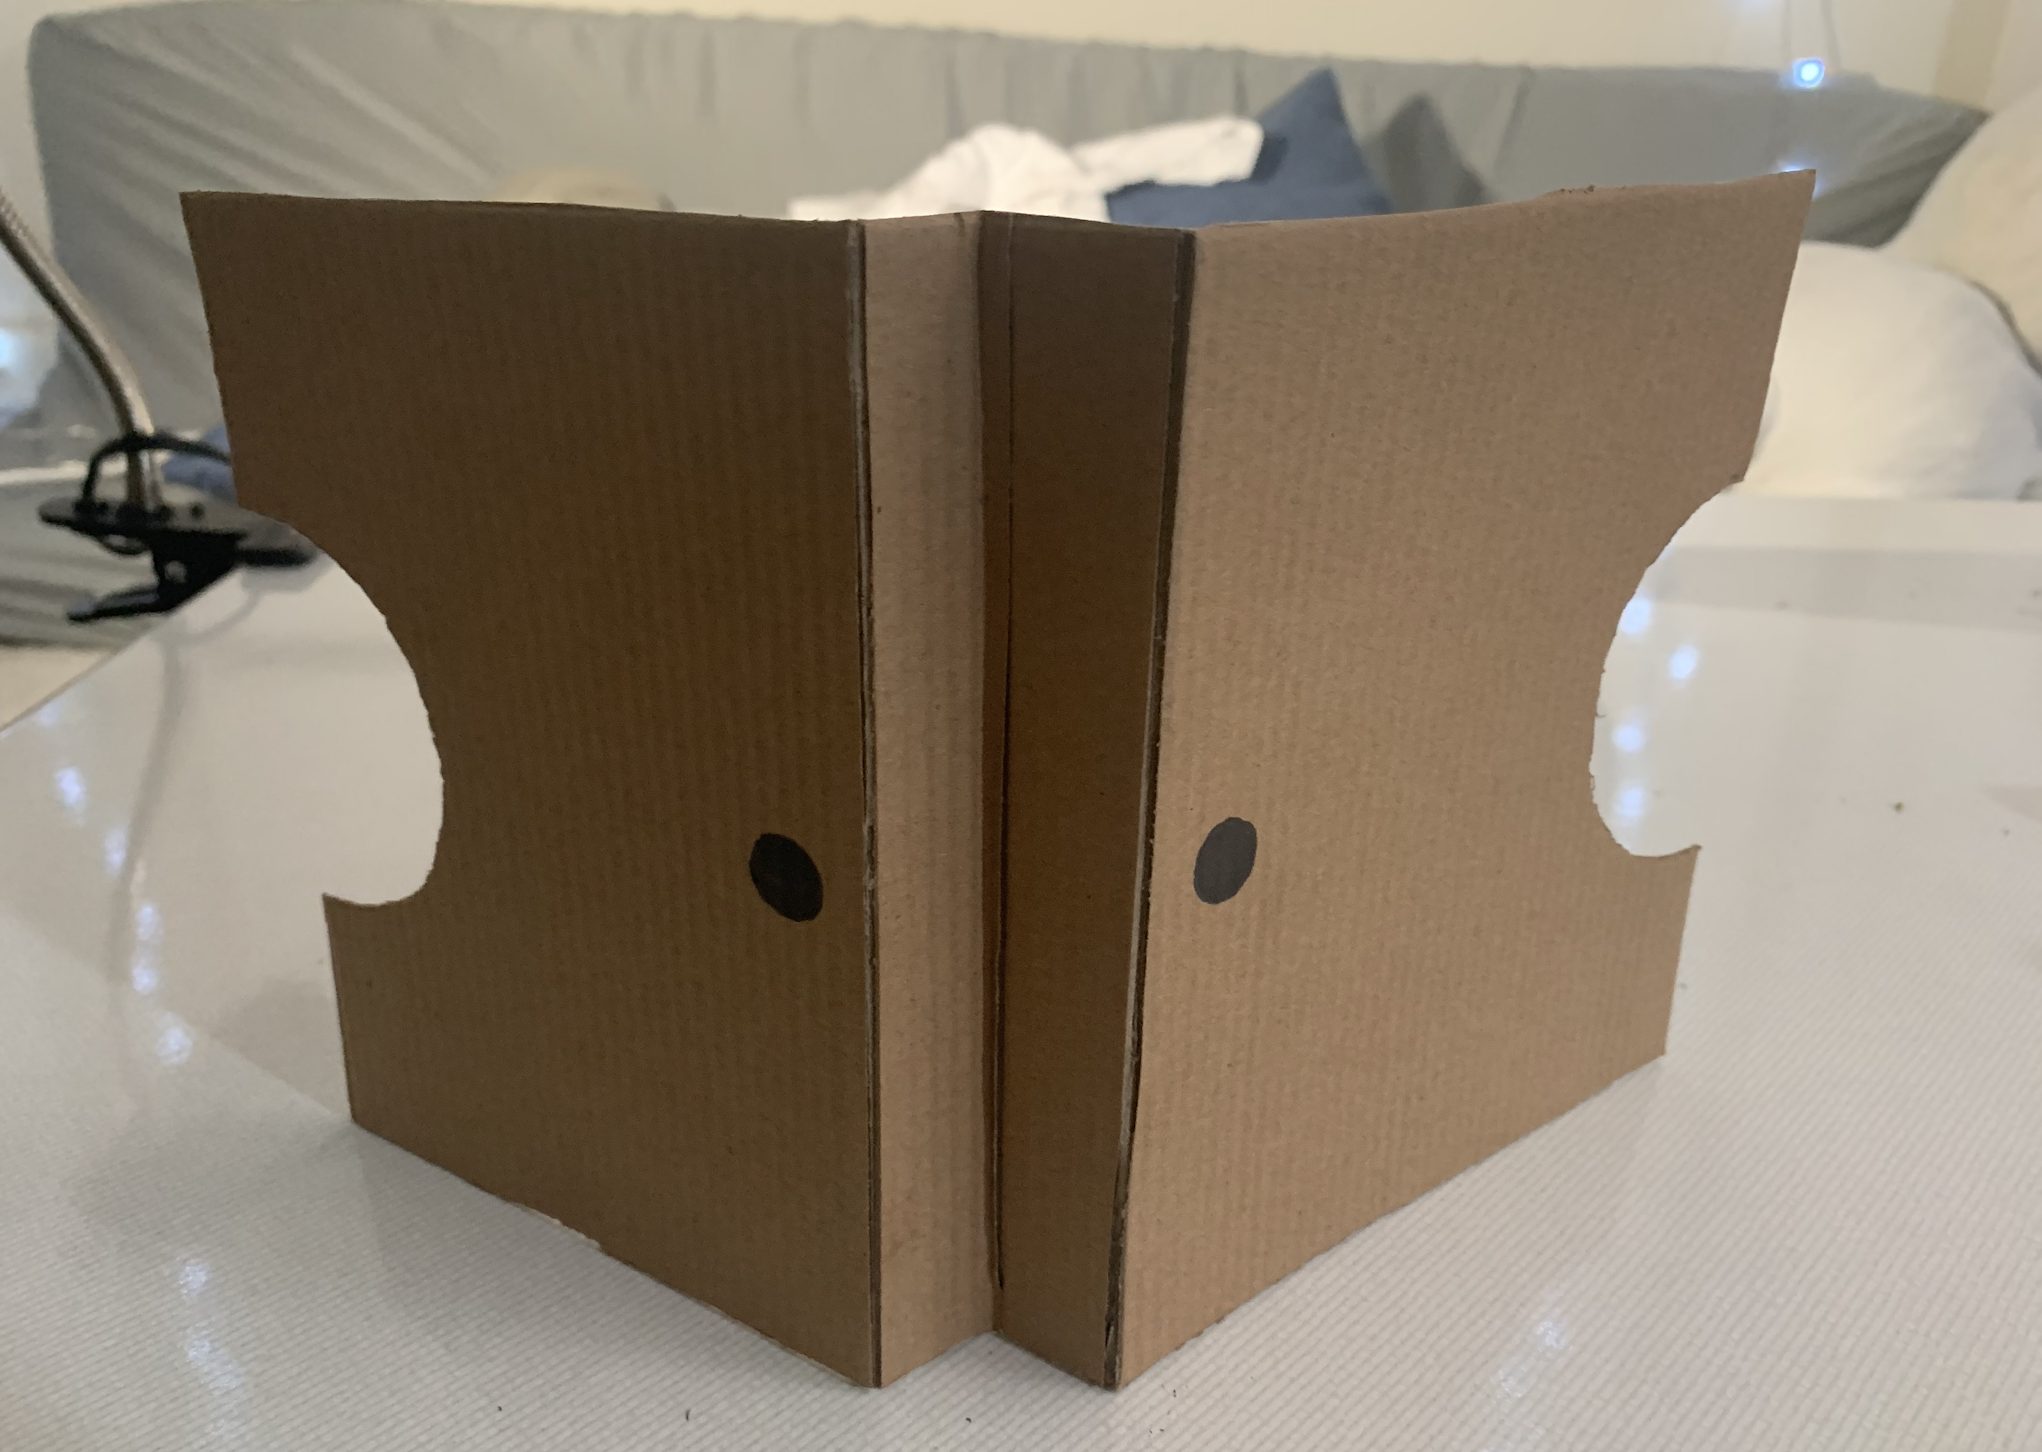
Here is the prototype standing up!
PROTOTYPE TESTING
The user testers that I asked was a former student of the class who I live near. It was helpful to work with her and get her feedback because she comes from a Computer Science background while also having experienced this type of prototype process before. Her feedback was extremely insightful and allowed me to start thinking more deeply with my iterations. In addition, there were many obvious issues that I missed in regards to the constraints your client has. Before starting, the user was informed about Elaine’s constraints so that they are more aware and truly trying to interact with the devices in the perspective of Elaine. There were two parts to the testing in order to help answer our questions. The first part was letting the user on their own interact with the device without any information. The second part was giving more context on how to use the device. I purposely did this so that I could see if the device was intuitive and if there were any new assumption found.
As demonstrated below, the user is able to have the first type of device lying on the arms of their chair. This was purposeful in considering Elaine’s wheel chair.
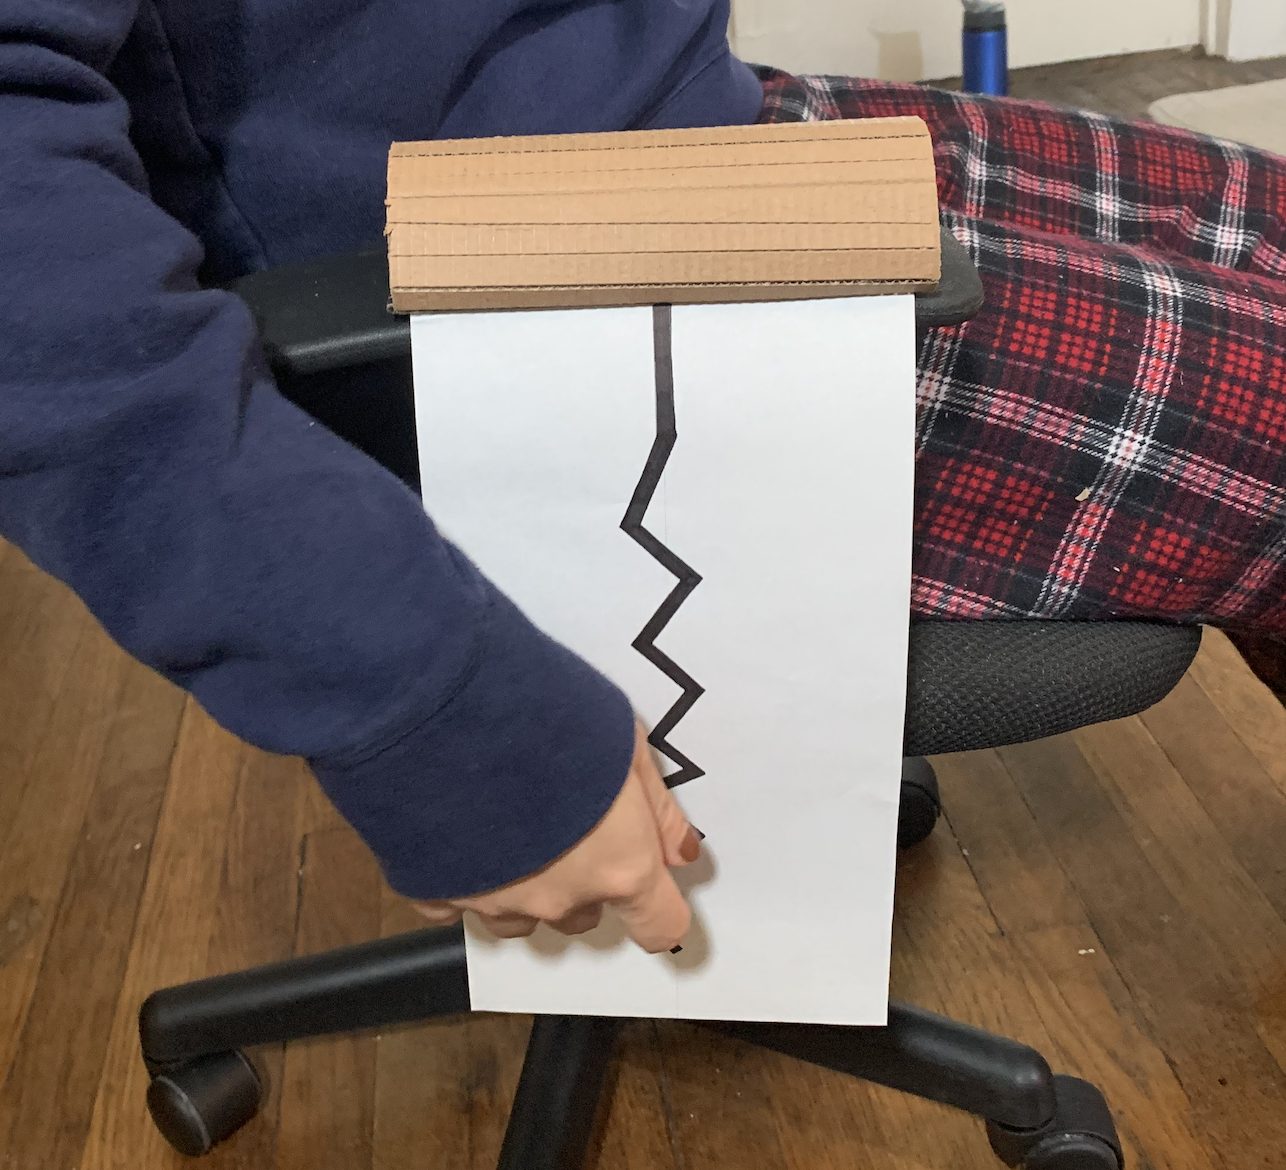
This is the user using the device with my rollable chair.
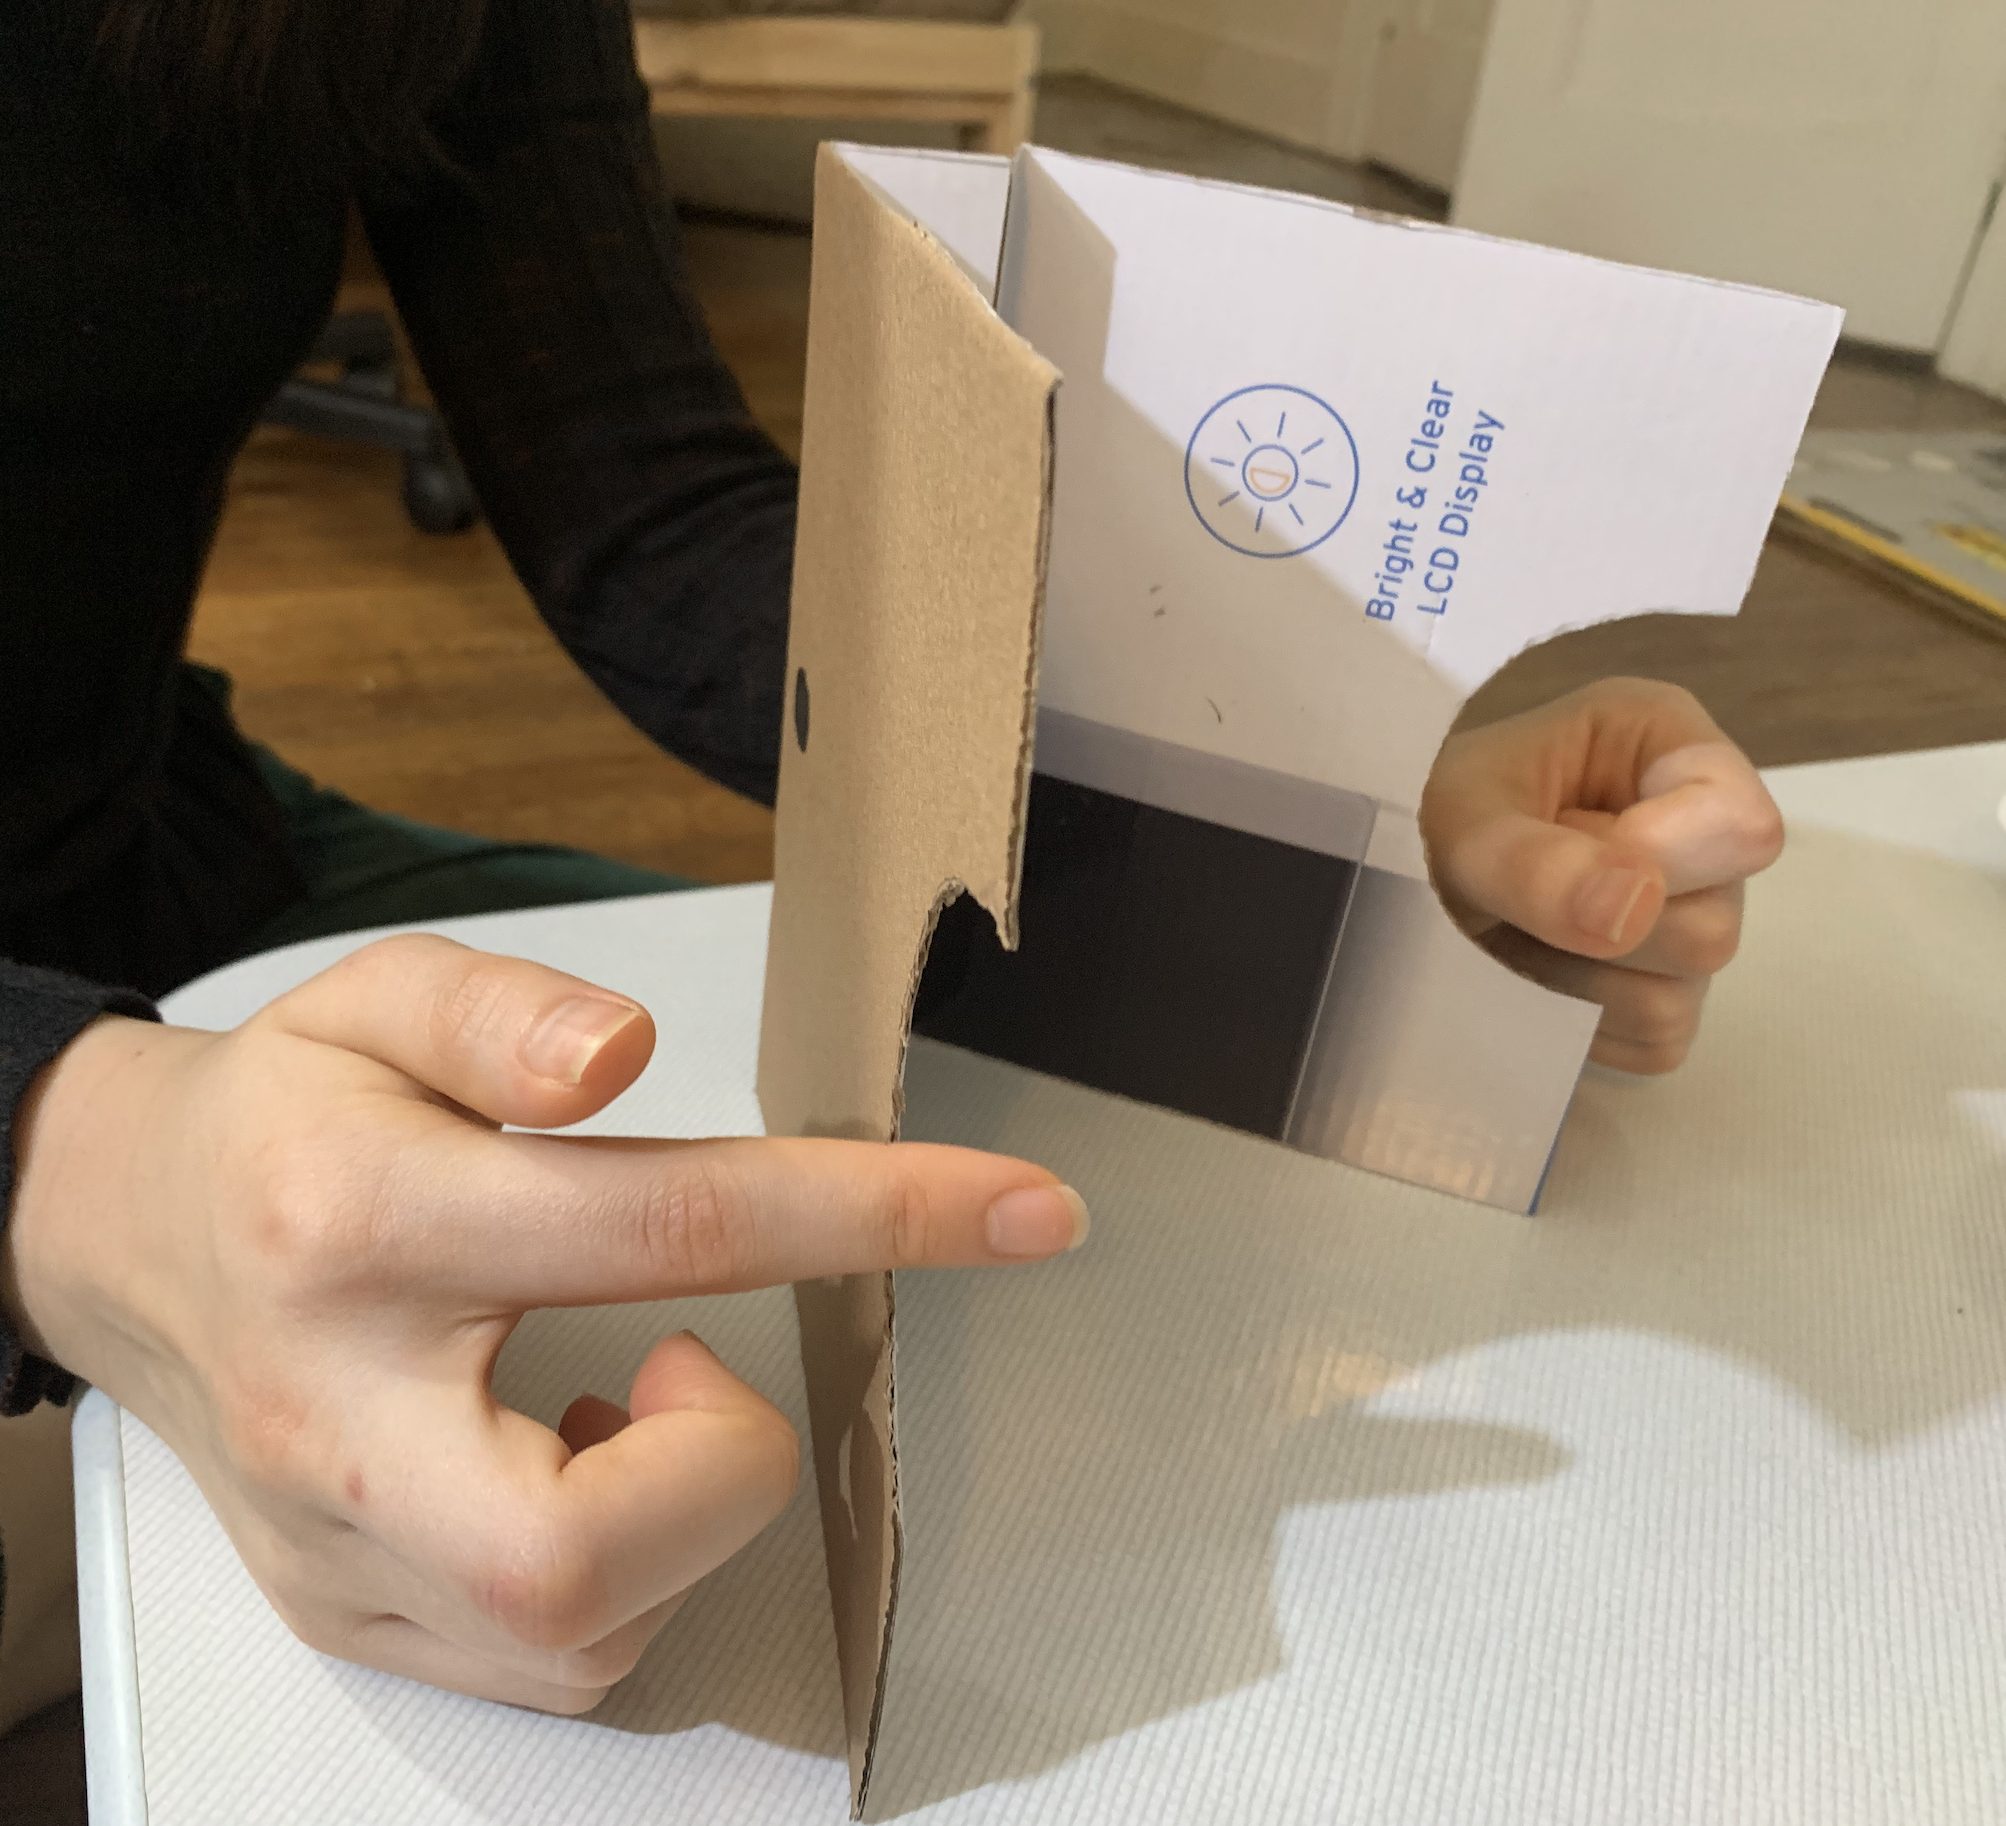
Here is the user trying the second device.
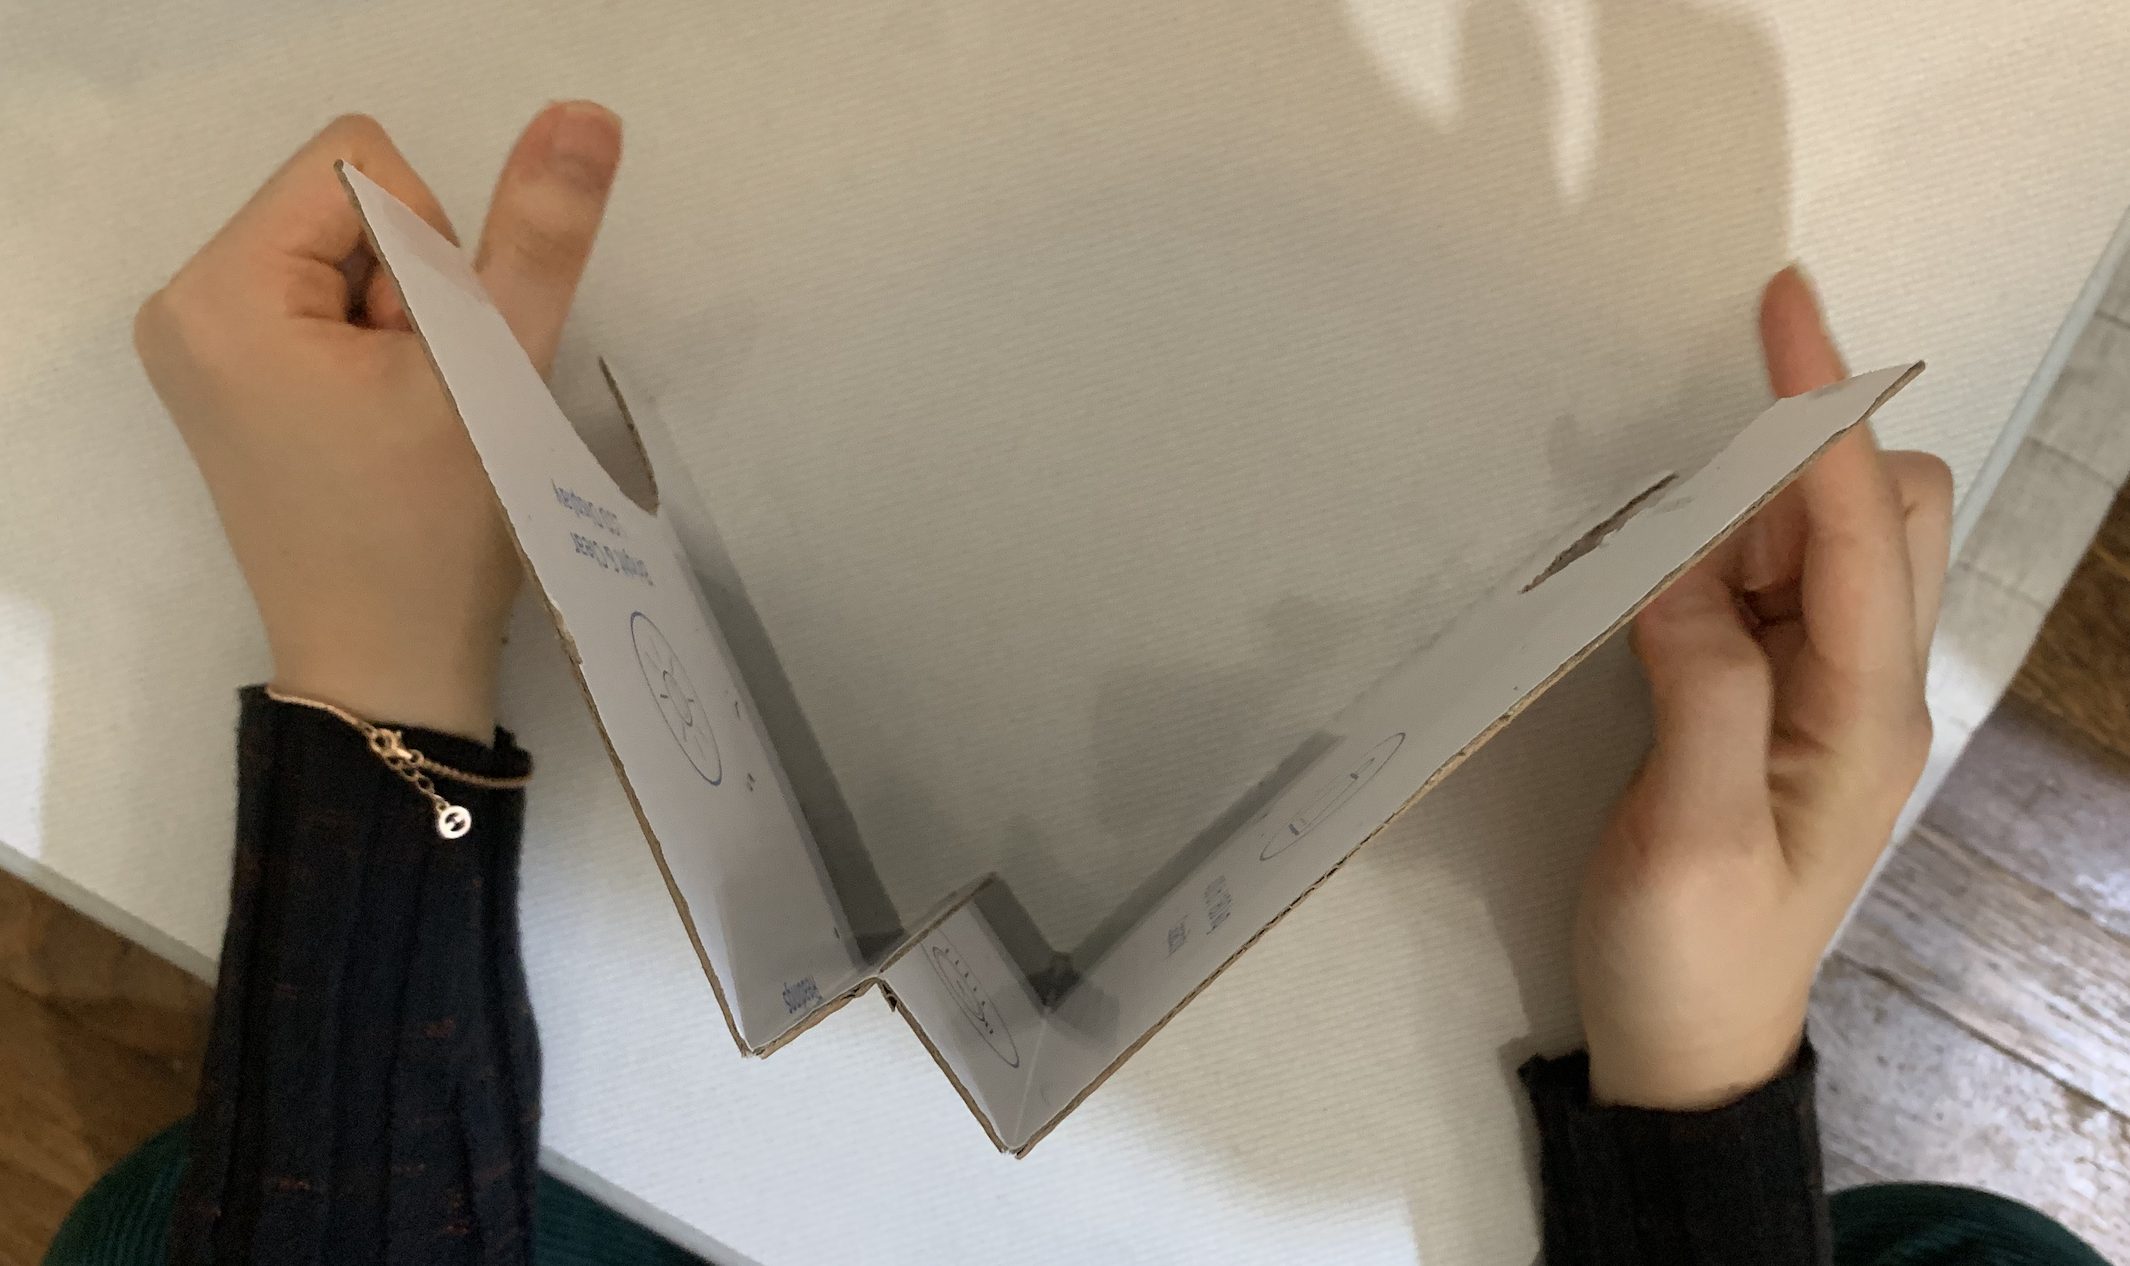
Here is the user trying the device from a birds eye view.
While user testing, I was able to take notes while also asking them to draw and write down their suggestions. The left is my notes and the right are the co-collaborative feedback from the user tester.
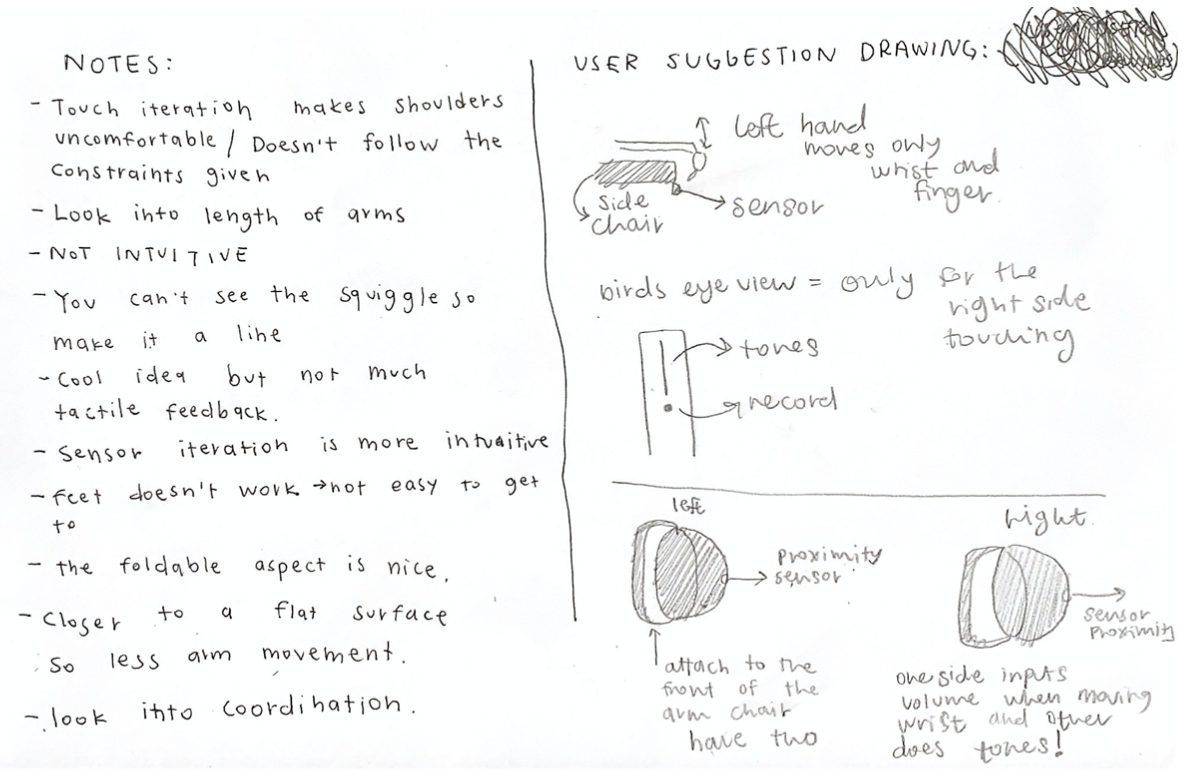
Here are the notes from the user testing.
CONCLUSION
The process was an extremely helpful learning experience as I had never worked with physical constraints in my design. In addition, coming from a communication design background, I do not know much about the product development and what is the most effective manner. I appreciate the challenges that I faced in the sense that not being able to physically work with the team and Elaine made me use my own assumtpions whether that ties with the visual or mechanical interactions.
The feedback that I got from the user testing was that the design was not as intuitive especially the touch based design. I had not thought about how the touch components are on the side of the chair, making it difficult for users to see where they are touching. They suggested moving the touch based element onto the arm rest. On the other hand, they thought that the sensor design was much more effective in the sense that the constraints work better with it.
After the presentation, we were able to talk with Elaine. It was extremely helpful to talk with her and get her input. She said that the touch base element is okay to have for the input method, but having a sensor is better for her. Her left hand works better with the manipulation of volume as it does not require much finger movement. She also enjoyed how the first design iteration was split into two inputs so that she is able to play around more with the instrument manipulation. She suggested that it is better to have the device on her arm rests but put an emphasis on not having the sensors go to the midline as she does not have the flexibility with extension. Having a plan on the arm rest is the best option for her so that she does not have to move her shoulders and arm too much while giving her arm a platform to be used as a pivot.
Based on the feedback I received, for our final device, I have a better understanding of how to move forward. I plan on choosing to incorporate Elaine’s feedback, user testers feedback, and the ergonomic exploration and findings that Connor did together to create the most effective experience.
S O F T W A R E
One of the doubts we had as a team was whether the MIDI(Musical Instrument Digital Interface) would work with the Arduino. Since it is not an inbuilt software, we were concerned about whether the connection would work and if yes, how easy and straightforward would the connection be? Another concern was whether the MIDI synthesizer would produce a sound that resembles a musical instrument enough? Or whether we needed to find a new approach. In order to answer these questions, we set up the entire MIDI connection, downloaded the appropriate software and synthesizer. To mimic an analog input, we connected a potentiometer to Arduino and by varying the value of the potentiometer, we got different pitched to be played through the synthesizer.
Images of the prototype
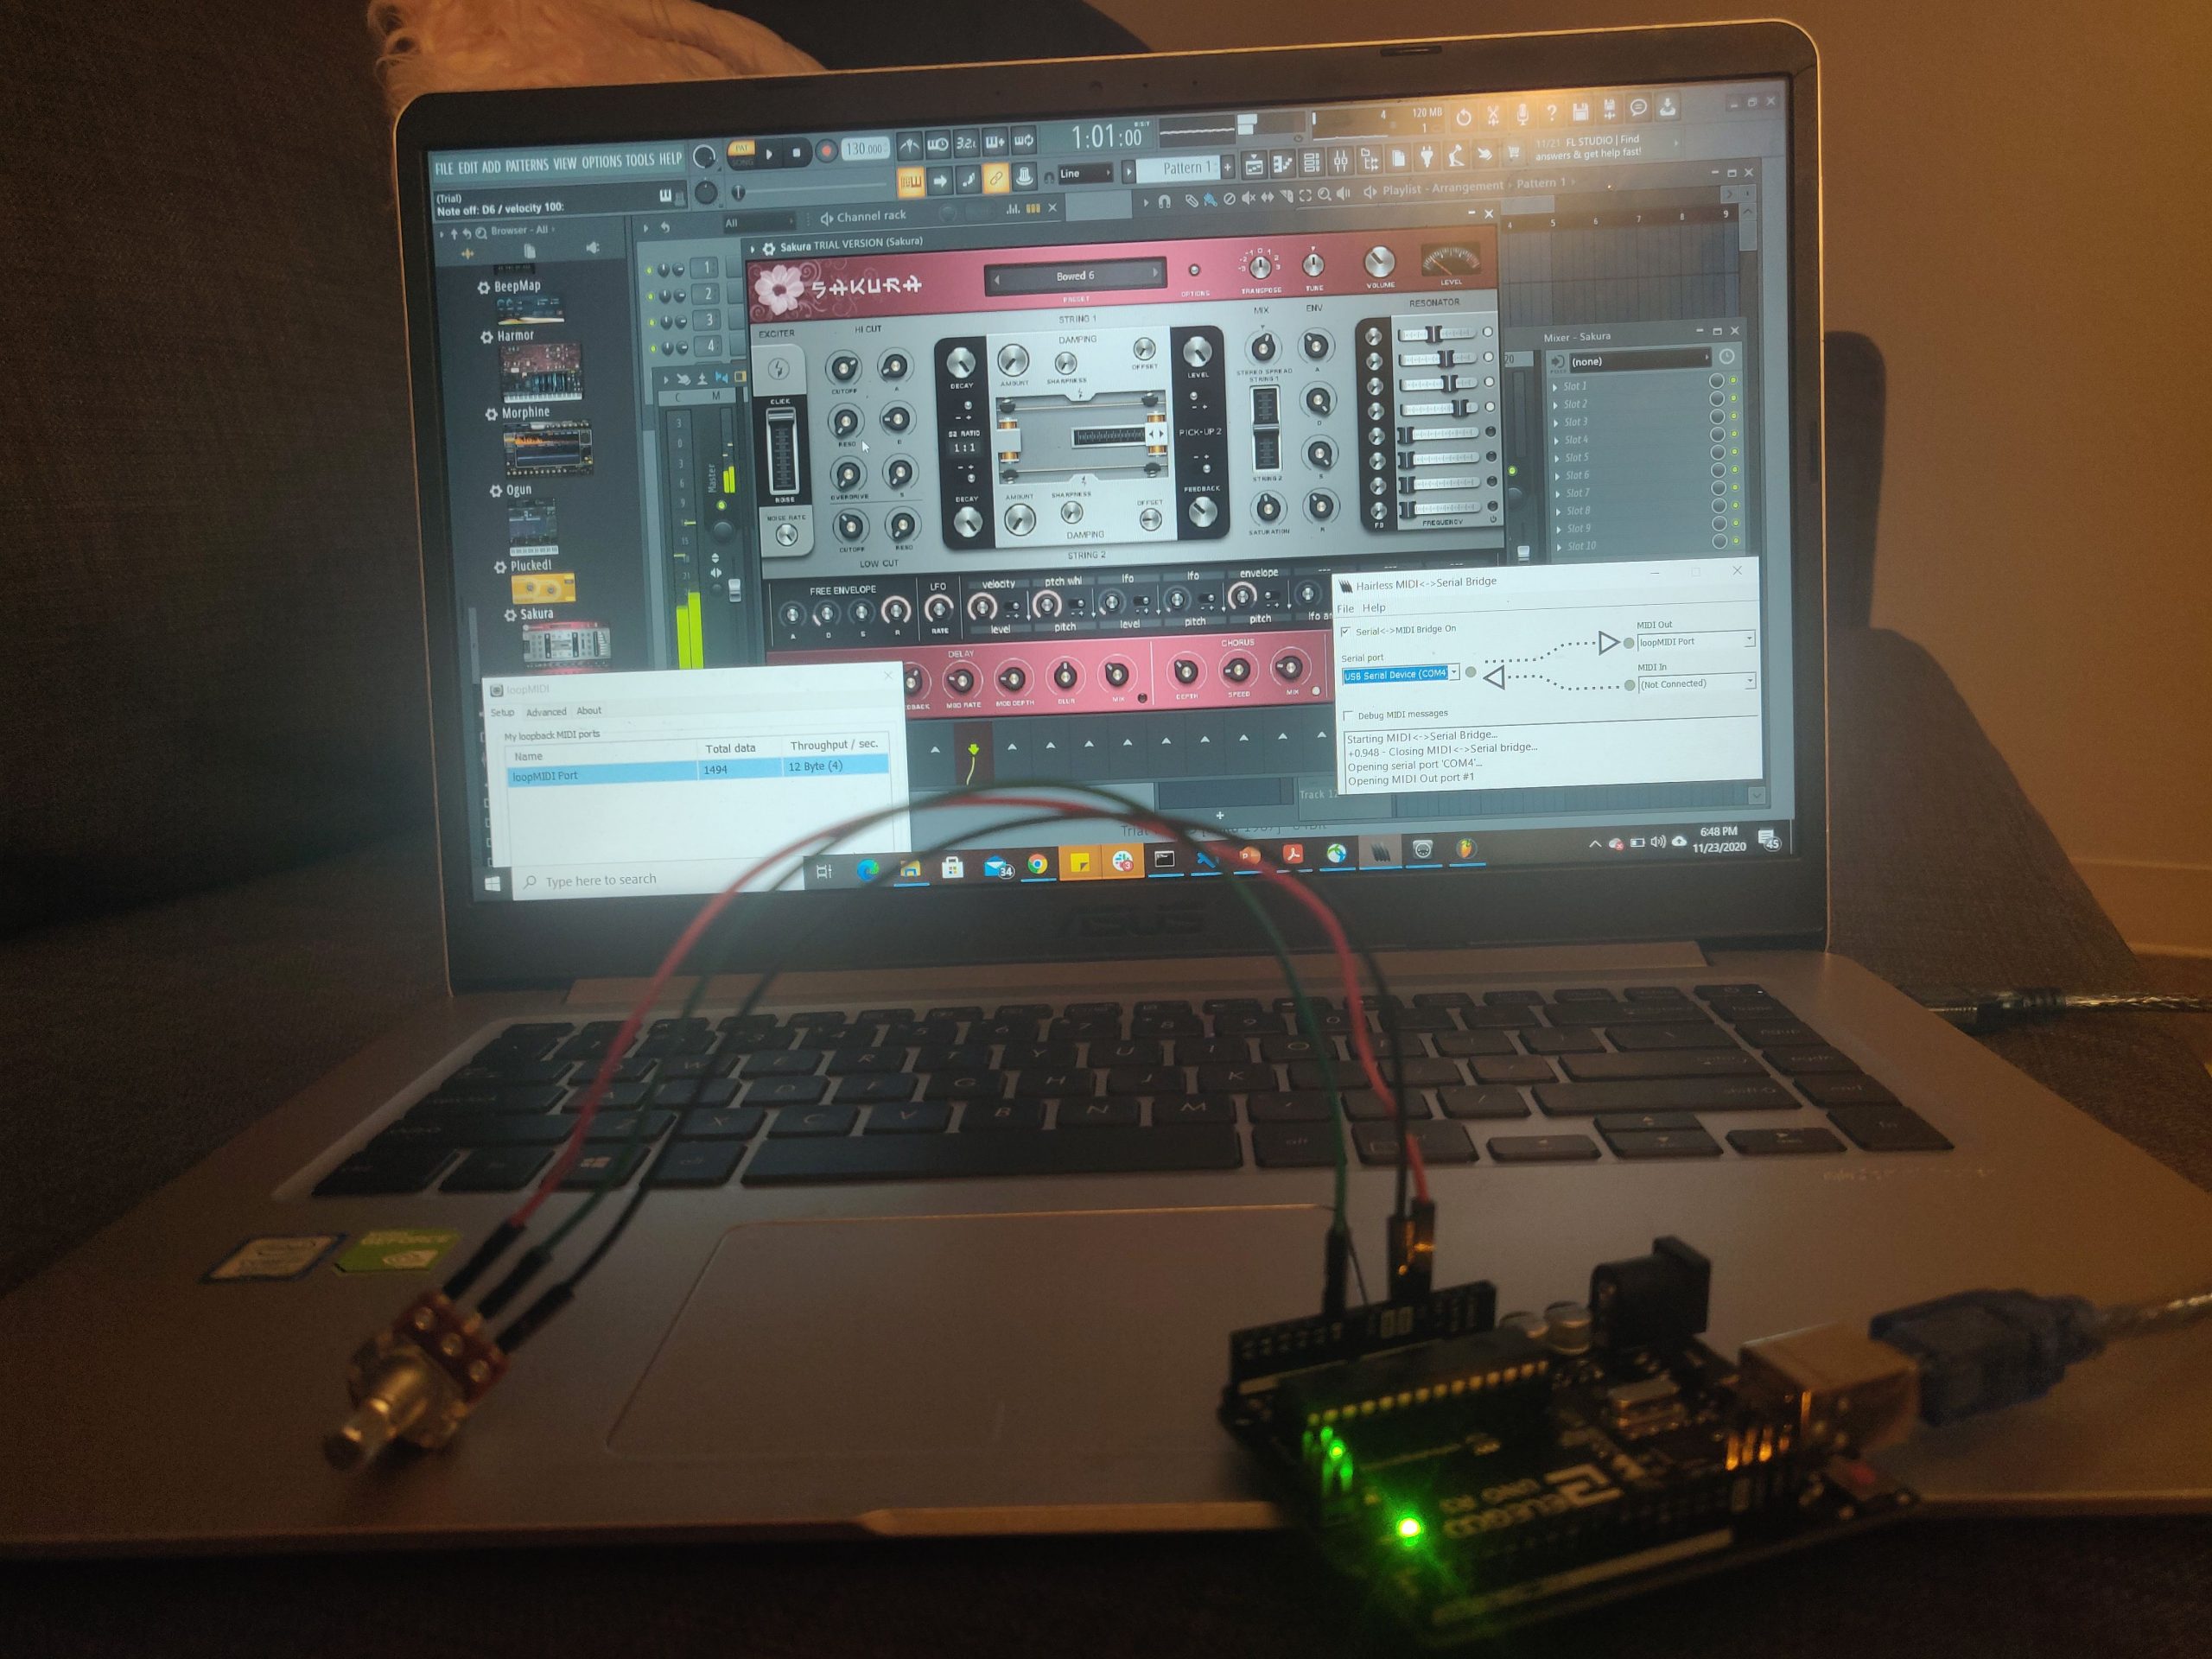
Overall prototype
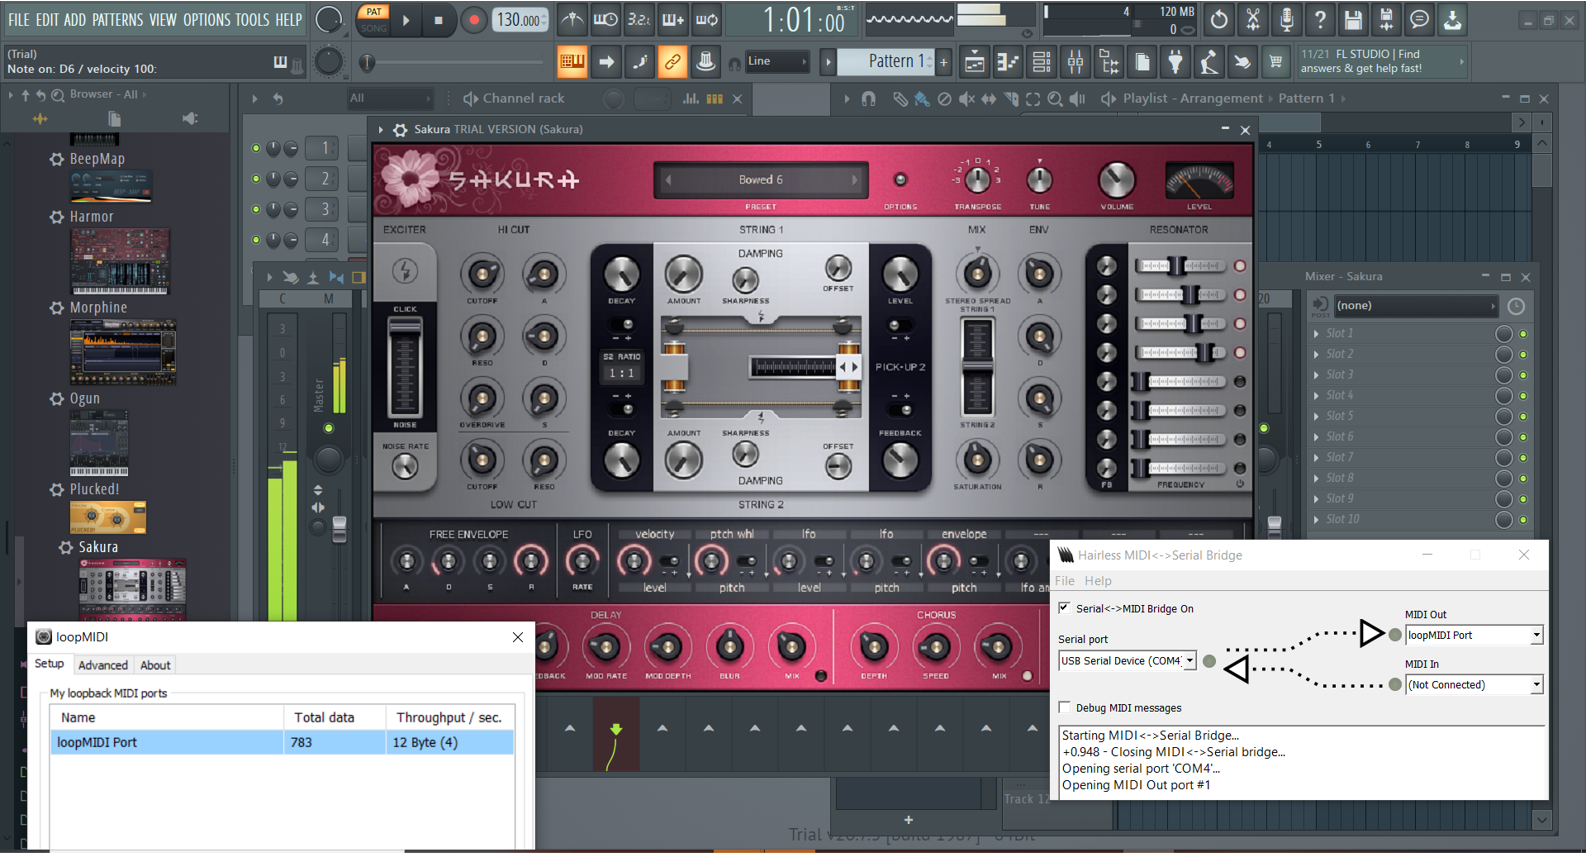
Software – music synthesizer
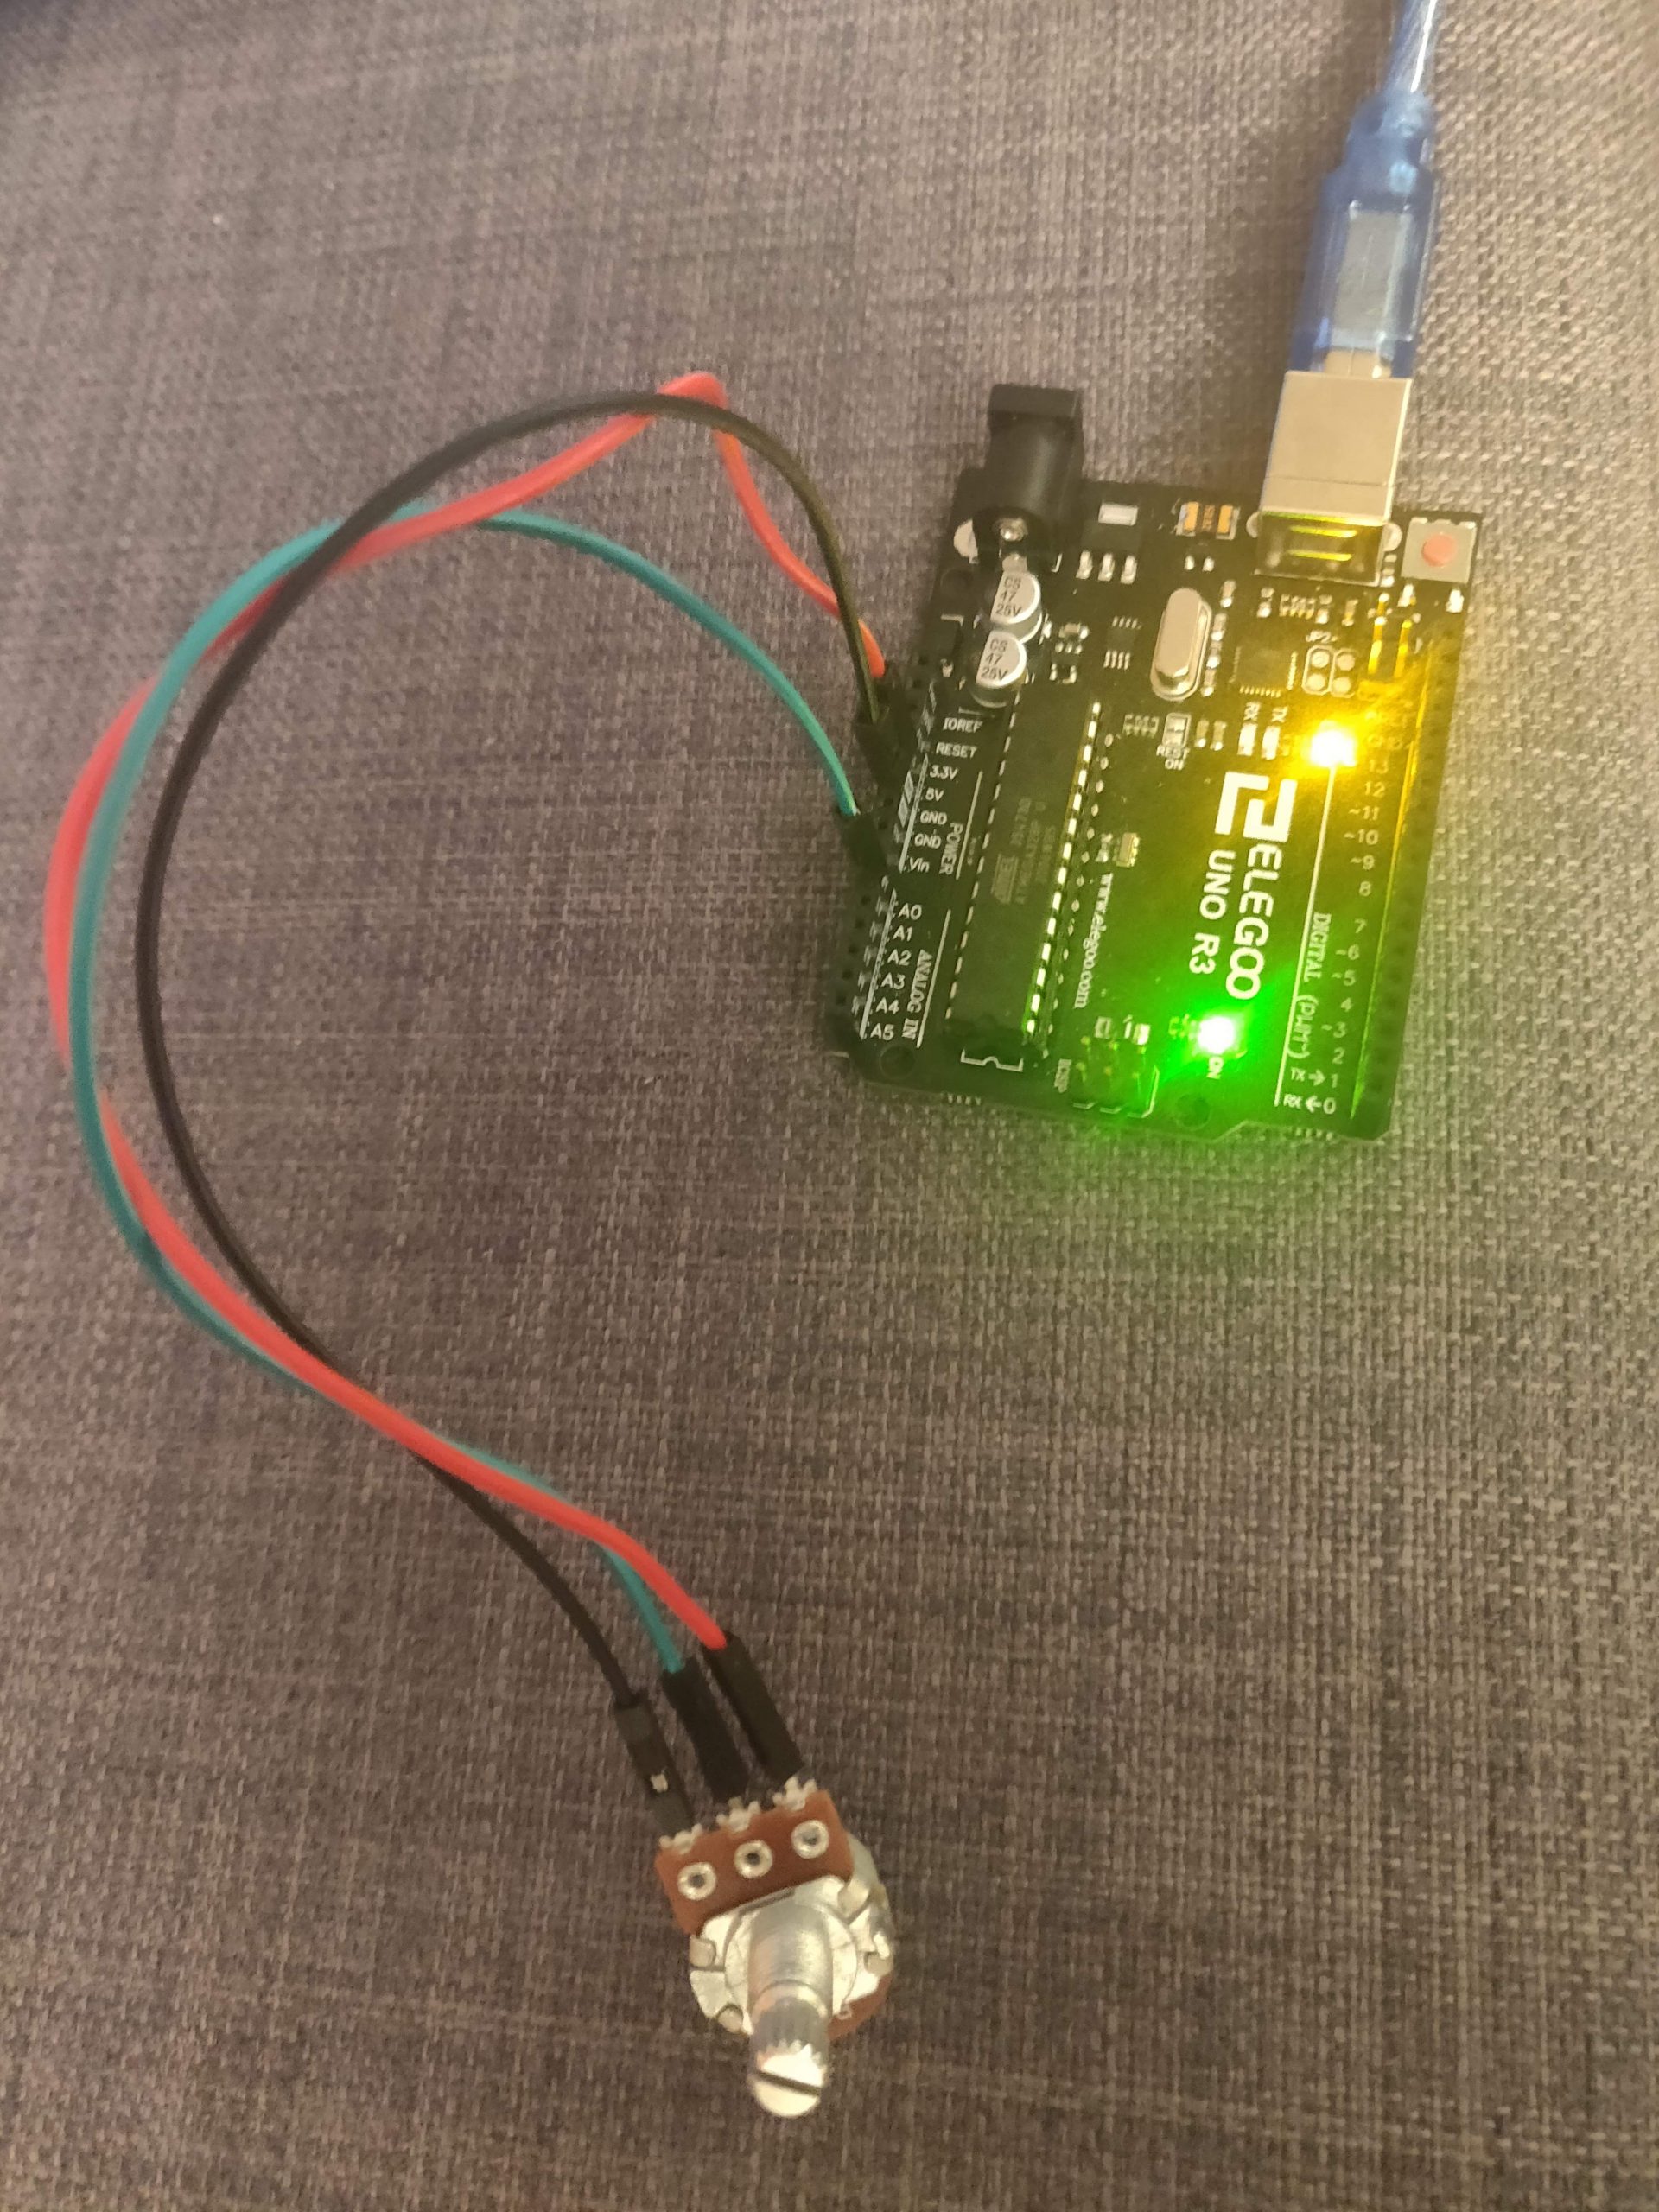
Hardware – potentiometer to simulate analog input
Video of the prototype in action
Images of in-person prototype testing
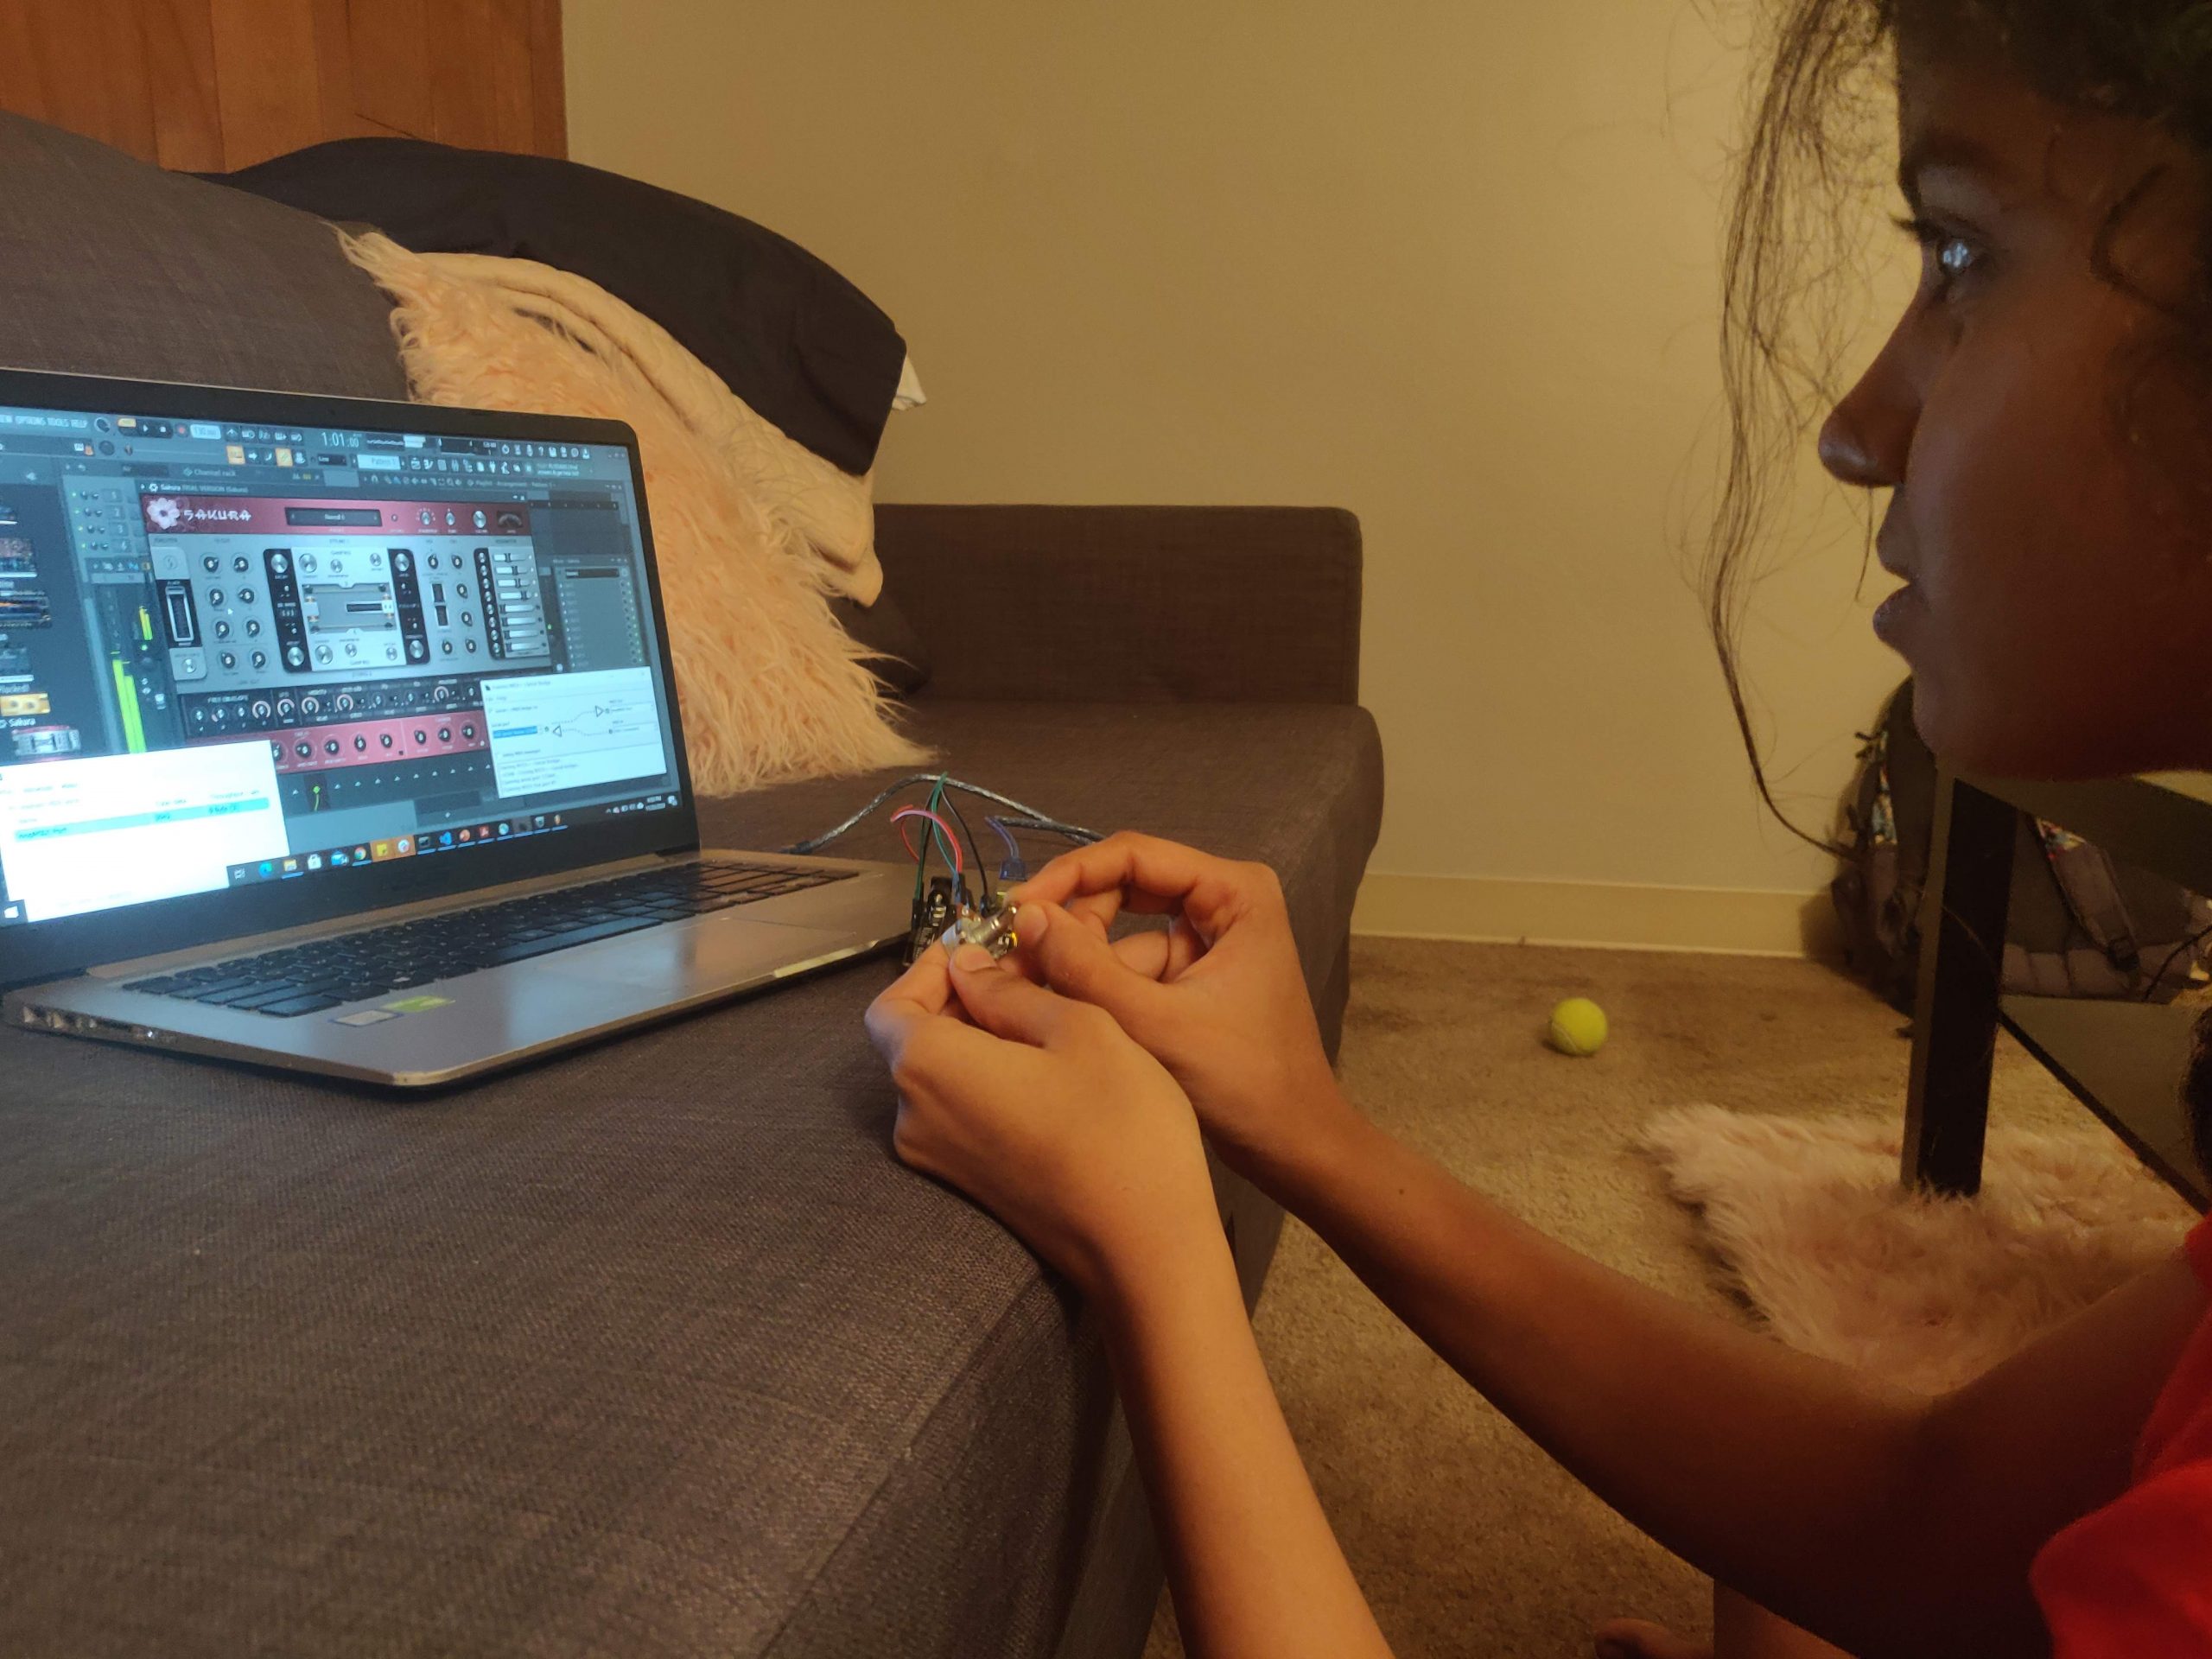
My sister testing the prototype
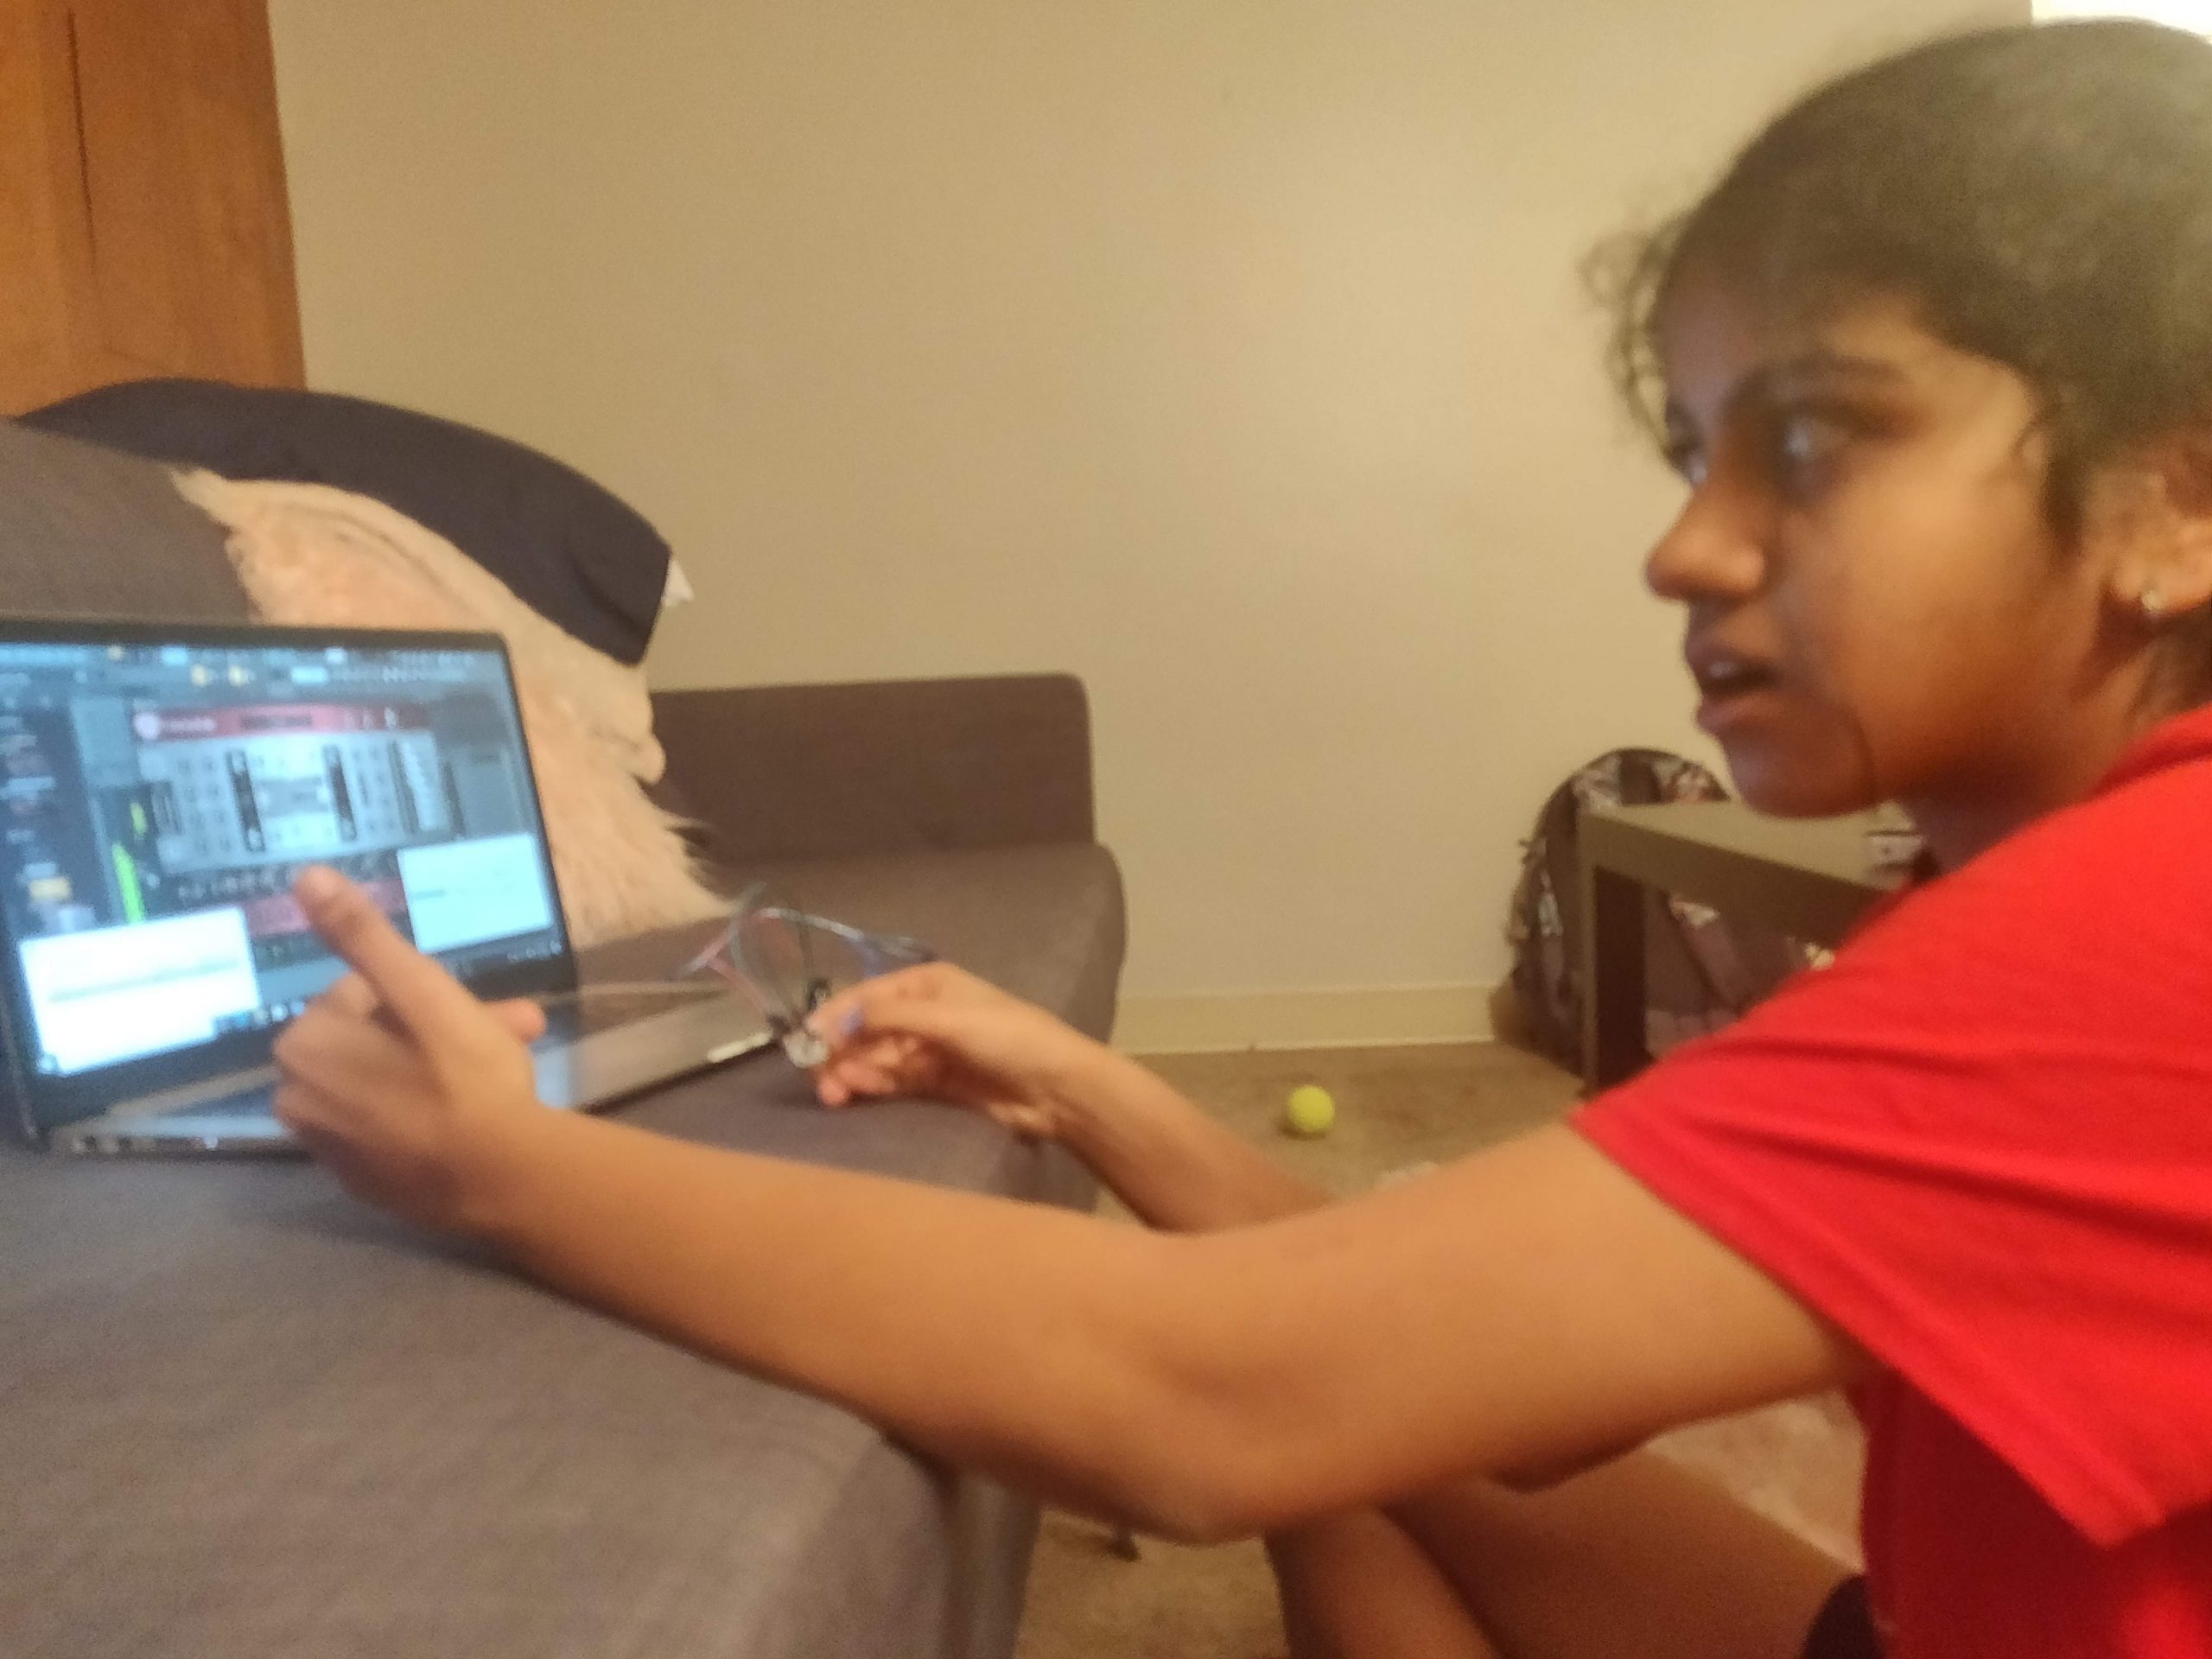
Getting feedback and suggestions on the prototype
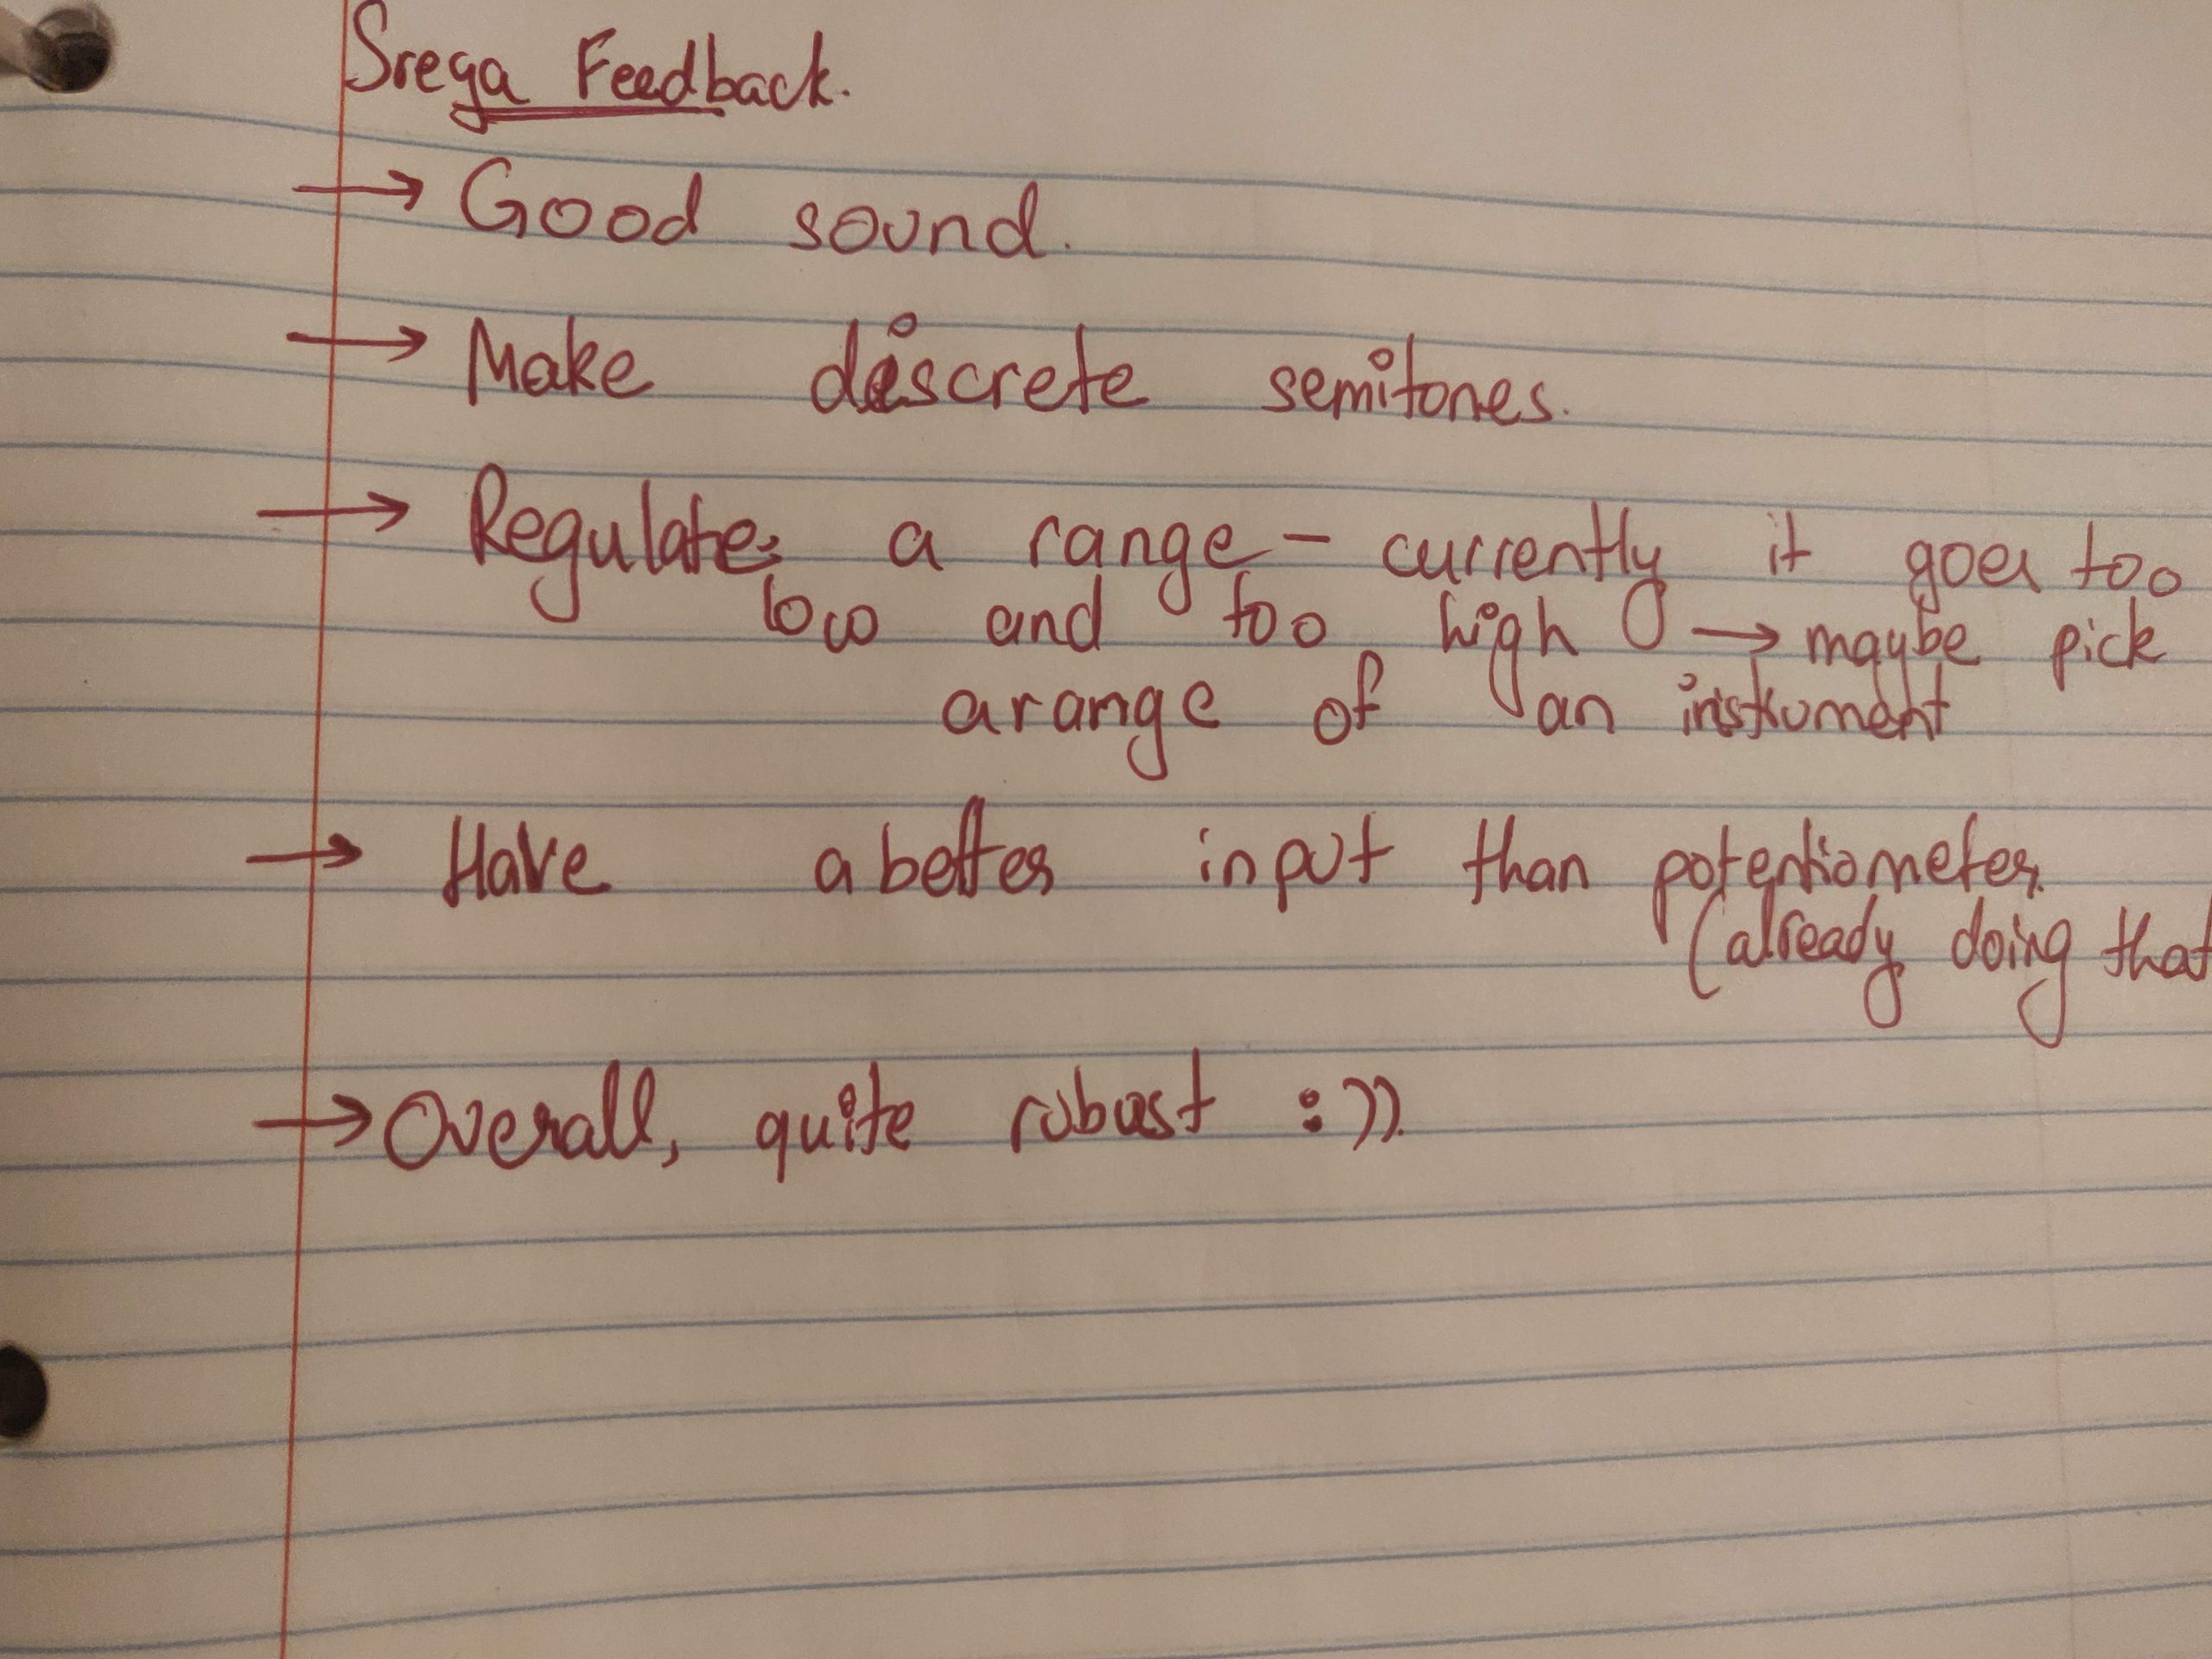
Notes taken from the testing
CONCLUSION
From my in-person prototype demo, I got very constructive and helpful feedback. This project was shown to my sister and she seemed quite impressed by the quality of sound being produced by simply rotating a small knob on the potentiometer. Overall, it did answer my question for this prototype, yes the MIDI connection works fine with the Arduino and the sound produced is very similar to that of a real instrument. My sister played around with the prototype quite a bit and came back to me with a few suggestions and modifications. One of the things she said was that I was not restricting the range of notes and so when I am trying to play a very low frequency (e.g. 10Hz), the sound is very hoarse and unpleasant. She thus asked me to restrict the frequency range of the instrument. She also suggested that I picked one instrument and research its exact range and notes and make the instrument mimic that. Another suggestion, which I would definitely love to implement, but would give a lower priority, is creating discrete notes rather than a continuous range of frequencies. This particular synthesizer already only has limited notes it can play, so it is discrete, however, she suggested I make them discrete when I pass the signal through the MIDI as it would give me control over which notes I want to let the instrument play.
While talking to Elaine about the project, she too was happy with what was done so far. In addition, however, she asked me to add a control to manipulate the volume of each note played. This is a task that is quite straightforward and doable and is a very good suggestion that will allow for more dynamic playing and makes the device more like a true musical instrument. In addition, she also asked if there was a way to choose which instrument she plays, that is vary the instrument. This is definitely possible if she manipulates the software directly but dynamically doing it through the device will be quite challenging but I hope it is possible as it a great feature to add in to the project.
Moving Forward:
Through this process, our team was able to learn a lot about what our main goals of our project is. Before we had an idea, but now, we have a strong and detailed understanding. In addition, we were able to discover the strengths and weaknesses of our prototypes to help us move forward. We used the method of “dividing and conquering” for the prototyping research was effective in allowing us to scope/answer a wider range of questions and gaps we had previously. In the end, we were able to find that ergonomic prototyping not only better mapped Elaine’s range of motion, but also pinned thresholds of comfort firsthand. The software was a lot less straightforward than expected. In addition, designing with constraints was much more difficult than expected! There would be purposeful design decisions, but the constraints weren’t fully thought out, causing issues during the user tests.
After the prototype presentations, we were able to talk with Elaine and get her feedback. It was extremely helpful because there were some aspects she really enjoyed and wanted us to continue to use while things she does not want us to have. Elaine talked about how she would love to have the device change instruments because of her past experiences of having a very limited range in band during school. In addition, having access to discreet or continuous change. As we continue to further iterate, we plan on continuing to work with Elaine to finish our project. It is extremely helpful that she has a strong background in this field so that if we have an obstacle, we are able to reach out to her and receive help.
Overall, we are able to look into new questions that were found through this exploration. Now we have three individual research directions, we are planning on using all the feedback we got to plan our next steps.
- Deciding on what type of type of interactions our device will focus on i.e touch, sensor, and mouse.
- Work on combining the software with the design prototype
- Final iteration of the prototype based on feedback
- User test with our client to get final feedback
- Musical Device is finished and reflecting on the process and potential next steps