This project consisted of creating a “talking scale” for our client, Justin. This project in particular featured building an assistive device for a client, building off our prior project of building an assistive device for ourselves. Here, we met with Justin, talking through his needs and desires, and were able to work collaboratively towards creating a product that could help him. For information about our process working with Justin, see our interview documentation.
What We Built
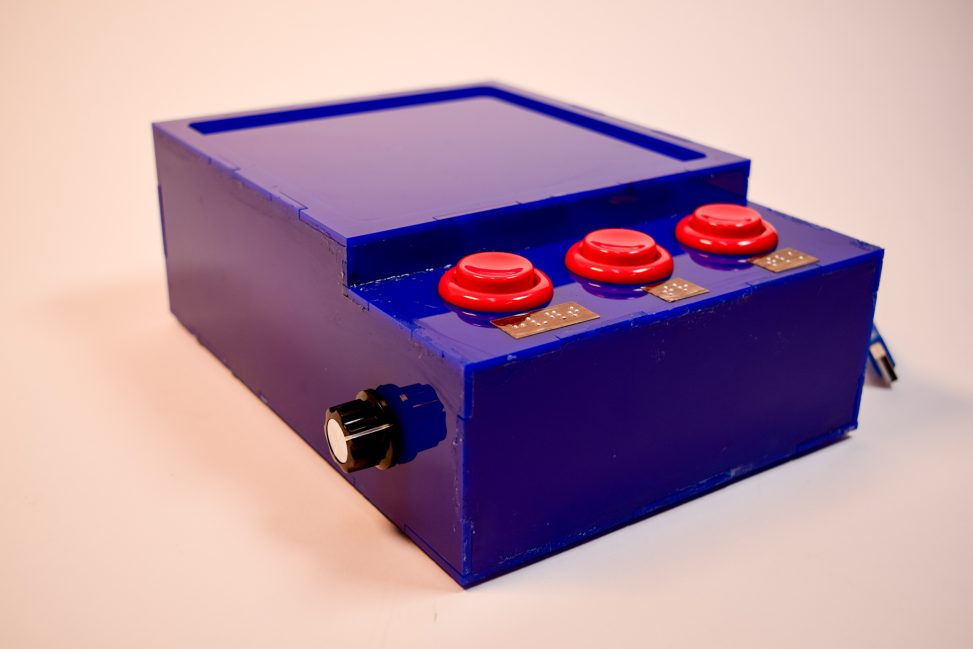
Our talking scale functions as a typical scale, able to measure how much an item placed on it weighs, with additional functionality that allows it to be accessible for a blind person. For example, each function that we have also has an audio cue. In addition, our buttons have printed braille labels that allow Justin to be able to read what each one does.

Overall view of the final product
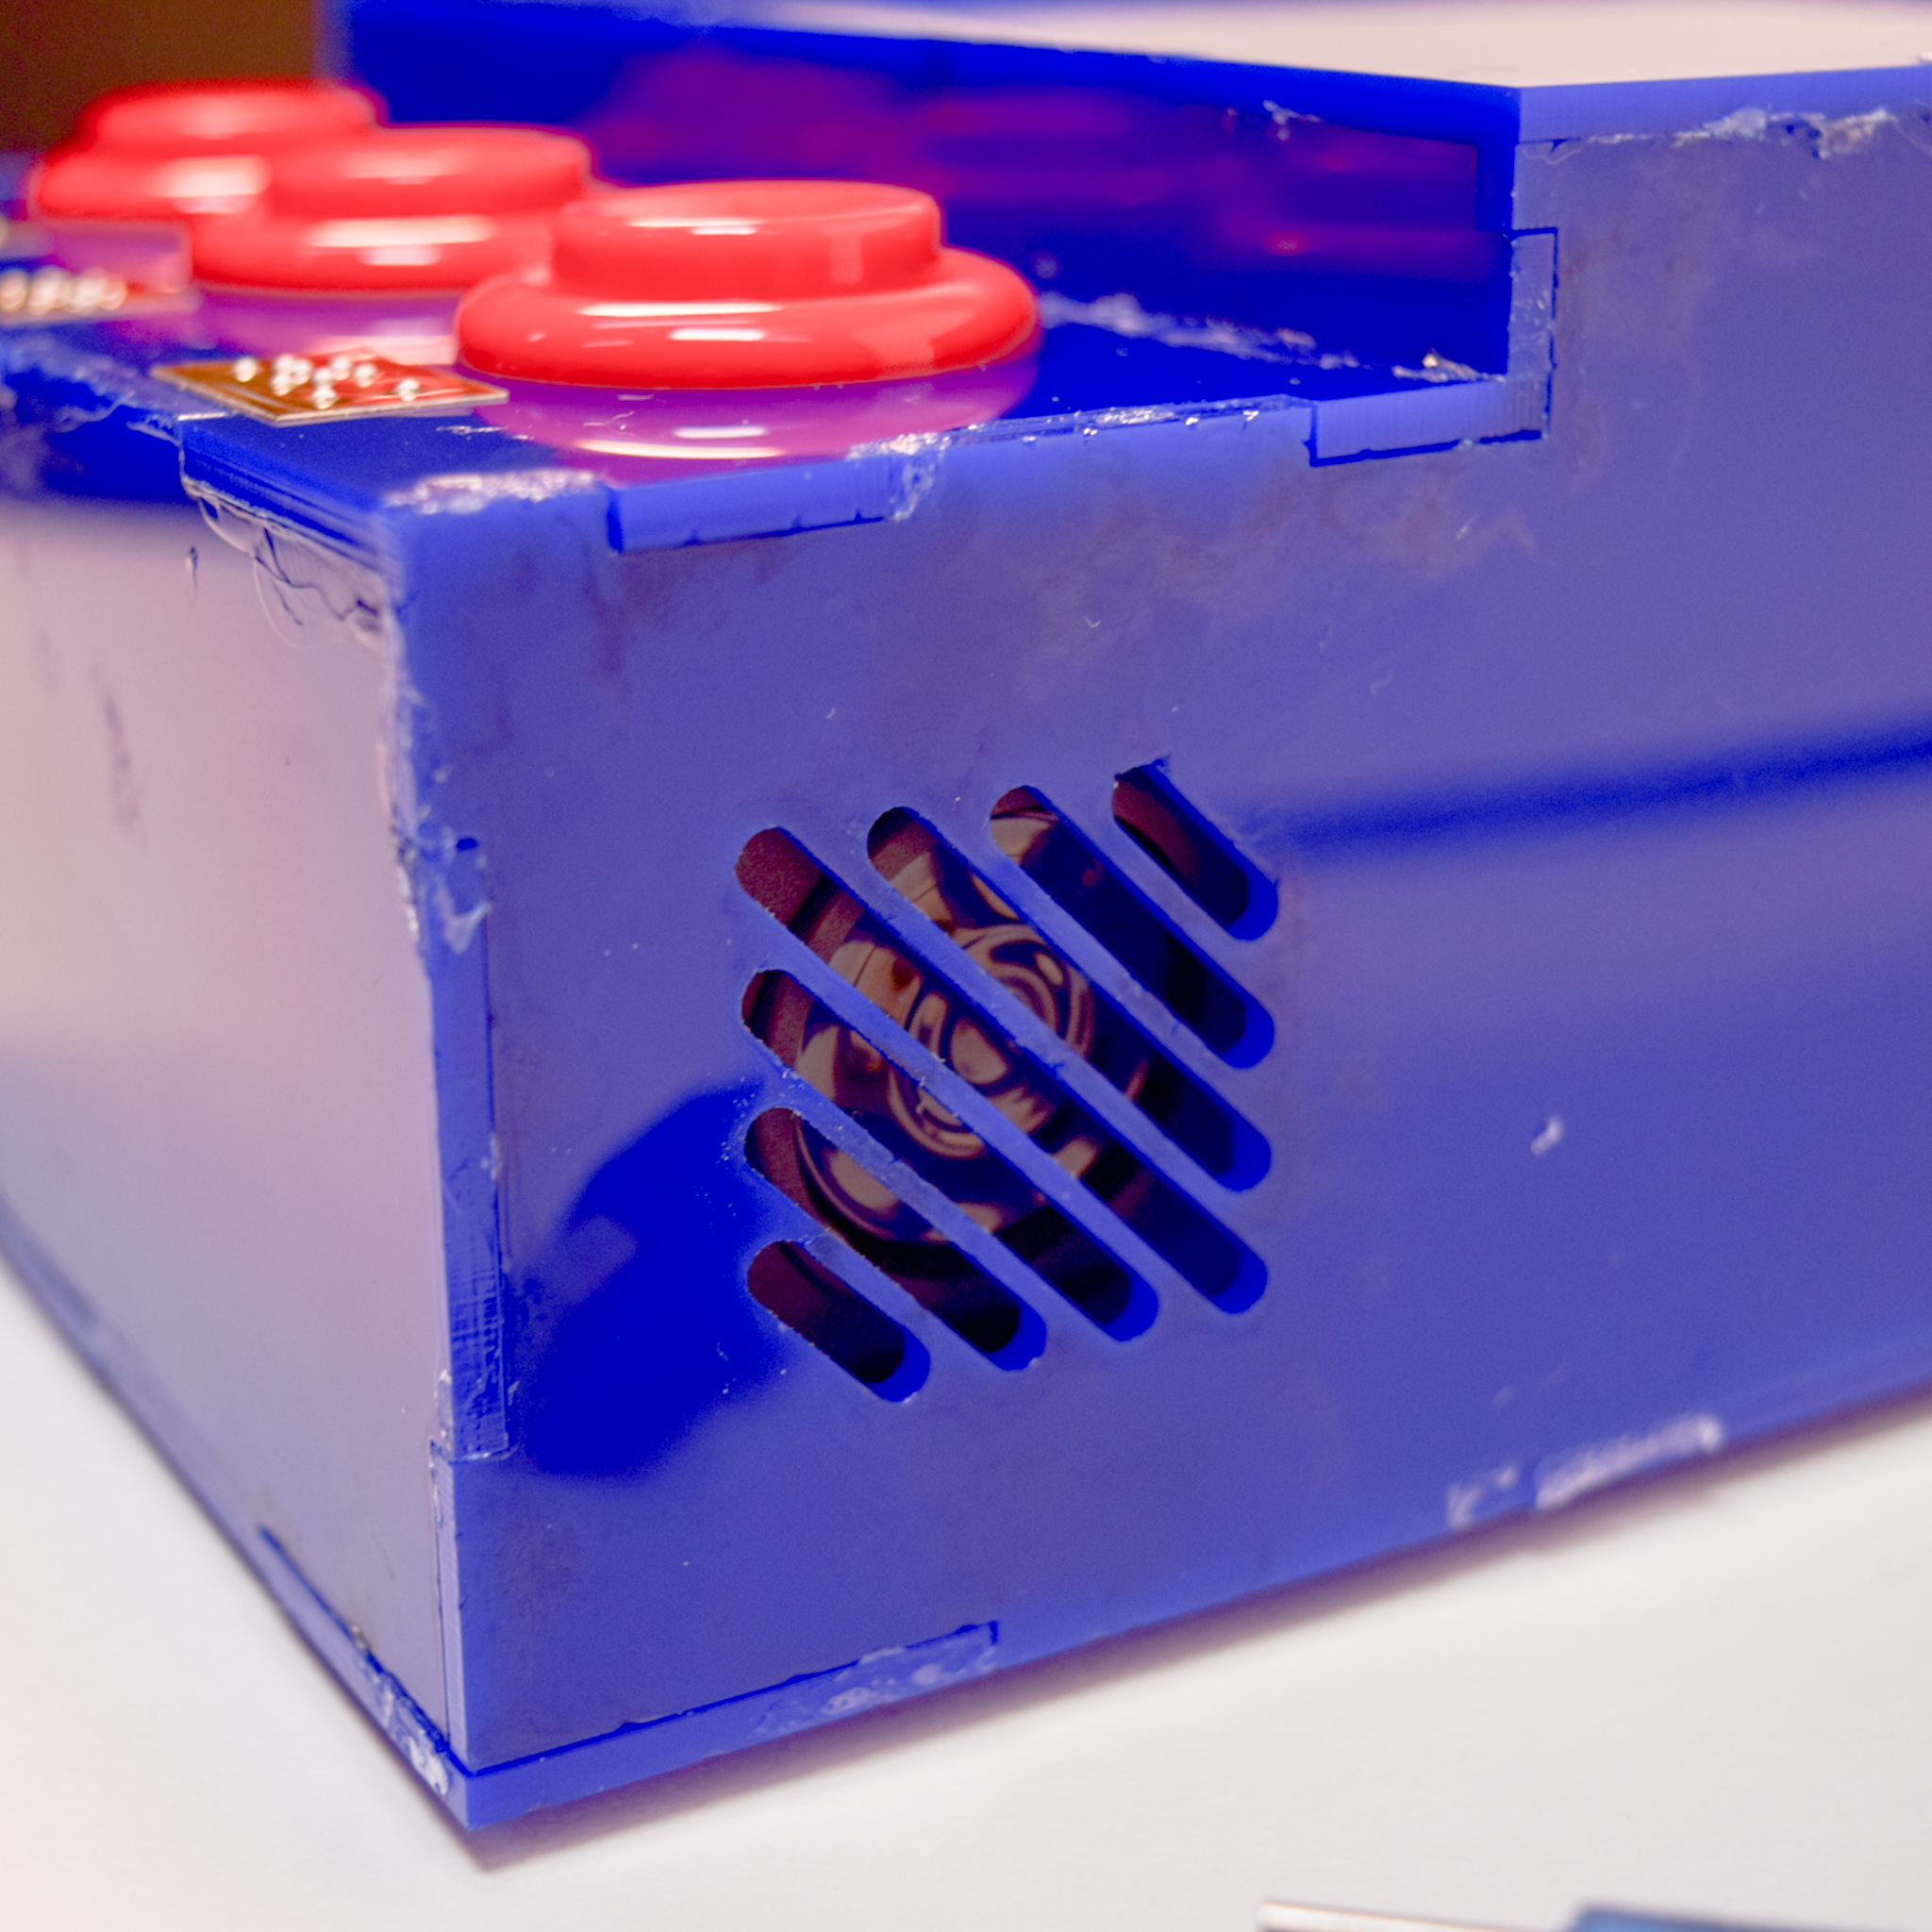
Grate for the speaker
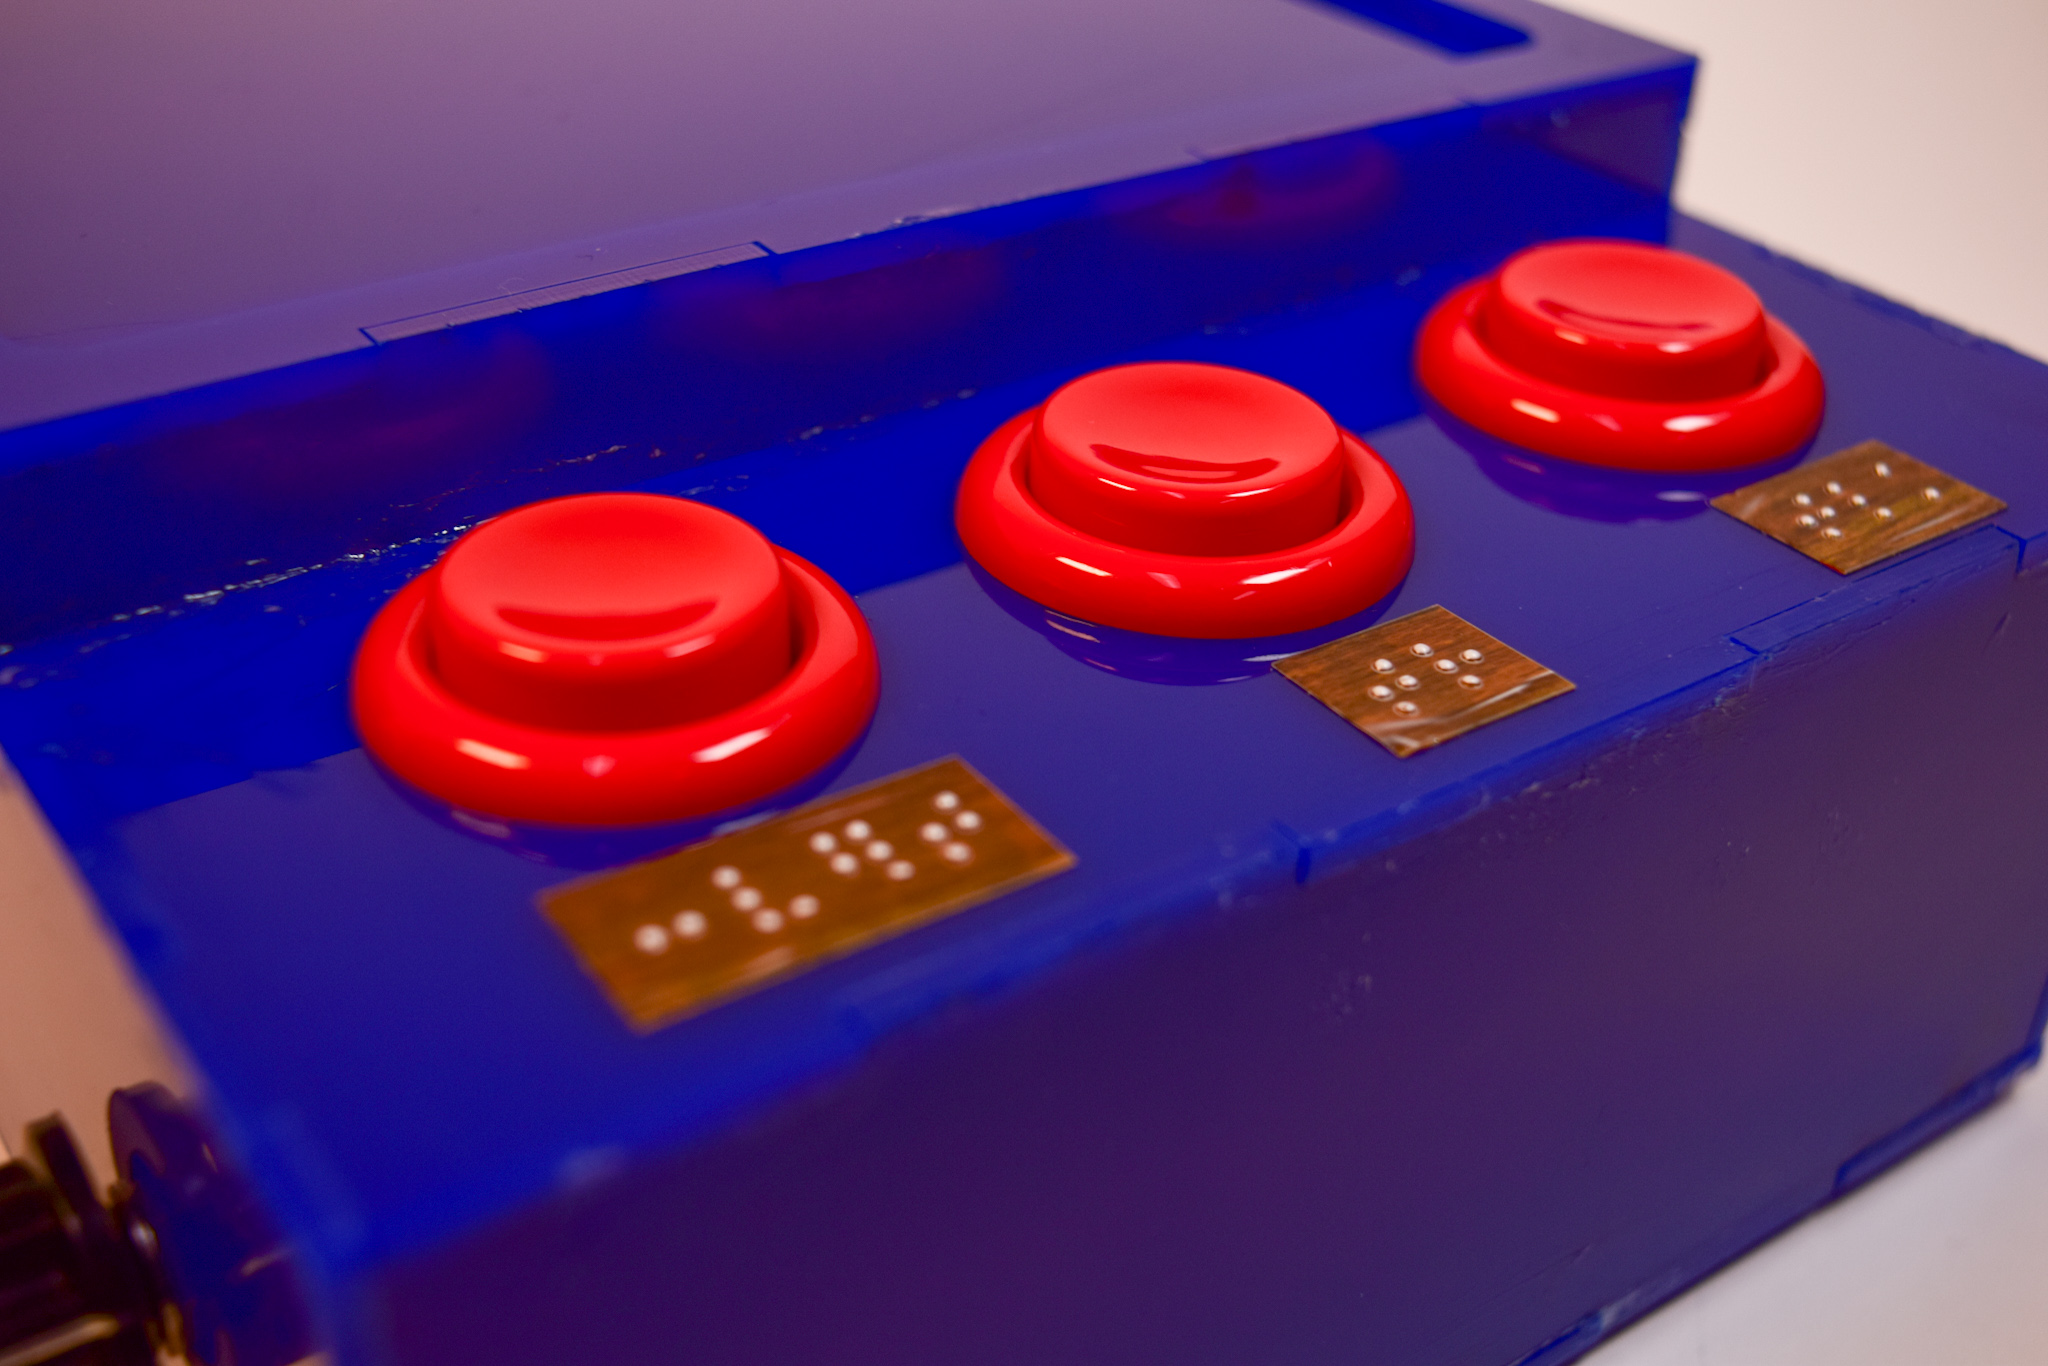
Buttons for unit change, tare, and speak functions
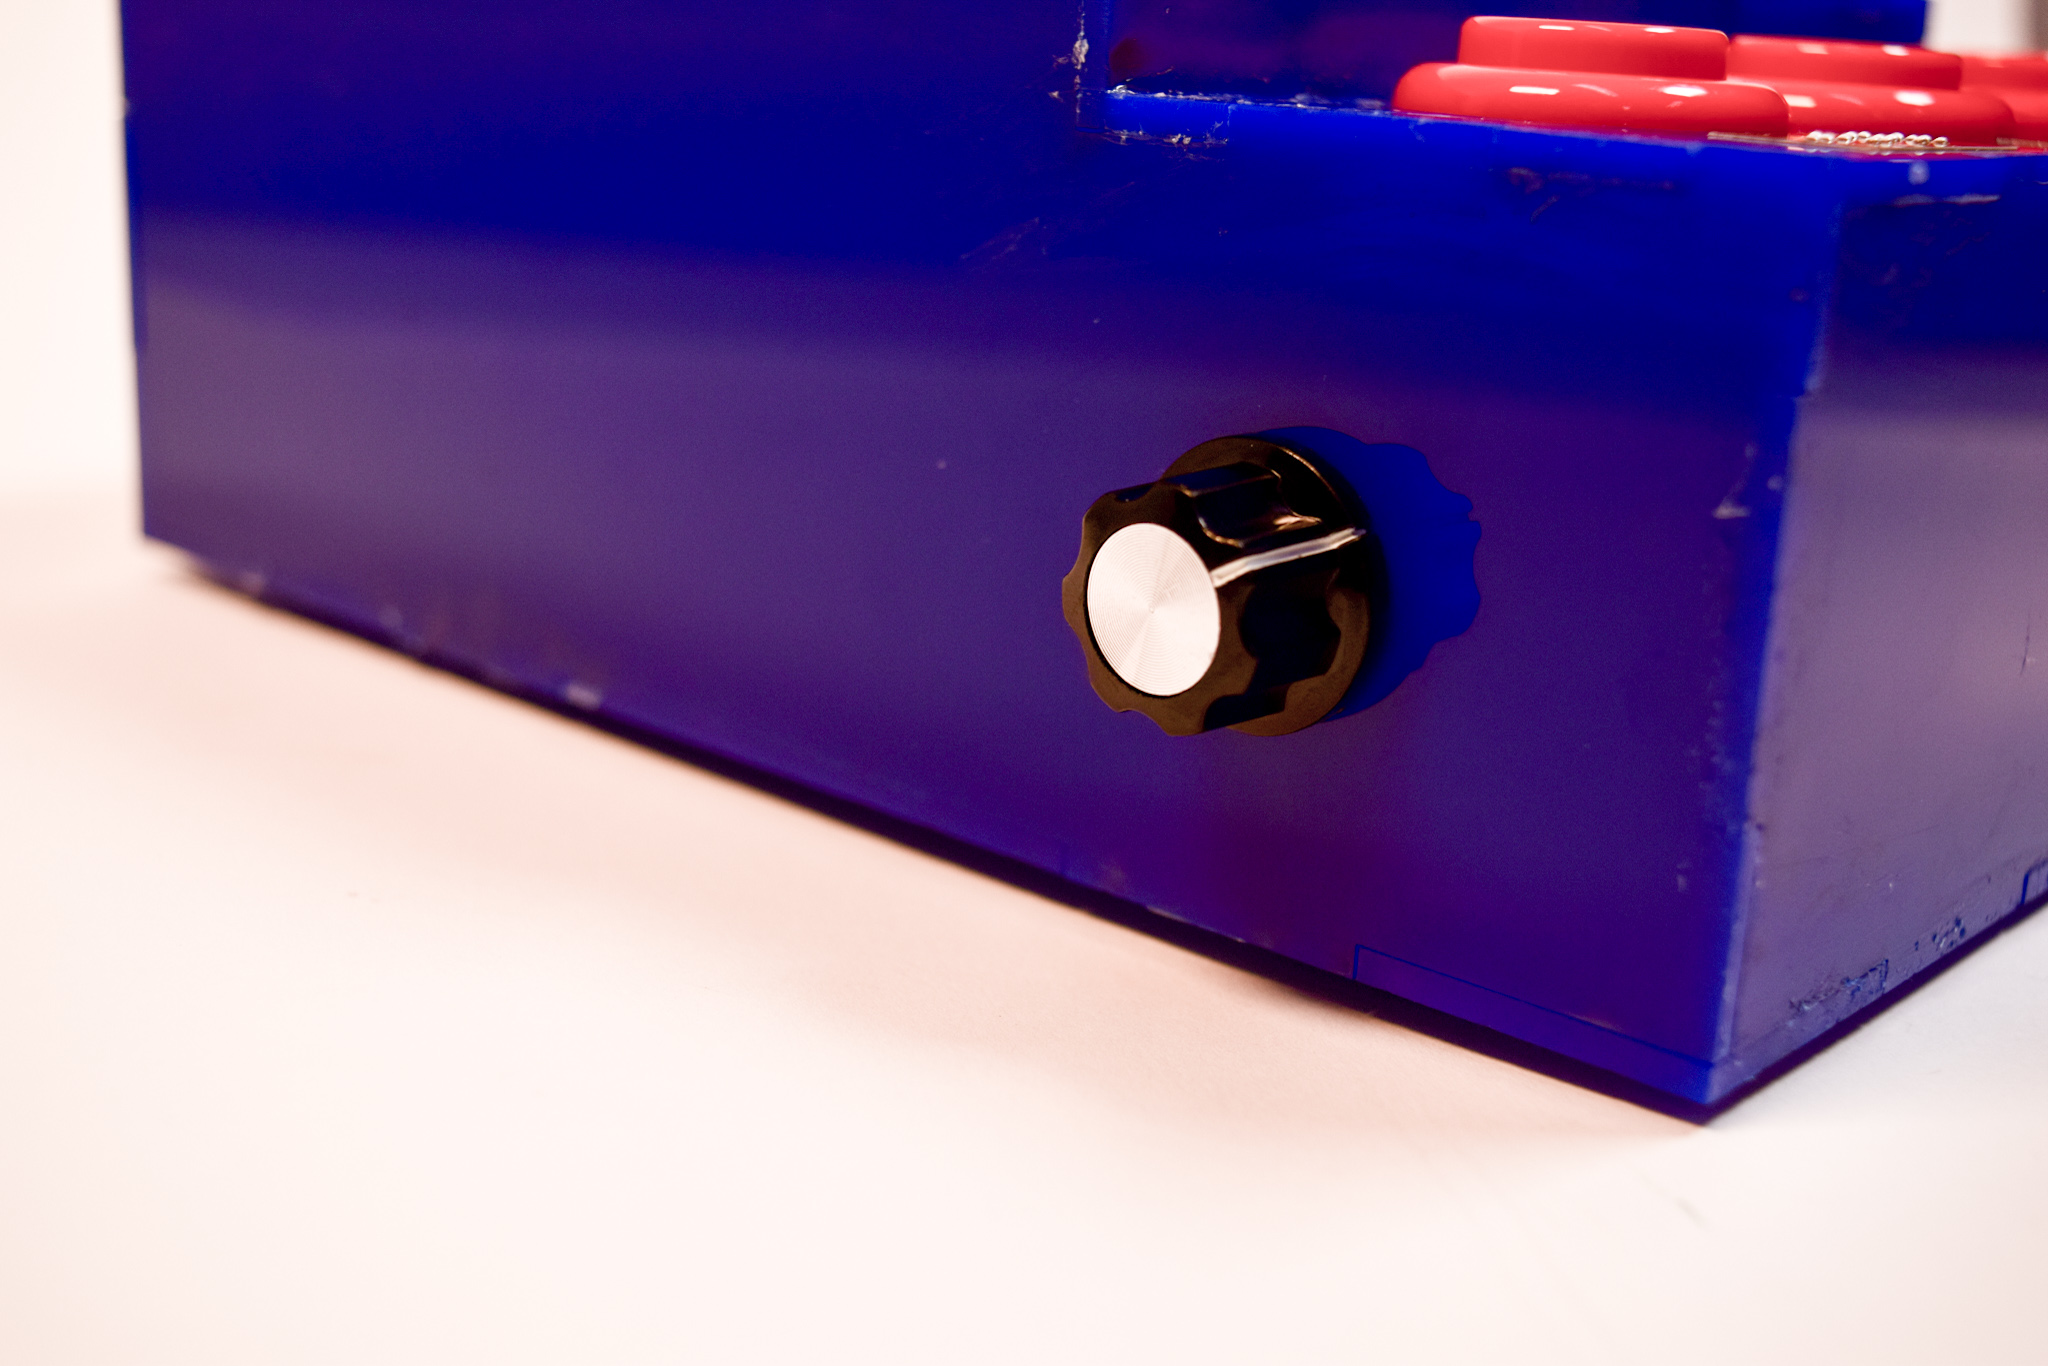
Knob to control the volume
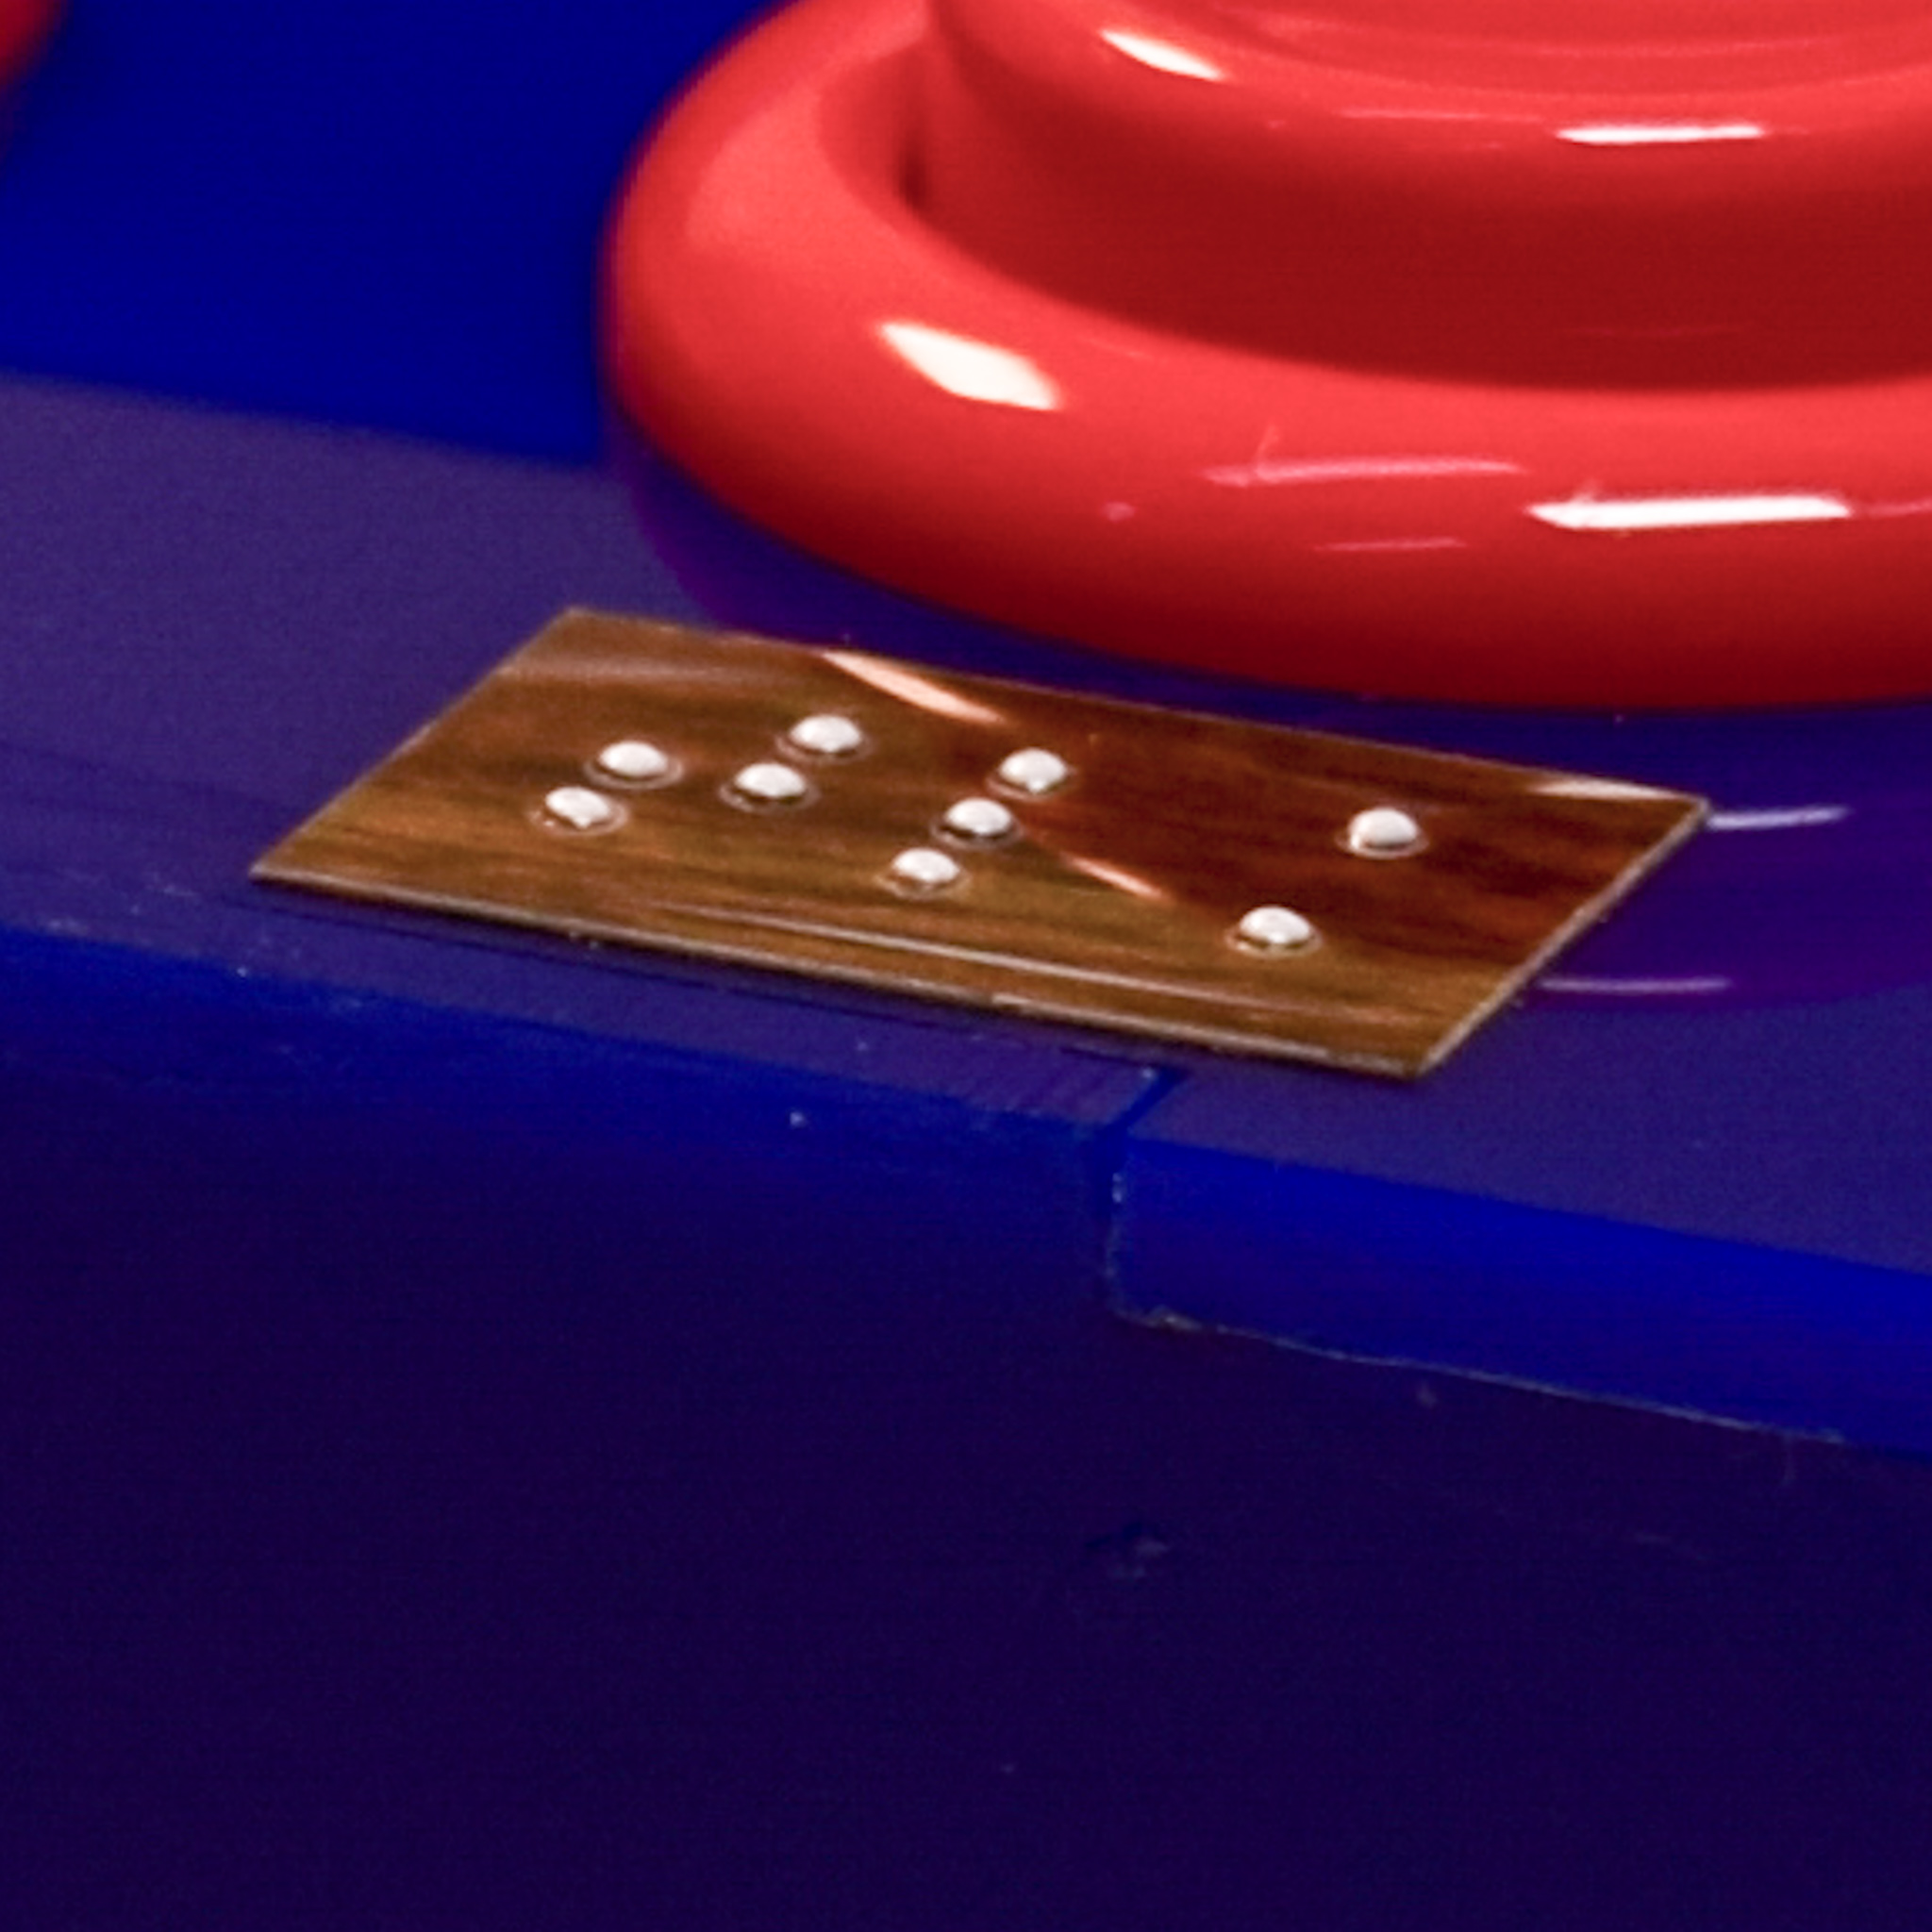
Braille strips graciously provided by Justin
Our talking scale functions as a typical scale, able to measure how much an item placed on it weighs, with additional functionality that allows it to be accessible for a blind person. For example, each function that we have also has an audio cue. In addition, our buttons have printed braille labels that allow Justin to be able to read what each one does.
Narrative Sketch
As Justin prepares his yearly deer jerky, he goes to his kitchen and to his kitchen counter, where he has his Talking Scale. He plugs it in, and it does a little musical motif to notify him that it’s on. He places a bowl in the middle of the scale and pushes the middle button, which reads “tare” in braille underneath in order to zero out the scale. From the speaker, the scale says, “weight is now zero” indicating that the tare worked. He then places the jerky in the bowl, and presses the button on the right, which has the “talk” label in braille. The scale reads out, “One point one pounds,” telling him that the jerky weighs 1.1 pounds. He also wants the reading in grams, so he presses the left button, which has the “units” label in braille, changing the units. The scale says “grams” indicating that the unit is now in grams. He presses the talk button once more, and it reads out, “four hundred ninety nine grams,” telling him the weight of the jerky in grams. Satisfied with the weight of his jerky, he is able to successfully partition it out.
How We Got Here
This prototype was designed to help answer the design question of how we would get the load cell to work and how we would design the scale to be as accessible as possible for a blind person.
As such, our prototype had a working load cell. We also had a Fusion design mockup, and braille prototypes for Justin to give feedback on.
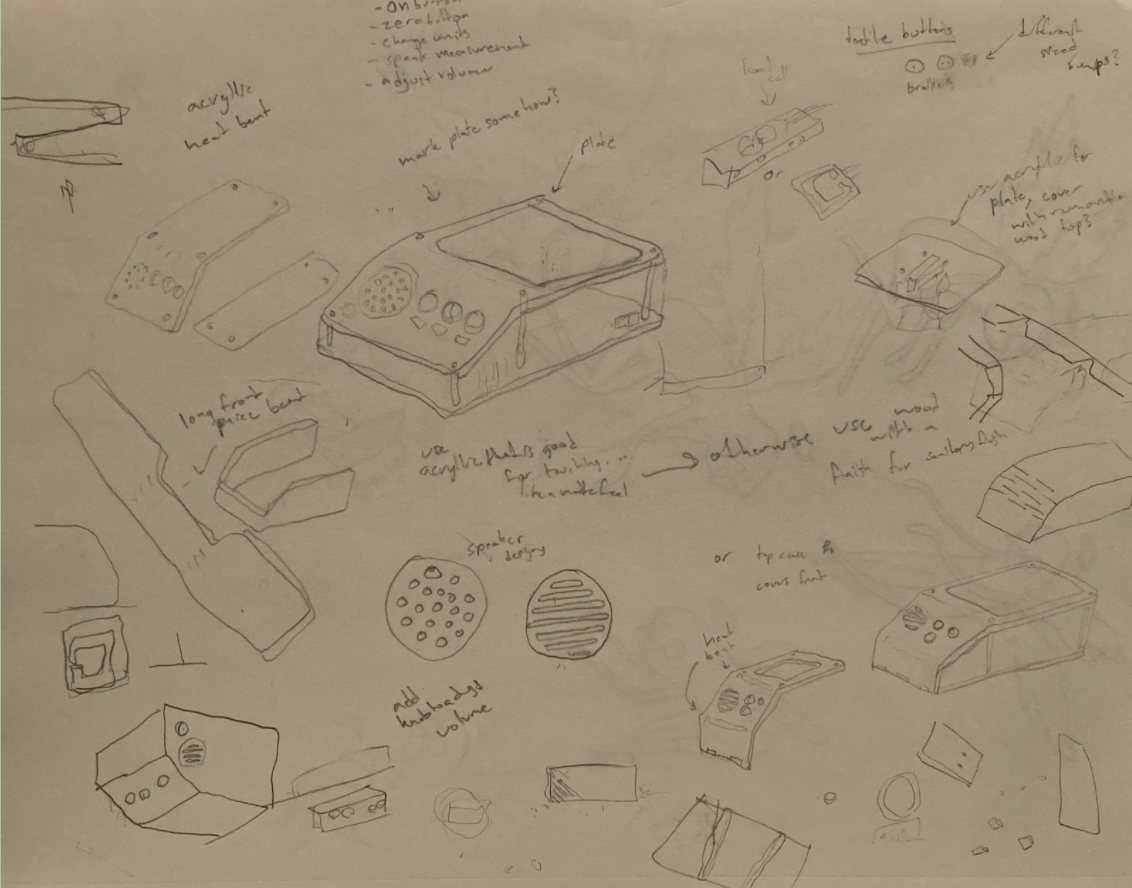
Sketchbook work brainstorming forms of the project, as well as how to integrate the mechanism of the load cell
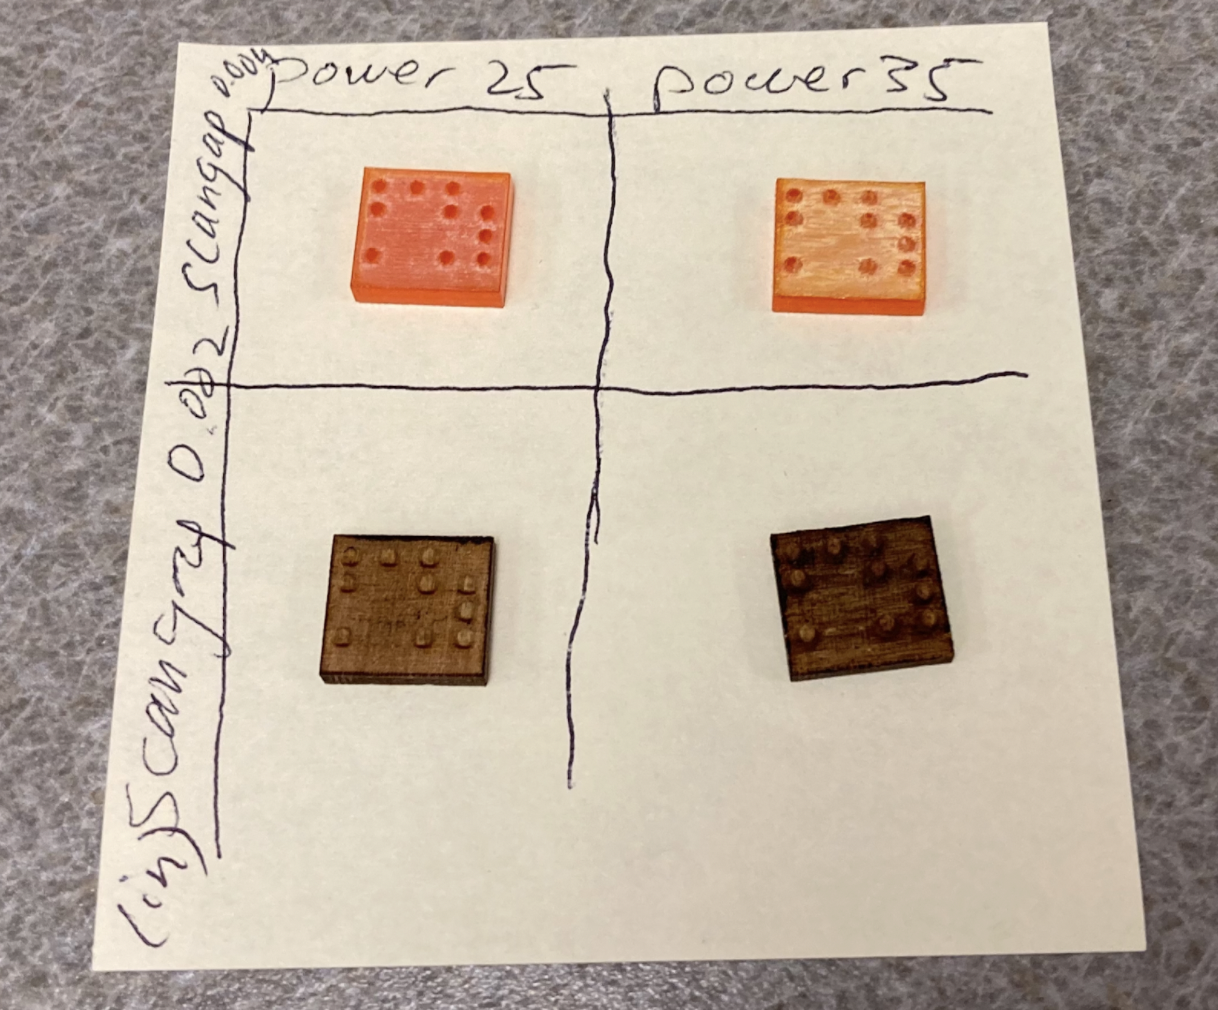
Progress shot of different braille squares produced by experimenting with different laser settings

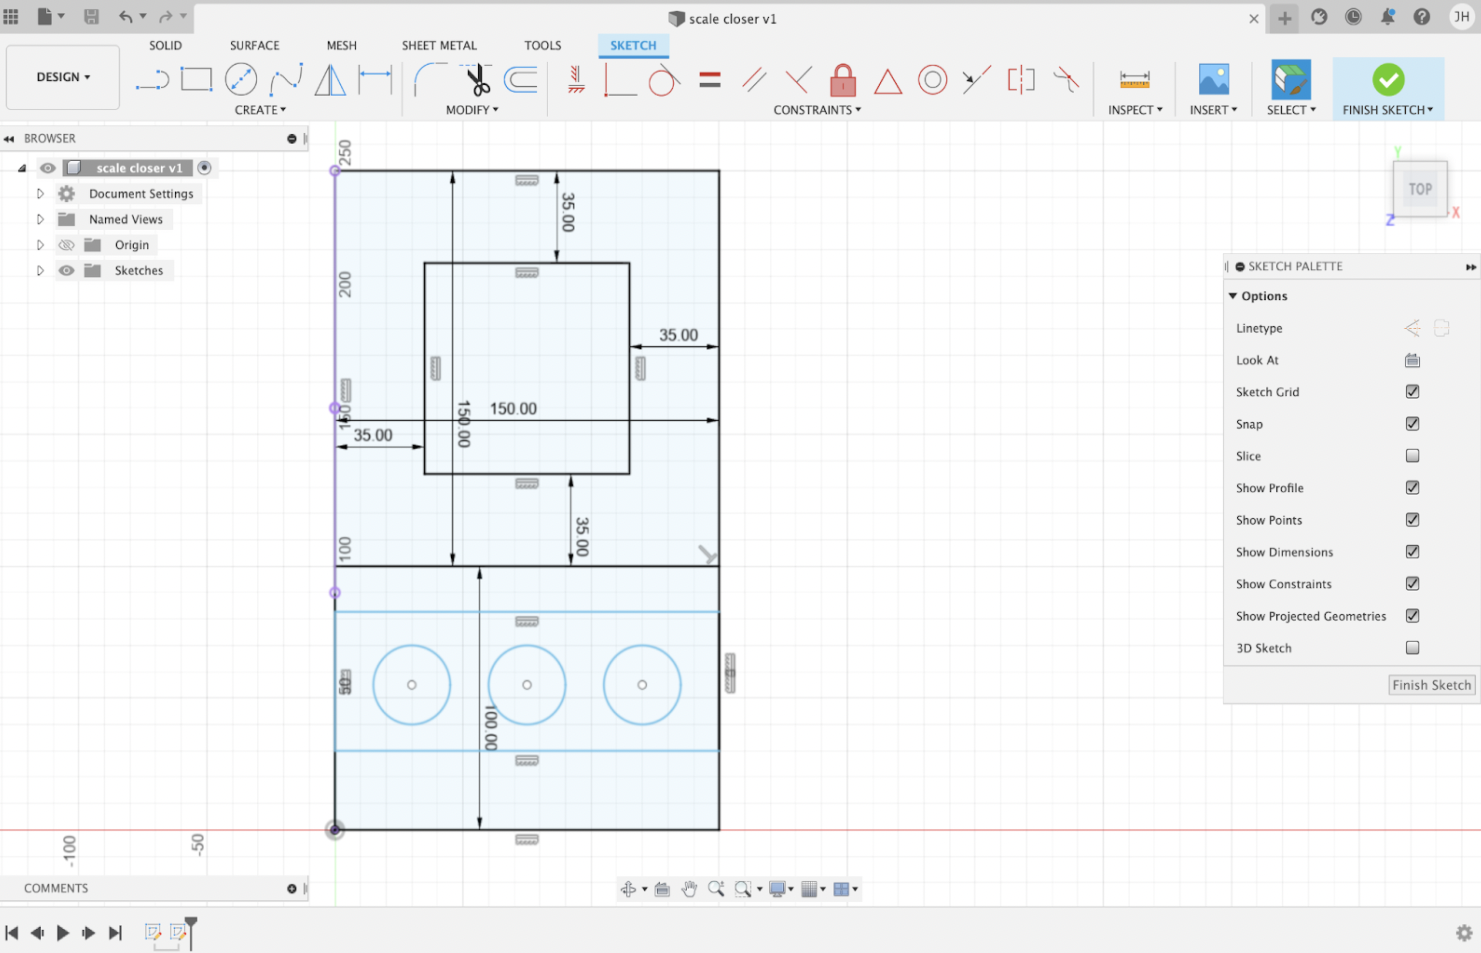
Progress shot of the CAD file at the onset of the project
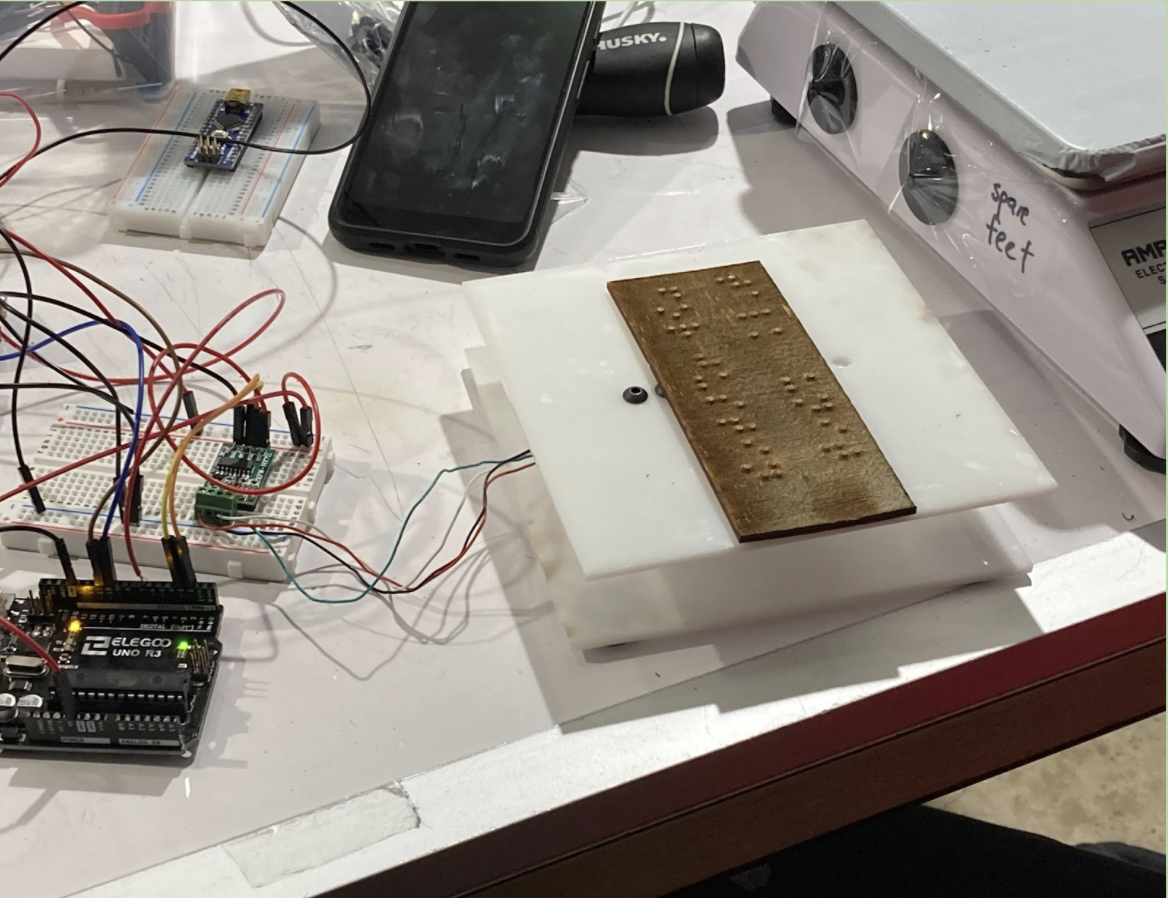
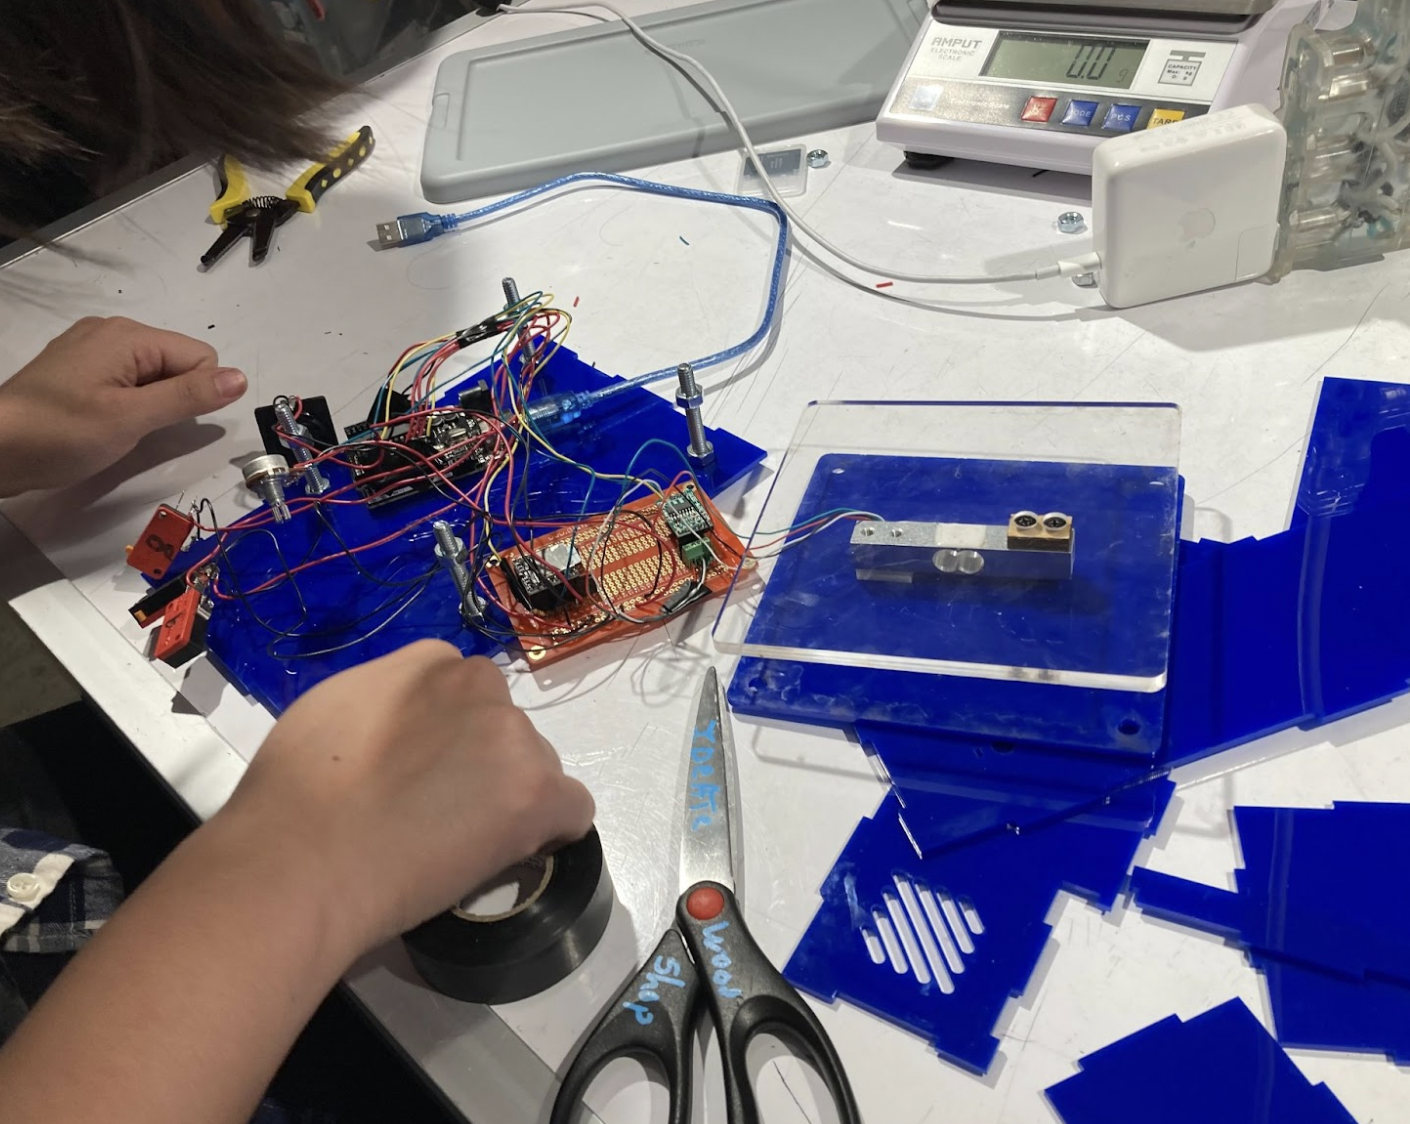
Overall view of the prototype
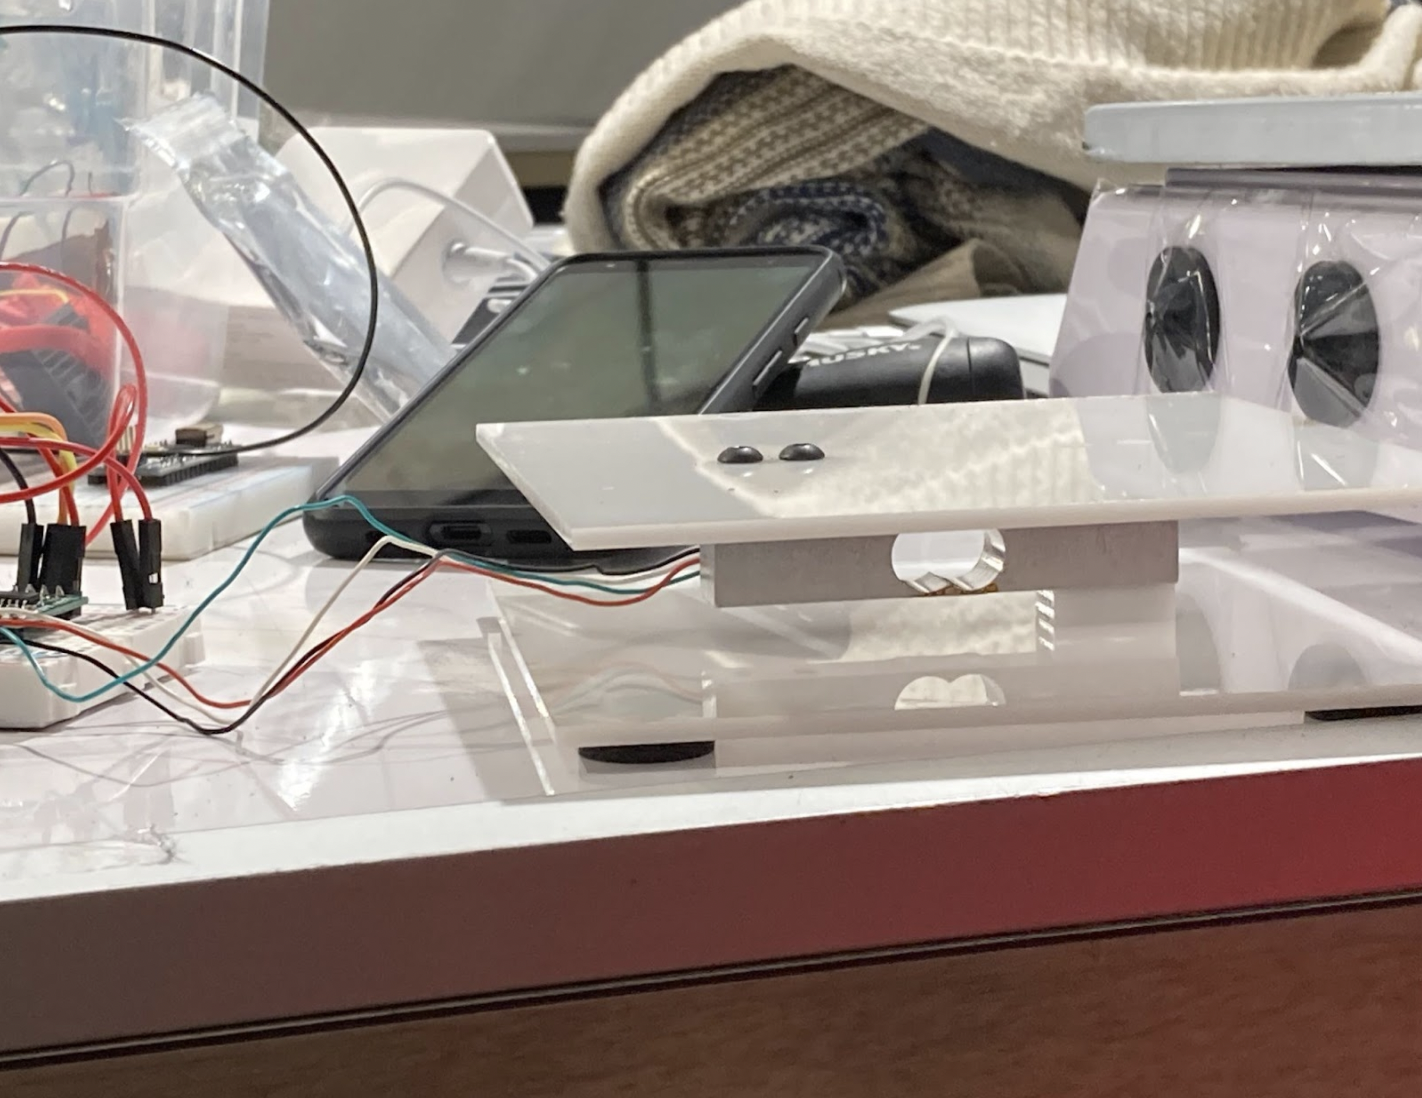
Closer detail look at the load cell, the tool with which we weigh objects
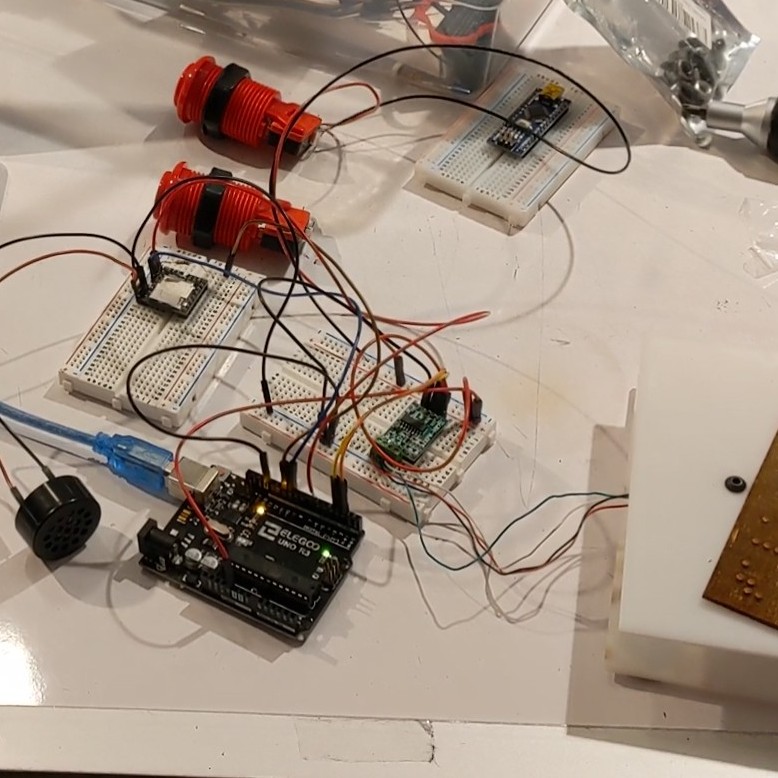
Closer details of the wiring and chips used in the prototype
Above is a video showing how the prototype was used: at this stage of the process, we had set up a small load cell, which sent information about the weight of the item placed on it to the Arduino, which sourced from a library of spoken numbers to speak the correct weight through the connected speaker
PROTOTYPE DEVELOPMENT
This device was developed to provide an accessible kitchen scale to our client who is blind. Our prototype included a scale using a 1kg load cell, and laser cut braille samples.
When we started our project, we came up with a few variations on the design. Originally, we wanted to incorporate bends into the structure, knowing that it would take more time to figure out the logistics. However over time we determined a simpler design was going to be our best bet, which was fortunate as we had to re-cut several pieces, which might not have been as easy if we had decided on the more complicated design.
We wanted to use an online library of a person saying different numbers, which we had for our prototype, but after some discussion, we decided these audio files were low quality, and that it would probably be best to make our own sounds for this specific project. We were fortunate to have Shenai voice over 100+ different audio files, covering the numbers 0-100, and then the hundred places, and then the units included. Though we were told that using an online resource might be better, we were happy to find success in our homebrewed method.
One thing we were unable to include in the final that we had for our prototype was laser cut braille. We wanted to create tactile markings for our client using a negative space approach to creating braille, and were able to send Justin our samples from this experiment. Justin showed great enthusiasm for our work on this, which was heartening to us, and he taught us some interesting facets of braille that we didn’t know. What kept us from this technique in the final was actually that Justin brought a braille labeler to class because he thought we might be interested. We were all really intrigued by this device, and quickly came to the realization that it would be a more efficient and appropriate method to label the device than what we were planning on. Justin printed out the labels for the different buttons and those labels are what ended up on the final version.
Process

Reworked CAD files of the plates bracketing the load cell
Reworked CAD files of the overall box design
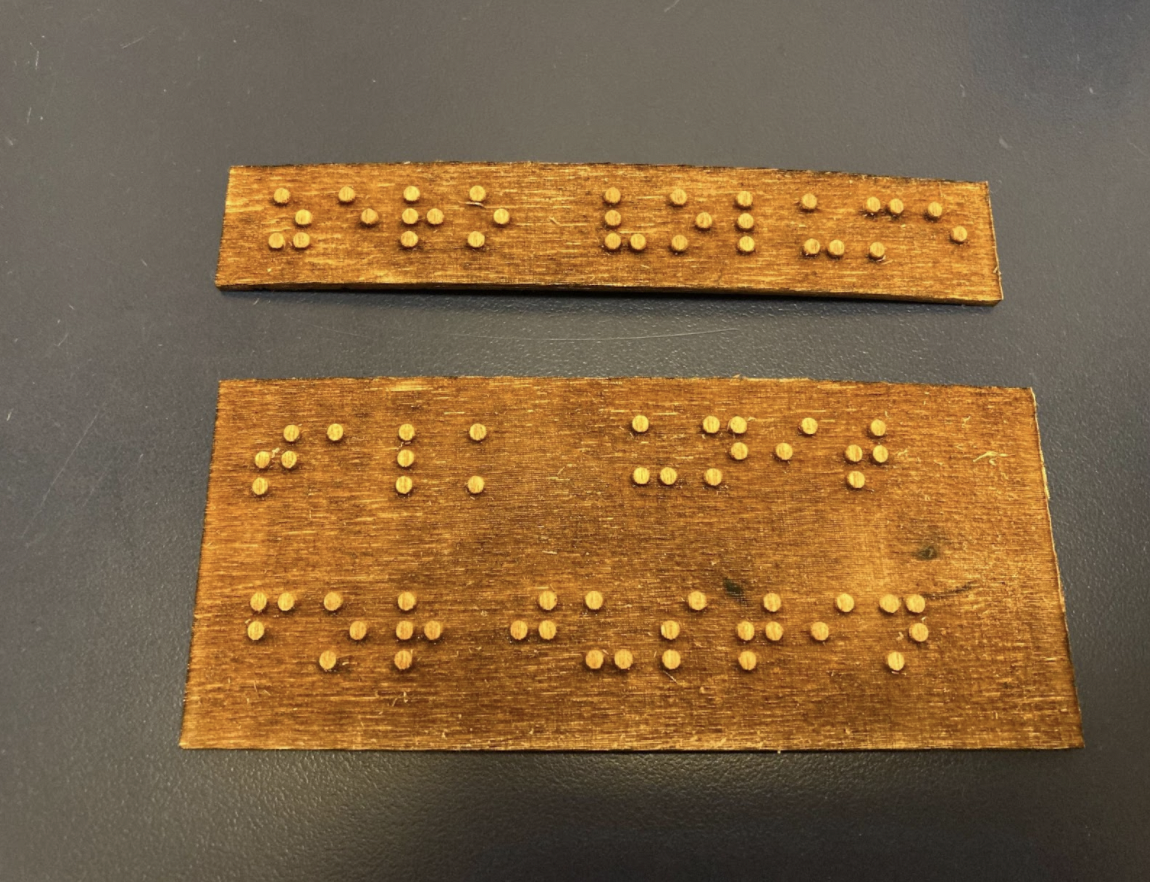
Our original braille descriptors
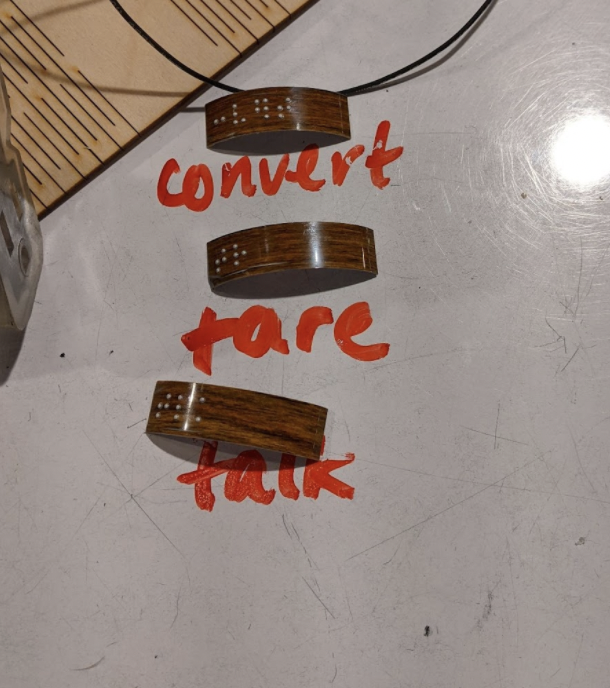
Strips of braille from Justin
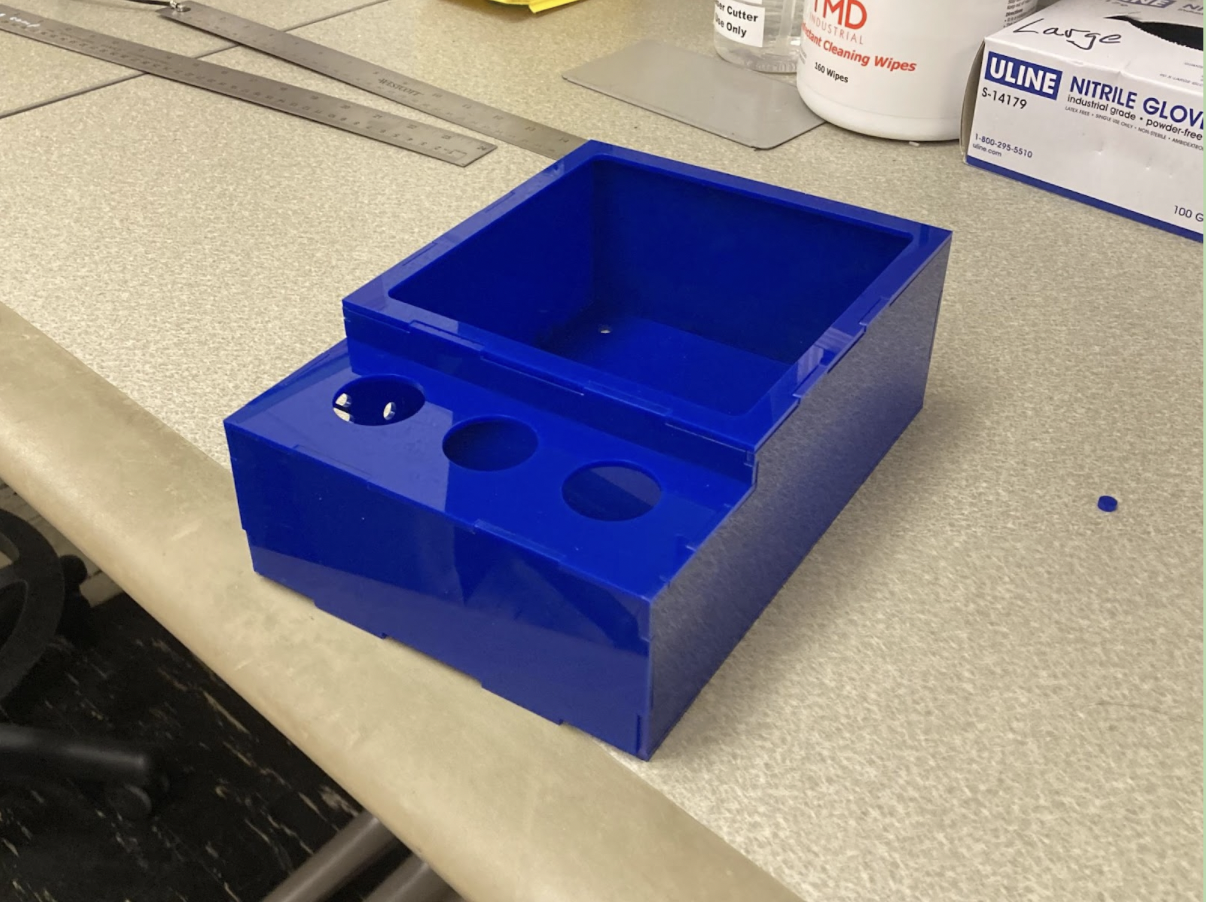
Freshly laser-cut box
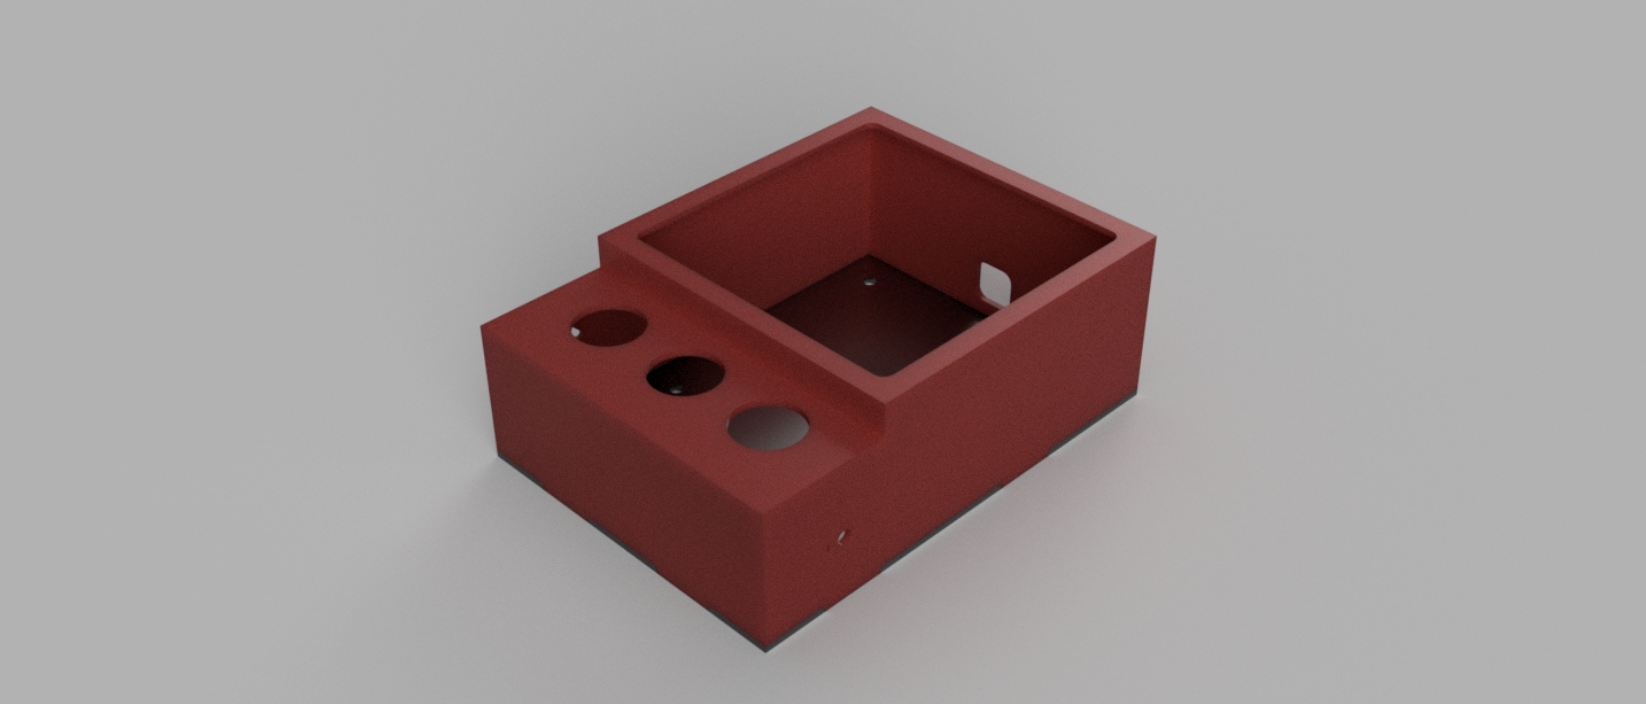
… and its accompanying 3-D model
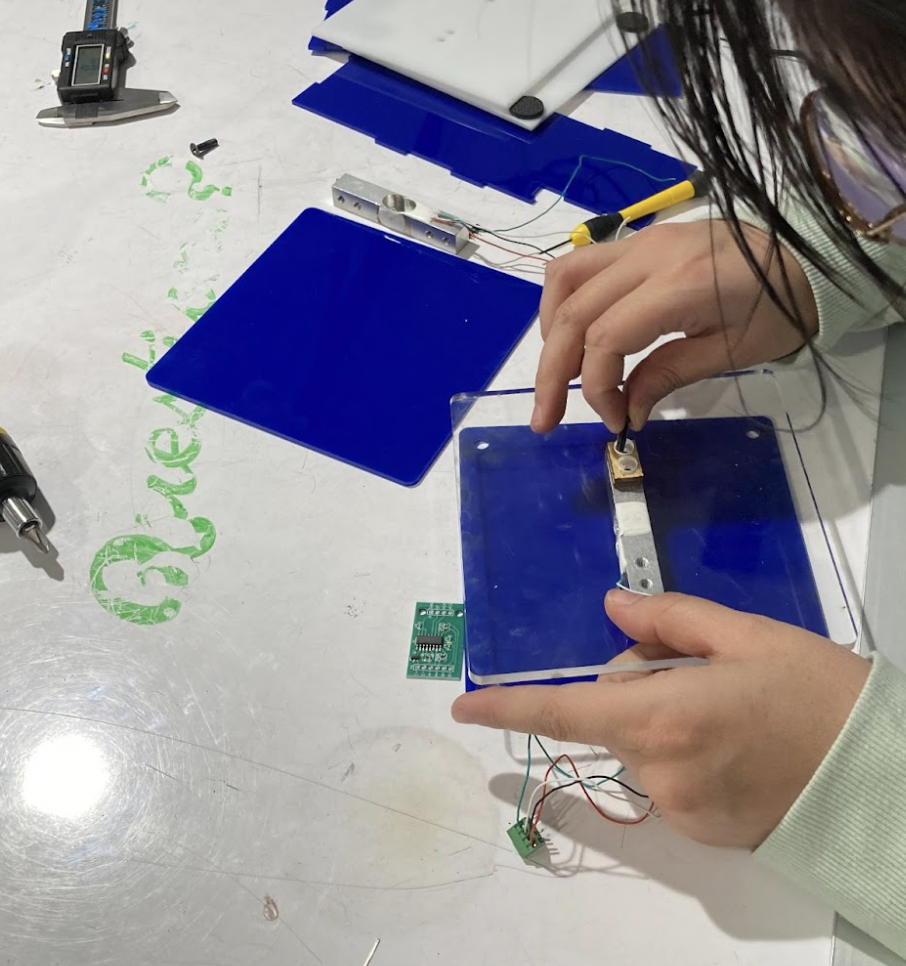
Screwing in the load cell to the final product
Freshly soldered connections, necessary for a tool we intended to hand off to another person to use regularly
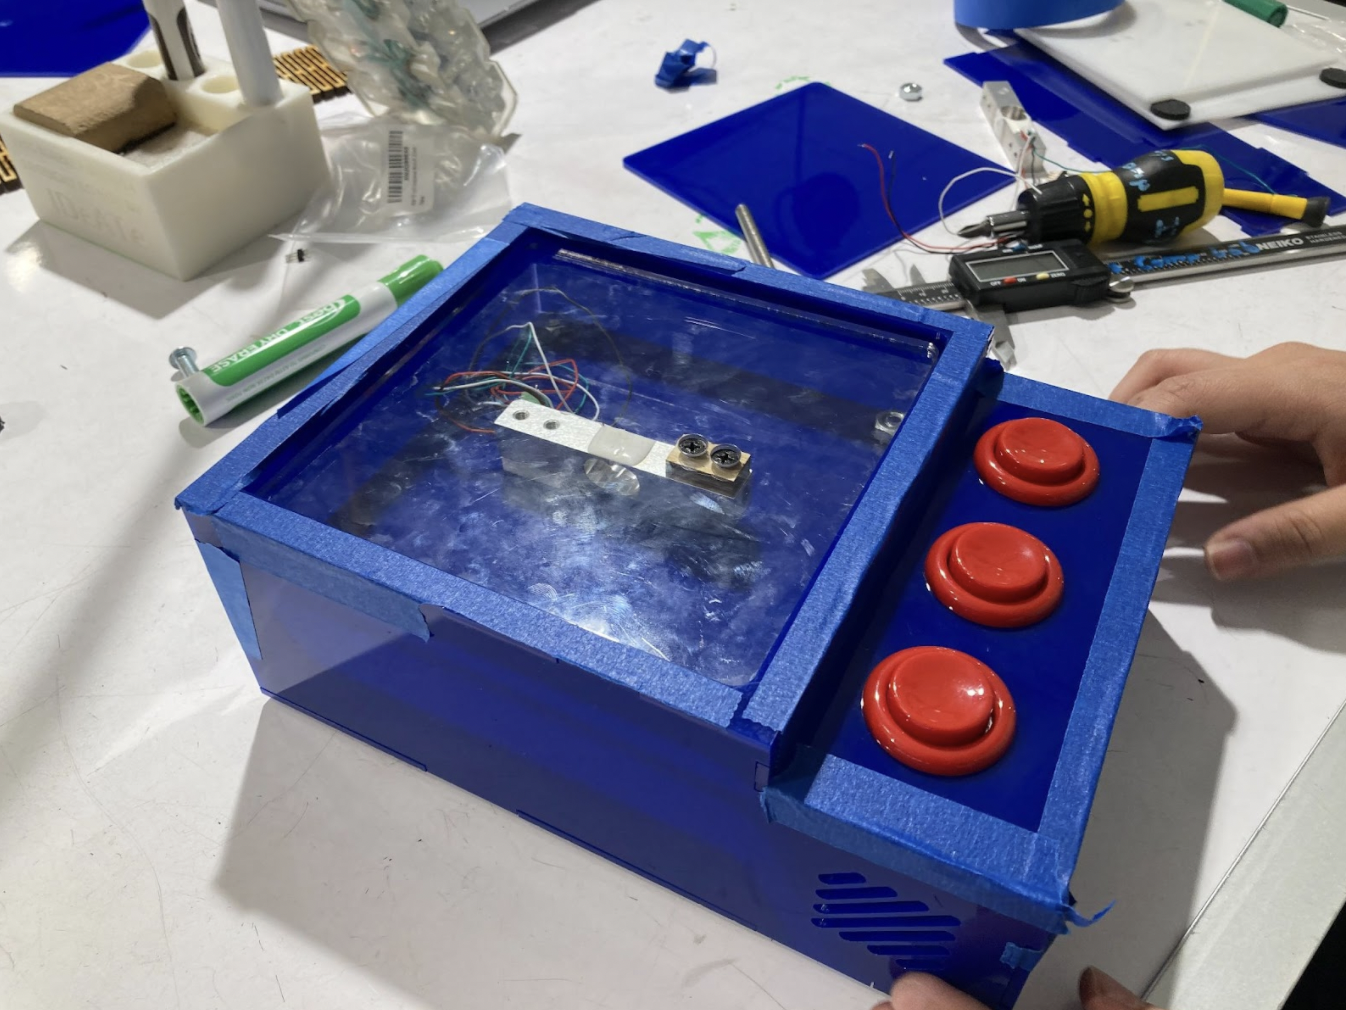
Final product without the top plate, with a clearer view of the load cell
Throughout our process, we made many decisions which altered our original plans to either something more manageable for us or intuitive/functional for Justin, some of which are discussed previously in the prototype discussion. To add to the choices mentioned above, we made a lot of design choices specifically for Justin, such as making the box blue as it was his favorite color, and adding a rim around the edge of the weighing platform, an atypical feature in most scales, but one which helps him feel where the weighing space ends.
Though we expected the CAD file to be mostly correct, and thus only allotted about a day to troubleshoot and finish the laser-cut box, there were many small mistakes in the design which caused us to re-cut a handful of the pieces. Because the box was so small, many of these revisions addressed spacing issues within the box to allow for different electronic devices to physically fit. However, otherwise, we largely stuck to our schedule of tasks, and it resulted in a product that mostly functioned in the end!
Conclusions and lessons learned
On presenting our project to the world at large (or at least, the members of the class and our special guests), we received a lot of good criticism and feedback.
In particular, a few people noted how exactly we read out the different weights, noting that we could “Change pounds with decimal value to pounds + ounces.” This would definitely improve the quality of our project, since in the kitchen things rarely are used in terms of decimals, instead being broken up into pounds and ounces for ease of measurement.
We also got multiple criticisms of the design of the top, noting that we should “Maybe look into making the weighing surface not recessed. Harder to place large plate on it, for example.” However, this was a specific request by our client, who noted that he wanted there to be a raised edge around the top of the scale so that he would be able to feel out where the edge was. Although, during the walk-around critique, someone suggested that we simply add the raised edge as part of the top of the scale, instead of part of the housing of the scale, which may have solved the problem.
“The middle button needs to be tapped twice – better button robustness.” We had a lot of problems with the buttons, which might be just a problem with how the buttons are placed within the scale, needing either to be tapped twice or pressed extra hard for it to register. We might need to add extra supports onto it.
“The speaker system seemed to be a bit wonky, possibly the scale wasn’t sensitive enough for initial triggering.” We realized after the critique that there were issues with the speaker not saying certain words, which ended up being fixed due to some fiddling with the code. Otherwise, it should trigger upon button press.
Although we ourselves were not remote for this project, our initial interview with Justin was. Being that he was blind, the video call was at first a bit awkward, but as we got into the conversation it flowed a lot better. We were also able to work out a preferred way to contact him that allowed us to effectively communicate.
Working with a person with disabilities was a new experience for all of us. During our initial discussion with Justin, who is blind, we discovered how significant accessible design is. There were so many aspects of life that an abled person might take for granted, that require solutions for those with disabilities. Justin was so kind and willing to teach us, that it became hard to determine what project to work on.
If we were going to do this again, I think we would spend more time learning about accessibility for blind people. We learned a lot during this project, but it became clear that there was much more to learn about accessible design.
A key concluding thought we had after completing this project was that it is extremely important that design be accessible to everyone. Justin mentioned a variety of everyday problems that he encounters, and we wished we were able to help with more. I think we were all satisfied with our final result, but it’s easy to think about how it could have been done better. I think we came to a final design that we were happy with and that addressed Justin’s concerns, however given more time, we would have liked to make the device rechargeable, as well as include a louder speaker. Of course we would also like to work out any kinks in the readings, perhaps with a more accurate load cell, but we were satisfied with the results we were able to achieve. I think our main lesson was the importance of accessible design.
Technical details
Schematic and block diagram
Block Diagram + Schematic
Code
/*
 *  Talking Scale
 *  Shenai, John, and Julia
 *  This takes in the scale readings and then reads them out appropriately, accessing
 *  files in the mp3 player and playing them.
 *
 *  Pin mapping:
 *  LOADCELL_DOUT_PIN  3
 *  LOADCELL_SCK_PIN  2
 *  SPEAK BUTTON 7
 *  TARE BUTTON 8
 *  UNIT BUTTON 9
 */

#include "Arduino.h"
#include "SoftwareSerial.h"
#include "DFRobotDFPlayerMini.h"
#include "HX711.h"

#define LOADCELL_DOUT_PIN  3
#define LOADCELL_SCK_PIN  2
#define ZERO 102
#define POINT 103
#define STARTING_SOUND 106
#define SPEAKBUTT 7
#define TAREBUTT 8
#define UNITBUTT 9
#define GRAMS 104
#define POUNDWORD 105
#define TARE 107


HX711 scale;
//Correct calibration factor: ~405
float calibration_factor = 405; // this calibration factor is adjusted according to my load cell

SoftwareSerial mySoftwareSerial(10, 11); // RX, TX
DFRobotDFPlayerMini myDFPlayer;
bool pounds;

void setup() {
  mySoftwareSerial.begin(9600);
  Serial.begin(9600);
  pinMode(SPEAKBUTT, INPUT);
  pinMode(TAREBUTT, INPUT);
  pinMode(UNITBUTT, INPUT);
  digitalWrite(SPEAKBUTT, HIGH);
  digitalWrite(TAREBUTT, HIGH);
  digitalWrite(UNITBUTT, HIGH);
  pounds = true;


  Serial.println();
  Serial.println(F("DFRobot DFPlayer Mini Demo"));
  Serial.println(F("Initializing DFPlayer ... (May take 3~5 seconds)"));

  if (!myDFPlayer.begin(mySoftwareSerial)) {  //Use softwareSerial to communicate with mp3.
    Serial.println(F("Unable to begin:"));
    Serial.println(F("1.Please recheck the connection!"));
    Serial.println(F("2.Please insert the SD card!"));
    while(true);
  }

  myDFPlayer.volume(30);  //Set volume value. From 0 to 30
  myDFPlayer.playMp3Folder(STARTING_SOUND);  //Play the starting sound
  delay(2000);

  scale.begin(LOADCELL_DOUT_PIN, LOADCELL_SCK_PIN);

  scale.set_scale(calibration_factor); //Adjust to this calibration factor
  scale.tare();
}

// gets a scale reading
float getunits(void) {
  // gets an average of a few readings in order to be accurate
  float units = 0;
  units += scale.get_units();
  delay(100);
  units += scale.get_units();
  delay(100);
  units += scale.get_units();
  delay(100);
  units += scale.get_units();
  units = units / 4.0;

  // adjustments
  if (units < 0) {
    units =  0;
  }
  if (pounds) {
    units = units / 454.0;
  }
  return units;

}

void loop() {
  // changes the volume
  int volumevalue = analogRead(A0);
  int newvol = map(volumevalue, 0, 1023, 0, 30);
  myDFPlayer.volume(newvol);

  // gets units and then reads them out
  if (digitalRead(SPEAKBUTT) == LOW) {
    float units = getunits();
    read(units);
  }
  // tares the scale
  else if (digitalRead(TAREBUTT) == LOW) {
    // extra tares for insurance
    scale.tare();
    delay(100);
    scale.tare();
    delay(100);
    scale.tare();
    myDFPlayer.playMp3Folder(TARE);
    delay(3000);
    scale.tare();
  }
  else if (digitalRead(UNITBUTT) == LOW) {
    pounds = !pounds;
    if (pounds) {
      myDFPlayer.playMp3Folder(POUNDWORD);
      delay(1000);
    }
    else {
      myDFPlayer.playMp3Folder(GRAMS);
      delay(1000);
    }

  }


}

// separates out a number into its component parts and then reads it
void read(float weight) {
  float fractpart;
  float intpart;
  fractpart = modff(weight, &intpart);
  // separates out the number
  // this works anyway because of floats
  int decimal = (int) (fractpart * 100 + .5);
  int integerpart = (int) intpart;
  if (integerpart >= 1000) {
    int thousand = integerpart / 1000 * 1000;
    myDFPlayer.playMp3Folder(thousand);
    delay(1100);
    if (integerpart % 1000 != 0) {
      int hundred = integerpart % 1000;
      if (hundred / 100 != 0) {
        myDFPlayer.playMp3Folder(hundred / 100 * 100);
        delay(1000);
      }
      if (hundred % 100 != 0) {
        myDFPlayer.playMp3Folder(hundred % 100);
        delay(1000);
      }
    }
  }
  else if (integerpart > 100) {
    myDFPlayer.playMp3Folder(integerpart / 100 * 100);
    delay(1000);
    if (integerpart % 100 != 0) {
      myDFPlayer.playMp3Folder(integerpart % 100);
      delay(1000);
    }
  }
  else if (integerpart > 0){
    myDFPlayer.playMp3Folder(integerpart);
    delay(1000);
  }
  else if (integerpart == 0) {
    myDFPlayer.playMp3Folder(ZERO);
    delay(1000);
  }
  // only reads the decimal part for pounds
  if (pounds) {
    myDFPlayer.playMp3Folder(POINT);
    delay(1000);
    if (decimal / 10 == 0) {
      myDFPlayer.playMp3Folder(ZERO);
    }
    else {
      myDFPlayer.playMp3Folder(decimal / 10 );
    }
    delay(1000);
    myDFPlayer.playMp3Folder(decimal % 10);
    delay(700);
    myDFPlayer.playMp3Folder(POUNDWORD);
    delay(1000);
  }
  else {
    myDFPlayer.playMp3Folder(GRAMS);
    delay(1000);
  }
}
