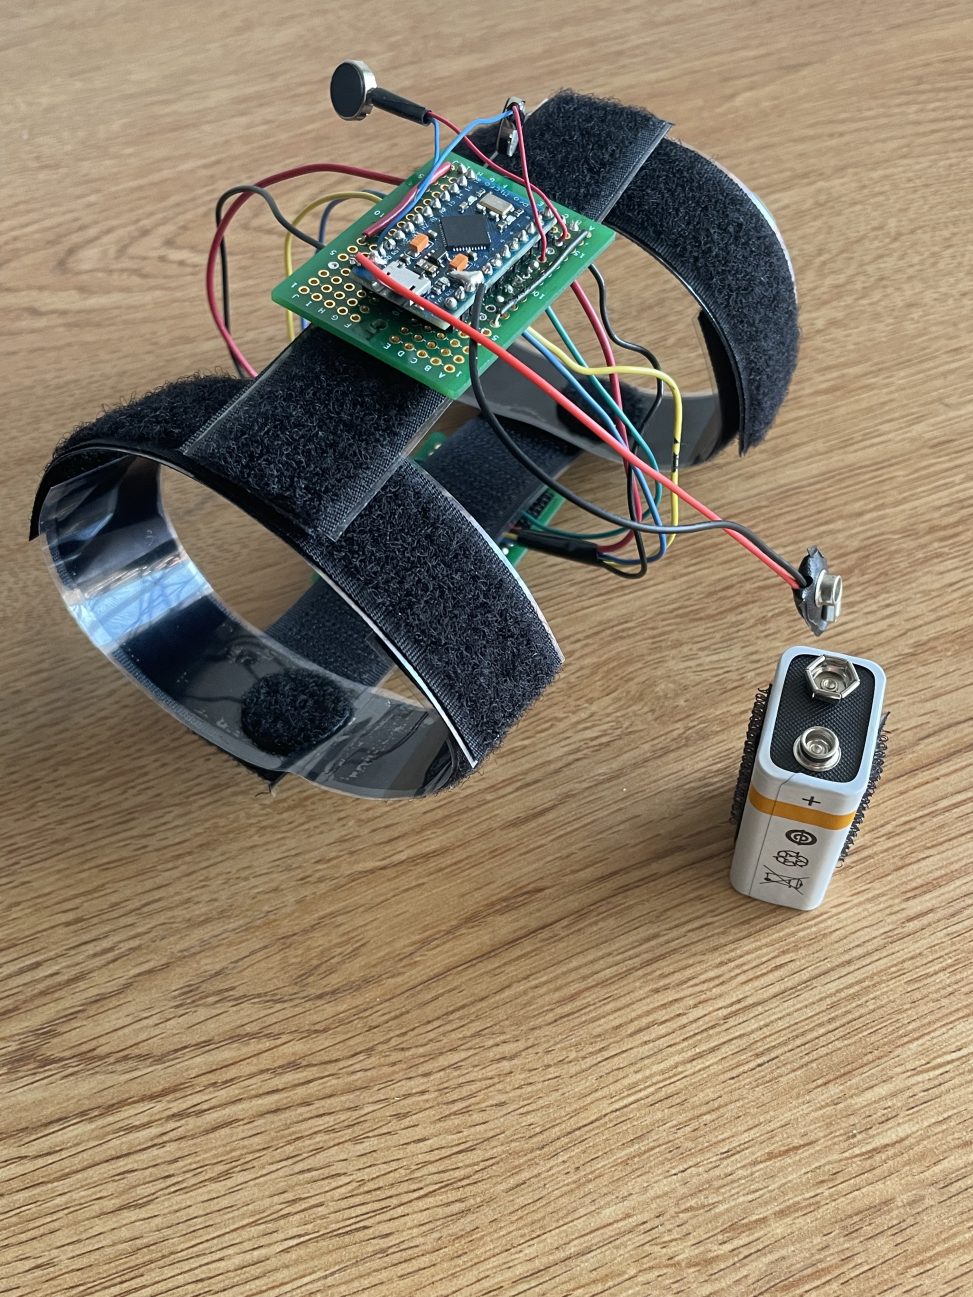
Introducing the Carpel Tunnel Prevention Sleeve, an innovative tool that buzzes the user into “Carpel Tunnel Syndrome”-safe arm positions.

Isometric View
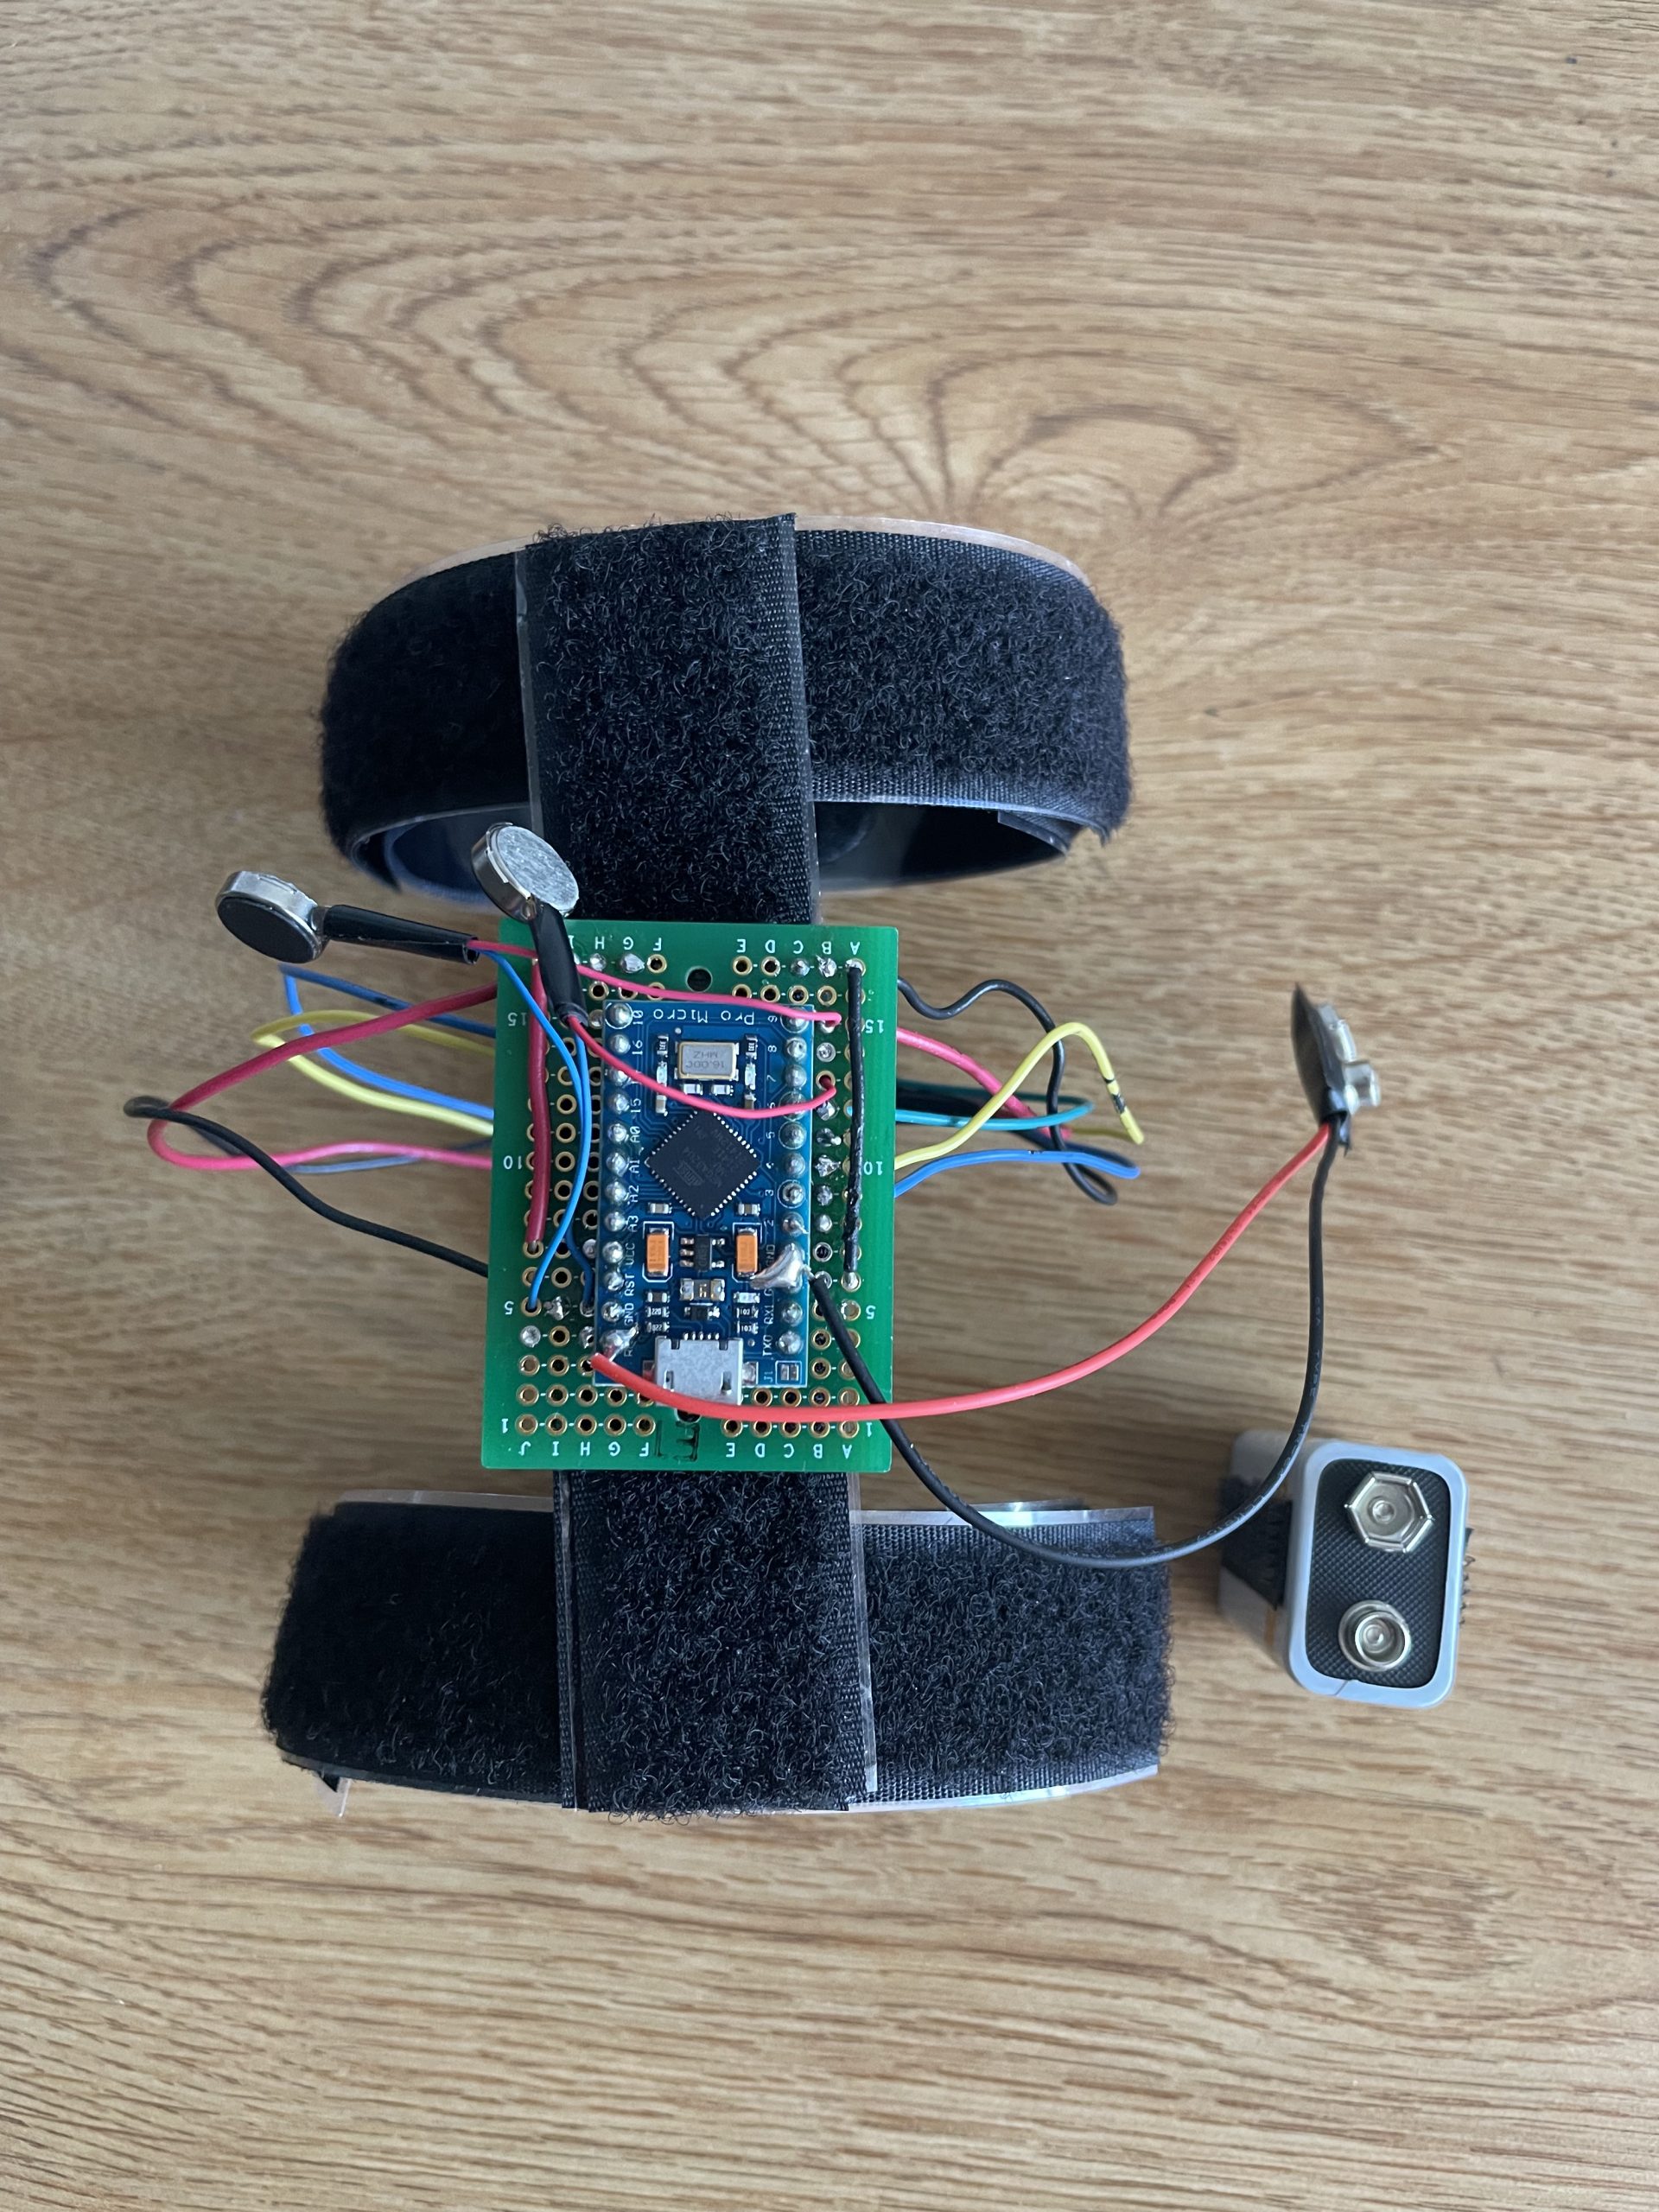
Top View
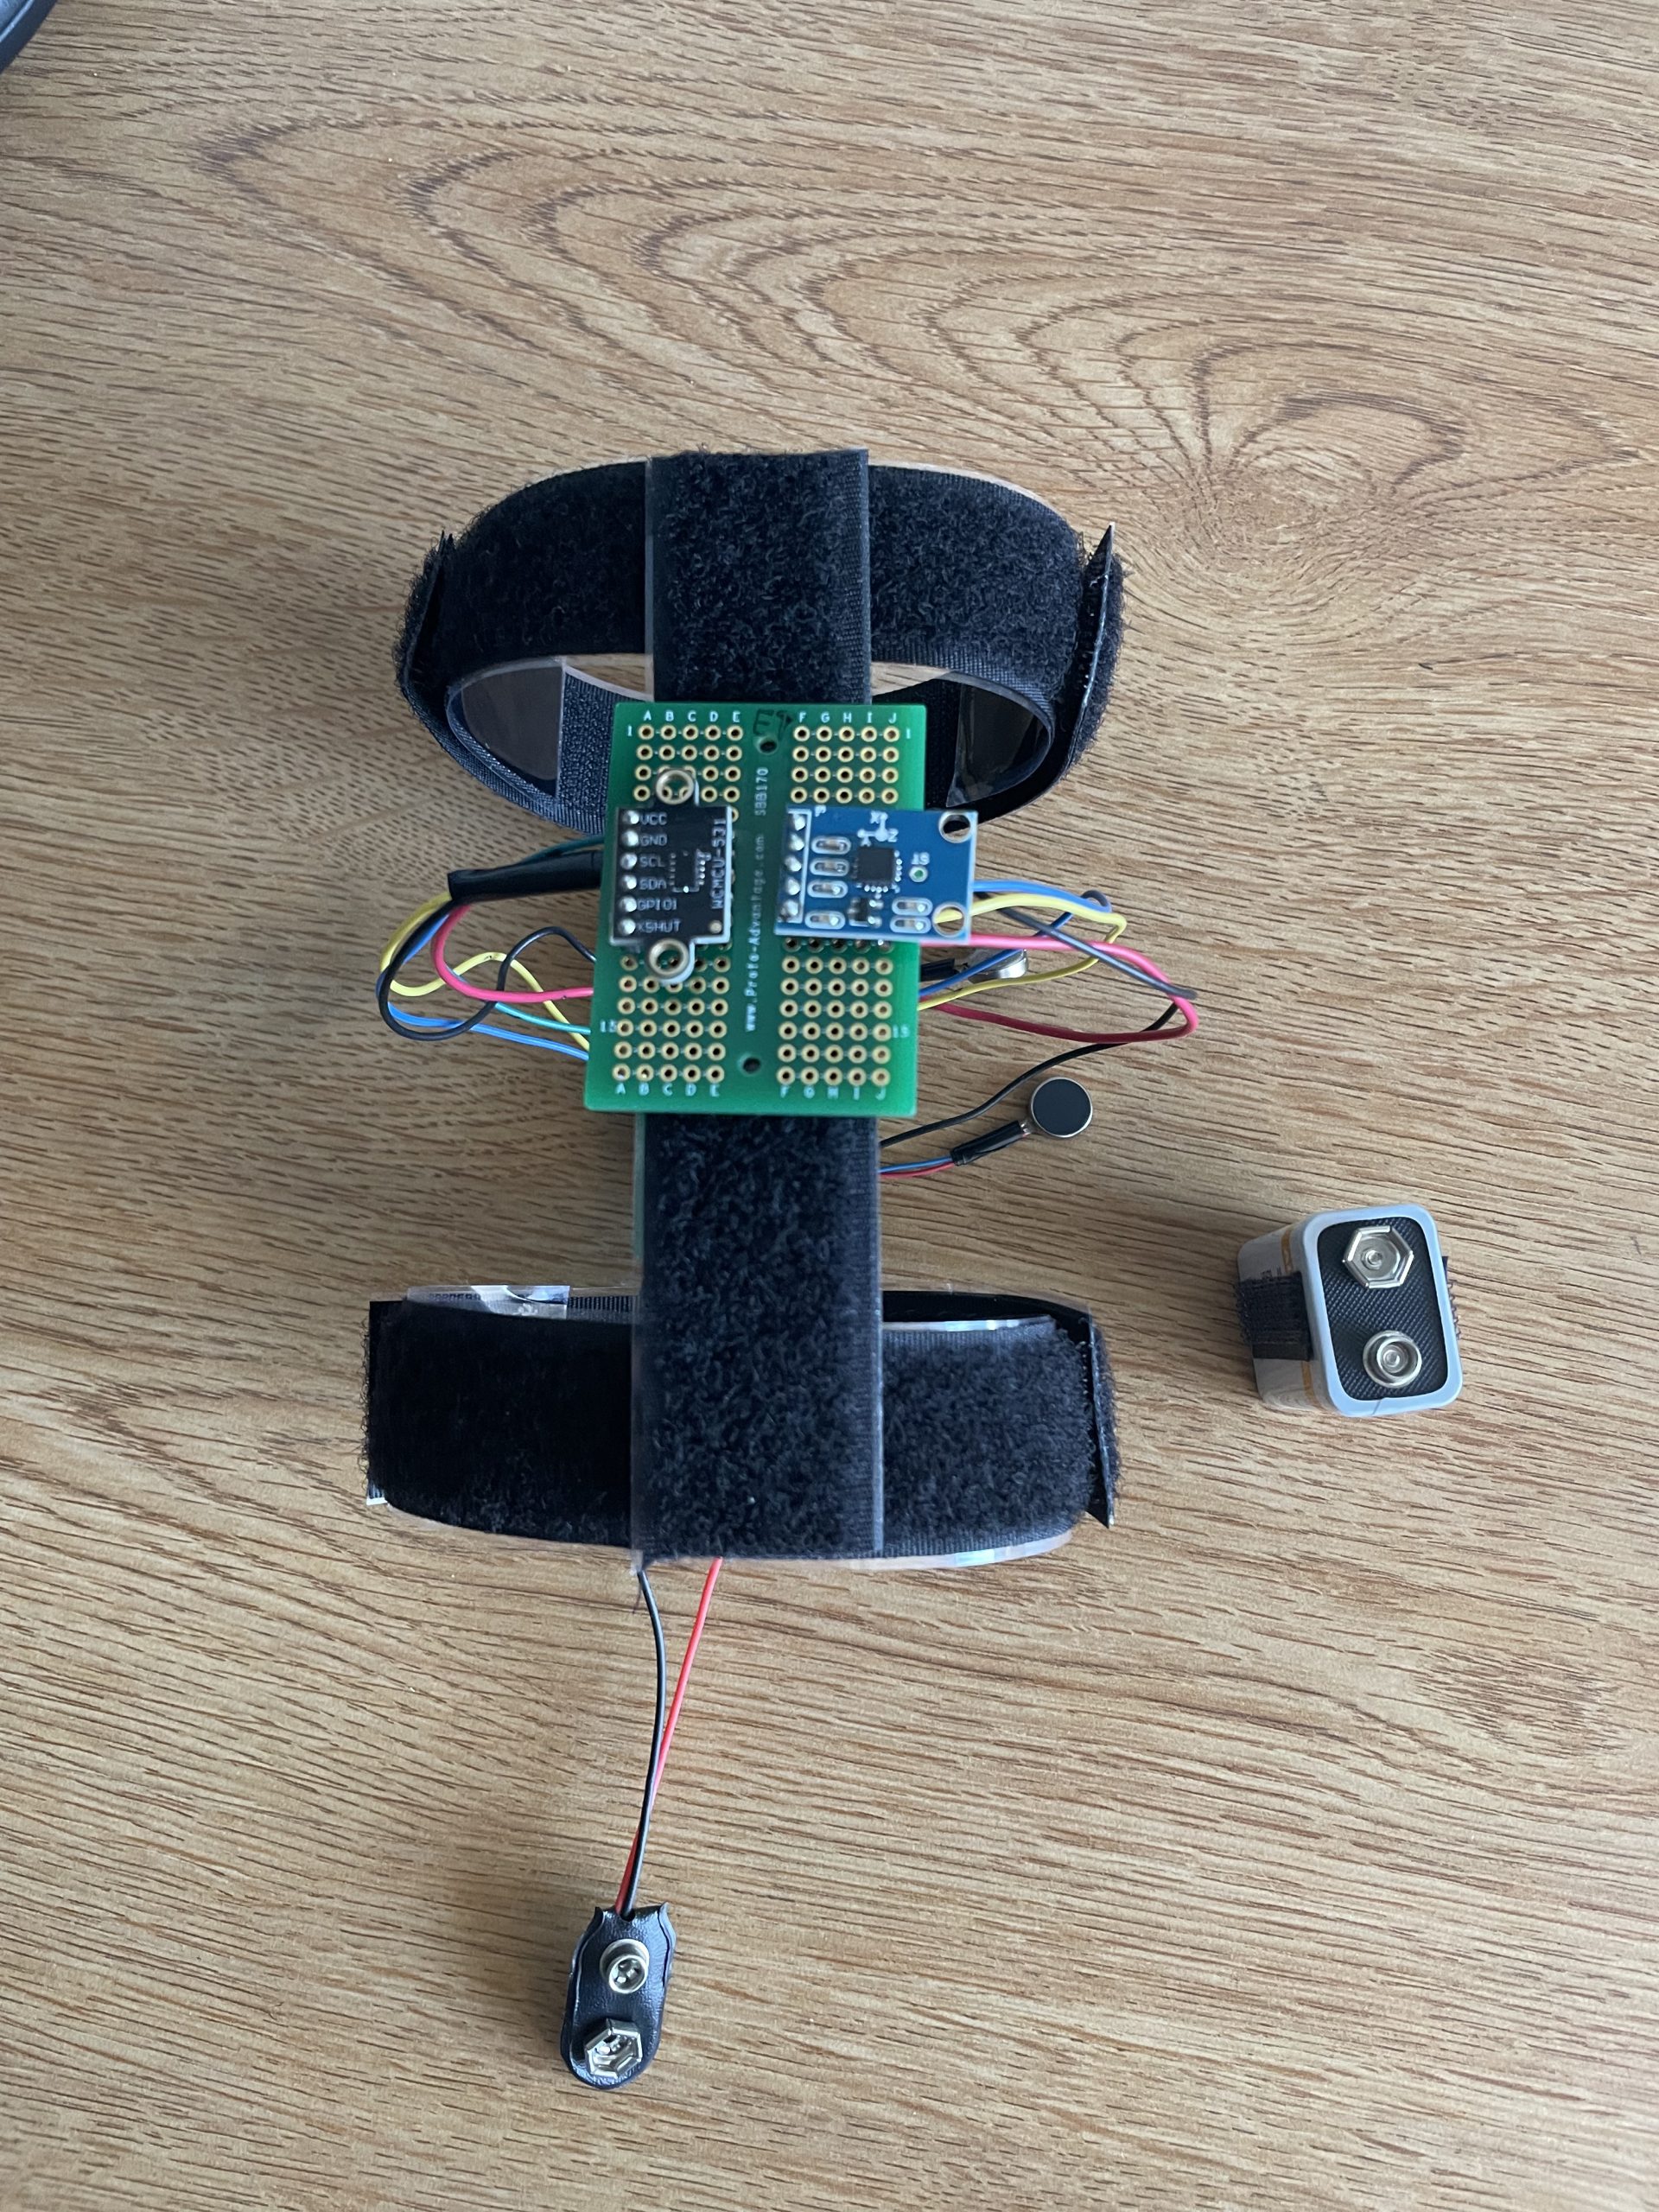
Bottom View
Process Review
Major Decision 1:
The first major decision of this project was abandoning the Arduino Uno in favor of the Arduino Pro Micro. I wanted the Carpel Tunnel Prevention Sleeve to be a compact device, and with the dimension Arduino Uno I could not accomplish this goal. In addition, the Arduino Pro Micro made for much easier prototyping as the microcontroller could be soldered directly onto the circuit board.
Major Decision 2:
The second major decision of this project was changing the design of the Carpel Tunnel Prevention Sleeve to be more like an arm brace as opposed to the original bracelet idea. This change was a result of me struggling to keep both the VL53L0X Laser Distance Sensor and the ADXL335 3-axis Accelerometer parallel to the surface it was above. With the bracelet design, the sensors shifted around too much. With the new arm brace design, there was another VELCRO strip keeping the sensors in-place.
Process Images:
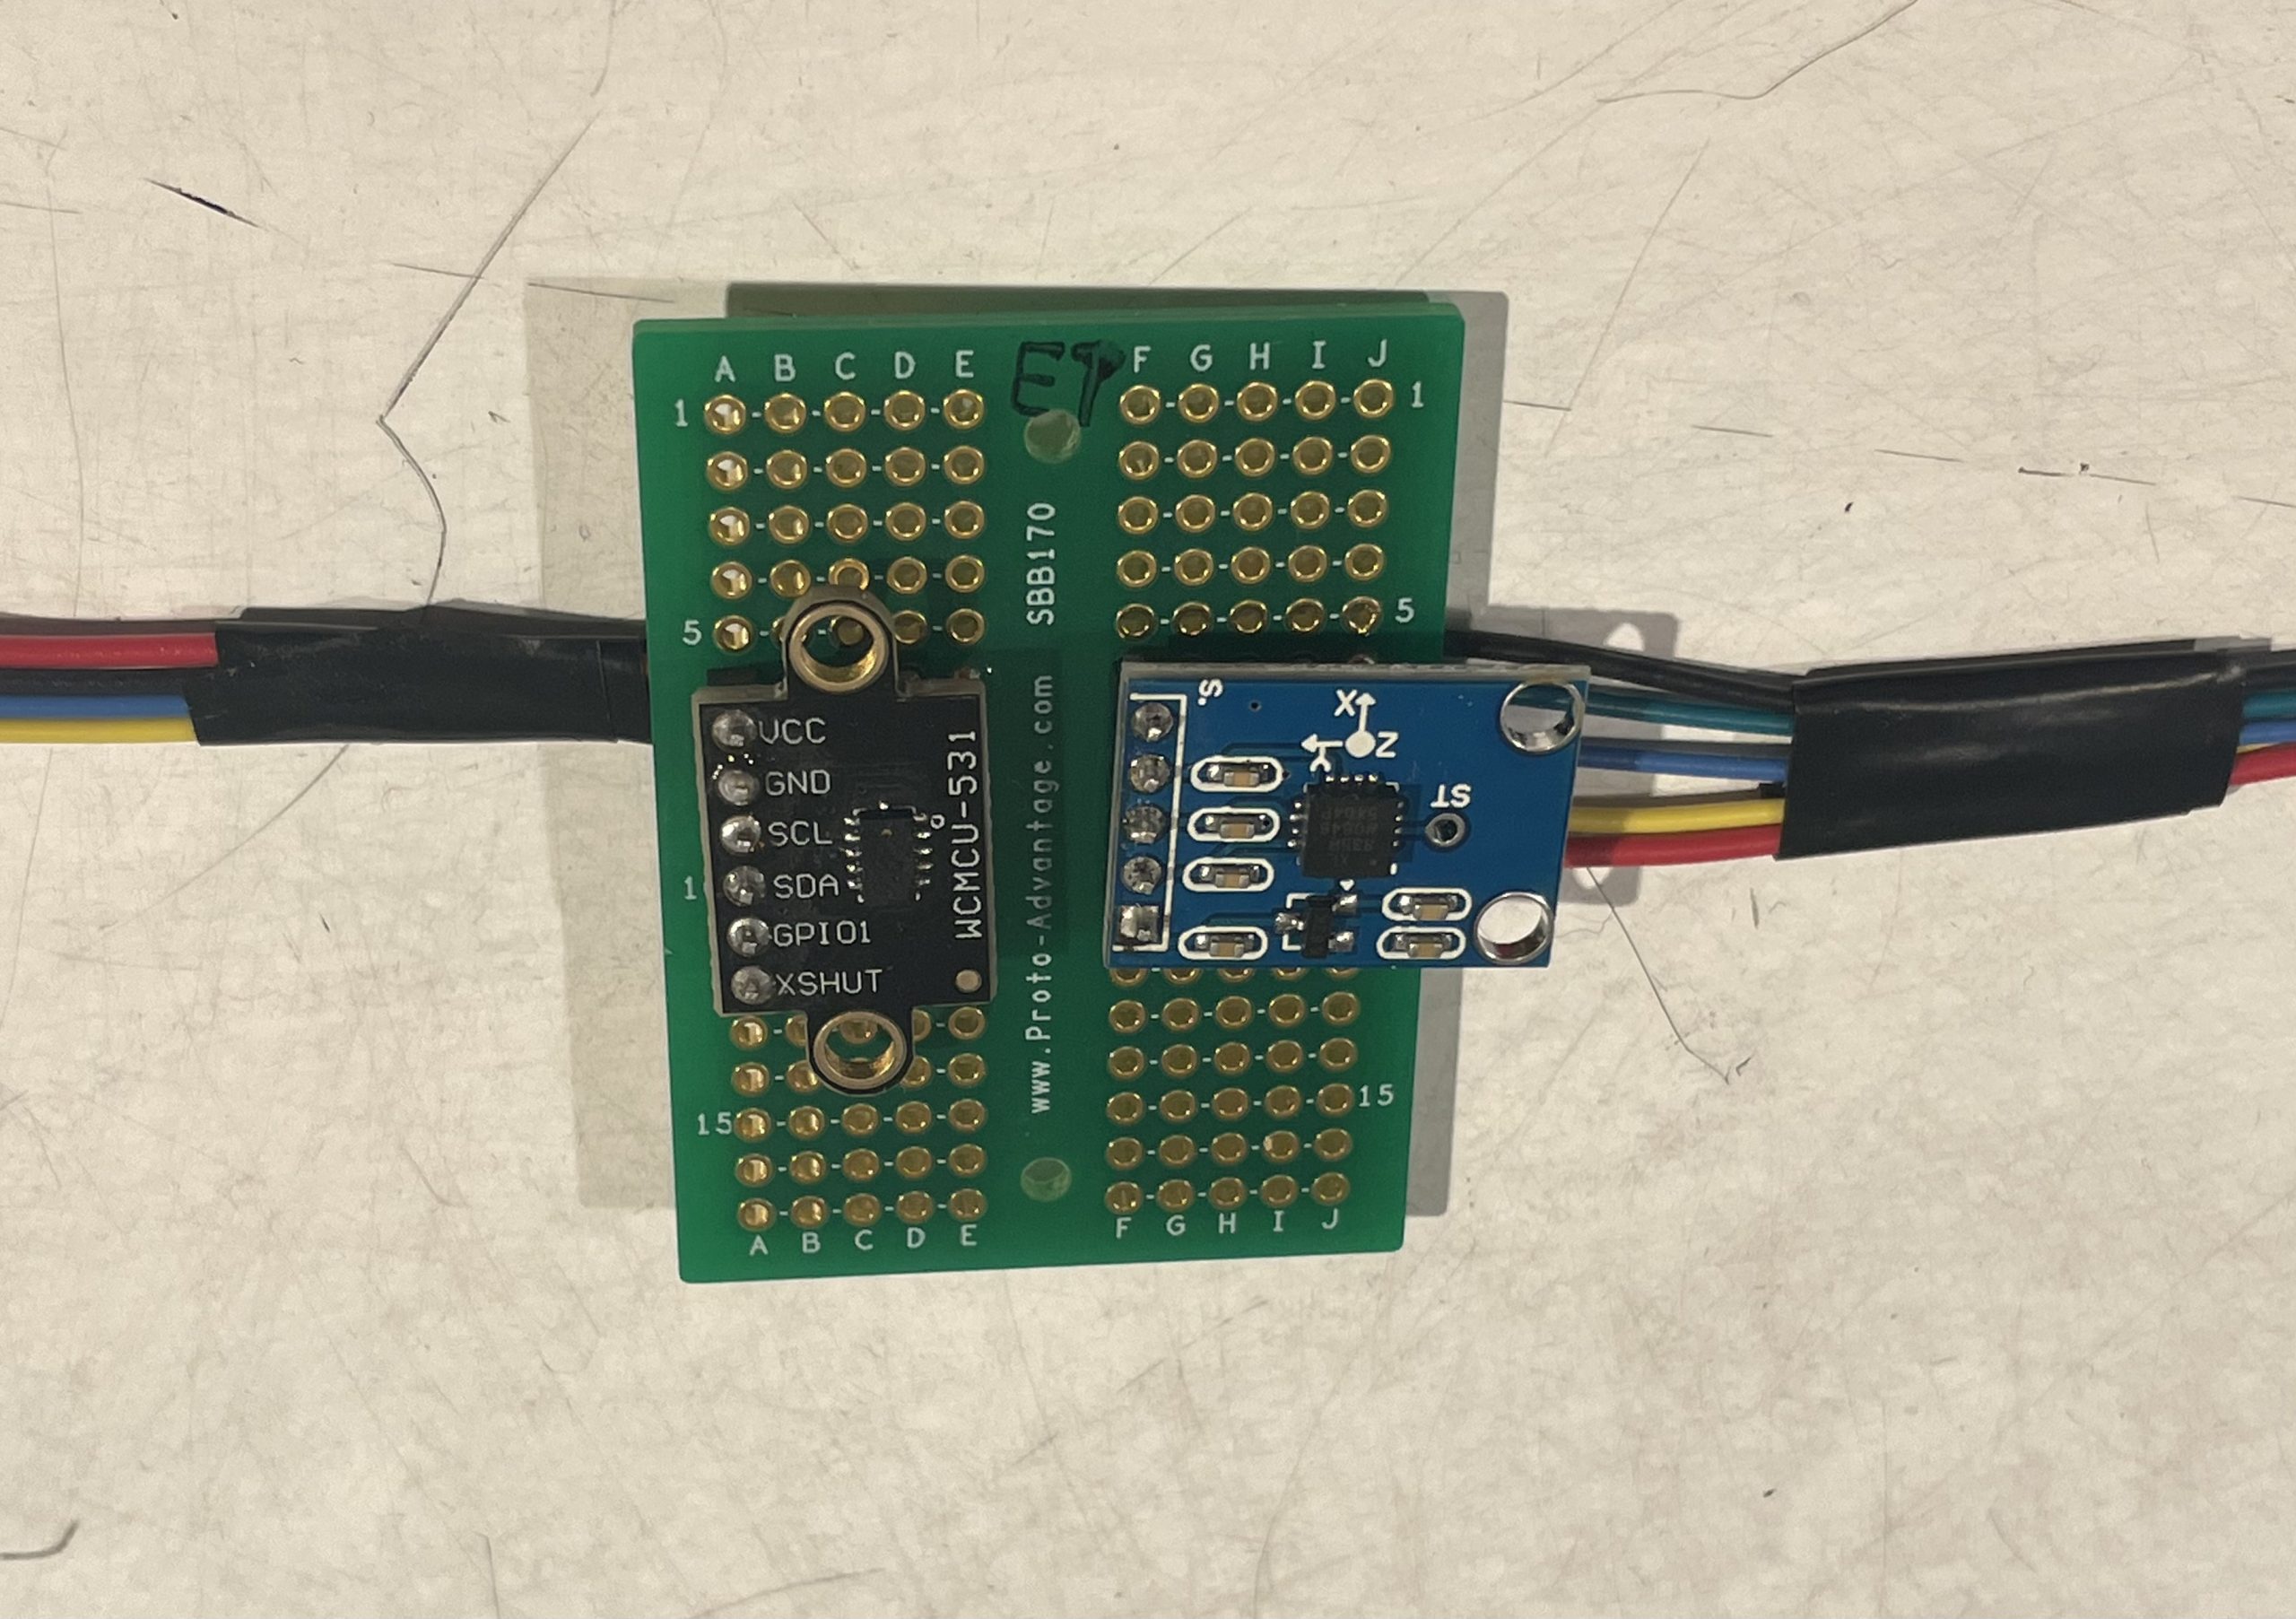
3-axis Accelerometer ADXL335 and VL53L0X Laser Distance Sensor soldered on a circuit board
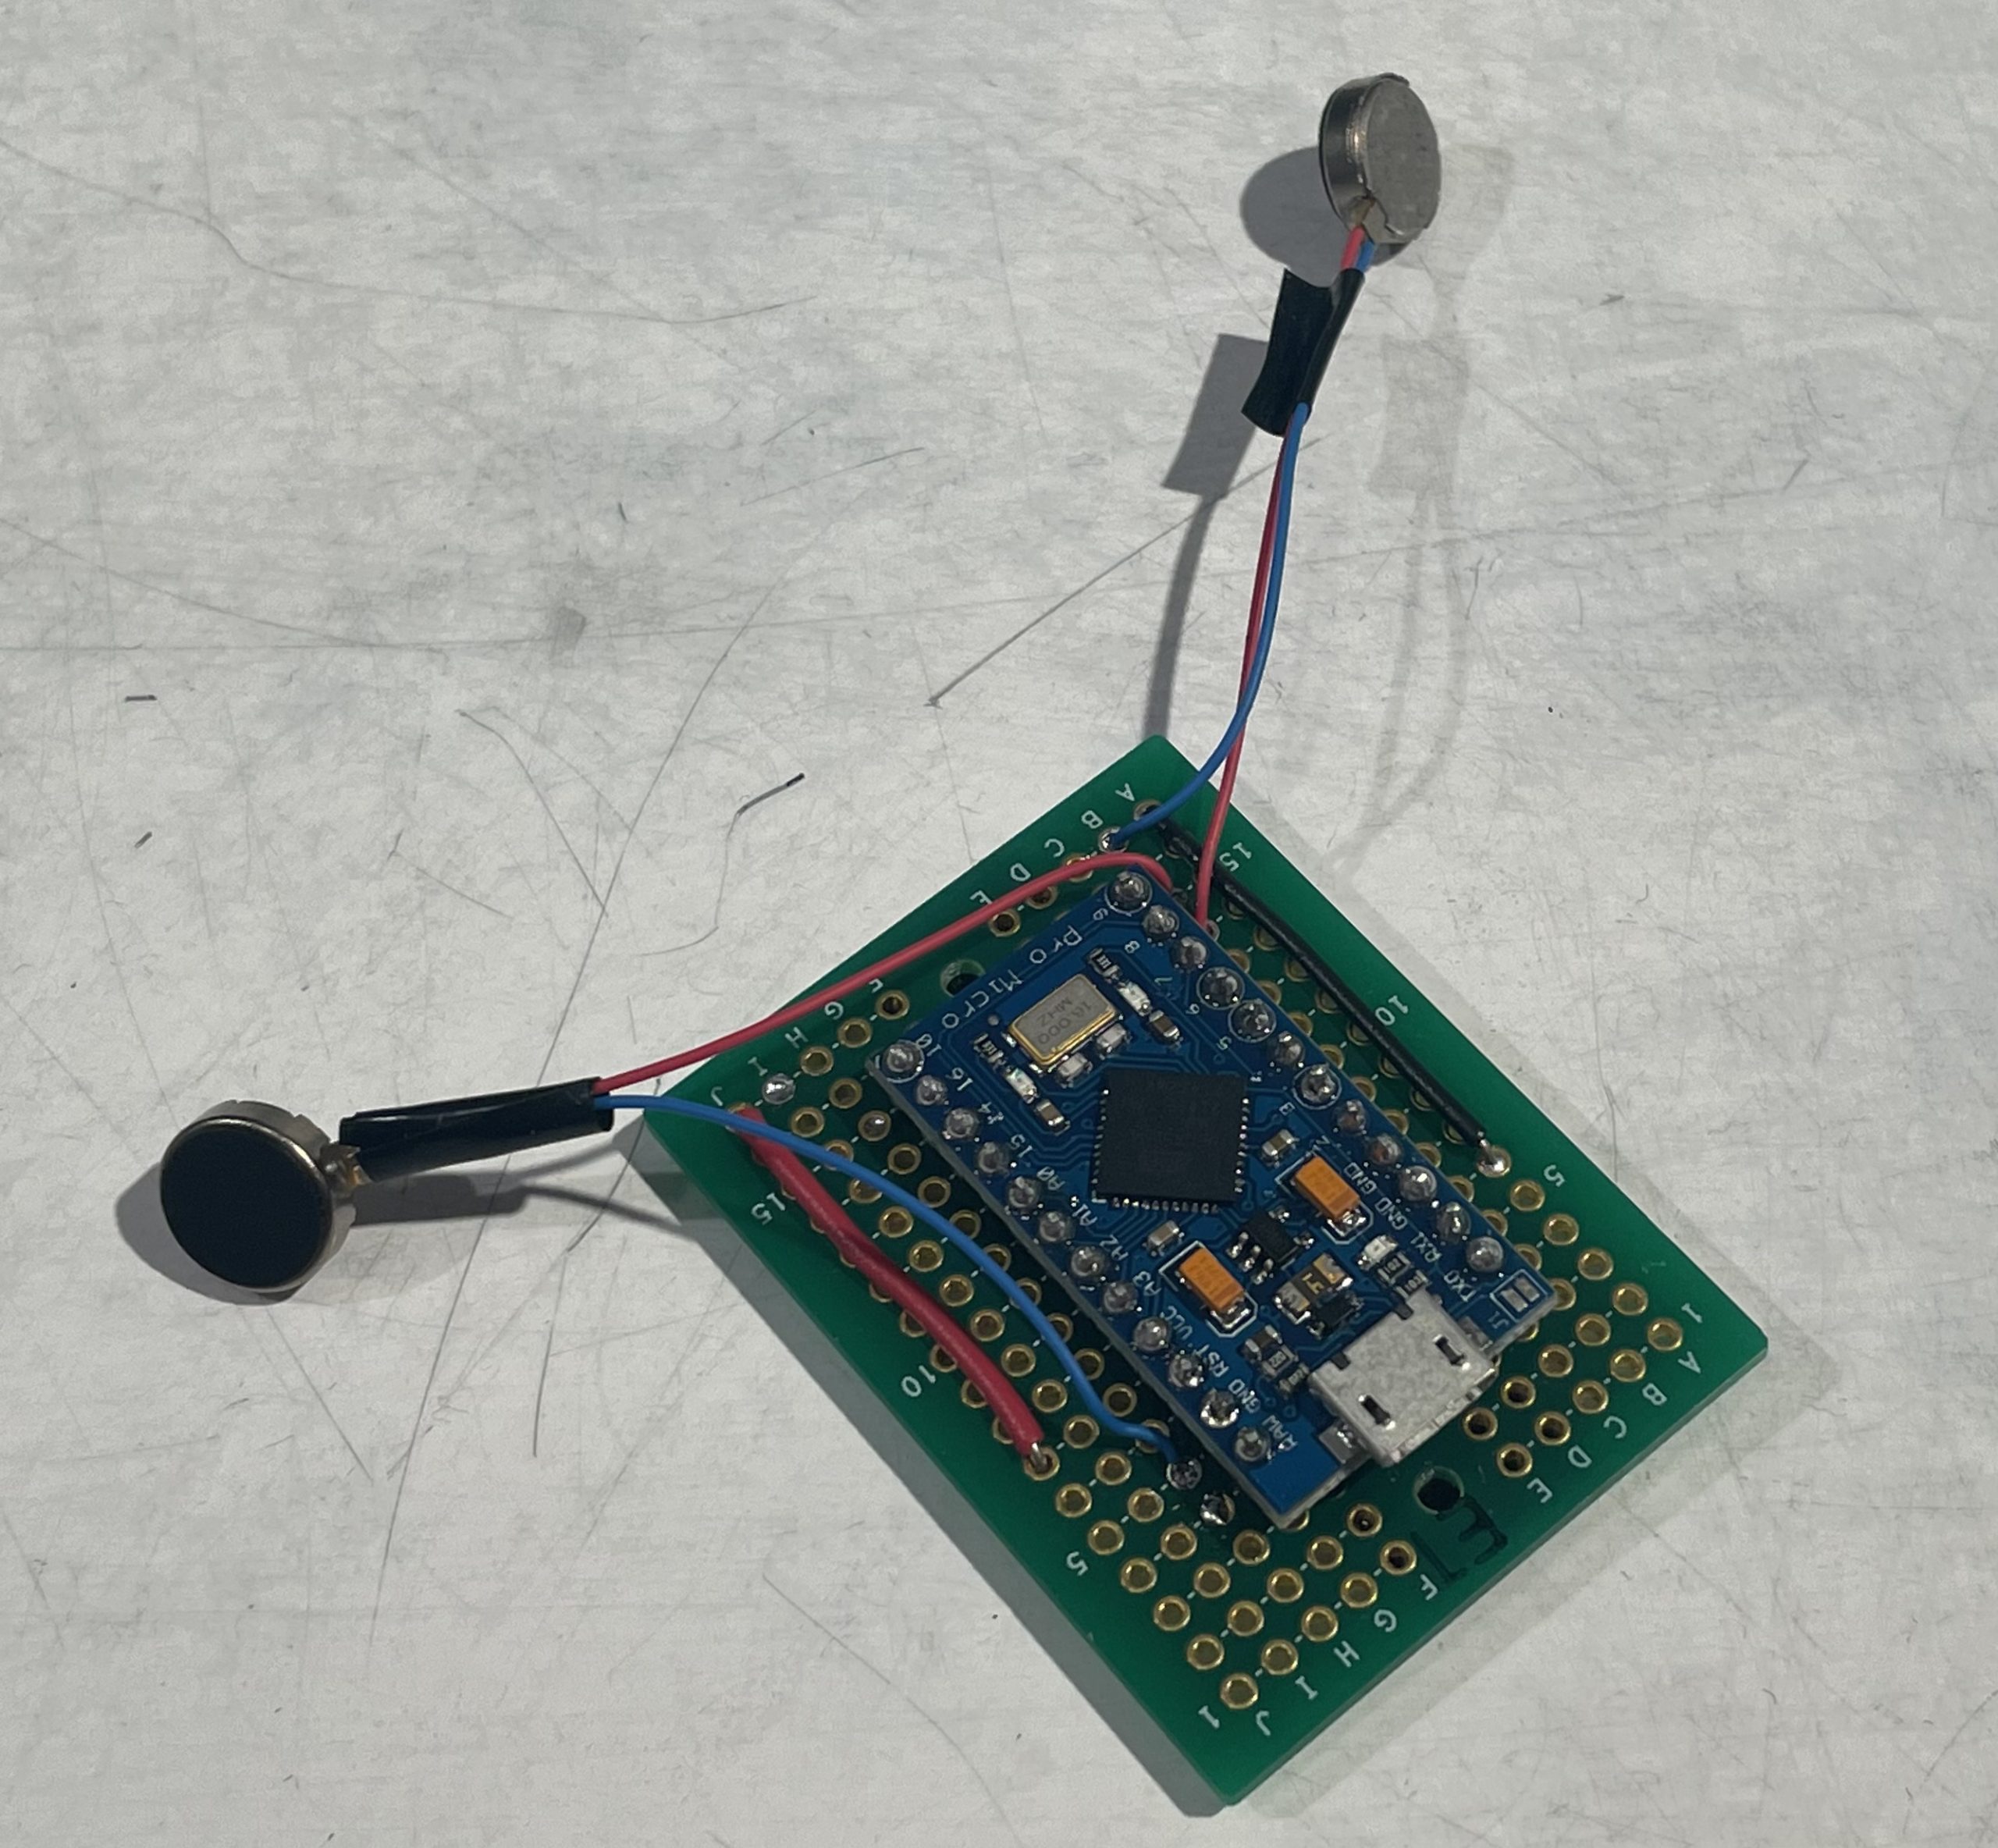
Both vibrating motors soldered alongside an Arduino Pro Micro
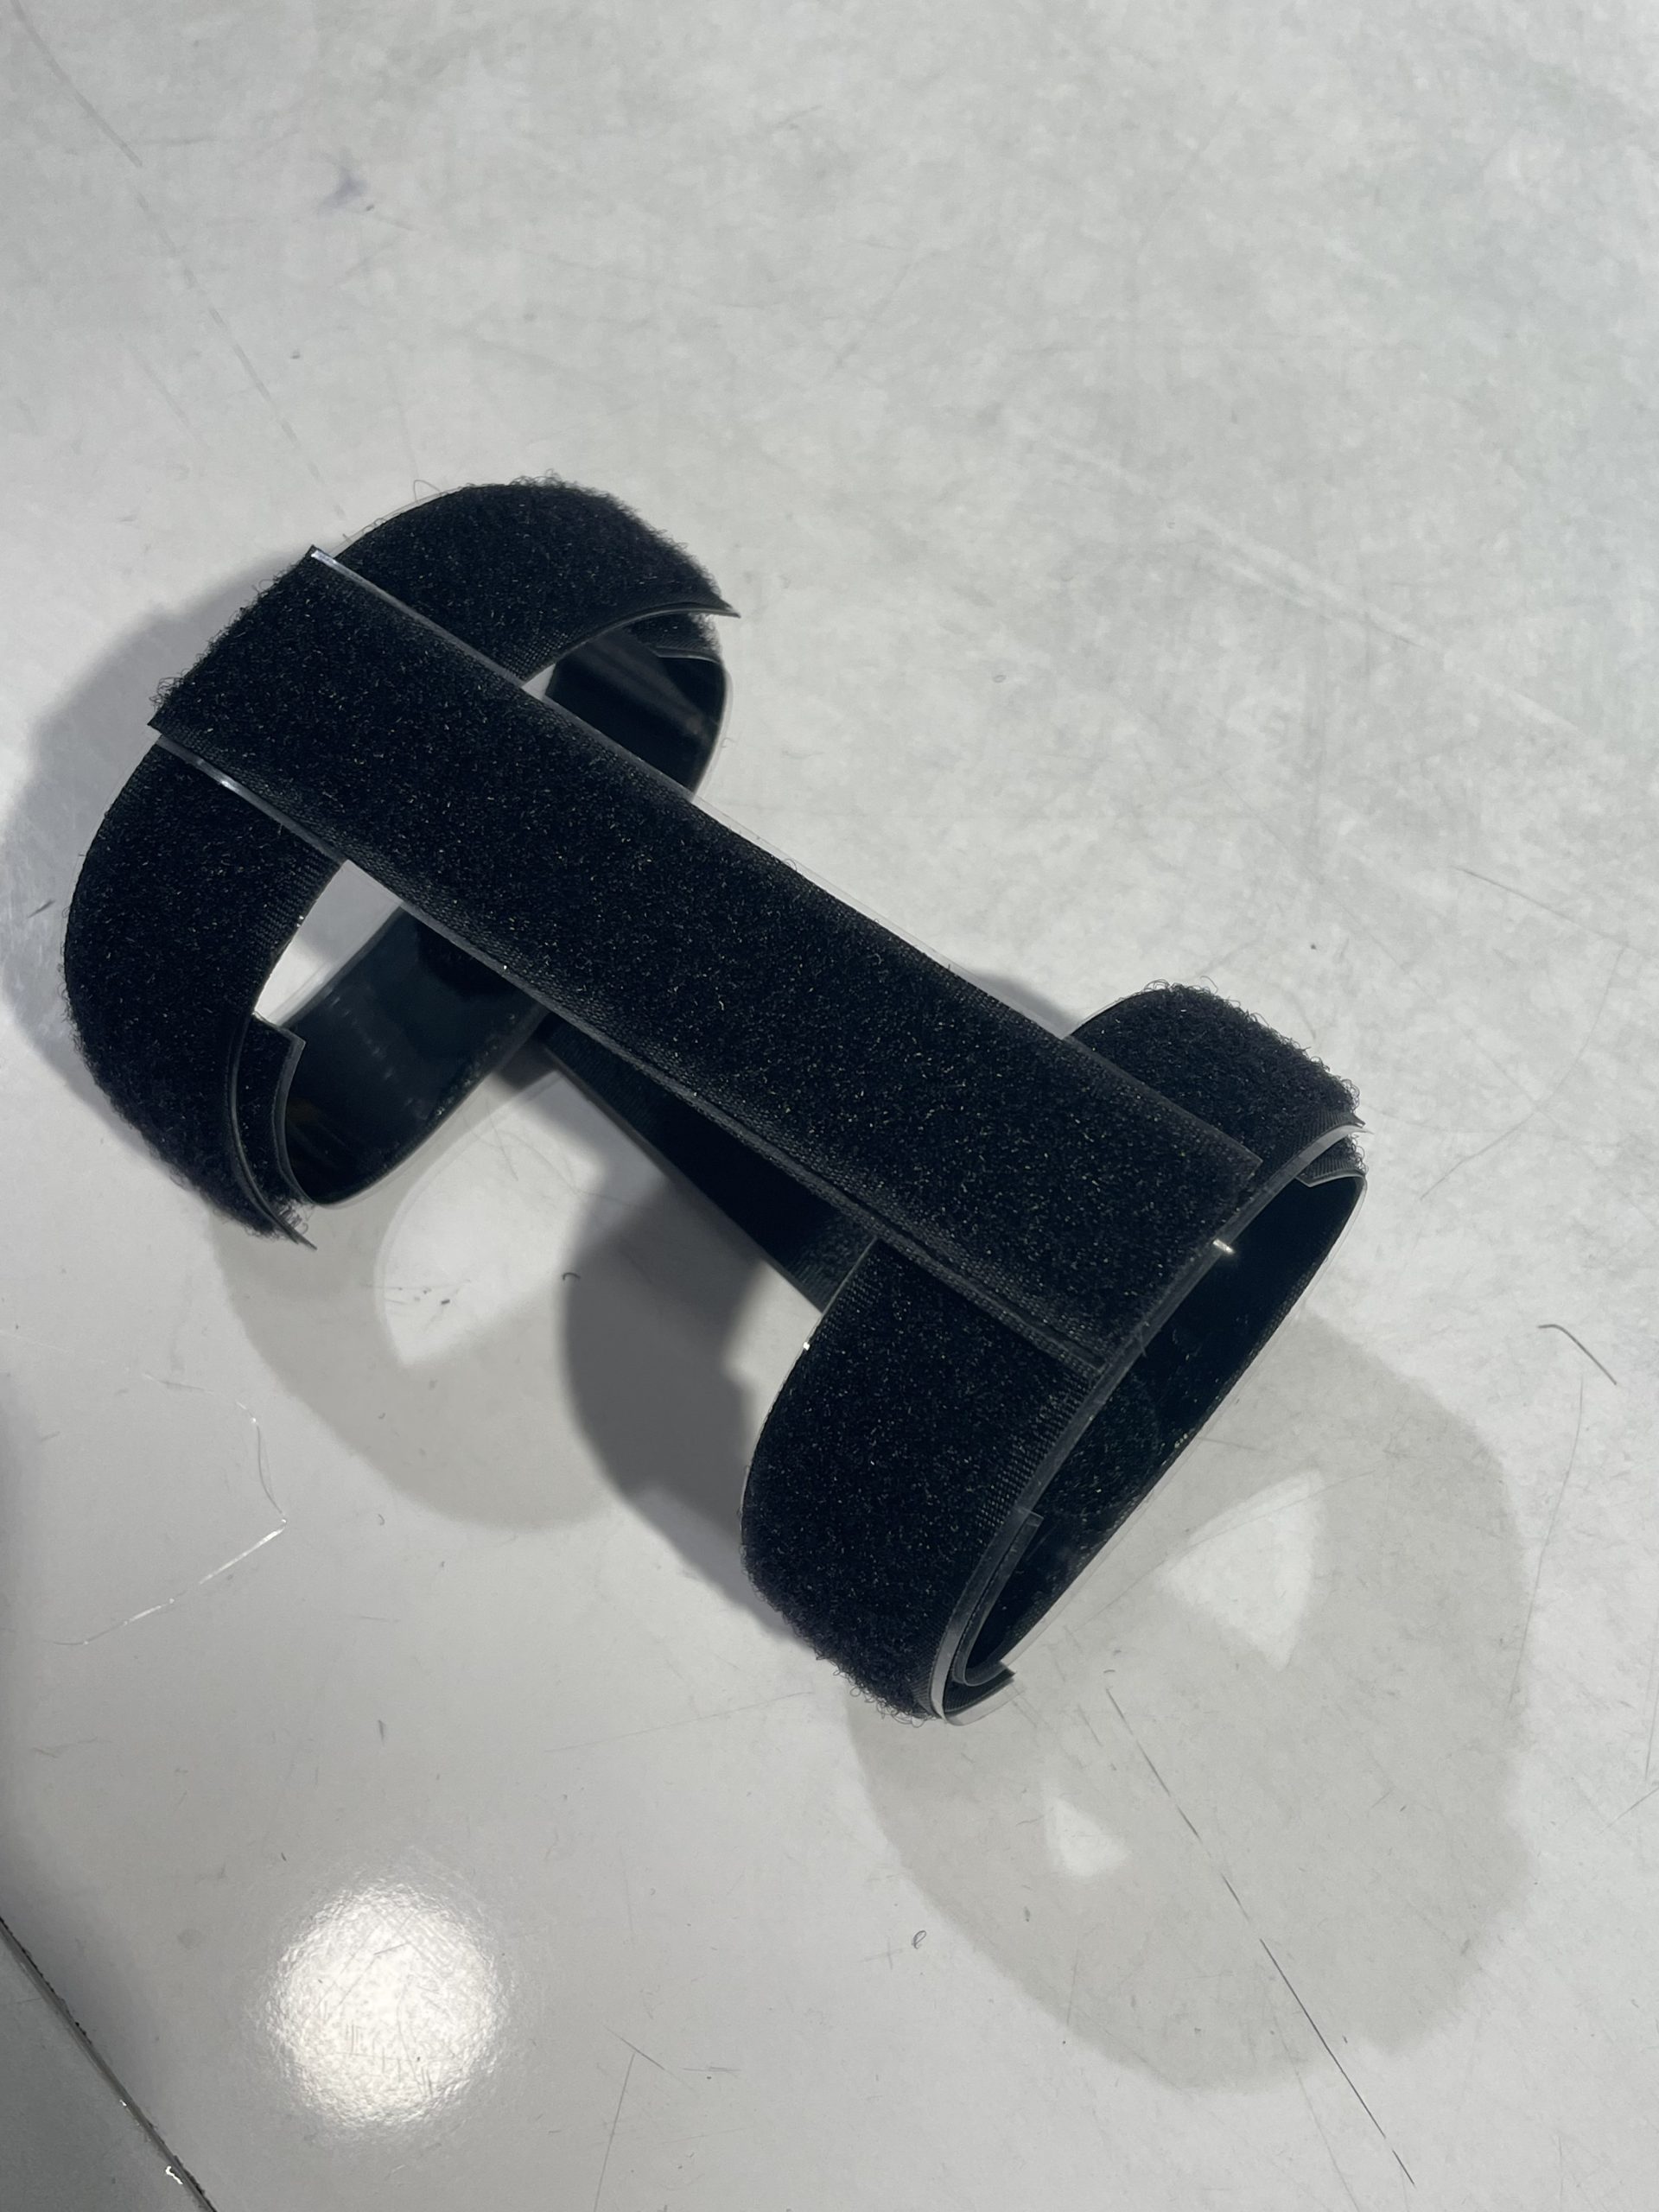
The Carpal Tunnel Prevention VELCRO arm brace
Discussion
From the in-class critique, I received valuable feedback from my classmates that I would consider in the next iteration of the Carpel Tunnel Prevention Sleeve. One specific comment read: “Maybe figure out what’s up with the smell”. This is an incredibly important piece of feedback, because the smell the commenter is referring to the burning smell from the Arduino Pro Micro. My original plan was to power the Carpel Tunnel Prevention Sleeve using the four rechargeable AA batteries I got from IDEATE Lending. Unfortunately, all four batteries were dead and I was not given the charger. I ended up using a 9V battery for a device that can take up to 3.3V, which was not the best decision on my part.
In addition to this comment, the rest of the other comments talked to visual aspect of the Carpel Tunnel Prevention Sleeve. One such comment read: “I think it would be more usable if it was more comfortable and the wires were more hidden. More like a bracelet type of thing“. I agree with the concerns of this commenter. The Carpel Tunnel Prevention Sleeve is quite fragile and putting on and taking off the device is somewhat difficult. I wished I could have devised a clever way to hide the wires from the both the user and the audience.
On a scale from 1 to 5, where 1 is not satisfied at all and 5 is extremely satisfied, I am at a 4. I believe I was able to capture the functionality I was imagining during the Ideation Stage – a wearable device that buzzes. However, much of the visual design was not what I imagined. As of now, the design for the Carpel Tunnel Prevention Sleeve is a bit sloppy, and not sleek at all. I wish I could have improved the overall wiring of the device as some wires ended up crossing each other. I wish could have improved the soldering on the device as it isn’t too clean throughout the circuit board. Improving these three items would make me extremely satisfied with the Carpel Tunnel Prevention Sleeve.
A key discovery I made on this project was how difficult it is to make a compact device. Soldering, wiring, and designing in such as small scope was incredibly frustrating because there is little to no margin of error. Much of my struggle was a result of poor planning. If I could go back and talk to my past self, I would force him to spend a lot more time on planning out how each component will mesh with each other. On a more happy note, this project made me realize how much fun it was to play with VELCRO. In future project, I will look to include VELCRO at any step possible.
If I had to chance to build another iteration of the Carpel Tunnel Prevention Sleeve. I would investigate eliminating the wires completely. A bluetooth chip from IDEATE Lending maybe a good way to fulfill this desire. Another focus in the next iteration would be to make the arm brace a bit more fashionable. Perhaps, I could investigate making a full-on sleeve with fabric.
Block Diagram

Electrical Schematic

Code
/**
 * @Project Title: Carpal Tunnel Prevention Sleeve
 * @Author: Ethan Lu <ethanl2@andrew.cmu.edu>
 * @Description:
 * Processes analog readings from a VL53L0X distance Laser Sensor and a ADXL335 analog accelerometer
 * to calculate distance and angle relative to the table. If the distance and angle results in a
 * "bad position", the two vibrating motors will activate, signaling to the user to change positions.
 *
 * @Mapping:
 * Arduino Pin |  Role | Description
 * ------------|-------|------------
 *      2        INPUT    VL53L0X SDA
 *      3        INPUT    VL53L0X SCL
 *      4        INPUT   ADXL335 XOUT
 *      5        INPUT   ADXL335 YOUT
 *      6        INPUT   ADXL335 ZOUT
 *      8       OUTPUT   Motor OUTPUT
 *      9       OUTPUT   Motor OUTPUT
 */


/**
 * @brief: import header files
 */
#include <VL53L0X.h>
#include <Wire.h>
#include <math.h>

/**
 * @brief: define macros
 */
#define pinX 4
#define pinY 5
#define pinZ 6

#define pinMotorRight 8
#define pinMotorLeft 9

#define adcRef 3.3
#define zeroRef 1.569
#define sensitivityRef 0.3

/**
 * @brief: declare a VL53L0X object
 */
VL53L0X laser_distance;

/**
 * @brief: initialize variables
 */
unsigned x, y, z;
float vecX, vecY, vecZ;
float roll, pitch, yaw;

/**
 * @brief: initialize pinouts
 */
void setup() {
  Wire.begin();

  pinMode(pinX, INPUT);
  pinMode(pinY, INPUT);
  pinMode(pinZ, INPUT);

  pinMode(pinMotorRight, OUTPUT);
  pinMode(pinMotorLeft, OUTPUT);

  /**
   * @brief: initialize the VL53L0X object
   */
  laser_distance.init();
  laser_distance.setTimeout(500);
  laser_distance.startContinuous();

  analogReference(DEFAULT);
}

/**
 * @brief: activate the Carpal Tunnel Prevention Sleeve
 */
void loop() {
  int distance = laser_distance.readRangeContinuousMillimeters();
  delay(100);

  x = analogRead(pinX);
  y = analogRead(pinY);
  z = analogRead(pinZ);
  delay(100);

  vecX = vectorize(x);
  vecY = vectorize(y);
  vecZ = vectorize(z);
  delay(100);

  roll = eulerize(vecY, vecZ);
  pitch = eulerize(vecX, vecZ);
  yaw = eulerize(vecY, vecX);
  delay(100);

  roll = fabs(roll);
  pitch = fabs(pitch);
  yaw = fabs(yaw);

  /**
   * @brief: determine if a "bad position"
   */
  if(distance < 55) {
    /*
     * @brief: check if current position is bad
     */
    if(roll < 15.0 || 32.5 < roll || pitch < 19.5 || 32.5 < pitch) {
      activate();
      delay(1000);
    }
  }
  deactivate();
}

/**
 * @brief: determine the vector representation of an acceleration value
 * @param[in] a: acceleration value
 * @return: the predicted vector representation
 */
float vectorize(unsigned a) {
  return (a / 1024.0 * adcRef - zeroRef) / sensitivityRef;
}

/**
 * @brief: calculate the angle between two vectors
 * @param[in] v1: the first vector
 * @param[in] v2: the second vector
 * @return: the predicted angle between v1 and v2
 */
float eulerize(float v1, float v2) {
  return atan2(-v1, -v2) * (180 / PI) + 180;
}

/**
 * @brief: floating point equivalent to abs()
 * @param[in] x: the value to convert
 * @return: |x|
 */
float fabs(float x) {
  if(x < 0) {
    return -1 * x;
  }
  return x;
}

/**
 * @brief: send a 5V signal to the vibrating motors
 */
float activate() {
  digitalWrite(pinMotorRight, HIGH);
  digitalWrite(pinMotorLeft, HIGH);
}

/**
 * @brief: send a 0V signal to the vibrating motors
 */
float deactivate() {
  digitalWrite(pinMotorRight, LOW);
  digitalWrite(pinMotorLeft, LOW);
}