
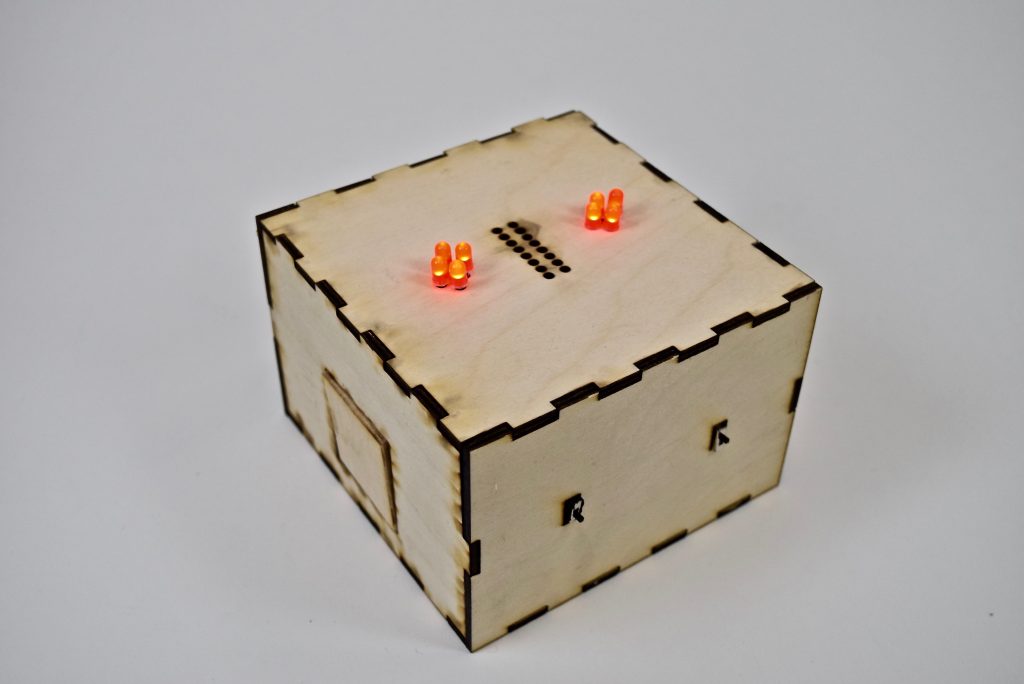
The Box in its steady state.
Description:
The Box has two light switches on the front, and two sets of four LEDs on the top. When the user flicks the right switch on, all LEDs turn on. When the user flicks the same switch off, both lights turn off. When the user flicks the left switch on, the Box starts to beep faster and faster. When that switch is turned off, the Box stops beeping. Flipping the same switch on resumes the beeping. After the beeping flatlines, a side panel will open on the left side of the Box and the user can grab the candy inside the Box.
The Box when the right switch is flipped on.
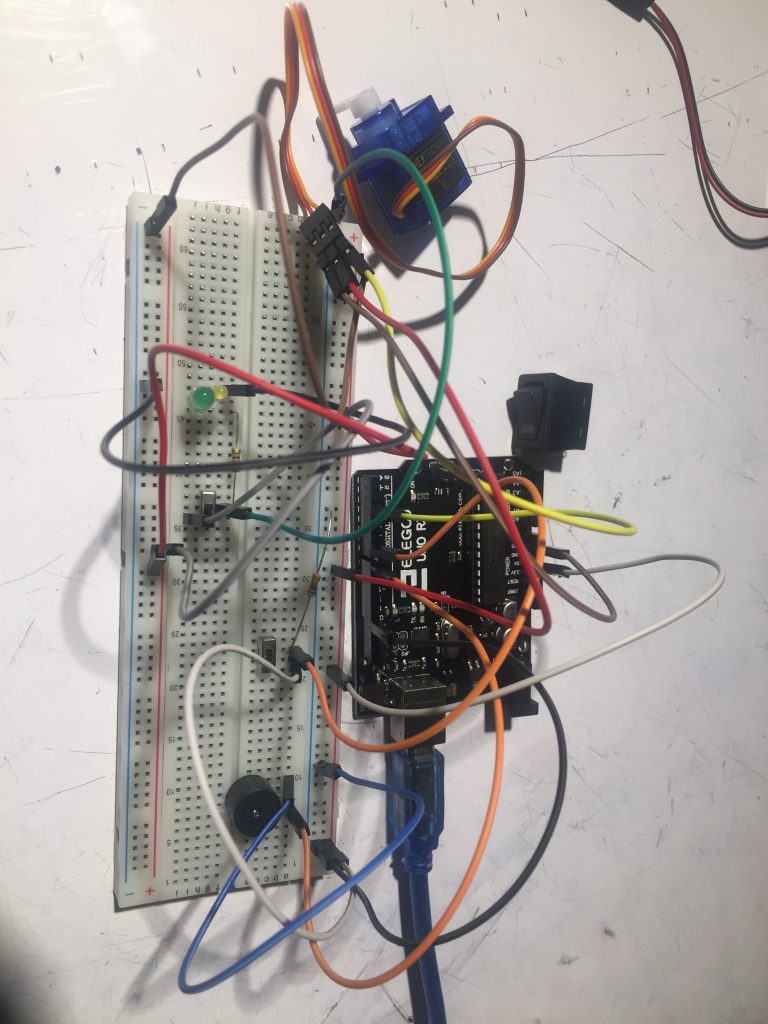
Progress 1: Initial assembly of circuit on large breadboard, using small LEDs. The decision of which switch and which lights to use was yet to be made.
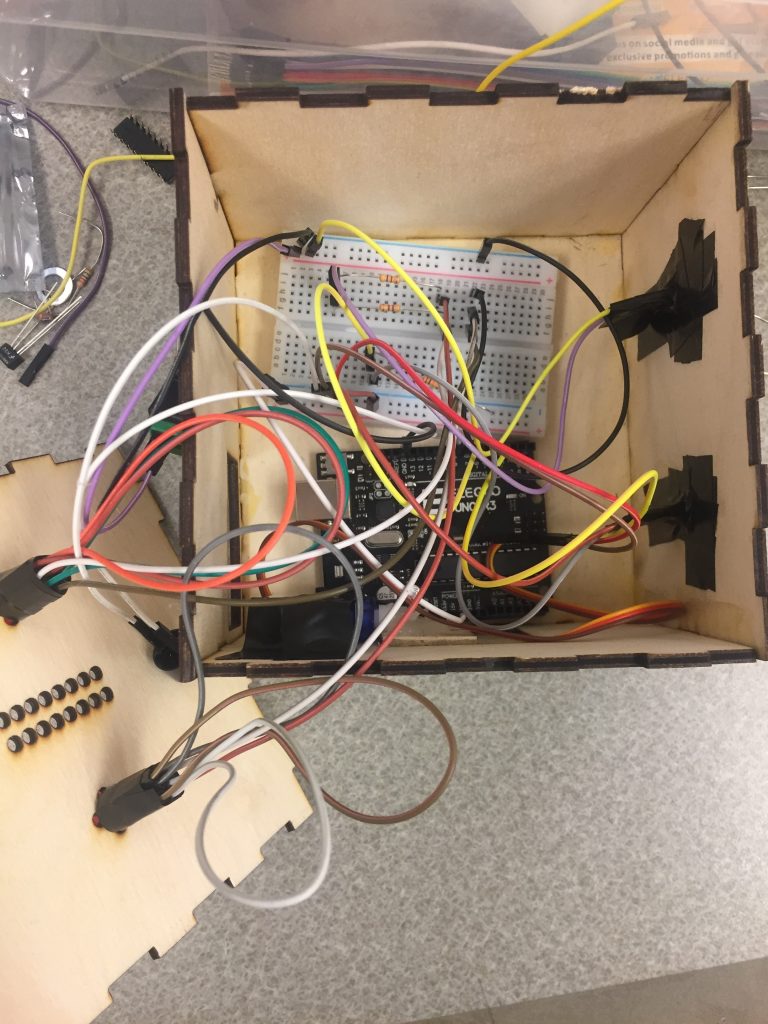
Progress 2: The circuits were moved to a smaller breadboard, LEDs, switches, and servomotor were attached to the interior of the Box, and the Arduino and breadboard were fit into the Box (first generation Box was ill fitting and not pictured).
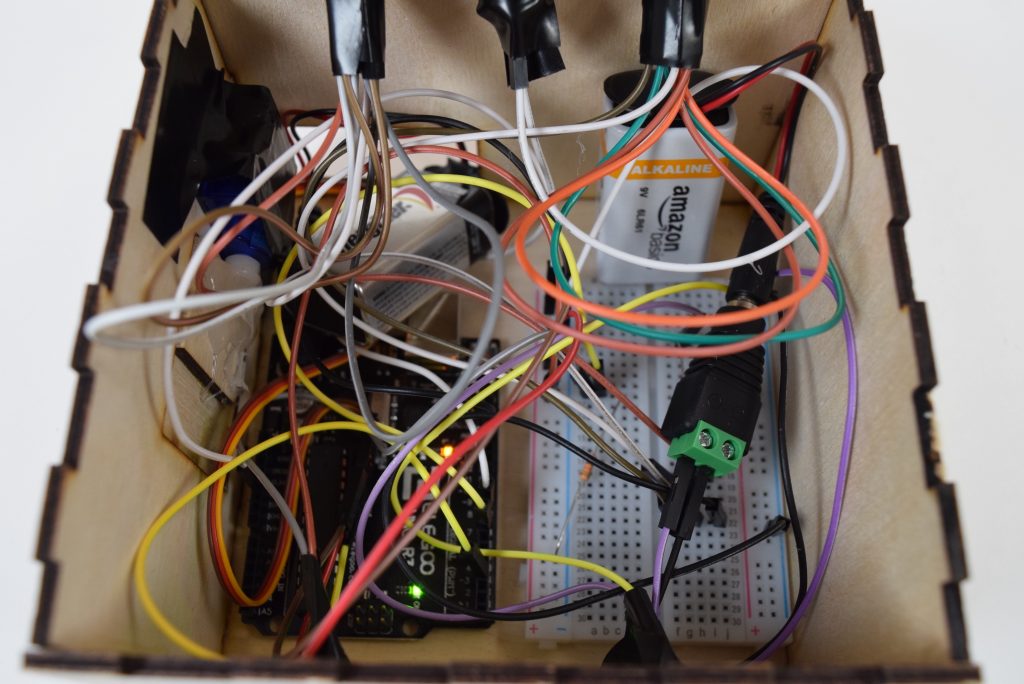
Progress 3: The speaker was attached to the lid and everything else was stuffed inside the Box with the two batteries; one for the Arduino and one for the LEDs.

We decided the most efficient way to stabilize the LEDs and their wires was to use electrical tape rather than solder.
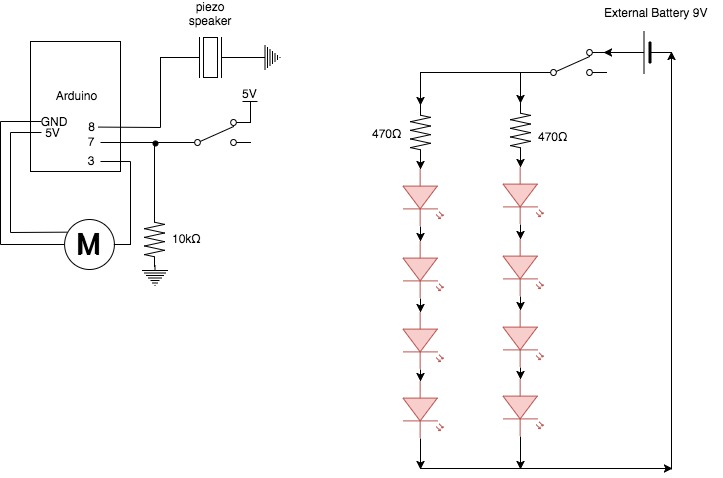
Schematic of both circuits used in the Box
Code:
#include <Servo.h>;
Servo myMotor;
int piezoPin = 8;
int servoPin = 3;
int interval = 100;
int switchPin = 7;
int delayTime1 = 1000;
int delayTime2 = delayTime1;
int play = 0;
int frequency = 2000;
int quiet = 500;
int waitTime = 10000;
void setup() {
myMotor.attach(servoPin);
Serial.begin(9600);
}
void loop() {
int switchVal = digitalRead(switchPin);
//decreases interval between beeps and resets # of plays
if (switchVal == 1 && delayTime2 > 50 && play == 4){
delayTime2 -= 100;
play = 0;
}
//beeping
if (switchVal == 1 && play != quiet){
/*Tone needs 2 arguments, but can take three
1) Pin#
2) Frequency - this is in hertz (cycles per second) which determines the pitch of the noise made
3) Duration - how long teh tone plays
*/
tone(piezoPin, frequency, interval);
delay(delayTime2);
play++;
}
//move motor when done beeping
if (play == quiet){
myMotor.write(90);
//wait a little so that the user can take the prize
delay(waitTime);
//reset parameters
delayTime2 = delayTime1;
play = 0;
myMotor.write(175);
}
Serial.print(play);
Serial.print(" ");
Serial.println(delayTime2);
}
Discussion:
Overall as a team we had little prior experience working with circuits so it was a great learning experience to create a full system from scratch. The hardest part was determining with our current knowledge what components we could use to achieve the aesthetic and goals that we wanted with our product. We tried for instance to use mini light bulbs instead of LEDs but could not figure out how to wire them properly. We also tried to use large toggle switches but instead switched to the smaller switches in order to use components that we knew how to wire. These decisions were largely made due to our inexperience working with larger components so we decided to stay with things we had worked with before. Another difficult part was the creation of the laser cut box and the trap door. It was difficult because we taped the servo motor to the wall of the box and glued the rotor to the door. This led to alignment issues when the door would open. From this we learned to properly plan and spec out everything before building it. This would have made fitting the components, from the servo to the switches, easier to the laser cut pieces.
We had little trouble once we determined the final components we were using in both the creation of the circuit and the coding. All of the logic was relatively simple in our operation and we just had to make little changes to things such as the frequency of the beeps. Looking back we could have changed the code in order to account for different user cases in how people could potentially interact with our box. As we had it set up, one switch powered the LEDs while the other switch triggered the noises as well as the trap door. What we should have done was make the first switch hit power the lights then the second switch trigger the noises/trap door. This would have led to the correct order of events happening no matter what thus setting up the overall surprise better. Overall this project was a great introduction to making an electro-mechanical system. We were able to see the importance of everything from using the right electrical components, to creating a sound mechanical system, and accounting for multiple usage cases in our code.
Leave a Reply
You must be logged in to post a comment.