What I’ve Made?
I created a device that allows me and other students to anonymously silence loud talkers in our design studio space.
How Does it Work?
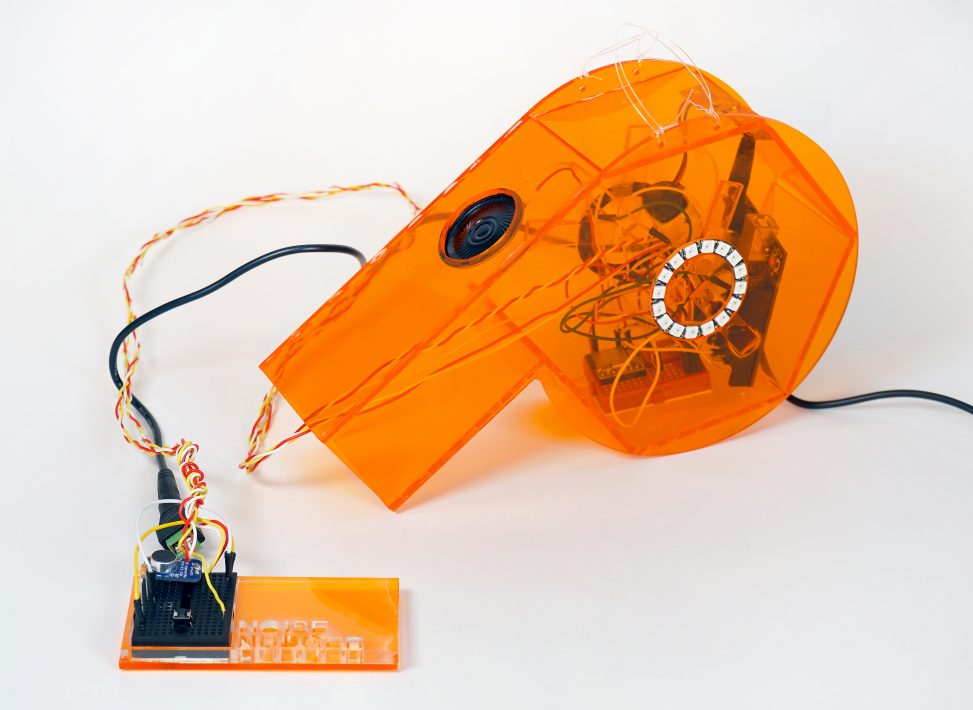
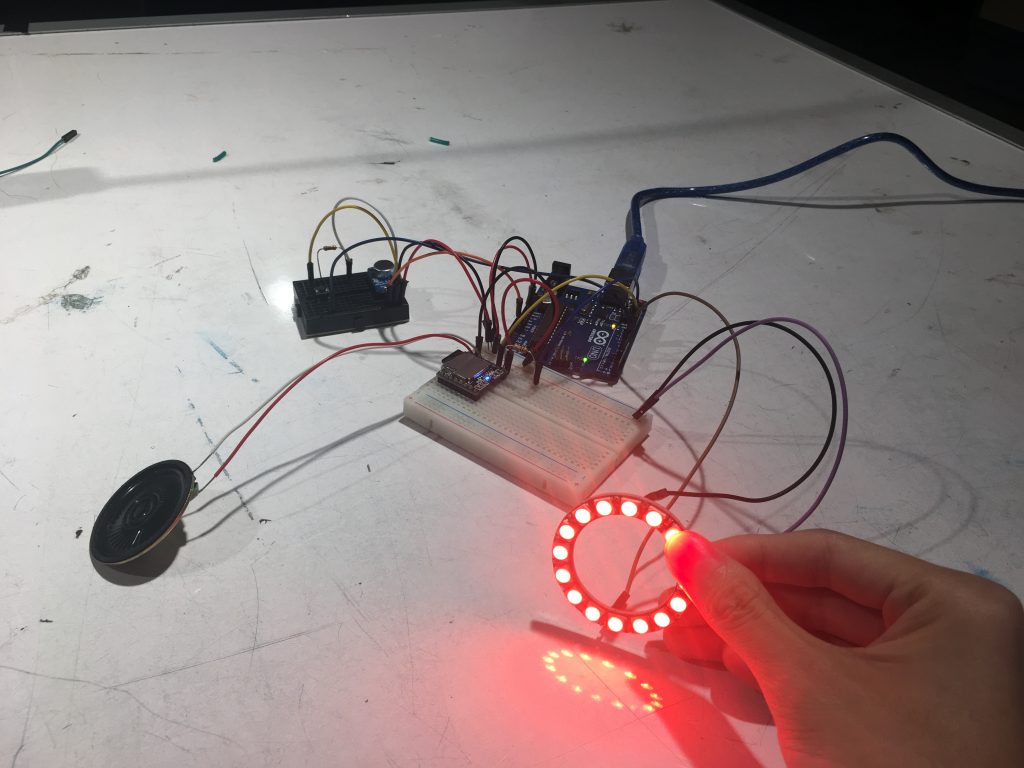
The device prototype is comprised of a noise nudging station and a whistle-shaped notifier. The station has a button and a microphone, and ideally will be located on every student’s desk. The notifier has an Arduino, a battery, a DFPlayer Mini MP3 Player, a speaker and two Neo-pixel LEDs. Ideally the notifier will be located at the center of the studio space, hanging from the ceiling.
If the user is pressing the station button and the noise level (reading from microphone) is below certain threshold, the notifier will not be activated since the environment is judged to be not that noisy.
If the user is pressing the station button and the noise level is above certain threshold, the notifier will play “Please keep your voice down”recording for three times, and the LEDs will light up with an animated color pattern.

Hardware-Notifier
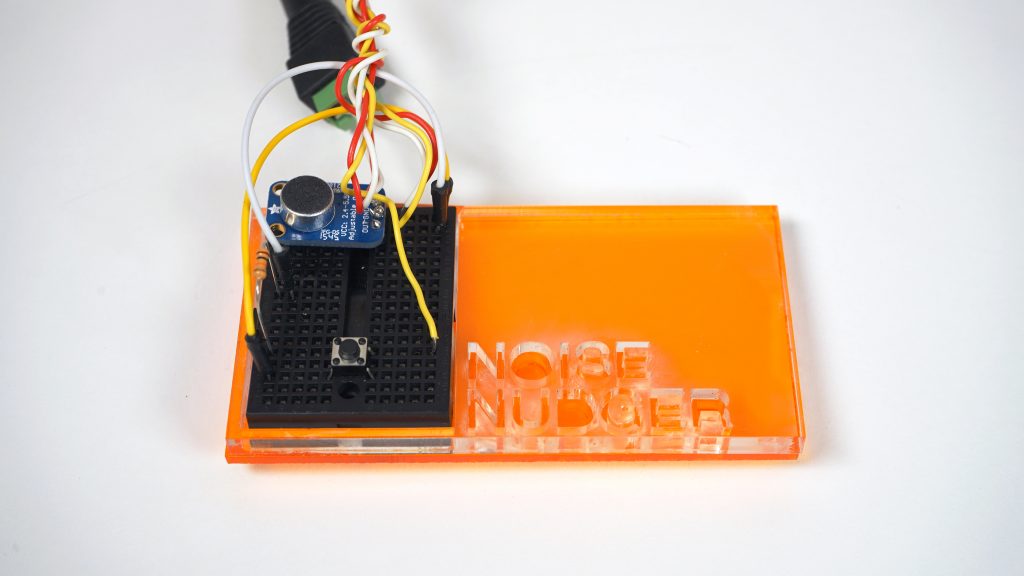
Hardware-Noise Nudging Station
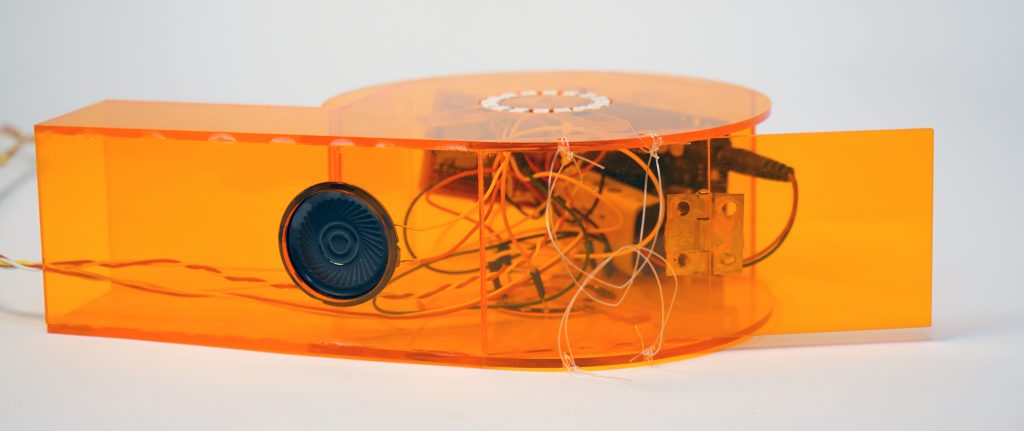
Top View
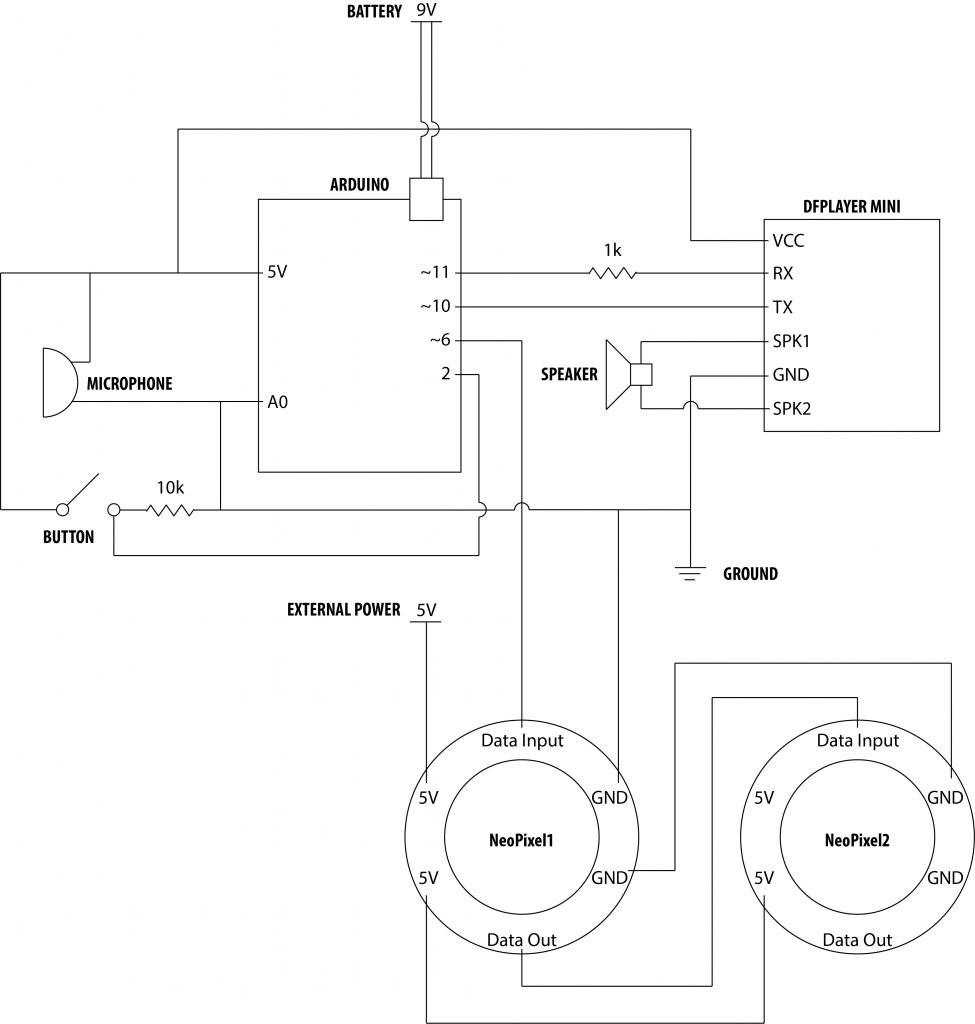
Electronics Wiring Diagram
The Arduino code for controlling the system is shown below:
</pre>
#include "Adafruit_NeoPixel.h"
//#include "Arduino.h"
#include "SoftwareSerial.h"
//#include "DFRobotDFPlayerMini.h"
#include <DFMiniMp3.h>

#ifdef __AVR__
#include <avr/power.h>
#endif

#define PIN1 6
#define NUMPIXELS1 32
Adafruit_NeoPixel ring1 = Adafruit_NeoPixel(NUMPIXELS1, PIN1, NEO_GRB + NEO_KHZ800);

int delayval = 500; // delay for half a second

class Mp3Notify
{
public:
static void OnError(uint16_t errorCode)
{
// see DfMp3_Error for code meaning
Serial.println();
Serial.print("Com Error ");
Serial.println(errorCode);
}

static void OnPlayFinished(uint16_t globalTrack)
{
Serial.println();
Serial.print("Play finished for #");
Serial.println(globalTrack);
}

static void OnCardOnline(uint16_t code)
{
Serial.println();
Serial.print("Card online ");
Serial.println(code);
}

static void OnCardInserted(uint16_t code)
{
Serial.println();
Serial.print("Card inserted ");
Serial.println(code);
}

static void OnCardRemoved(uint16_t code)
{
Serial.println();
Serial.print("Card removed ");
Serial.println(code);
}
};

SoftwareSerial secondarySerial(10, 11); // RX, TX
DFMiniMp3<SoftwareSerial, Mp3Notify> mp3(secondarySerial);

int noisePin = A0;
int buttonPin = 2;
int buttonState = 0;
int noiseReading = 0;
const int sampleWindow = 50; // Sample window width in mS (50 mS = 20Hz)
long timer = 0;
int previousCounter = 0;
int Counter = 1;

void setup()
{
secondarySerial.begin(9600);
Serial.begin(115200);

Serial.println("initializing...");

pinMode(noisePin, INPUT);
pinMode(buttonPin, INPUT);

ring1.begin();
ring1.show();

mp3.begin();
mp3.setVolume(30);

Serial.println("starting...");

}

void loop()
{

long startMillis = millis(); // Start of sample window
int peakToPeak = 0; // peak-to-peak level
int signalMax = 0;
int signalMin = 1024;

while (millis() - startMillis < sampleWindow)
{
noiseReading = analogRead(noisePin);
if (noiseReading < 1024) // toss out spurious readings
{
if (noiseReading > signalMax)
{
signalMax = noiseReading; // save just the max levels
}
else if (noiseReading < signalMin)
{
signalMin = noiseReading; // save just the min levels
}
}
}
peakToPeak = signalMax - signalMin; // max - min = peak-peak amplitude
Serial.print ("Volume: ");
Serial.print (peakToPeak);

buttonState = digitalRead(buttonPin);
Serial.print ("; Button: ");
Serial.print (buttonState);

Serial.print ("; Timer: ");
Serial.println (millis() - timer);

if ( peakToPeak >= 45 && buttonState == HIGH ) {
mp3.playRandomTrackFromAll();
previousCounter = Counter;
mp3.pause();
}

if (previousCounter == Counter) {
for (int i = 0; i < 10; i++) {
mp3.start();
delay(1000);
mp3.pause();
for (int j = 0; j < NUMPIXELS1; j++) {
ring1.setPixelColor(j, ring1.Color(255, 20 * i, 0));
}
ring1.show();
}
previousCounter = 0;
} else {
for (int i = 0; i < NUMPIXELS1; i++) {
ring1.setPixelColor(i, ring1.Color(0, 0, 0));
}
ring1.show();
}

delay( 100 );
}
<pre>
The code can also be found via the link below:
https://github.com/willowhong/Noise-Nudger/blob/master/Nudger.ino
What Is the Process?
1. Firstly I tried to make the button, the microphone, the DFPlayer, the speaker and one NeoPixel work together. I eventually found one DFPlayer library that works well.
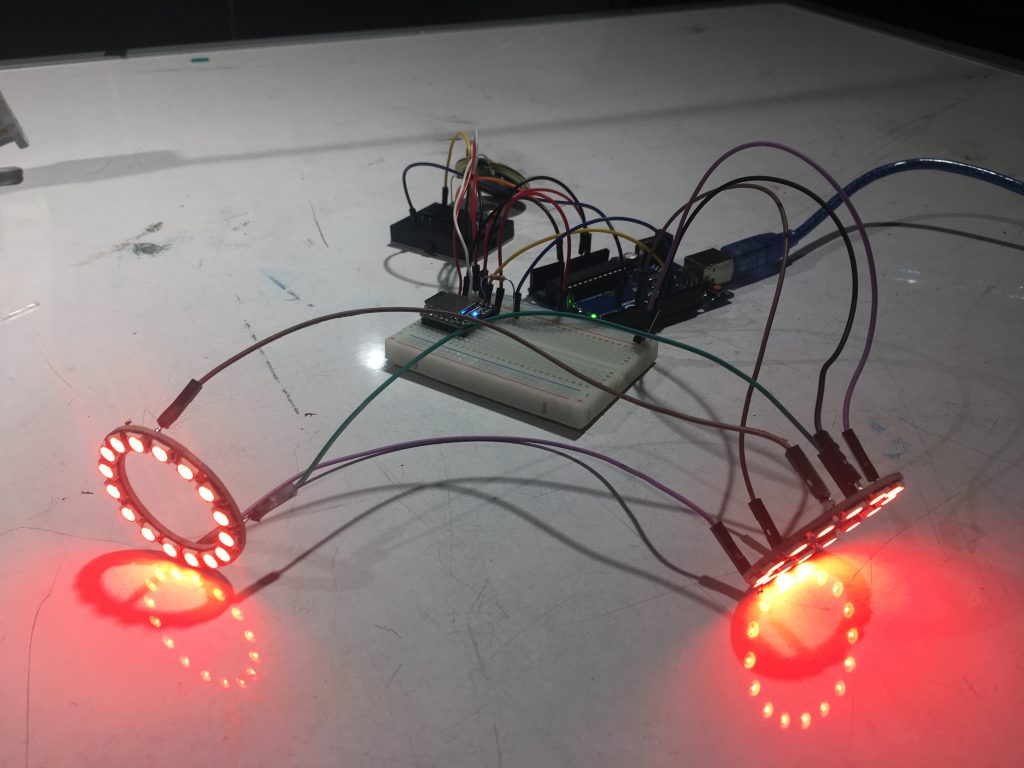
2. Then I put two NeoPixels into a series circuit, and found that the player is not functioning well. I then learnt that the LEDs need a separate 5V power to avoid interference with the player.
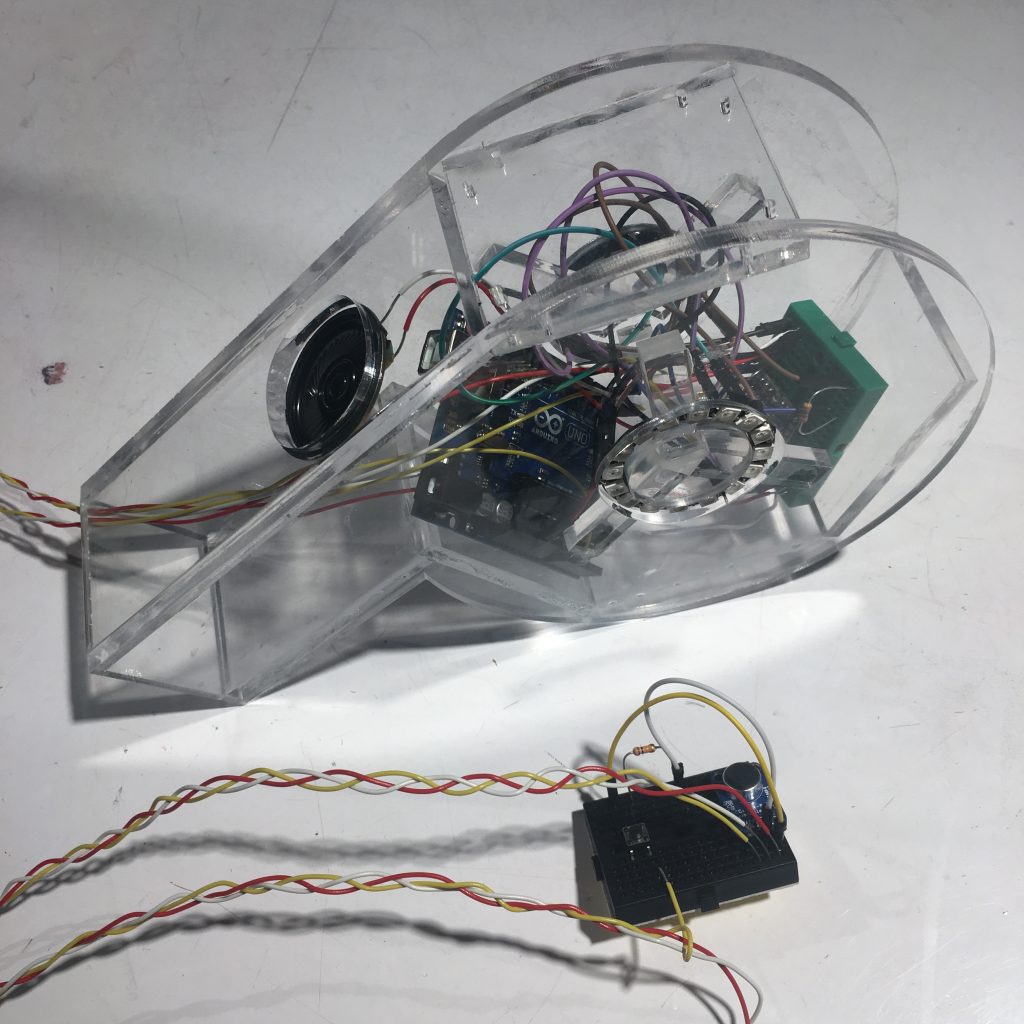
3. Next I lasercutted the whistle form and put all parts together for testing. I found that the width and the place for tiding the string were not right. And the glue trace was too obvious on the transparent acrylic.
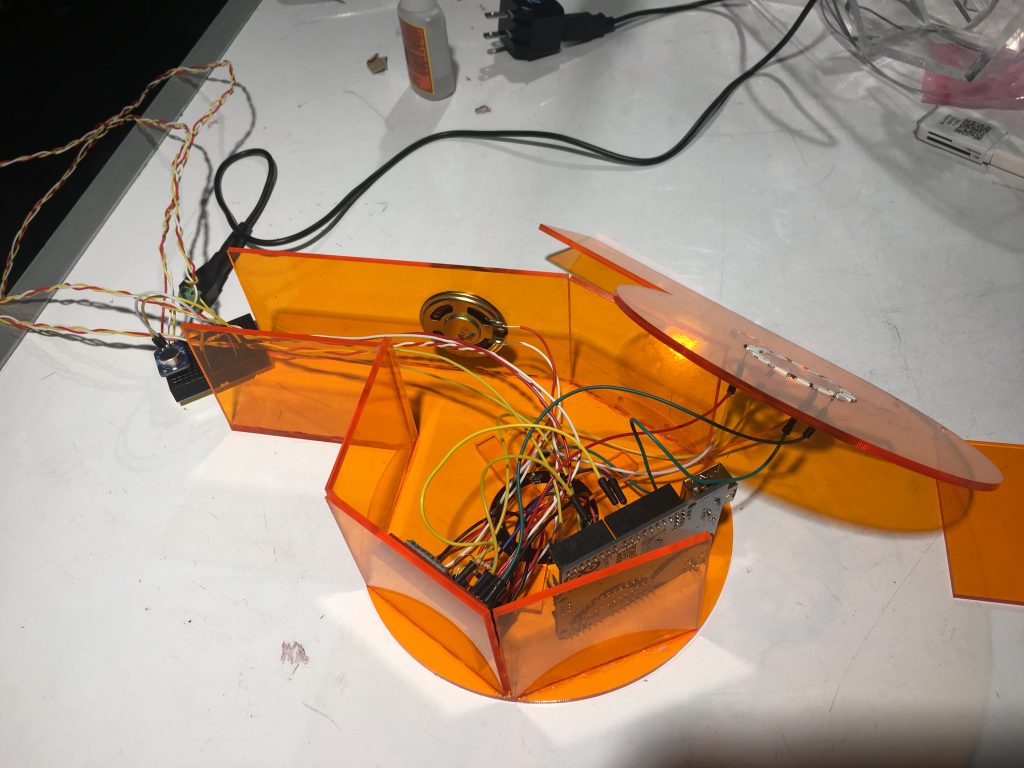
4. Lastly I recutted the form and tested all parts again.
REFLECTION
I spent a lot of time trying to figure out how to make the audio play and the NeoPixel light animation work together. Initially I hooked up everything and ran the code, and I could not figure out why when there was no output. I then learnt to do one thing at a time, trying to make the simplest system work first, then adding more parts to increase the system complexity.
Another thing I learnt is that I need to connect everything to one common ground. Initially I connected the player’s GND to Arduino’s GND pin, and connected the NeoPixel’s GND to external power’s GND. This results in a different reference point for reading voltages (signals). In order to have a correct signal reading, all grounds should be connected together.
Leave a Reply
You must be logged in to post a comment.