Introduction
Our overall goal is to create an assistive device for our partner Wilma to help her life in some fashion. After narrowing down product ideas we decided to develop a way for her to know the contents of her downstairs freezer without having to walk down an extra flight of stairs. We developed a product which takes physical user input to develop a inventory list which can be accessed from a different location. This is our first iteration prototype in which we wanted to develop a behaves like prototype to give Wilma the feel of what our final product will look like. After presenting this prototype and getting critique both from classmates and from Wilma we have been able to develop steps for how to take this prototype further.
Product
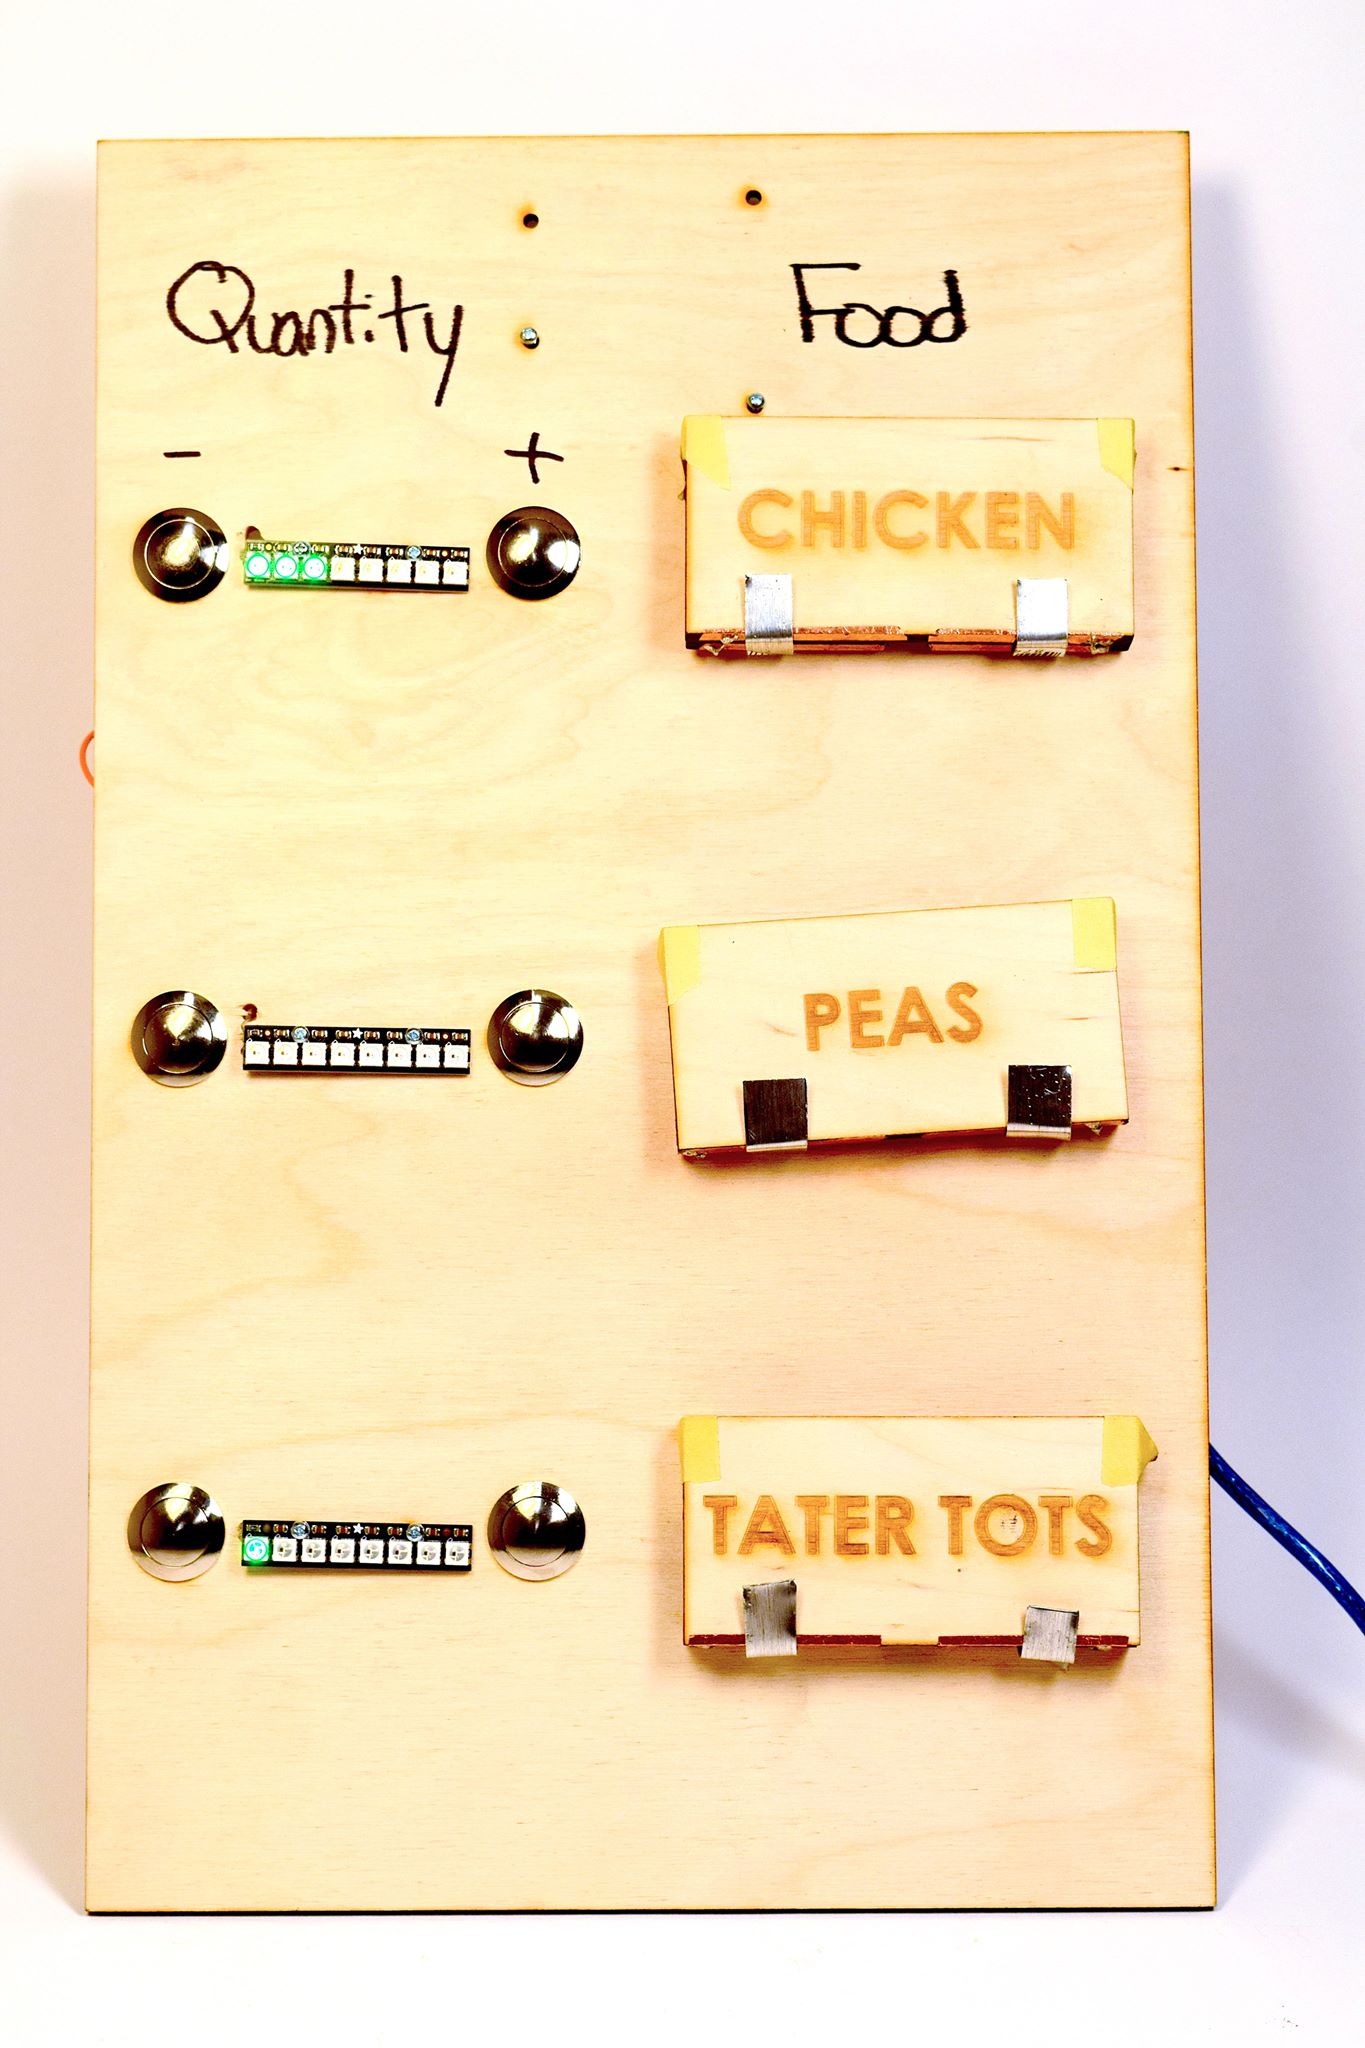
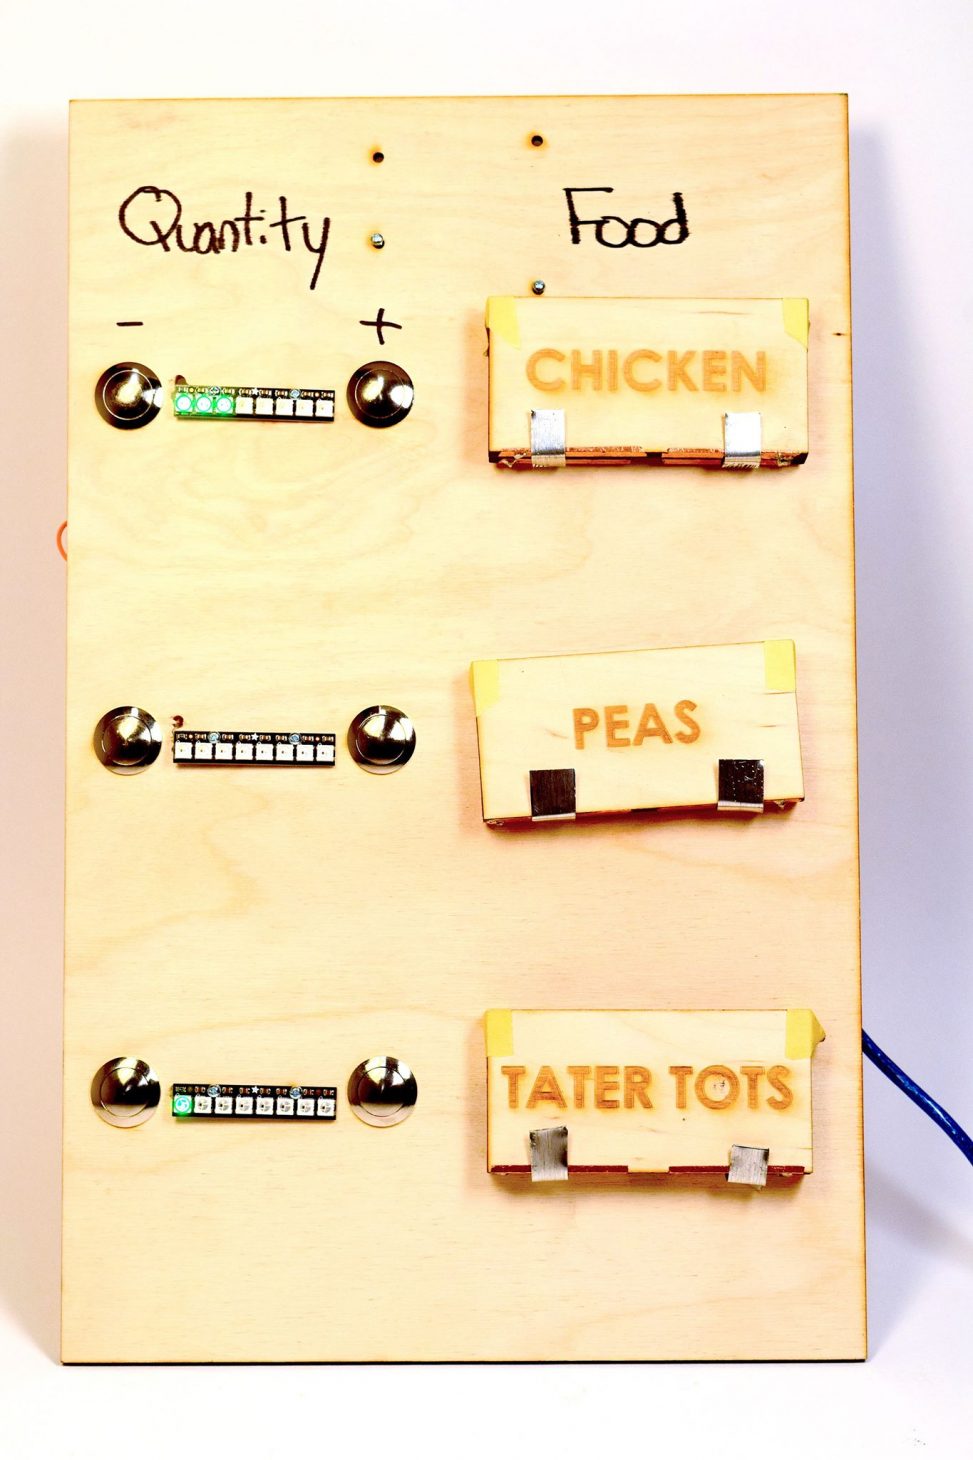
Fig 1) Physical interface board, this will be by the freezer downstairs, user can add the blocks in the various spots and change the quantity with the buttons which is reflected by the lights
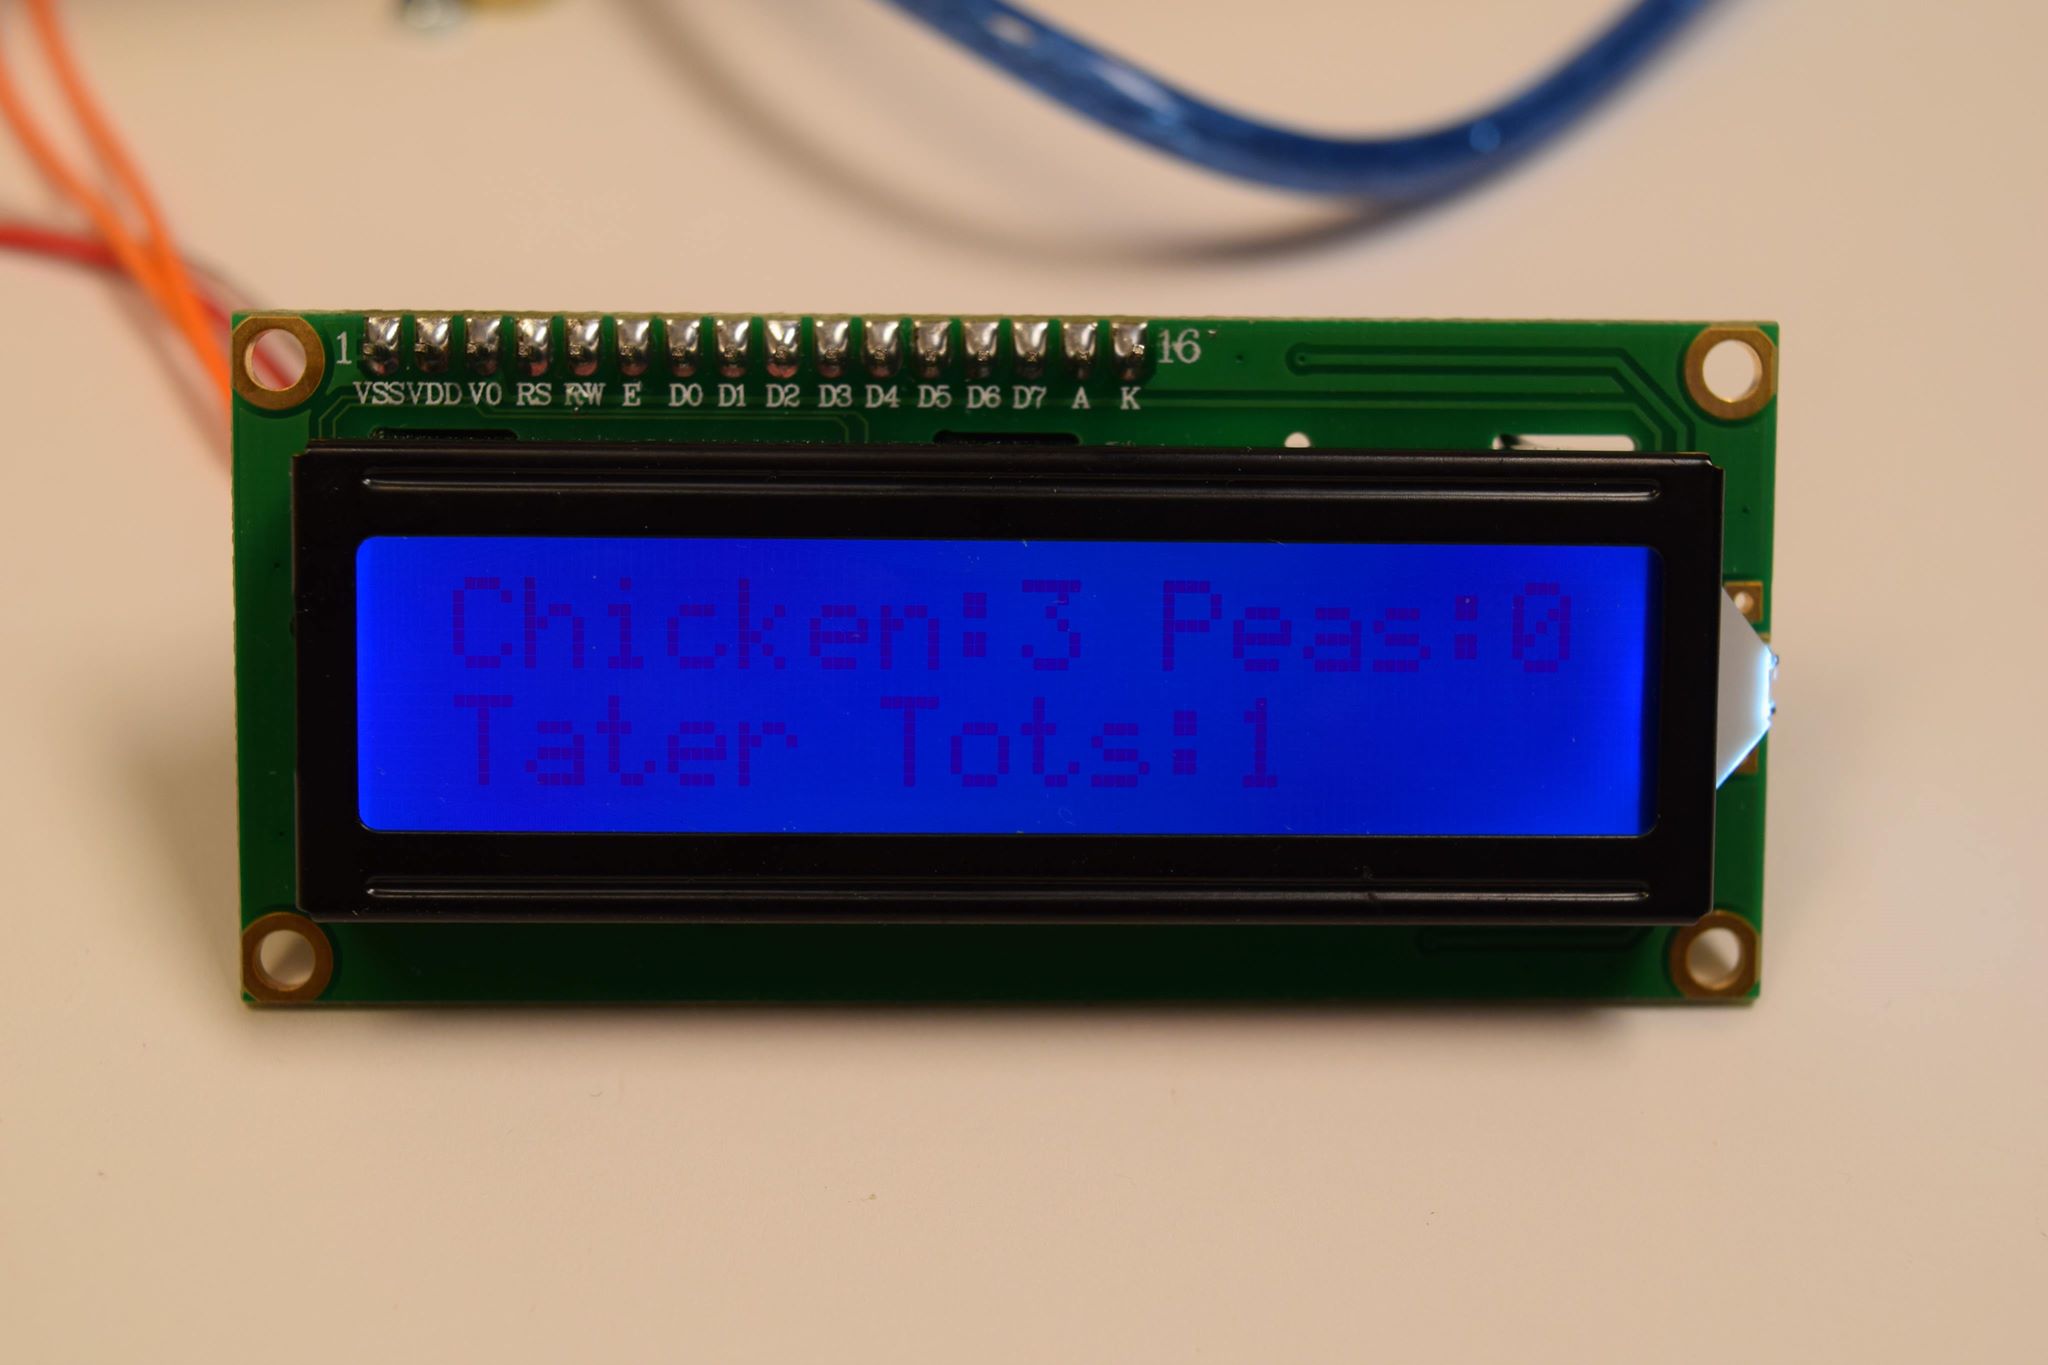
Fig 2) Upstairs display which shows the food type and quantity reflected from the physical user input
Our products main function is to give its user the ability to input their freezer inventory and then have access to that inventory list in a separate location. In order to make the product more user friendly, keeping our target subject in mind, we wanted to make the input process more physical and tangible. The product has two main parts, the physical input interface in the freezer area where they manage the quantity and the monitor that would be kept upstairs that gives the user the ability to see the quantity of items they have in the freezer. For the physical input interface the user can pick amongst the different wooden blocks representing the most kept food items and place them on any of the stands. Once placed on a stand this tells the upstairs monitor that the food is present in the freezer. Then they are able to use buttons to increase or decrease the quantity of that item which is reflected by lights going on and off. This quantity is tied to the food on the corresponding stand which is then shown on the screen to the user upstairs. This saves the user time and a trip downstairs to check what is in their freezer as they can see the list on the upstairs monitor.
Process
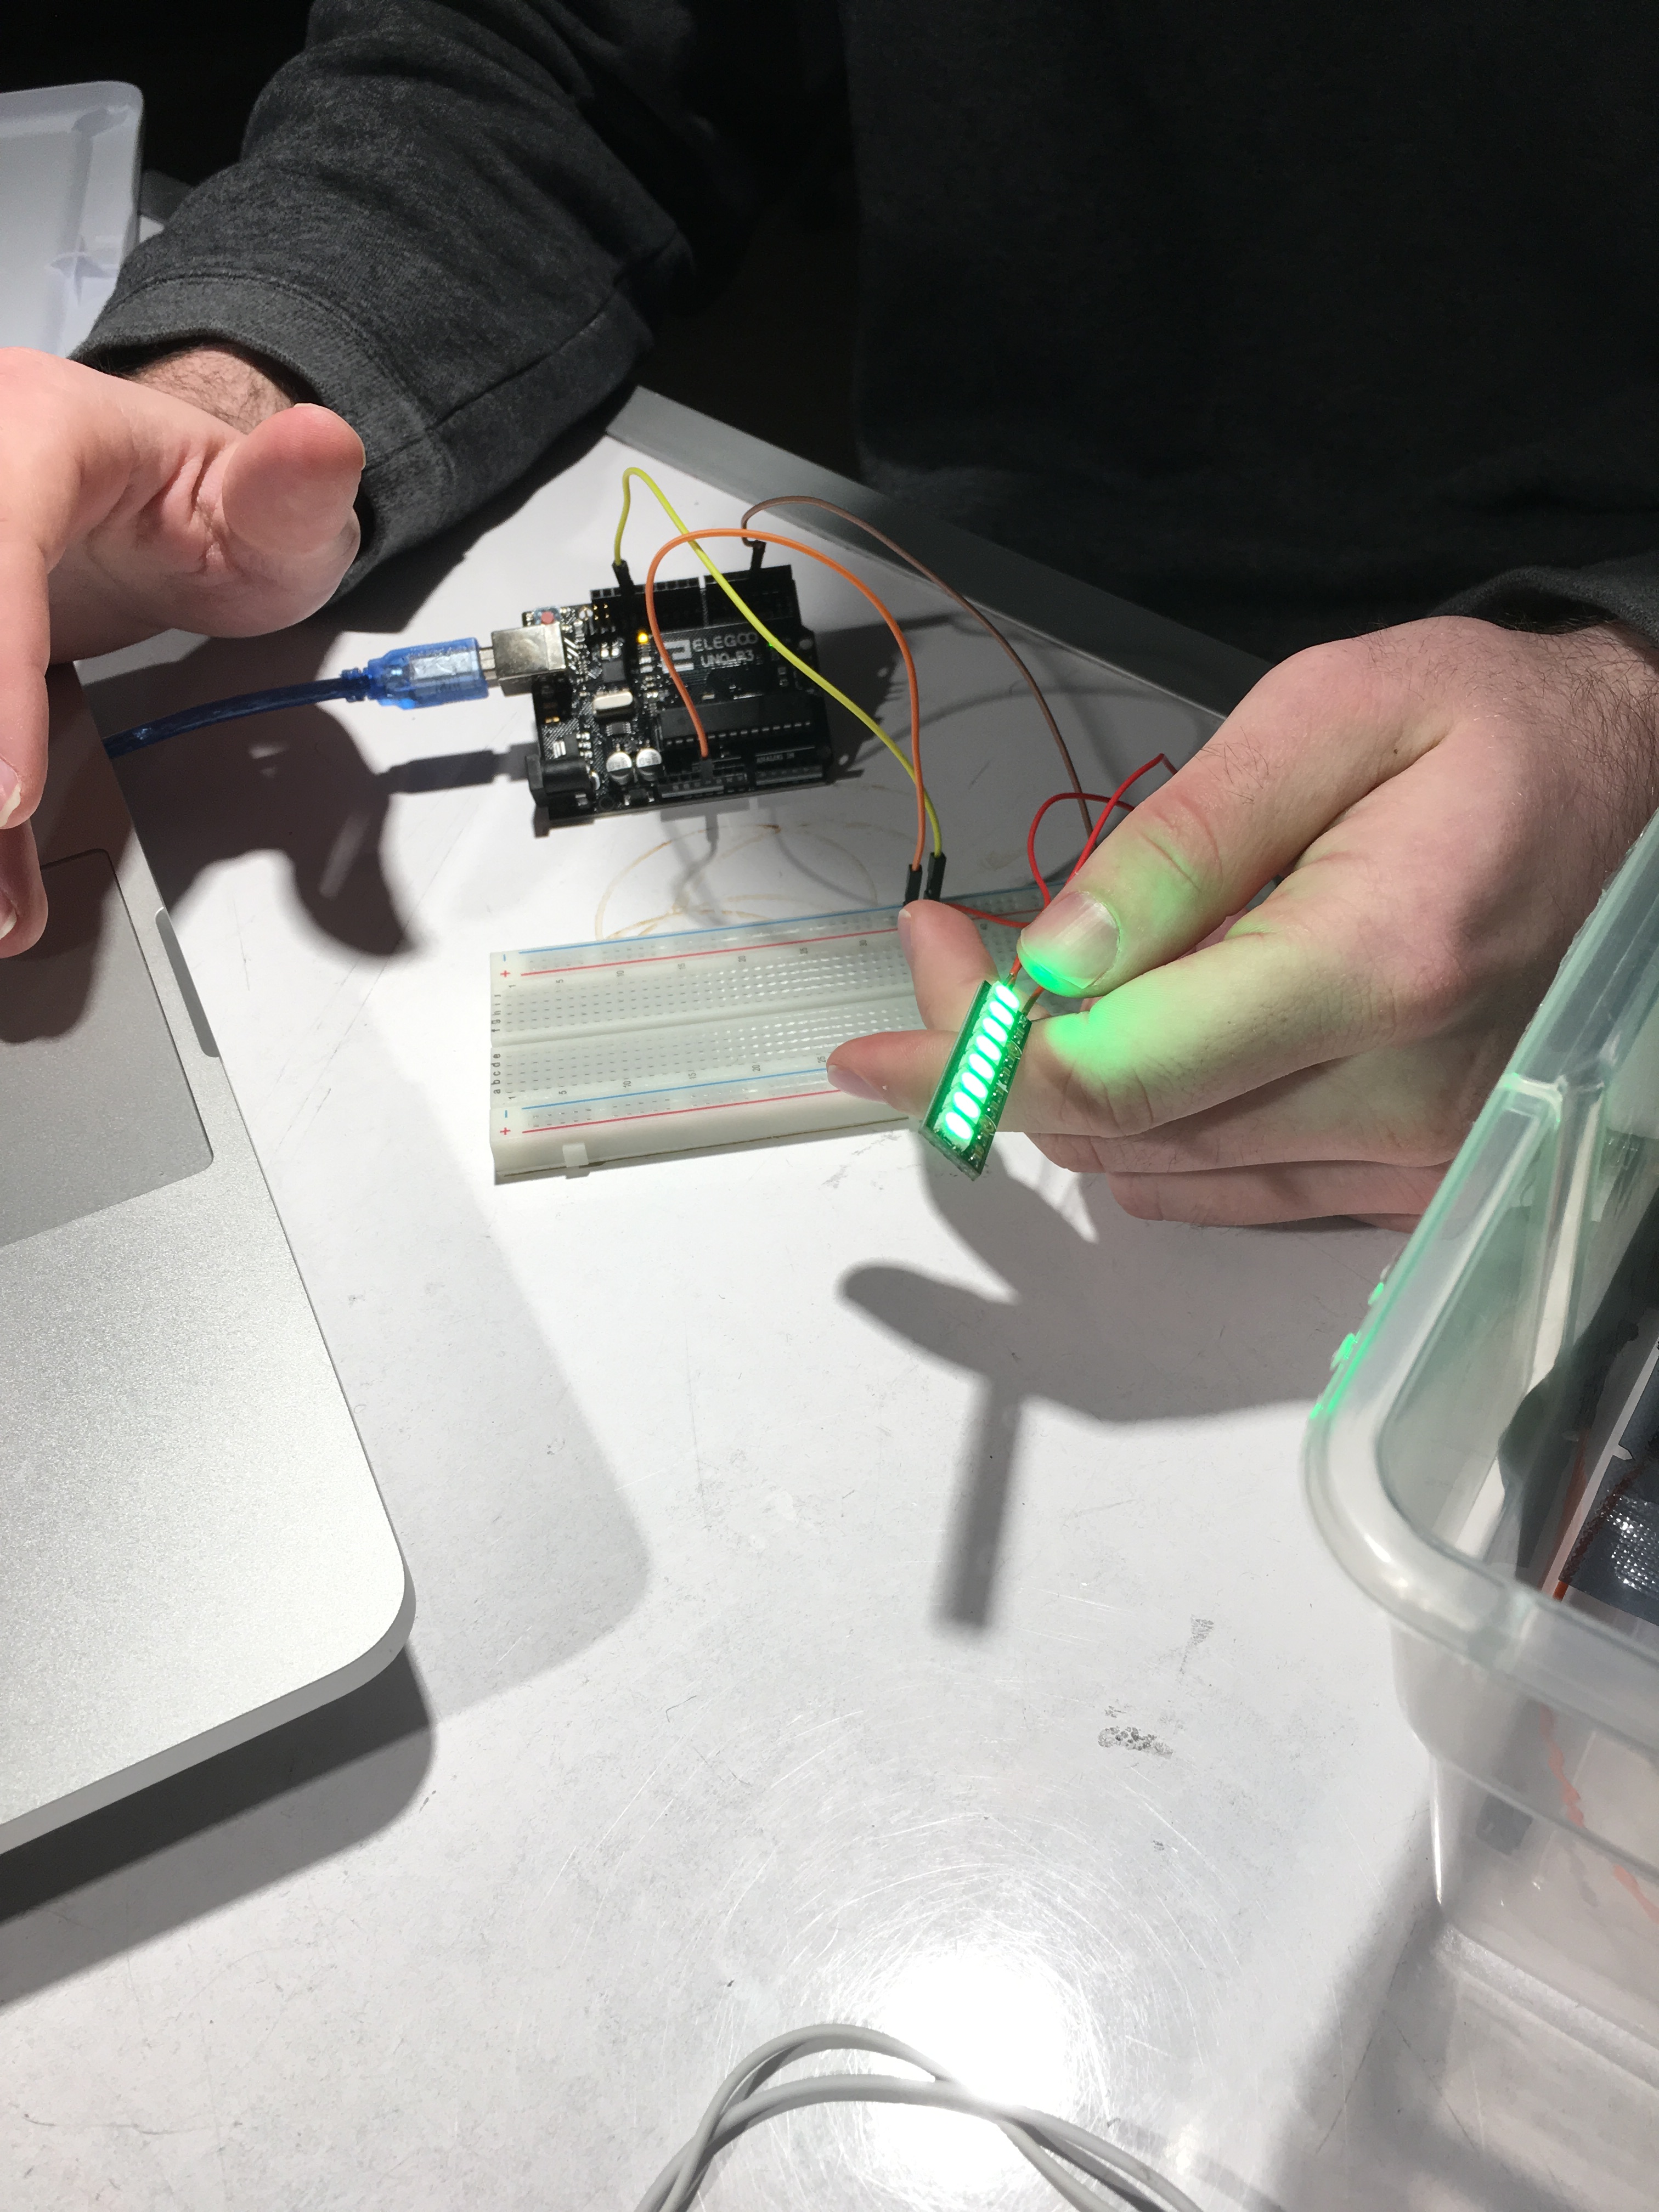
Fig 3) Initial circuitry tests, test Neopixel Led Strips to see if we could control them for our purpose. It was important to be able to control each LED individually which this gave us the ability to do.
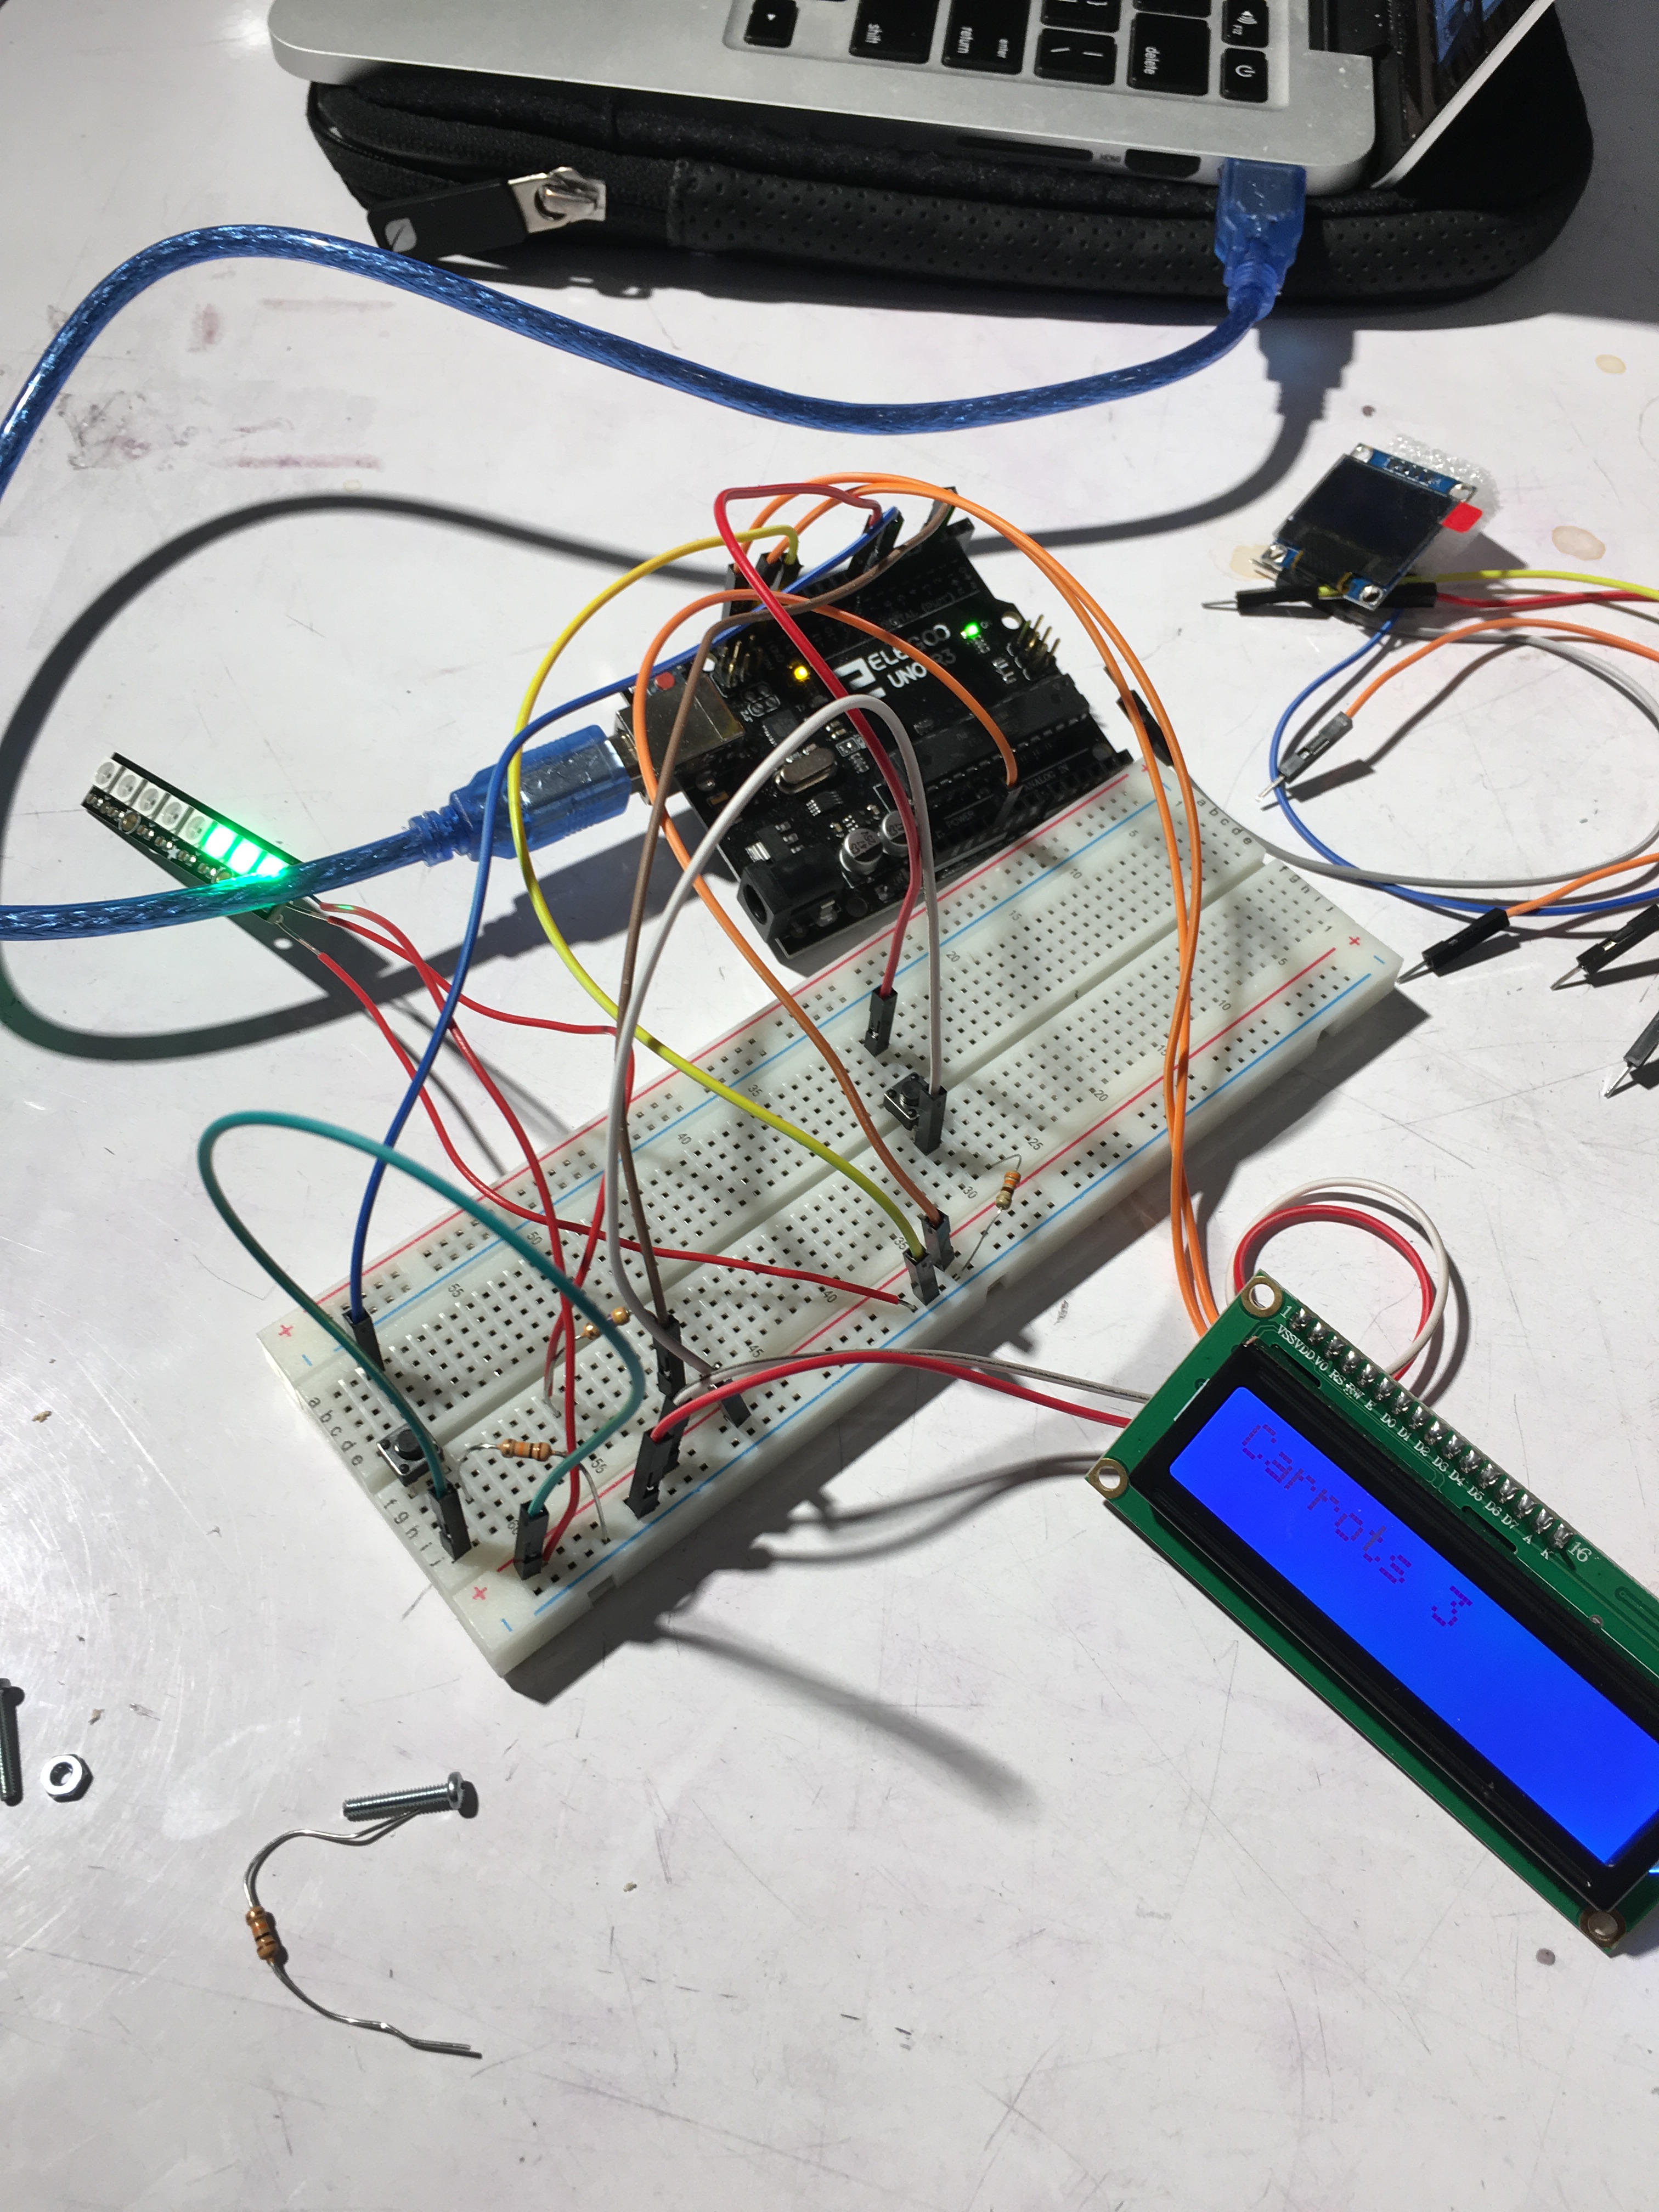
Fig 4) Then added the LCD display and small push buttons to test the overall functionality of our product. This was a simplified version of our final circuit which included larger push buttons. We wanted to see if we could coordinate two push buttons to change both the quantity on the LCD as well as the lights on the Neopixel.
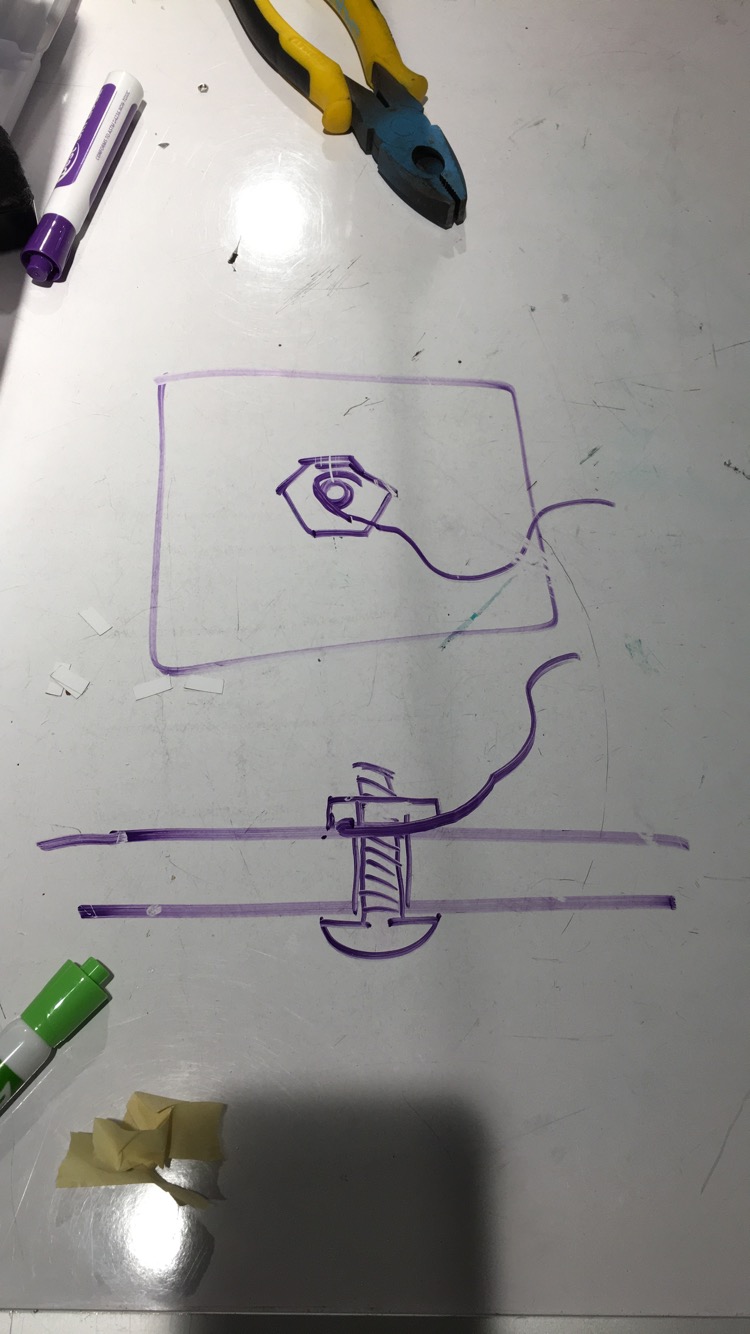
Fig 5) Sketching ideas for physical prototype and how we would attach larger push buttons, after initial sketches we were able to create CAD models of the various laser cut pieces.

Fig 6) Laser cut blocks and physical interface with button attached.
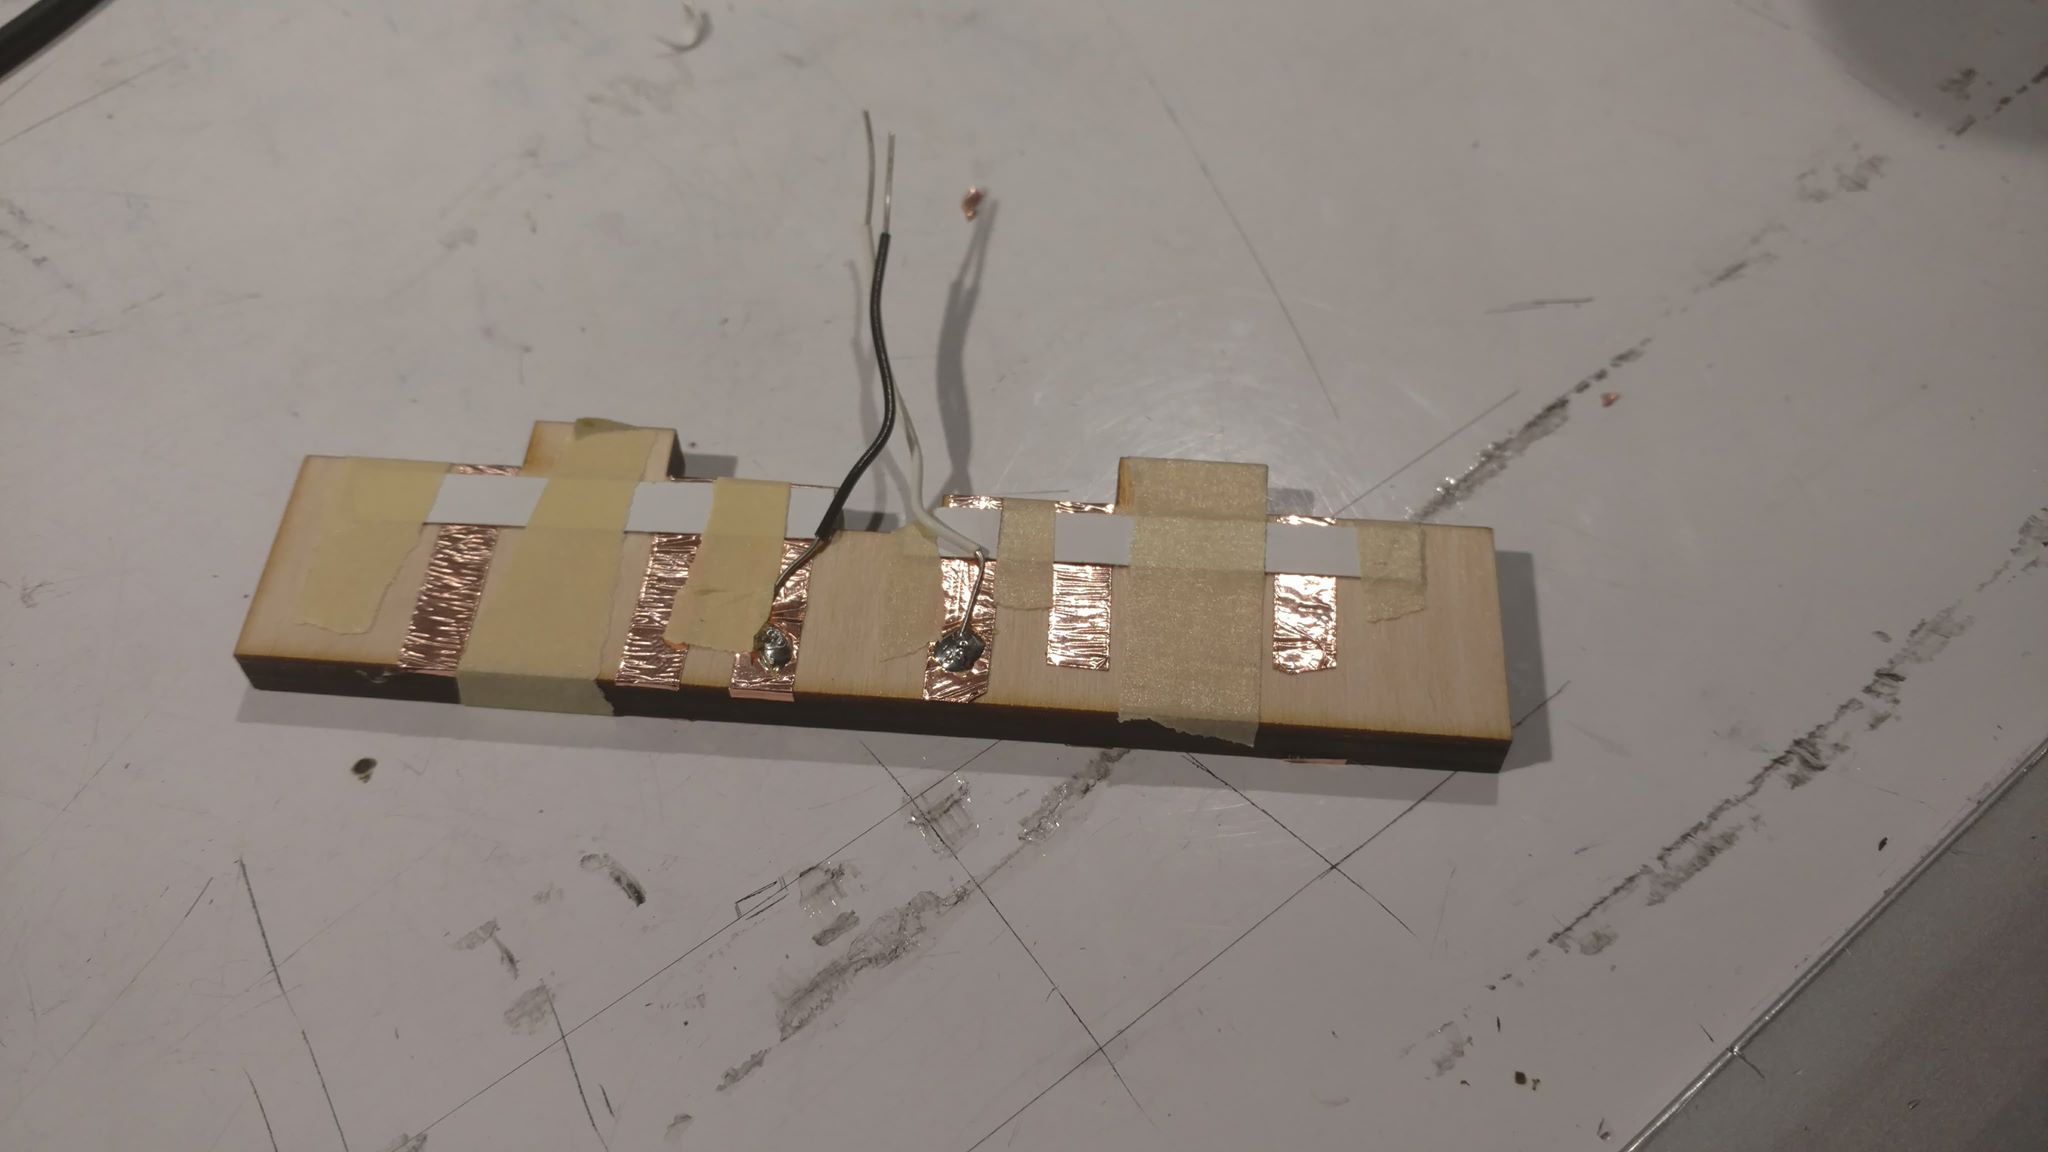
Fig 7) Attached conductive tape and resistor to the laser cut blocks, we went through many different iterations of how we would attach the conductive tape and resistor to create the best contact to the metal supports.
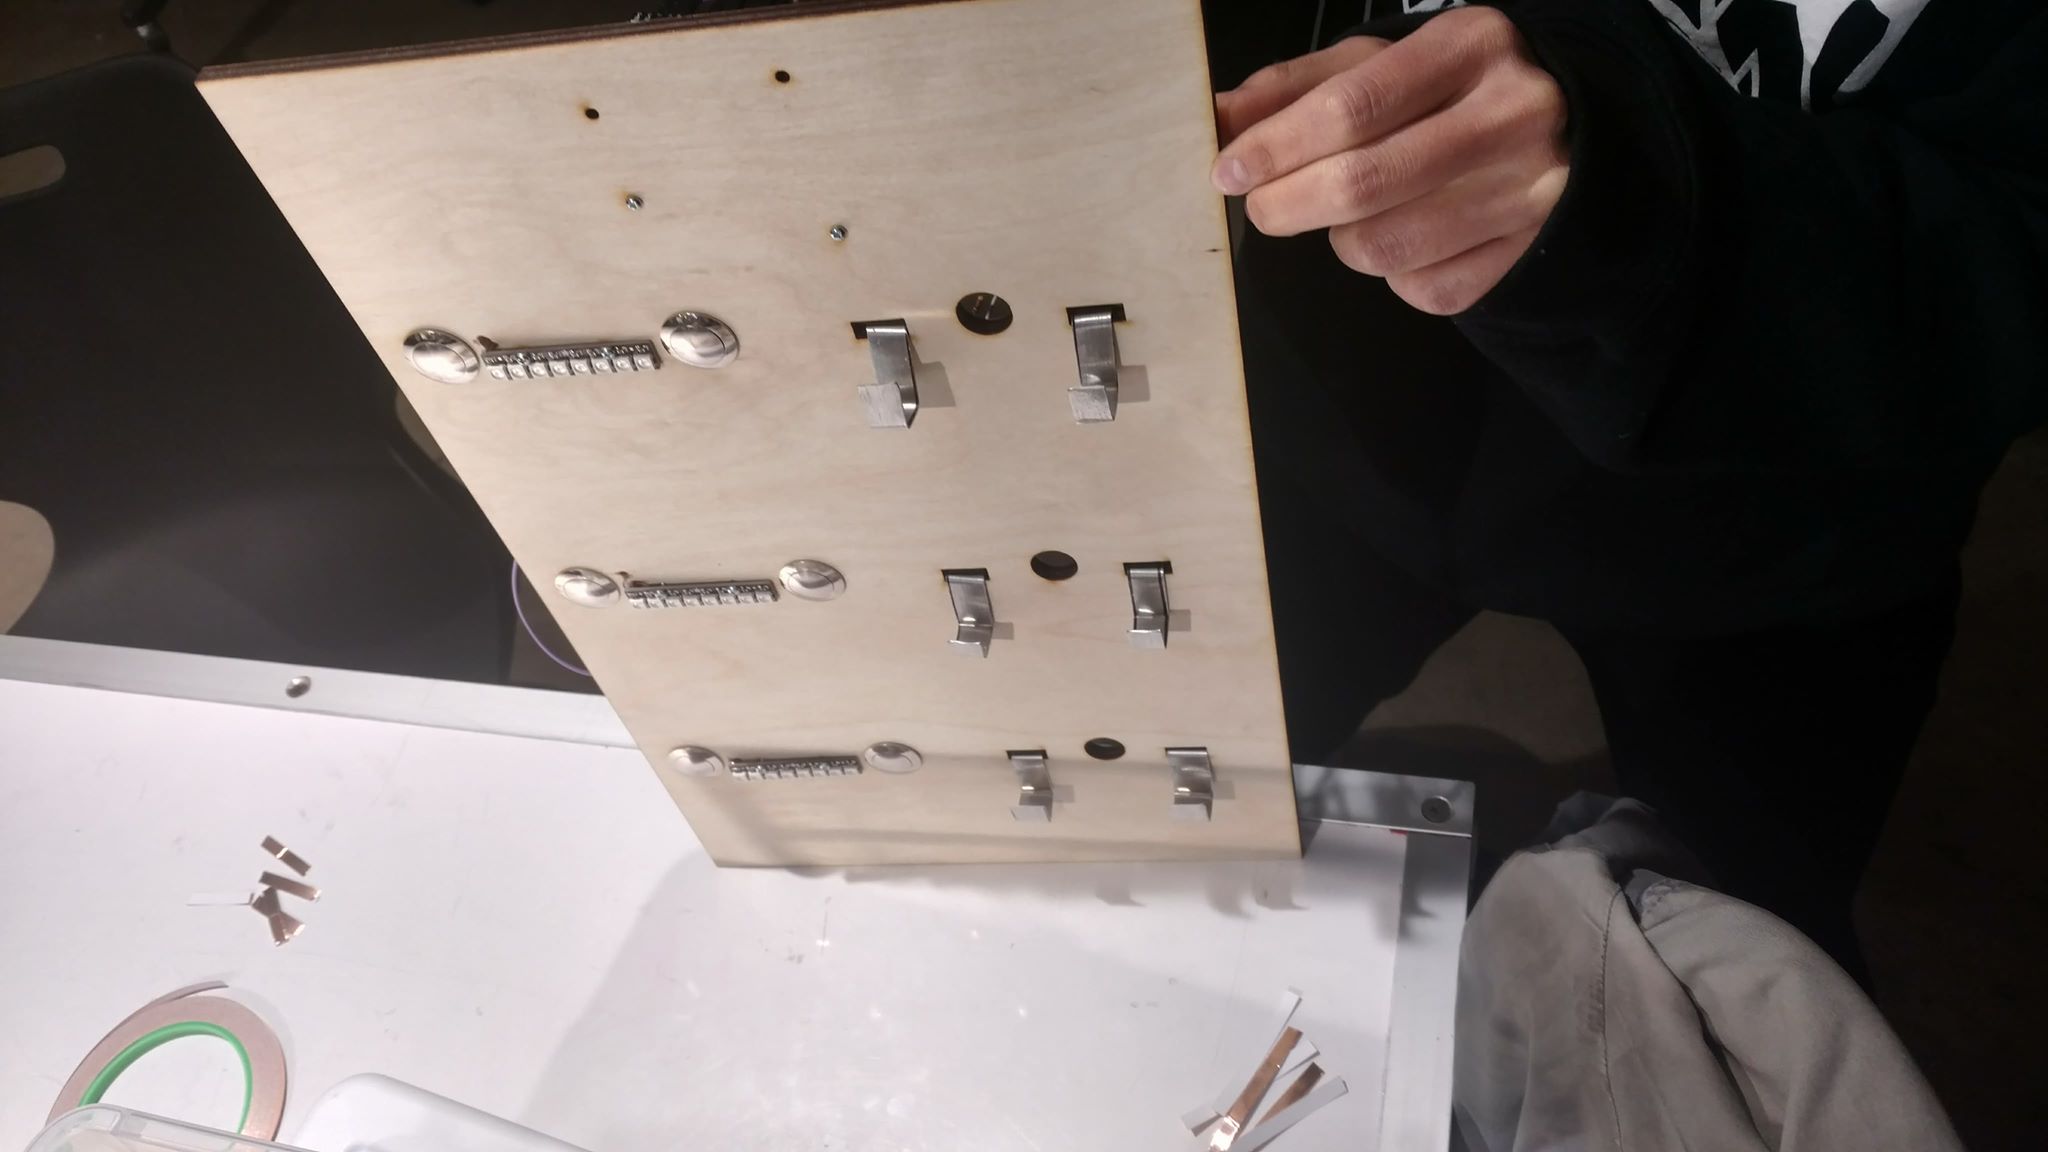
Fig 8) Attached NeoPixels and metal contact holders for the blocks. We wanted to get the bent metal contacts in place to test our voltage divider circuits as well as make sure the laser cut holes properly fit all of our circuitry. We had to physically drill a couple of holes to mount the Neopixels as we forgot to laser cut them in our initial model.

Fig 9) Testing analog read values of the different voltage divider circuits caused by the different resistor values of the different blocks, in order to properly hard code each block into the software we had to test its range over each of the three possible circuits it could be attached to.
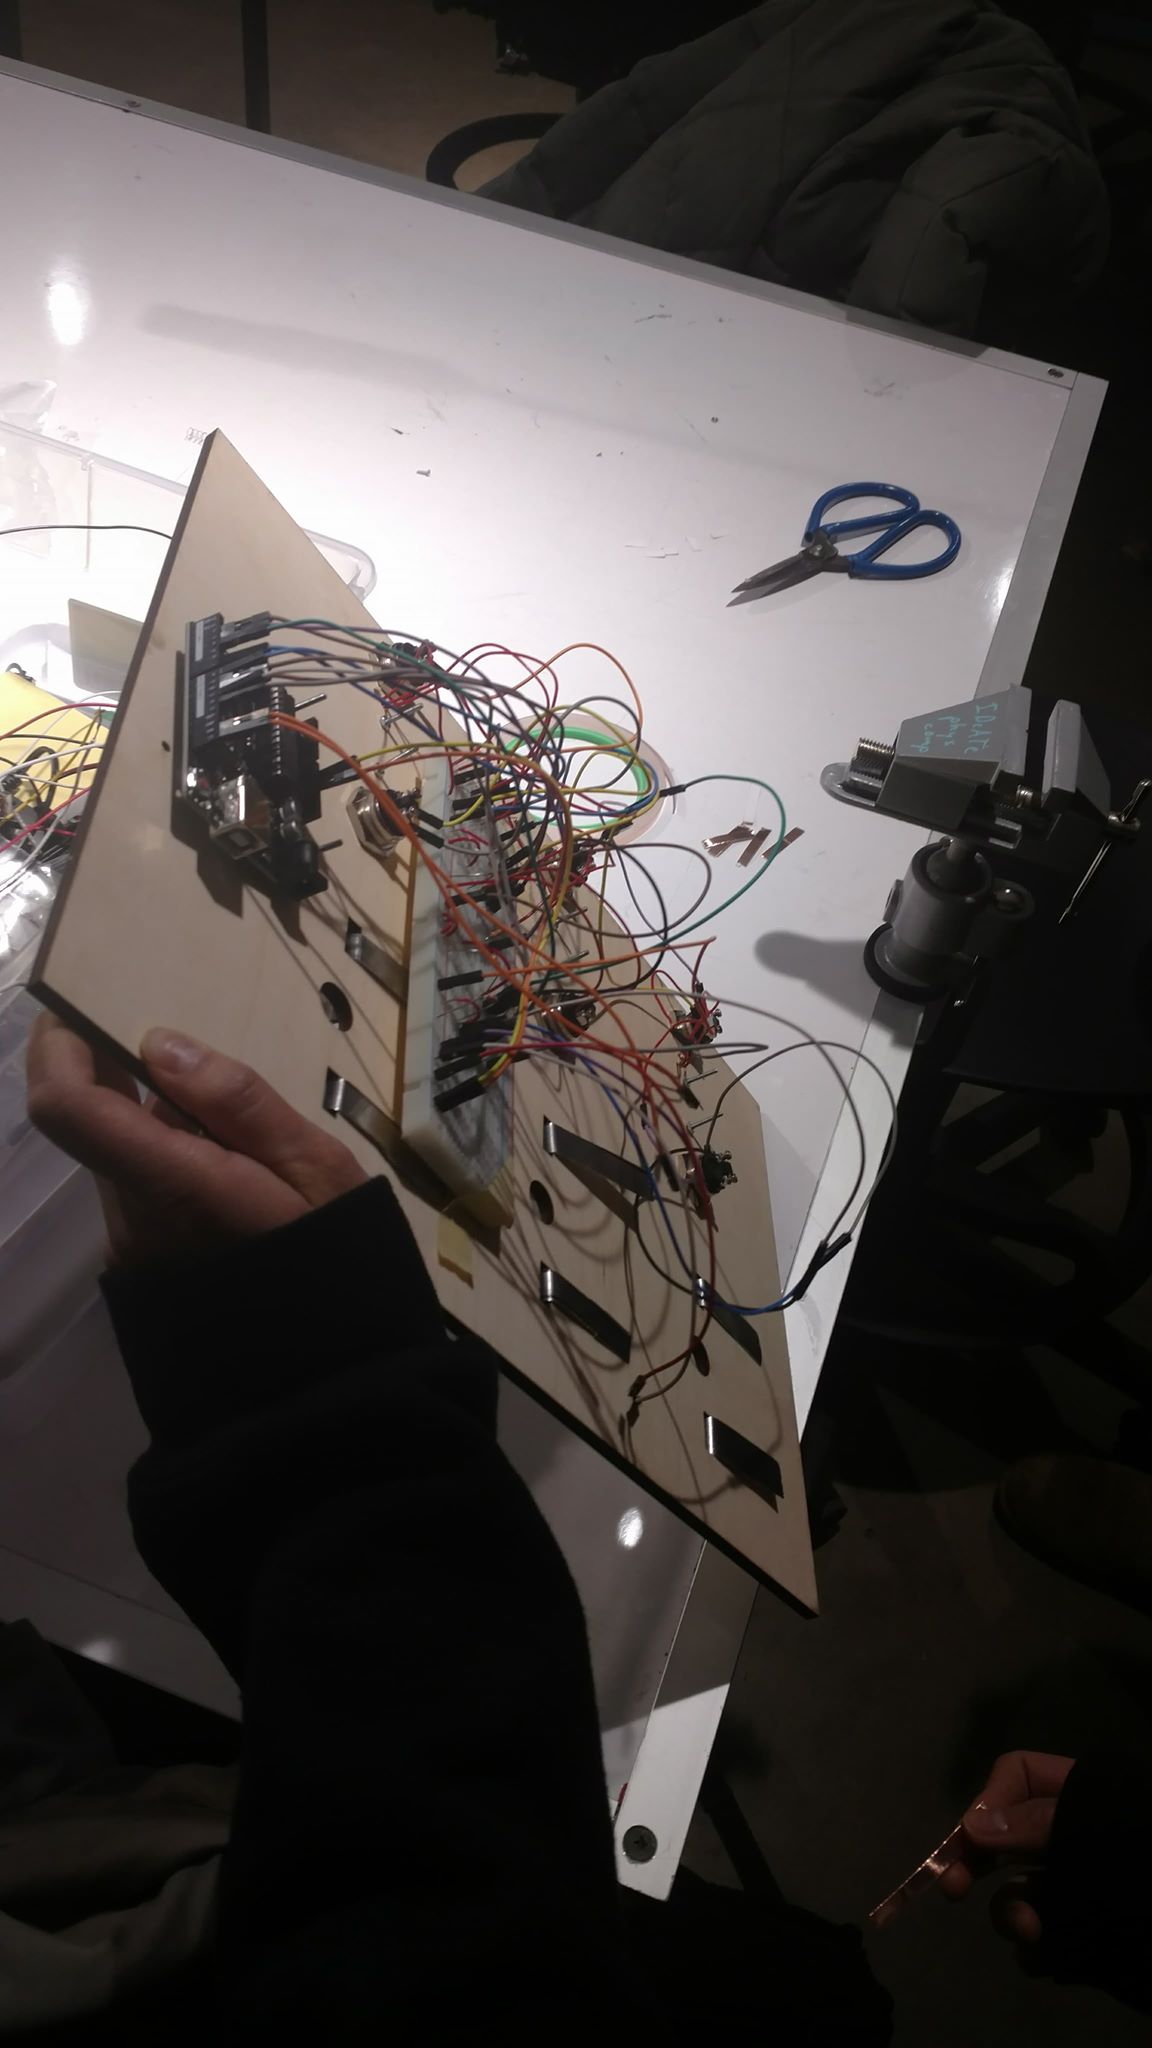
Fig 10) Fully completed and wired circuit
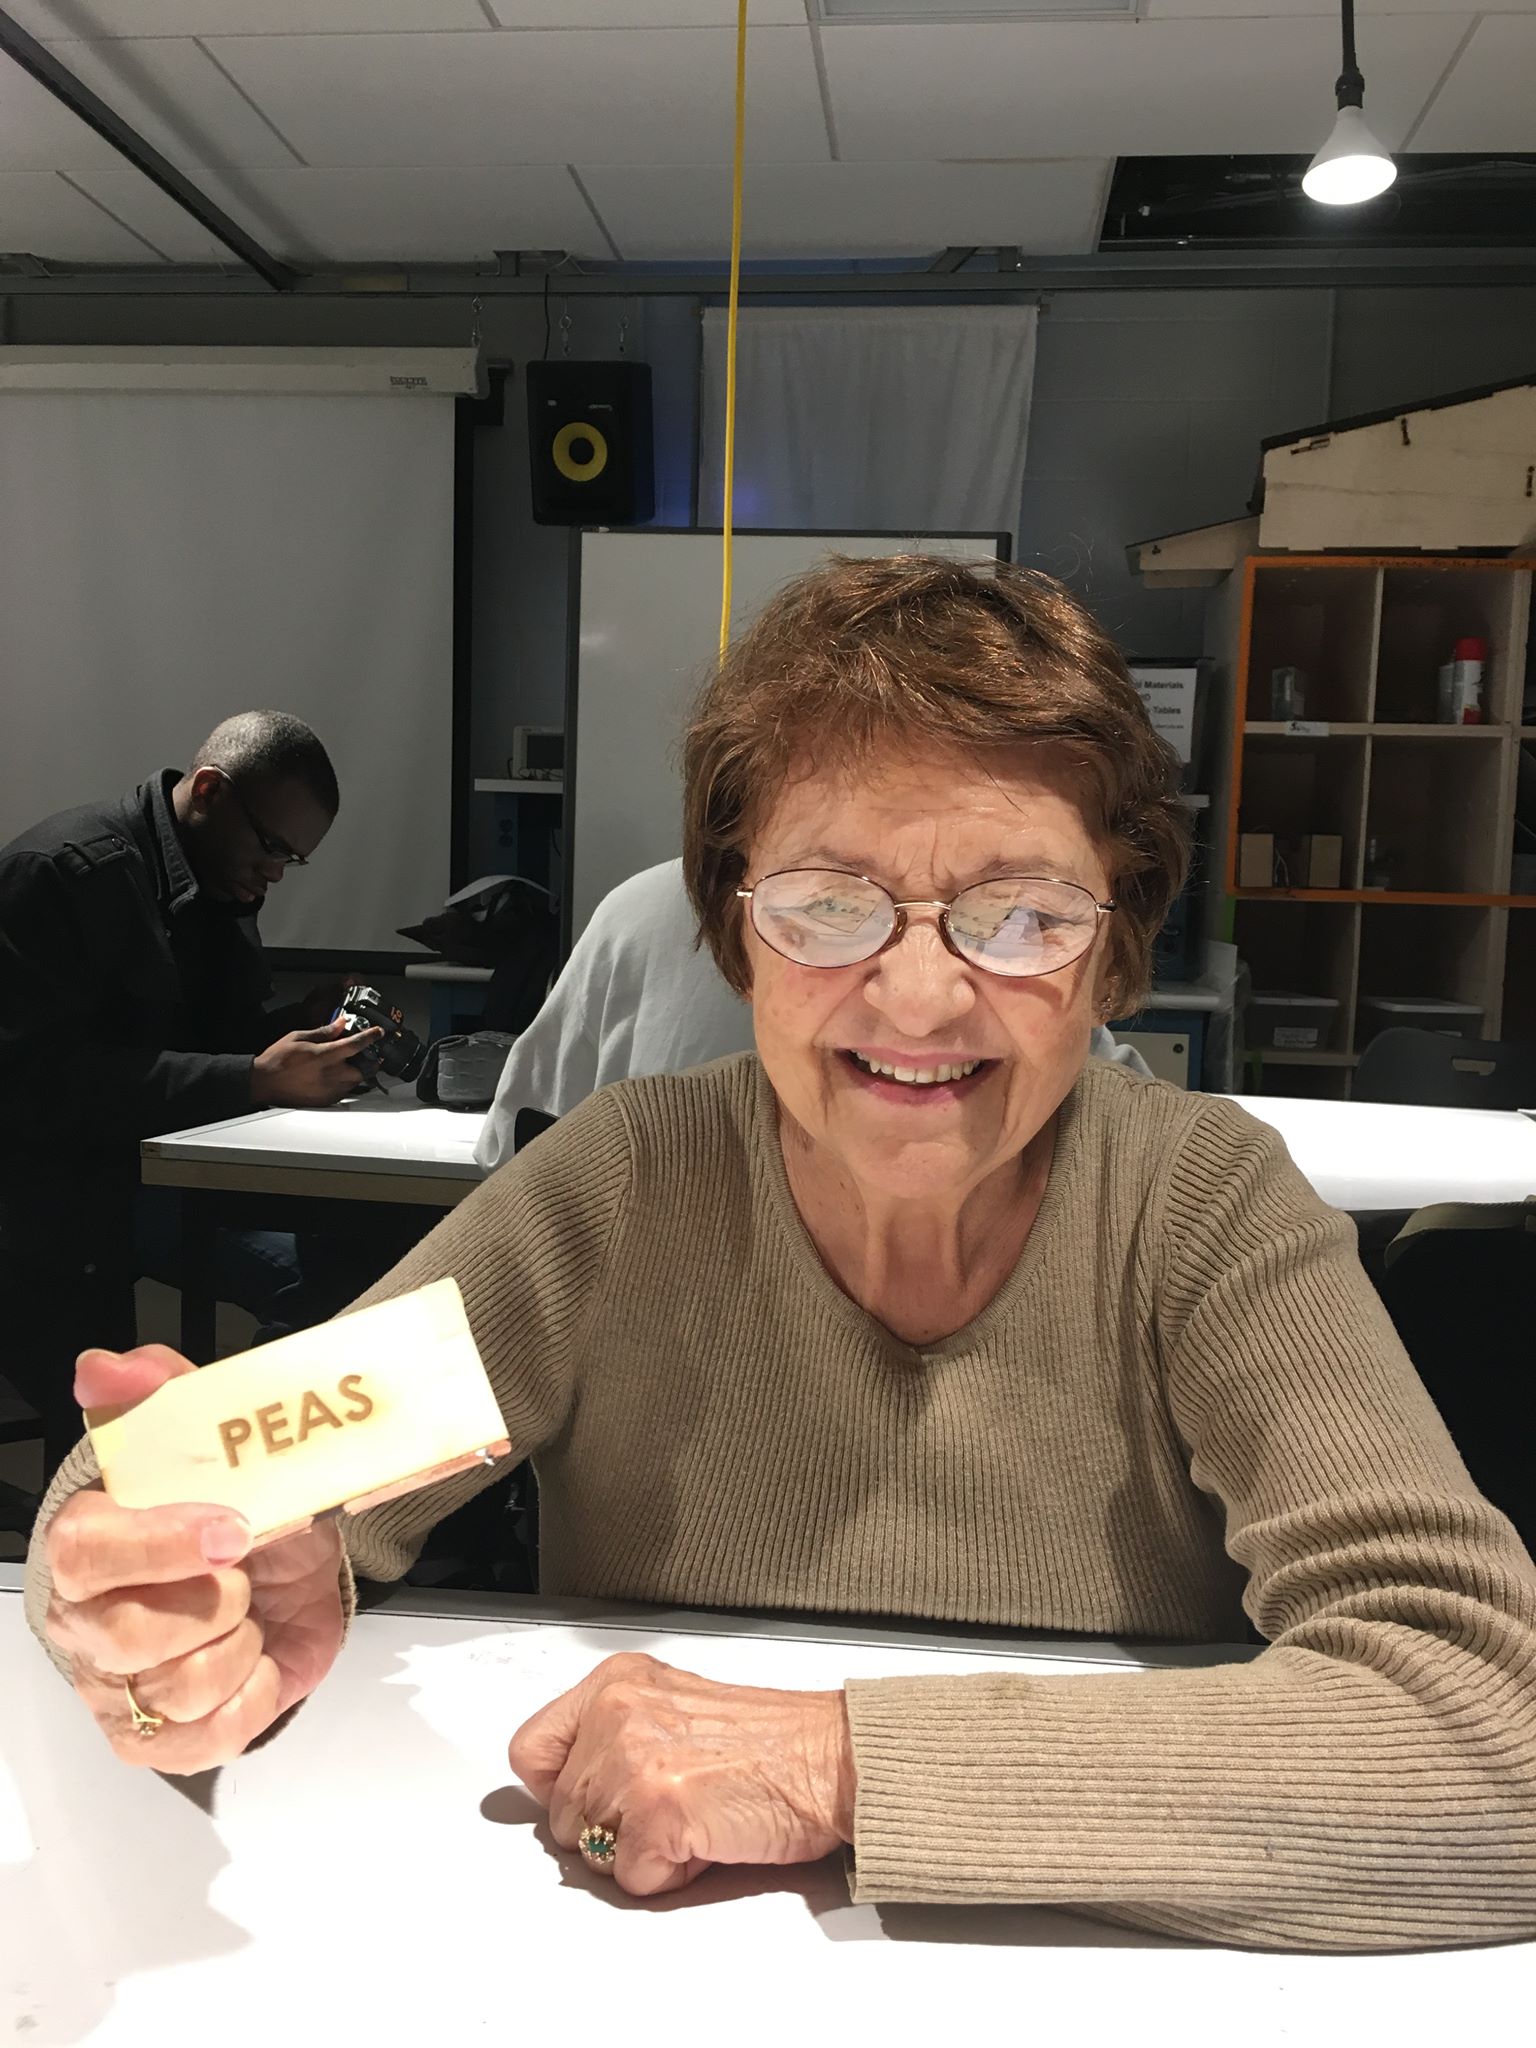
Fig 11) Wilma holding a block after our meeting with her. She was able to give us good insight into how we can improve the product to her liking and it was great to get her opinion on the product.
Challenges
One of the first major challenges that we had was developing a product idea from our initial meeting with Wilma. She mentioned early on that she would forget what was in her downstairs freezer and would have to walk down the stairs a lot to check the contents which is not ideal. We thought we could create some way to track the inventory but did not want a tech heavy solution. We thought if Wilma had to enter the data on a screen that it would not be used as often so we wanted to develop a way to make the process more physical. From this we developed the solution to use different resistors placed on blocks which when placed on a stand would allow us to read the voltage from a voltage divider circuit thus giving us the ability to categorize the blocks. Some issues from this included how we were going to attach the resistors to the blocks and then the blocks to the board to make a good enough connection to get a consistent reading. We were able to develop a solution to use conductive tape on the blocks and then have bent metal be used as the stand to create the contact which was then connected to our circuitry.
Other challenges included choosing what type of display to use as the “upstairs monitor” as well as how to display the quantity of the items on the board downstairs. For this prototype we decided to use the 16×2 LCD as the upstair monitor. From weighing different choices and thinking about the scope of the behaves like prototype we thought that this was the best solution as it gave us the ability to show a list of three items and did not need any extra circuitry to run. For the physical interface quantity we initially tried to use the OLED displays but were not able to get the results we were looking for and realized we would have the pin outputs necessary to house multiple OLED displays. This led us to the Neopixel LED strips which gives us the ability to control each light on the strip individually. This meant it was a perfect way to track the quantity of each of the items. Overall many of our problems were in the early stages of prototyping developing our idea and picking the circuitry that we wanted to use but once we were able to get our product concept completed we were able to build and code everything else with little trouble.
Crit Review
We met with Wilma on Monday during class and she was able to give both positive and negative feedback on our prototype. One of the things she liked about our project was the tactile user interface. She mentioned that this was preferable to typing into a computer. We hope to keep this feature in the final iteration of our product. At the same time, she mentioned that the blocks we made were a little too bulky. After some quick ideation, we decided to move forward with RFID cards, which can be easily stored and organized. Other input that was useful was her telling us that she did not have a lot of space in her kitchen. For this reason, we decided not to make a separate set of cards/blocks for the kitchen, but instead use something a little more convenient. Through our conversation with Wilma, we decided that we did not need any kind of input on the first floor kitchen, and that we only needed a way to display information in a useful way (i.e. a screen that is easily synced with the downstairs panel).
Leave a Reply
You must be logged in to post a comment.