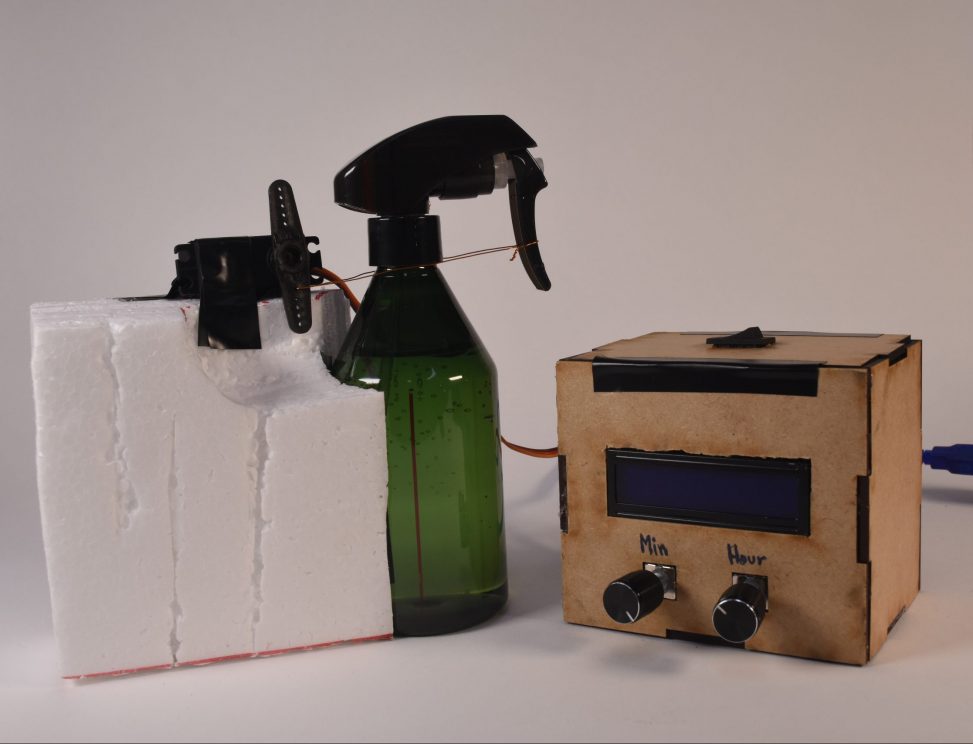
Water-spray Alarm Clock
A servo-activated alarm clock that instantly wakes you up by spraying water.
Images
Short clip of alarm clock
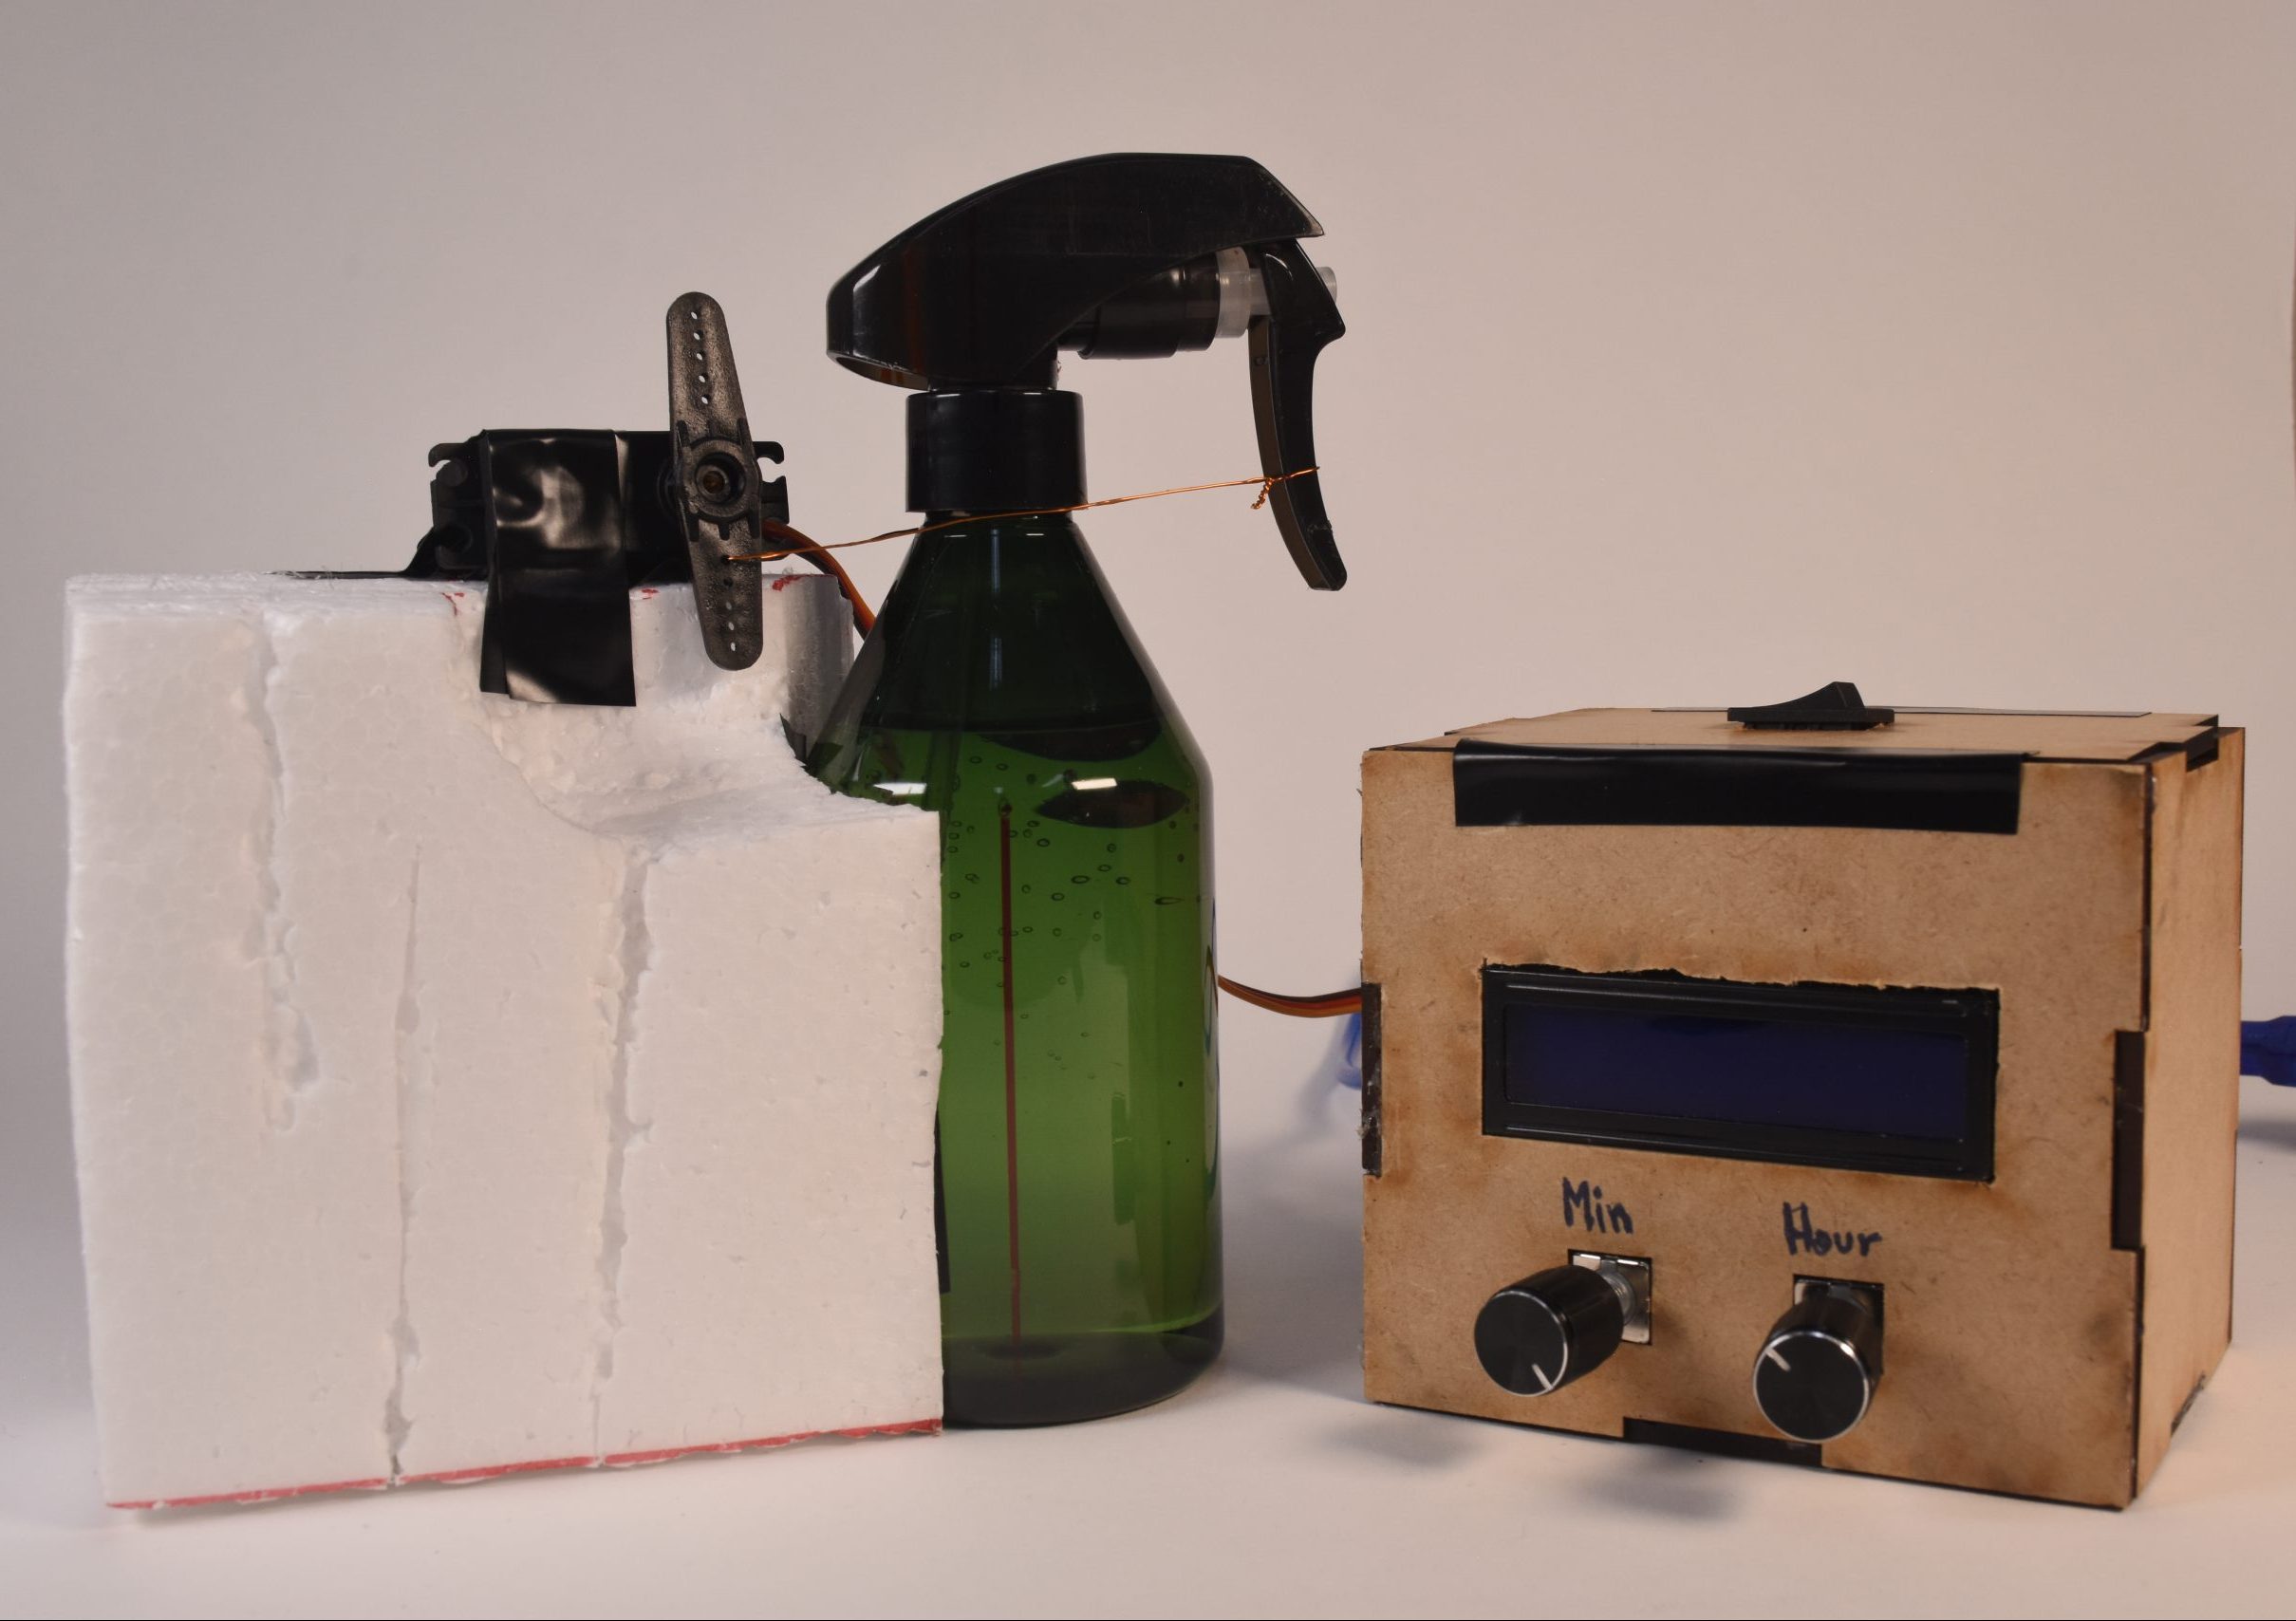
Close up shot of the alarm clock
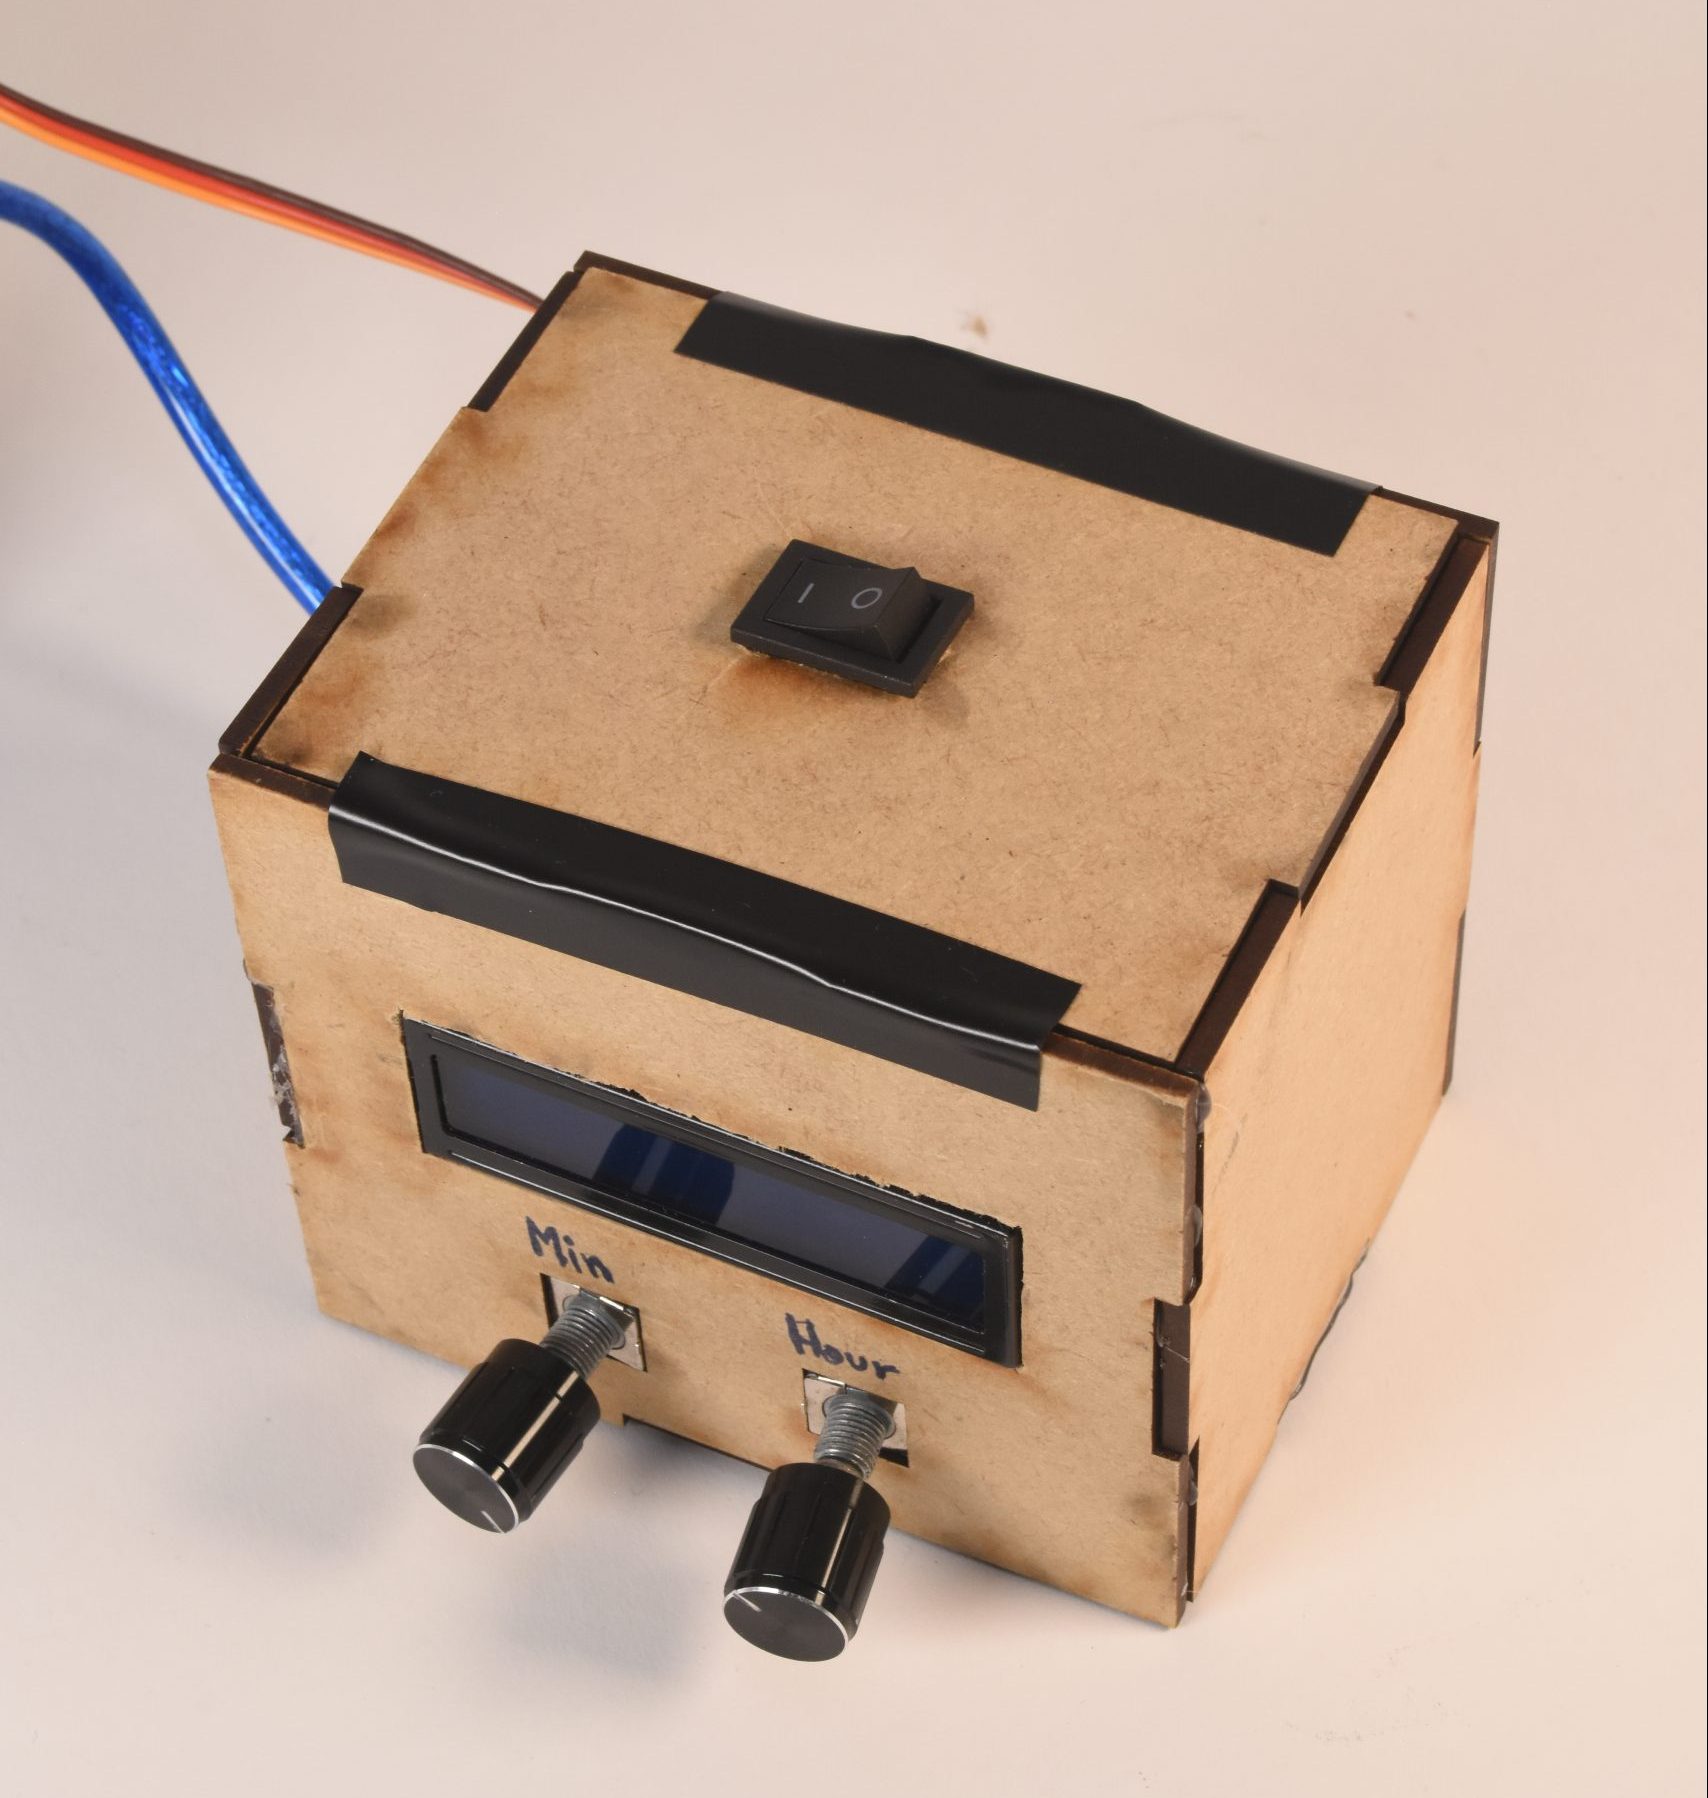
Top-view of input alarm
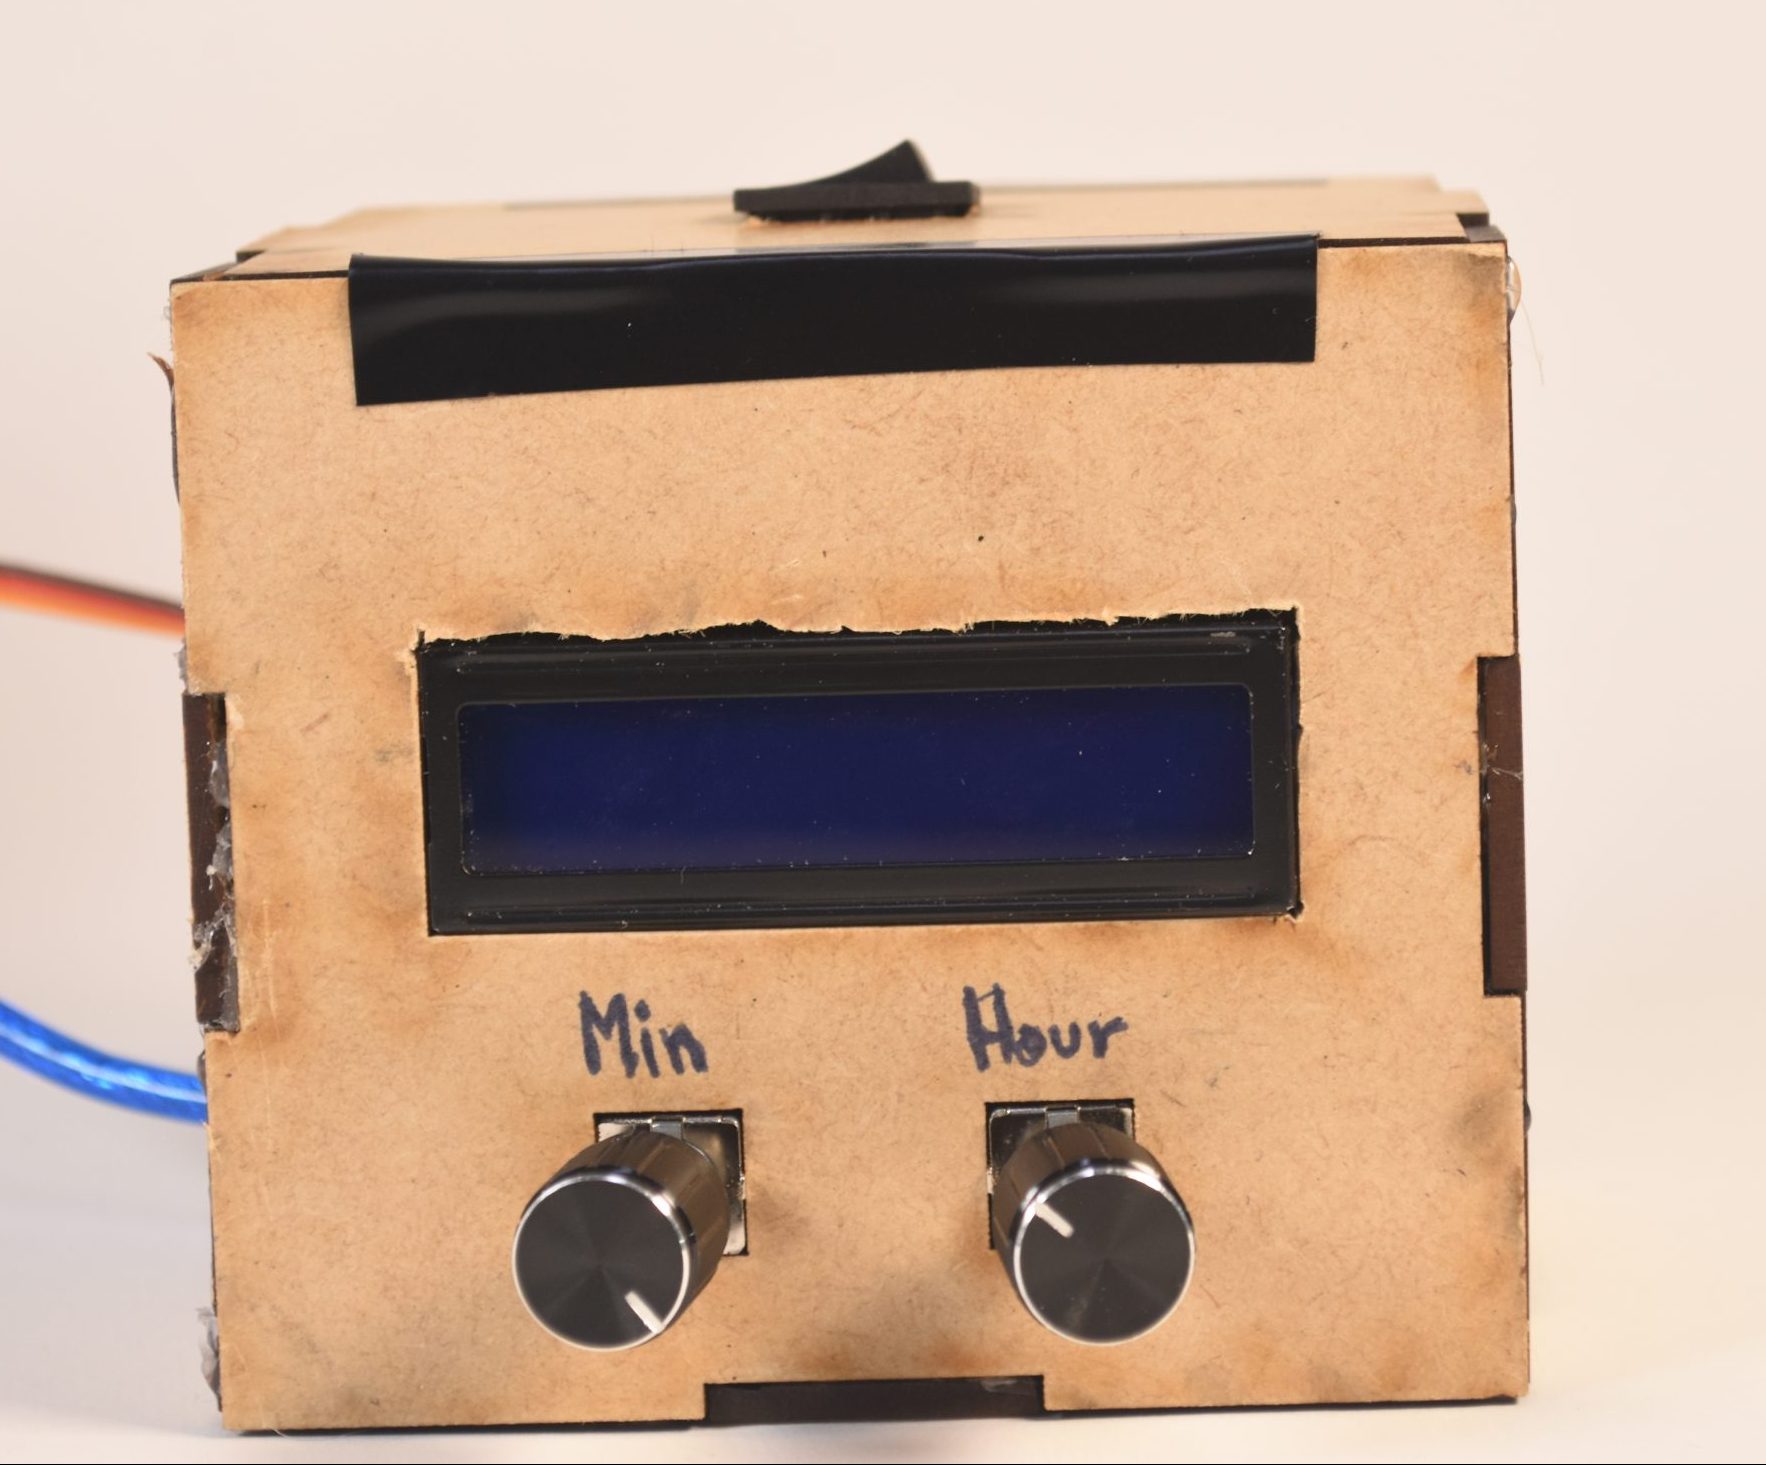
Front view of input alarm
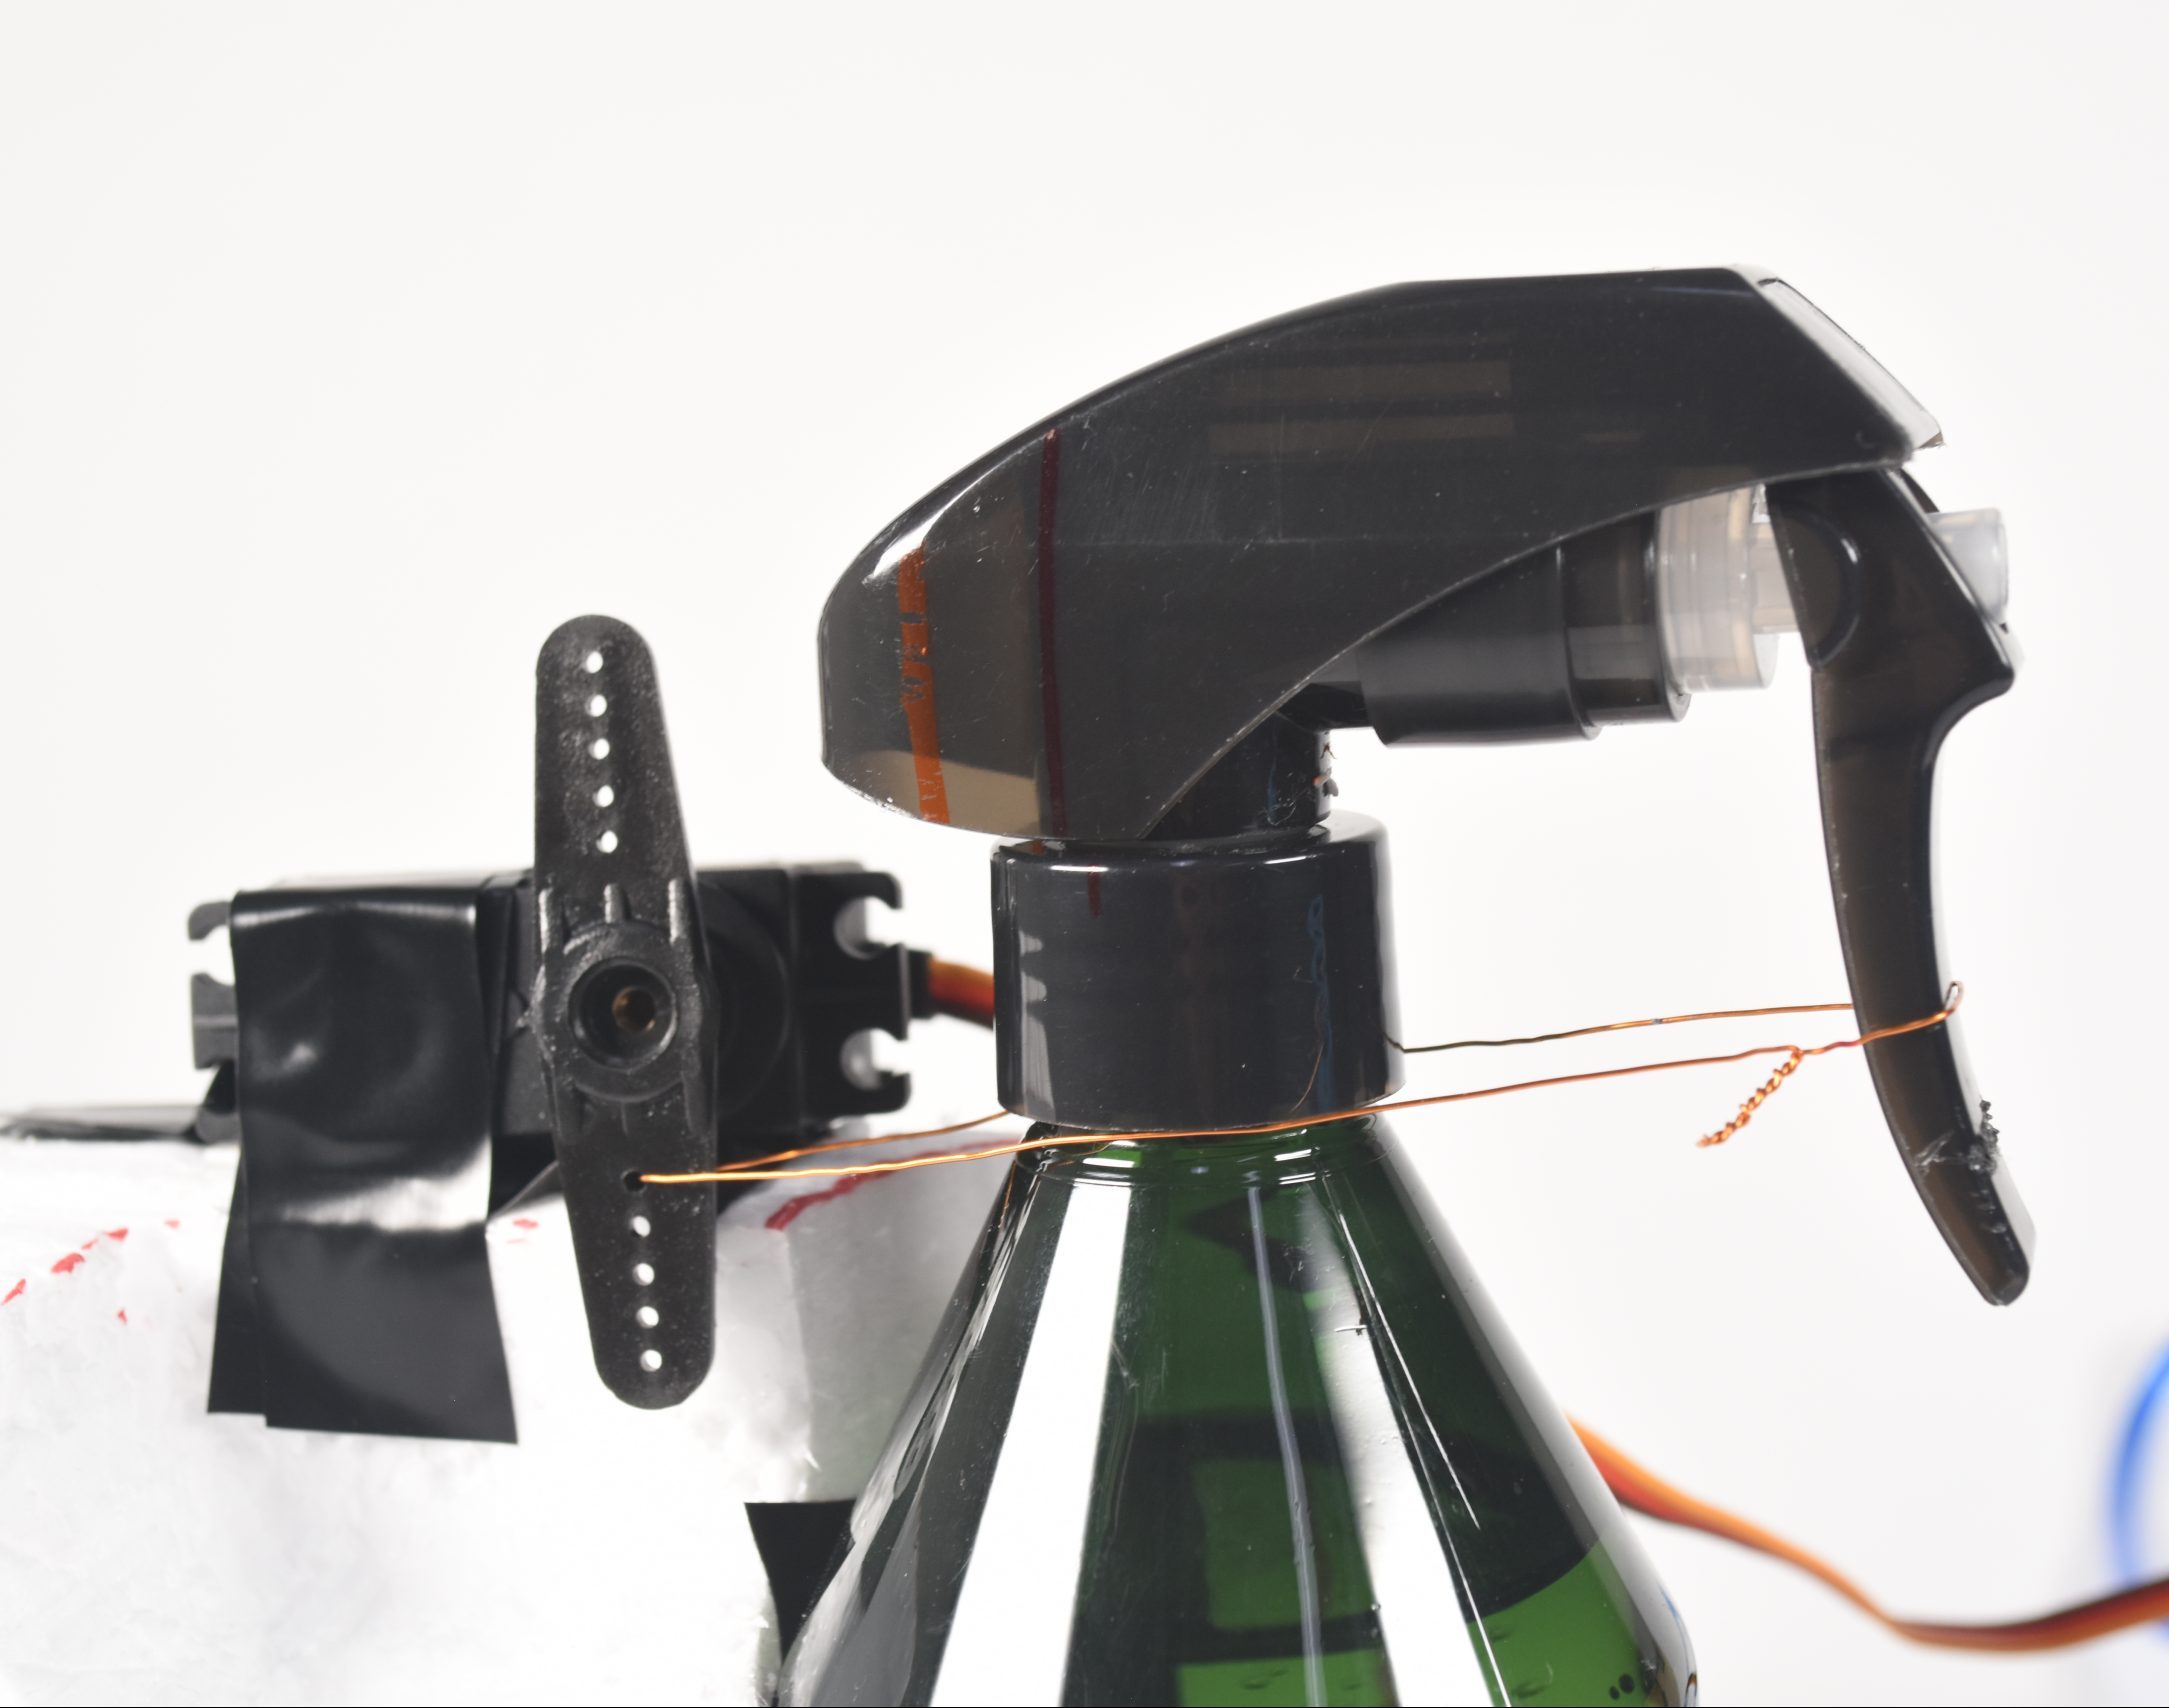
Close up of trigger mechanism
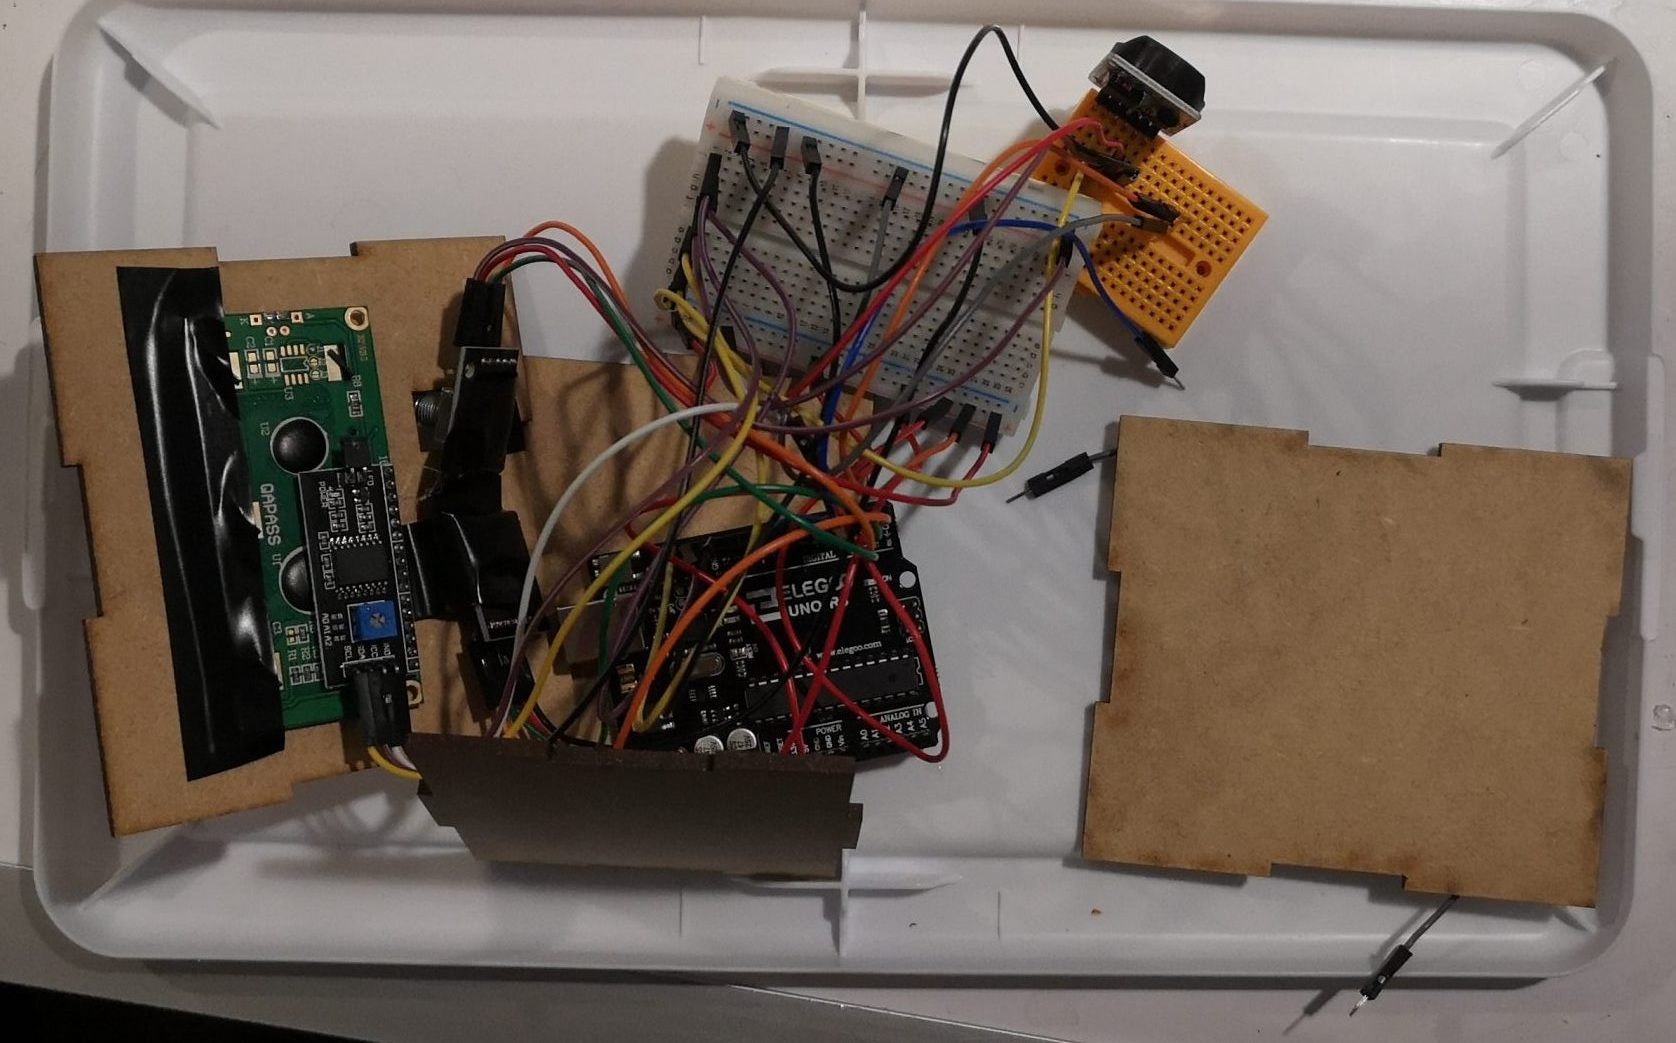
The insides of the box which contains all the other parts.
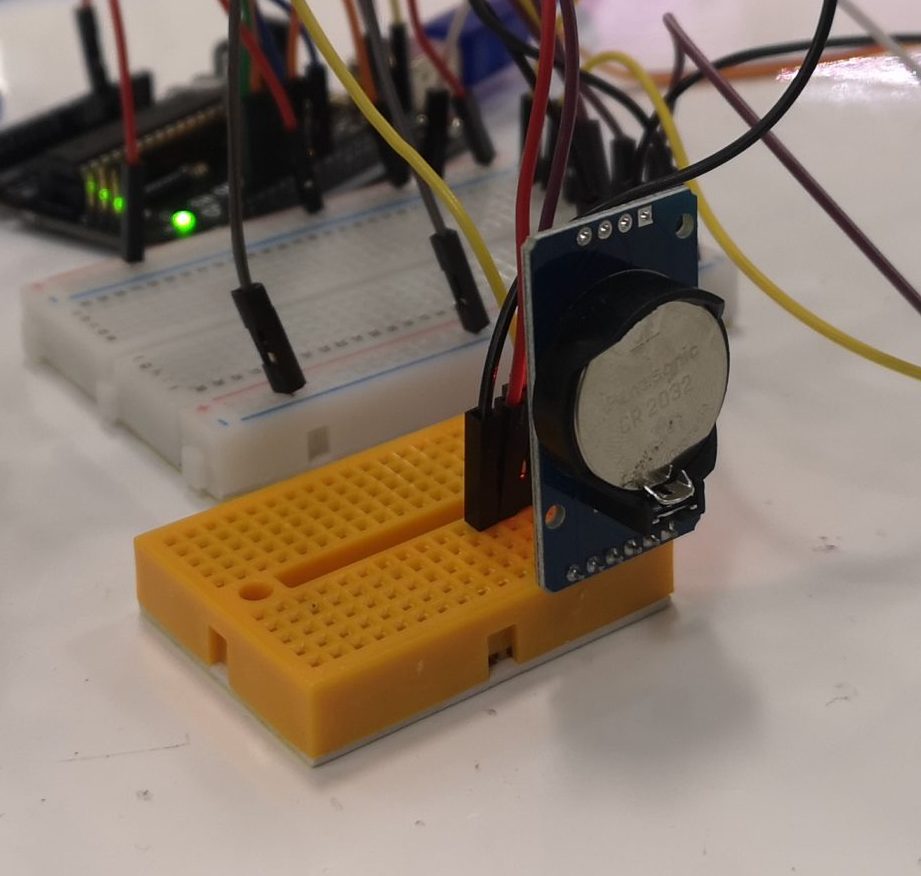
The RTC module was instrumental in keeping track of time
Decision Points
-
Switching the servo’s position
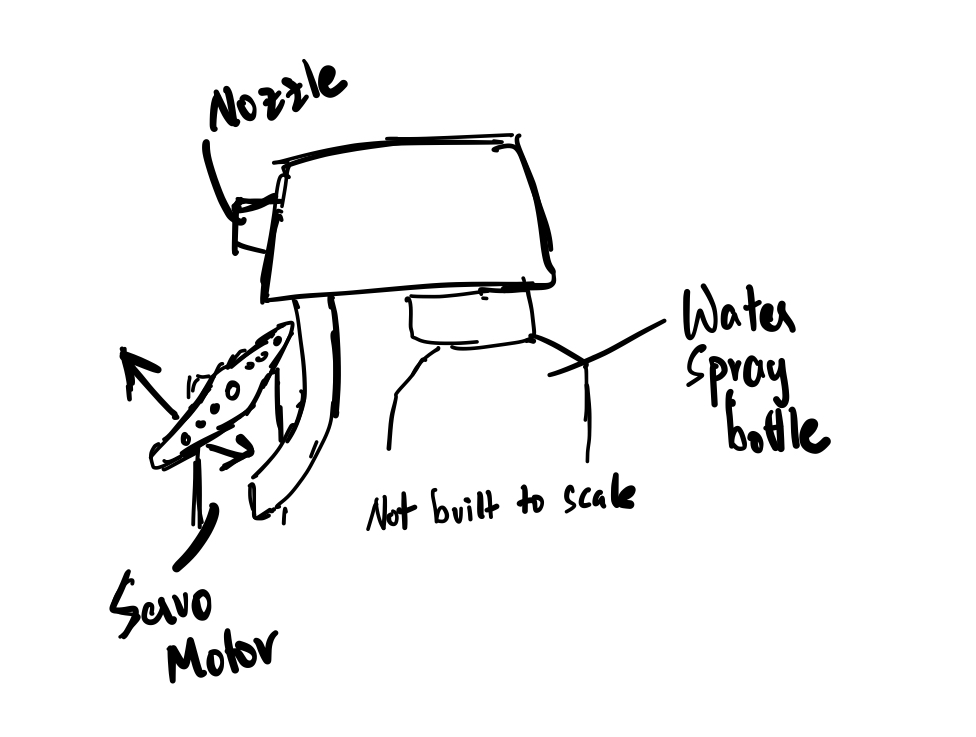
Initial design to place Servo in front of trigger
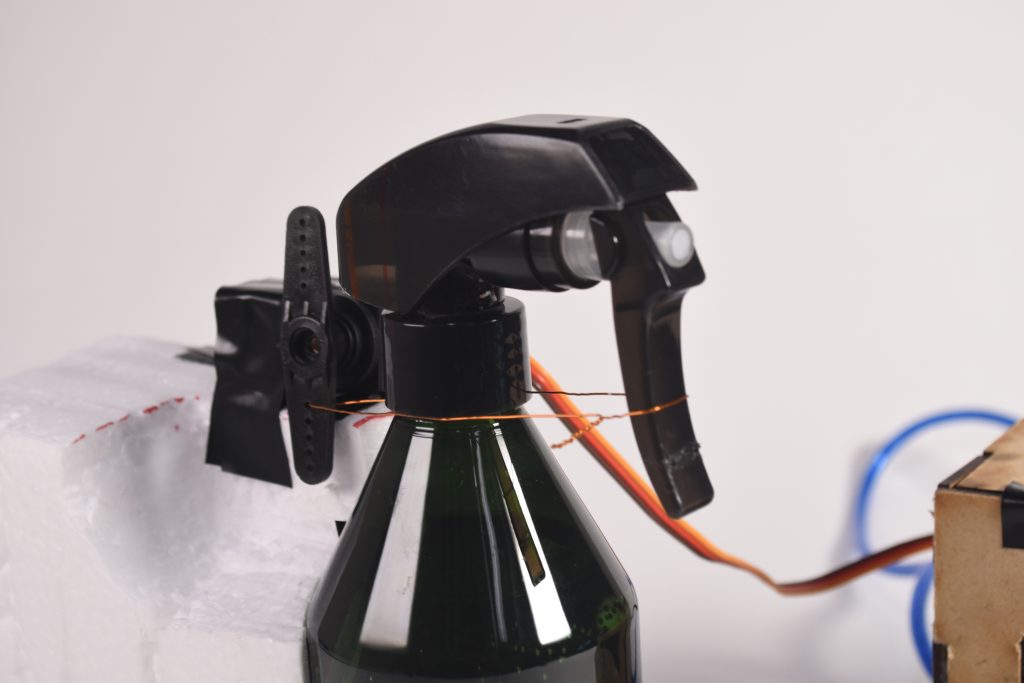
Final position for Servo behind bottle that pulls the trigger
Initially, I envisioned the servo to trigger the water spray by pushing against the trigger from the front. This was conceptualized based on a previous project along the same lines. This was not feasible as I could not create a practical build where the servo provides sufficient force to trigger the water spray. However, through the guidance of the professor, he suggested to change the servo’s position to back of the water spray for a pulling mechanism which would be more efficient in triggering the water spray. This change in design ensured that proper functioning of my project!
-
Creating a separate build for the arduino, LCD and rotary encoders
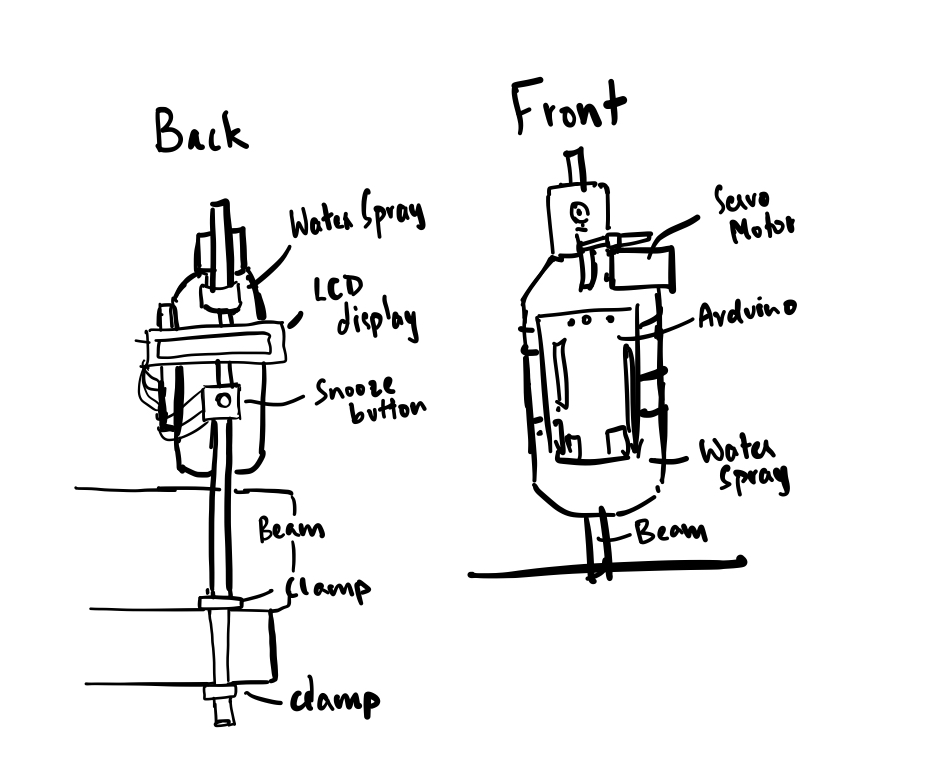
Initial design to build all hardware on water spray
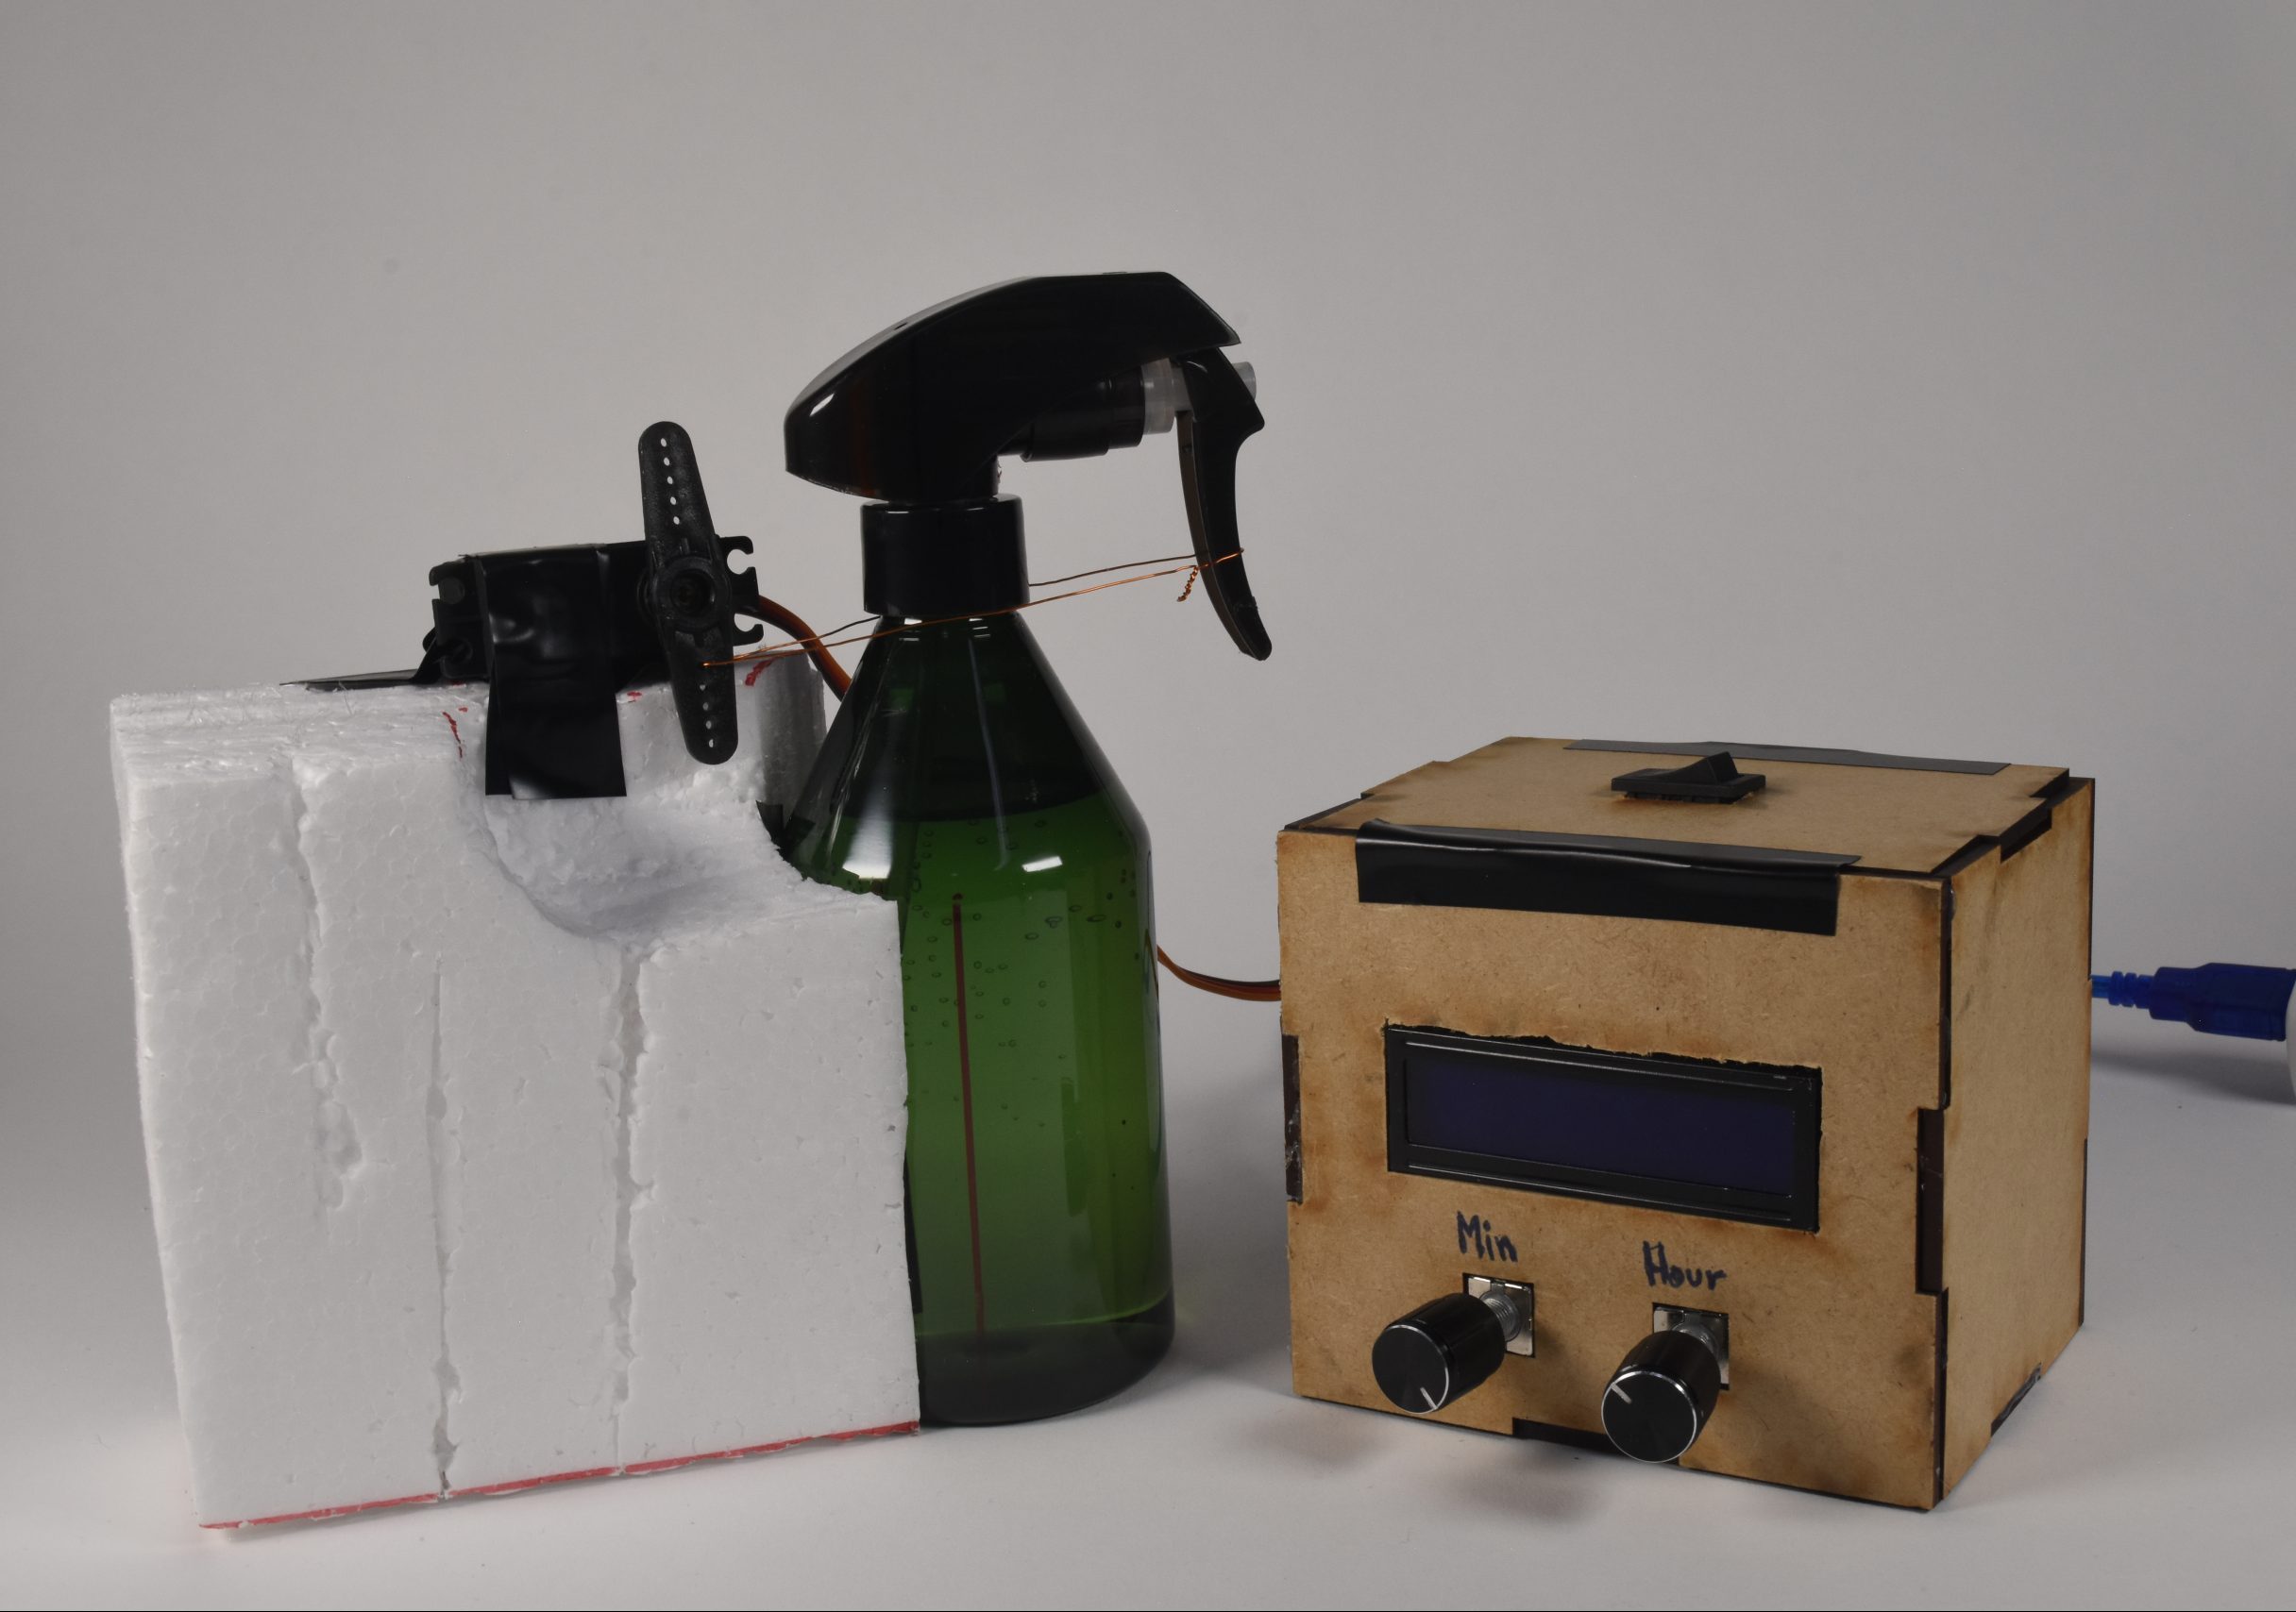
Final design with separate box for ardunio and other wiring.
My original design aspired for the alarm clock to be as compact as possible. As seen in my sketch, I wanted all the hardwares to be mounted on the water spray so it could occupy the least space on my side table. My initial trials were futile as I tried to tape and super glue the arduino and LCD display on the water spray with a box that covers it. This was potentially practical when the servo motor was at the front of the water spray. However, the servo motor required a base behind the water spray which meant none of these designs could be accomplished. So, I used laser cutting to create a separate box that included all my other hardware. Nevertheless, this change appeared to be most practical and visually appealing.
Critiques
“Such a useful device that definitely wakes me up.”
This was definitely my intention, as a person who frequently misses their morning alarms, I wanted to create a device that wakes me up in the first go. Though the mist is quite refreshing in the first spray, it gets annoying when it triggers multiple times when the alarm rings!
“Do you like to sleep with wet pillows?”
This was something I did not consider! I did not foresee that it would make my bed wet after it sprays a number of times. Thankfully, the water spray only sprays mist as compared to water droplets which mitigates this issue. However, I would have to find waterproof bedding now onwards.
Discussion
I was extremely delighted when I first saw the water spray being triggered by the servo based on the alarm time. It met the basic functionality that I had originally envisioned. I couldn’t wait to try it out in my room when it worked in the physical computing lab. The first few tests seemed to work perfectly but it filled me with dread upon realising that it would ruin my mornings if it disrupted my dreams or sleep cycles.
This project provided insights into the process of designing and building prototypes which I have never done before in my life. The structured delivery timeline ensured I was on time for all my deliverables while providing incentive to work ahead of the deadline. There were times where I was at the end of my wits when the servo did not trigger as expected. During the process, I found myself stuck in a particular way of thinking which limits my creativity and in this case, without the help of the professor, I would not have been able to overcome it. It emphasized the importance of having some degree of flexibility from the design of the prototype in the actual implementation as we cannot foresee everything from the get-go.
After finishing the project, I planned to 3D print a build that accomodates everything on the water spray but eventually dropped the idea to focus on other upcoming deliverables. I would try to create a build with a smaller base for the servo motor using other alternates besides styrofoam. Additionally, would try to find a way to screw the servo into the water spray or the base to ensure that it does not come off loose as the current project is hot glued together and might come off after frequent number of triggers. I would incorporate other design changes such as adding a snooze function which is not a simple switch at the top, add a water level sensor to remind the user when the bottle is empty.
Schematic and block diagrams
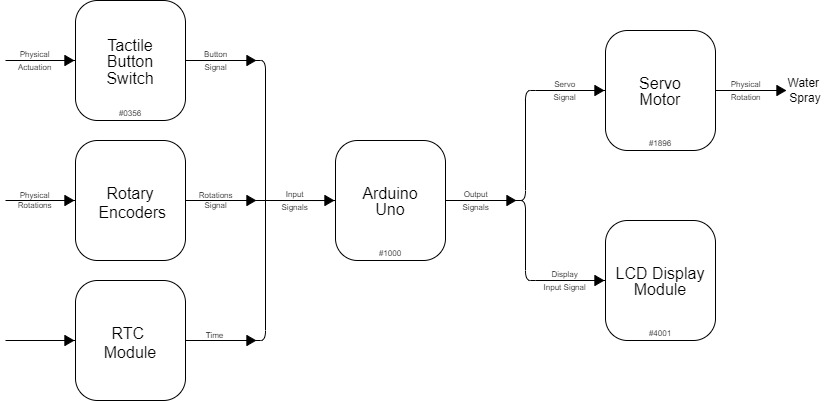
Block diagram
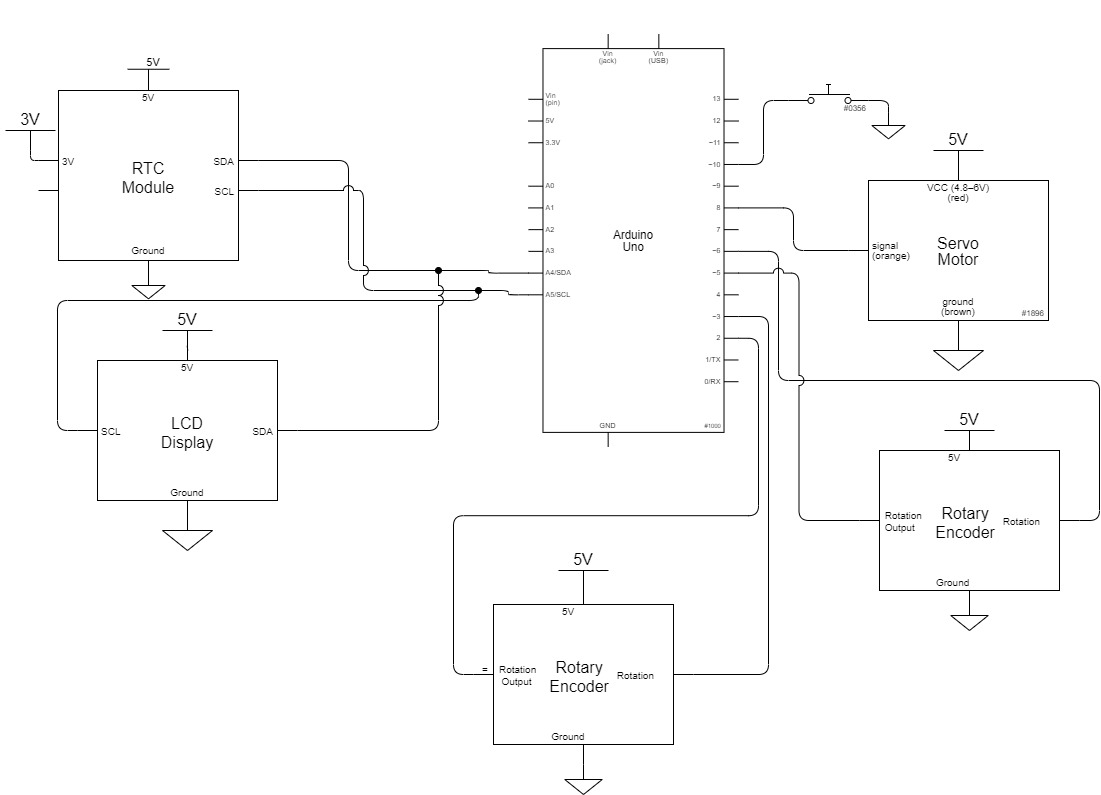
Schematic
Code
/*
Project Title: Water-spray Alarm Clock
Name: Siddharth Parthiban
Description: User sets the time for the alarm by rotating the two rotary encoders whereby controlling the hours and the minutes which is displayed by the LCD Screen. The RTC module provides the input for the current time and when both the alarm and the current time is the same, the code directs the servo to rotates 40 degrees back and forth to trigger the water spray. Additionally, as a snooze button, the switch controls whether the water spray is triggered multiple times during the alarm duration.

Pin Mapping:
   Arduino pin | role    | description
   ------------|---------|-------------
   2             input     rotary encoder(hour) pin A
   3             input     rotary encoder(hour) pin B
   5             input     rotary encoder(min) pin A
   6             input     rotary encoder(min) pin B
   8             output    Servo motor
   10            input     switch
   SCL           input     RTC Module/LCD
   SDA           input     RTC Module/LCD

Rotary Encoder Code adapted from https://dronebotworkshop.com/rotary-encoders-arduino/#Arduino_Motor_Encoder_Sketch DroneBot Workshop 2019
*/

#include <Encoder.h>
#include <Servo.h>
#include <LiquidCrystal_I2C.h>
#include <Wire.h>
#include <DS3232RTC.h>

//Initialising variables for user input
long rotatMin = 0;
long prevRotatMin = -999;
int alarmMinute;
int alarmHour;
int curMinute;
int curHour;
long rotatHour = 0;
long prevRotatHour= -999;

//Initialising variable for output
int servoDegree = 20;
float oldTimeDisplay  = 0;

//Initialising pin ports for Arduino
int SWITCHPIN = 10;
const int SERVOMOTORPIN = 8;

//Creating Servo, Rotary Encoder and RTC module objects
Servo servoMotor;
Encoder hourEncod(2,3);
Encoder minEncod(5,6);
DS3232RTC myRTC;

//Declaring LCD screen object
LiquidCrystal_I2C screen(0x27, 16, 2);

void setup() {
  Serial.begin(9600); //setting data rate
  pinMode(SWITCHPIN, INPUT); //declaring switch for arduino

  //Setting up servo motor
  servoMotor.attach(SERVOMOTORPIN);
  servoMotor.write(servoDegree);

  //Setting up LCD Screen
  screen.init();
  screen.backlight();
  screen.home();
}


void loop() {
  time_t t = myRTC.get(); //Get current time

  //Read user input from rotary encoder
  rotatMin = minEncod.read();
  rotatHour = hourEncod.read();

  //Calculate the minutes based on rotations
  if (rotatMin != prevRotatMin){
    prevRotatMin = rotatMin;

 //Rotations divided by 4 to set an arbitrary unit for 1 turn of the knob
 //Modulo 60 to get convert turns to respective minutes
 //if-else statements to consider anti-clockwise turns
    if (rotatMin < 0){
      alarmMinute = (-(rotatMin/4)) % 60;
    } else {
      alarmMinute =  (rotatMin/4) % 60;
    }

    //Display set minutes to LCD Screen
    screen.setCursor(12,1);
    screen.print((String)alarmMinute);
  }

//Calculate hour based on rotations
  if (rotatHour != prevRotatHour){
    prevRotatHour = rotatHour;

//Rotations divided by 4 to set an arbitrary unit for 1 turn of the knob
//Modulo 24 to get convert turns to respective hour
//if-else statements to consider anti-clockwise turns
    if (rotatHour < 0){
      alarmHour = (-(rotatHour)/4) % 24;
    } else {
      alarmHour = (rotatHour/4) % 24;
    }

    //Display hour on LCD Screen
    screen.setCursor(9,1);
    screen.print((String)alarmHour + ":");
  }

//Move servo motor if not on snooze to trigger water spray
  if (digitalRead(SWITCHPIN) == 0){

    //Check if current time is equal to alarm time
    if (minute(t) == alarmMinute && hour(t) == alarmHour){
      servoMotor.write(servoDegree + 90);
      delay(500);
      servoMotor.write(servoDegree - 50);
      delay(1000);
      servoMotor.write(servoDegree + 90);
      delay(500);
      servoMotor.write(servoDegree - 50);
    }
  }
    //Reset servo motor to neutral position
    servoDegree = 20;
    servoMotor.write(servoDegree);

//Display values to LCD Screen
  if (millis() - oldTimeDisplay >= 250) {
    oldTimeDisplay = millis();
    screen.clear();
    screen.setCursor(2, 0);
    screen.print("Time");
    screen.setCursor(2, 1);
    screen.print((String)hour(t)+ ":" +(String) minute(t));
    screen.setCursor(8, 0);
    screen.print("Alarm");
    screen.setCursor(9, 1);
    screen.print((String)alarmHour + ":" + (String) alarmMinute);

  }
}
