Part.0 Overview
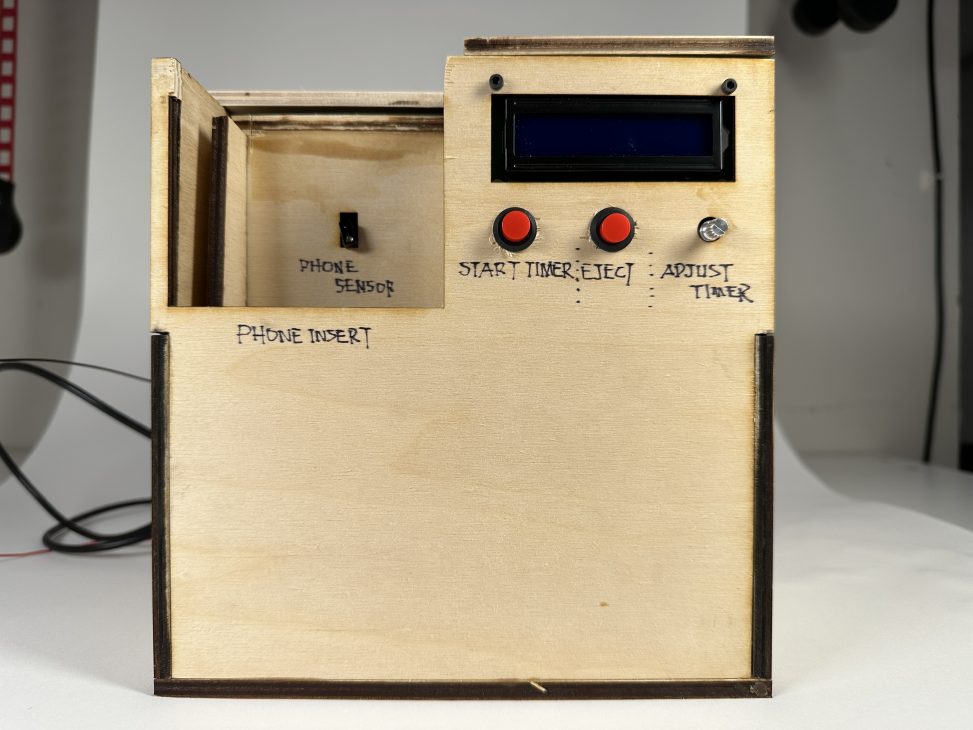
An assistive device that helps the user to focus on the task at hand rather than his or her phone by mechanically retracting the phone inside.
Technical Demostration:
Orange Tape Acting as Phone to Trick the IR Sensor
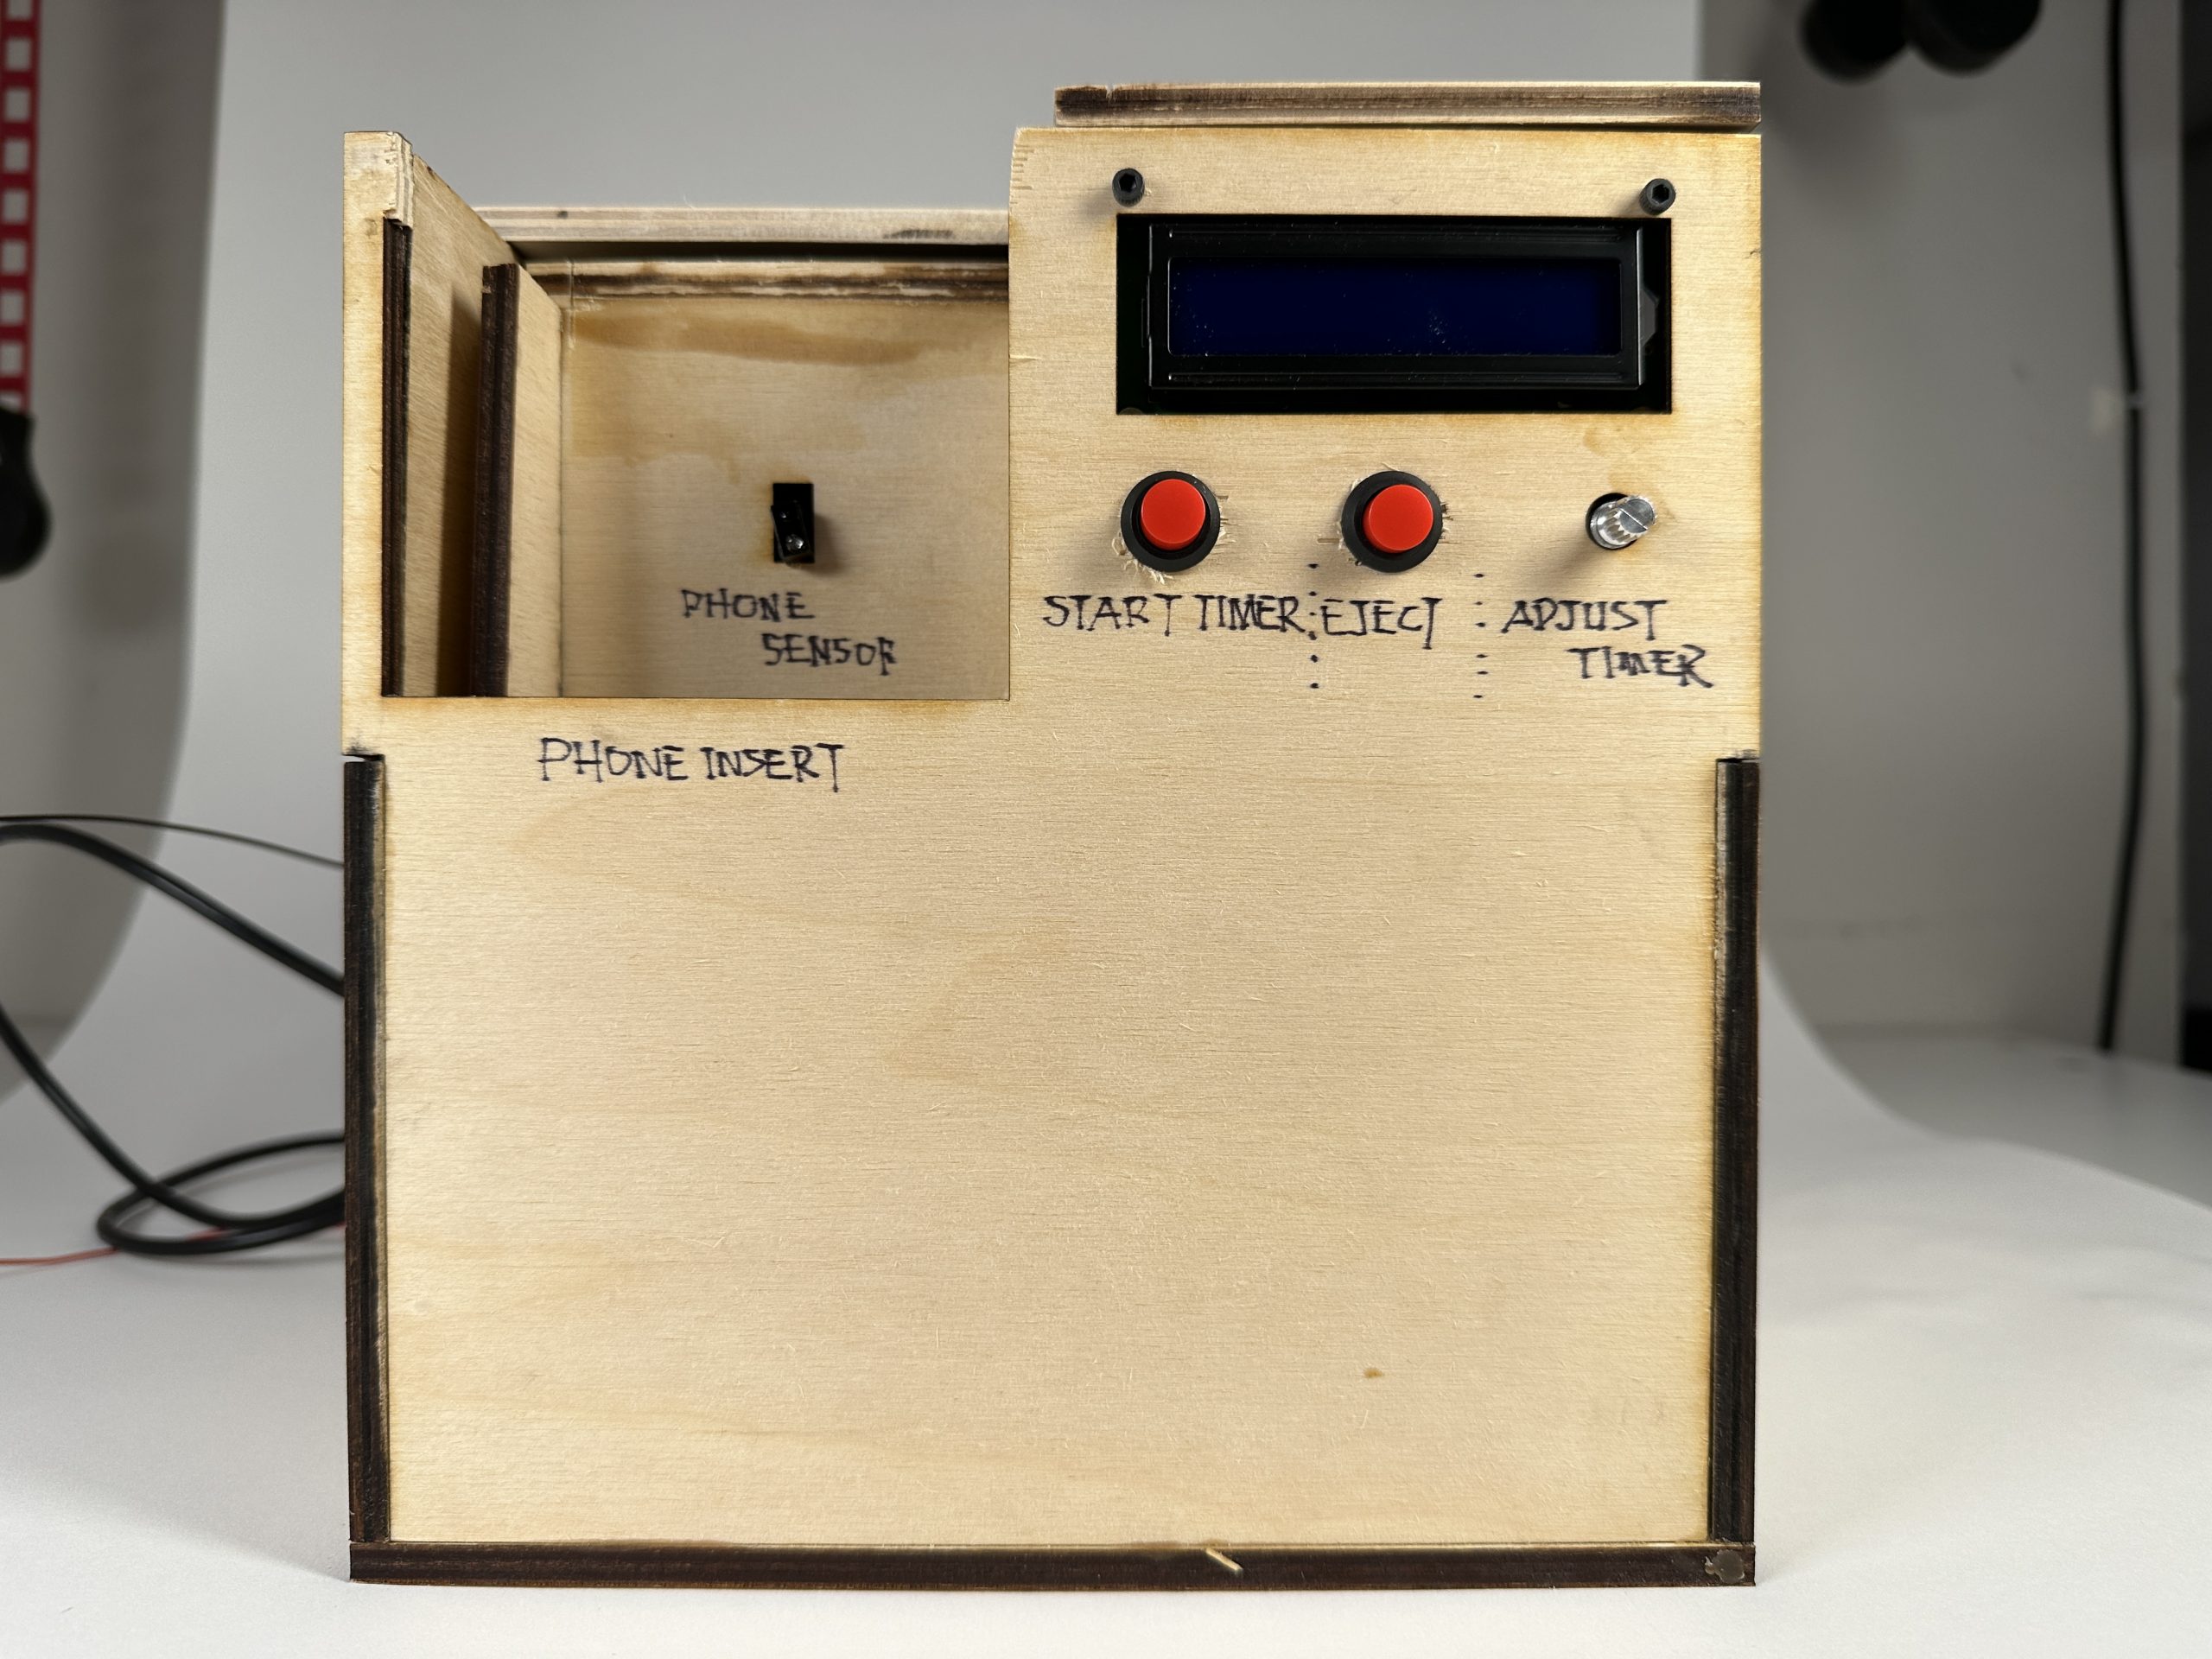
Overall Photo:
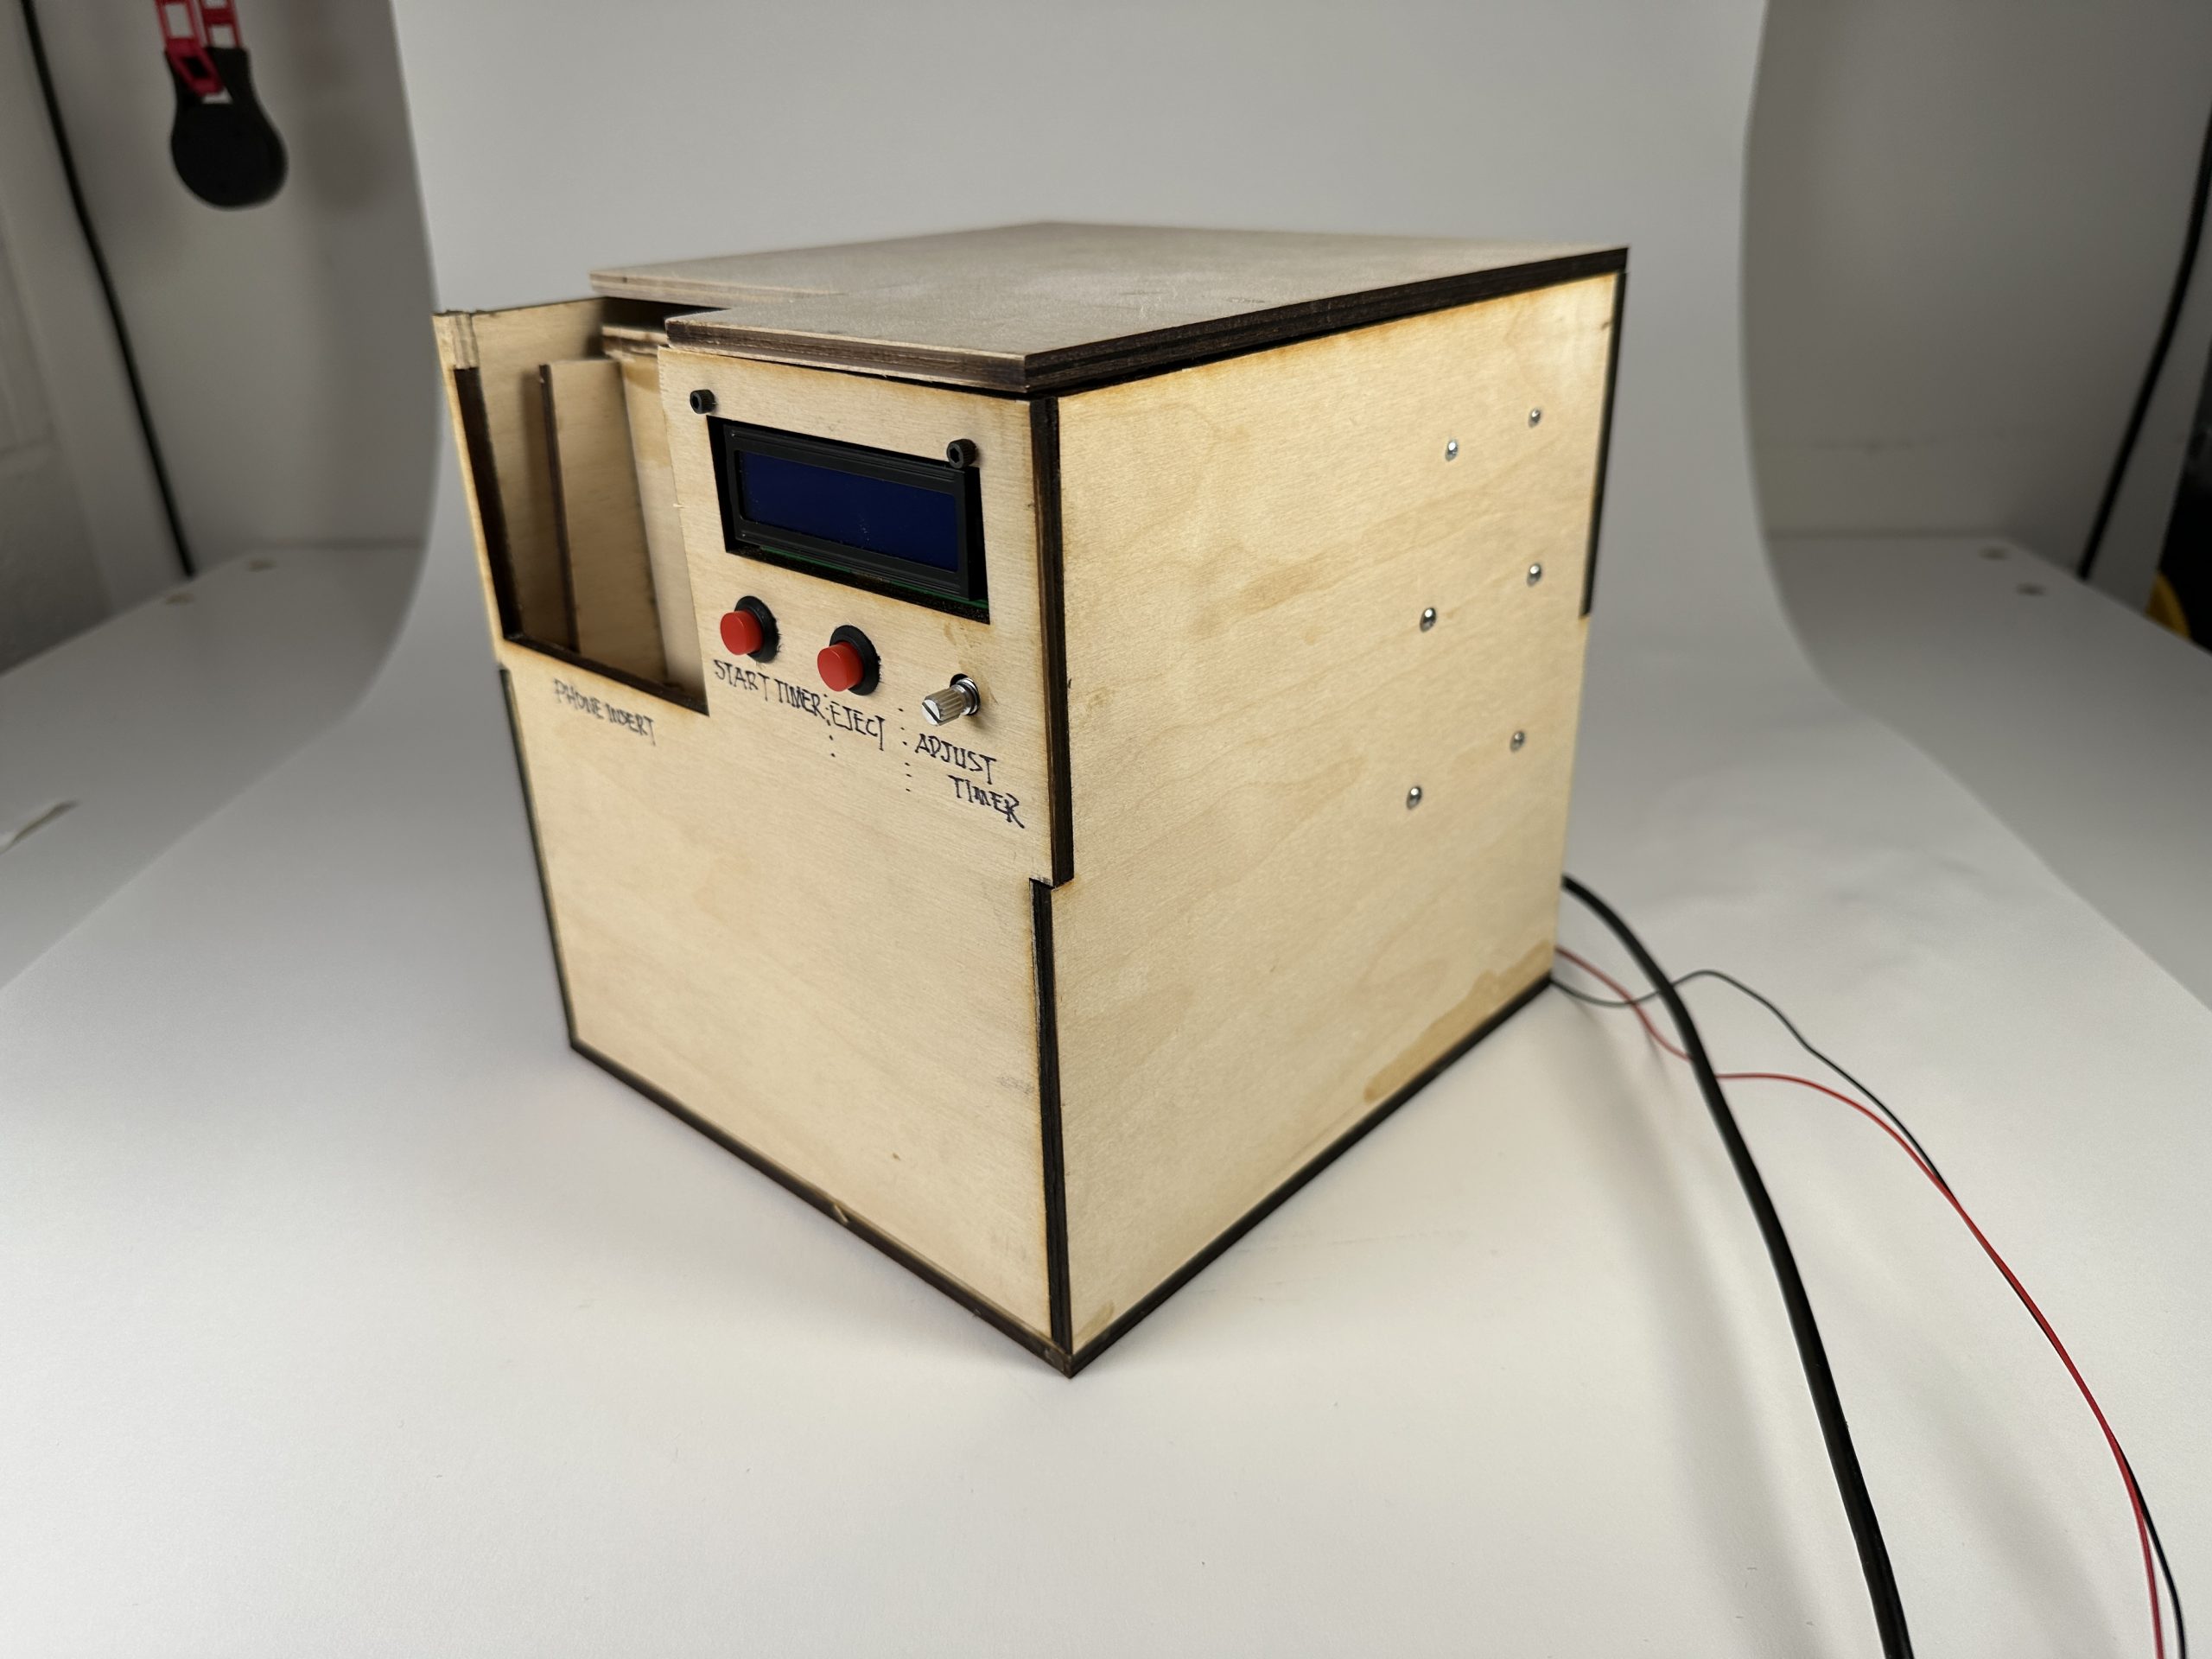
Overall Dimension (8″x8″x8″)
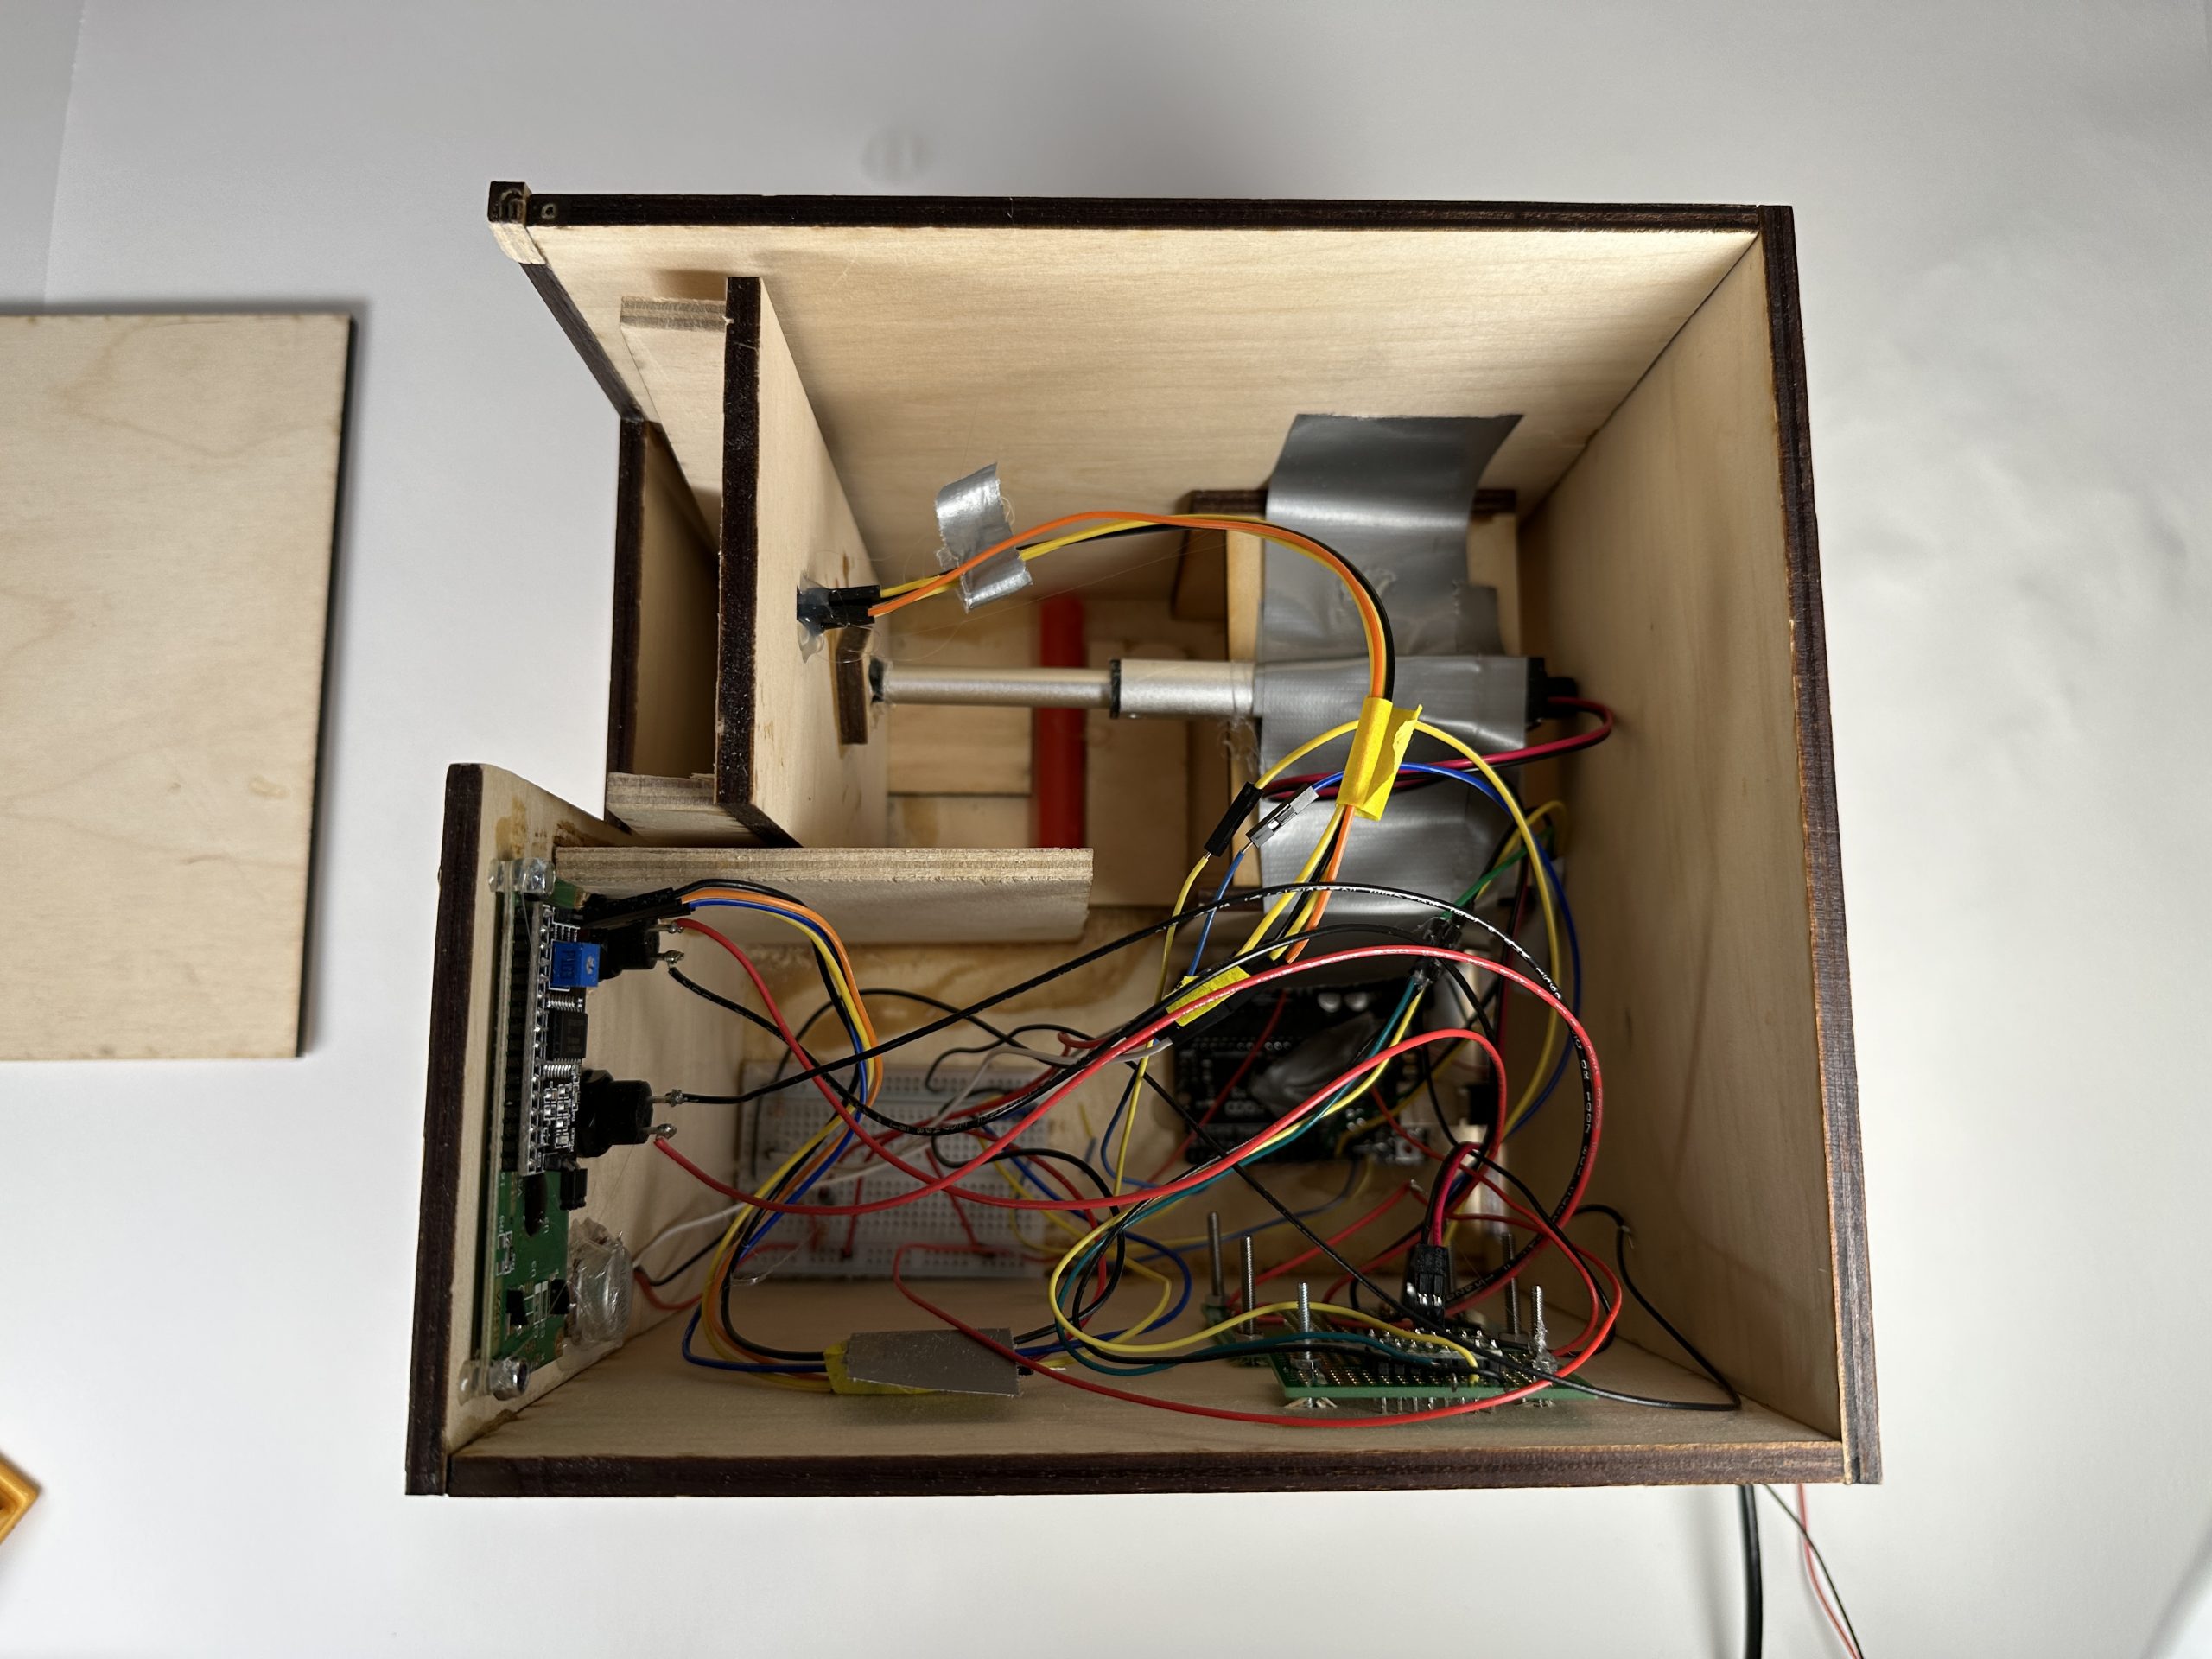
Internal Wiring & Layout
Detailed Photos:
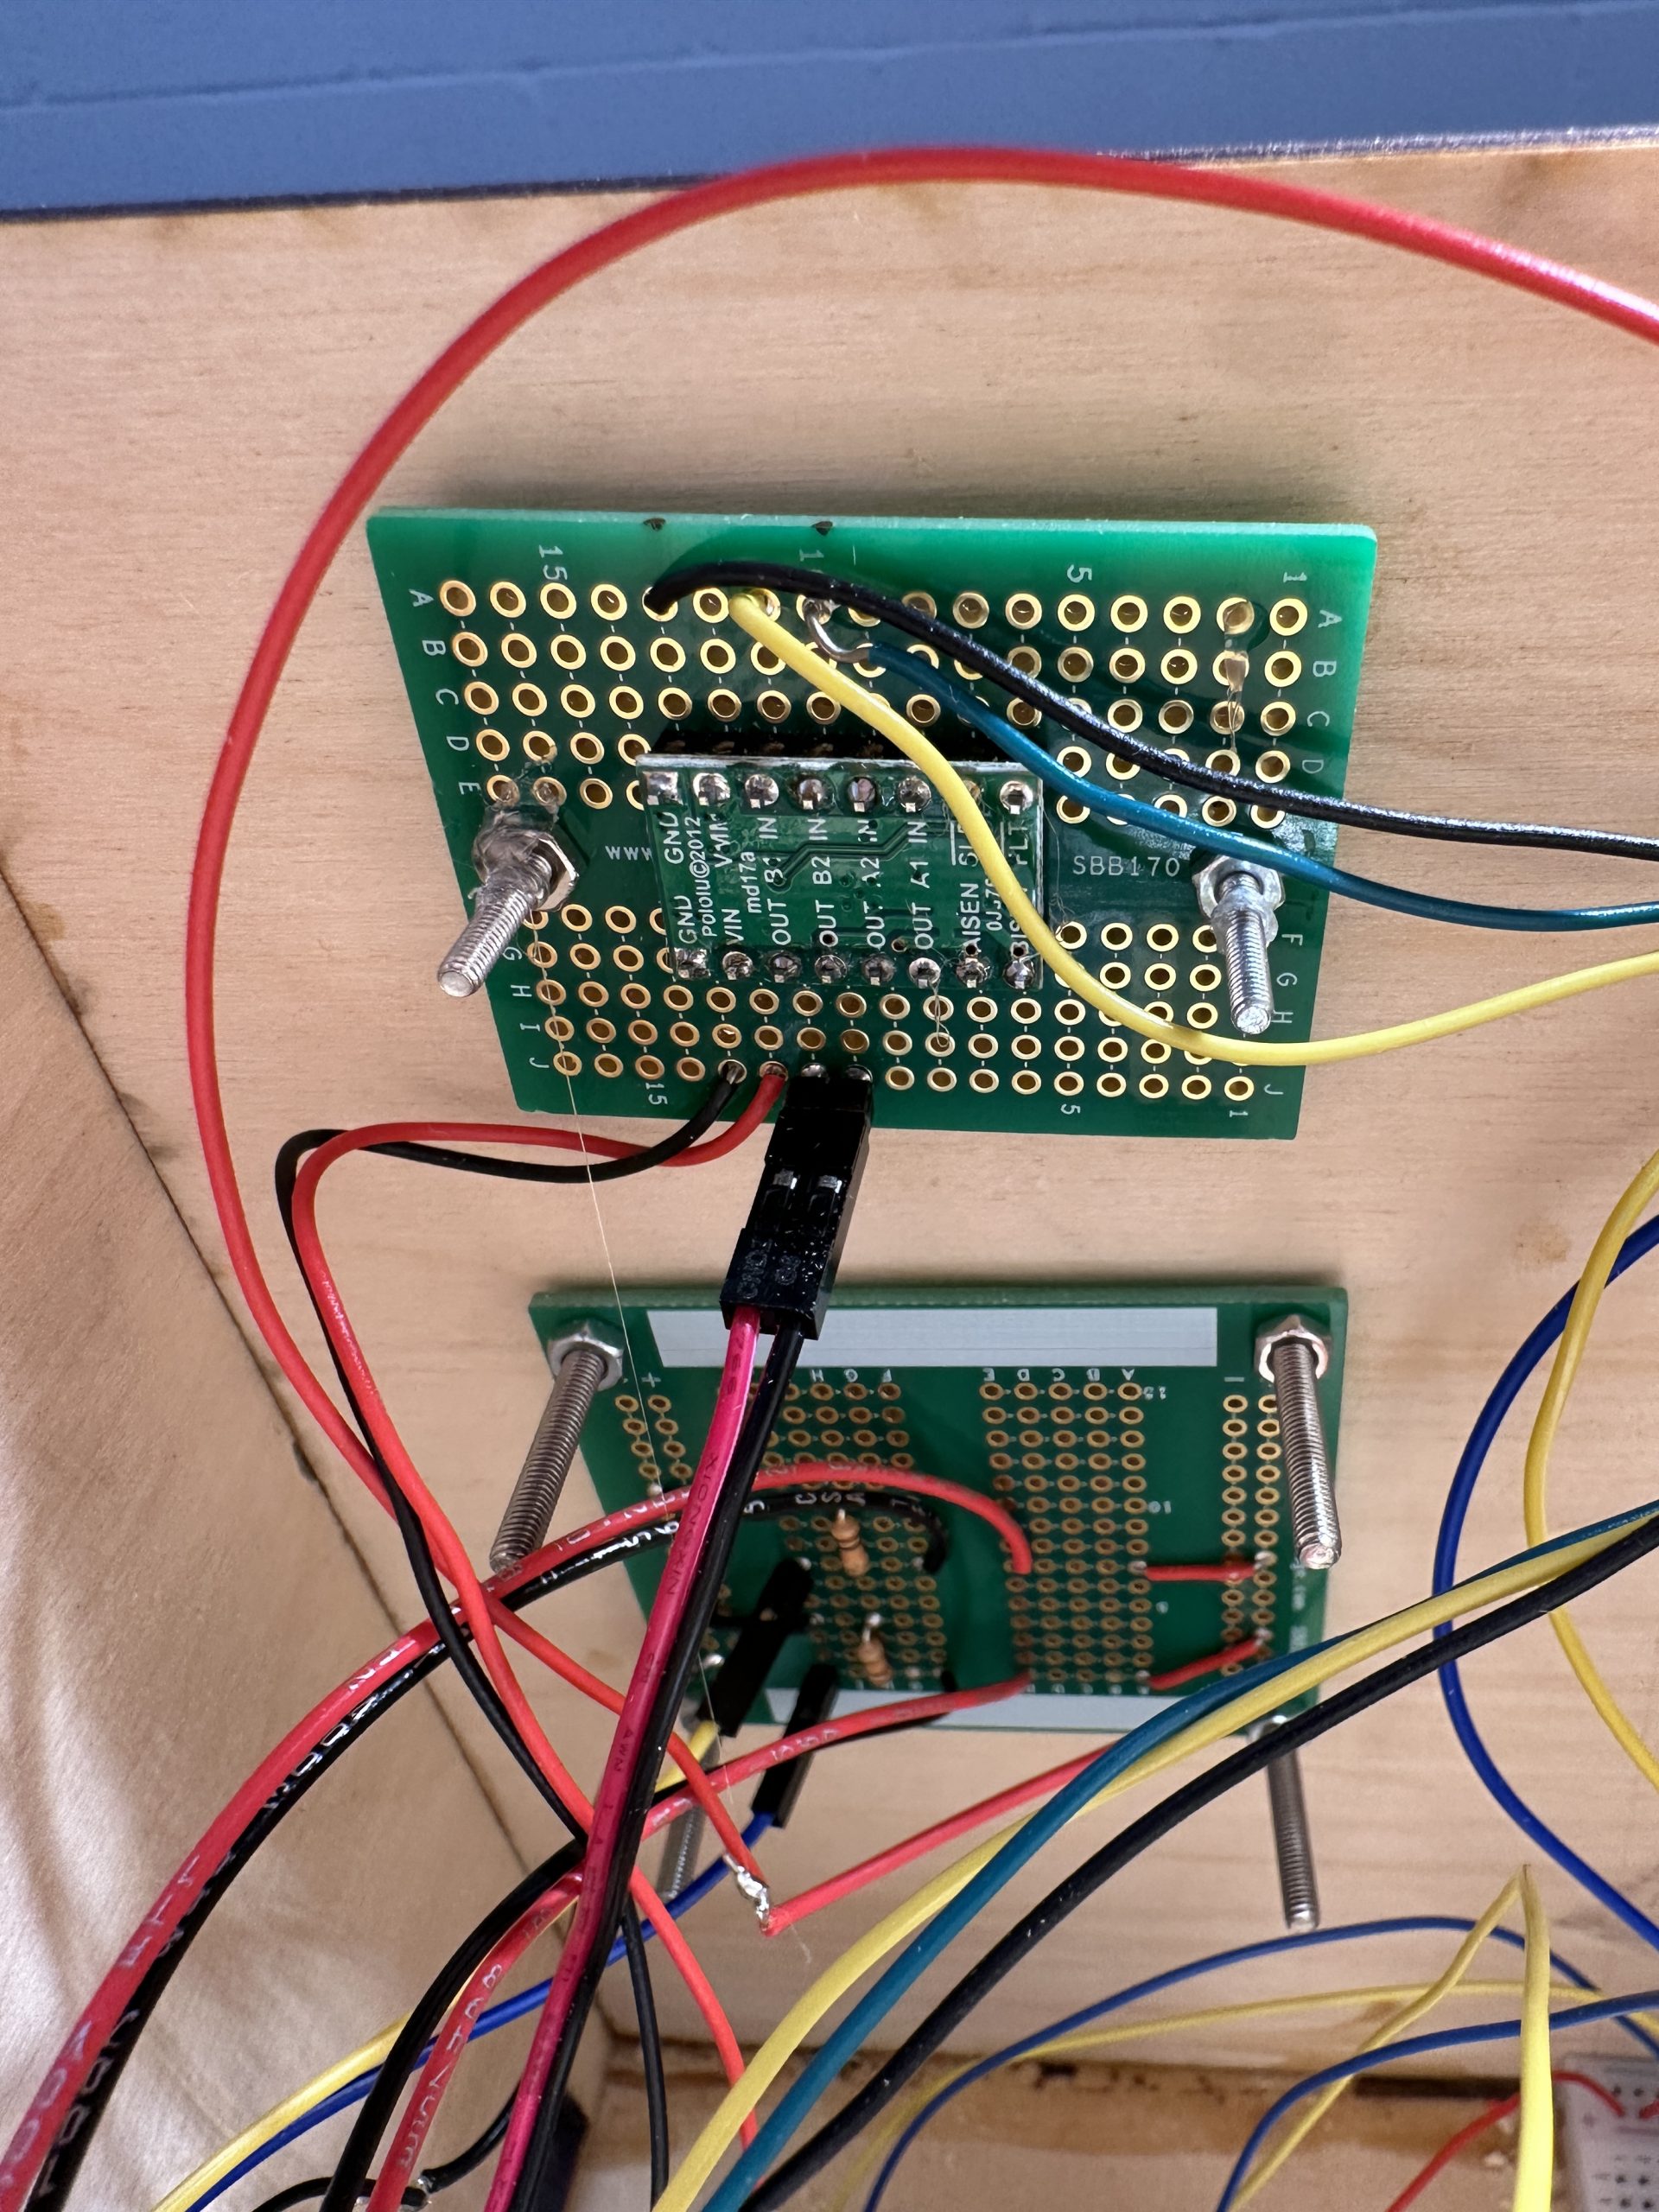
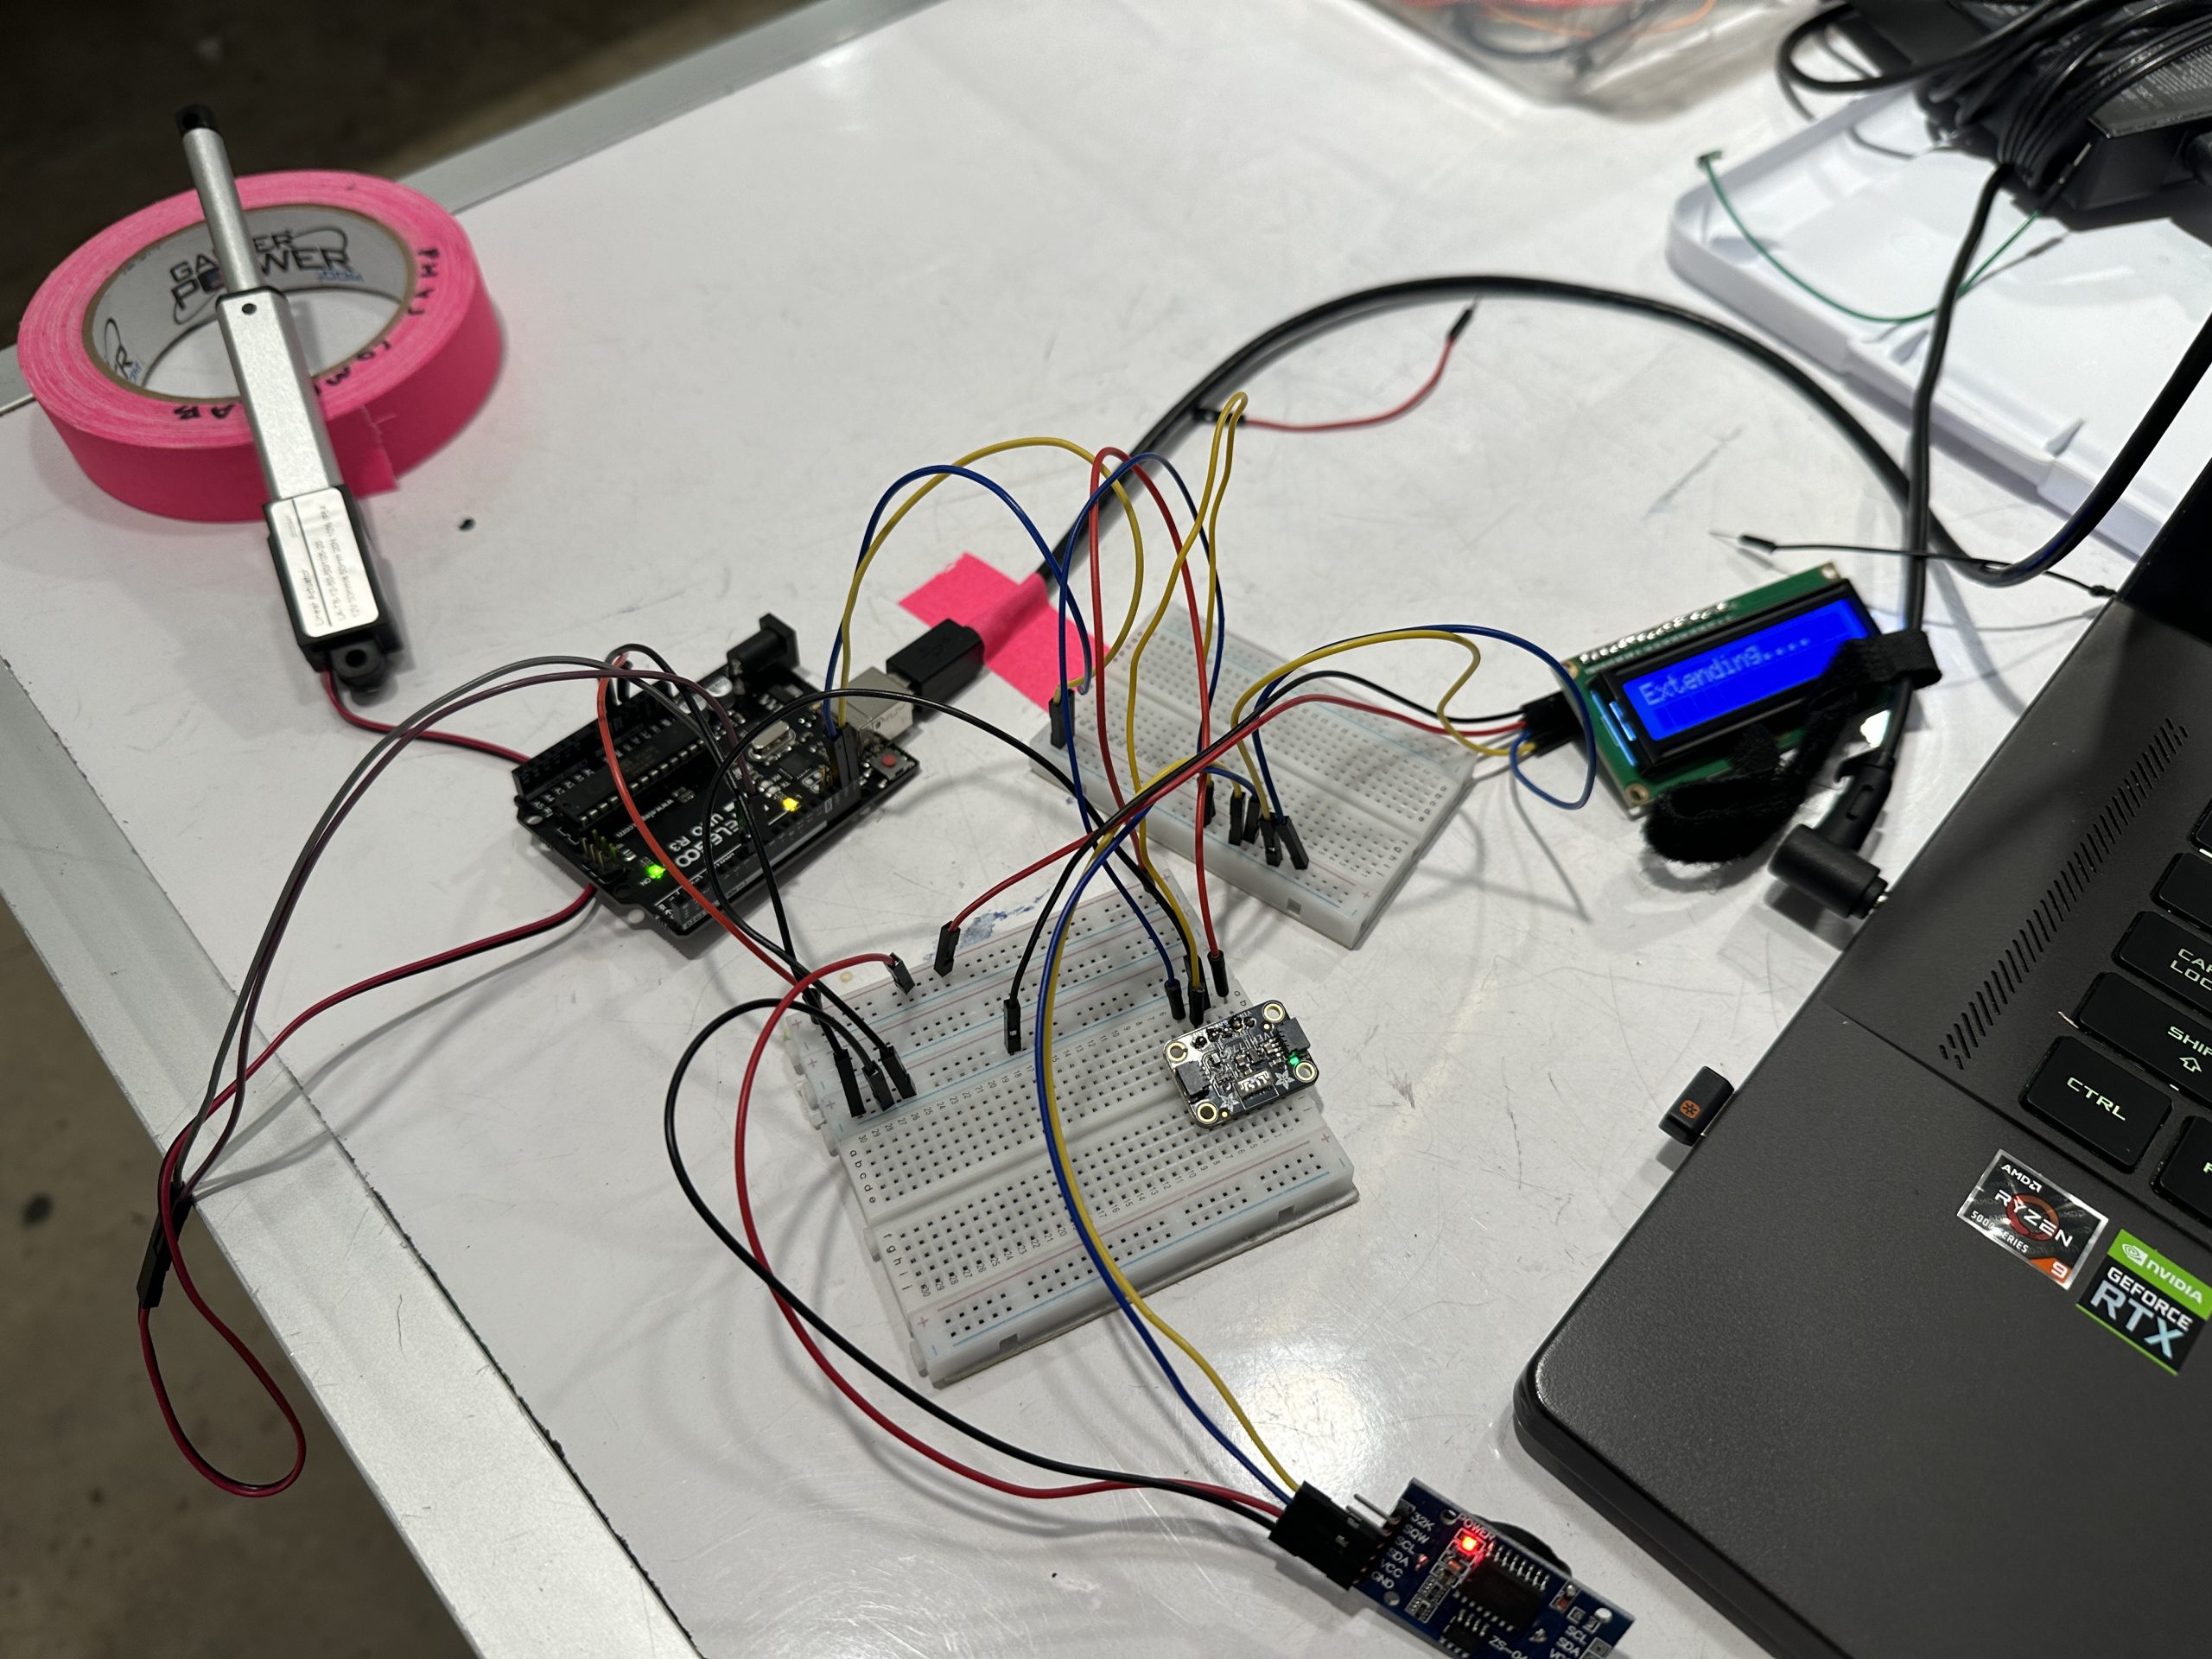
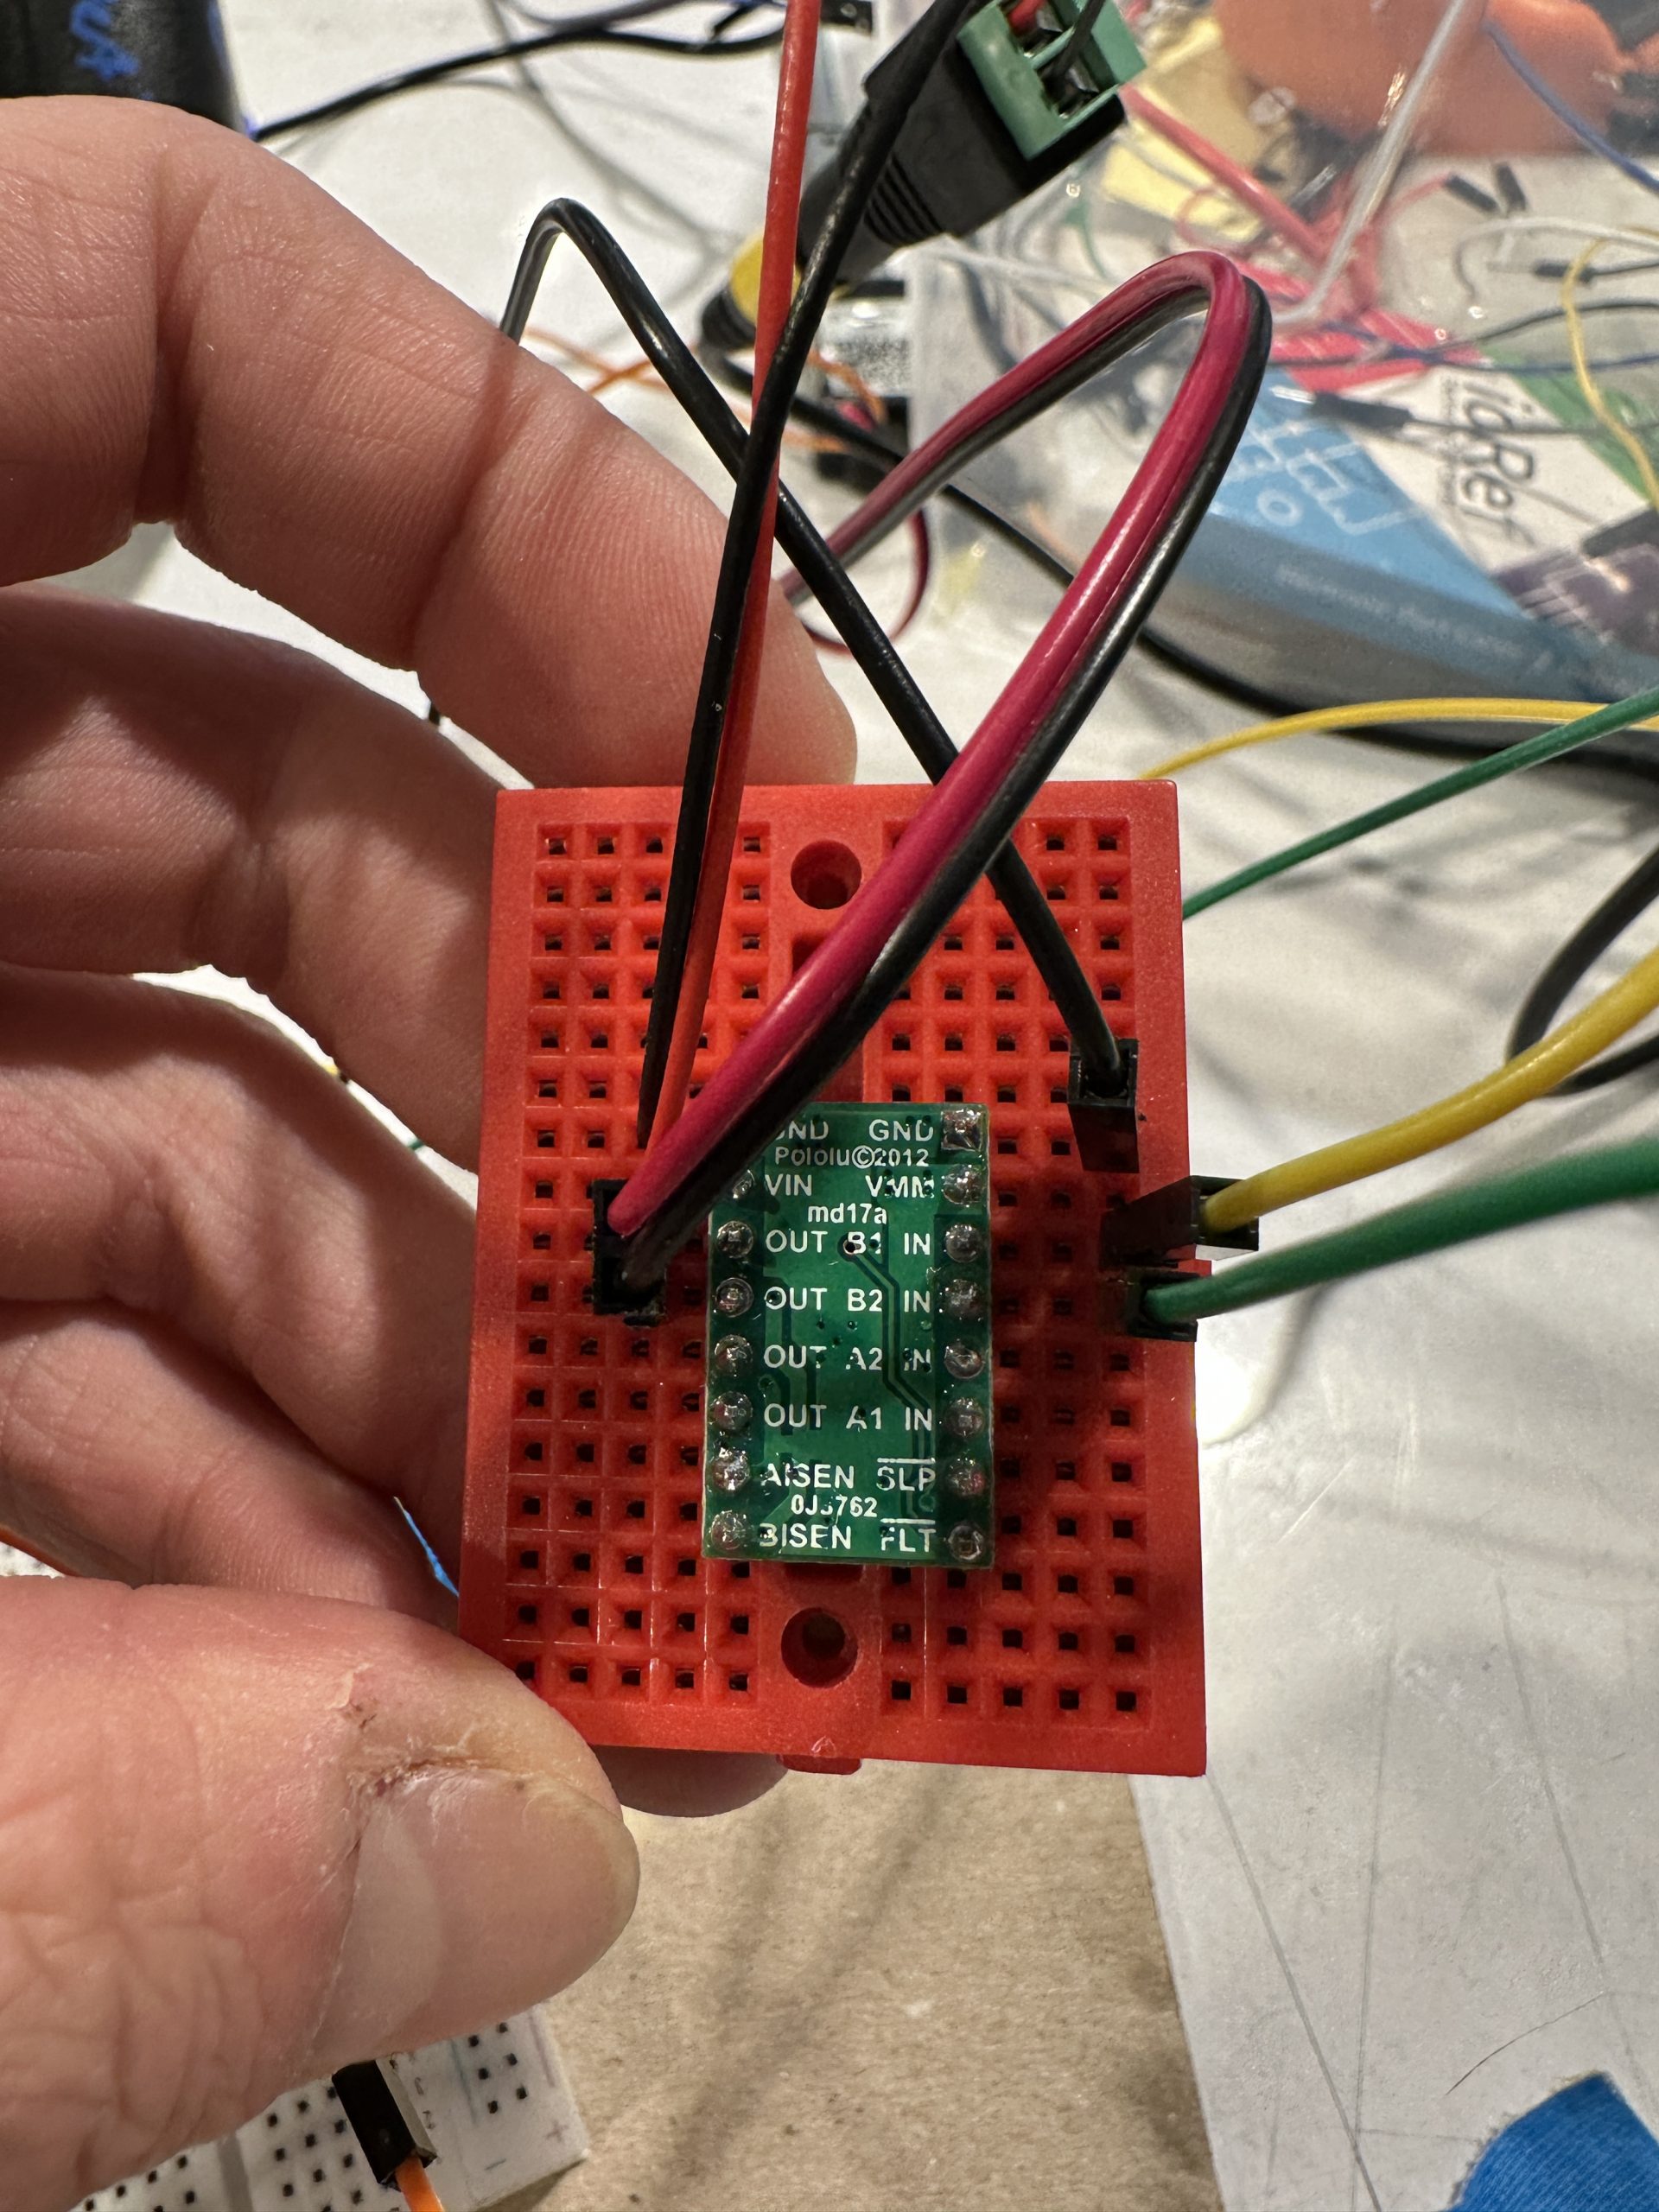
Protoboards Connections: Motor Driver & UI Systems
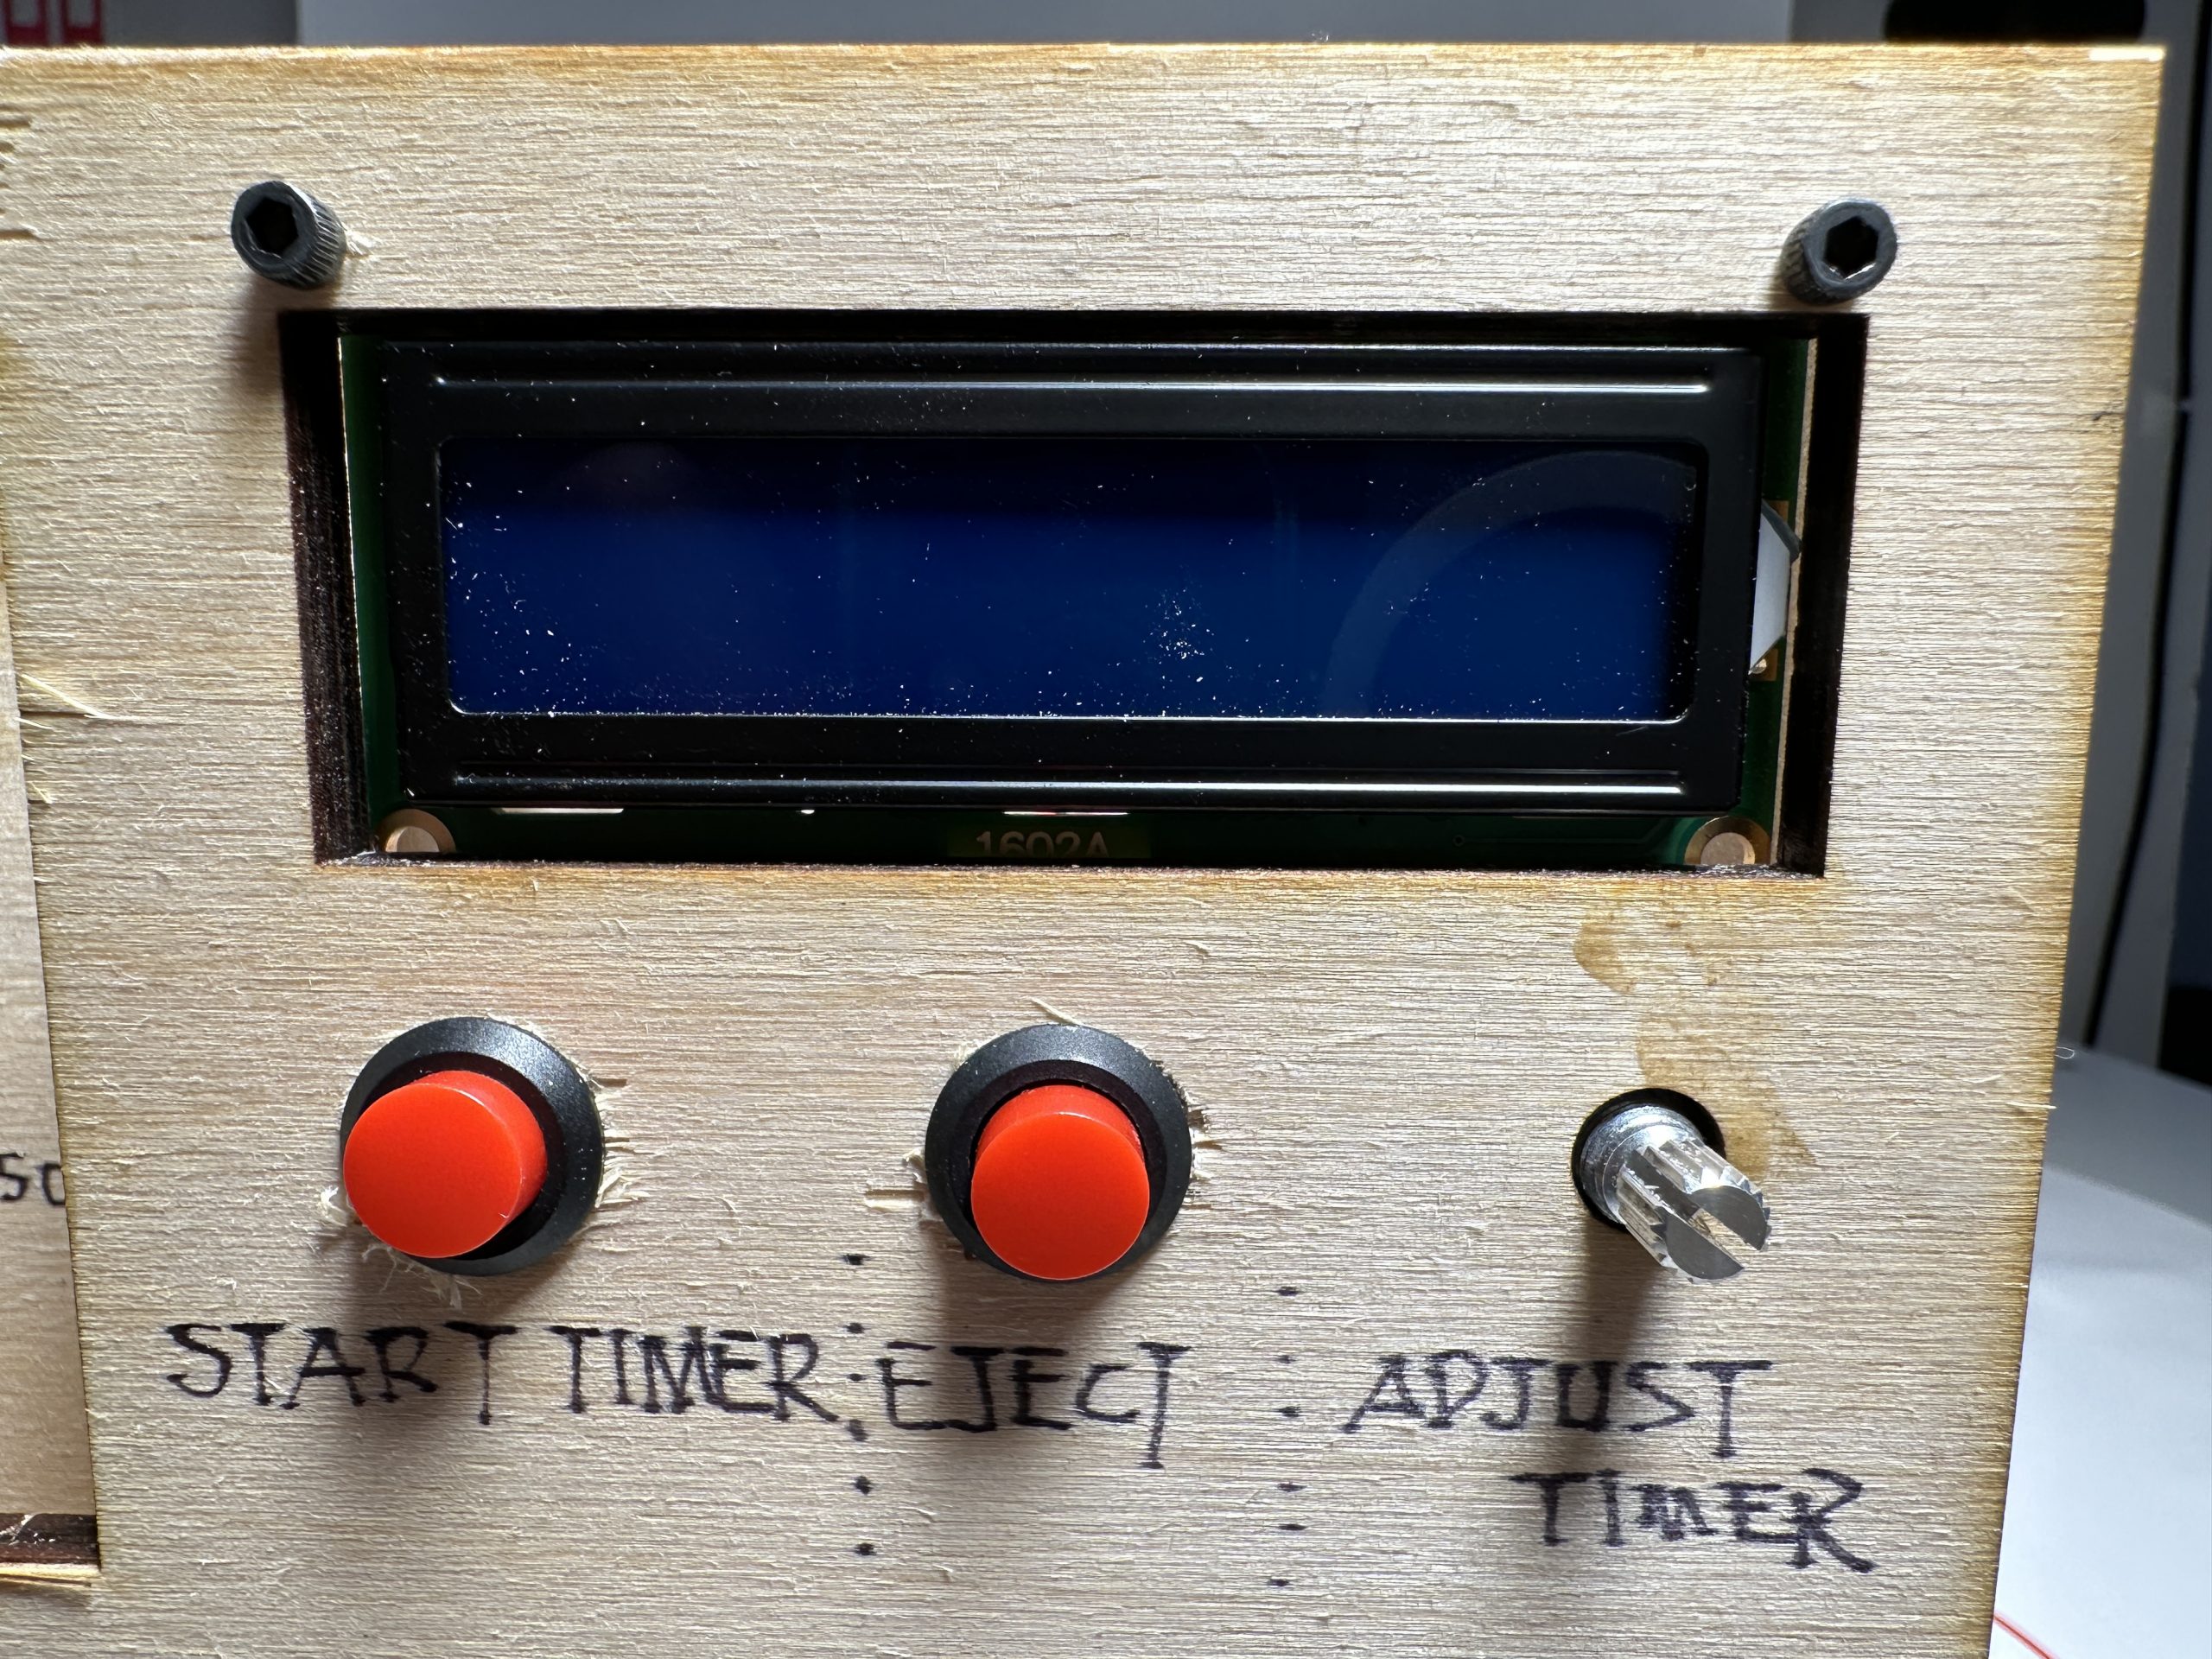
UI – Front
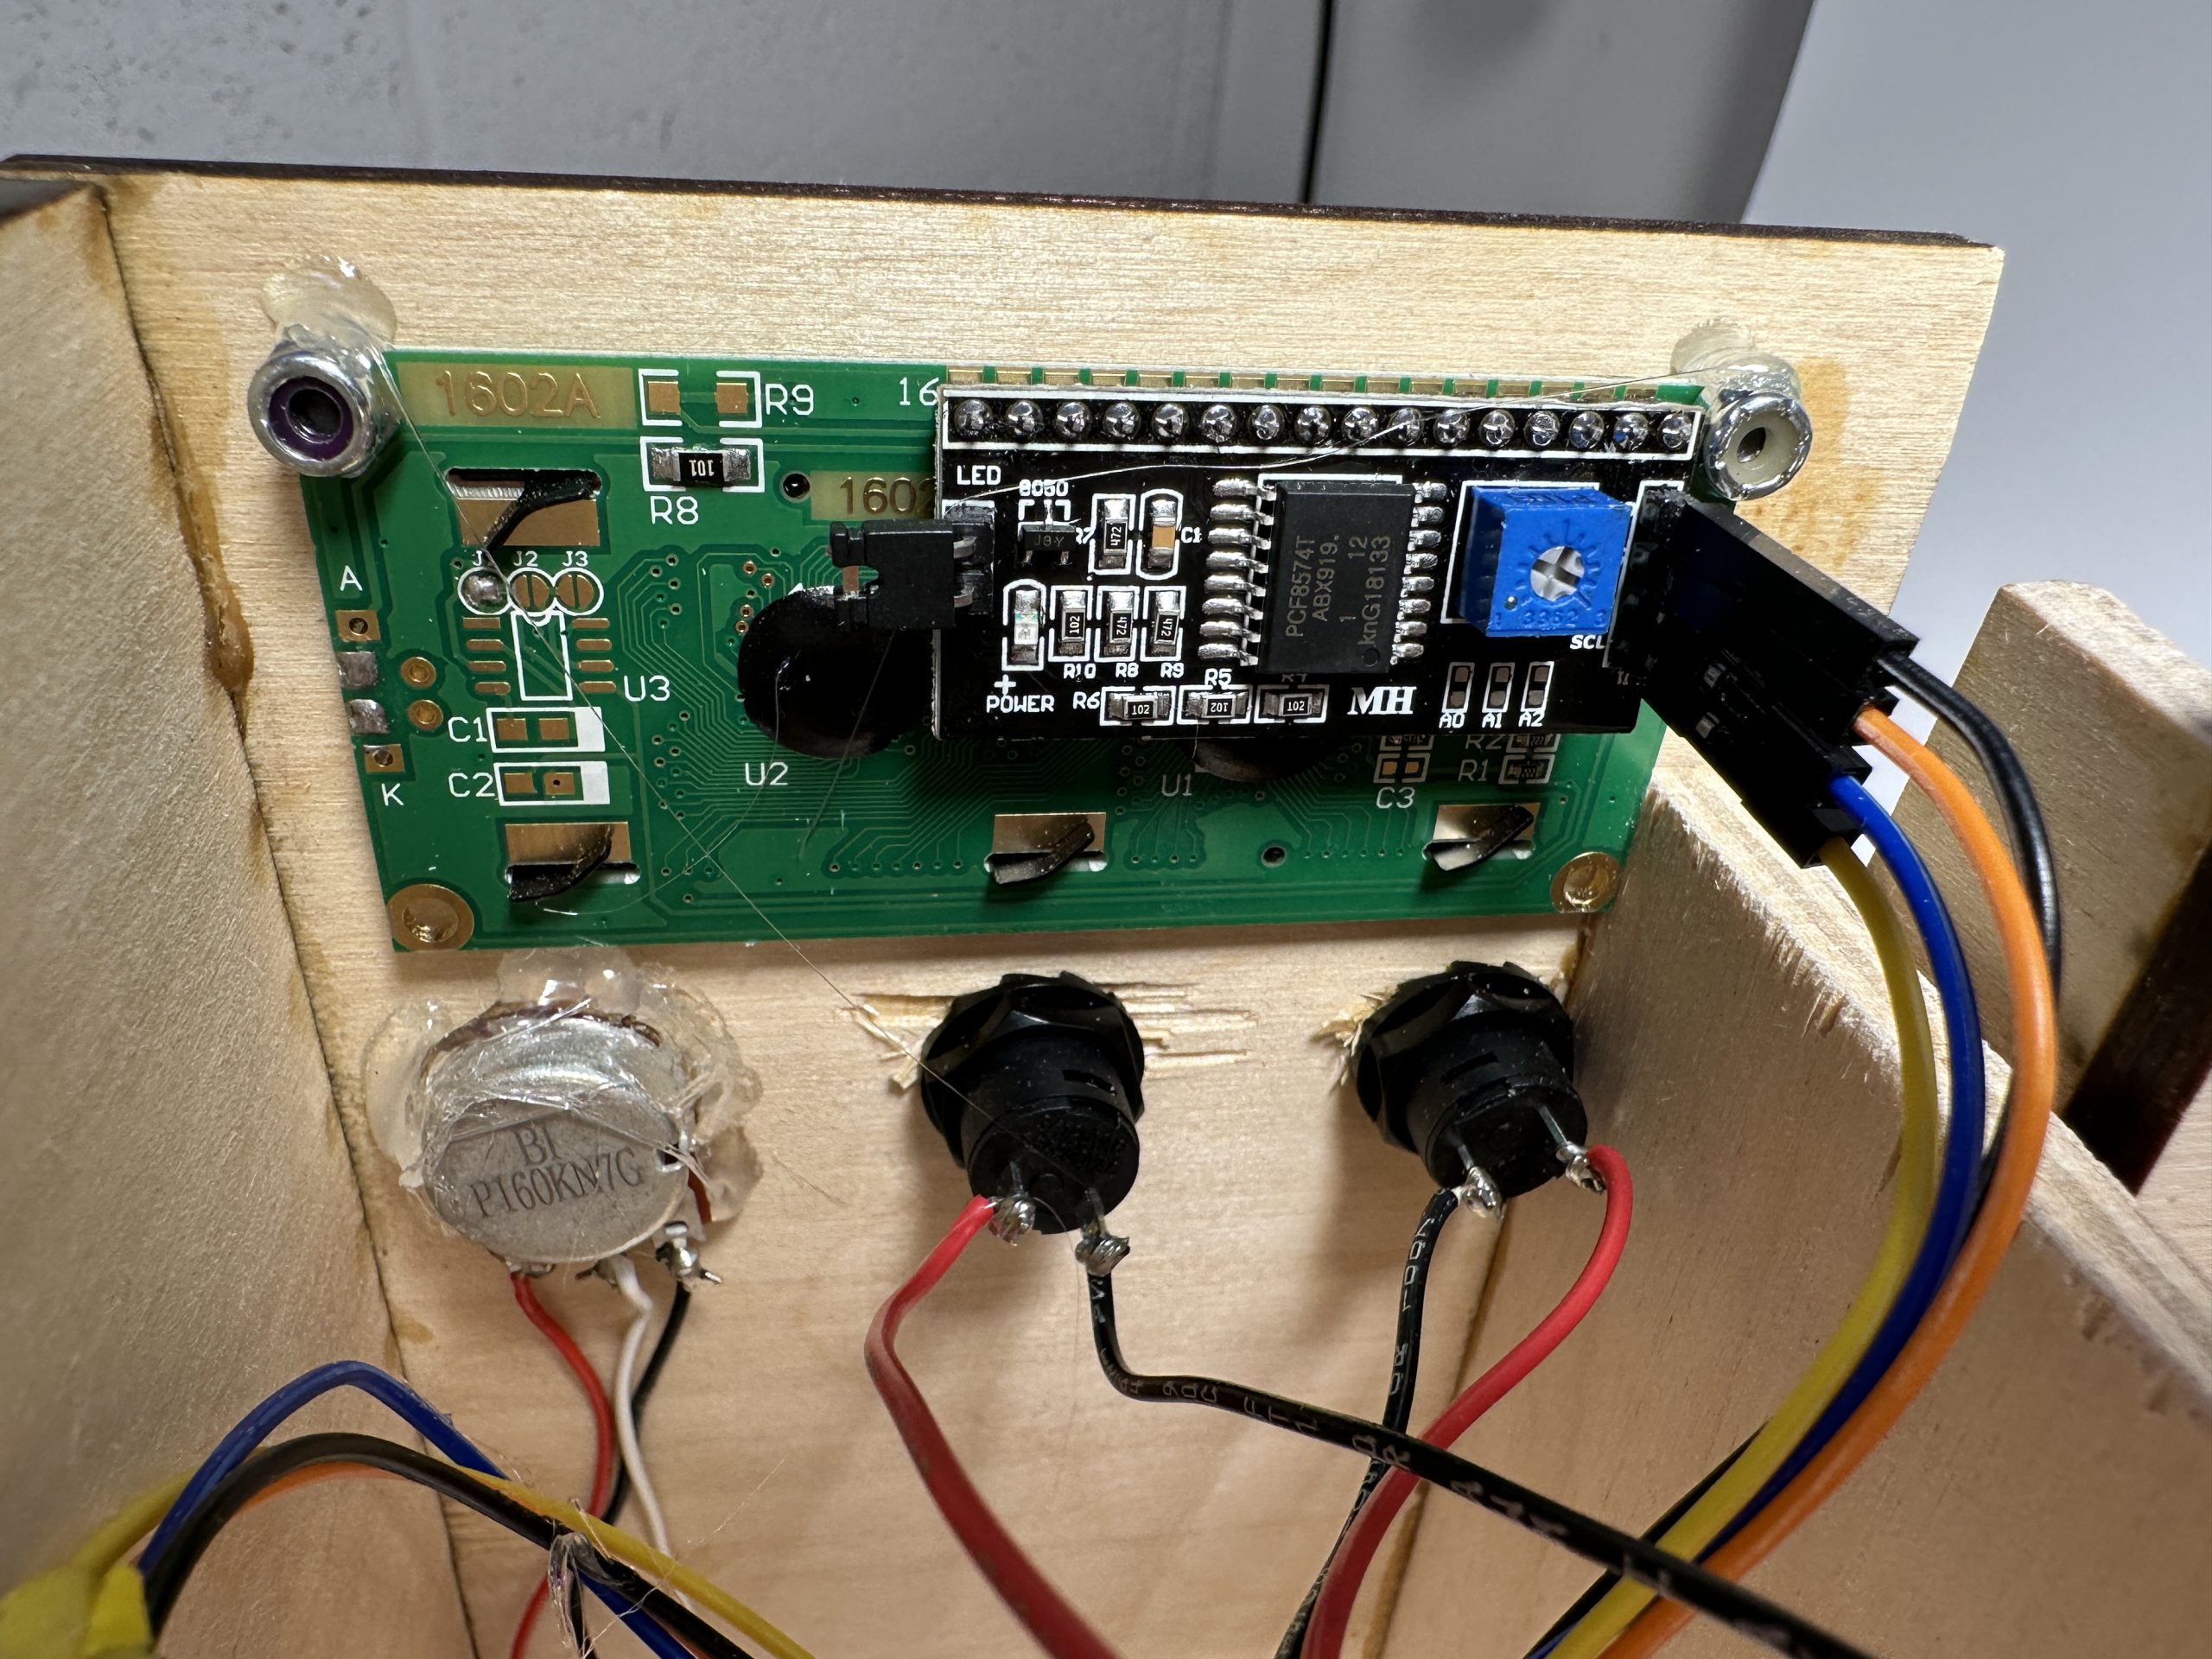
UI – Back
In Use:
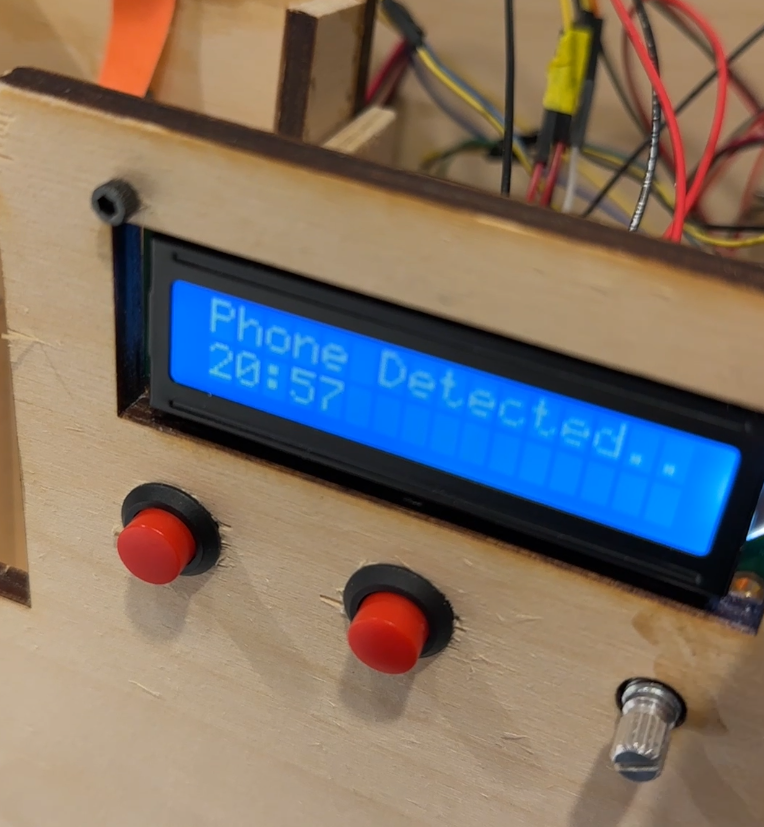
Timer Counting Down
Part.1 Process Images & Review
Using a Ambient Light Sensor Instead of an IR Sensor
In the very beginning, I decided to use an ambient light sensor as the sensor for detecting the phone on the stand. I also thought about using the same laser range finder I used for the project 1. There were some significant issues with the ambient light sensor, however. It was way too sensitive, and the code had to be tweaked everytime the overhead lighting condition was changed. I also should have considered that there would eventually be a roof covering much of the sensor input, making the ambiance differences between phone on and phone off very difficult to distinguish. Instead, Zach recommended an IR sensor, which was much easier to code and more reliable in its data output. Also, its compact size allowed for more versatility.
Dedicated 9V Power Breadboard (Ignore my disgusting hand)
This decision did not necessarily change the outcome of my project, but it was critical in keeping everything safe and secure. Mixing 5V and 9V on the same breadboard is asking for a disater. Therefore, I opted for a dedicated breadboard and, later, a protoboard to hold all the components that required 9V power. This way, I would always have the opportunity to get everything right.
Red Buttons
Before knowing these red buttons existed, I planned to use the tiny four-legged push buttons. That would not have made a massive difference in the wiring. However, I was planning to solder the legs, which would have been annoying. These red buttons are big and eye-catching, much more user-friendly than the legged push buttons.
Part.2 Discussion
Overall, I am satisfied with the final result of my assistive device, even though I had to make changes to reduce complexity. However, the project was challenging, and I am content that everything worked during the technical demonstration.
One of the comments I received from the final critique that stood out to me was, “I like how it doesn’t completely lock your phone away— there’s definitely less anxiety associated with it and I think i would be pretty likely to use it!” I thought this was quite interesting. I saw the lack of securing your phone inside as a failure since a focus box should take away your access to your phone over the countdown. However, now reflecting on this quote again, it is intriguing to see others’ perspectives, as it seems to encourage the user to use the device more and make it less intimidating.
Though I was pleased with the final results, as I mentioned before, there were places where I had to cut corners and features to reduce the project’s completion timeline and complexity. First, the box was supposed to function as a toaster, in which the phone would be placed on top of the box, and some mechanical motion would retract the phone inside the box, locking it away until the timer ran out or the release was hit. However, the ratio of extension to overall length could have been better on the linear actuator, which means I would have a massive box if I were to implement a vertical operation. Another idea I had to overcome this issue was to design a DC Motor-driven contraption, maybe pulling on a string or rubber band. However, I had yet to learn how to create a system as such in the time frame given. I also did not do an excellent job designing in Rhino. I have done plenty of detailed, beautiful physical models for my architecture studios; nevertheless, this was my first time creating something involving moving parts and wiring. I ran into issues of pieces not fitting, usually due to inaccuracies in measuring component dimensions and assuming things that may not be true.
Besides learning how the components involved in my project worked, as stated previously, I also learned that working to build a shell for the internal wiring logic in Rhino, or any other CAD software, should be taken seriously and with great care and certainty. I should be more detailed in my component sizing documentation. That way, I would have produced a cut with no adjustment later. I also learned that a linear actuator is hard to use, especially when you want it to push an object parallel to the adjacent walls. I was extremely frustrated when it got stuck on a piece of glue and debris and broke the whole box. Besides that, I decided to use as much soldering as possible in this project to reduce the number of times my hands accidentally bumped into stuff and unplugged wires. I also ensured that everything running on 9V power was separated and placed on their dedicated protoboard to avoid catastrophe.
I was thrilled that the project worked thoroughly during the final critique. However, as stated before, there were places where features had to be cut to save time and ground the project within my capabilities. One of the features includes a trap door, which may be manual or controlled, to close when the phone is retracted and open when the phone is out. I also wanted to implement a way where a notification on your phone may prompt the box to reject it via specific sensors, such as a microphone or photoresistor. If given more time or to approach the project again, I will try my best to implement those forgotten ideas.
Part.3 Technical Information
Block Diagram:

Schematics:

Code:
// Focus Box:
// Assistive Device for myself, Project 2, Physical Computing

// Description:
// The code below will retract the linear actuator if the timer
// starter button is pressed when a phone is detector via an IR
// sensor. And when in the retracted state, the code will extend
// the linear actuator if the IR sensor no longer detects a phone,
// or the release button is hit.


// Credits:
// Used example code for millis() from https://courses.ideate.cmu.edu/60-223/s2023/tutorials/code-bites
// Used and edited example code for countdown timer from https://projecthub.arduino.cc/tylerpeppy/86bb3eef-23ec-4873-ad3b-86c7c277142f

#include <Wire.h>
#include <LiquidCrystal_I2C.h>


LiquidCrystal_I2C screen(0x27, 16, 2);

const int actuatorPinA = 12;      // linear actuator pinA, driven by a motor driver
const int actuatorPinB = 13;      // linear actuator pinB, driven by a motor driver
const int minutePin = A1;         // potentiometer input, adjust the timer
const int buttonPinRelease = 4;   // release
const int buttonPinTimer = 2;     // start timer
const int irPin = A0;             // IR Sensor pin, detects the phone

int prevReleaseState;
int currReleaseState;
int prevTimerState;
int currTimerState;
int countdown_time = 0;
int tempPotInput;

unsigned long quarterTimer = 0;

bool timerCounting;

void setup() {
  Serial.begin(115200);
  Wire.begin();

  // Linear Actuation
  pinMode(actuatorPinA, OUTPUT);
  pinMode(actuatorPinB, OUTPUT);
  pinMode(buttonPinRelease, INPUT_PULLUP);
  pinMode(buttonPinTimer, INPUT_PULLUP);
  pinMode(irPin, INPUT);

  currReleaseState = digitalRead(buttonPinRelease);
  currTimerState = digitalRead(buttonPinTimer);

  digitalWrite(actuatorPinA, HIGH);
  digitalWrite(actuatorPinB, HIGH);

  // Potentiometer
  pinMode(minutePin, INPUT);


  screen.init();
  screen.backlight();
  screen.home();
  screen.setCursor(0, 1);

  // Serial.print(hourInput);
}

void loop() {

  int luxThreshold = 100;
  int second = 0;
  int potInputA = map(analogRead(minutePin), 0, 1023, 1, 61);
  long countdown_time;


  // Serial.println(analogRead(irPin));
  int dist;
  dist = analogRead(irPin);
  Serial.println(dist);

  // timer start

  prevTimerState = currTimerState;
  currTimerState = digitalRead(buttonPinTimer);
  if (prevTimerState == HIGH && currTimerState == LOW) {  // when retracted
    if (dist > luxThreshold) {
      timerCounting = true;
      countdown_time = potInputA * 60;
      screen.clear();
    }
  }

  prevReleaseState = currReleaseState;
  currReleaseState = digitalRead(buttonPinRelease);

  if (prevReleaseState == HIGH && currReleaseState == LOW) {
    Serial.println("release");
  }

  if (timerCounting) {
    // when timer is counting down

    long countdown_minute = countdown_time / 60;

    long countdown_sec = countdown_time % 60;

    screen.setCursor(0, 1);

    // count down every second
    if ((millis() - quarterTimer) >= 1000) {
      Serial.println("1 Second Has Passed");
      countdown_time -= 1;
      Serial.println(countdown_time);
      quarterTimer = millis();
    }

    if (countdown_minute < 10) {
      screen.print("0");
    }
    screen.print(countdown_minute);
    screen.print(":");
    if (countdown_sec < 10) {
      screen.print("0");
    }
    screen.print(countdown_sec);
  } else {
    screen.setCursor(0, 1);
    // adjustable timer display (not counting down)
    tempPotInput = map(analogRead(minutePin), 0, 1023, 1, 61);
    long totalSec = tempPotInput * 60;
    long tempMin = totalSec / 60;
    long tempSec = totalSec % 60;
    if (tempMin < 10) {
      screen.print("0");
    }
    screen.print(tempMin);
    screen.print(":");
    if (tempSec < 10) {
      screen.print("0");
    }
    screen.print(tempSec);
  }

  if ((tempPotInput > 0) && (dist < luxThreshold)) {
    screen.setCursor(0, 0);
    screen.print("Stand By............");
  } else {
    screen.setCursor(0, 0);
    screen.print("Phone Detected....");
  }

  if ((countdown_time > 0)) {
    // if counter is still going
    if (prevReleaseState == HIGH && currReleaseState == LOW) {
      // release
      digitalWrite(actuatorPinA, LOW);
      digitalWrite(actuatorPinB, HIGH);
      timerCounting = false;
    } else {
      if (dist > luxThreshold) {
        // retract
        screen.setCursor(0, 0);
        screen.print("Phone Detected....");
        if (timerCounting) {
          digitalWrite(actuatorPinA, HIGH);
          digitalWrite(actuatorPinB, LOW);
        }
      } else {
        // the phone will be on top of the sensor
        screen.setCursor(0, 0);
        screen.print("Stand By........");
      }
    }
  } else {
    // time is up
    digitalWrite(actuatorPinA, LOW);
    digitalWrite(actuatorPinB, HIGH);
    timerCounting = false;
  }
  if (dist < luxThreshold) {
    digitalWrite(actuatorPinA, LOW);
    digitalWrite(actuatorPinB, HIGH);
    timerCounting = false;
  }
}