Final Project – Julia Nishizaki
Intention:
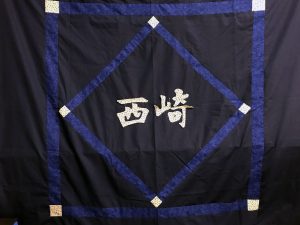
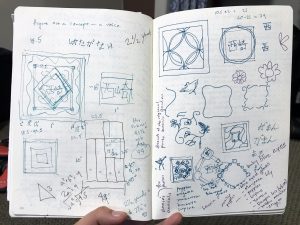
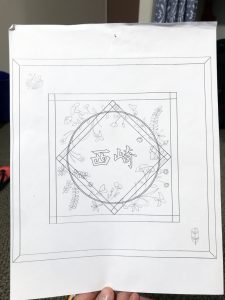
When starting this project, I knew I wanted to create a fairly traditional looking quilt that used both patchwork and applique. I decided to create this quilt for my brother, because I knew he would use it, and I intended for this quilt to celebrate our family, and specifically our identity as Japanese Americans. Because I had never created a quilt before, and had never done applique before, I checked out a couple of books from the library for inspiration: Beautiful Botanicals: 45 Applique Flowers & 14 Quilt Projects, by Deborah Kemball, and The Art of Gaman: Arts and Crafts from the Japanese American Internment Camps, 1942-1946, by Delphine Hirasuna. At first, I wasn’t entirely sure what direction I wanted to go in. I wasn’t quite sure if I wanted to go more into my family’s history, our ancestors, and the internment camps, or if I wanted to use the quilt to more generally celebrate our ethnicity. I decided to keep the quilt a little more simple, and went with the latter, focusing on our Japanese American identity. From there, I knew I wanted to incorporate California native plants and my last name written in Japanese. Using the book on appliqued flowers, I started to sketch out possible layouts for the quilt, and decided that I wanted the quilt to have a center area, where the flowers and my last name would be.
Process:
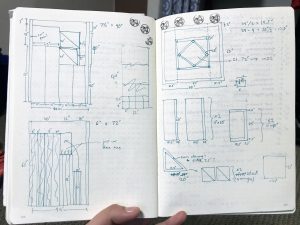
After creating a rough sketch of my quilt, I bought three different cotton fabrics, two for the background, and one for my appliqued last name. I decided on two different navy blues for the background, as indigo dye is often used in Japanese textiles, and I went with an off-white fabric with small flowers, for the applique. Based on my sketch of the quilt, I figured out the dimensions of each separate piece, and added on a half inch seam allowance. After buying and washing the fabric, I measured the width and length of each, and drew a couple of diagrams to help me figure out how to best lay out and cut each of my pieces. I then used chalk to mark out each piece, and a rotary cutter to cut. Starting in the center, I sewed the border pieces to my middle diamond, and worked outwards from there, making sure I ironed my seams open each time.
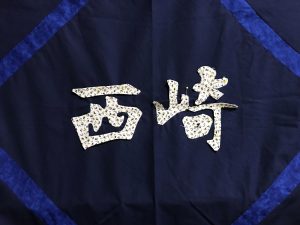
After putting the background together, I moved on to the applique of my last name. To begin, I printed out my last name at the size I wanted my applique to be, and traced the characters onto freezer paper to create templates. I then cut out each of the freezer paper templates, ironed them onto my fabric, and cut out each character. I knew I wanted to tuck the edges under to give the applique a cleaner finish, so I started to fold and iron the edges of the fabric around the freezer paper templates. However, the freezer paper kept on coming up, and it was difficult to fold over the edges, so instead, I started to just hand sew the characters onto my quilt, folding under the raw edges as I went along. This got to be really time consuming, so after talking to Margot about it, she recommended I use a glue stick to fold under the raw edges, so that I could use a sewing machine to quickly go around the edge of the applique. While this is as far as I was able to get, I will continue to use glue at the edges. When I’m ready to sew the characters and the rest of my applique on, I plan to use a blanket stitch on the sewing machine, so that I’ll mostly be sewing in the gutter, and occasionally stitching onto the appliqued piece.
Learning:
Although I haven’t finished this project yet, I learned a lot about the planning stages of a quilt, and how to go about creating a patchwork quilt. Even though I wasn’t sewing together that many pieces of fabric, it was really surprising to me how long it took to actually figure out the math and cut out each section. Moreover, it was really difficult to match up my pieces well. For example, several of my corner “squares” are a little bit off, and definitely look more like rectangles. For the applique, it was really interesting to try out several different methods before I figured out the ones that worked for me, from the freezer paper, to hand sewing, to glueing the edges. Overall, I definitely learned some of the basics of patchwork and applique quilting, and I’m really looking forward to continuing this project, and adding more applique and maybe some embroidery.
